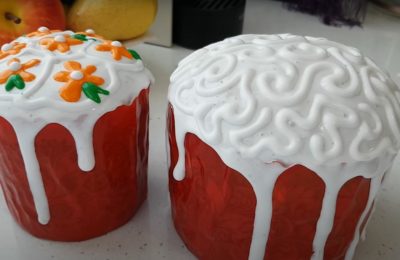
7 ways to beautifully dye Easter eggs using onion skins

Content
- 1 Preparatory work before dyeing Easter eggs
- 2 How to dye eggs using onion skins?
- 3 Original Easter egg coloring with shells and hibiscus tea
- 4 How to dye eggs using onion skins and brilliant green
- 5 Eggs with floral patterns
- 6 Easter eggs in onion skins with a rice pattern
- 7 Dyeing eggs in red onion skins
- 8 Video: Marbled Easter Eggs Using Onion Peels
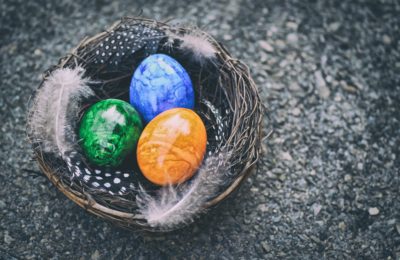
Easter eggs are one of the main symbols of Easter. People make painted eggs not only to decorate their own baskets but also to give to loved ones. While plain eggs are no longer a novelty, not everyone knows how to create original, chic painted eggs with a variety of patterns. Today, I'll tell you how to create stunning Easter eggs using natural dyes, so you don't have to go to the supermarket.
Preparatory work before dyeing Easter eggs
Before preparing krashenki, it is important not only to find the right dye, but also to prepare the eggs and utensils.
Incorrectly prepared or underprepared eggs risk cracking during boiling. Furthermore, the shells may absorb little or no color. Therefore, it's important to remember a few basic rules:
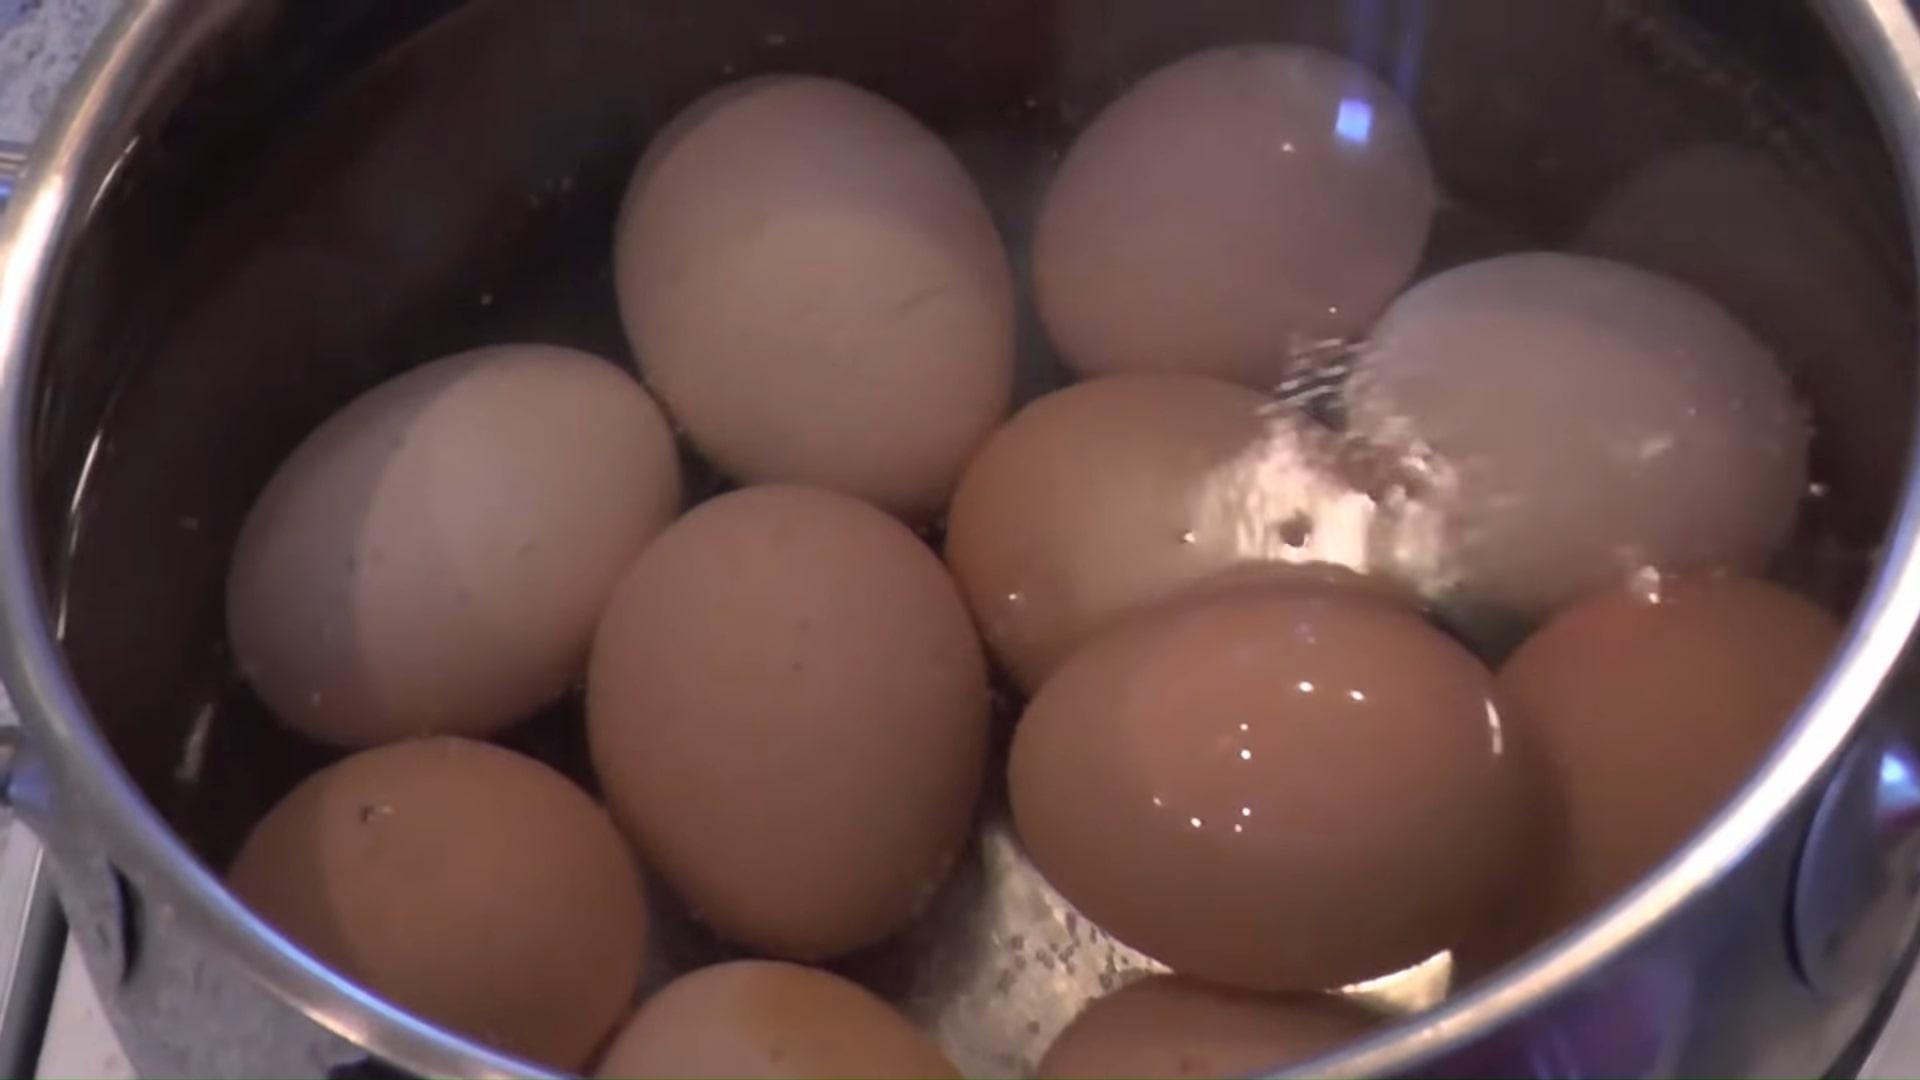
- Eggs should be at room temperature and removed from the refrigerator 2-3 hours before cooking.
- Eggs with white shells dyed with onion skins will have a purer pastel color, while those with brown shells will acquire a deep, rich shade.
- Before dyeing eggs, wash them thoroughly. This can be done with regular running tap water. A good solution is to wipe the eggs with a sponge soaked in a vinegar solution. This will remove grease from the shells and help the dye adhere better.
- Add ½ tablespoon of salt or citric acid to the water in which you'll be boiling the eggs. This will ensure the eggs stay whole.
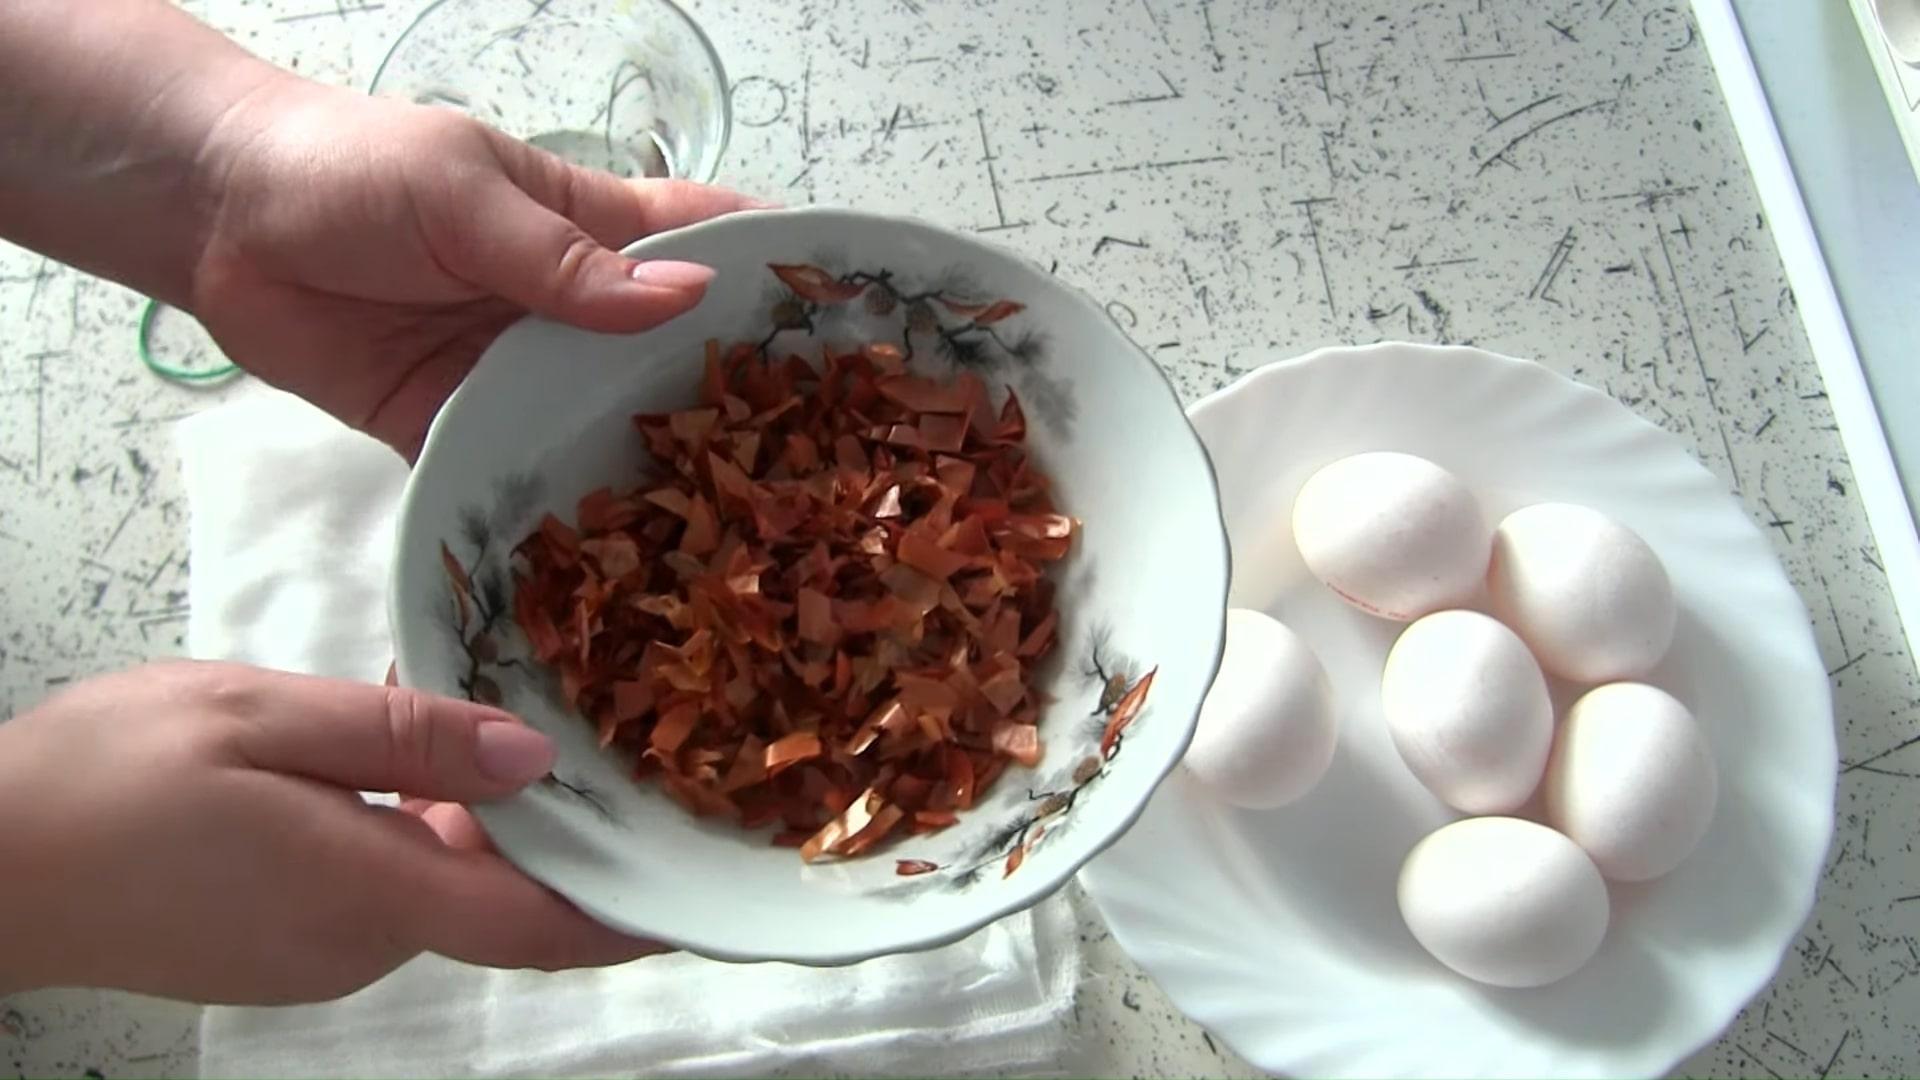
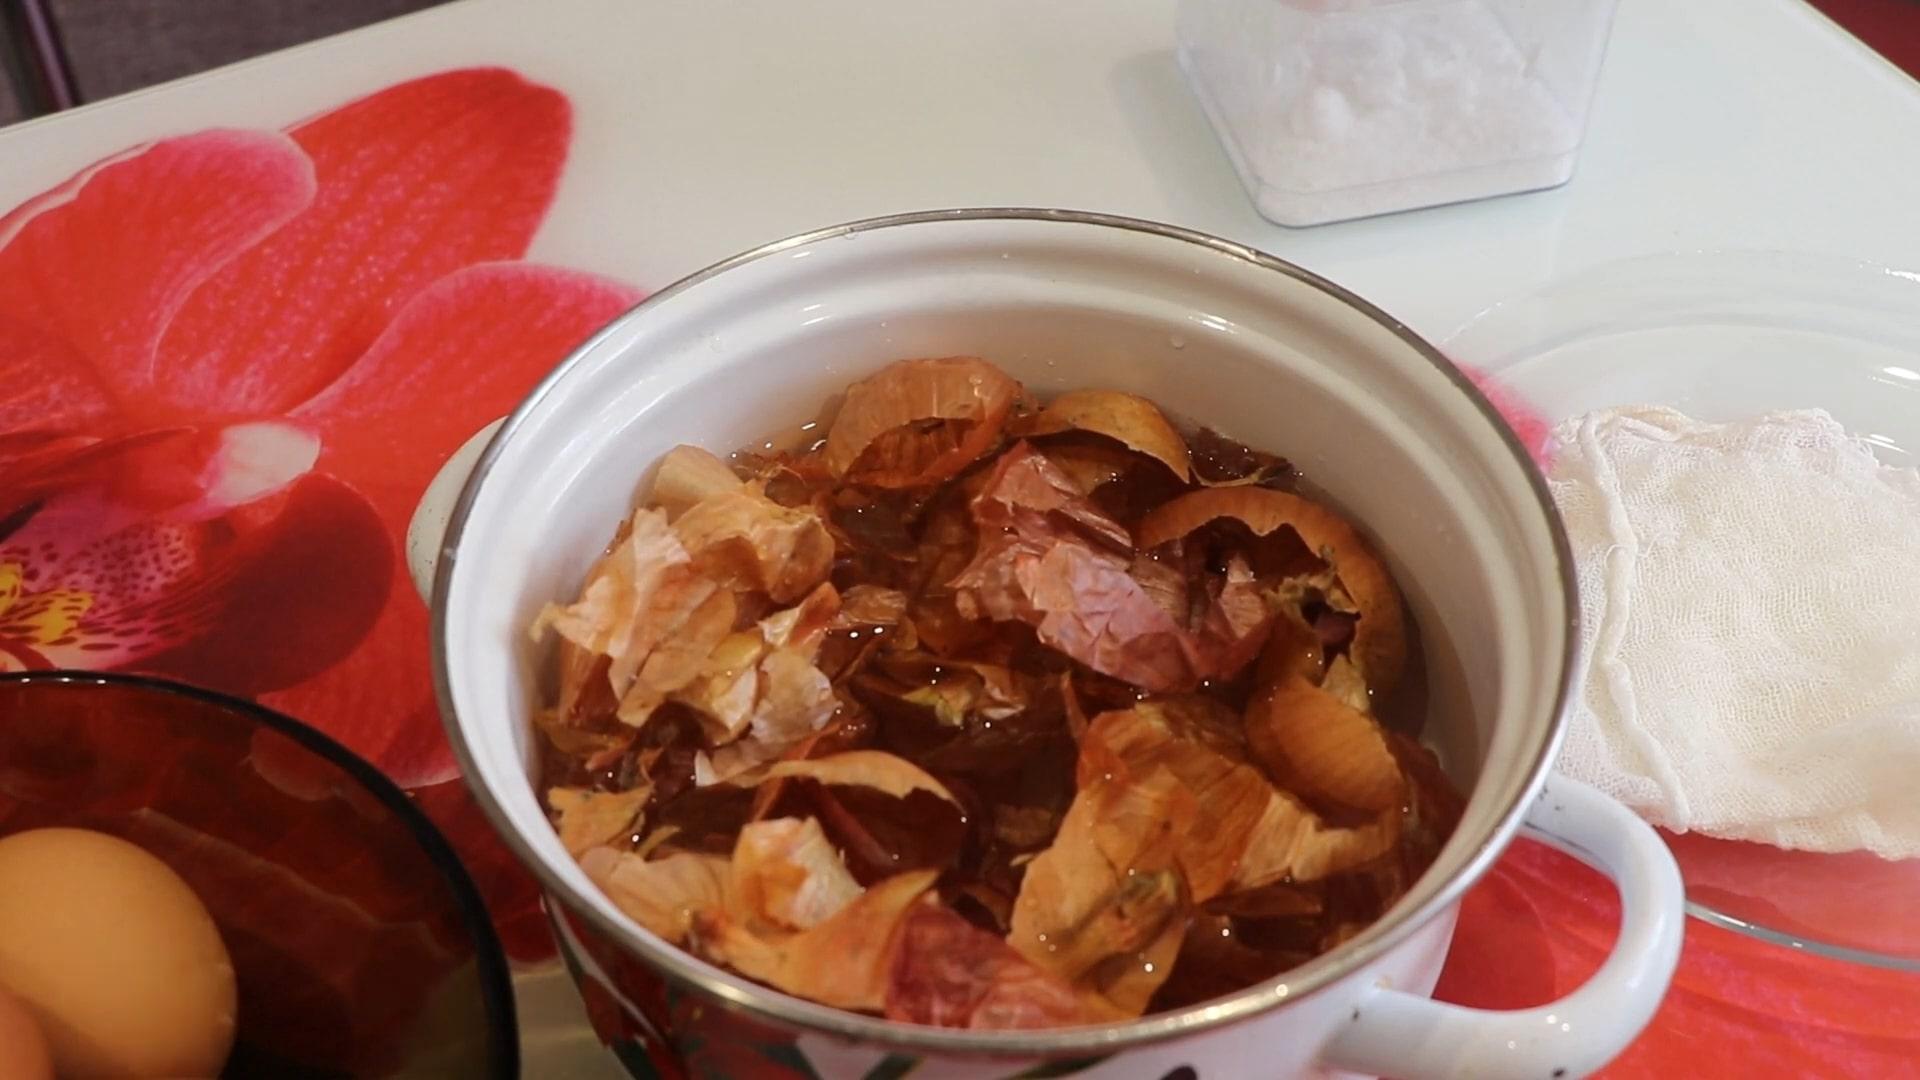
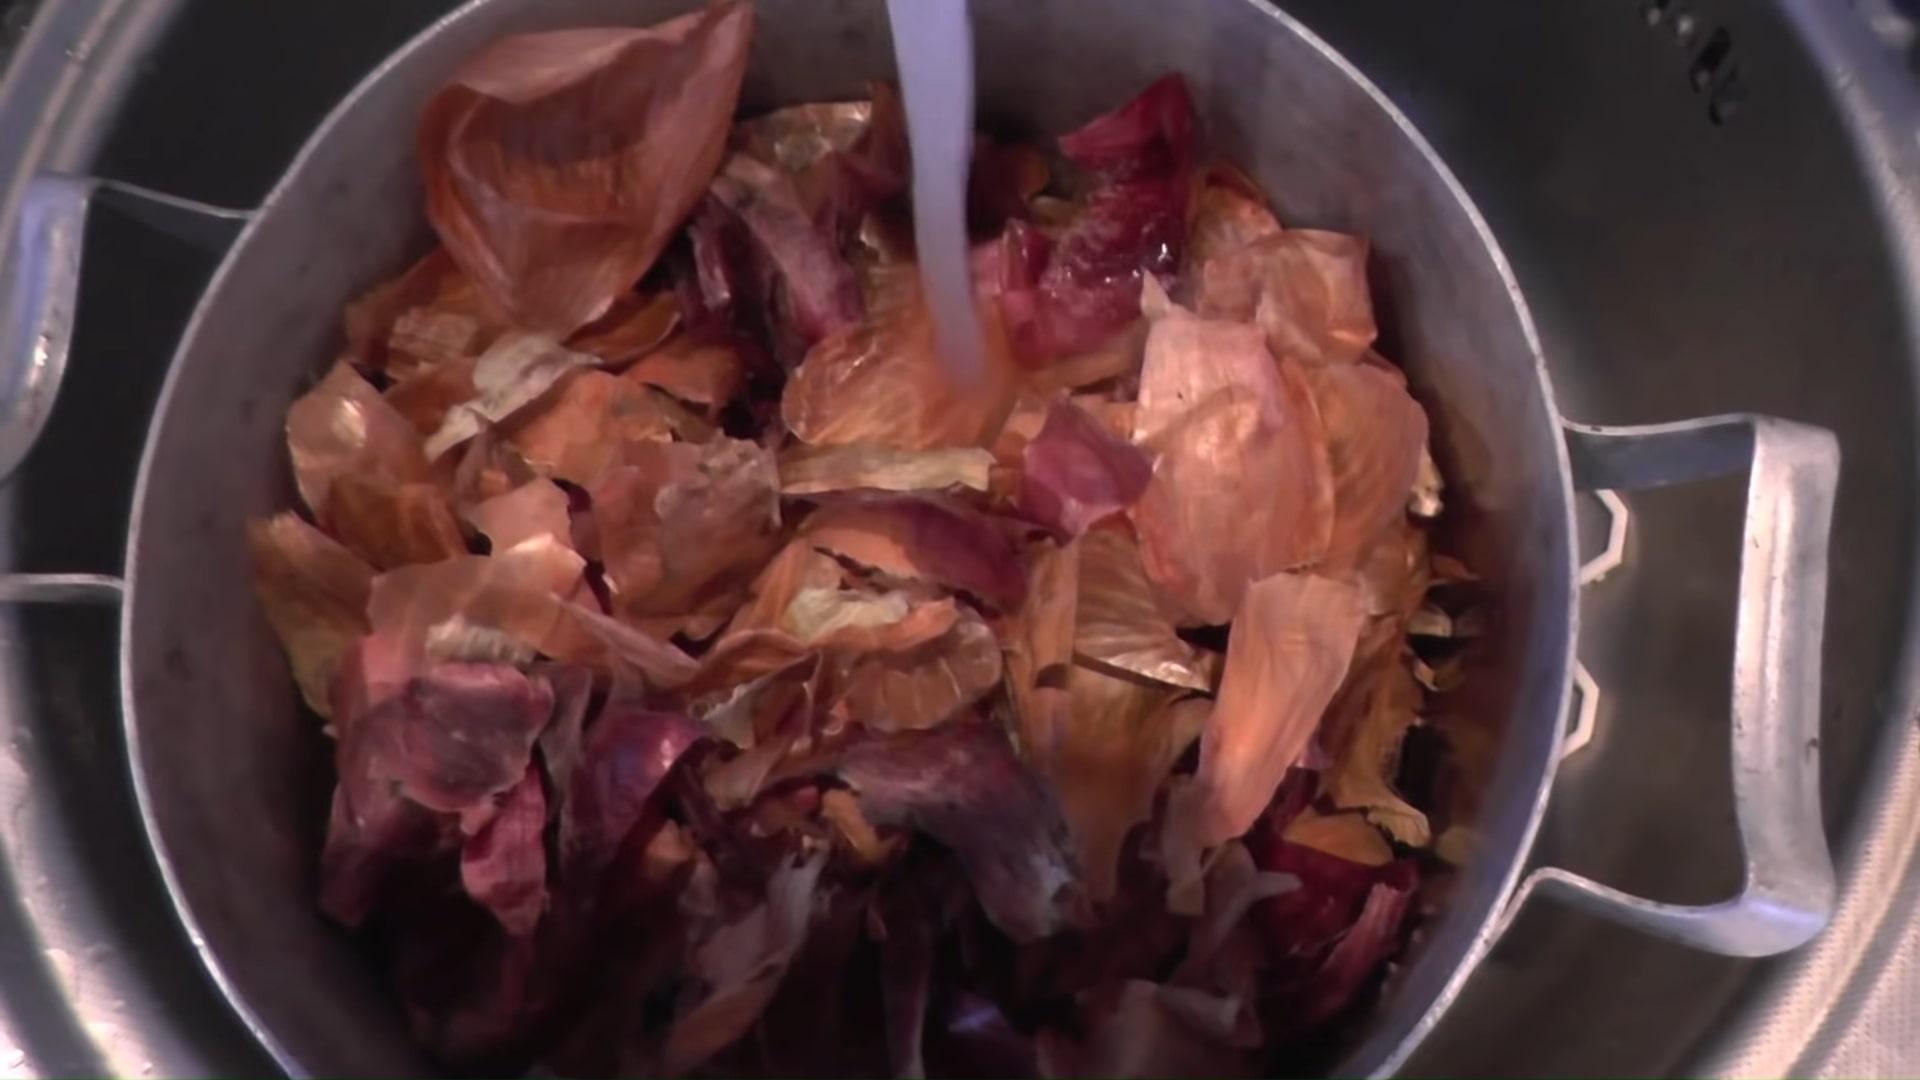
For a more vibrant color, soak the peels in water overnight. You can also boil the peels first before boiling the eggs. Raw eggs should be boiled directly in the onion skins to ensure the color sets more firmly.
The more husks, the more intense the color of the eggs will be in the end.
To make Easter eggs look more presentable and elegant, housewives often wipe them with a sponge soaked in vegetable oil.
How to dye eggs using onion skins?
- Proteins: 0 g
- Fats: 0 g
- Carbohydrates: 0 g
- Total time:
-
Complexity:
It will work even if you're making it for the first time. Not just this dish, but your first time ever.
- Number of servings: 1
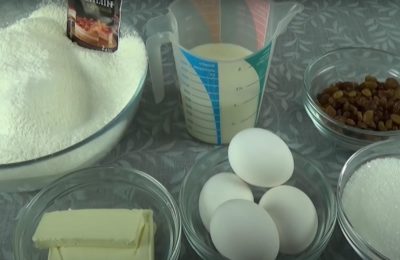
Ingredients
-
Water700 ml
-
Onion peel5 pcs
-
Salt1 pinch
Preparation

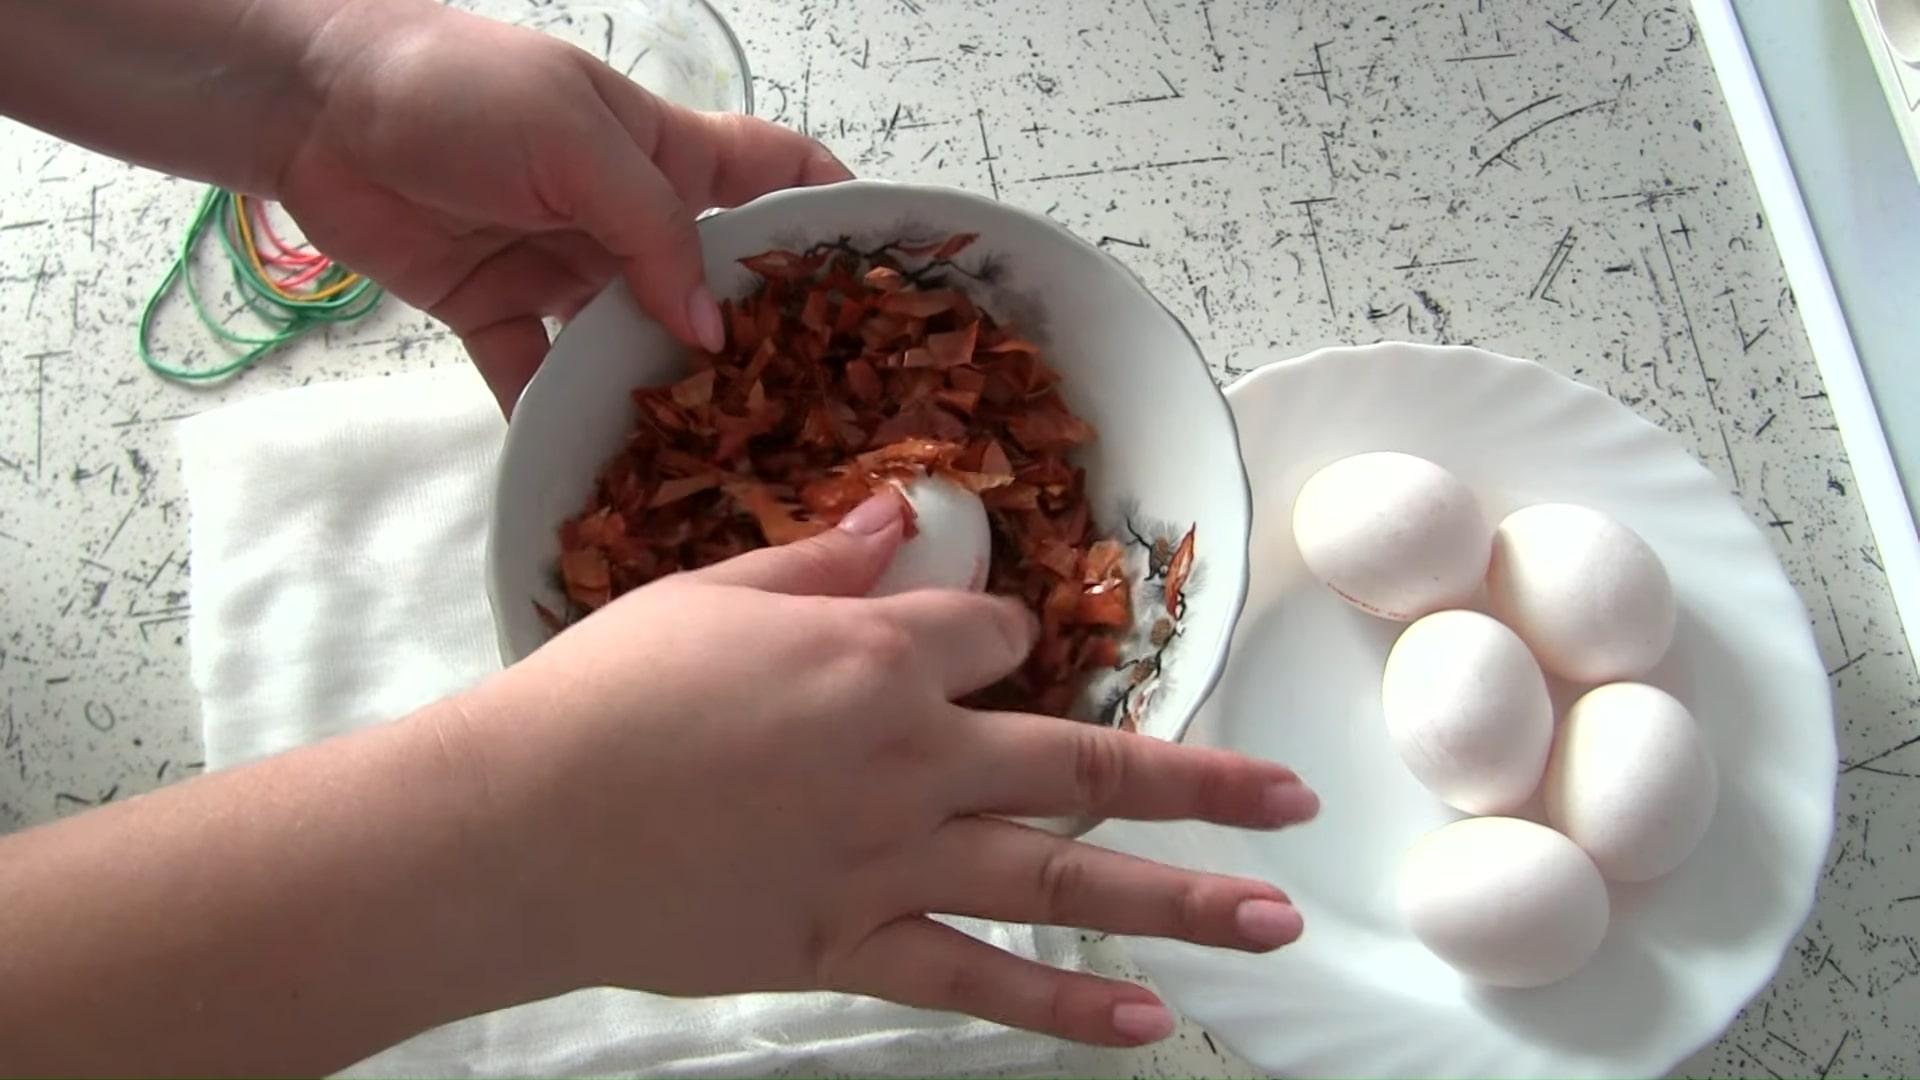
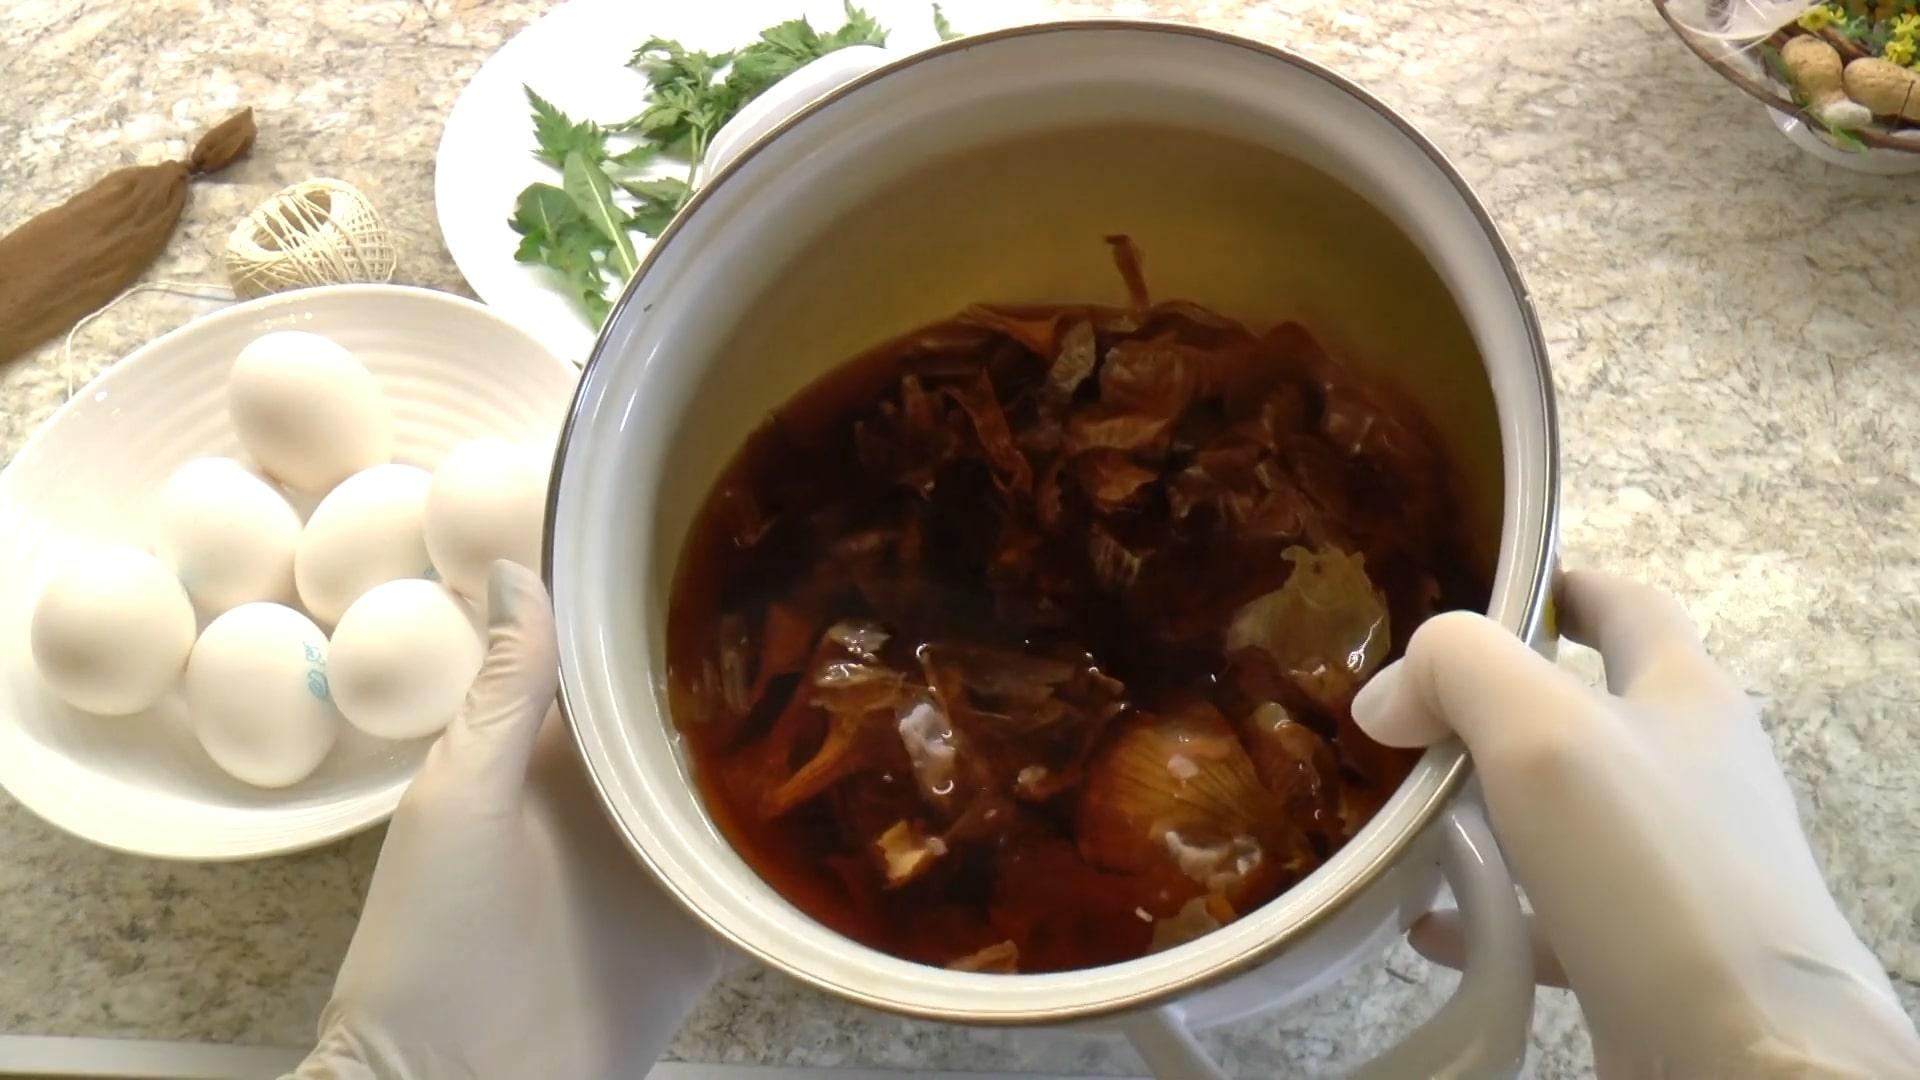
Pour cold water over the onion peel.

Place the raw eggs. It's best to choose eggs with white shells.

Add ½ tablespoon of salt.

Bring to a boil, then simmer for another 6-7 minutes.

We take out the eggs and place them on a plate to cool.

Rub the painted eggs with a sponge soaked in vegetable oil to make them shine.
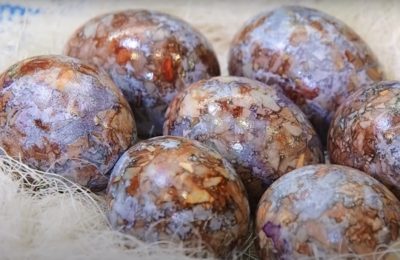
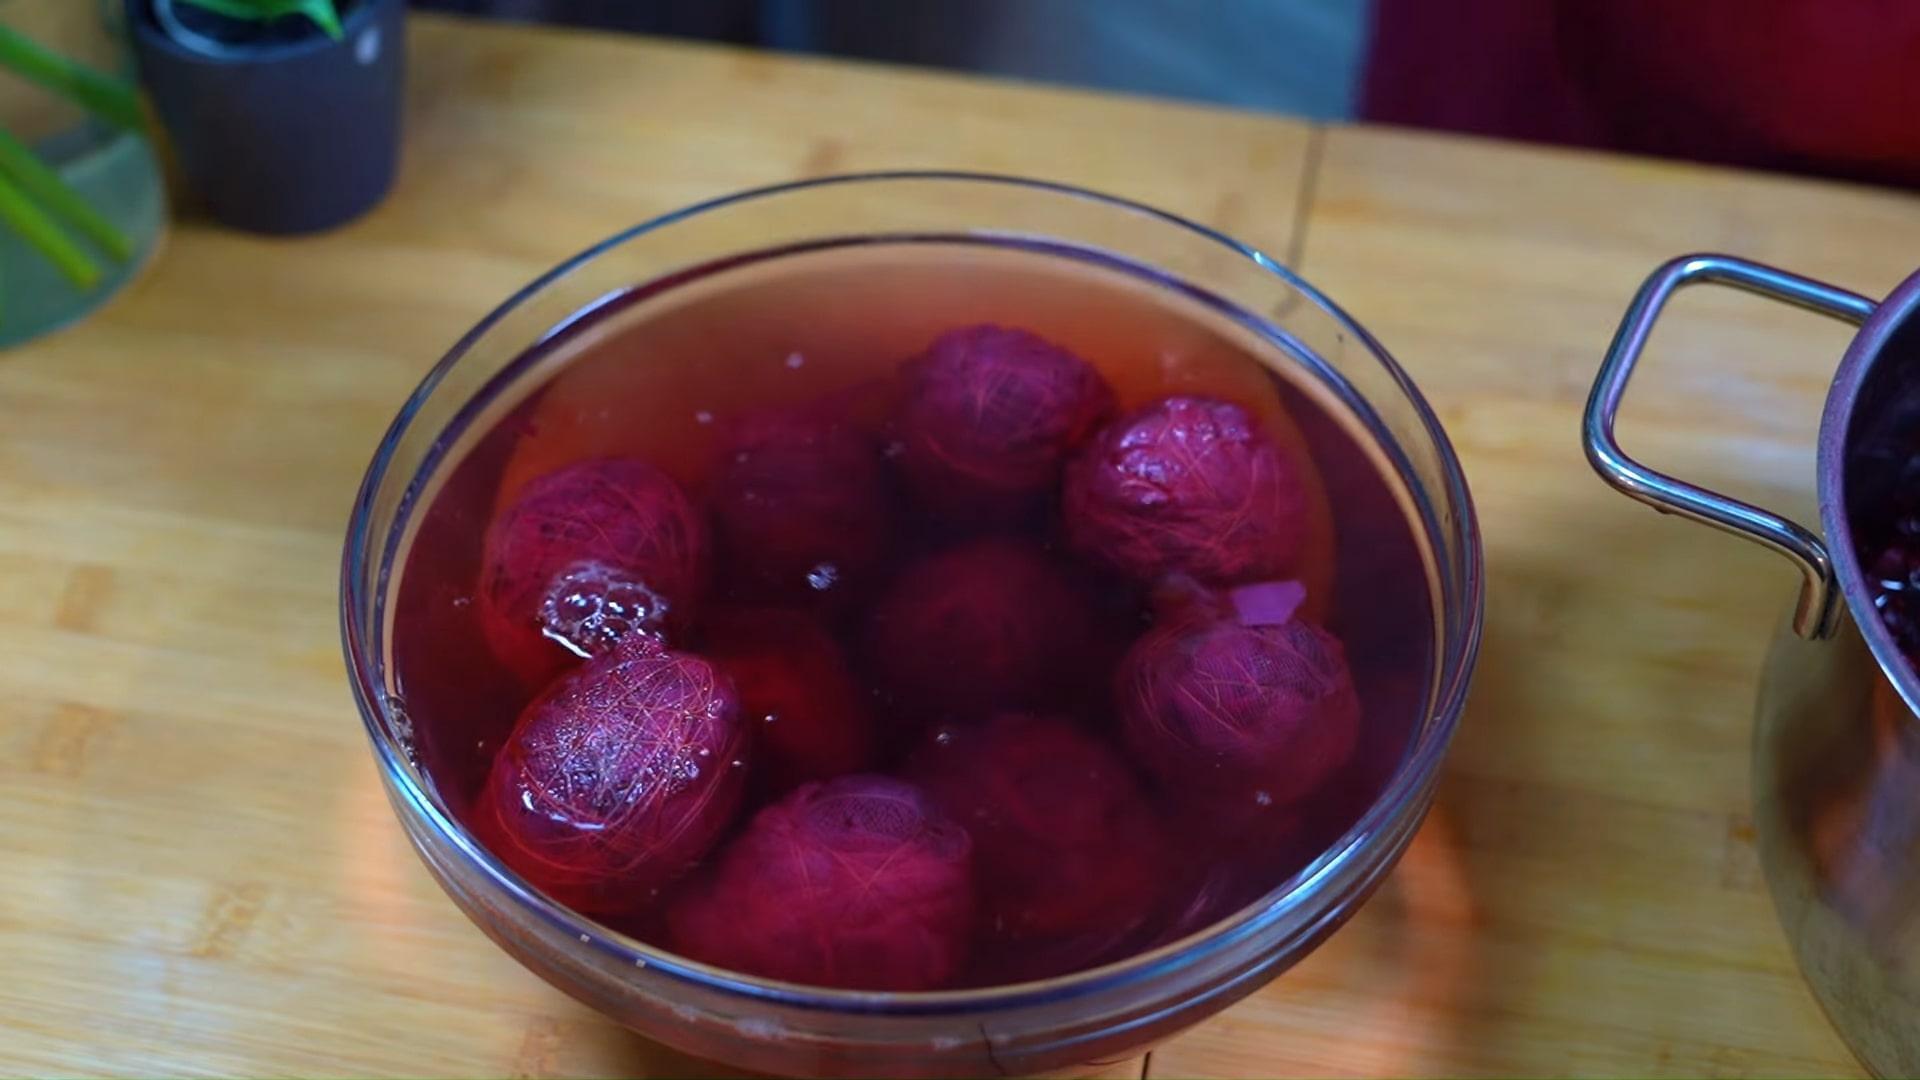
Original Easter egg coloring with shells and hibiscus tea
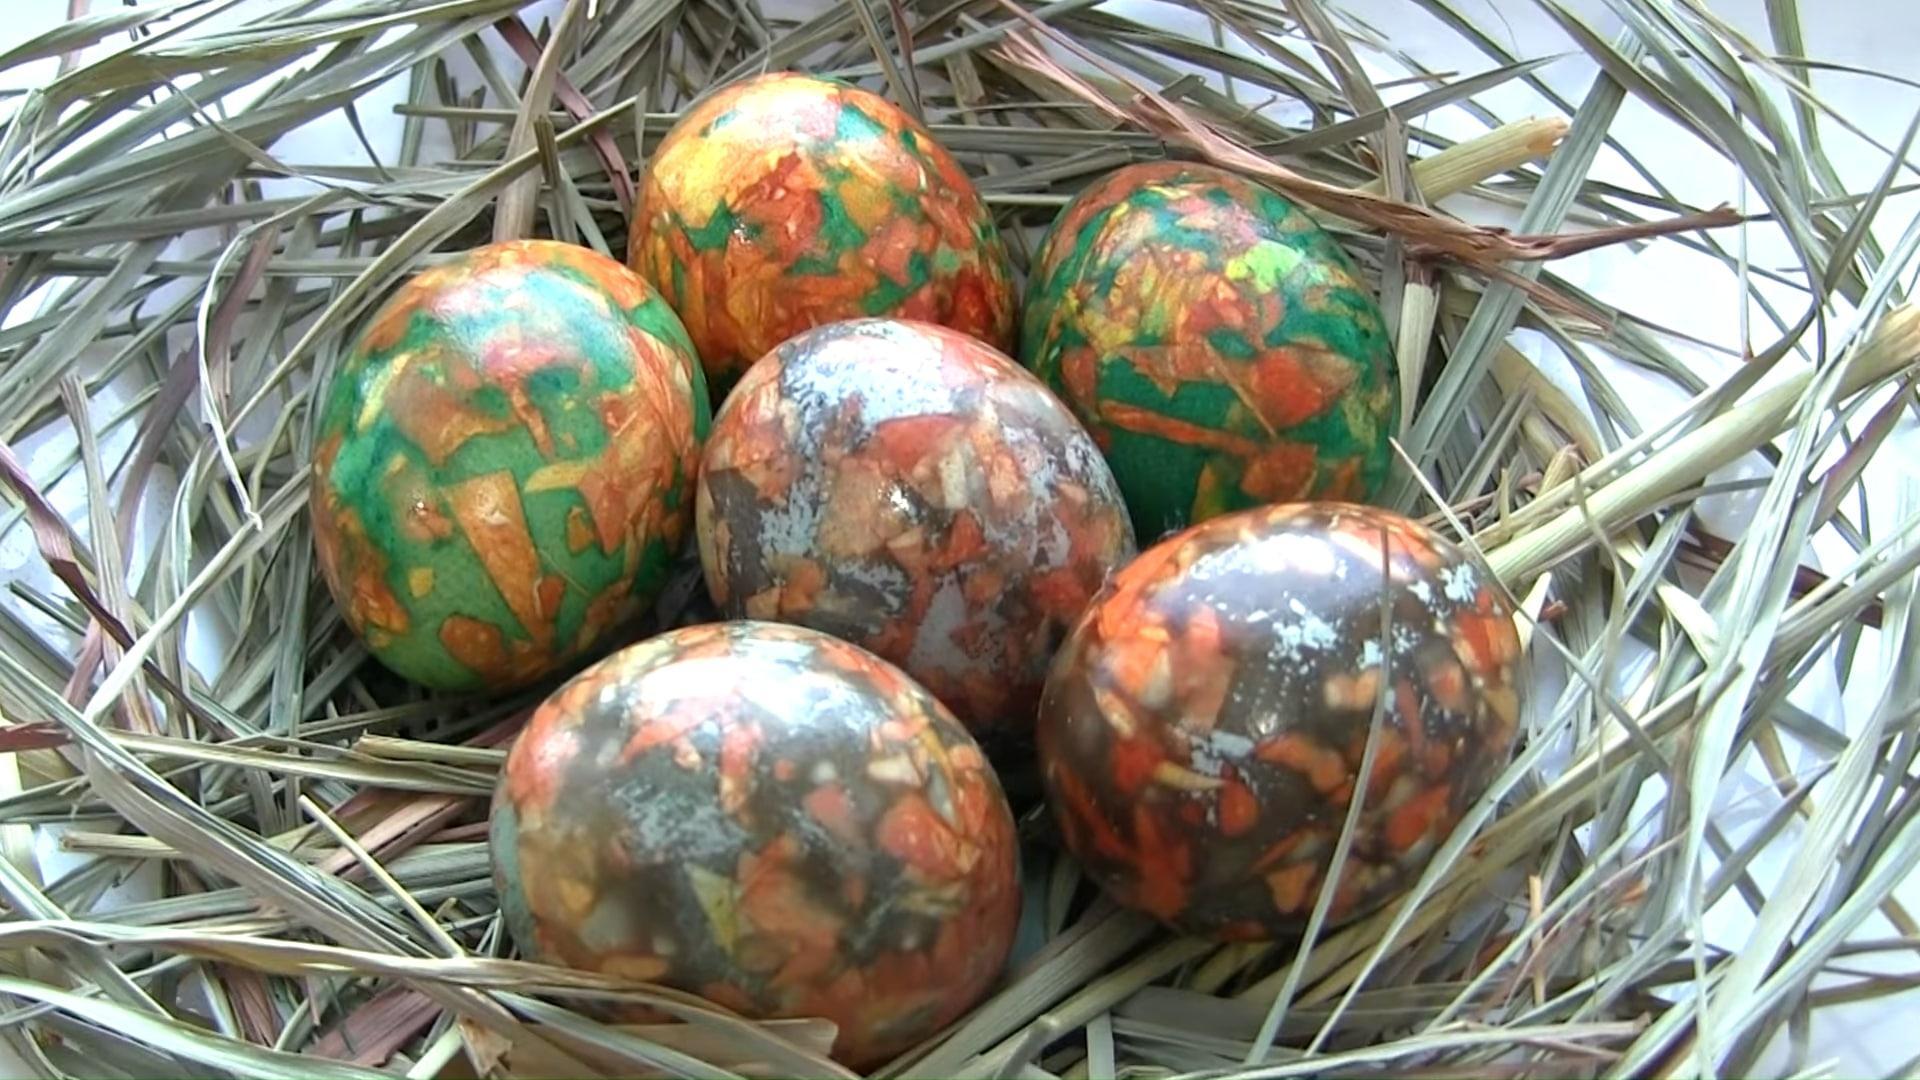
Original and stylish marbled eggs. The beautiful brick-green combination looks very noble and beautiful. Red symbolizes the victory of life over death, and green represents the essence of nature. This combination is sure to promise a favorable year.
Ingredients
- Water – 1.5 l
- Vinegar 5% – 80 ml
- Onion peel – 30 g
- Hibiscus tea – 80 g
- Salt – 1 tbsp.
Cooking time: 10 minutes
Servings: 1
Step-by-step recipe
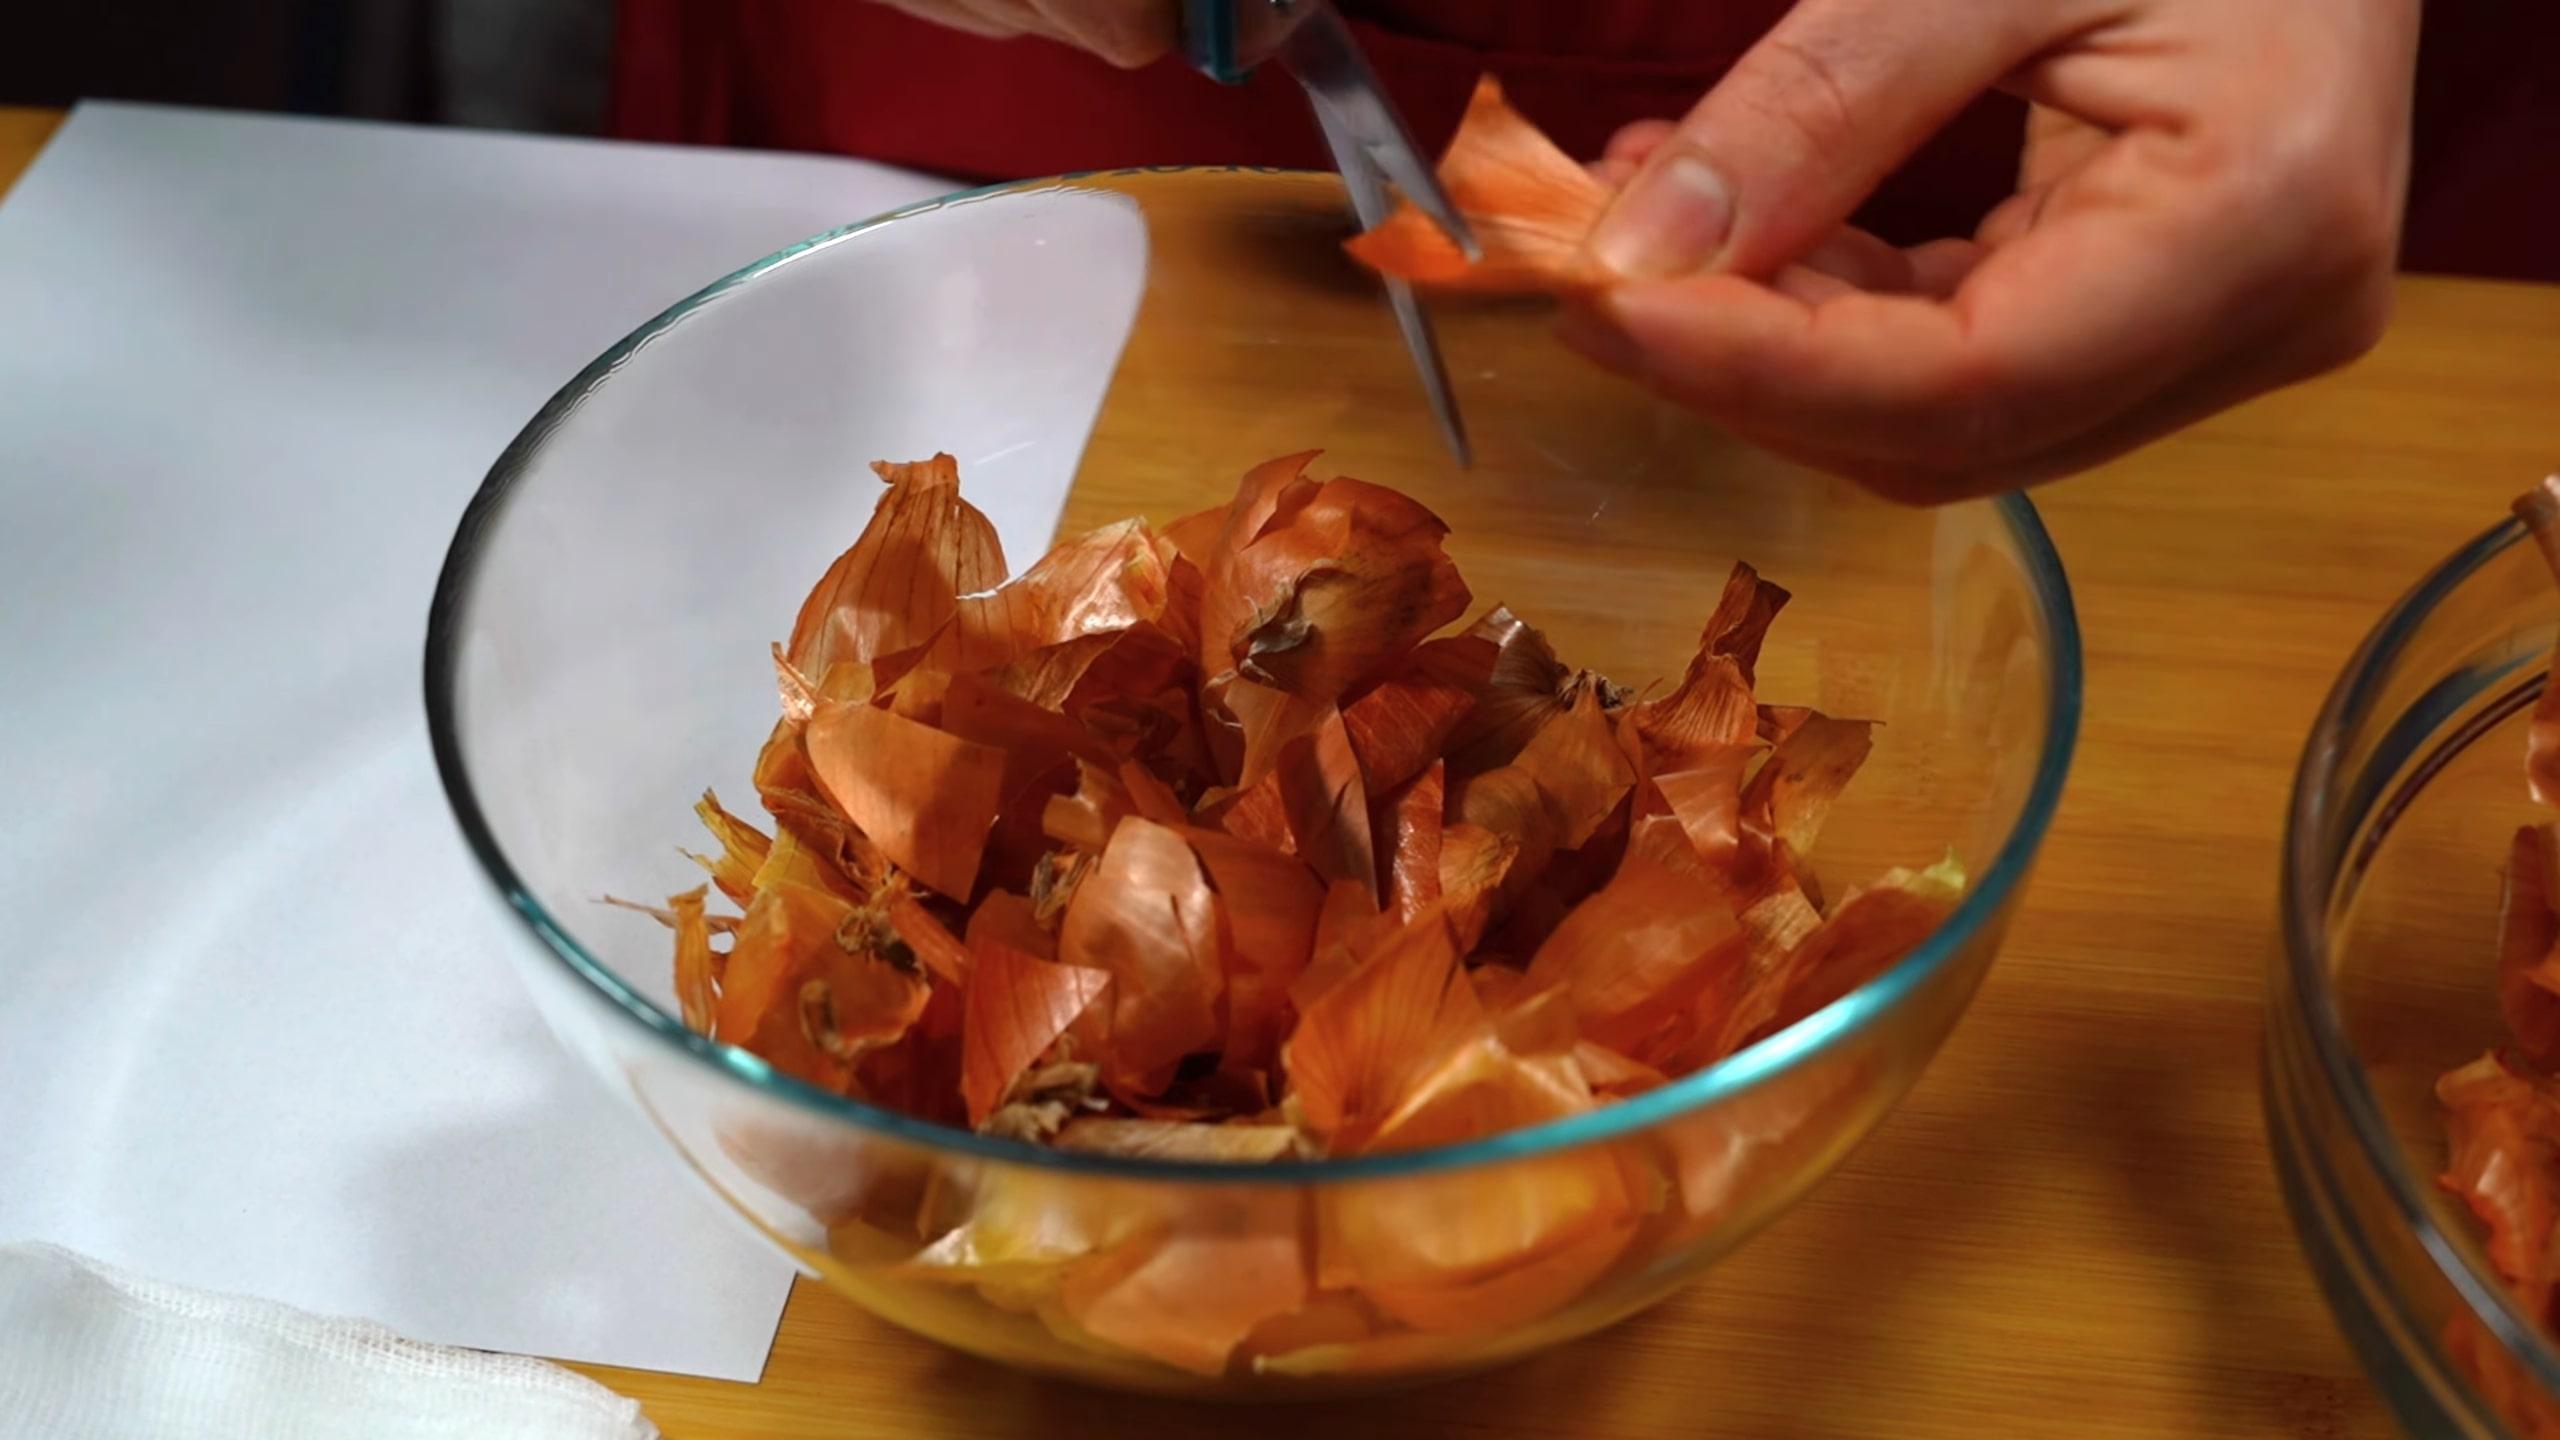
Step 1
Cut the onion peel into small pieces.
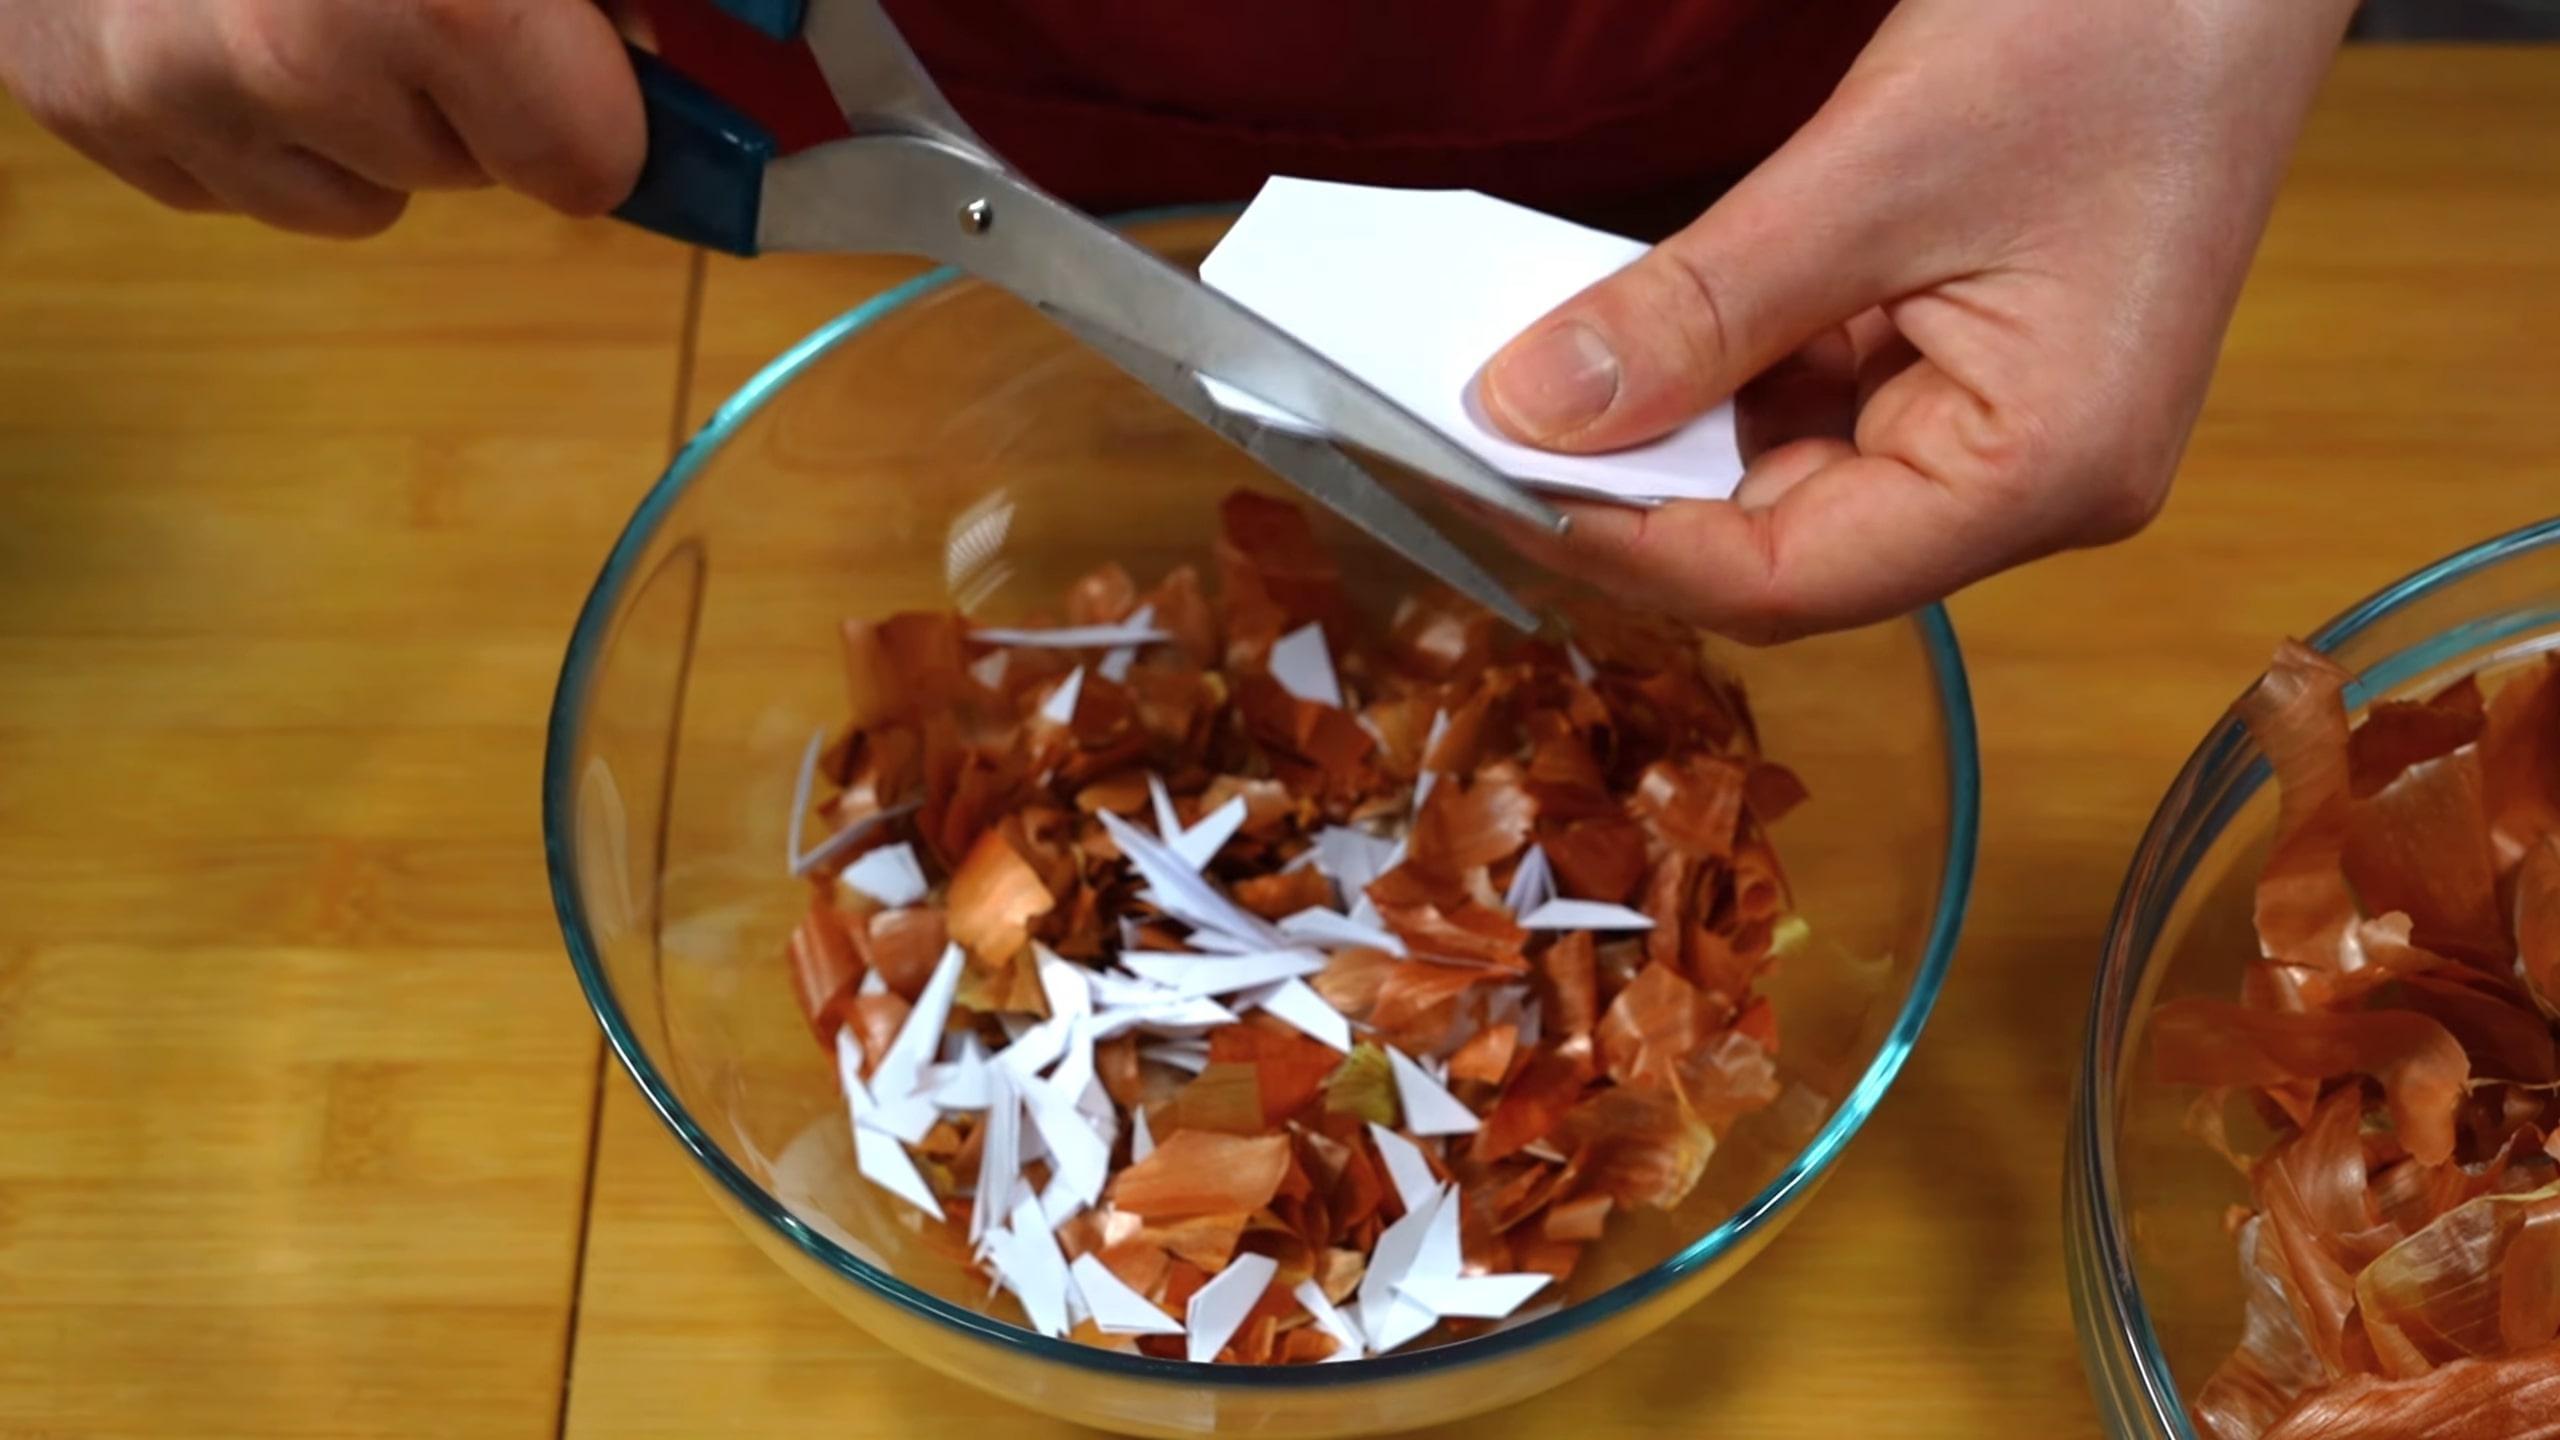
Step 2
Fold a white sheet of A4 paper 3-4 times, then cut it into small pieces like onion skins.
Step 3
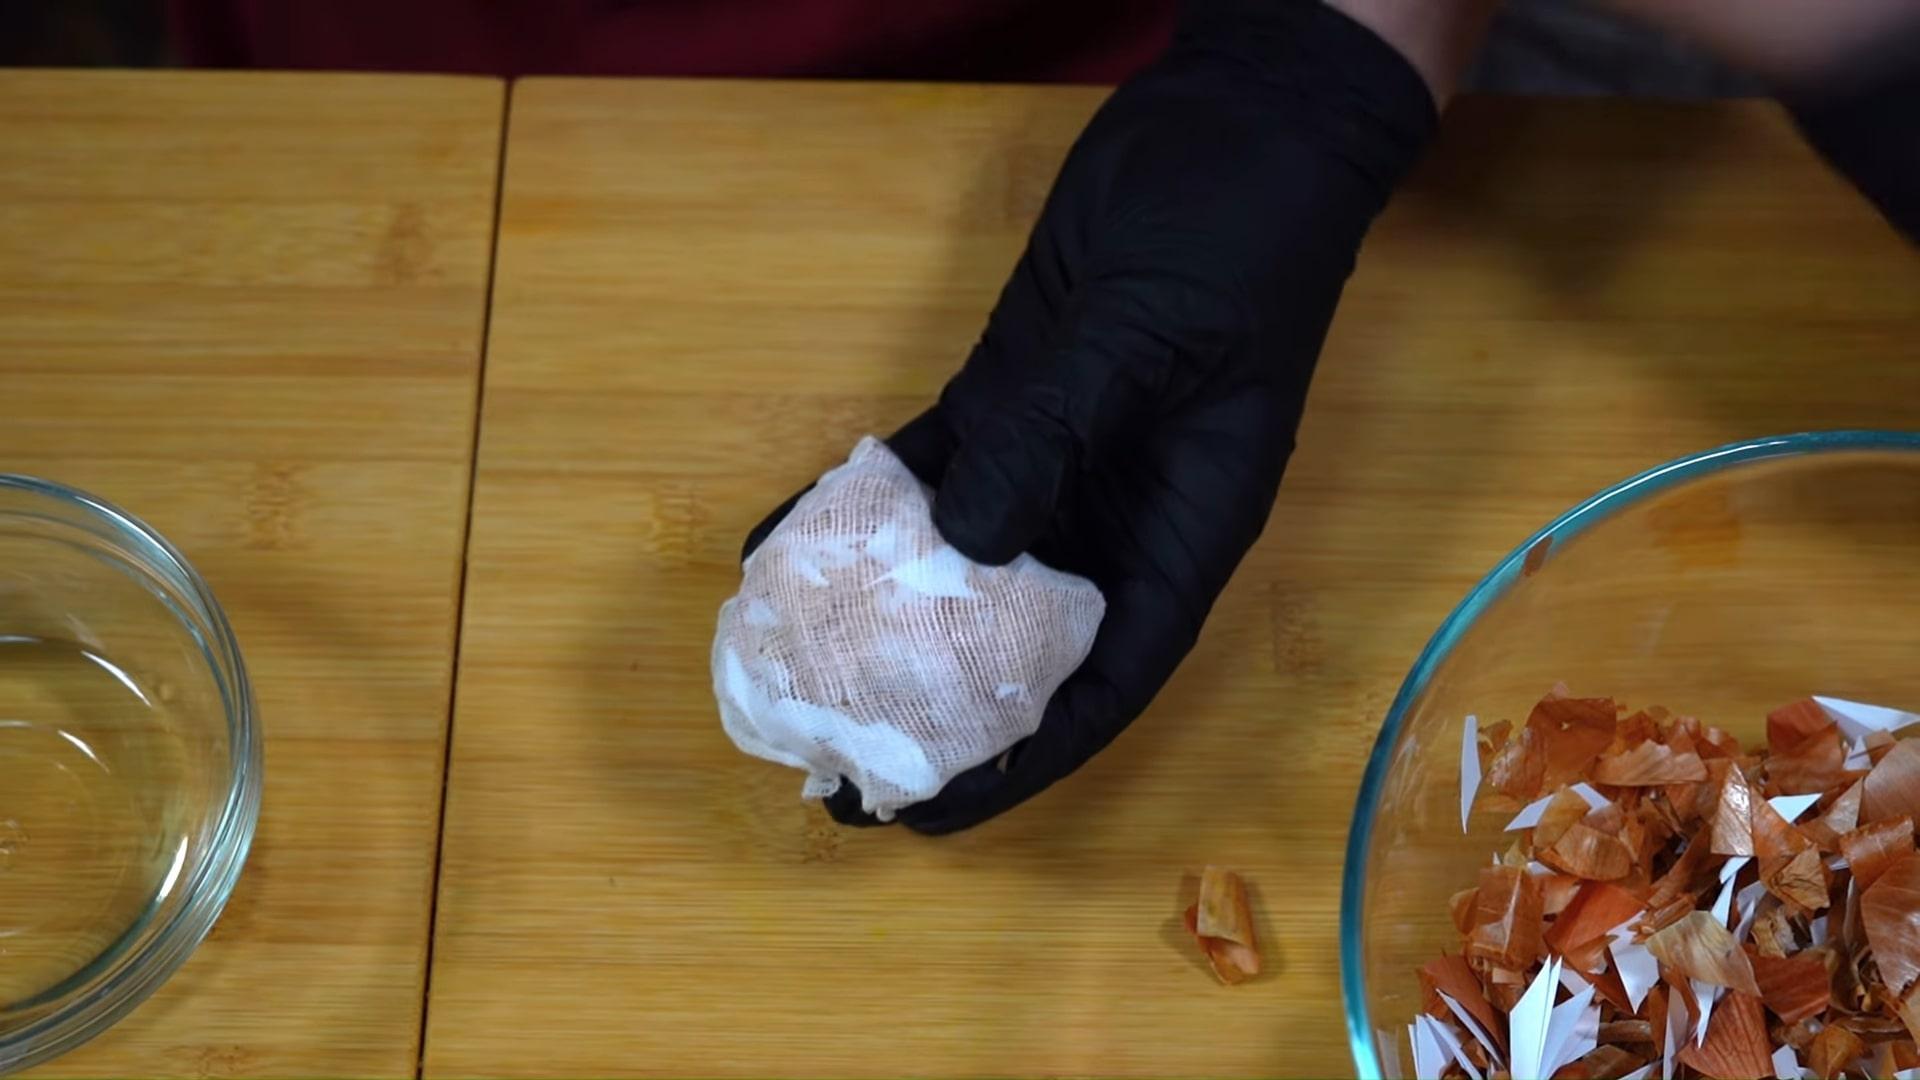
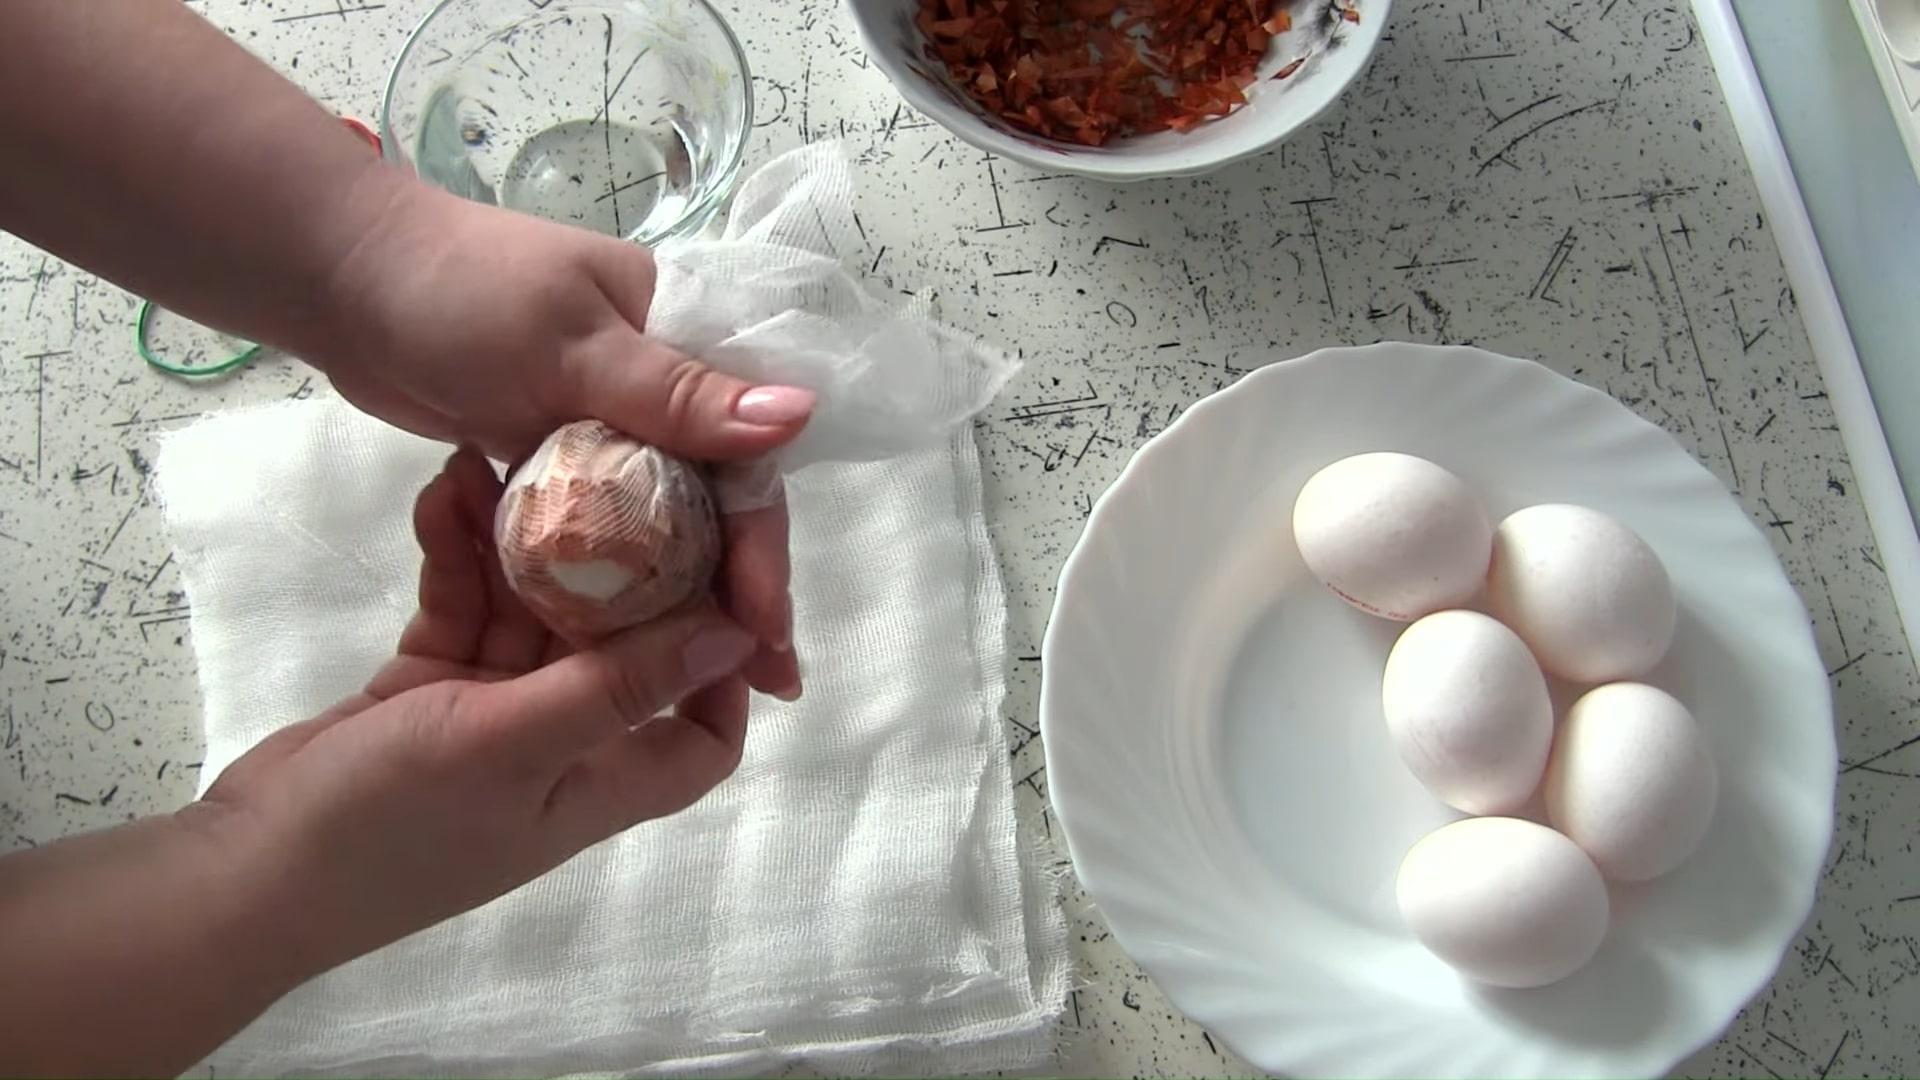
Pour vinegar into a bowl. Dip the eggs in it before rolling them in the skins to ensure they stick to the shells.
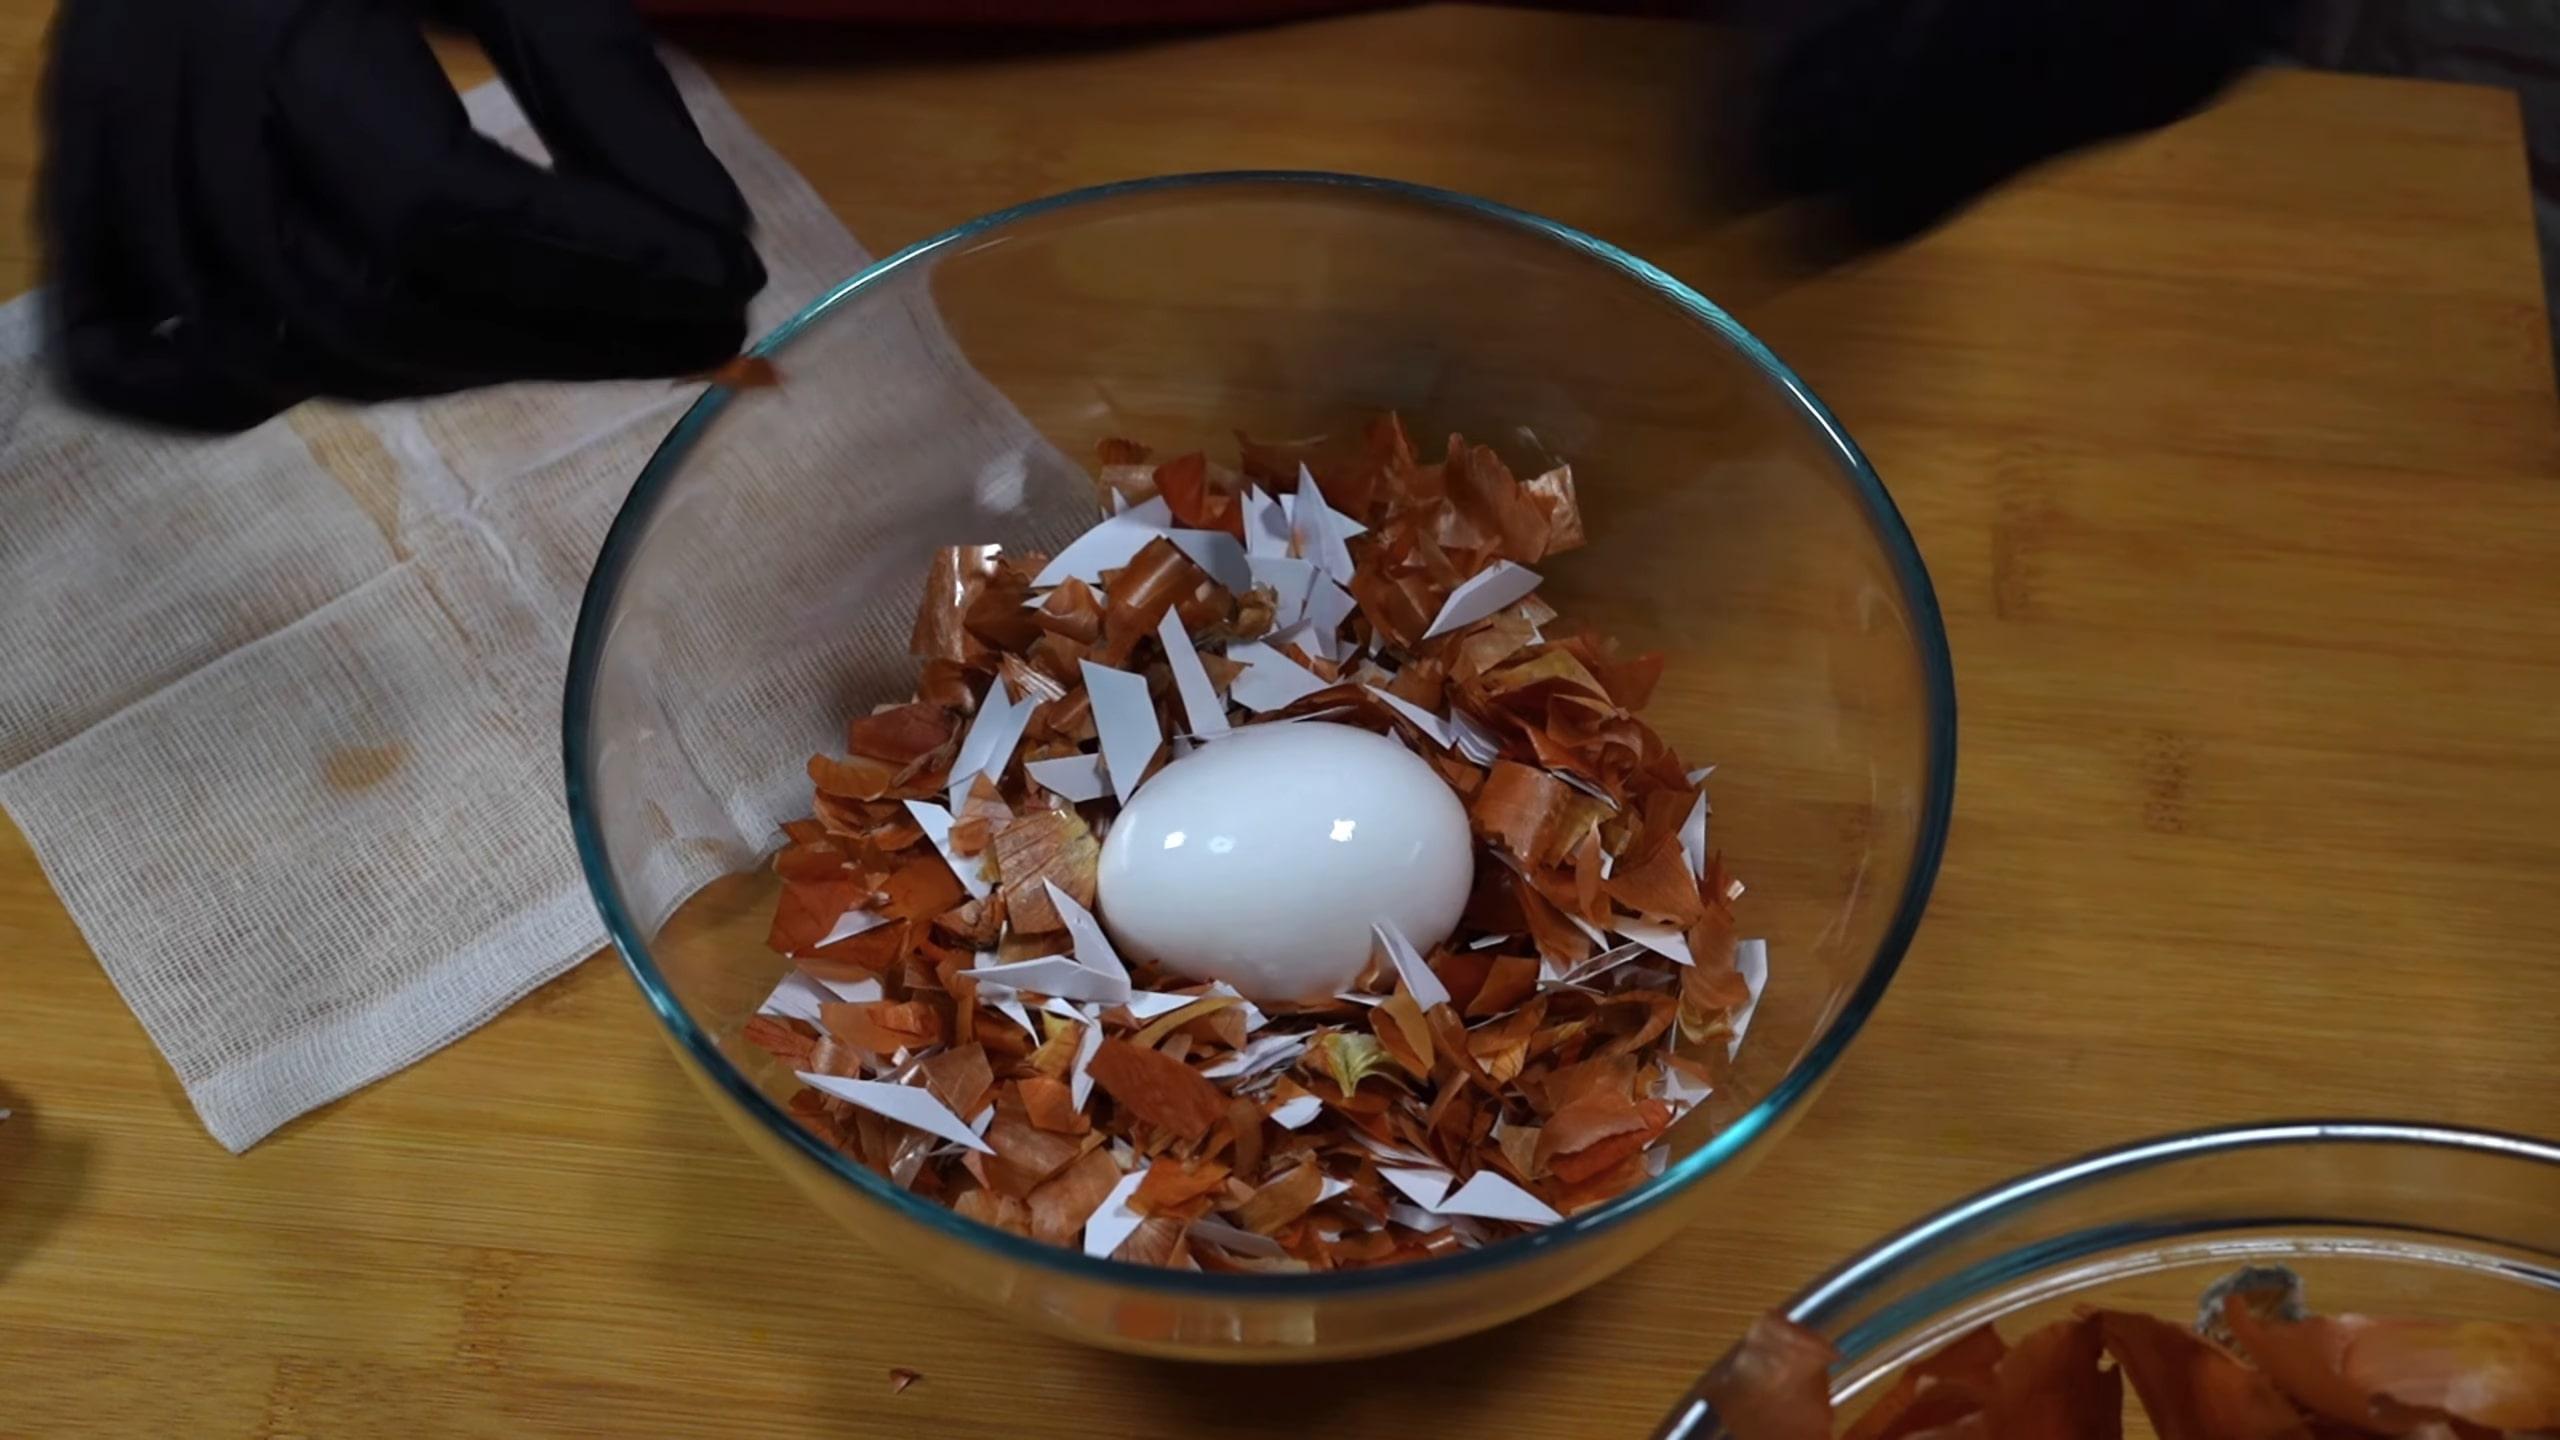
Step 4
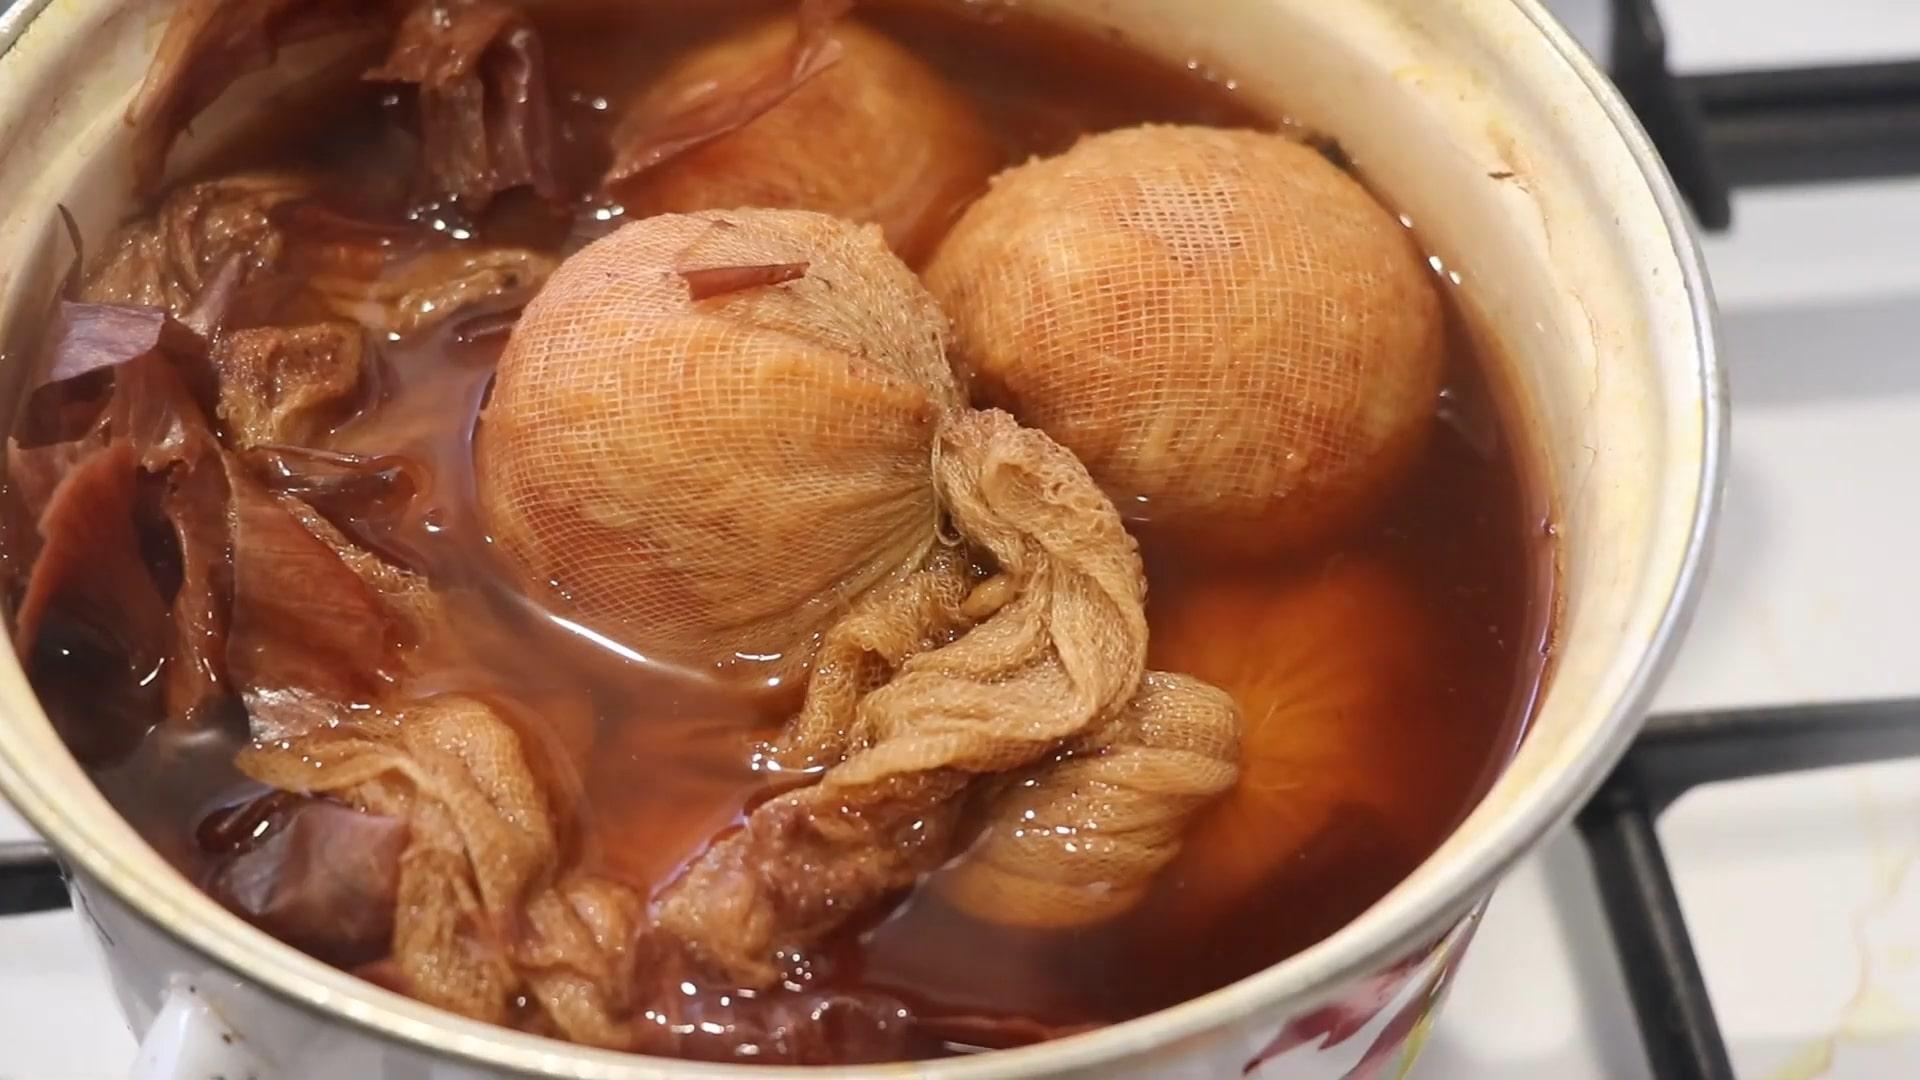
Place the shelled egg on a small square of cheesecloth. Form a pouch and secure the structure with thread.
Step 5
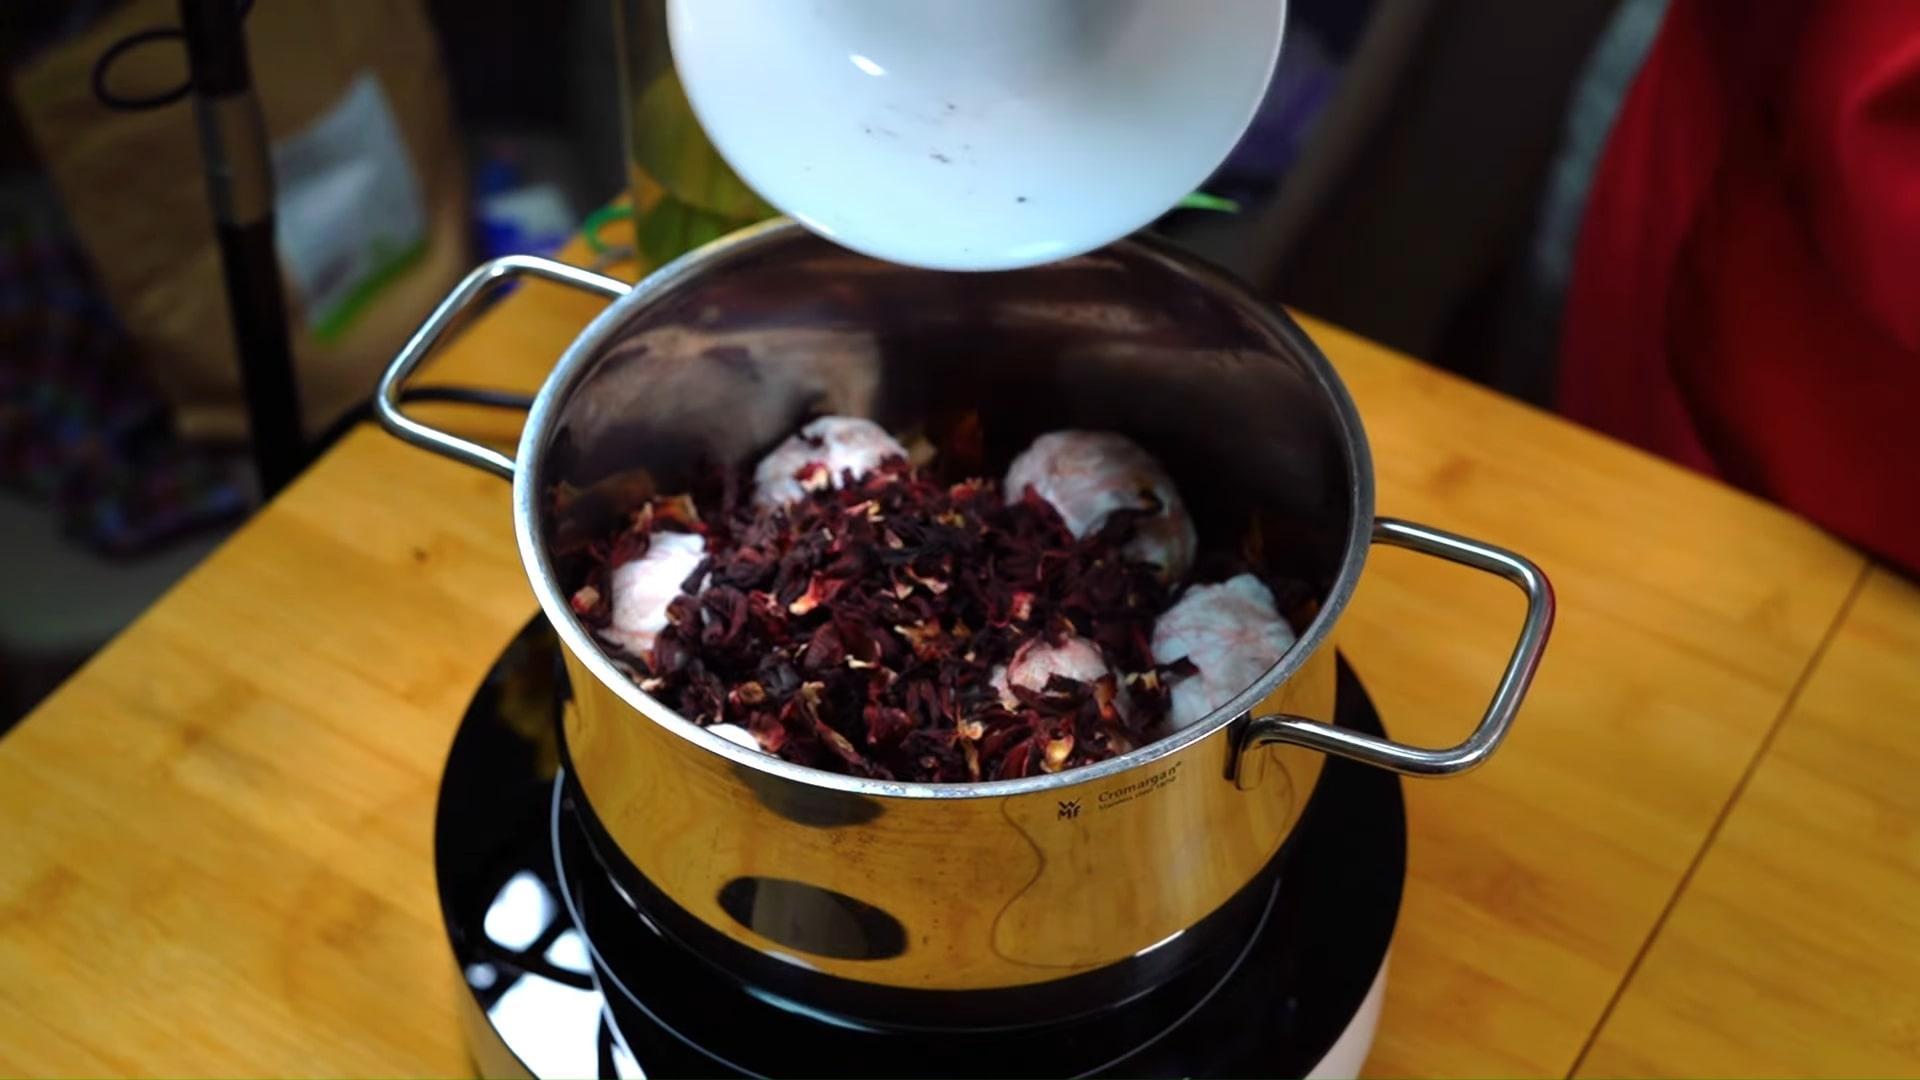
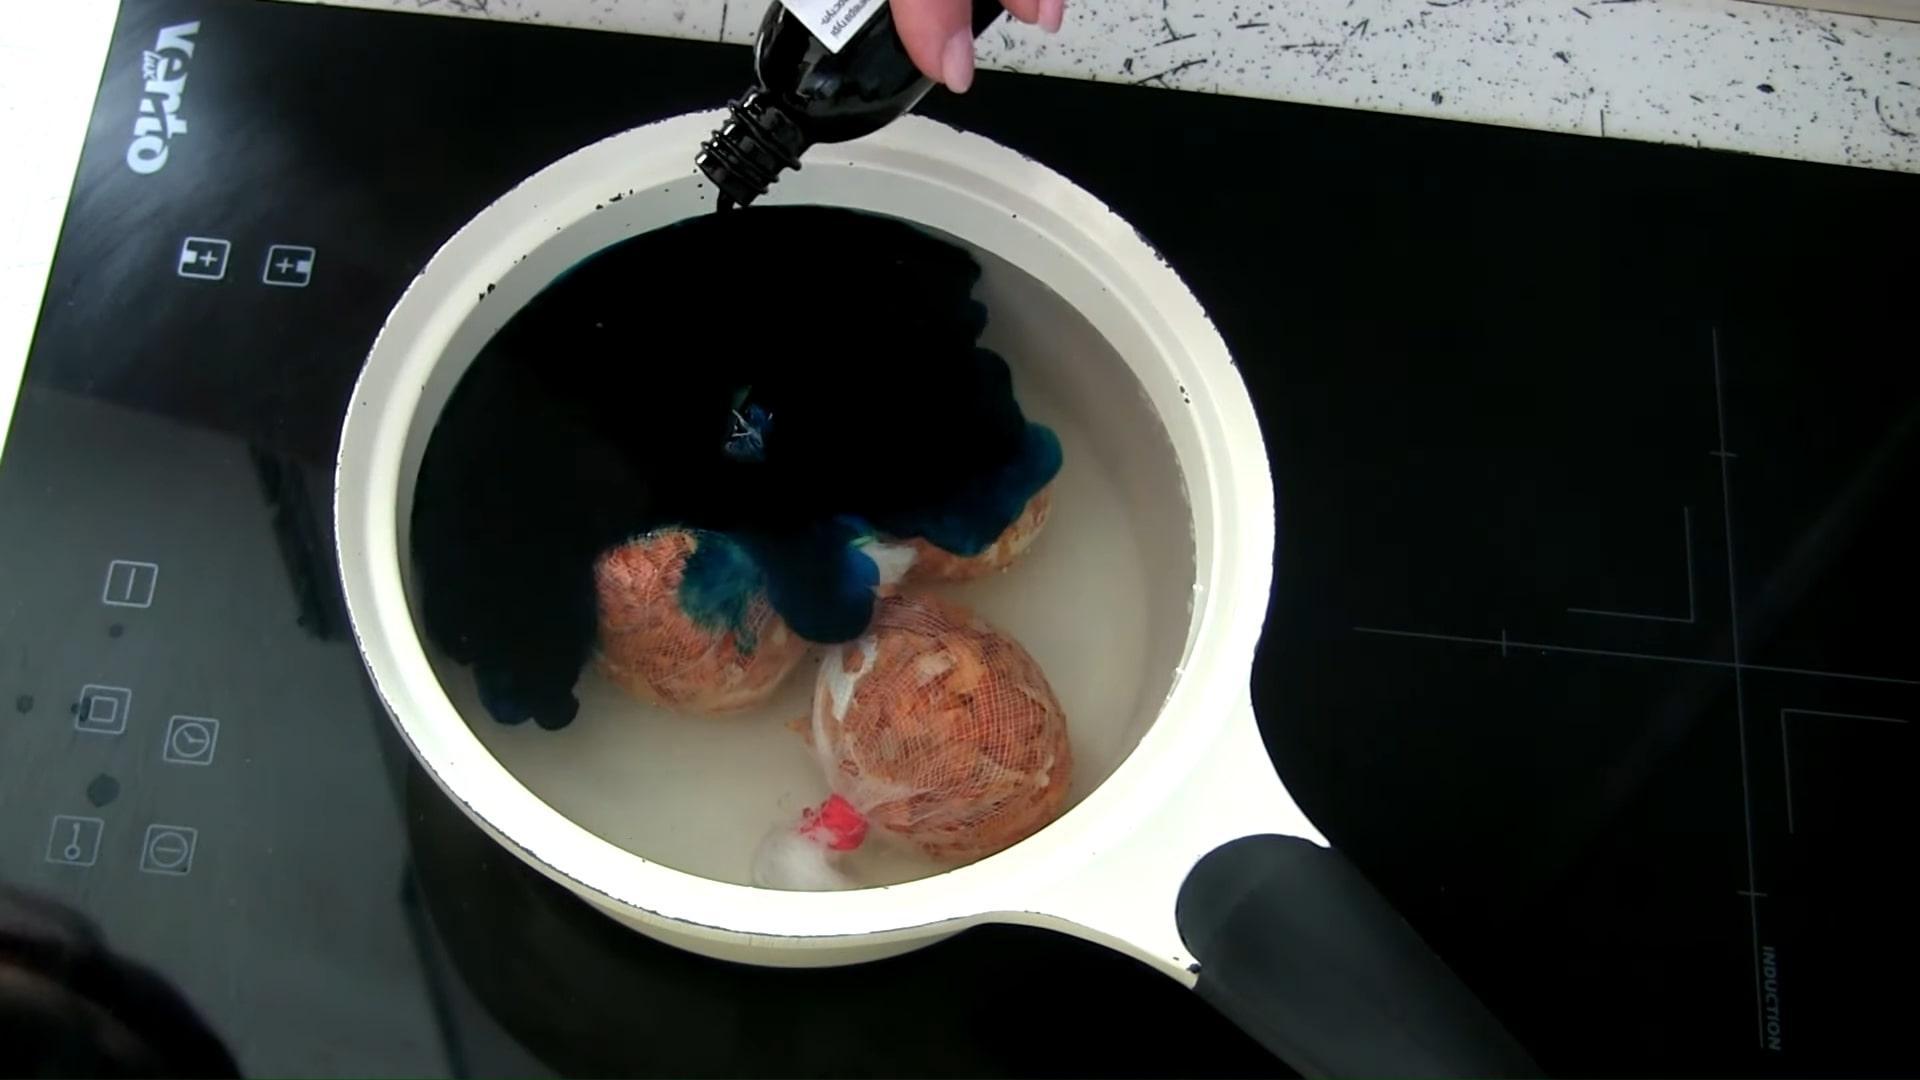
Place the remaining onion peel into a saucepan.
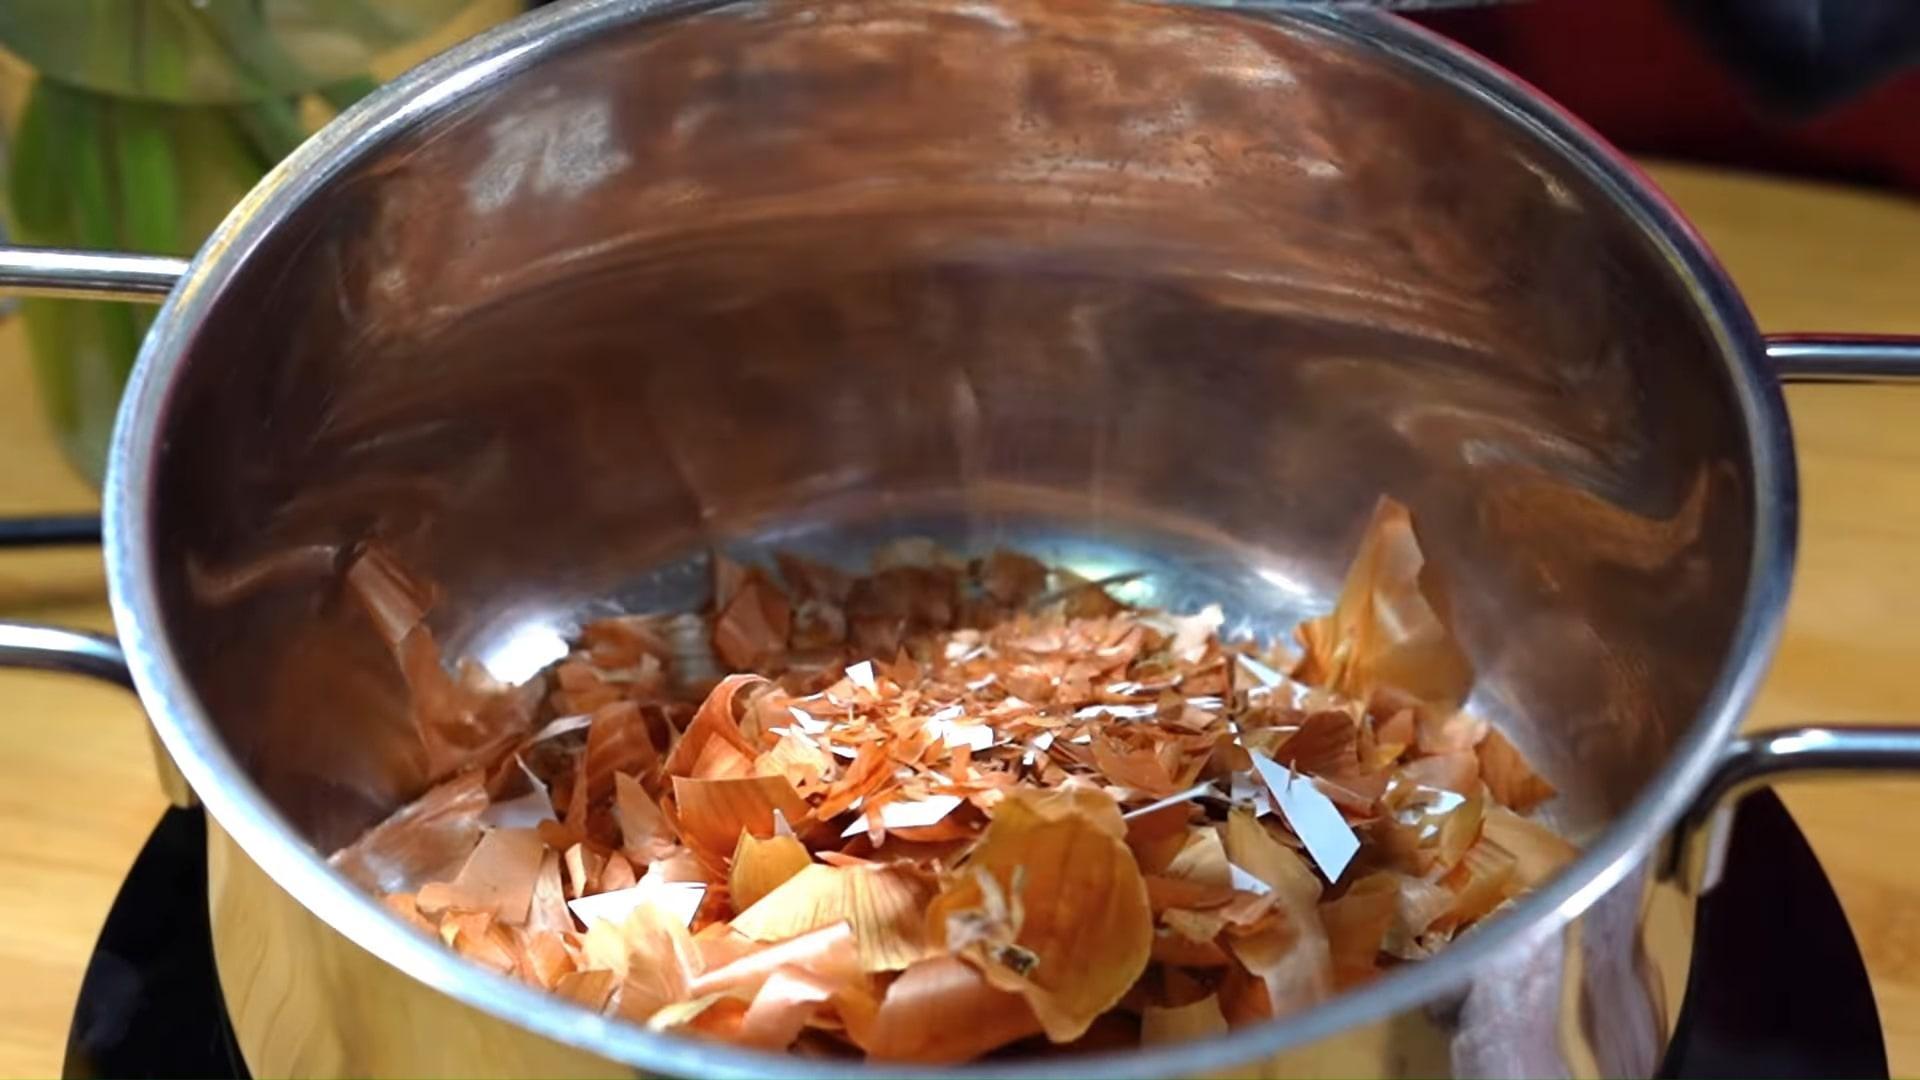
Step 6
Place the eggs in. Sprinkle with dried hibiscus tea leaves.
Step 7
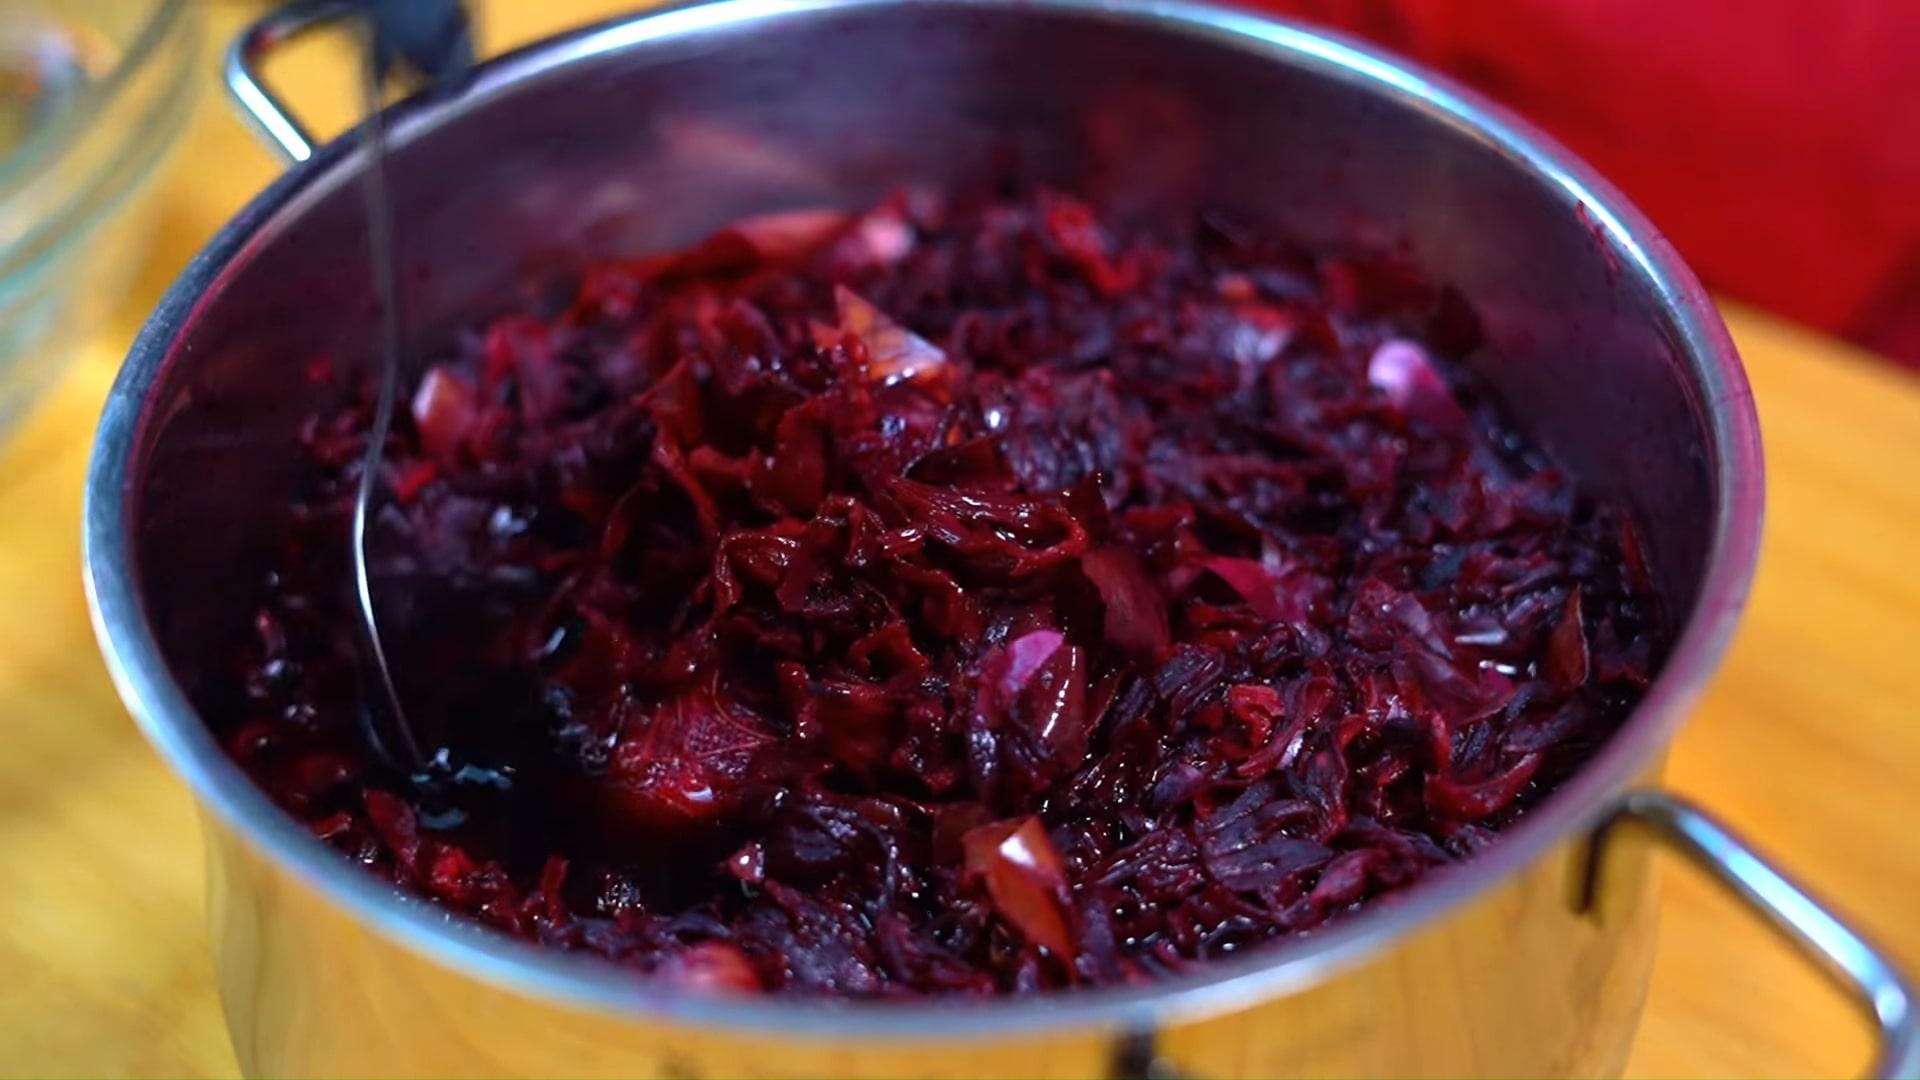
Pour water into a saucepan. Add salt and a tablespoon of vinegar.

Step 8
Place on the stove for 8-10 minutes. Then remove the pan with the eggs from the heat and let sit for 30-40 minutes.
Step 9
Place the eggs in gauze in cold water for 2–3 minutes.
Step 10
Remove the cheesecloth. Peel off the husks. Rub with vegetable oil for shine. Done!
How to dye eggs using onion skins and brilliant green
An incredibly beautiful Easter egg design that will be completely unique to every homemaker. This easy and quick dyeing method requires only brilliant green and onion skins. You can play with the intensity of the shades and use other natural dyes instead of brilliant green.
Ingredients
- Water – 1 l
- Brilliant green - 20 ml
- Crushed onion peel – 3 – 4 handfuls
- Salt – 1 tbsp.
Cooking time: 10 minutes
Servings: 1
Step-by-step recipe
Step 1
Grind the onion peel.
Step 2
Dip the egg in water, then roll it in onion skins.
Step 3
Place the egg and its shell on cheesecloth. Tie the bag shut. Trim the stem for easier handling.
Step 4
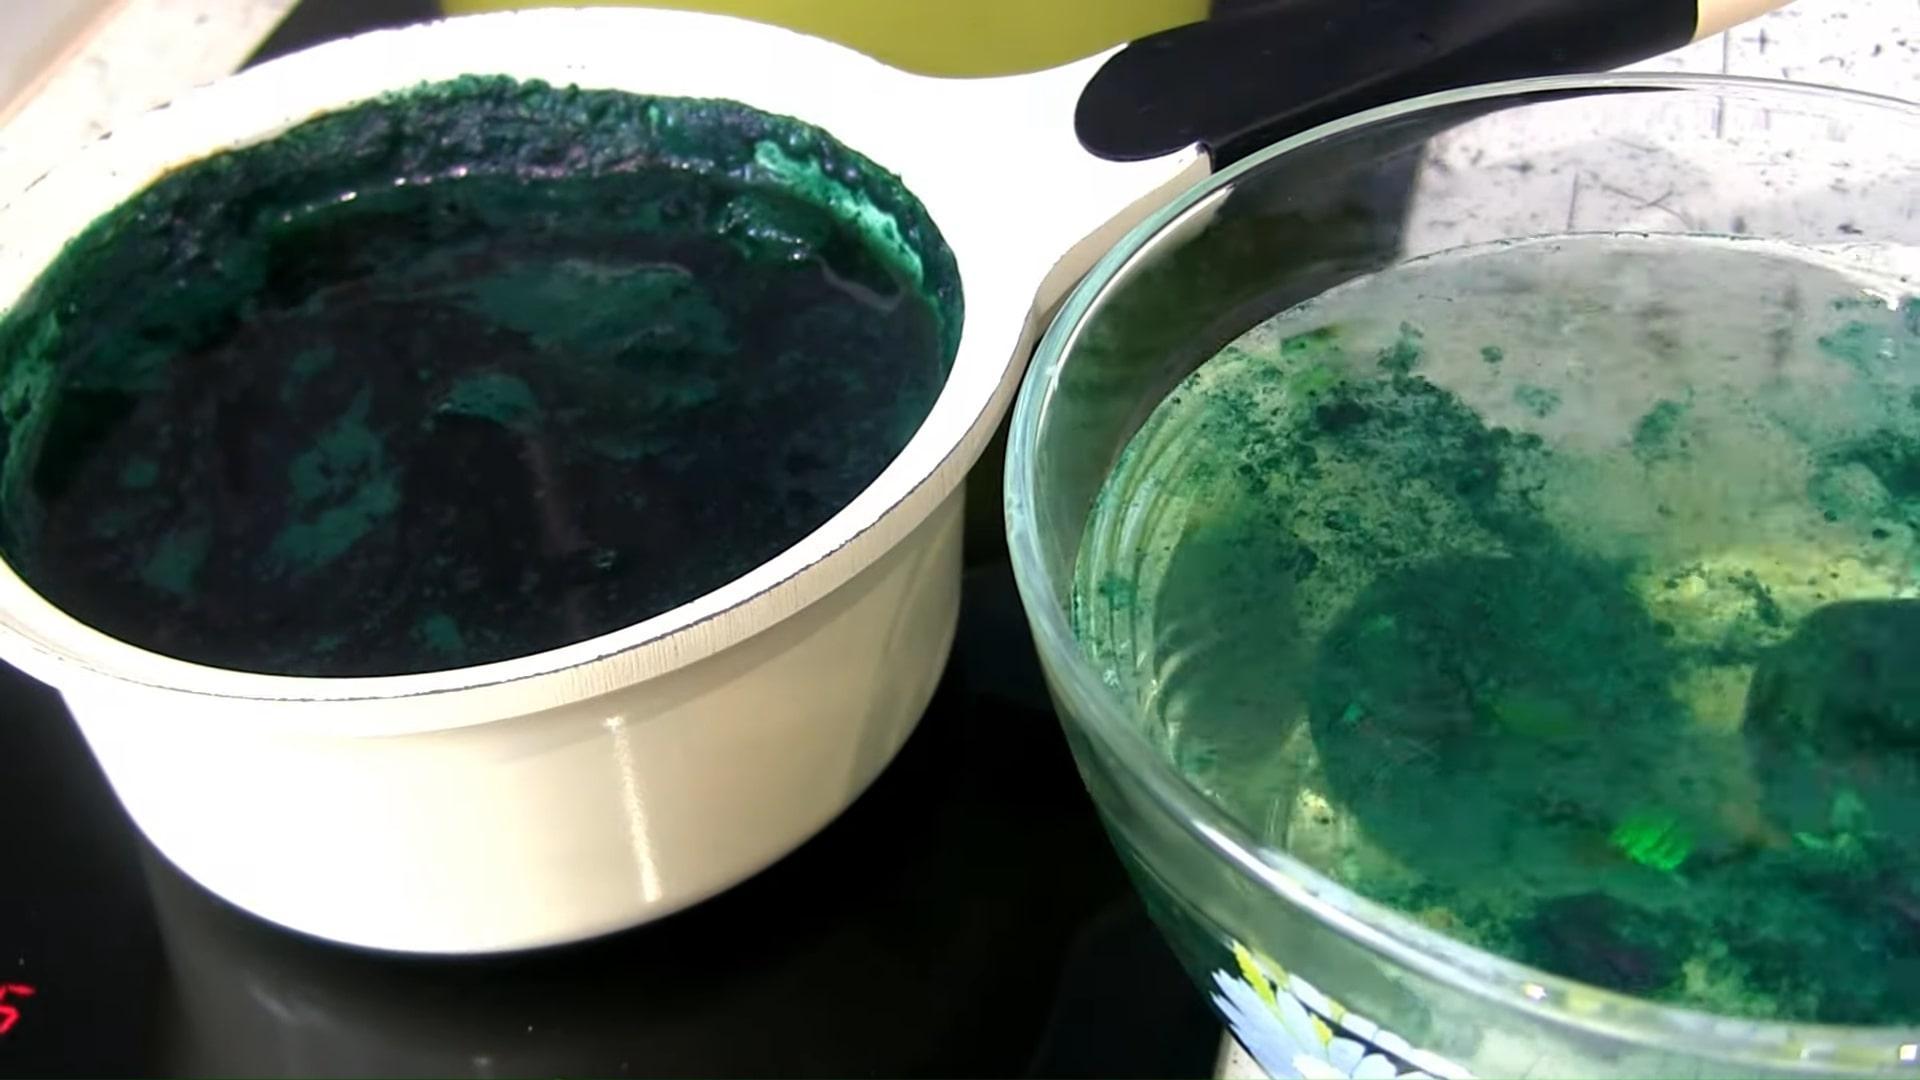
Place the eggs in a saucepan. Cover with water.

Step 5
Pour in the green stuff. Cook the eggs for 10 minutes after boiling.
Step 6
Place the finished eggs in gauze in cold water until they cool completely.
Step 7
Remove the cheesecloth. Carefully scrape away any remaining husk from the surface.
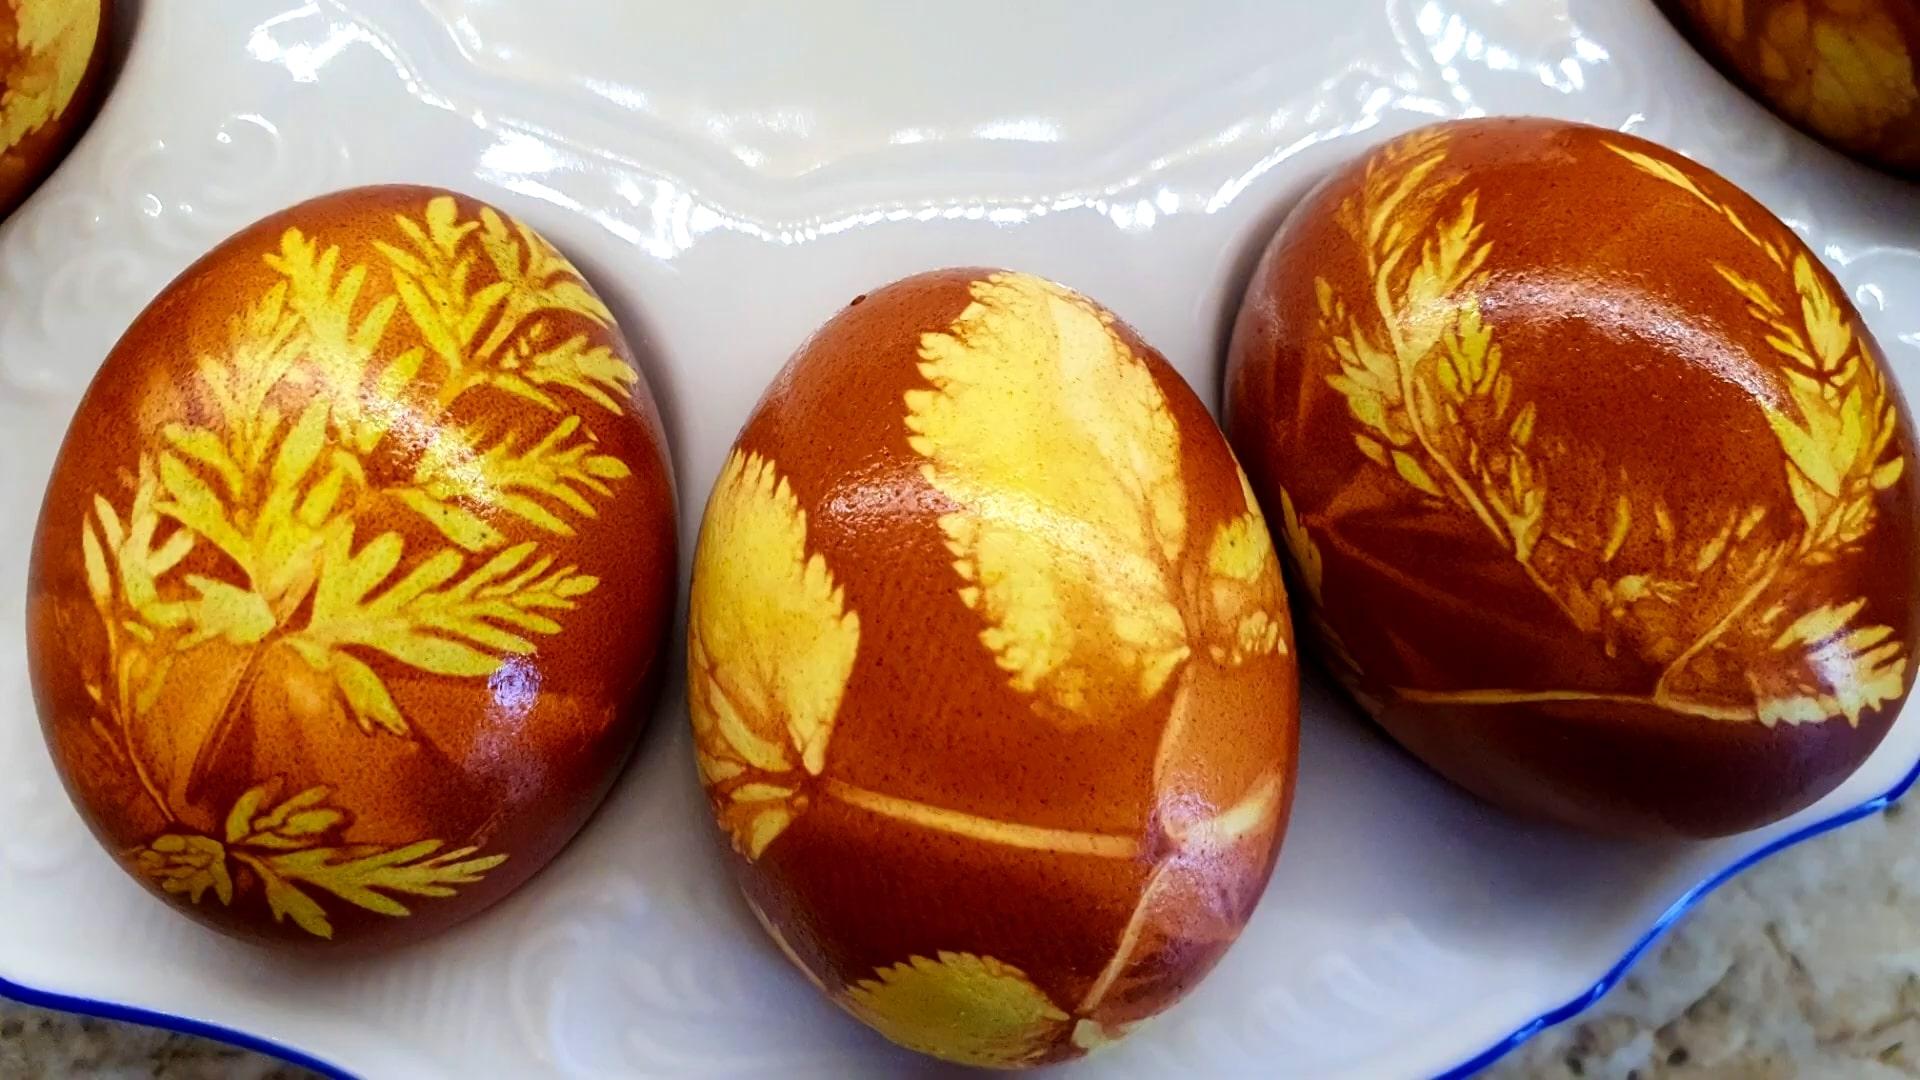
Eggs with floral patterns
Painted eggs featuring floral patterns symbolize fertility. Besides the sacred meaning inherent in the design and colors, this version of the Easter egg looks very beautiful and elegant.
Ingredients
- Water – 1.5 l
- The peel of 4–5 onions
- Green
- Salt - a pinch
Cooking time: 15 minutes
Servings: 1
Step-by-step recipe
Step 1
Place the onion peels in a saucepan and cover with cold water. Let it steep for a couple of hours.
Step 2
Wet the eggs with water. Carefully place a leaf of greenery on them.
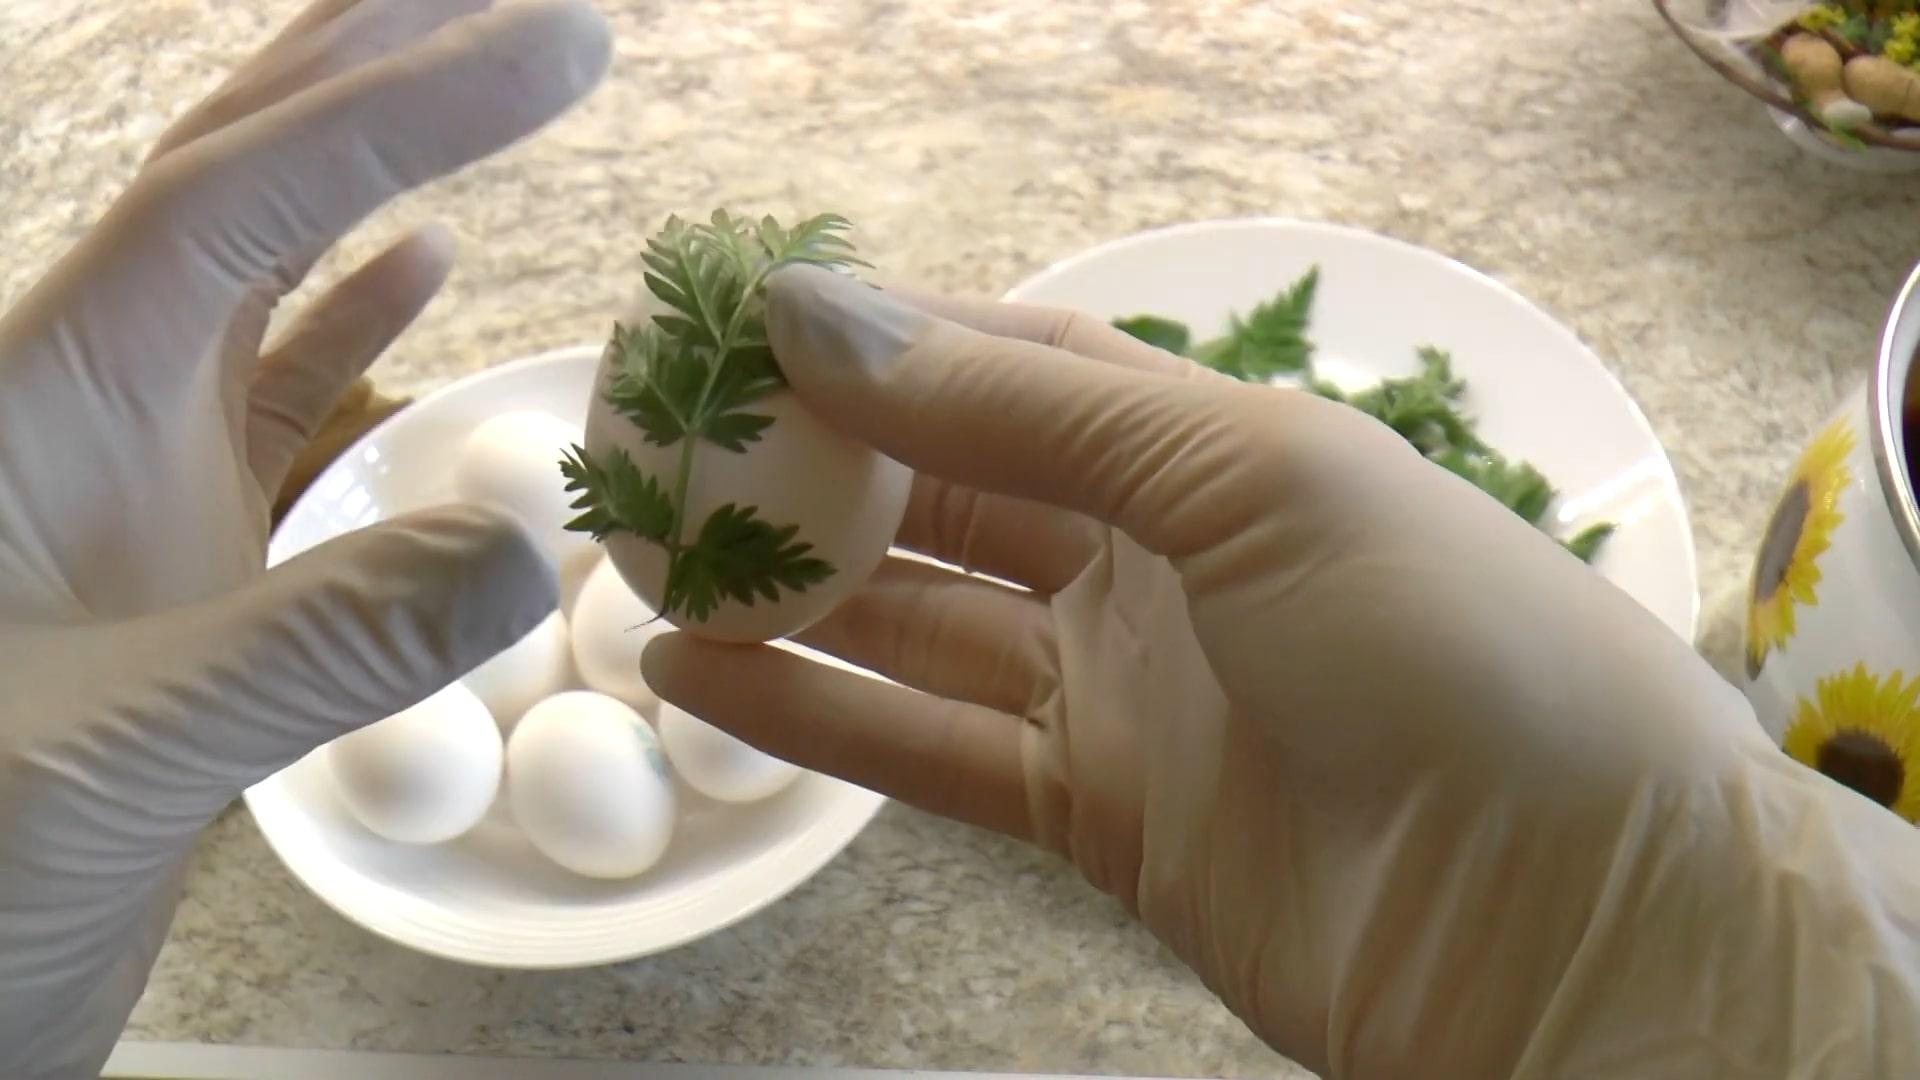
Step 3
Place the egg in a pre-prepared nylon stocking. Make sure the green leaf lies flat and doesn't curl. Tie it off.
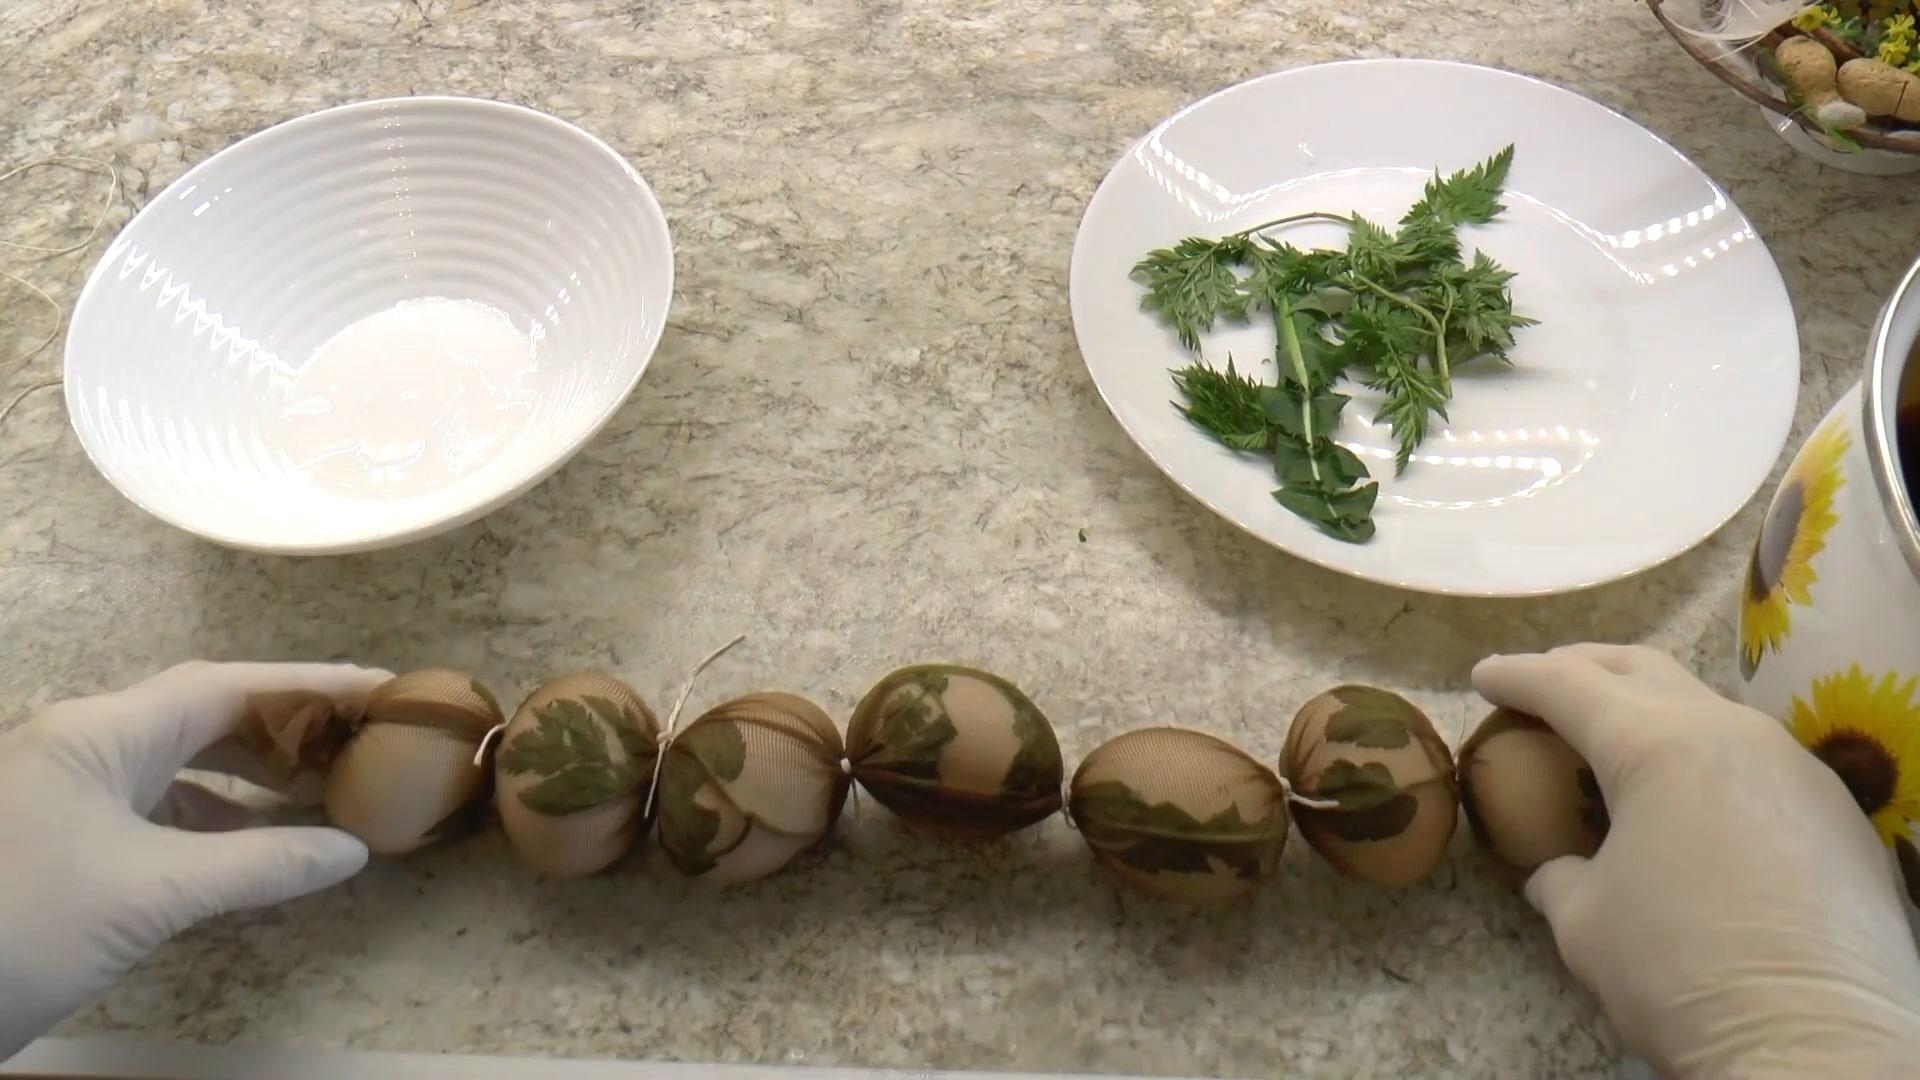
Step 4
Place the eggs in a saucepan with the onion skins. Add salt.
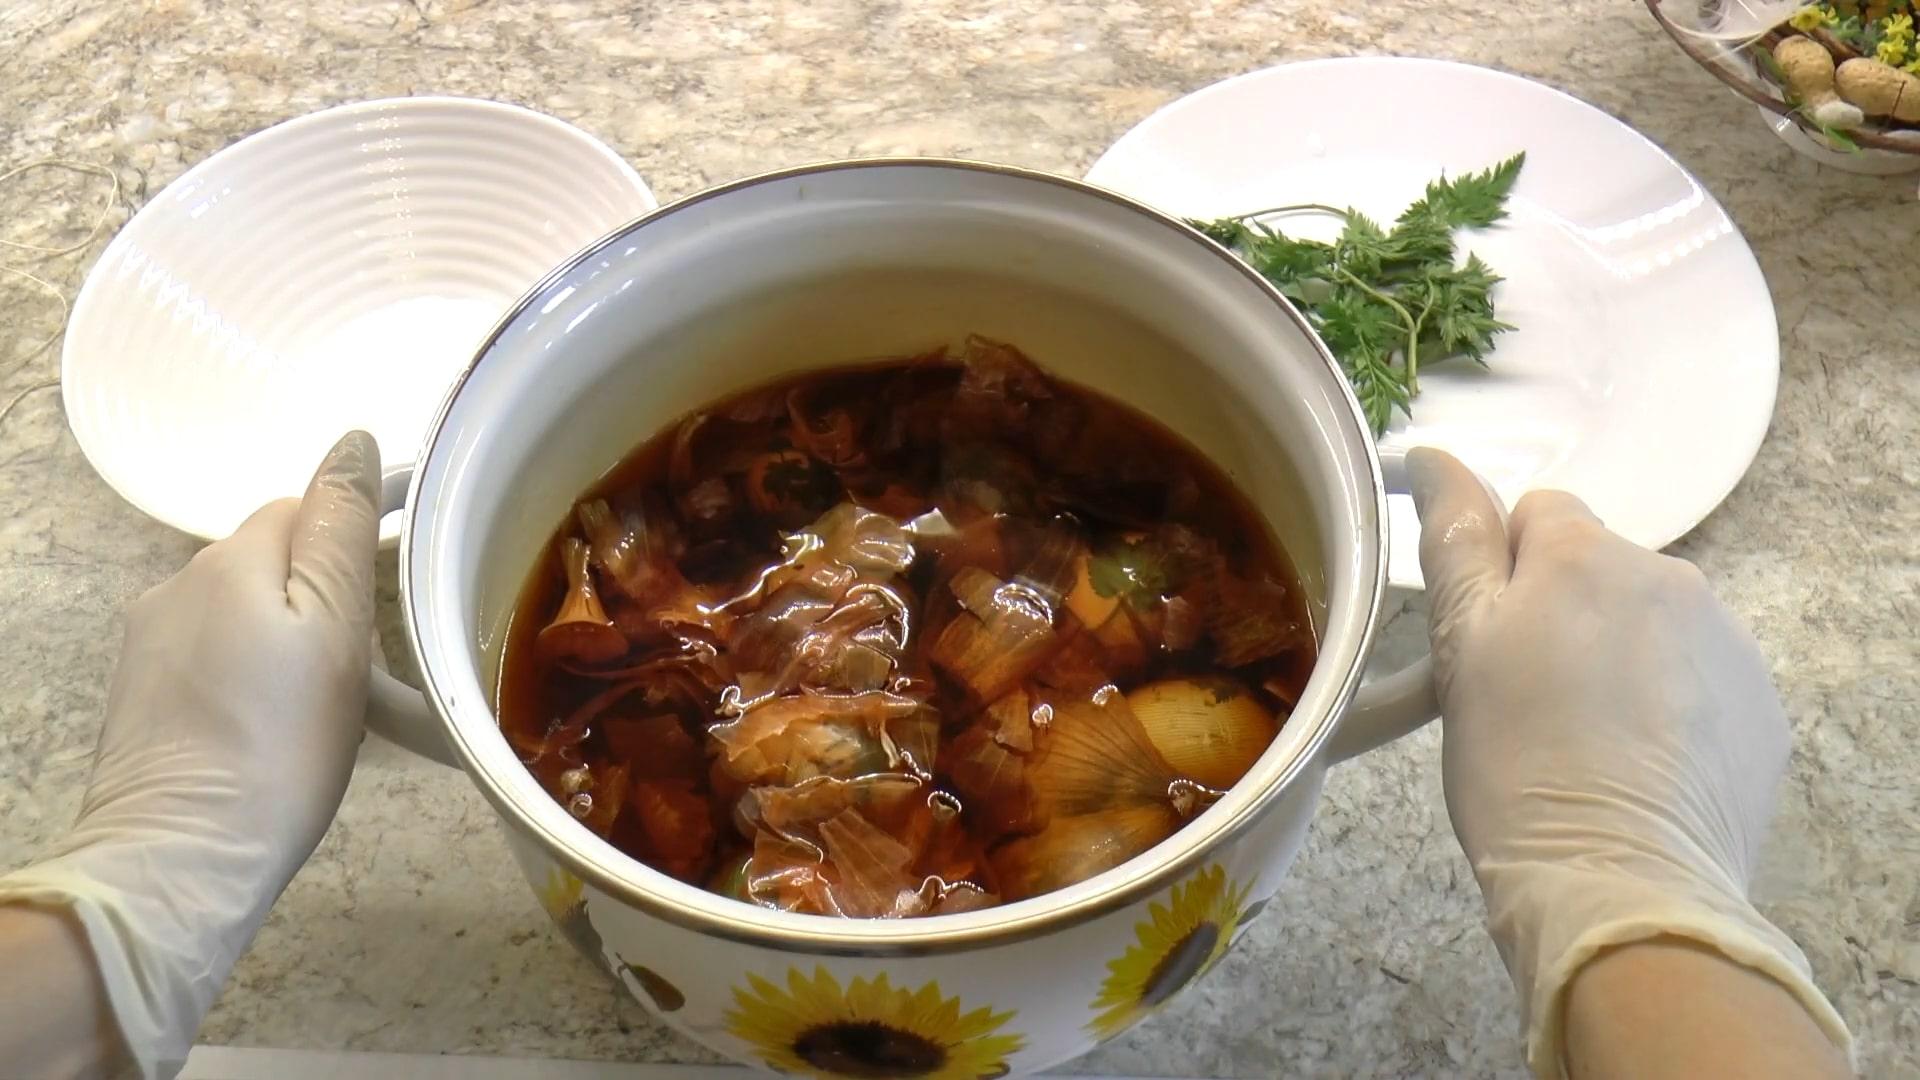
Step 5
Place over low heat. Bring to a boil and simmer for 8–10 minutes.
Step 6
Once cooked, transfer the eggs to a bowl of cold water and let cool.
Step 7
Once the eggs have cooled completely, remove the nylon wrapping. Rub with vegetable oil.
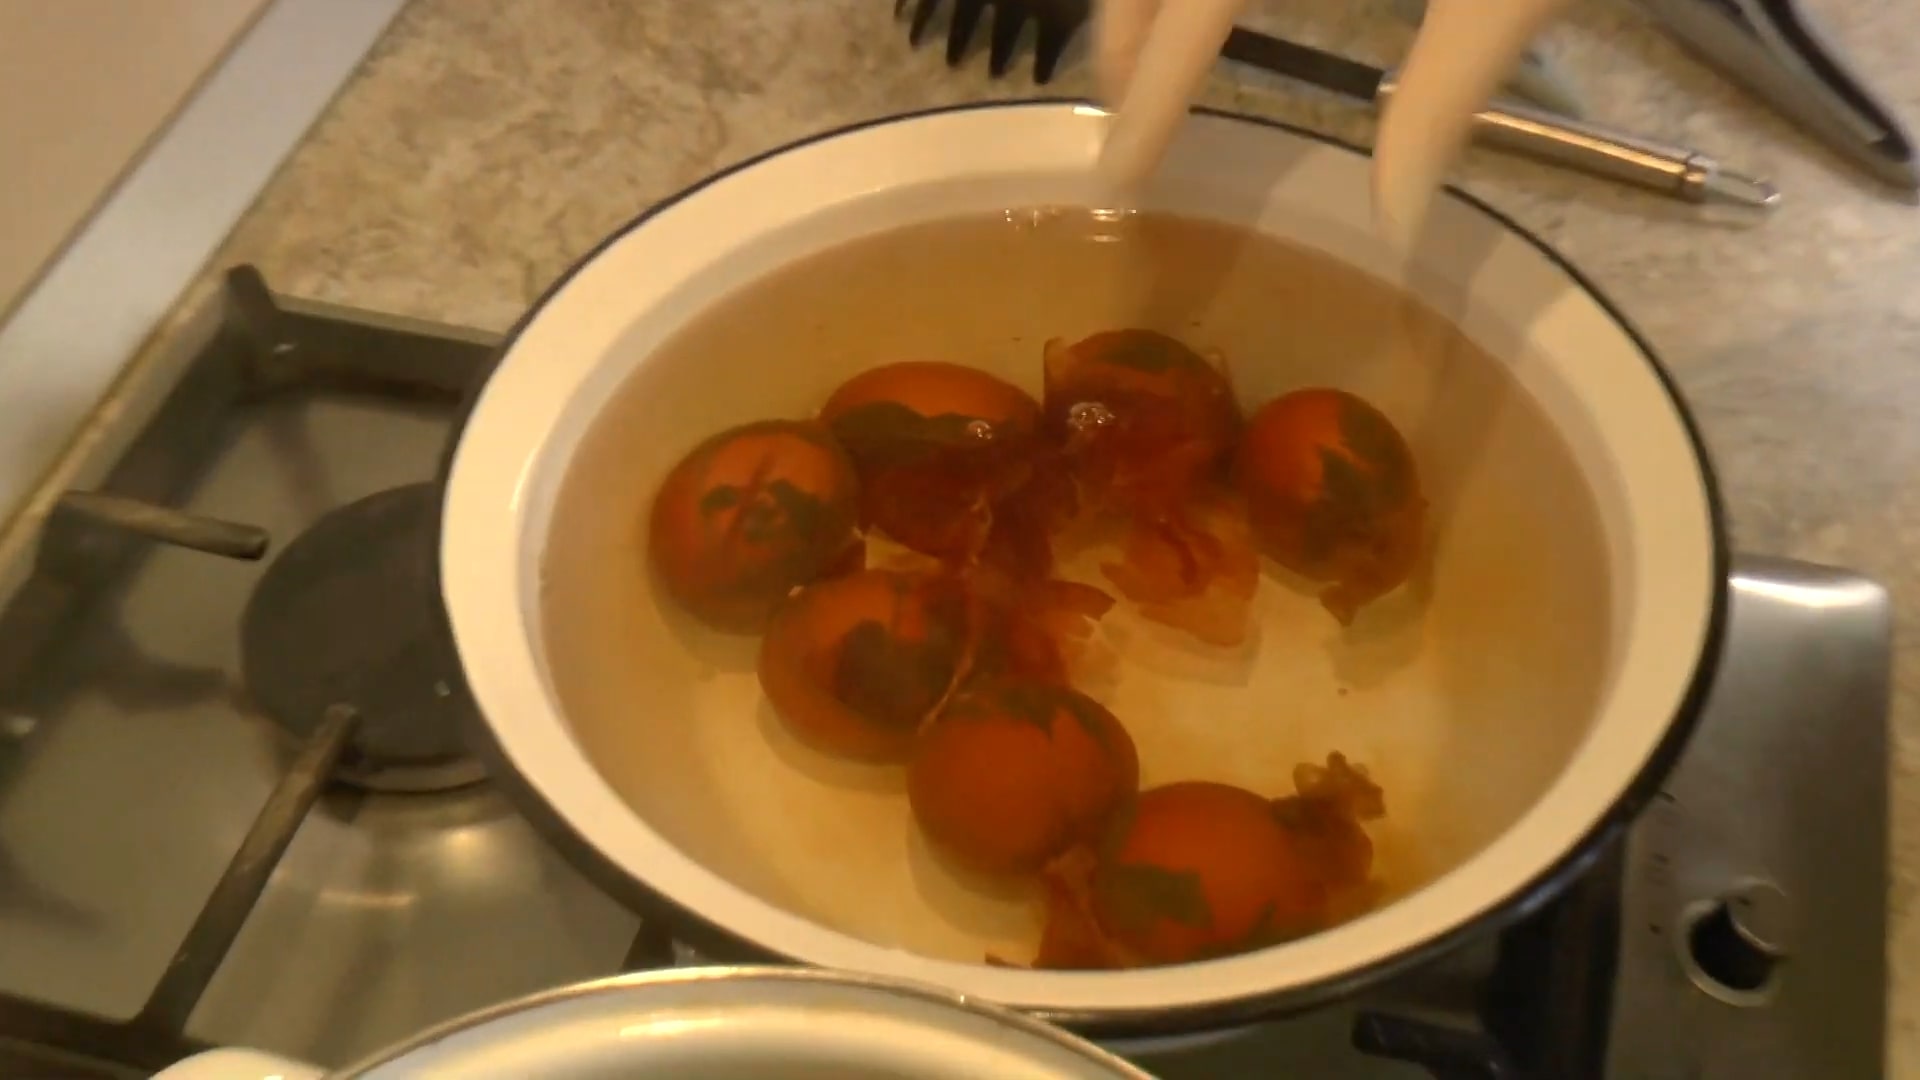
Easter eggs in onion skins with a rice pattern
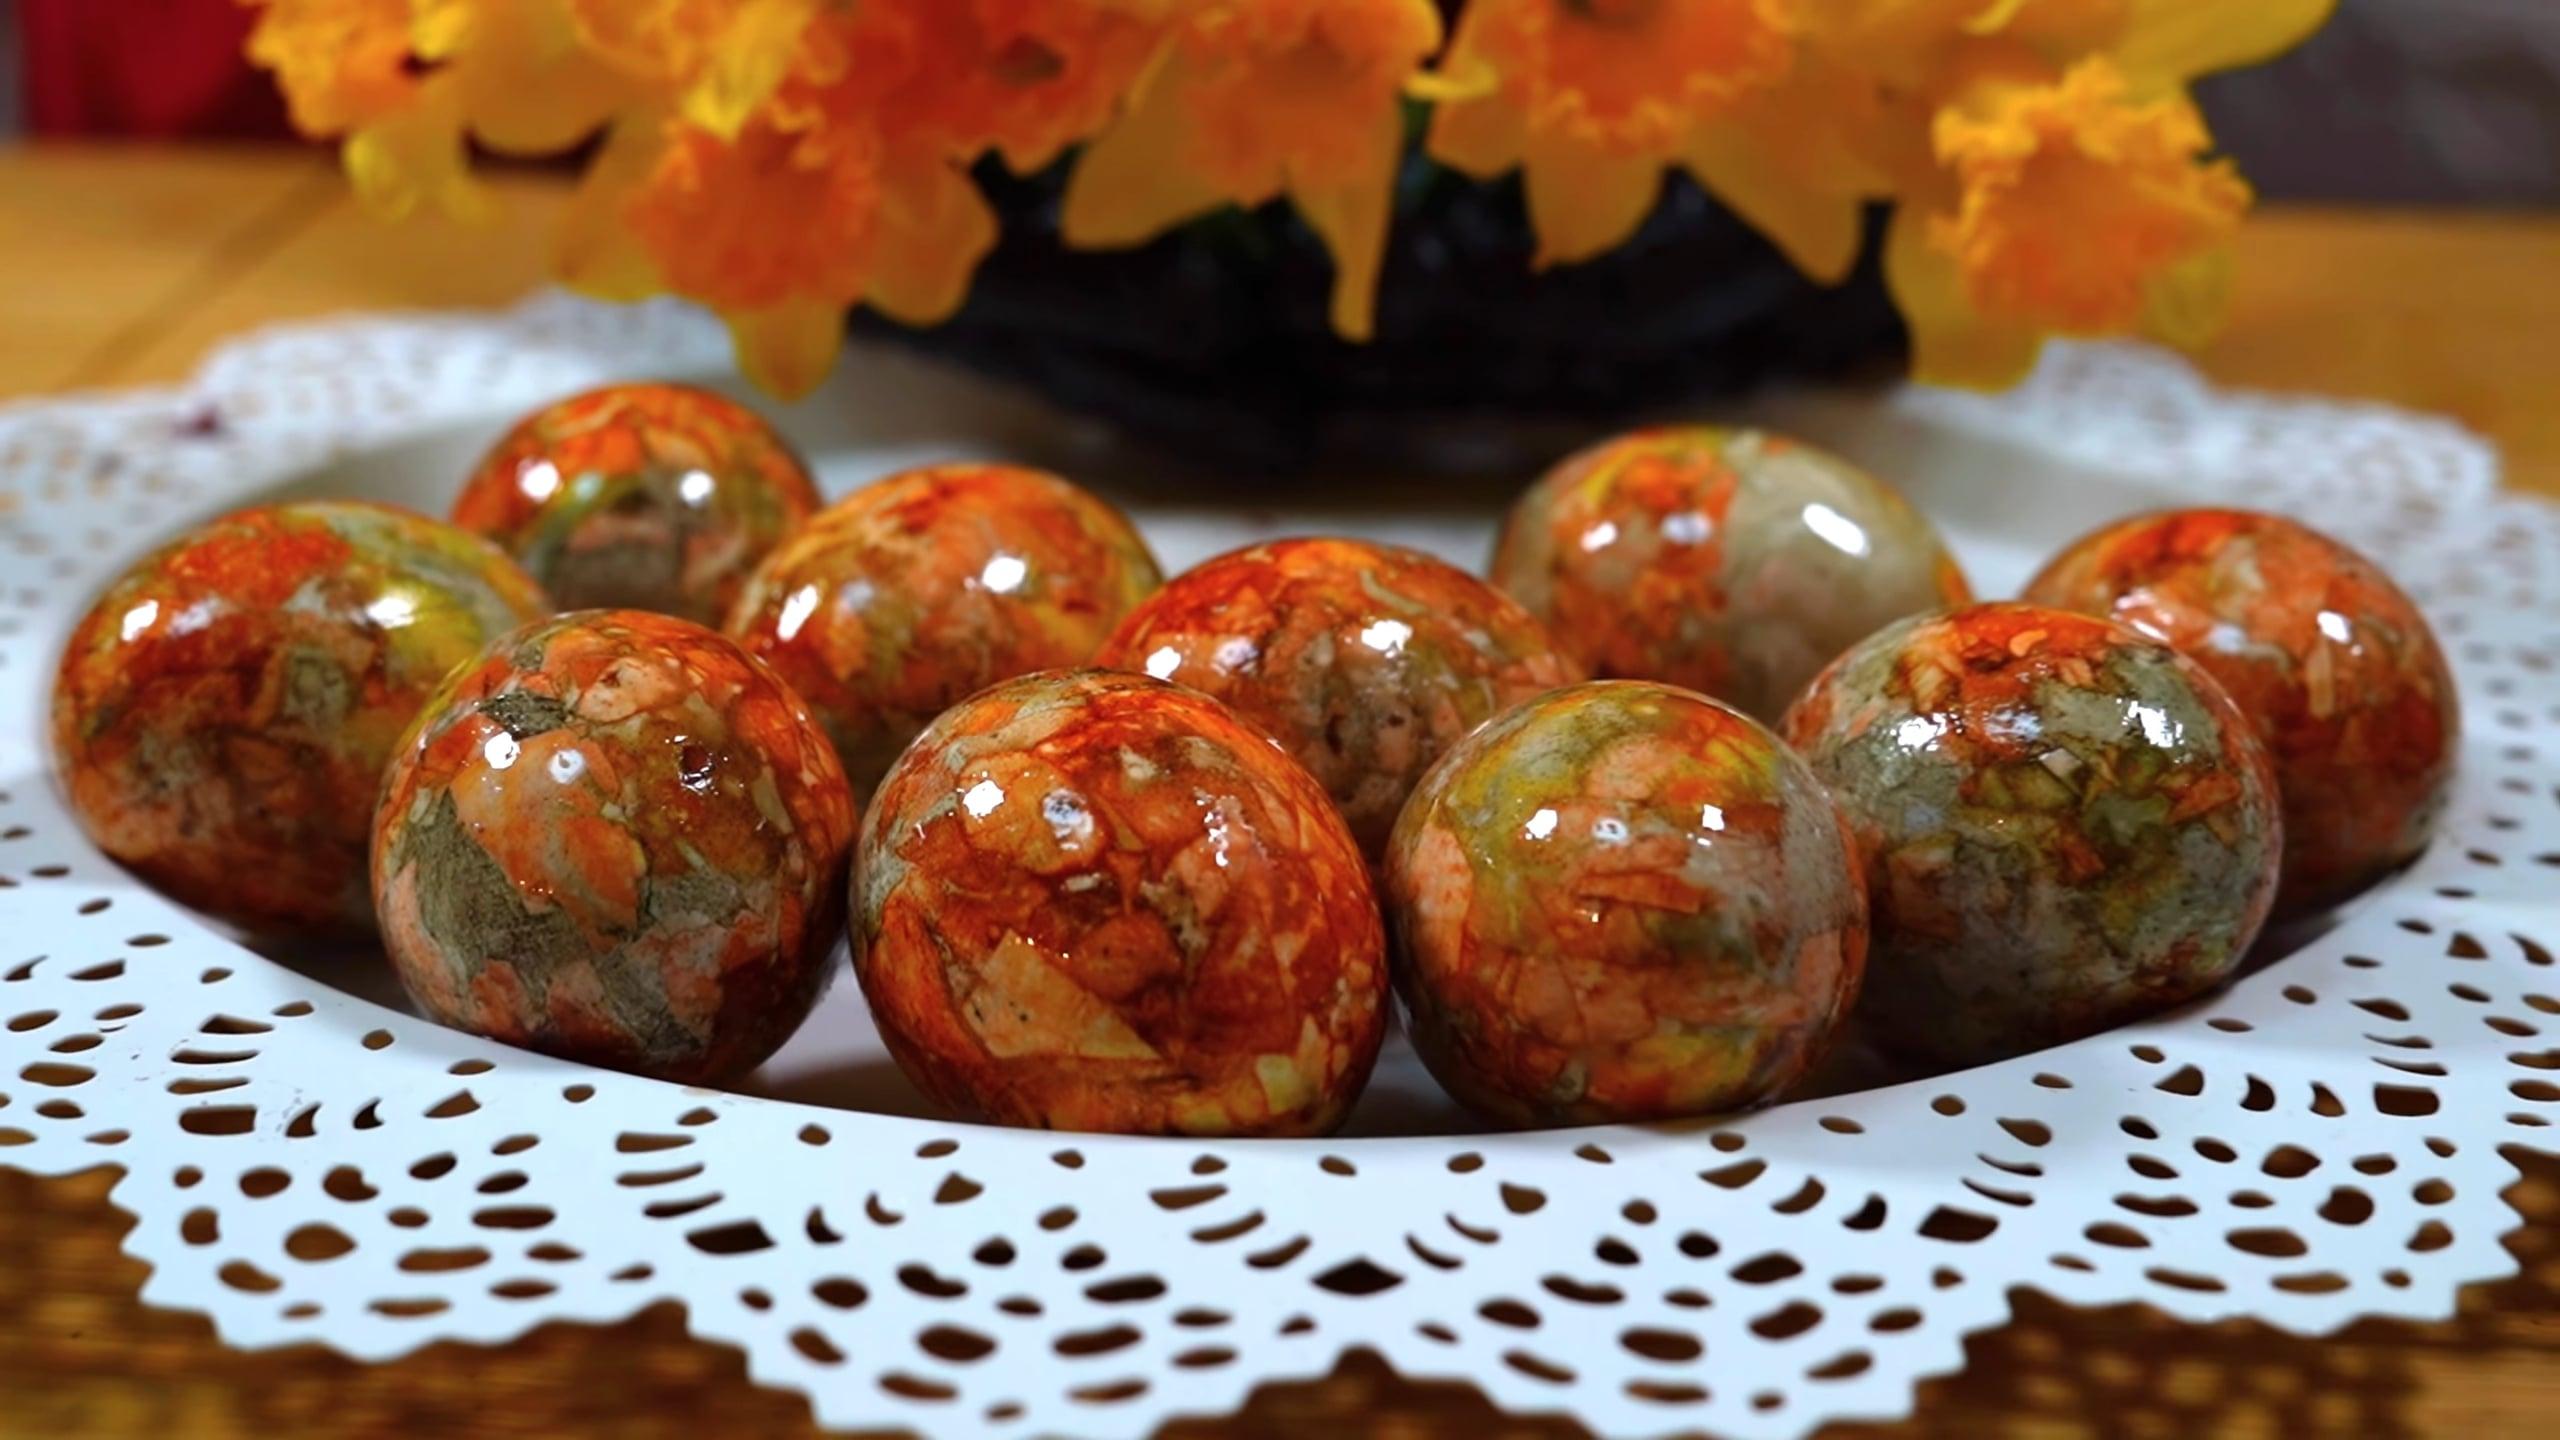
An interesting and very unusual Easter egg design that's truly captivating. The pattern makes the eggshell appear velvety and incredibly soft. This effect can be achieved with ordinary rice, but it's incredibly eye-catching.
Ingredients
- Water – 1.5 l
- Vinegar – 2 tbsp.
- Onion peel – 2 – 3 handfuls
- Rice – 100 g
- Salt – 1 tbsp.
Cooking time: 15 minutes
Servings: 1
Step-by-step recipe
Step 1
Place the onion skins in a saucepan. Cover with water. Simmer over low heat for 30 minutes.
Step 2
Remove from heat. Let cool.
Step 3
Dip the egg soaked in water into the rice.
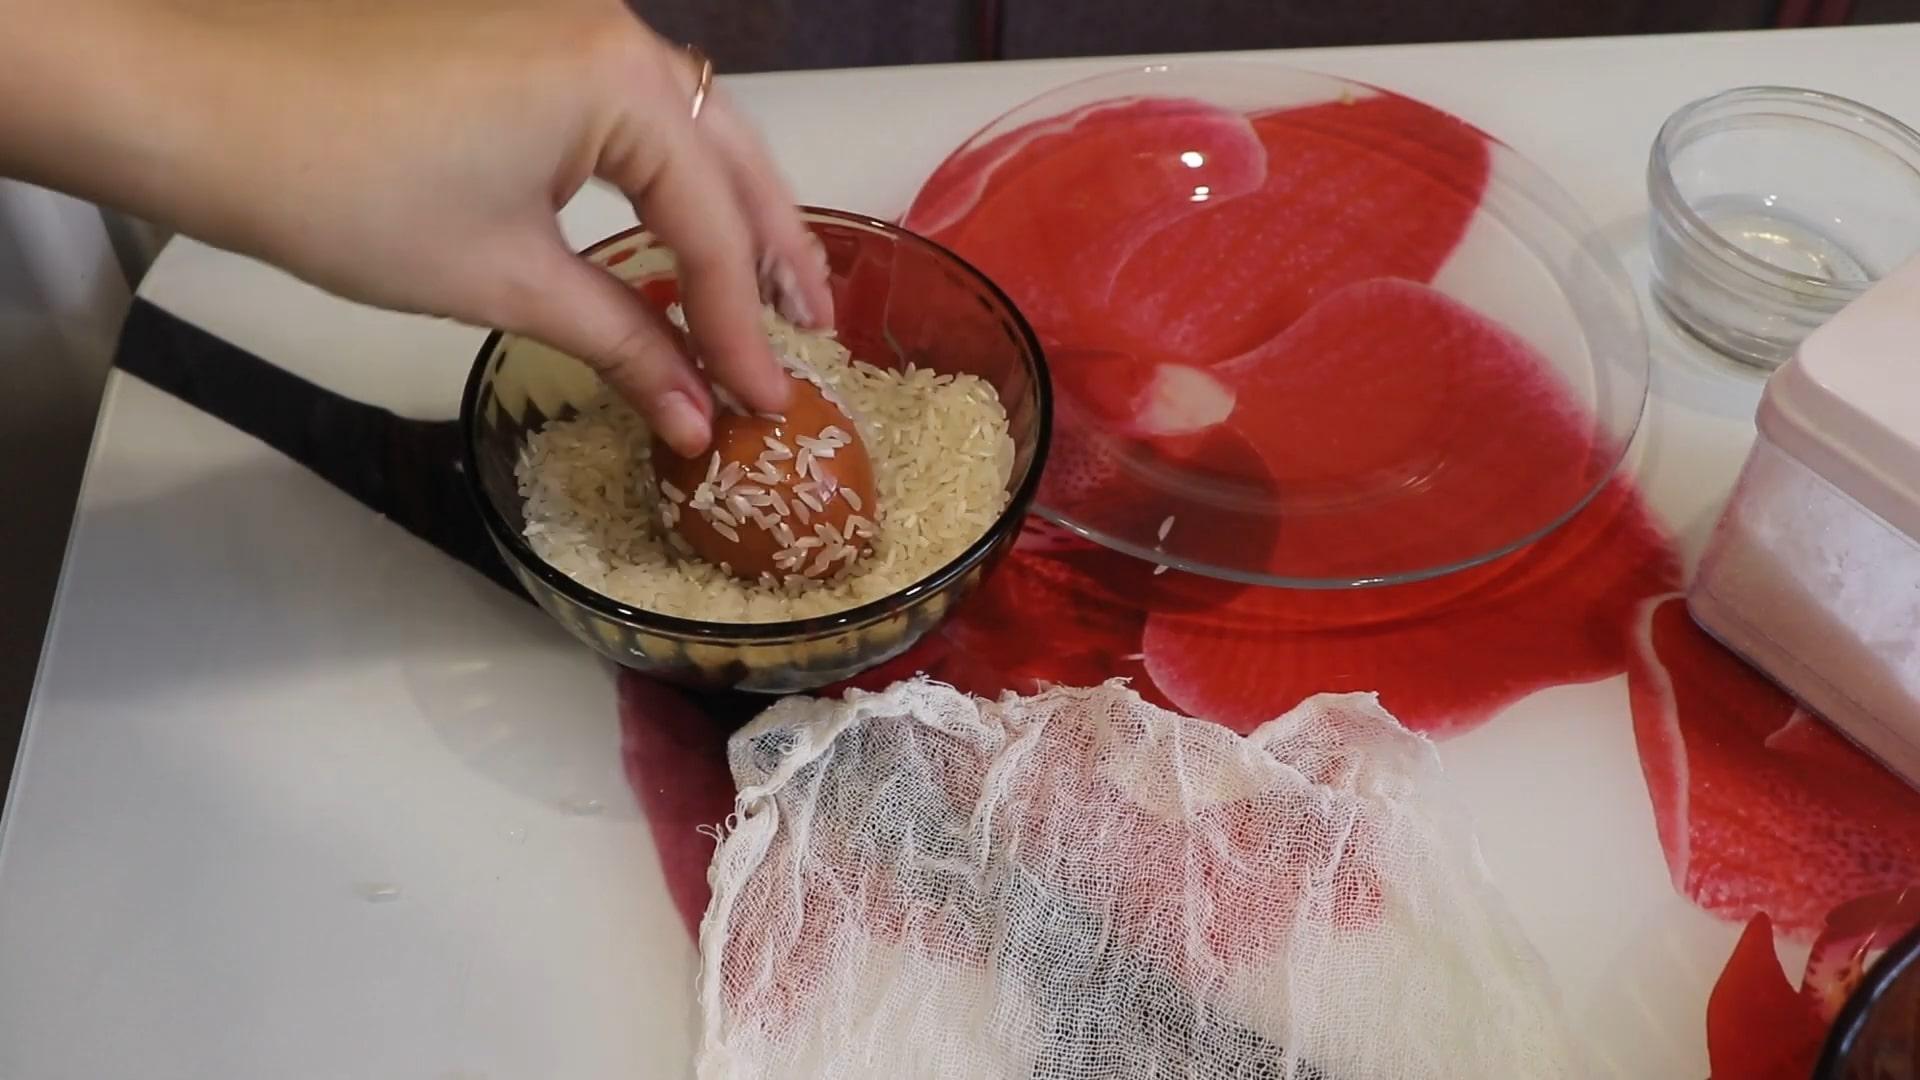
Step 4
Place a small amount of rice on a square piece of cheesecloth, then an egg. Tie the cheesecloth into a knot. Before securing the structure, gently rotate the egg inside the cheesecloth to distribute the rice.
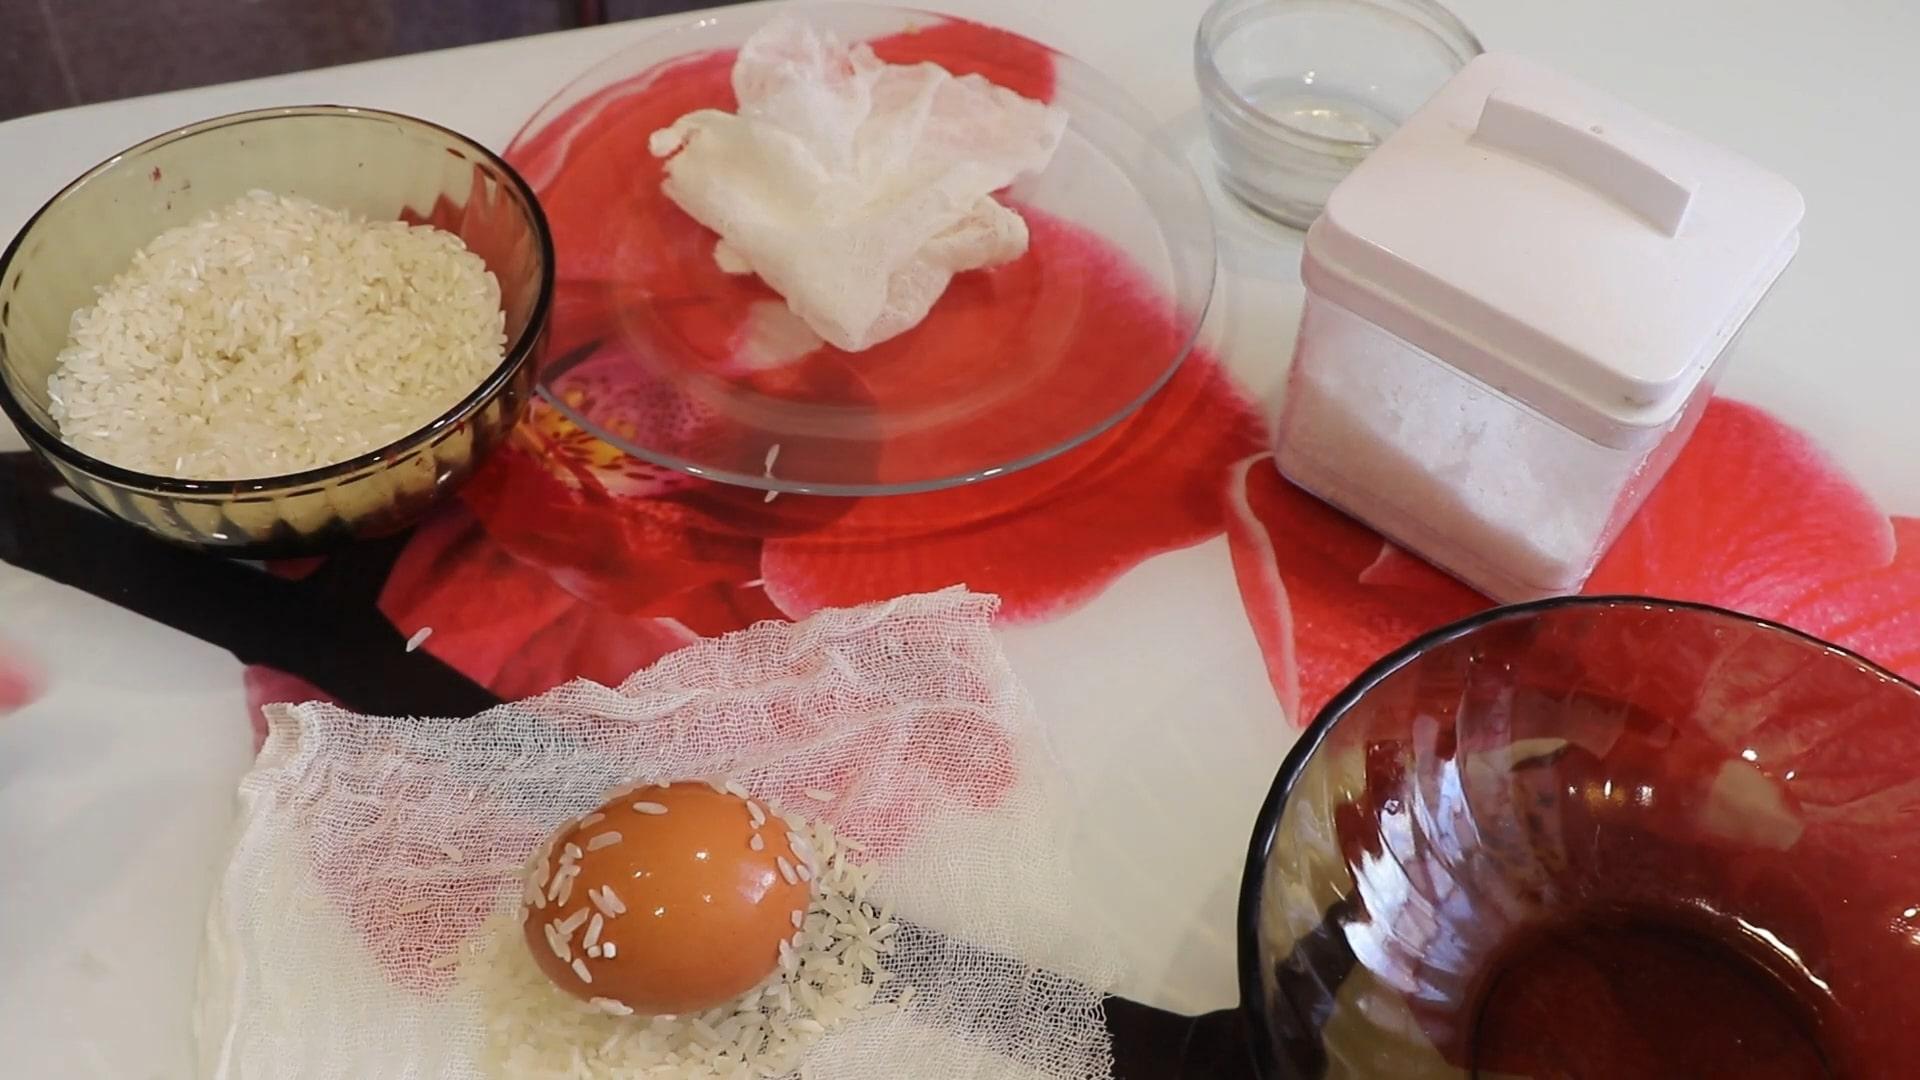
Step 5
Place the eggs in cheesecloth in cooled water with the peels. Pour in the vinegar. Add salt.
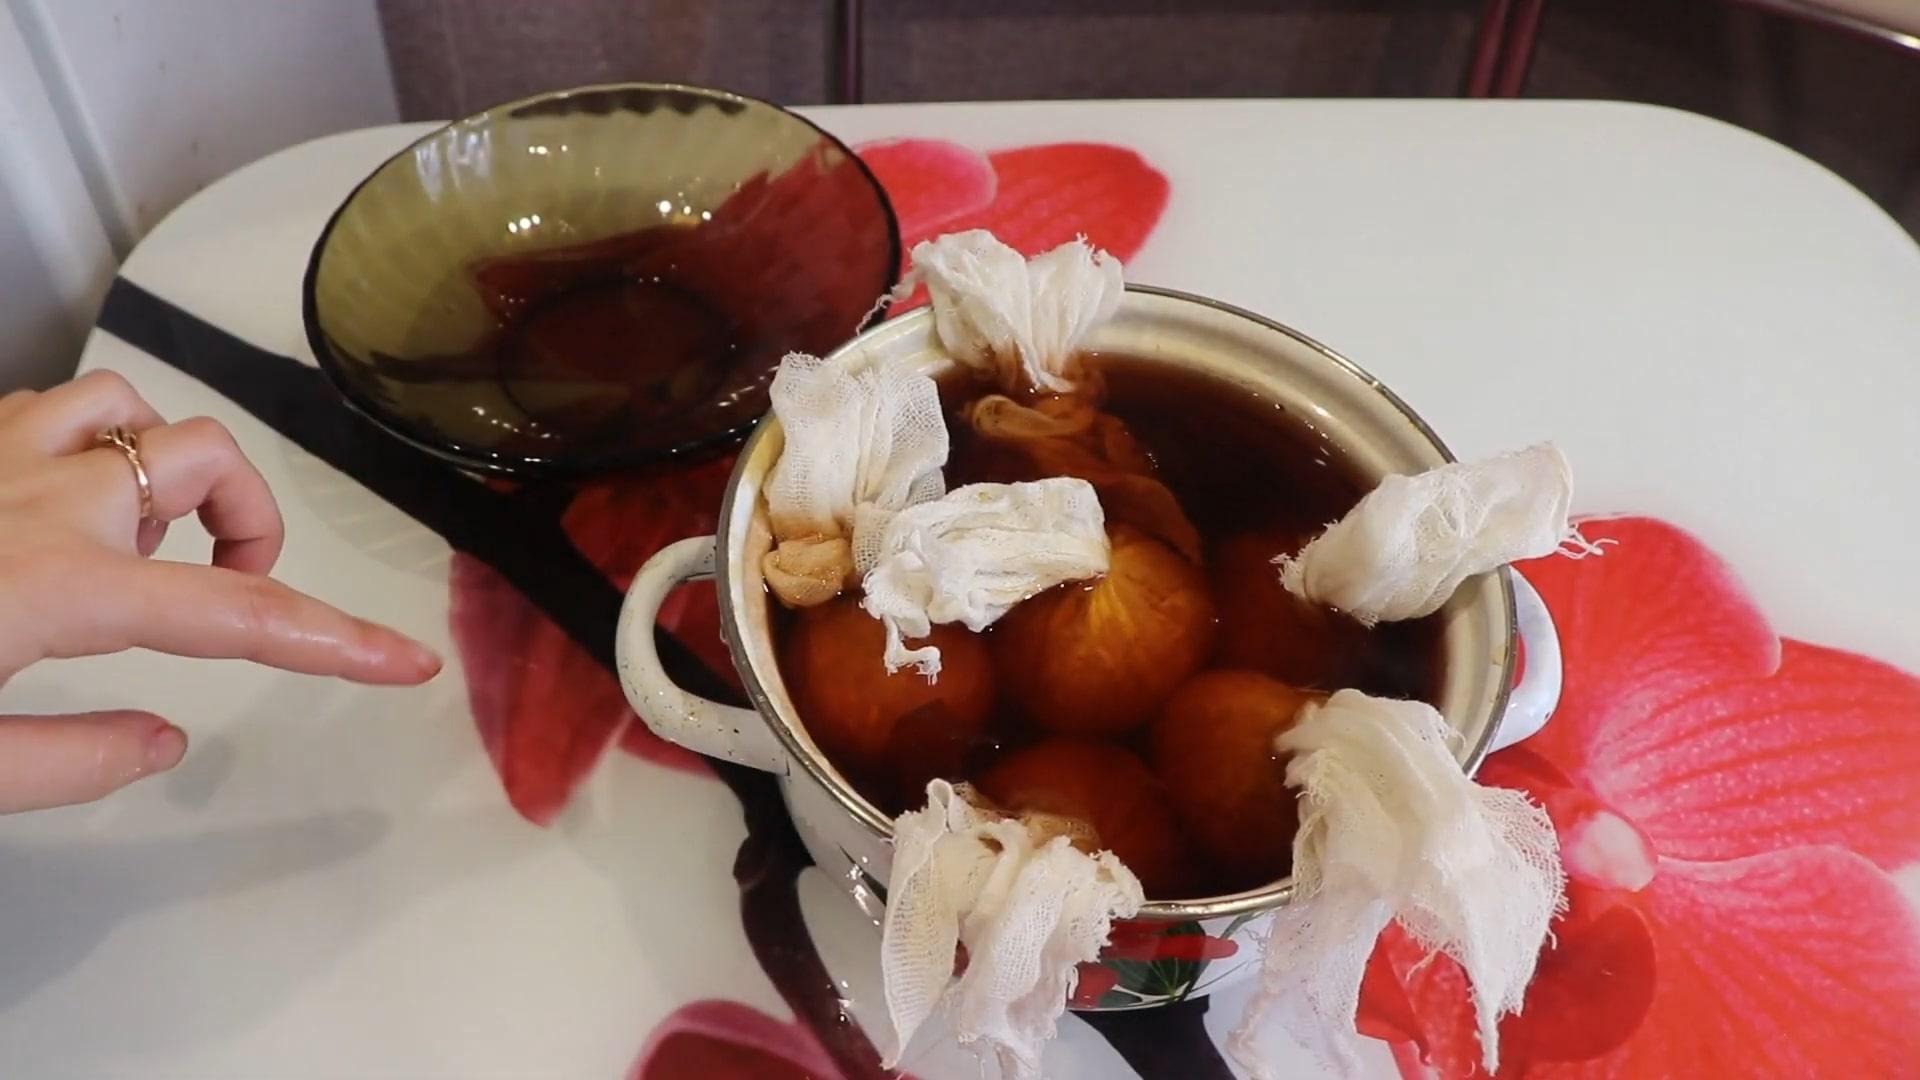
Step 6
Place the pan on the stove and cook the eggs in the broth for 10 minutes.
Step 7
Remove the eggs from the heat. Let them sit in the dye liquid until cool. Remove the cheesecloth.
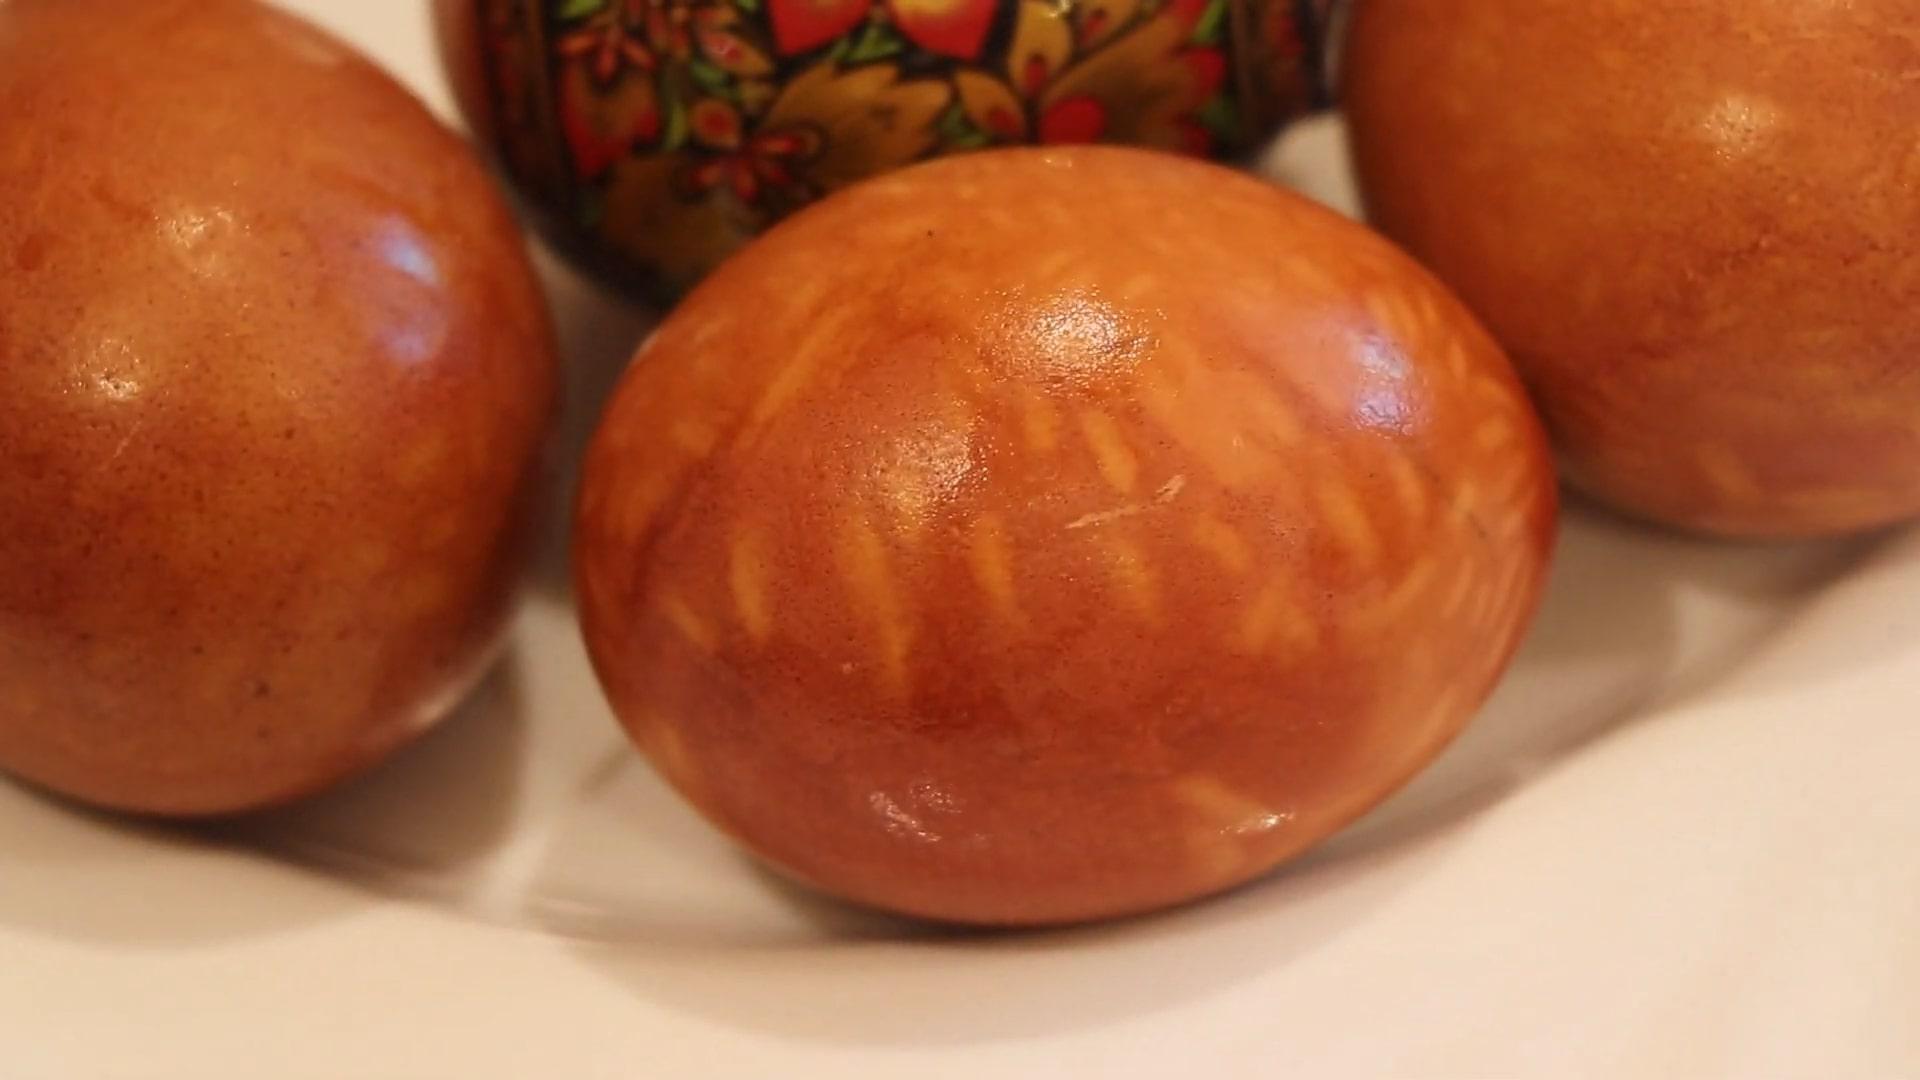
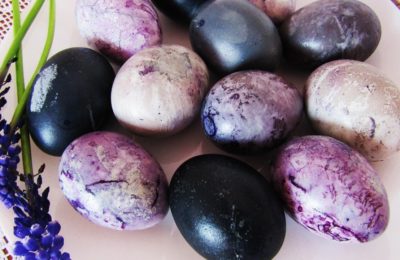
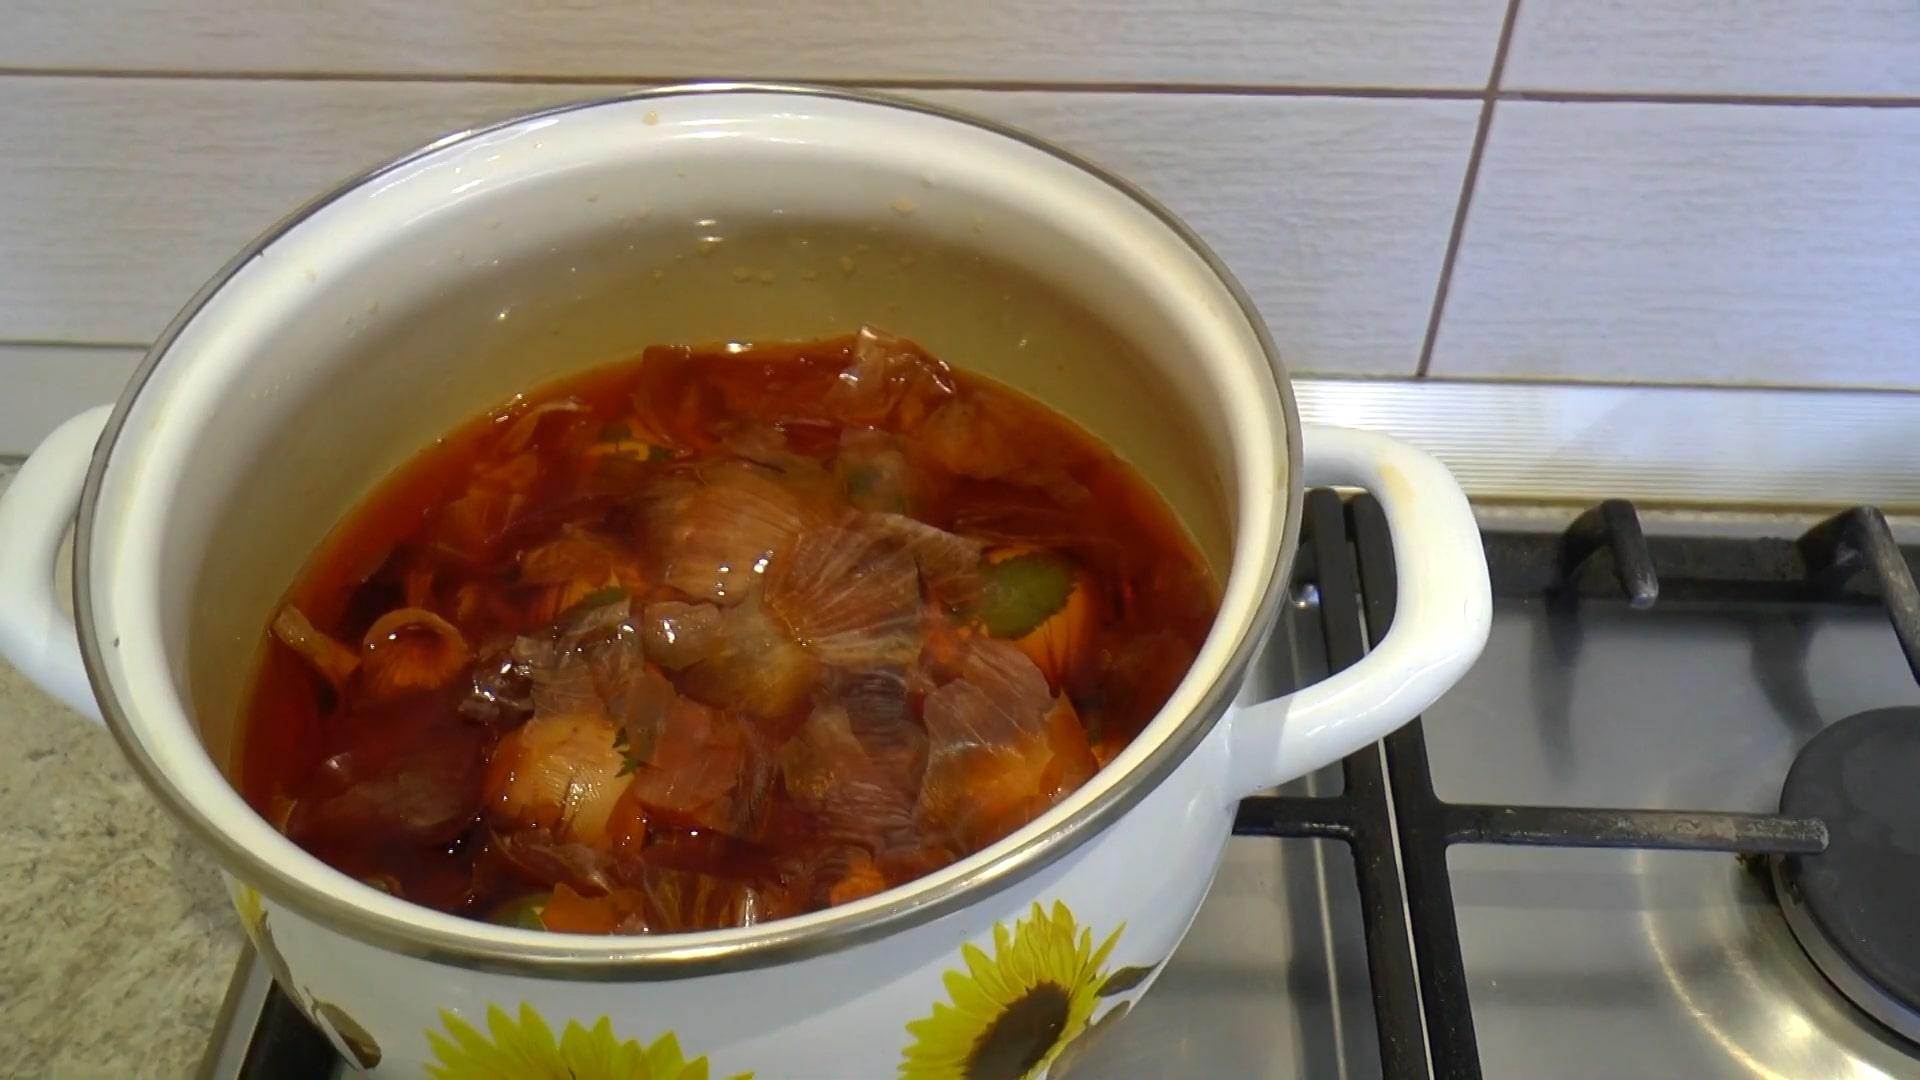
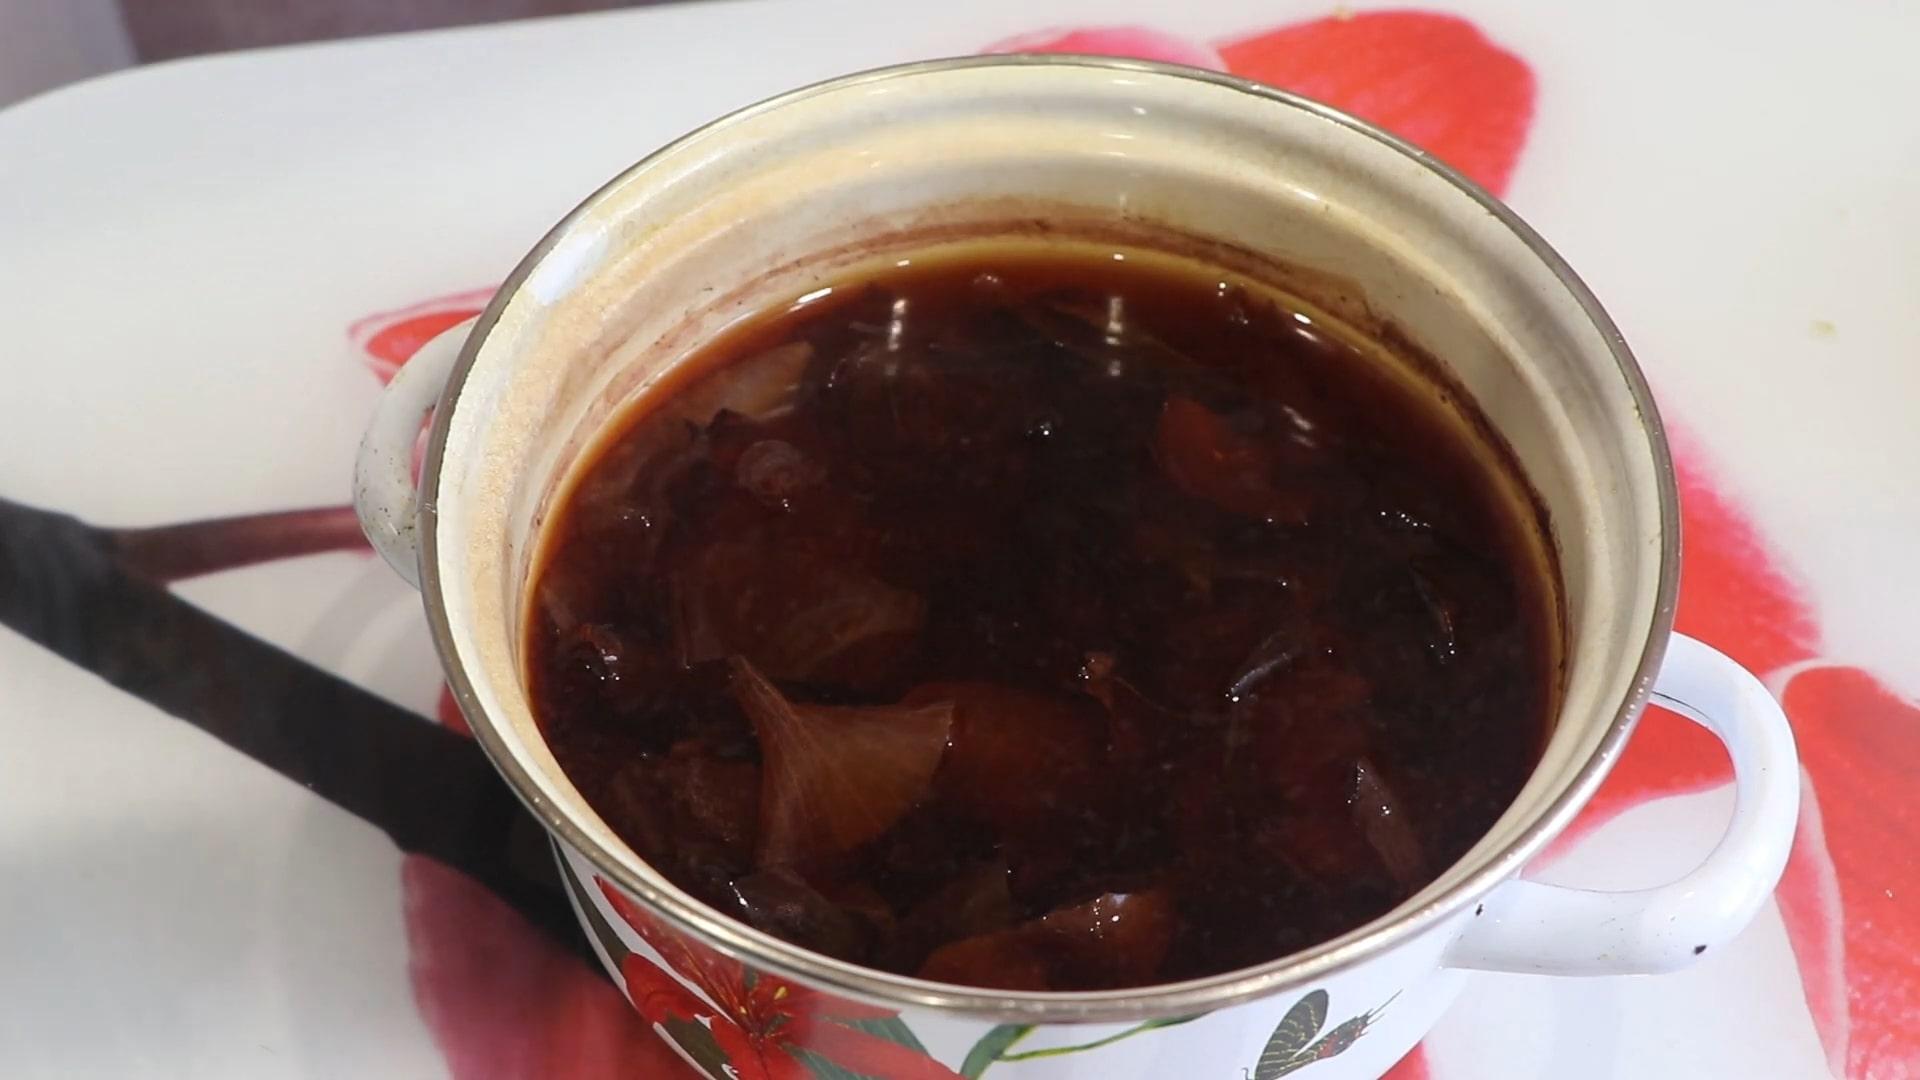
Dyeing eggs in red onion skins
Eggs in red onion skins acquire a deep crimson color. Depending on the amount of skins and the steeping time, you can achieve varying color intensities, from pink to deep crimson. These krashenki look very beautiful and will definitely stand out in an Easter basket.
Ingredients
- Water – 1.5 l
- Vinegar – 2 tbsp.
- Onion peel – 2 – 3 handfuls
- Salt – 1 tbsp.
Cooking time: 10 minutes
Servings: 1
Step-by-step recipe
Step 1
Place the onion peels in a saucepan. Add water. Simmer for 15–20 minutes.
Step 2
In another saucepan, cook the eggs for 3–4 minutes.
Step 3
After 4 minutes, transfer the eggs to the pan with the peels. Cook the eggs in the broth until done.
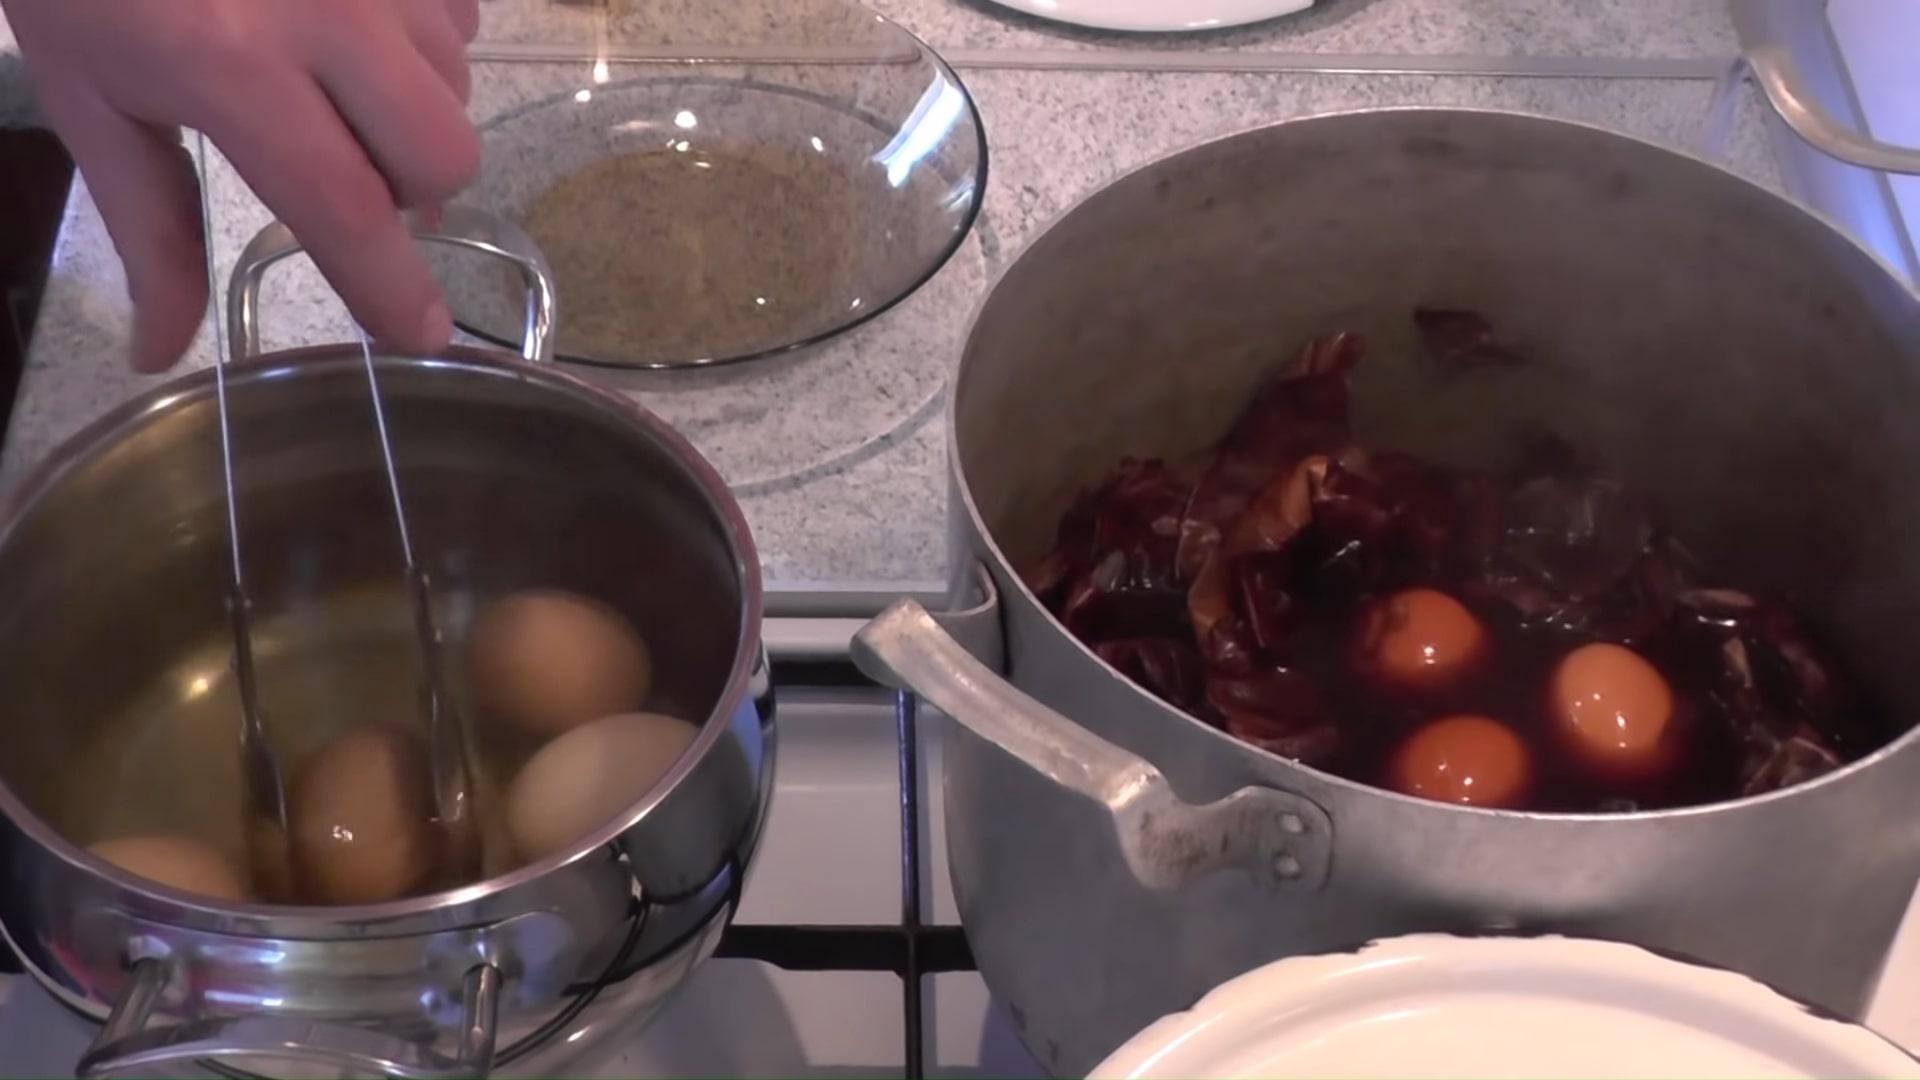
Step 4
Remove the eggs from the heat. Let them cool. Rub with vegetable oil for shine, if desired.
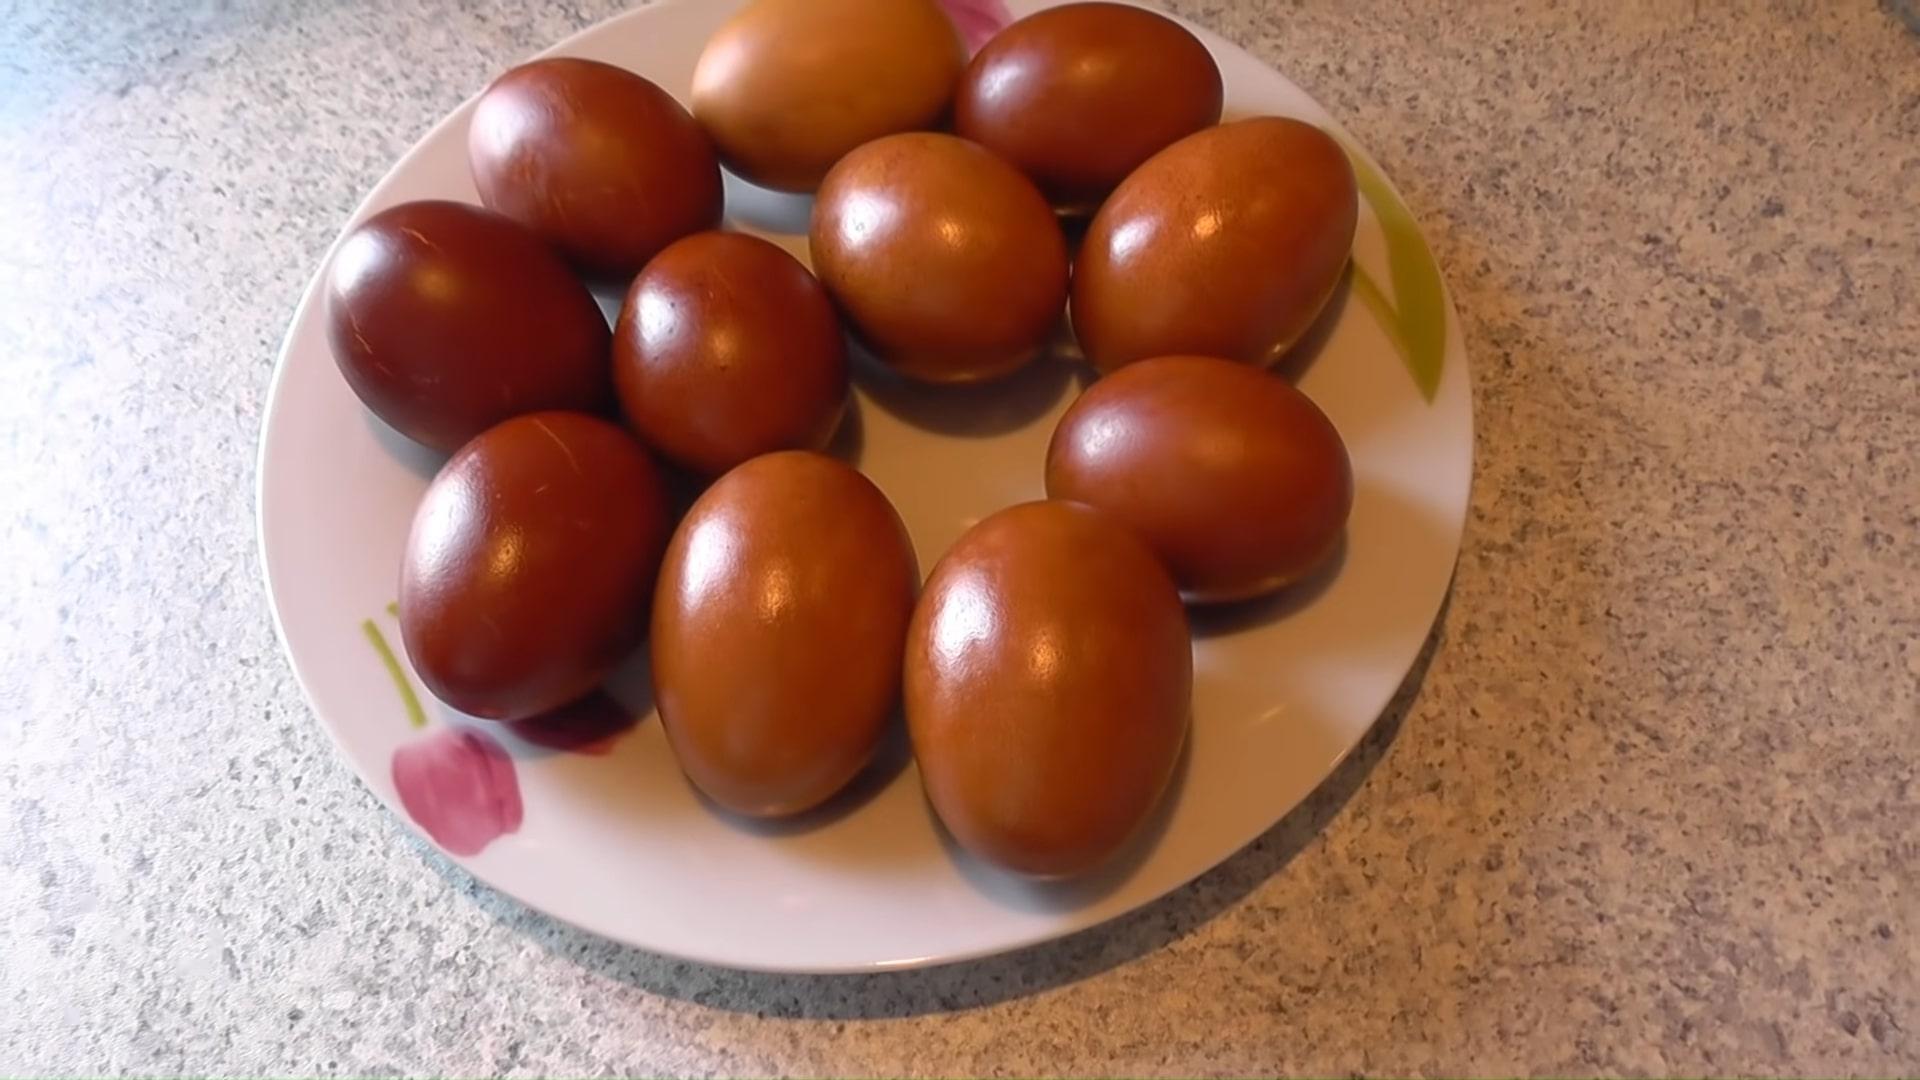
These krashenki are made using ordinary onion skins, the kind every housewife has left over from making a stew, soup, or other dish. This natural, free dye works well for coloring Easter eggs. Have you tried this dyeing method?
Video: Marbled Easter Eggs Using Onion Peels
According to the author of the channel "Ladnaya Kukhnya," onion peels are the best dye for Easter eggs. They truly are an excellent natural ingredient for coloring eggshells. Dried onion leaves can be used to achieve a deep burgundy color. They can also be used to create beautiful patterns and marbled effects on eggs.
Marbled eggs look very beautiful and presentable. Often, housewives use brilliant green to achieve a more striking result. In a video recipe I found on YouTube, the author creates stylish eggs with a luxurious marble effect using only onion skins. Everything is explained and demonstrated in such an accessible and detailed manner that even a child can create perfect eggs.