How to write on a chocolate cake

Content
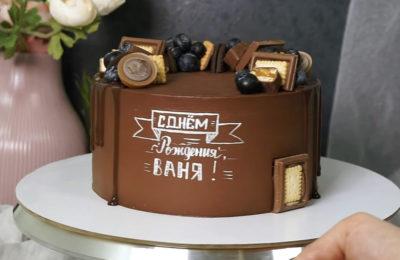
Continuing the theme of decorating desserts at home, we suggest discussing how to create an inscription or 3D letters on a cake using classic chocolate.
Inscriptions in dessert decoration

The inscription can be located:
- based on mastic (the best option for beginners);
- on top, directly on the cake covering (cream or ganache);
- on the side, on the mastic or directly on the cake.
It's entirely possible to create such beauty with your own hands at home, by choosing the technology that suits your needs and following simple recommendations from pastry chefs.
Openwork inscriptions
Expert advice:
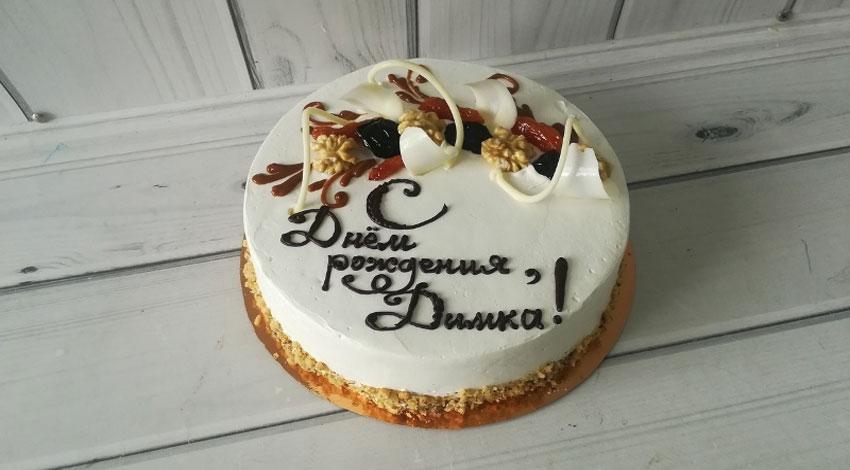
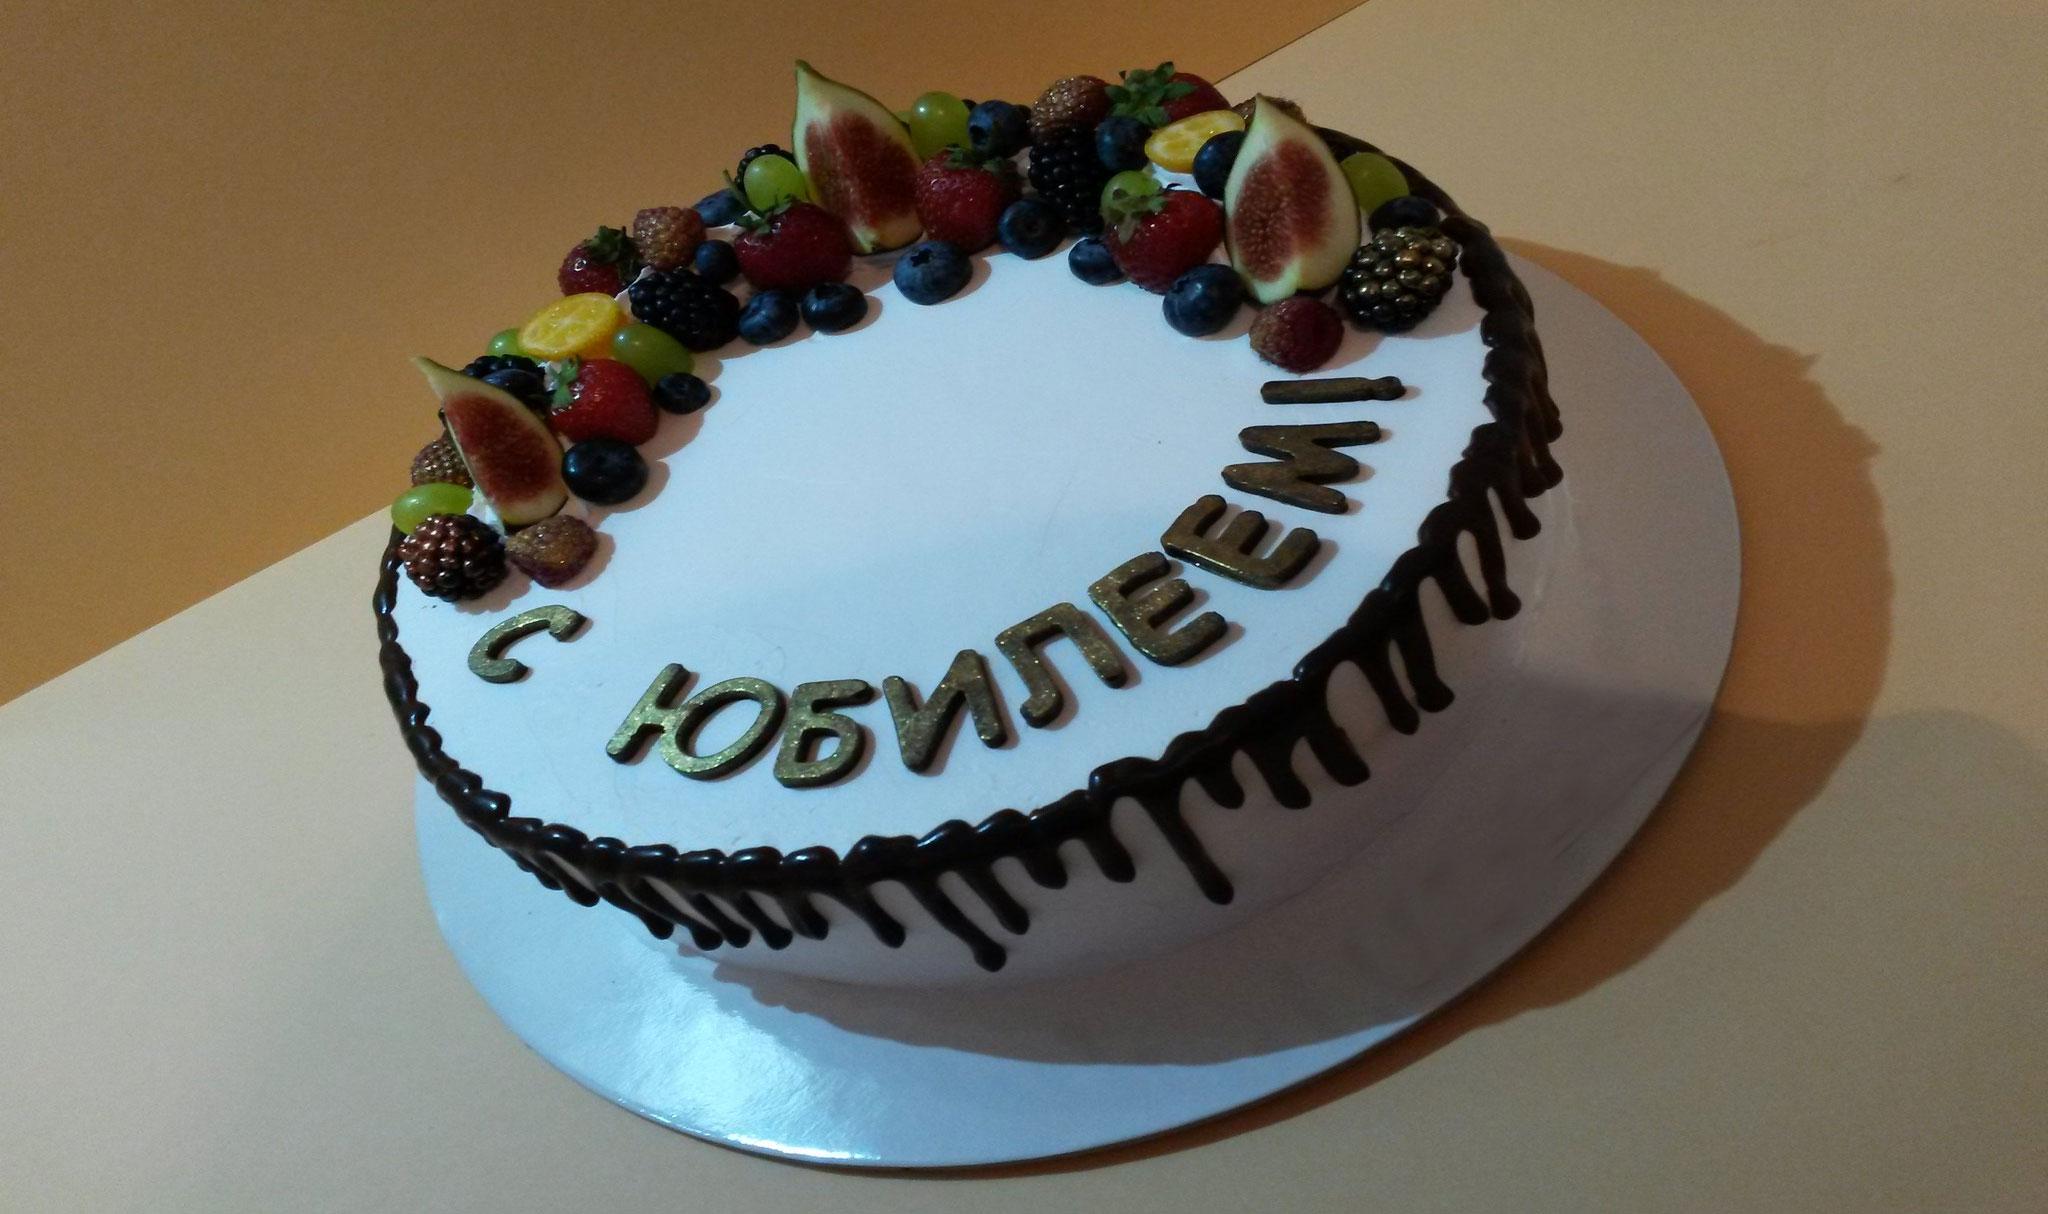
- the background of the base and the shade of the letters should contrast (brown lettering, as well as blue or pink letters, look best on cakes decorated with white cream, and for chocolate coating it is better to make a beautiful silver or gold lettering);
- openwork fonts should be readable;
- try to choose concise inscriptions (“Congratulations!”, “Happy Birthday!”, “Happy Anniversary!”), so that you don’t have to make the letters too small;
- write or print out the inscription you want to repeat and practice the technique on paper;
- Use a small piping bag instead of a syringe, this will make it easier to learn to write without smudges and blots;
- the surface of the cake should be well leveled with thick cream (cheese or butter cream will do), or covered with mastic;
- Apply the inscription to the cake without decoration, and then do the final decoration;
- It’s better to cool the cake itself well so that the chocolate hardens faster and the letters remain three-dimensional;
- Use a thinly rolled out fondant sign as a base, so you won't ruin your cake if you accidentally make a mistake while creating the inscription.
For more information on how to create a chocolate inscription directly on a cake lined with cream, watch this video:
Volumetric letters and numbers
These molds can be purchased at specialty stores. On Yandex Market, the price for these sets starts at 200 rubles.
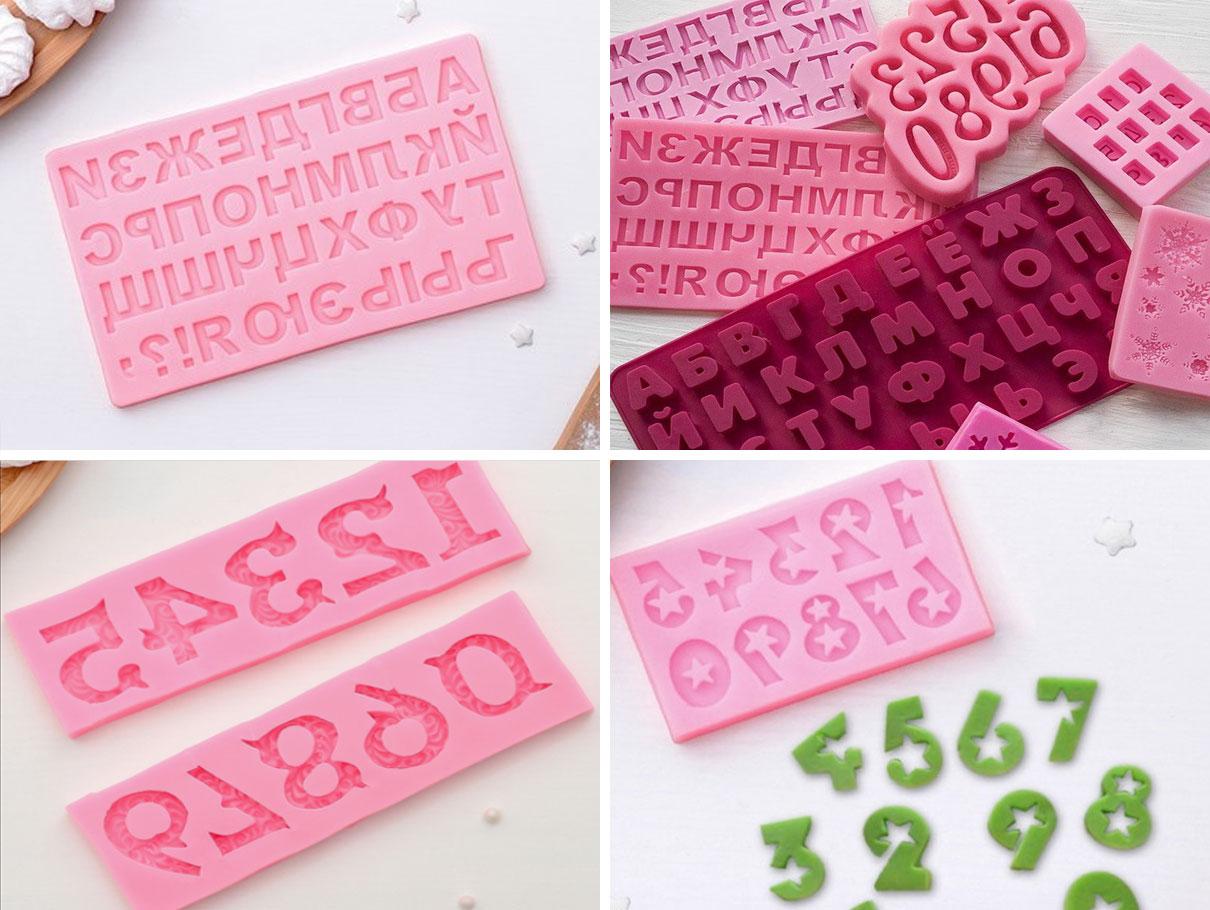
Expert advice:
- choose forms with large letters (those that are too thin will easily break when removed);
- It is recommended to coat the new mold with melted cocoa butter before use (if re-used, there is no need to grease it, as a thin layer of oil contained in the chocolate mass will remain on the surface);
- Keep the filled form in the refrigerator for 30 minutes (it is better not to put it in the freezer, otherwise the chocolate may change its structure and become covered with a white coating);
- Use high-quality chocolate for decoration so that the letters, numbers or inscriptions look beautiful and are durable enough.
Watch this video to learn how to make beautiful 3D chocolate letters step by step:
How to choose chocolate
The first thing you should pay attention to is the quality of the chocolate you will use to create the decoration.
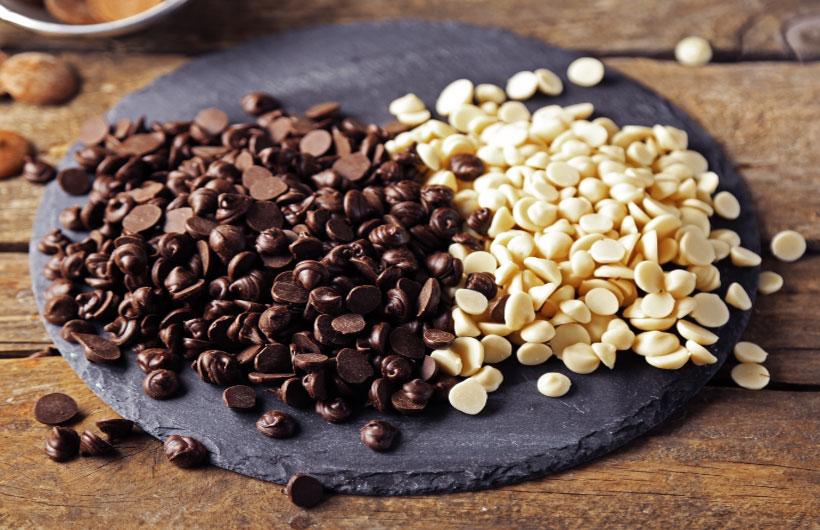
If you want to melt a chocolate bar you have at home, keep the following points in mind:
- any additives (nuts, raisins, sesame, etc.) will spoil the inscription if you want to fish the mass out of a syringe or bag, but are sometimes acceptable when making three-dimensional letters in a mold;
- porous chocolate gives a bumpy texture when hardened;
- dessert tiles lose their properties after heating, the inscription may become matte and uneven;
- use only one type of chocolate (do not mix different products);
- the basis for any colored inscriptions is white chocolate;
- Chocolate must be colored with food-grade fat-soluble pigments.
How to temper chocolate
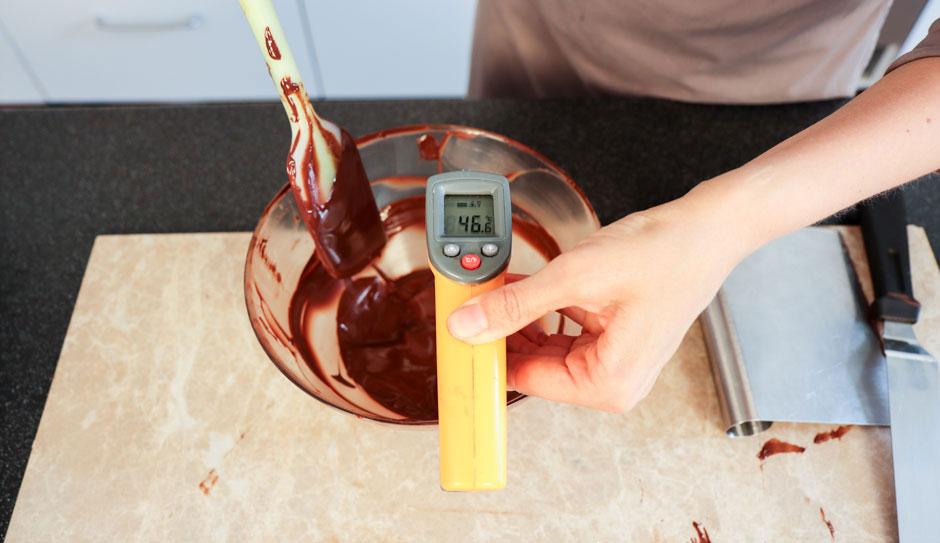
There are different ways to temper chocolate:
- in a water bath – the optimal option for beginning confectioners, as it allows for the most precise temperature control, avoiding overheating;
- in the microwave – heating is carried out in short pulses, mixing the mass after each heating;
- on the stove or in the oven – not the best option, since it is difficult to control the degree of heating.
When working with chocolate and chocolate glaze, it is important to consider the following parameters:
| Type of chocolate | freezing point | t℃ working | t℃ maximum |
| Black | 27-28℃ | 30-32℃ | 45-50℃ |
| Dark | 27-28℃ | 30-32℃ | 44-45℃ |
| Lactic | 25-26℃ | 28-39℃ | 40-45℃ |
| White | 25-26℃ | 28-39℃ | 40-45℃ |
For a detailed recipe for tempering chocolate at home (without a thermometer), watch this video:
Golden letters
There are two ways to make luxurious golden chocolate letters:
- Apply candurin (gold powder) with a soft brush onto the finished, cooled and completely hardened dark chocolate inscription.
- Apply a thin layer of candurin to the inside surface of the mold before pouring in the letters and numbers.
- Add candurin to the white chocolate mixture during the preparation stage.
We suggest watching a video with tips on using powdered candurin in cake decorating:
Also check out the step-by-step instructions on how to make a gold chocolate inscription on a cake at home: