Halloween Desserts - 8 DIY Baked Goodies and Sweet Recipes

Content
The number of people who want to dress up as evil spirits and decorate their homes with funny pumpkin faces is steadily growing every year. It's crucial to properly prepare for the holiday, not just by decorating your apartment but also by preparing fun treats. I've already shared how you can decorate cakes for HalloweenIn this collection, I offer several interesting and incredibly delicious desserts that are sure to please kids and will also be a hit with any adult party. Check out this collection of 8 Halloween candy ideas.
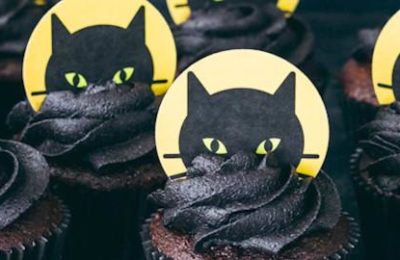
Halloween Cupcakes
- Proteins: 4.9 g
- Fats: 19.1 g
- Carbohydrates: 44.8 g
- Total time:
-
Complexity:
It's easy and straightforward to prepare, but it does require some experience. Not everyone can do it right the first time.
- Number of servings: 12
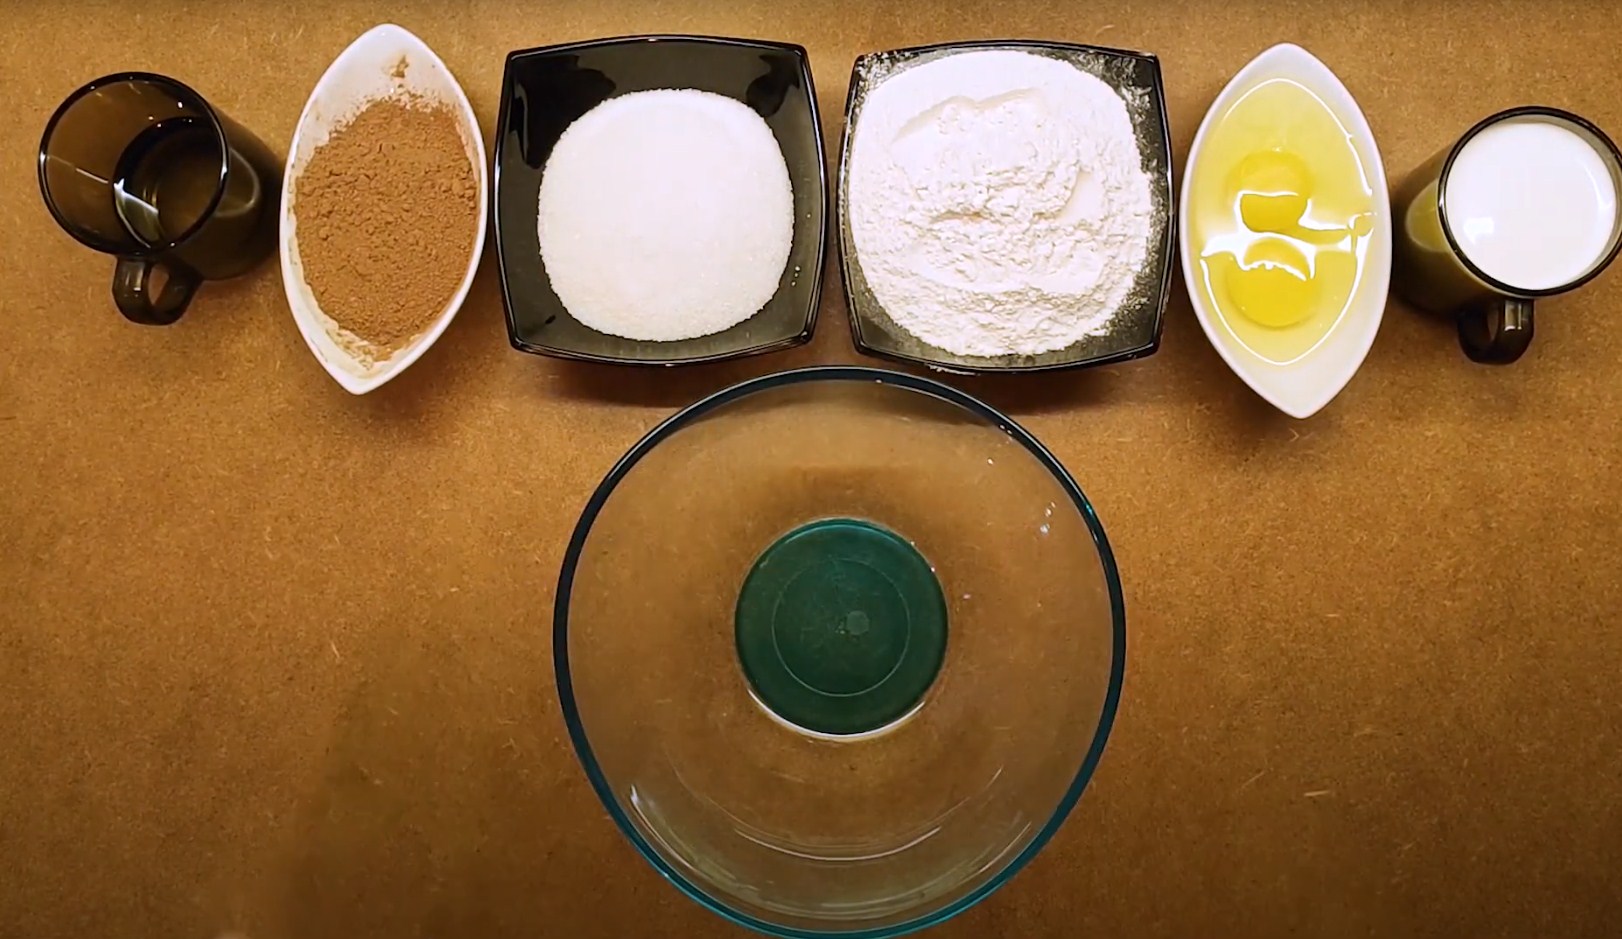
Ingredients
-
Egg C14 pcs
-
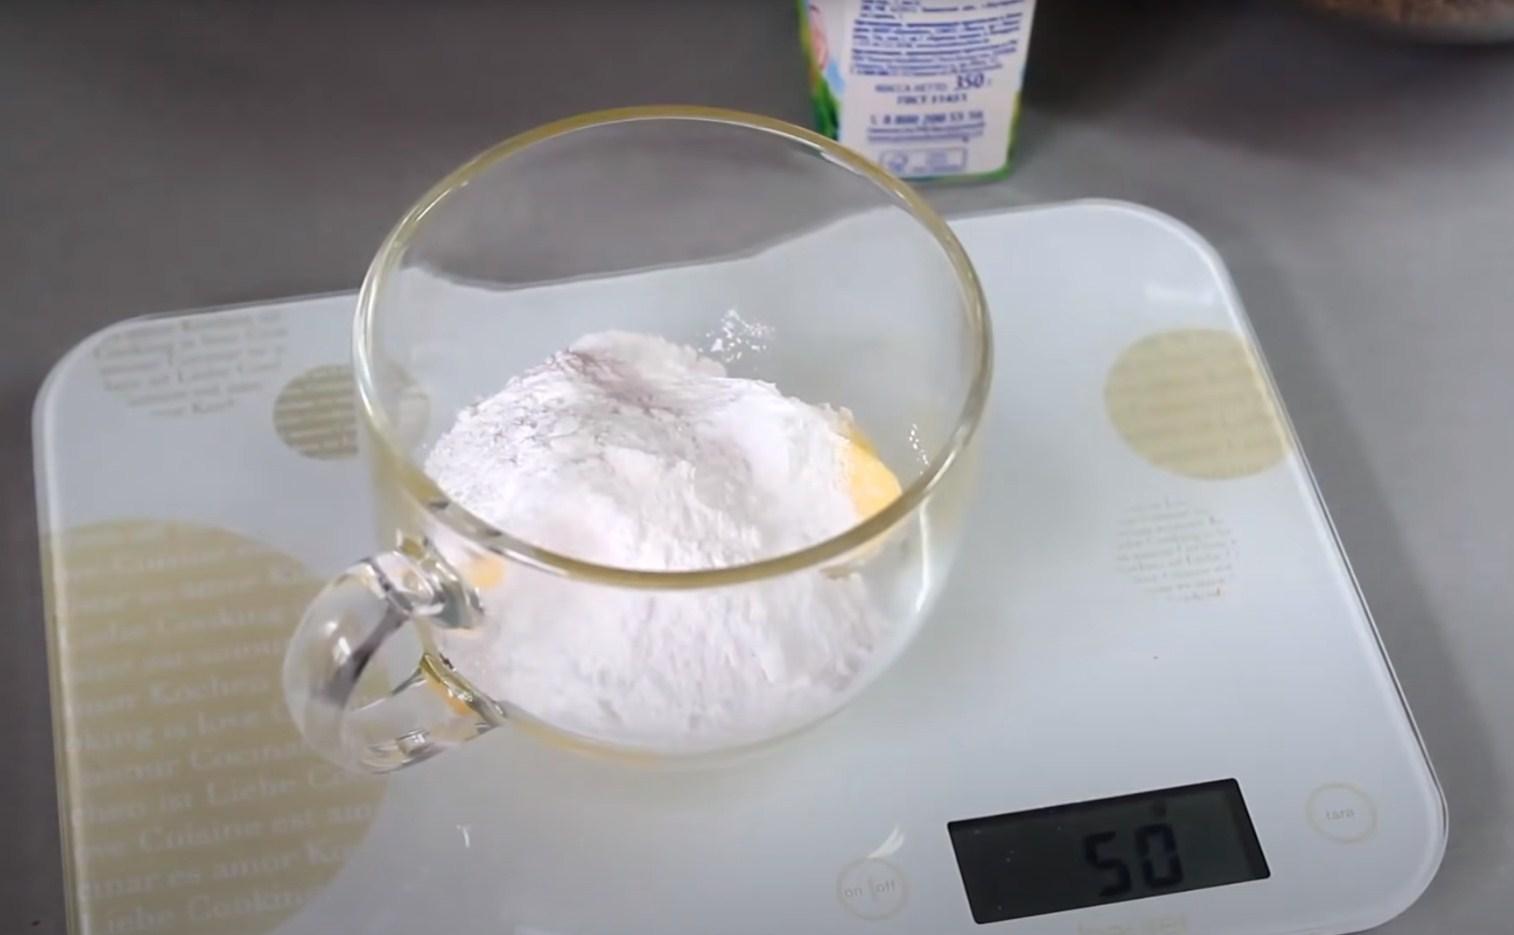
Sugar300 G
-
Flour300 G
-
Milk120 ml
-
Sunflower oil150 ml
-
Baking powder1 tbsp
-
Orange zest10 G
Preparation

Prepare all the necessary ingredients. Preheat the oven to 175 degrees Celsius.

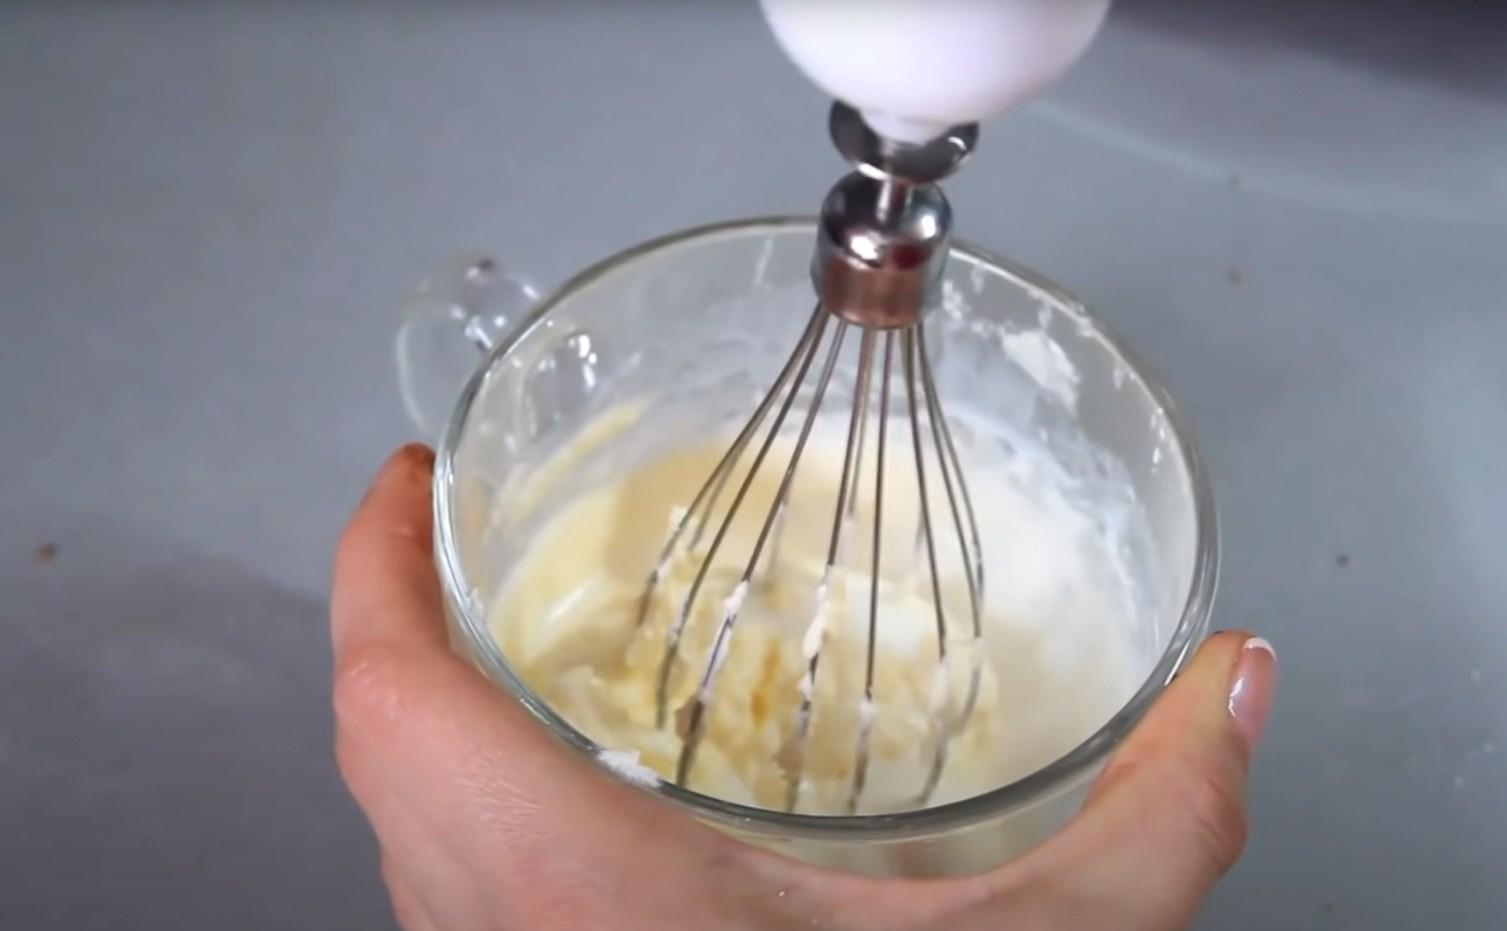
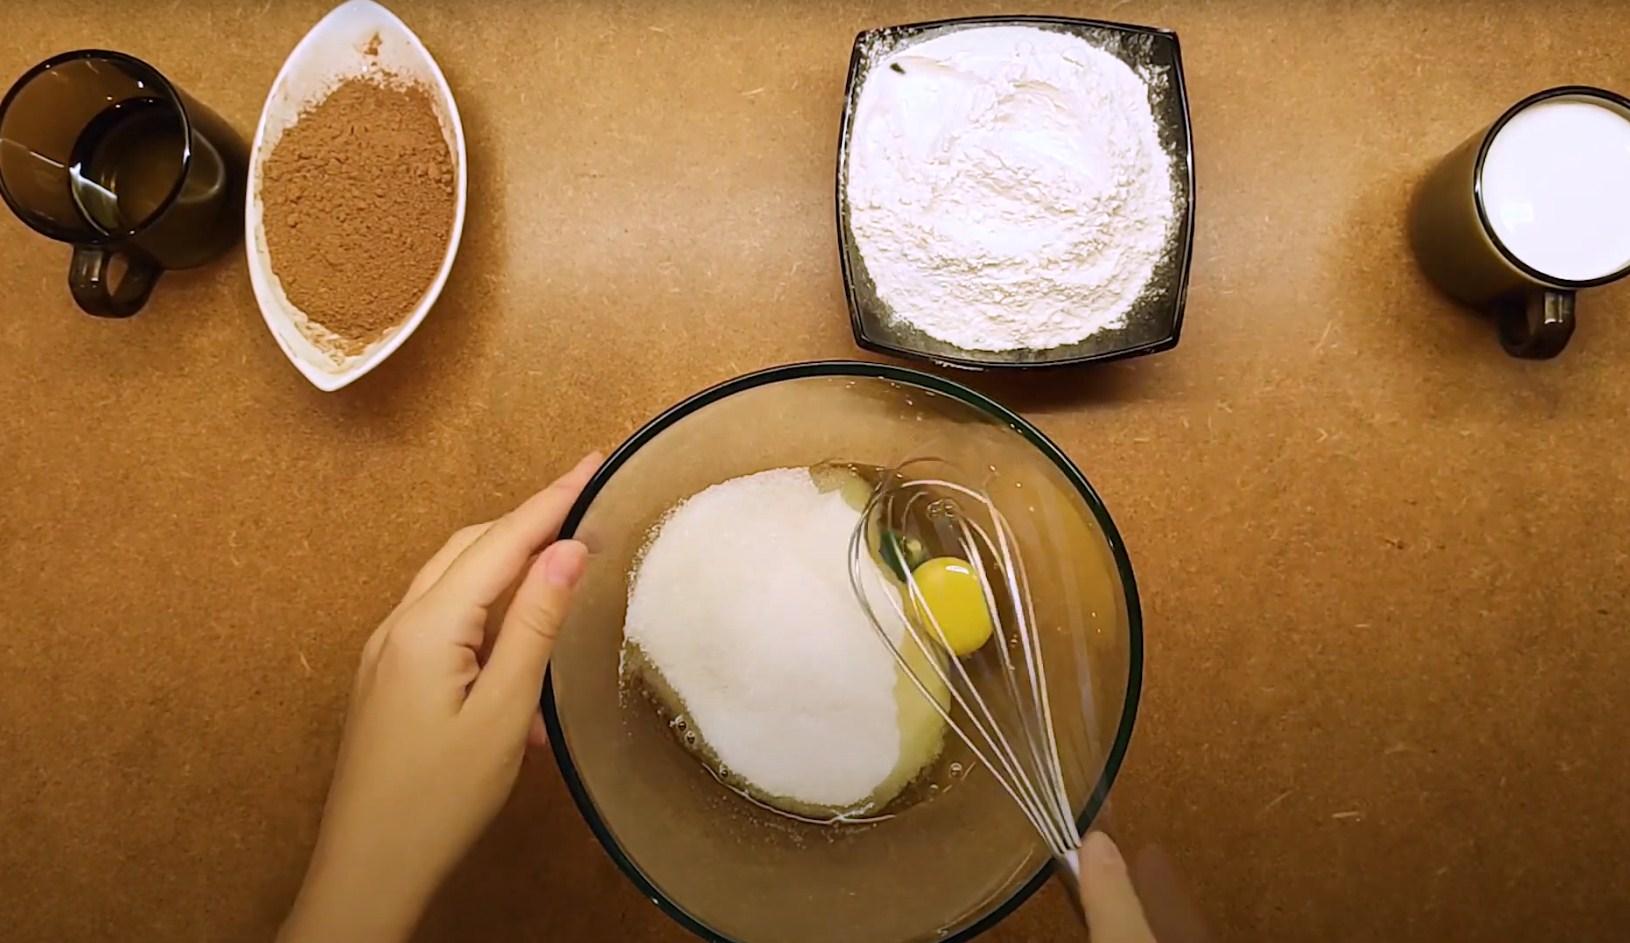
Beat sugar and eggs in a deep bowl using a whisk.

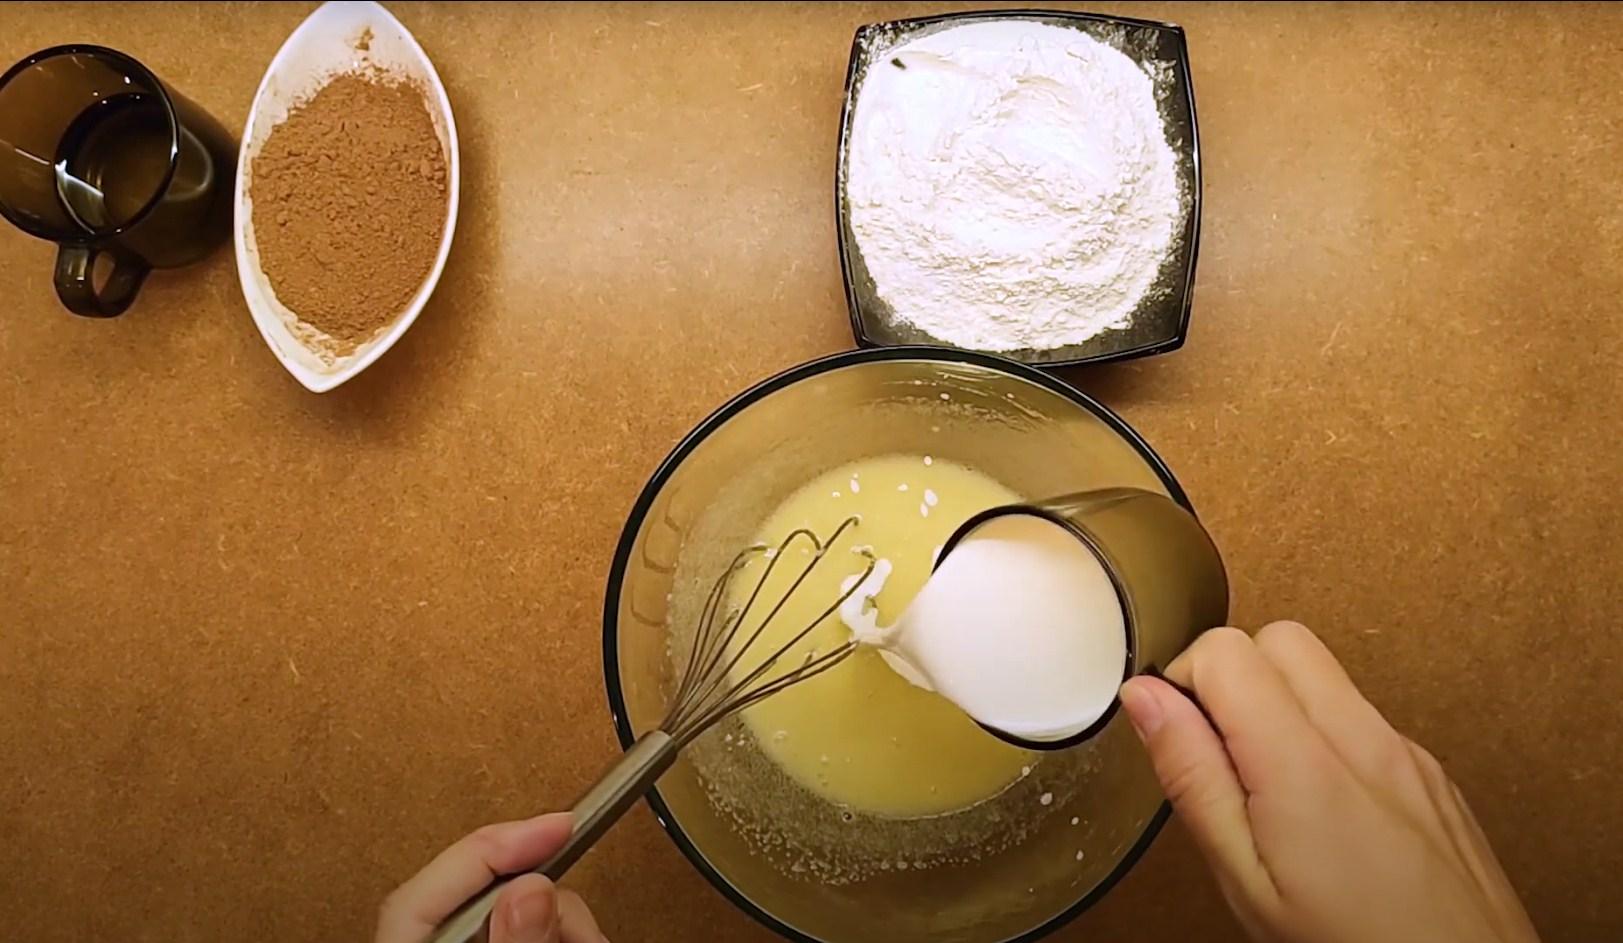
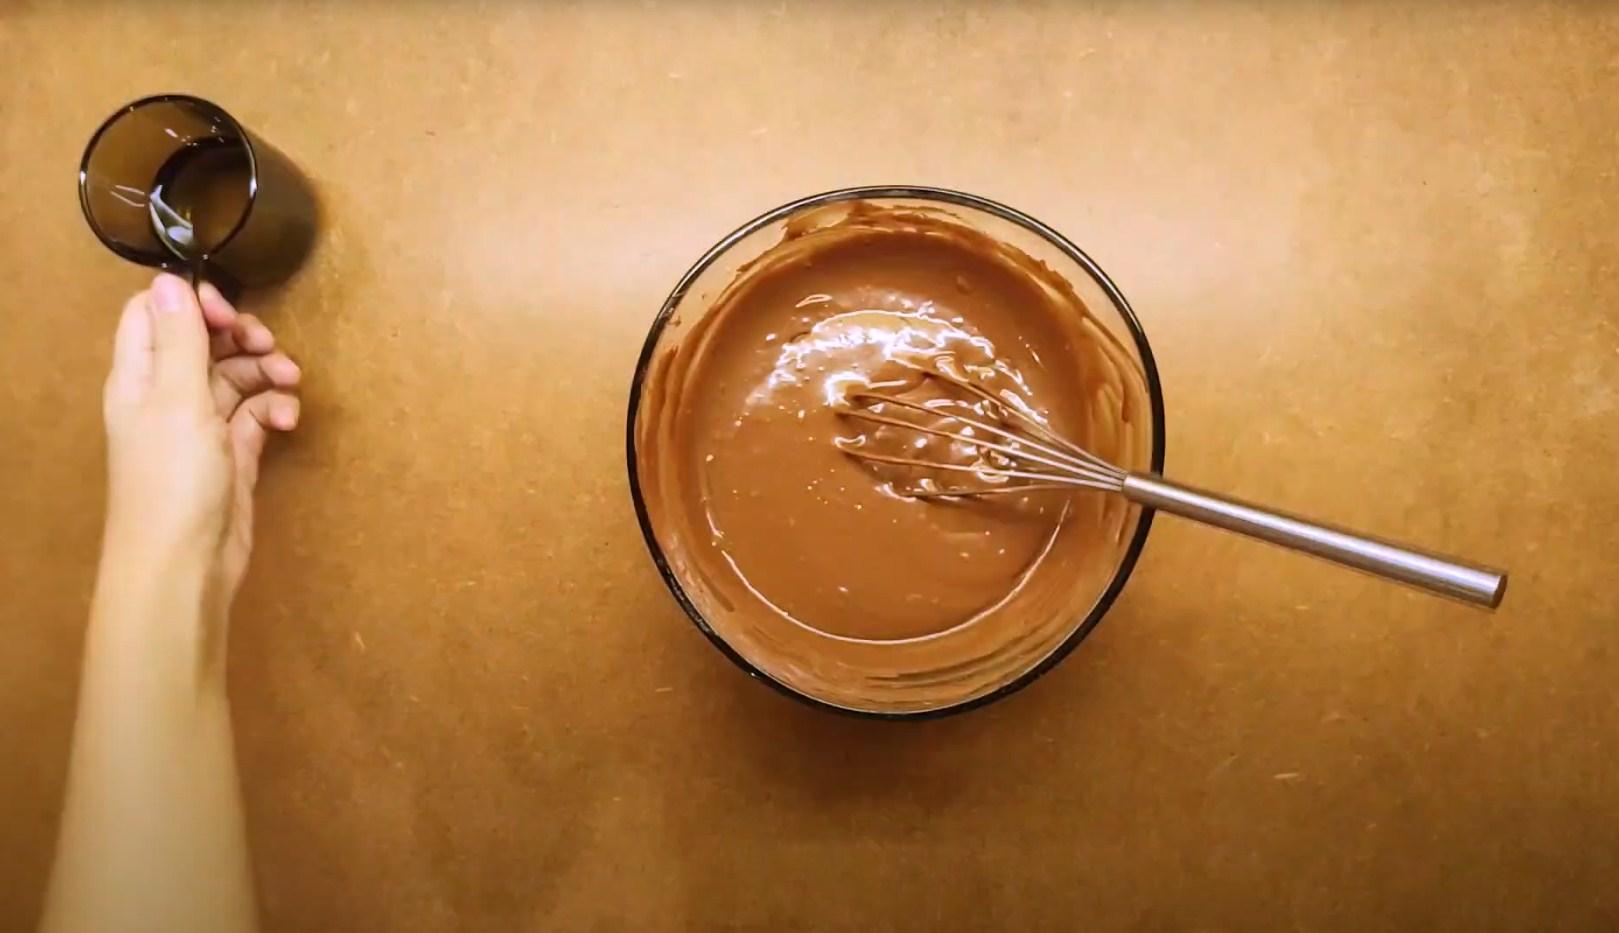
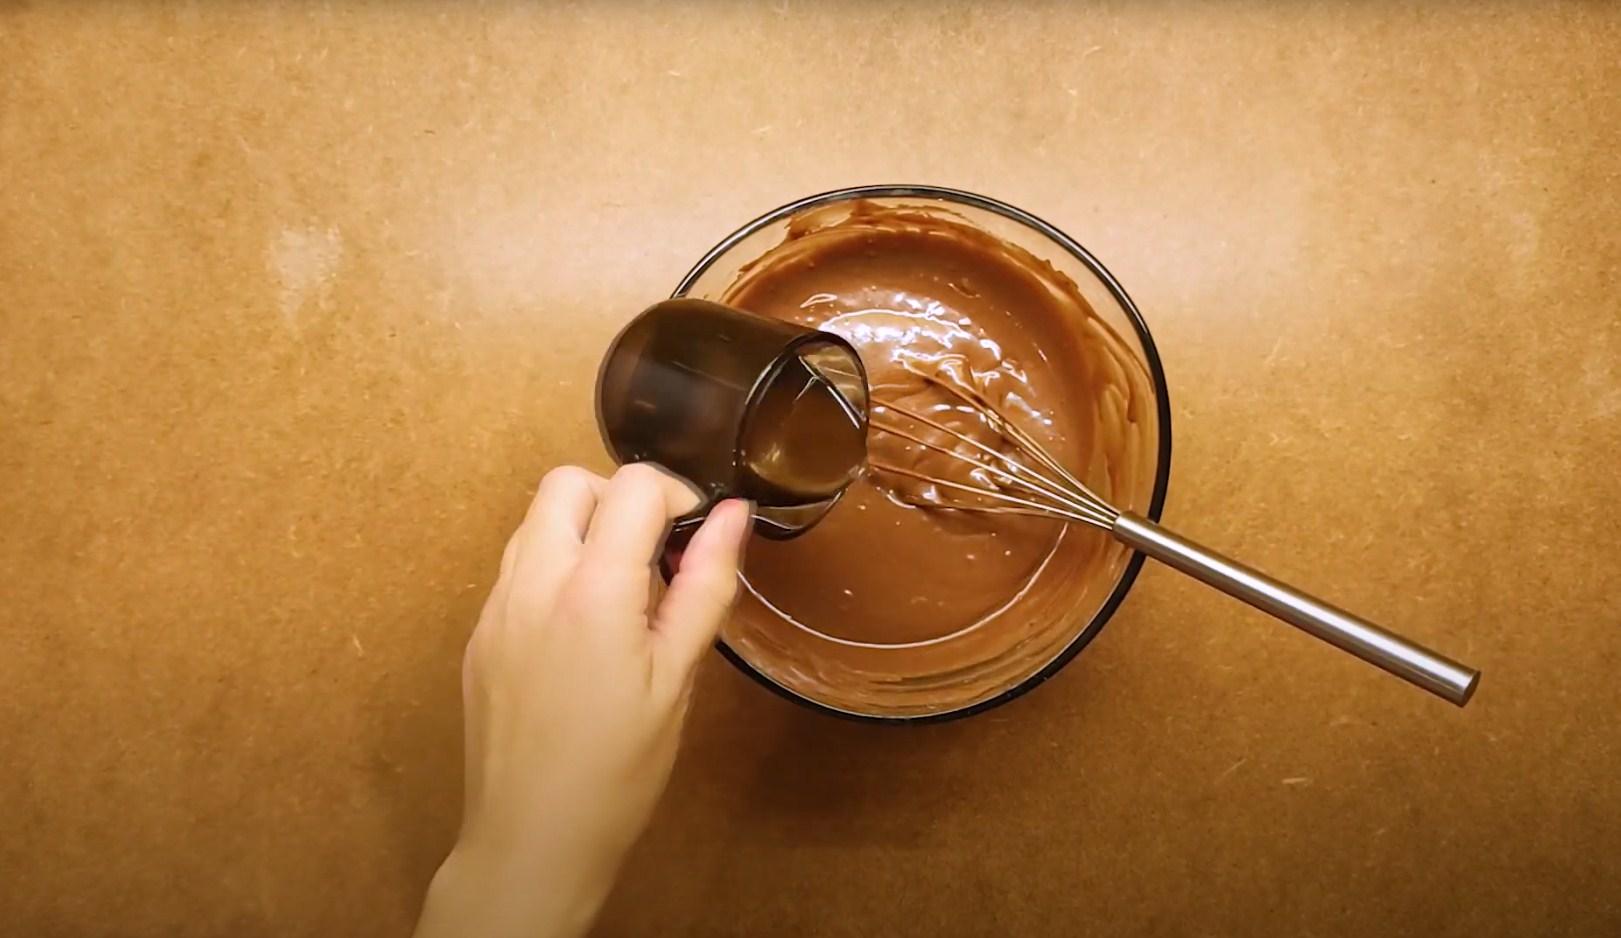
Add flour, baking powder, milk and vegetable oil to the sugar-egg mixture.

Whisk thoroughly until smooth and lump-free. If desired, you can add a little lemon or orange zest to the dough at this stage.

Place paper cupcake liners in a special baking tray.

We divide the dough into the molds, filling them a little more than halfway.

Place the baking tray in an oven preheated to 175 degrees for approximately 20 minutes.

When the cupcakes have risen and browned, remove them from the oven.

Let's start decorating. Drizzle sour cream onto the center of the cupcake.

Using a red sugar pencil, draw blood vessels, like on the eyes.

Use a green marker to outline the pupil.

We attach an M&M's candy in the center.

It should be located in the center.

Using gummy worms, teeth, grated chocolate, and other edible decorations, you can create a variety of fun Halloween cupcake designs.
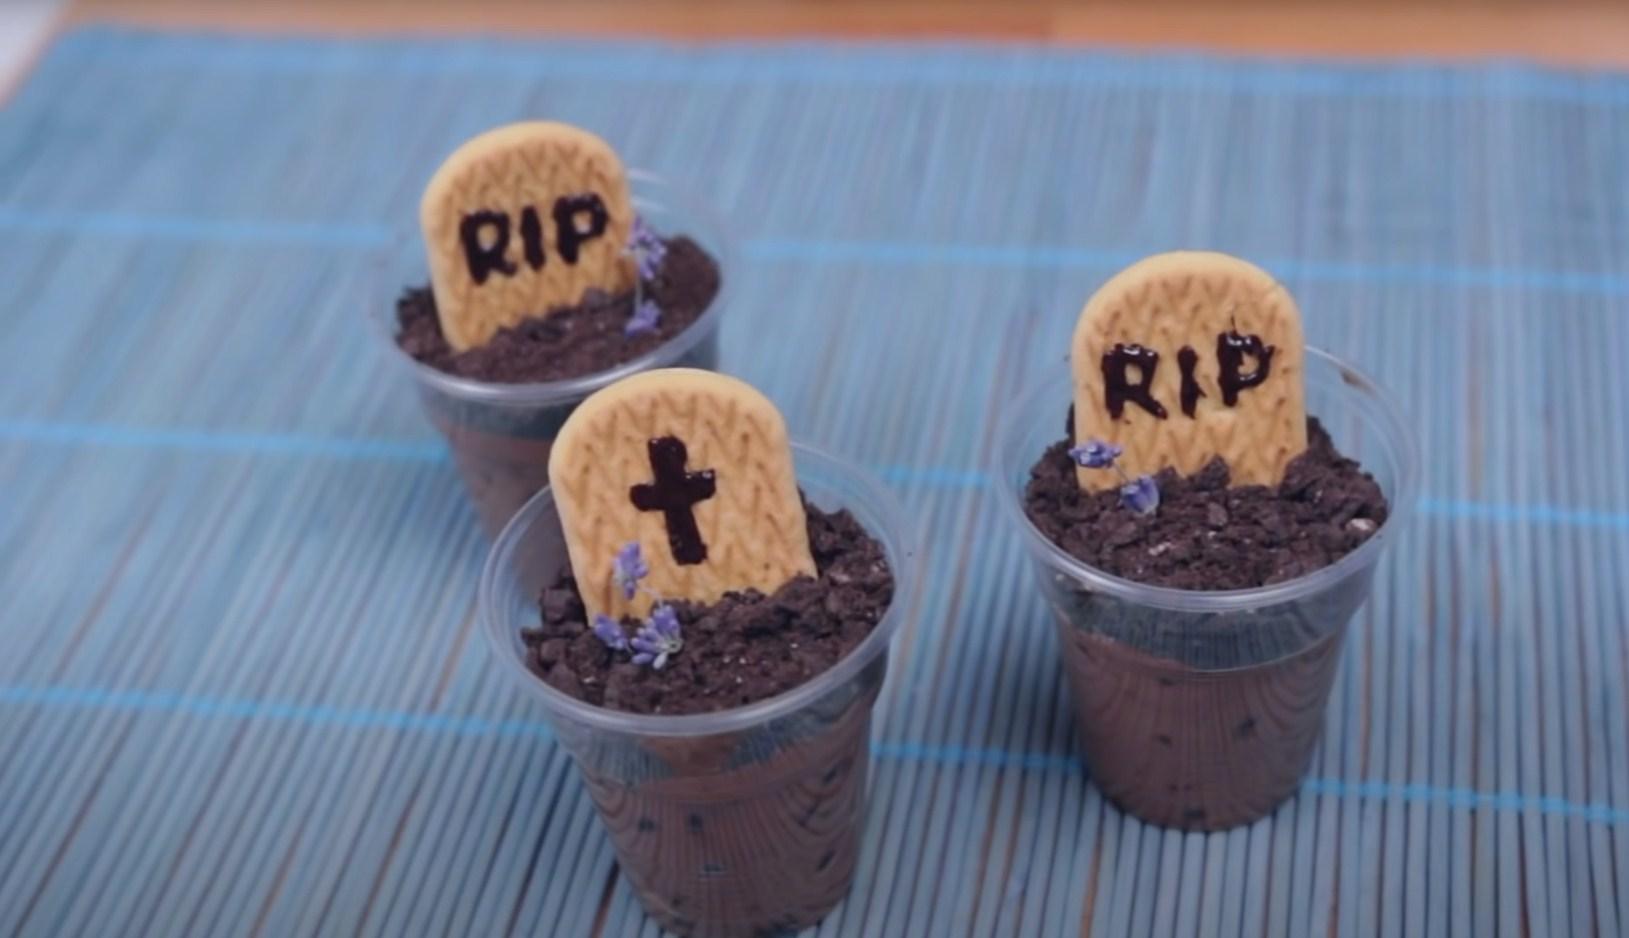
Chocolate "graves" for Halloween
If you're looking for a way to surprise your guests and family this Halloween, I suggest you take a closer look at this recipe. This dessert is sure to please any chocolate lover, and it's also sure to catch their eye with its incredibly unique appearance.
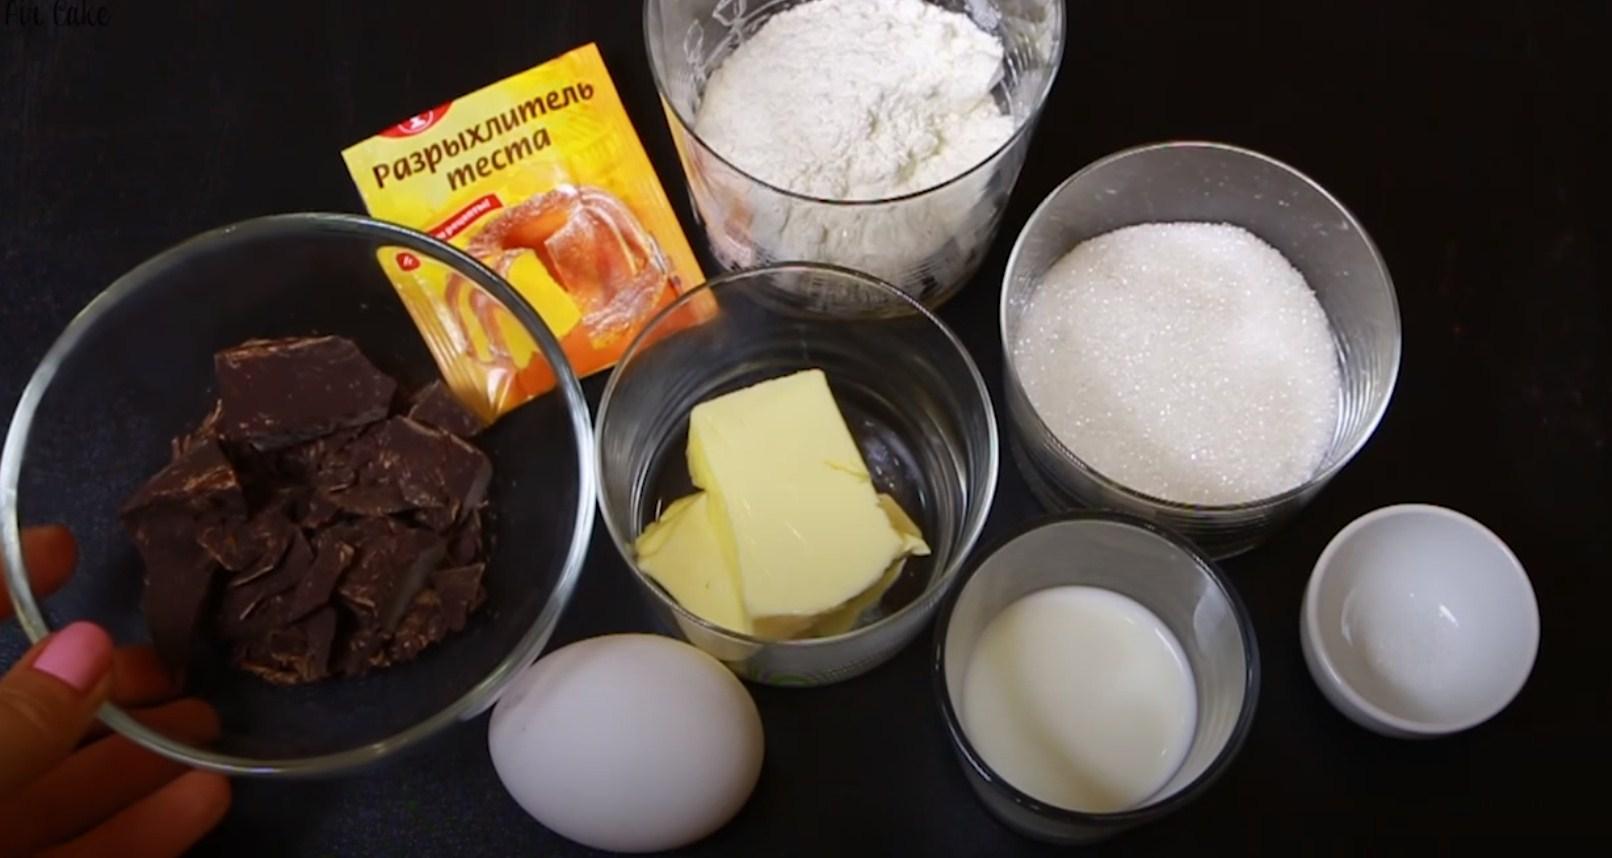
Ingredients
- Cream cheese – 60 g
- Cream (from 30%) – 160 ml
- Powdered sugar – 3 tbsp.
- Dark chocolate – 60 g
- Oreo cookies – 10 pcs.
- Tombstone-Shaped Cookies
Cooking time: 40-60 minutes
Servings: 6
Step-by-step recipe
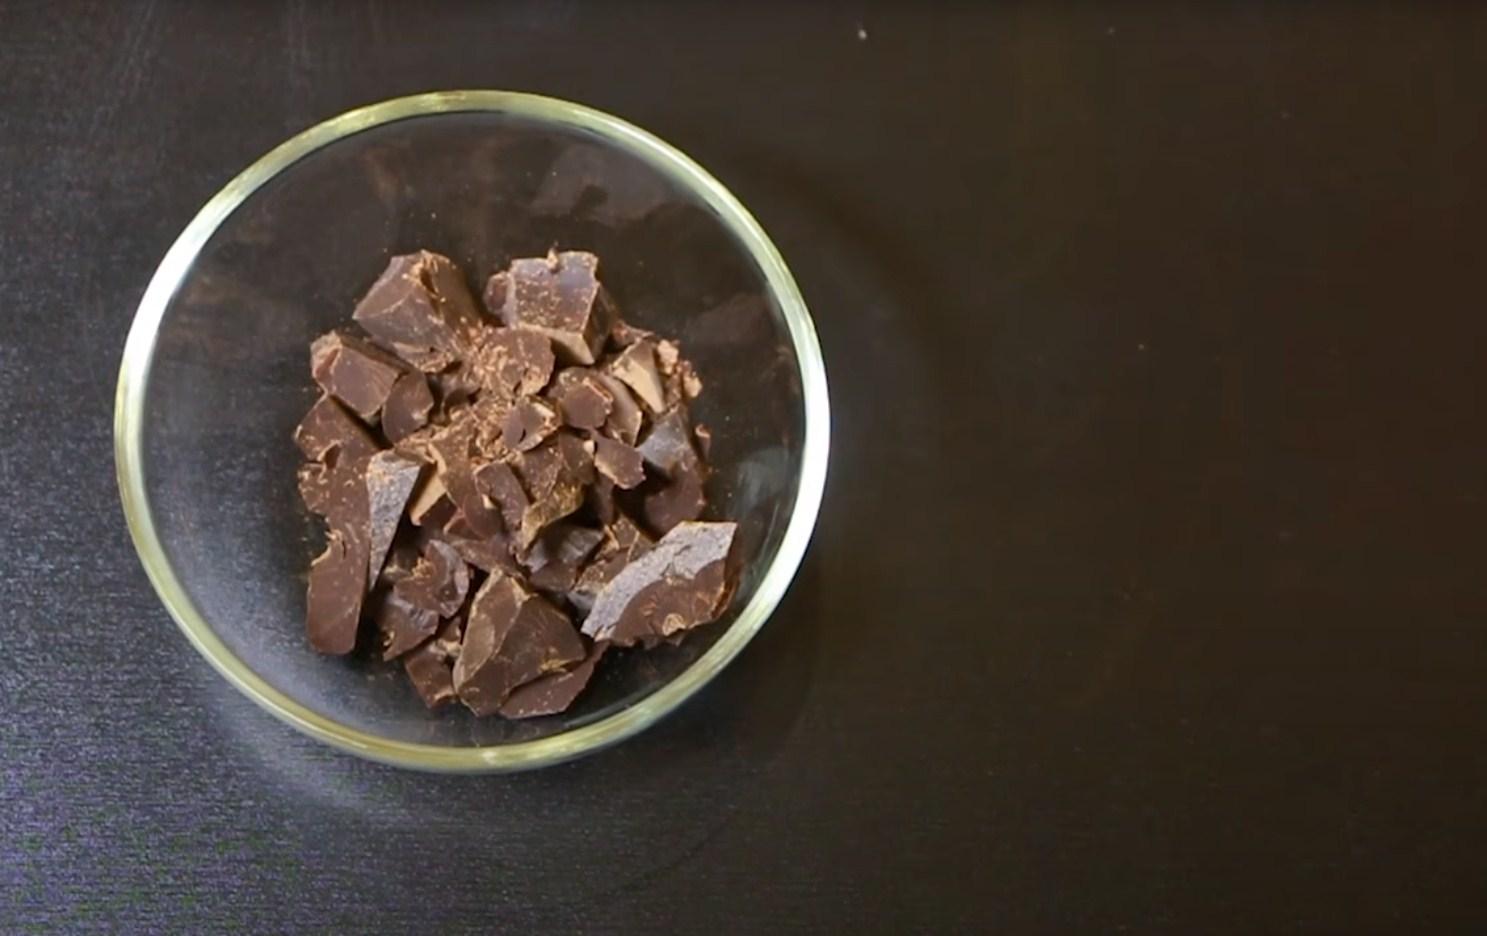
Step 1
Chop the dark chocolate.

Step 2
Transfer the chopped chocolate to a saucepan. Add a little (about 40 ml) of cream.
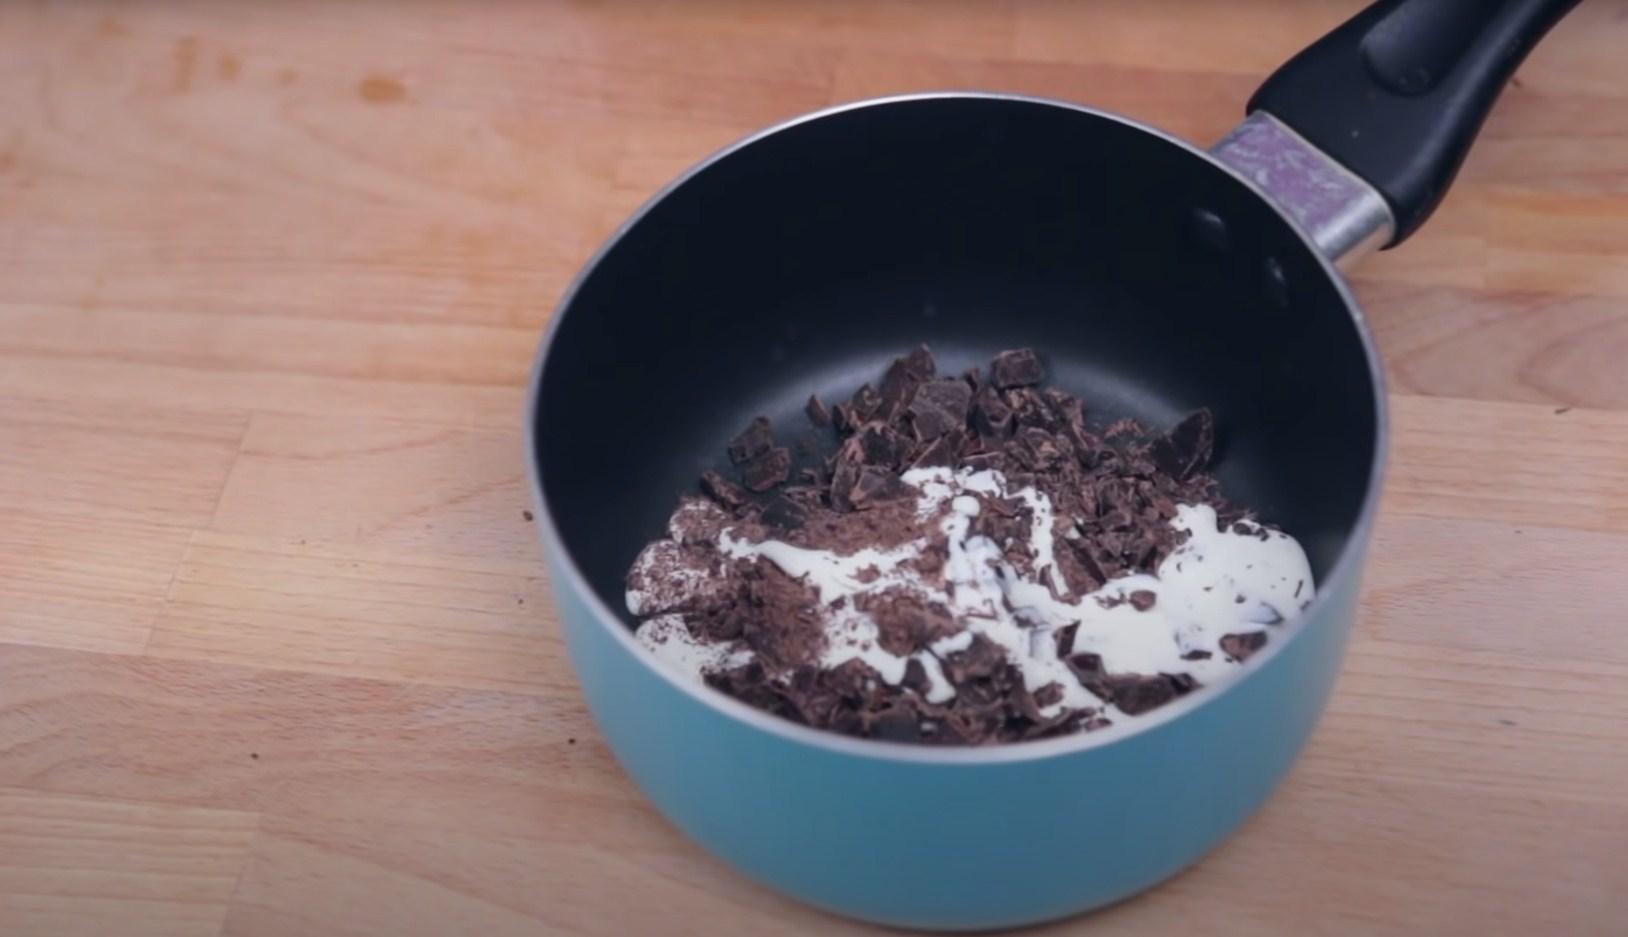
Step 3
Place the chocolate over medium heat and cook until melted. No need to let it boil.
Step 4
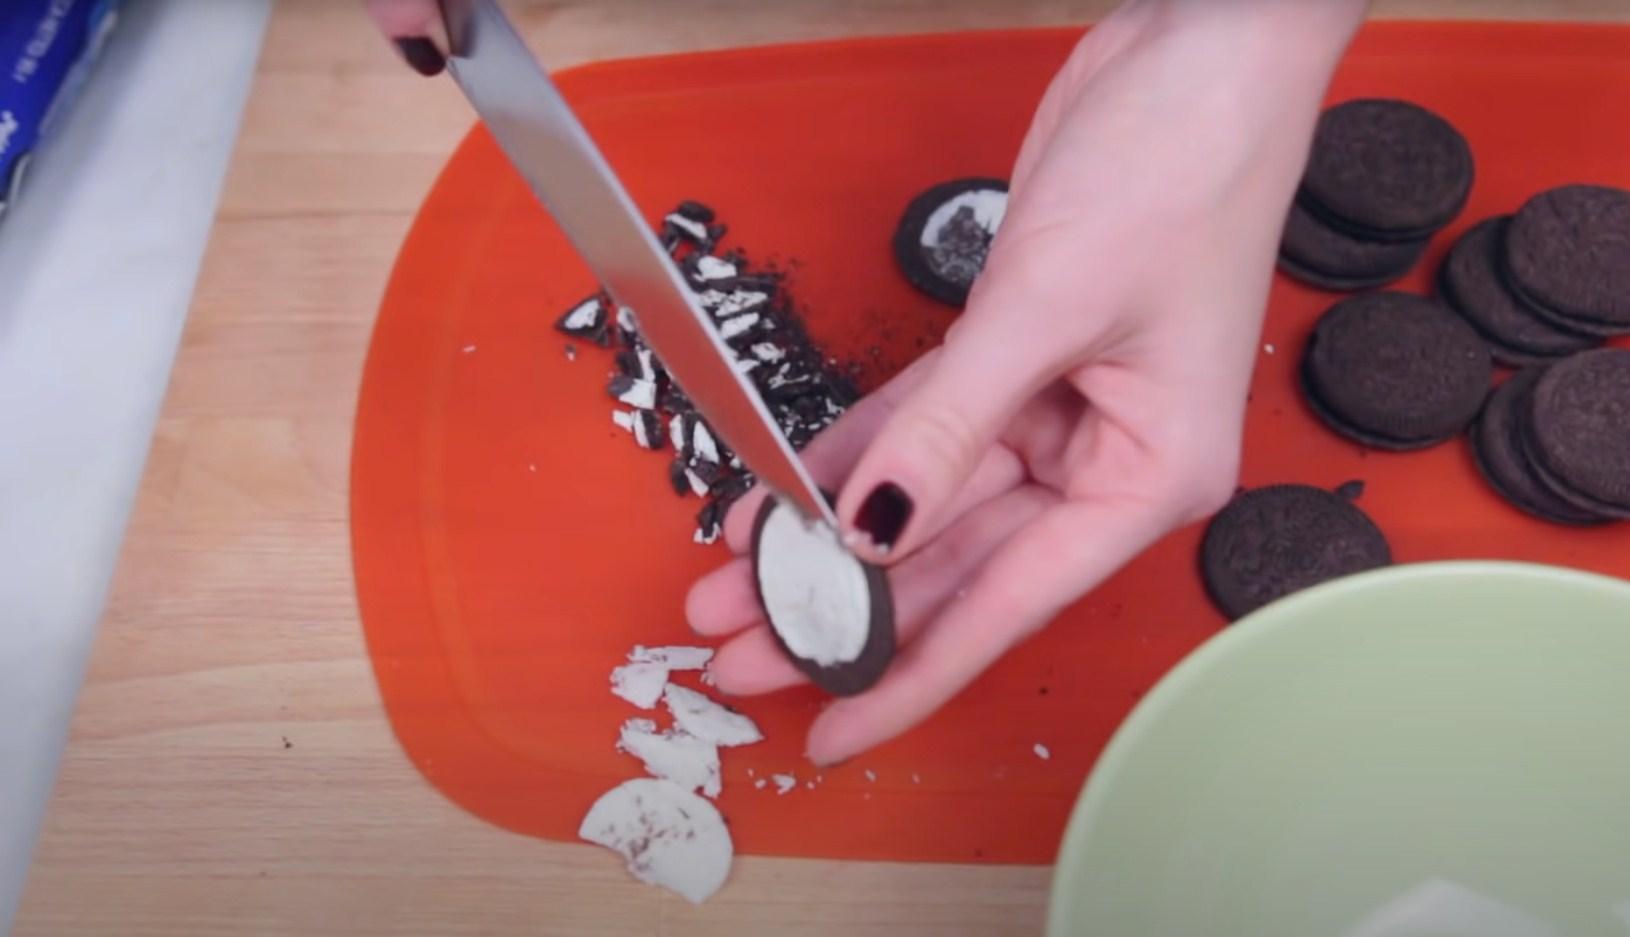
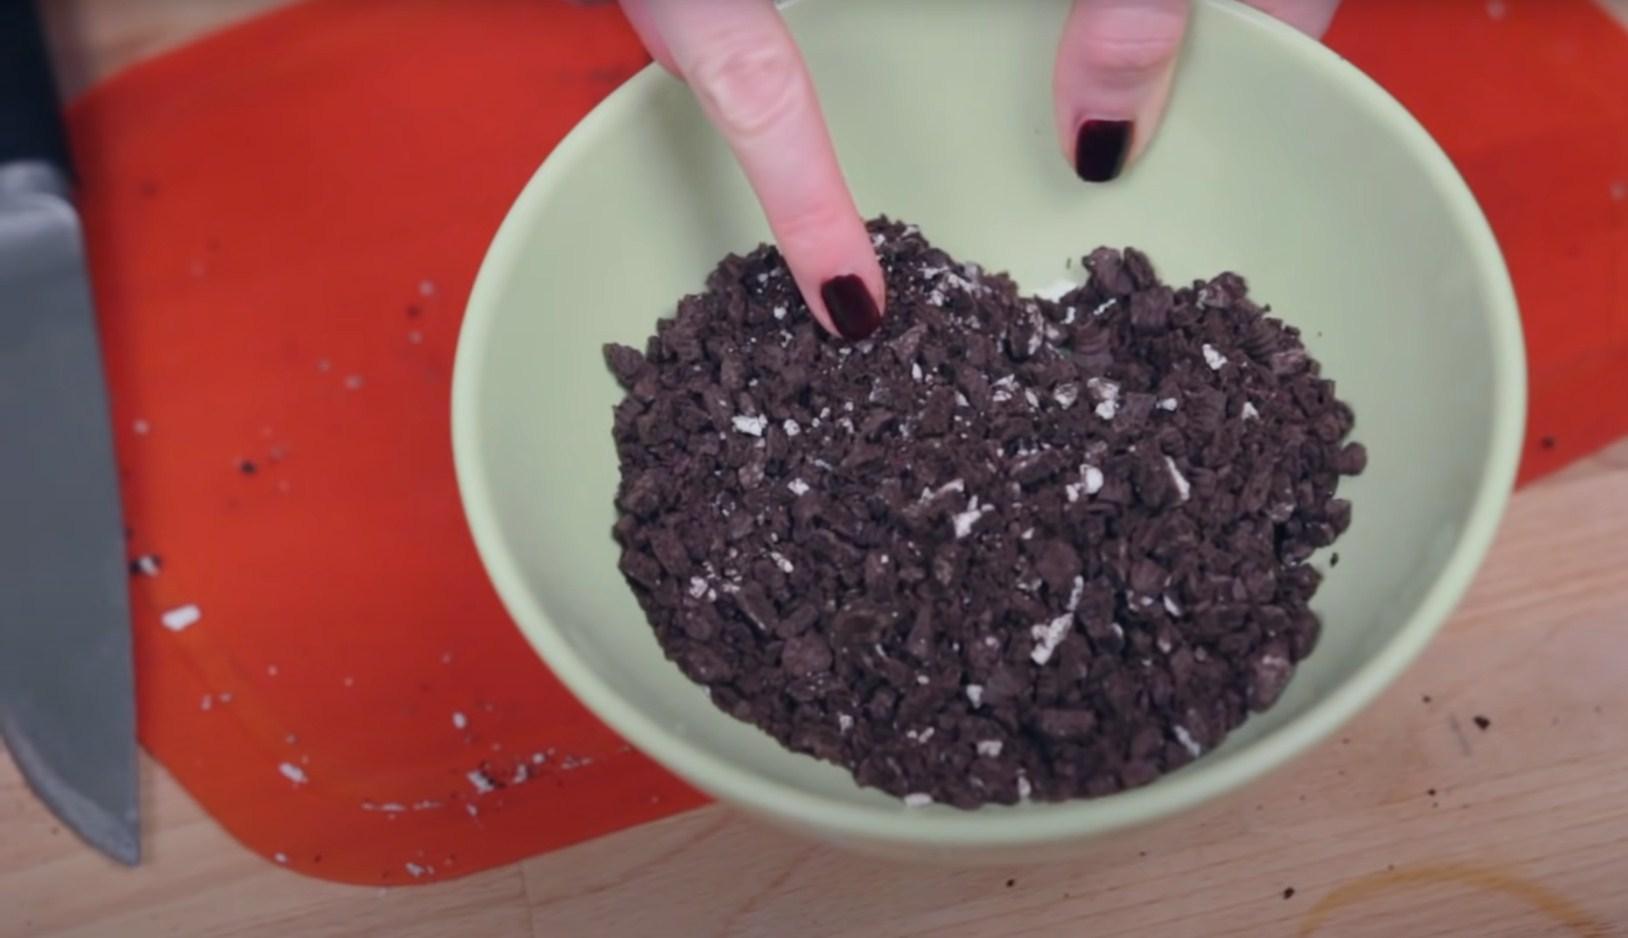
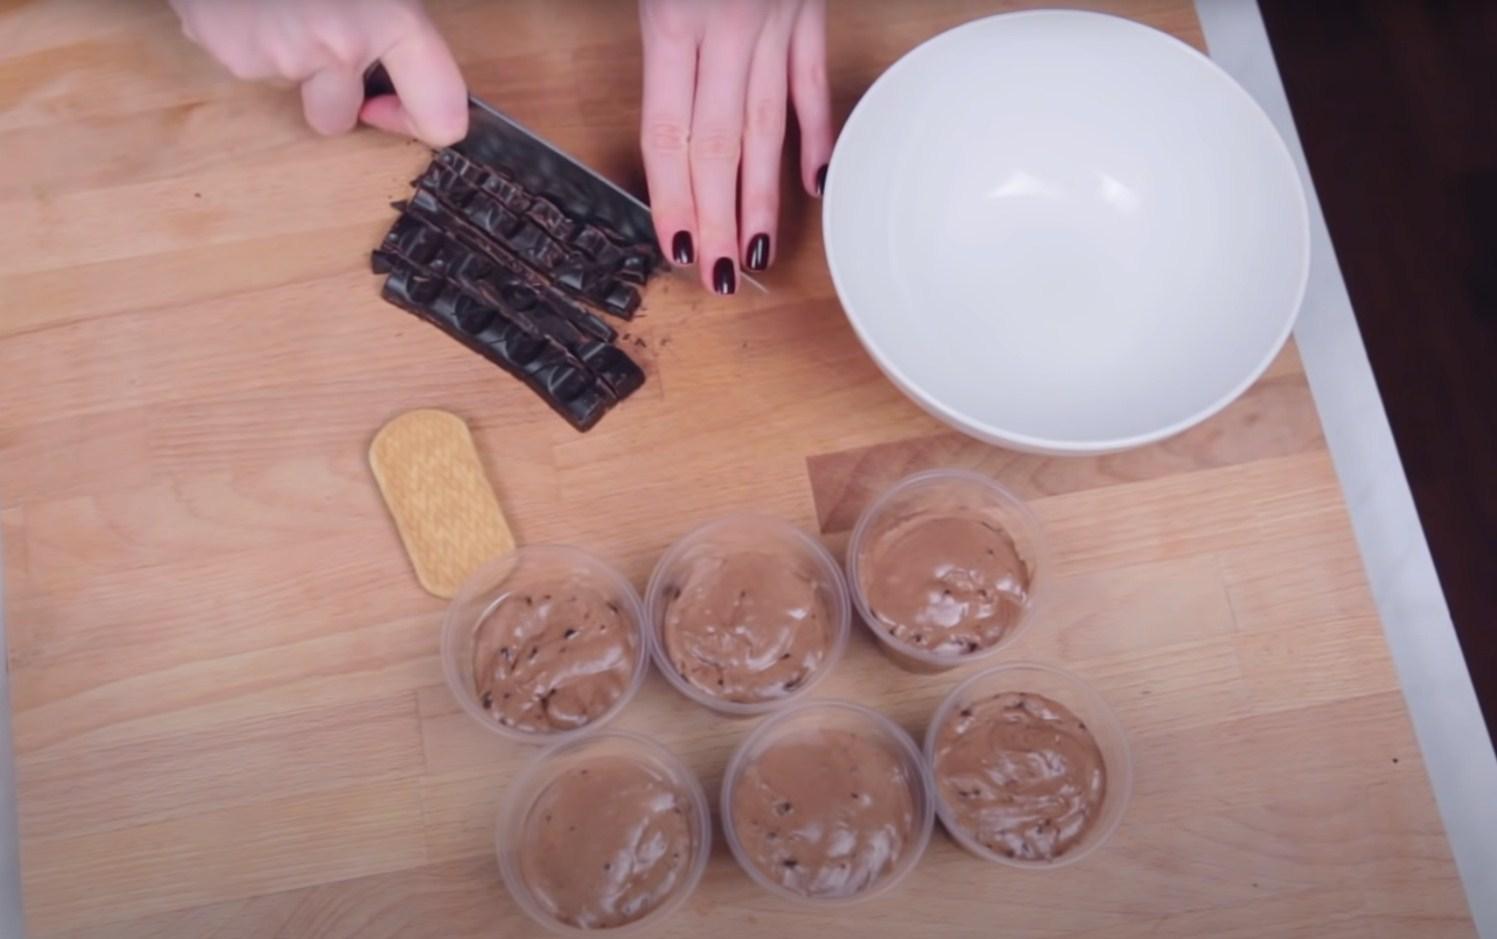
Using a blender or a knife, crush the Oreo cookies. If you choose the latter method, remove the white filling from the cookies—this will ensure the crumbs are as dark and earthy as possible.

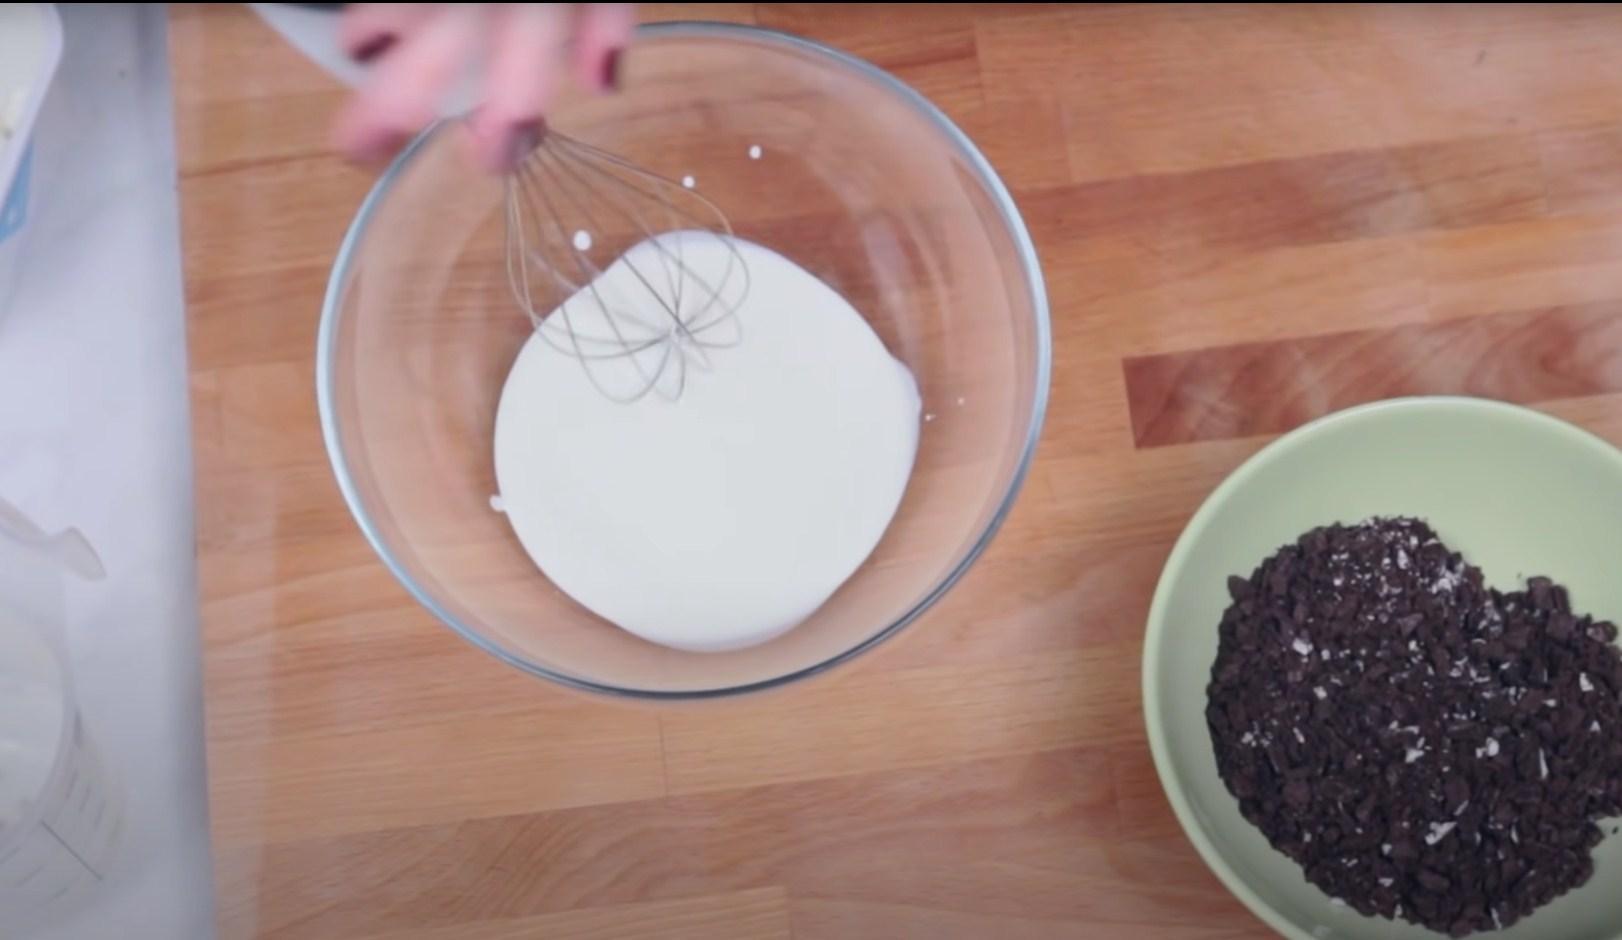
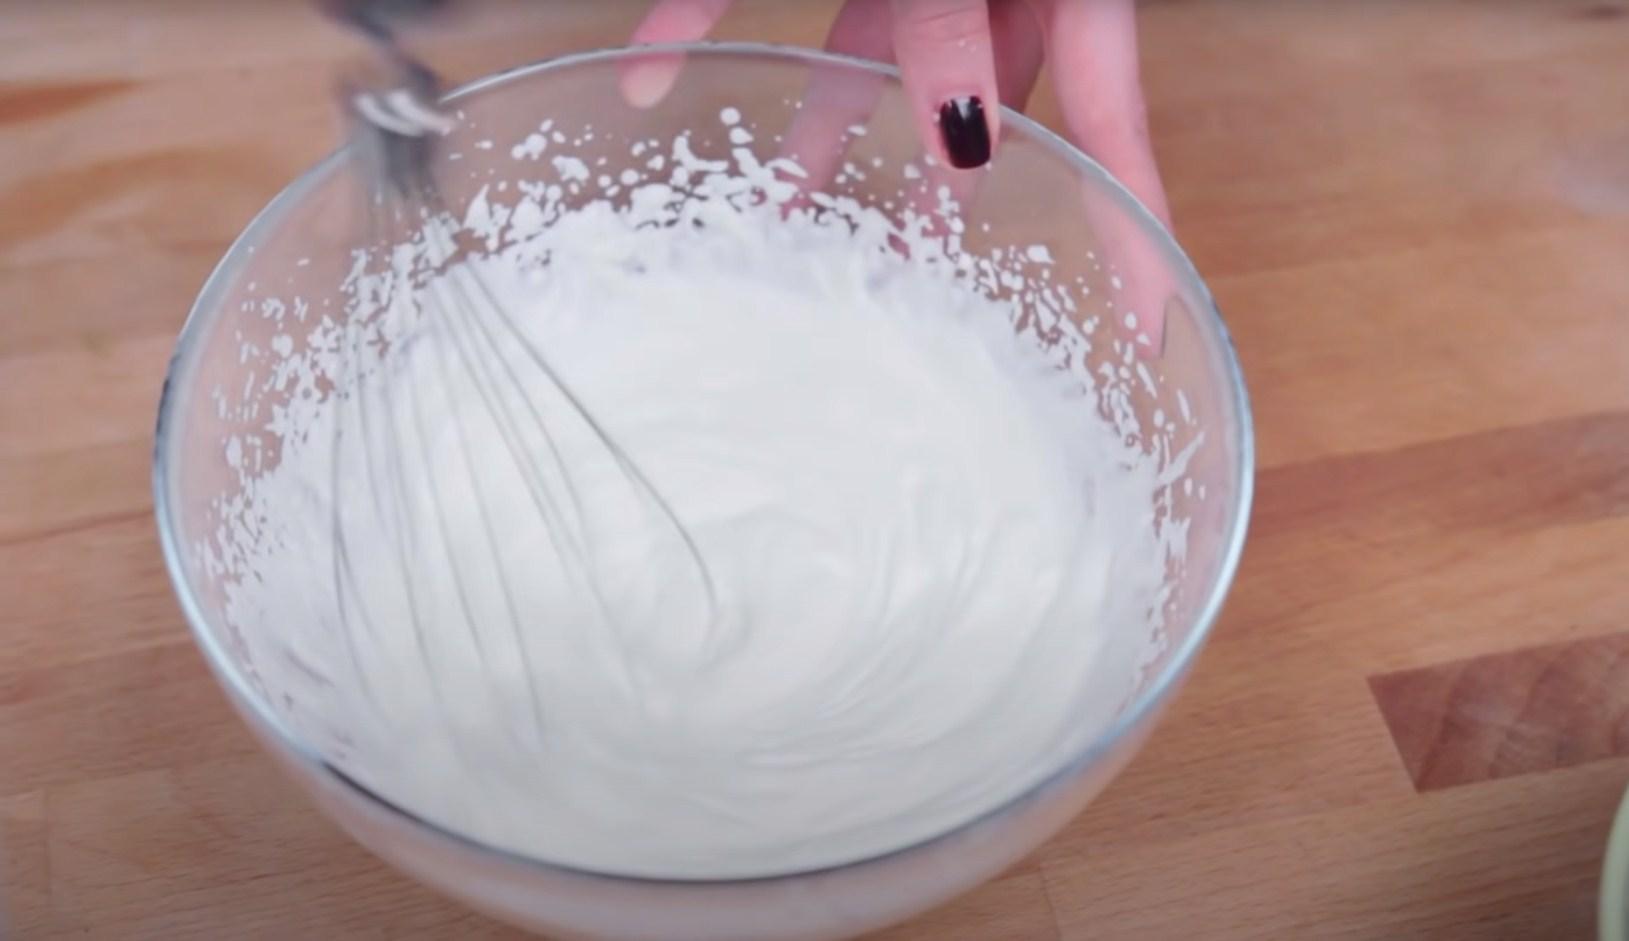
Step 5
Pour the cream into a deep bowl. Beat with a mixer until thick.
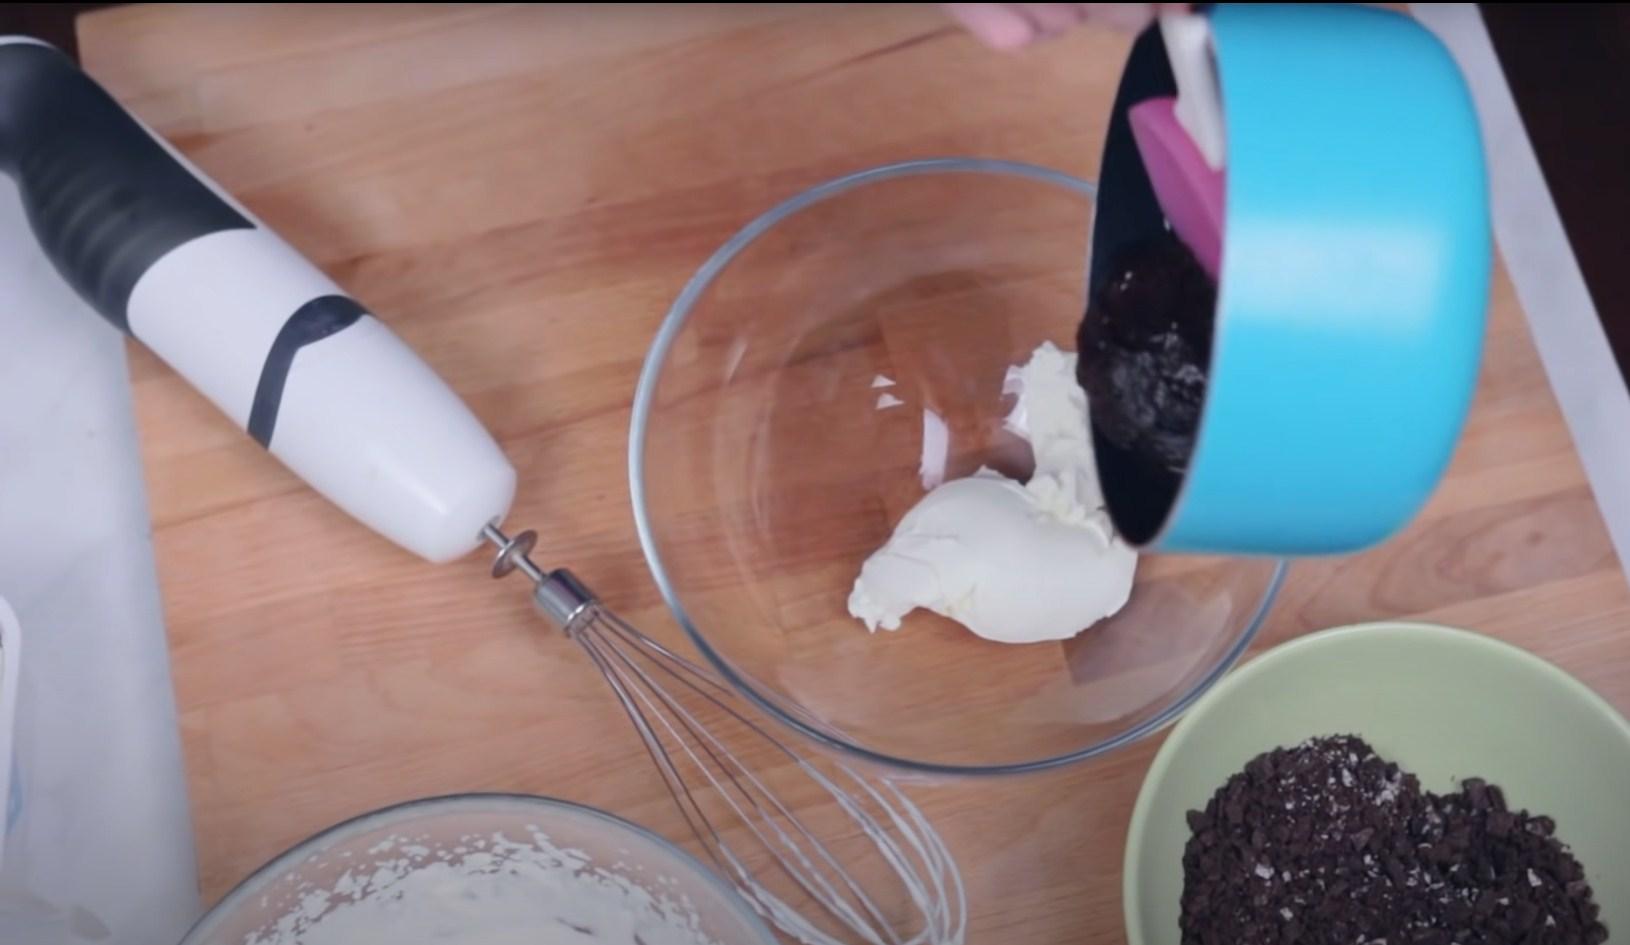
Step 6
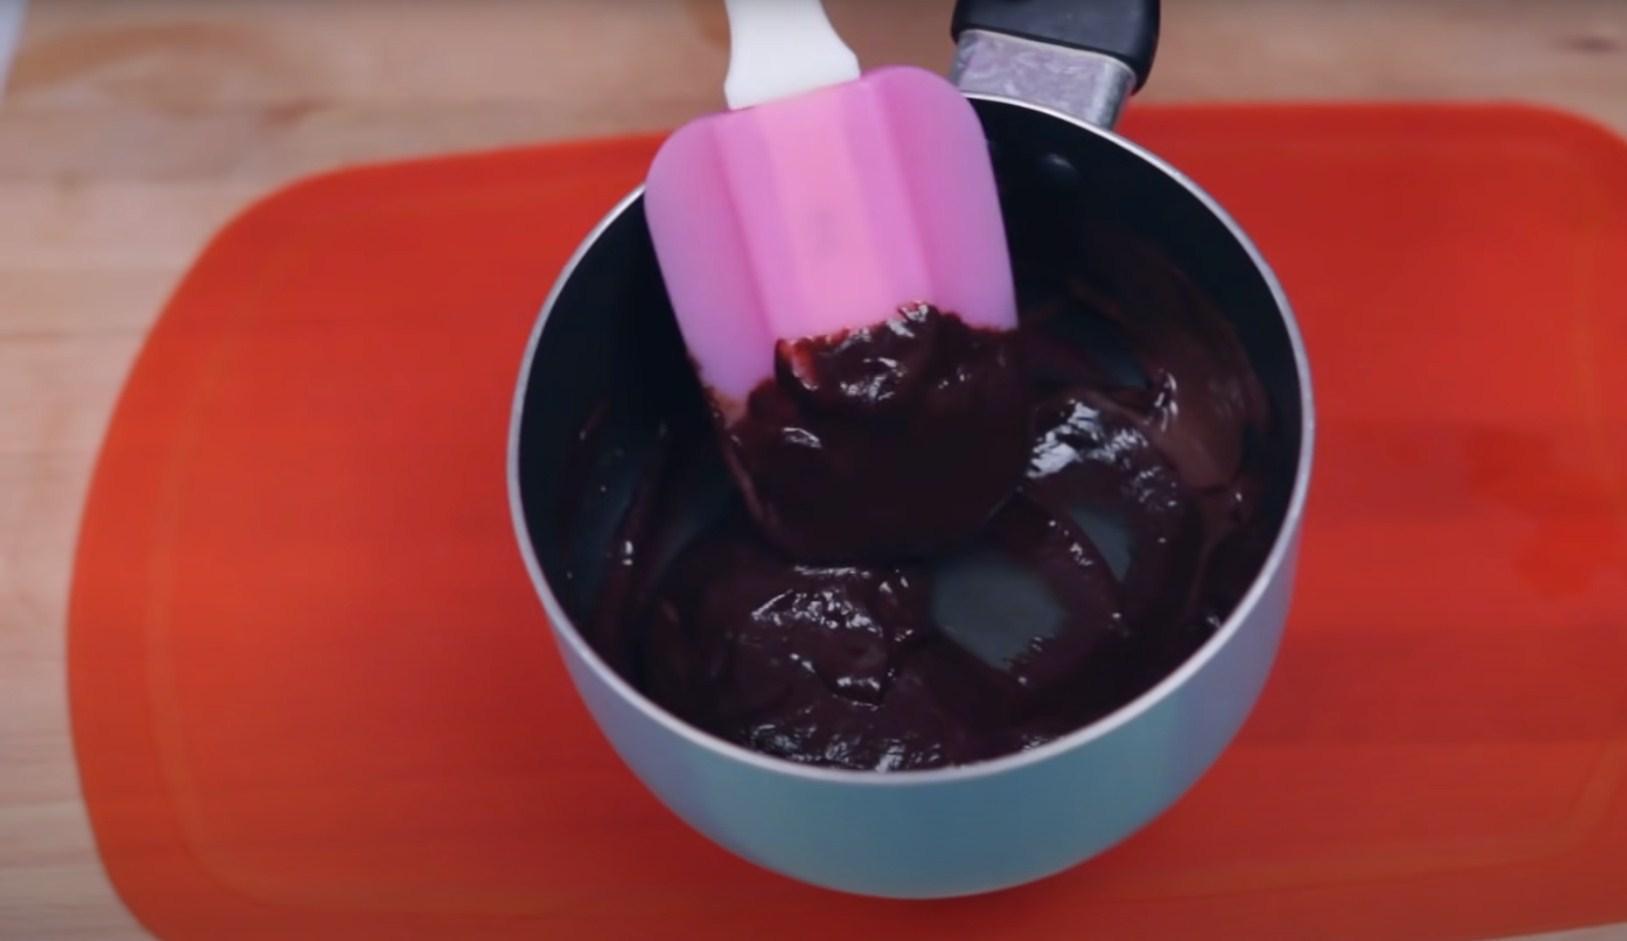
Add the cooled chocolate mixture to the cream cheese. Beat with a mixer until smooth.

Step 7
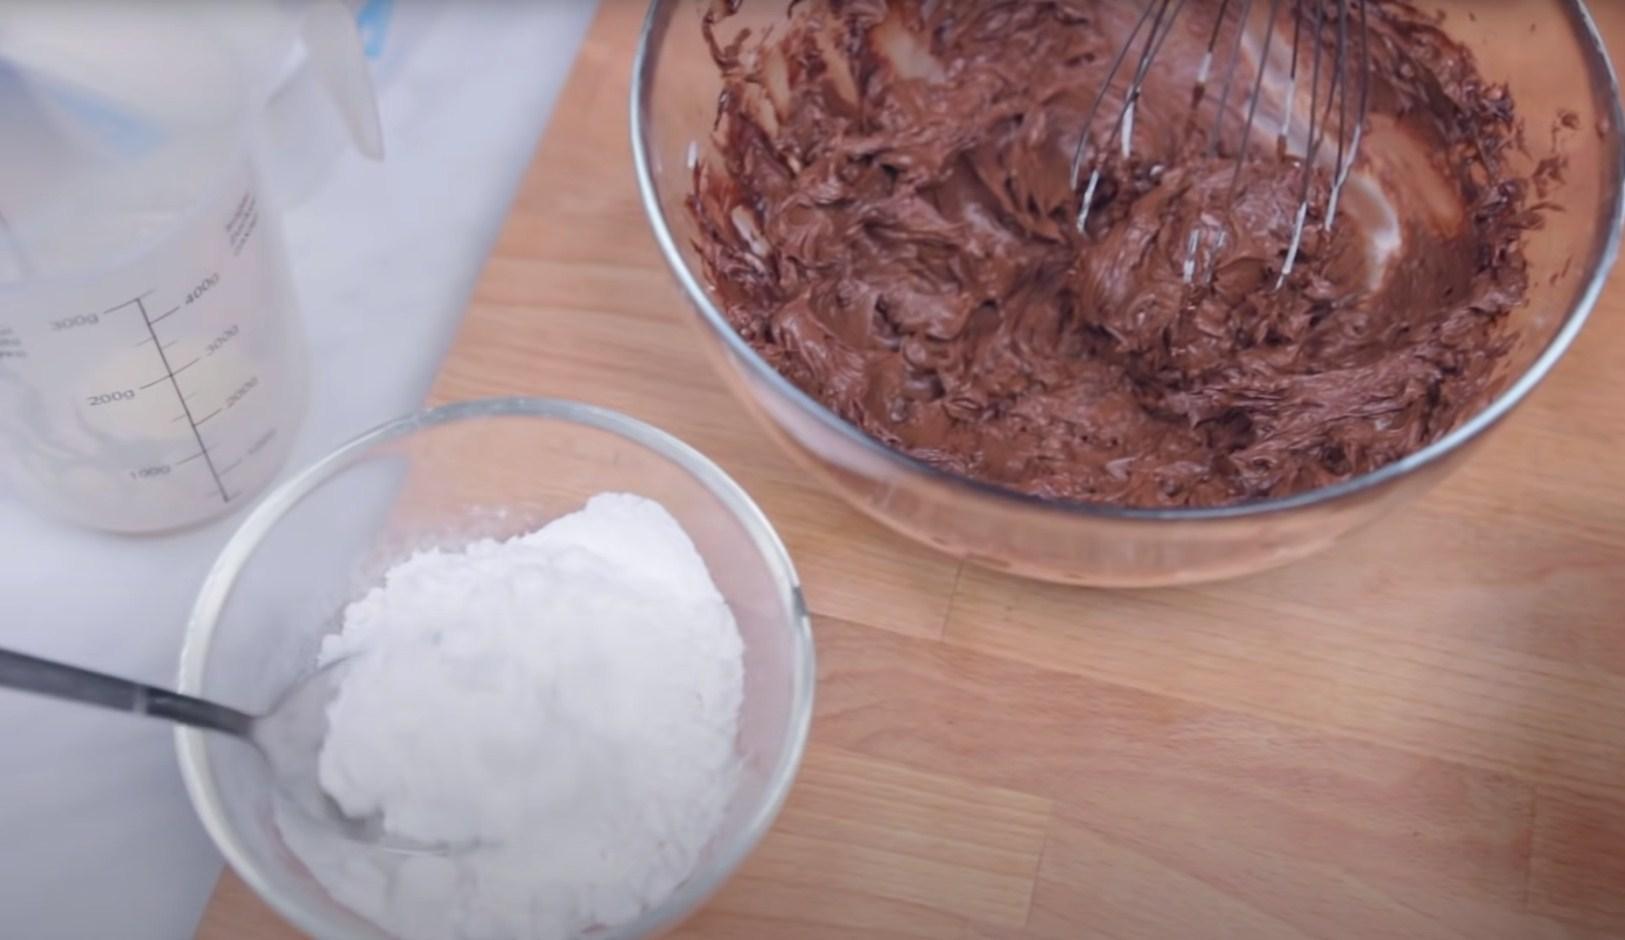
Gradually add powdered sugar to the chocolate mixture and beat at low speed until smooth.
Step 8
Pour most of the crushed Oreos into the chocolate mixture and mix thoroughly.
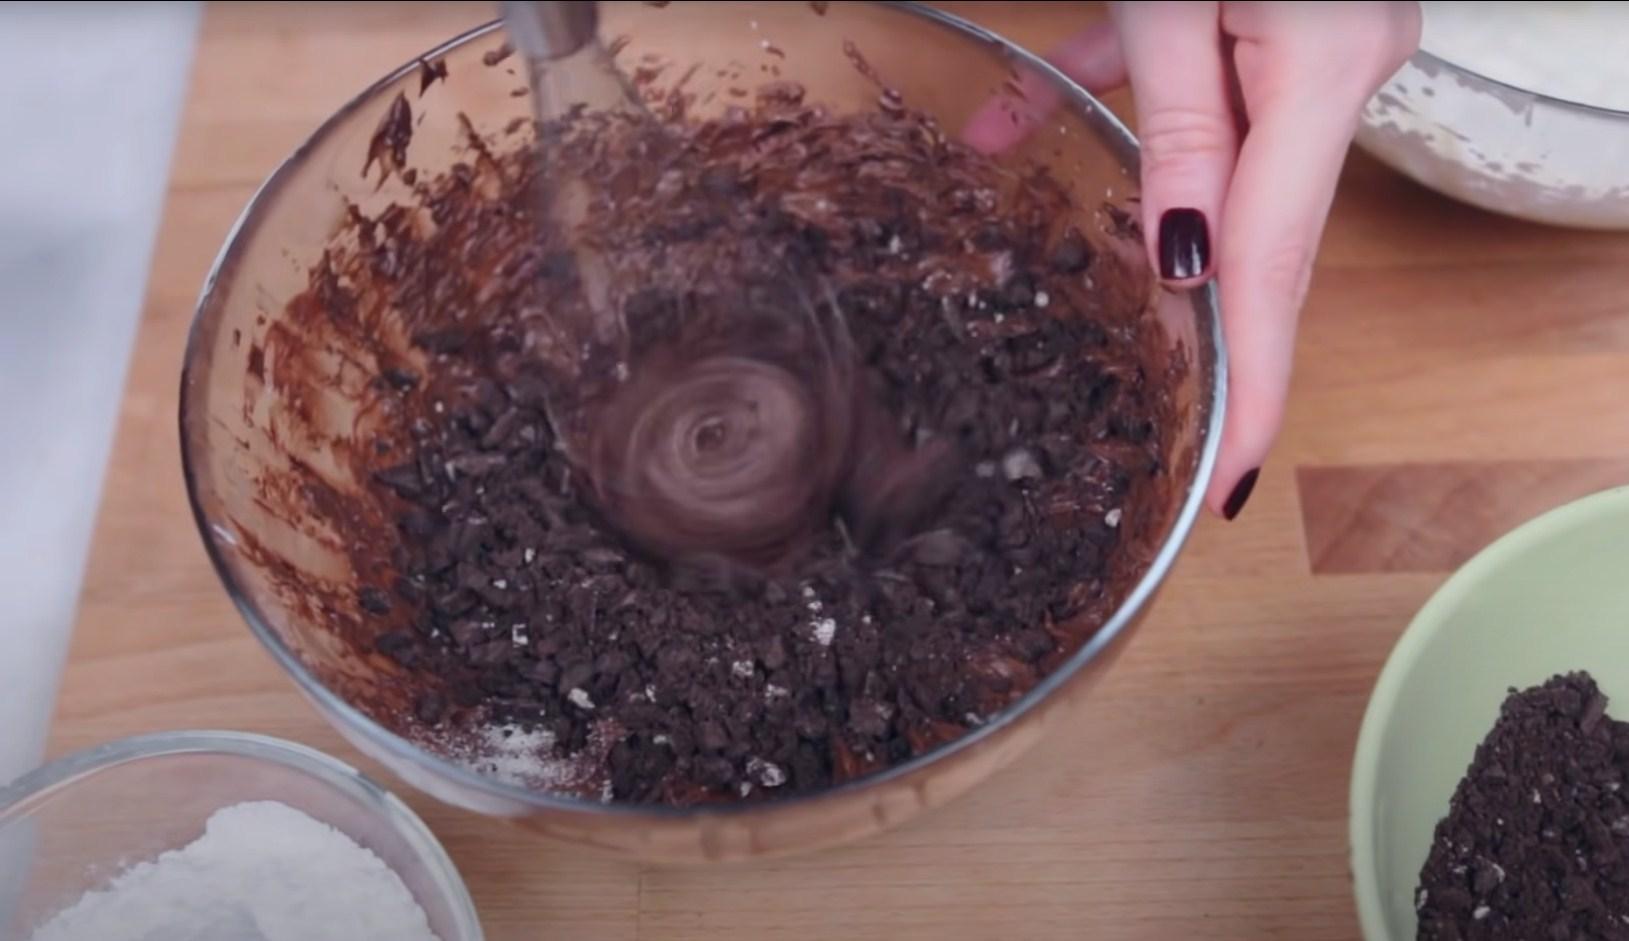
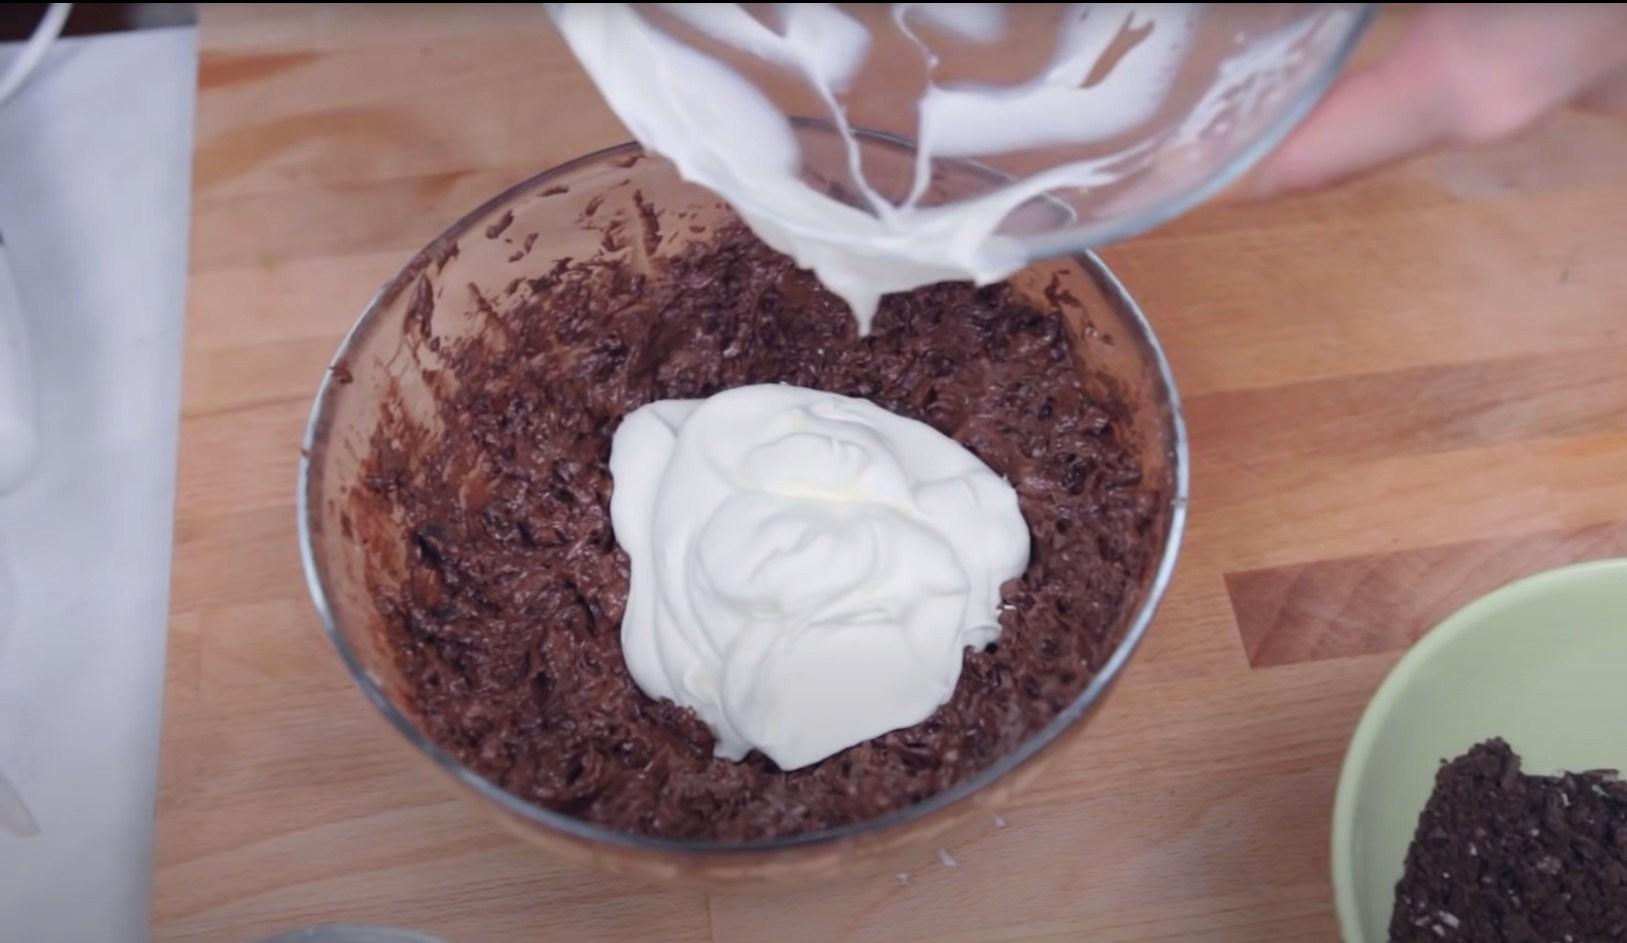
Step 9
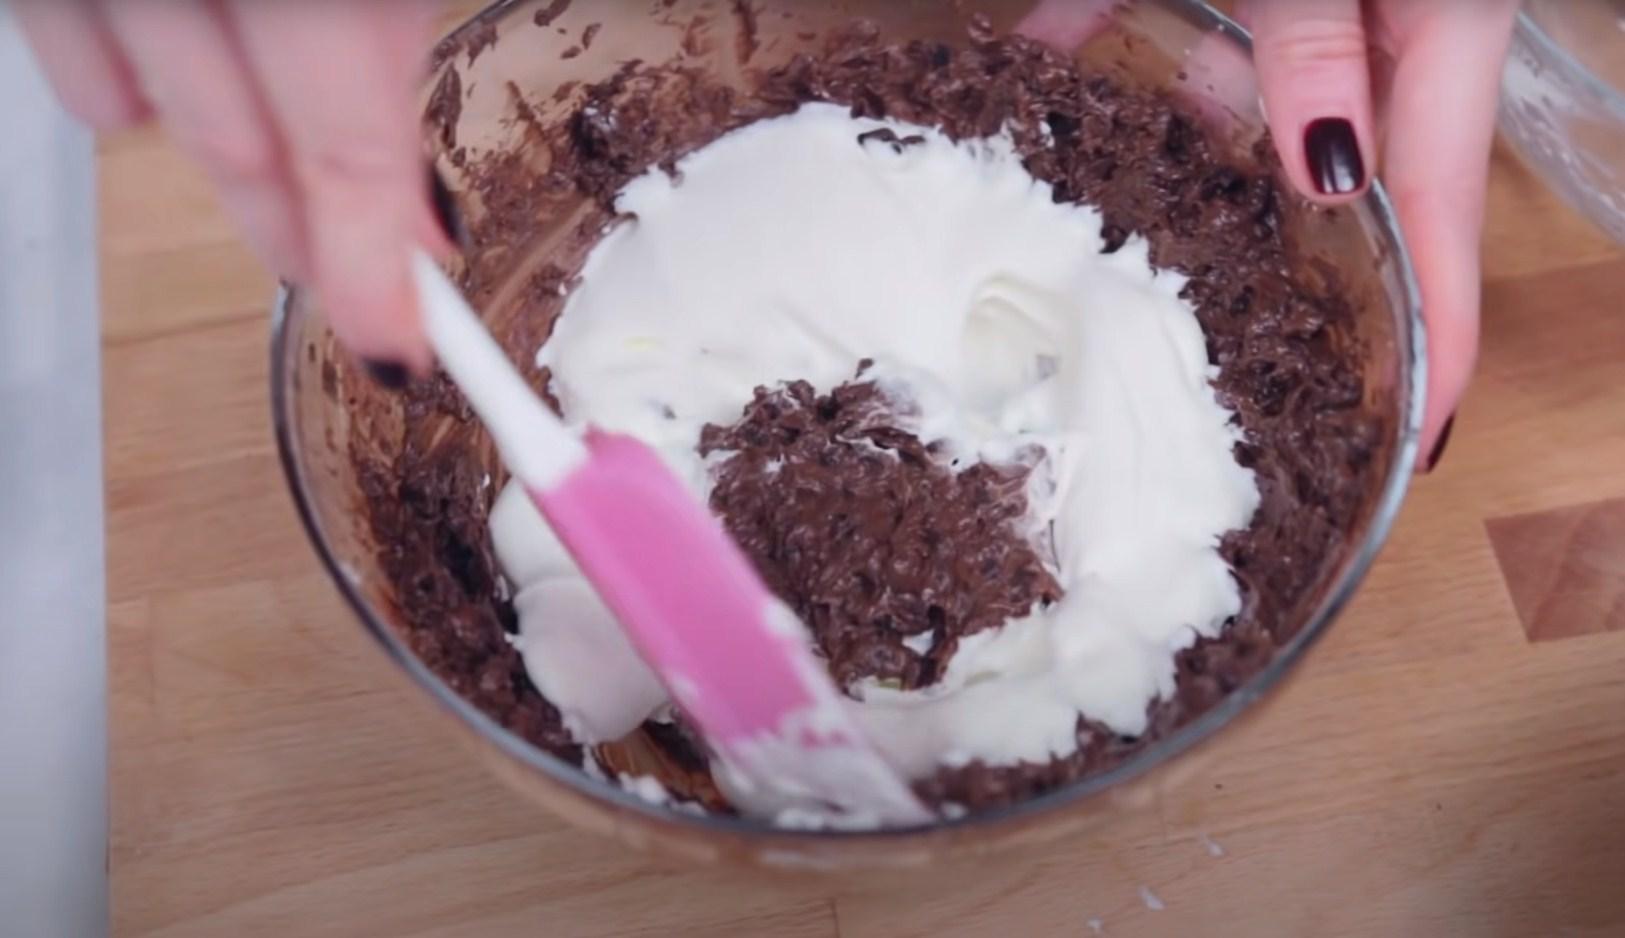
Add the creamy mixture and mix thoroughly with a spatula.
Step 10
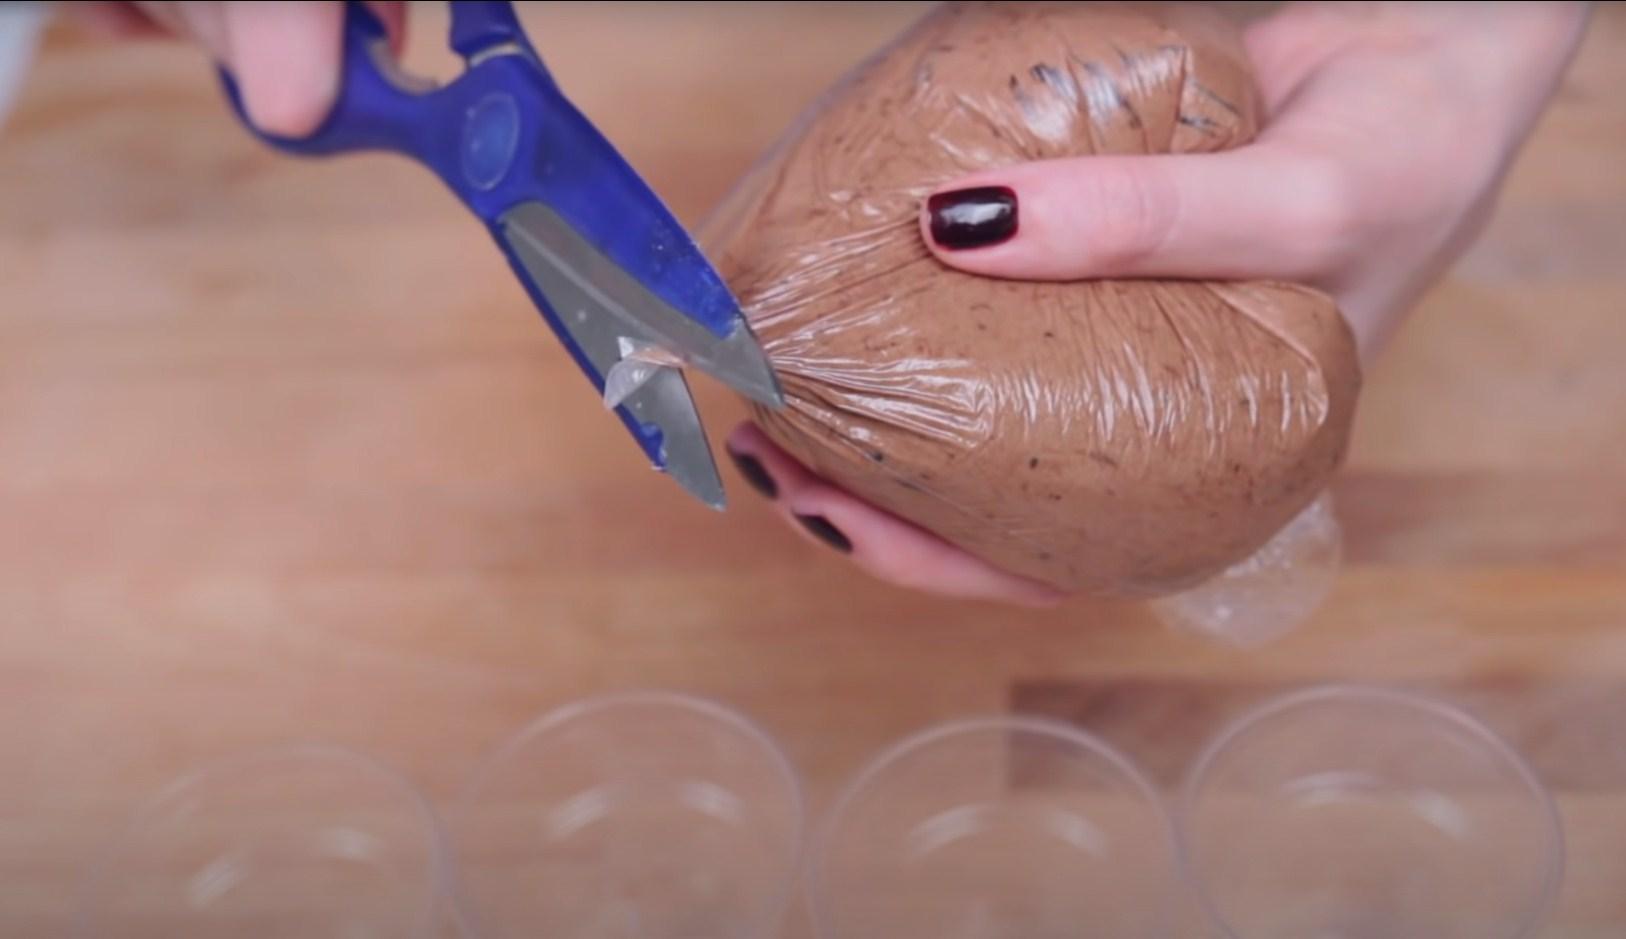
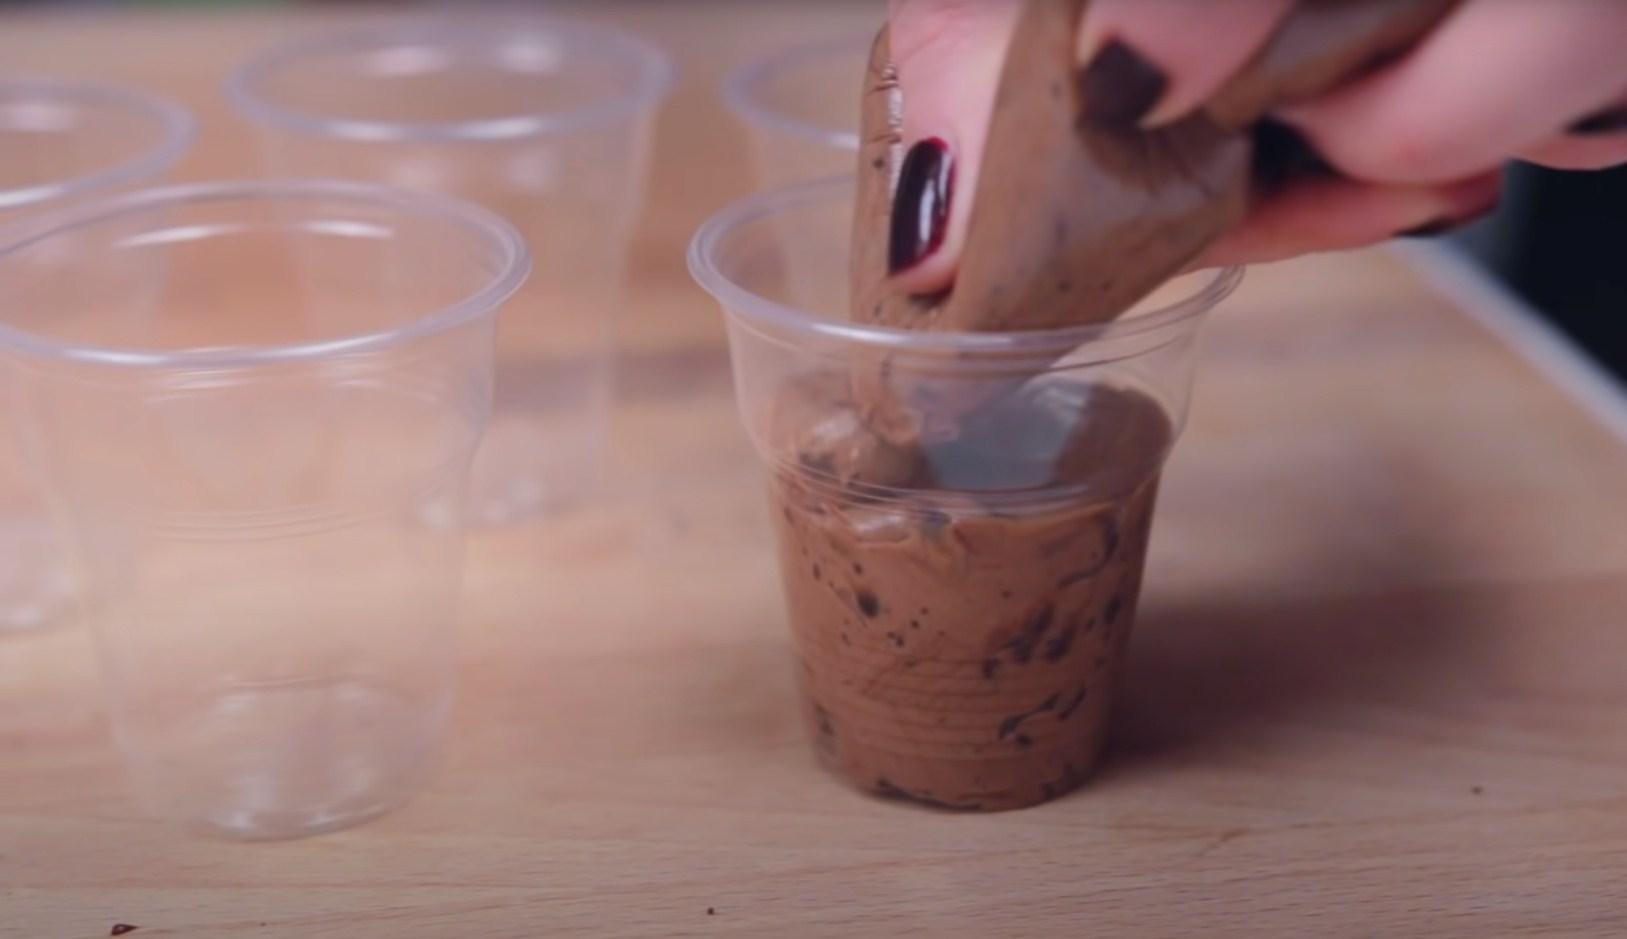
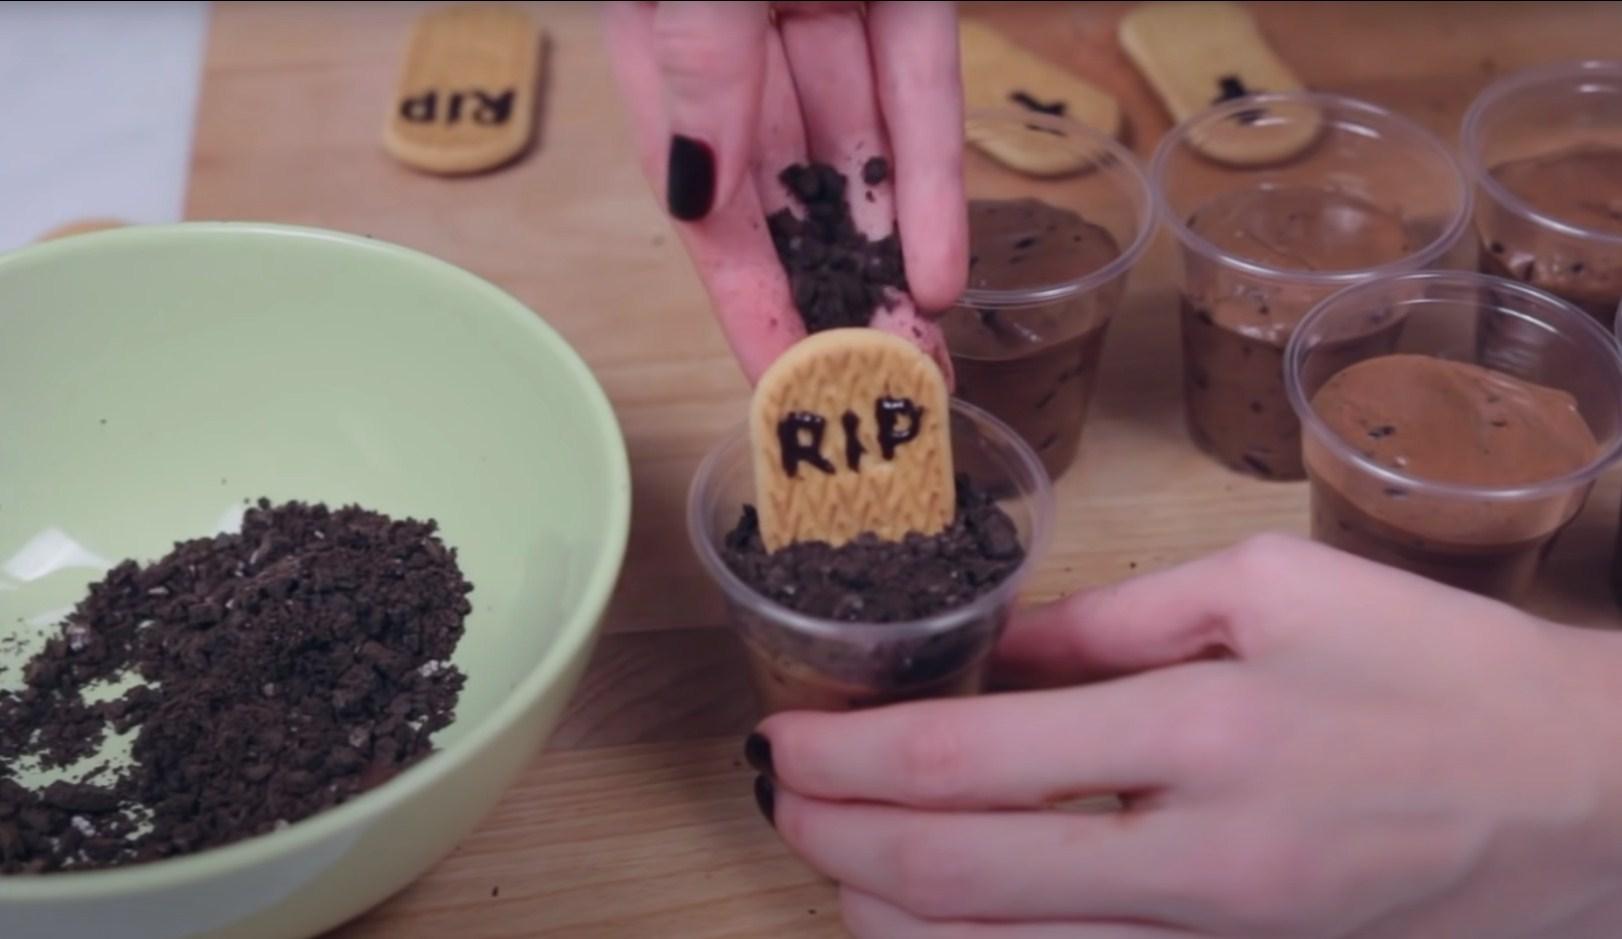
Let's begin shaping the dessert. Transfer the cream mixture to a pastry bag or regular plastic bag, snip off the corner, and pipe into the prepared containers.
Step 11
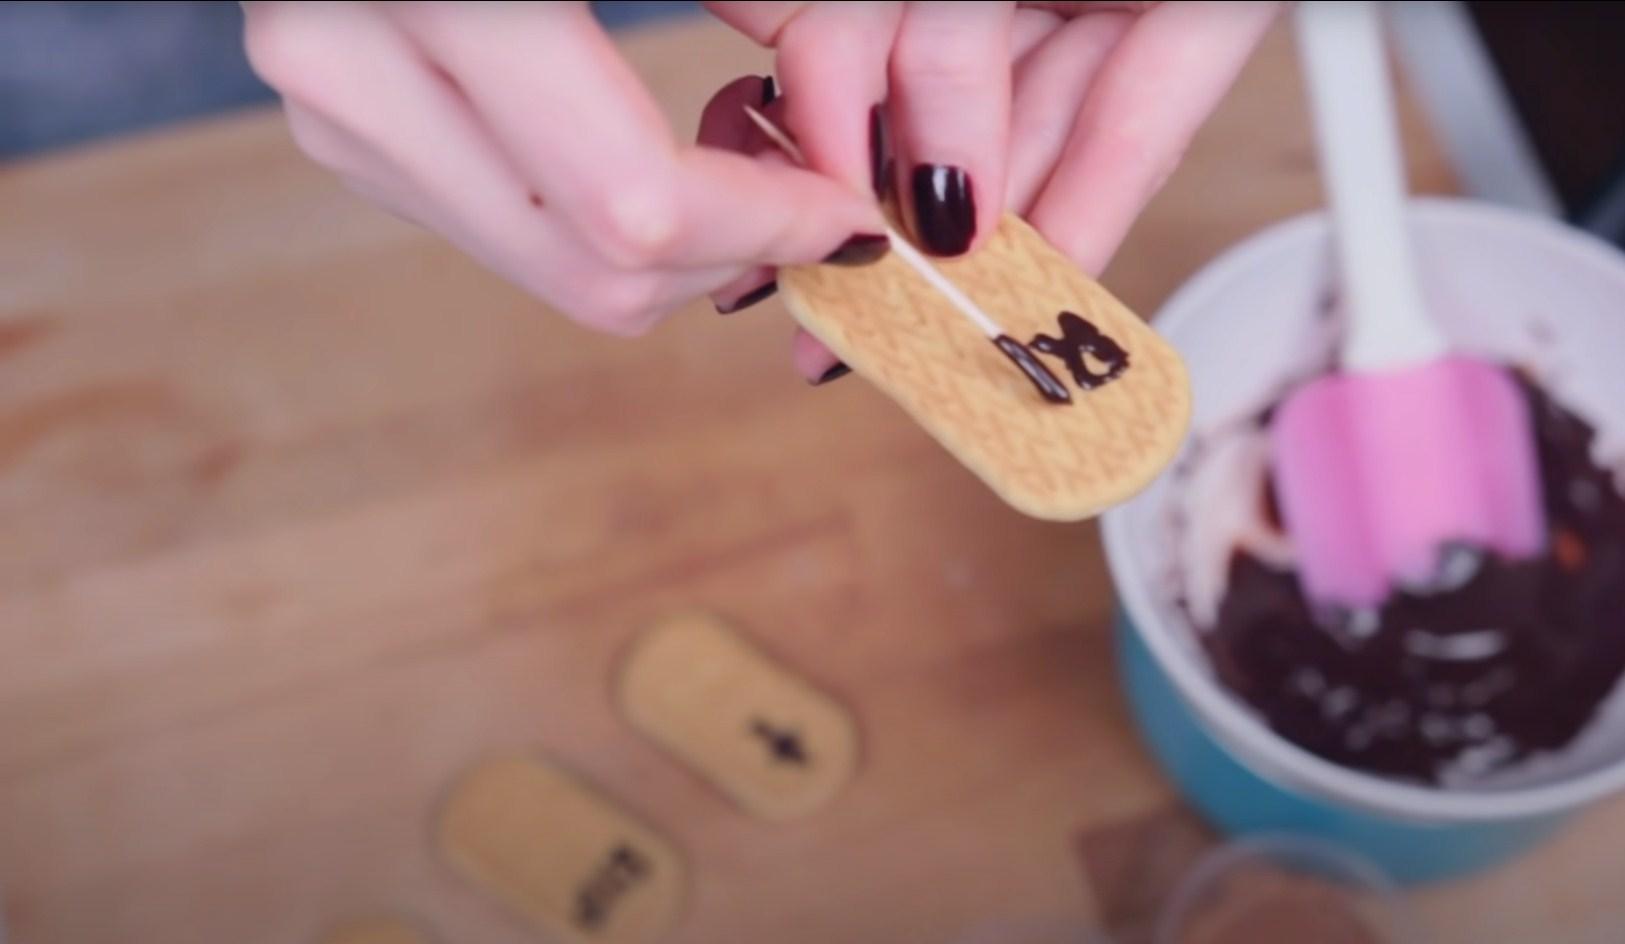
Chop and melt the chocolate in a double boiler. Using a toothpick, use the melted and slightly cooled chocolate to create inscriptions and designs on the improvised cookie tombstones.
Step 12
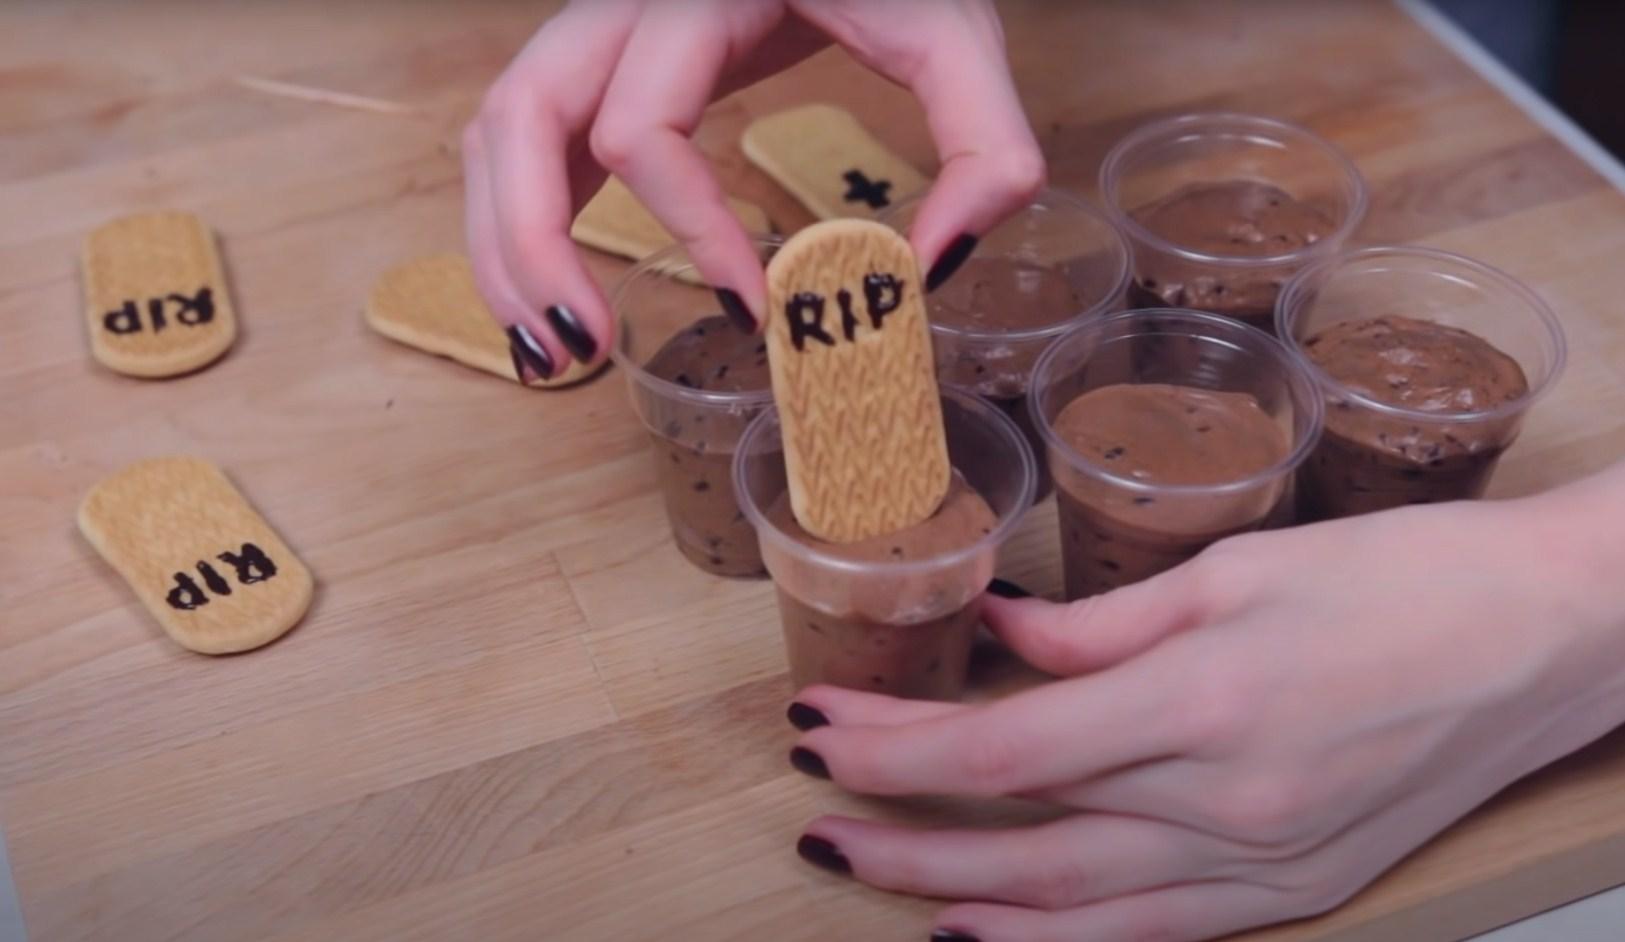
Assemble our dessert. Insert tombstone cookies and sprinkle with the remaining crushed Oreos. The finished dessert can be decorated with artificial flowers and other elements.
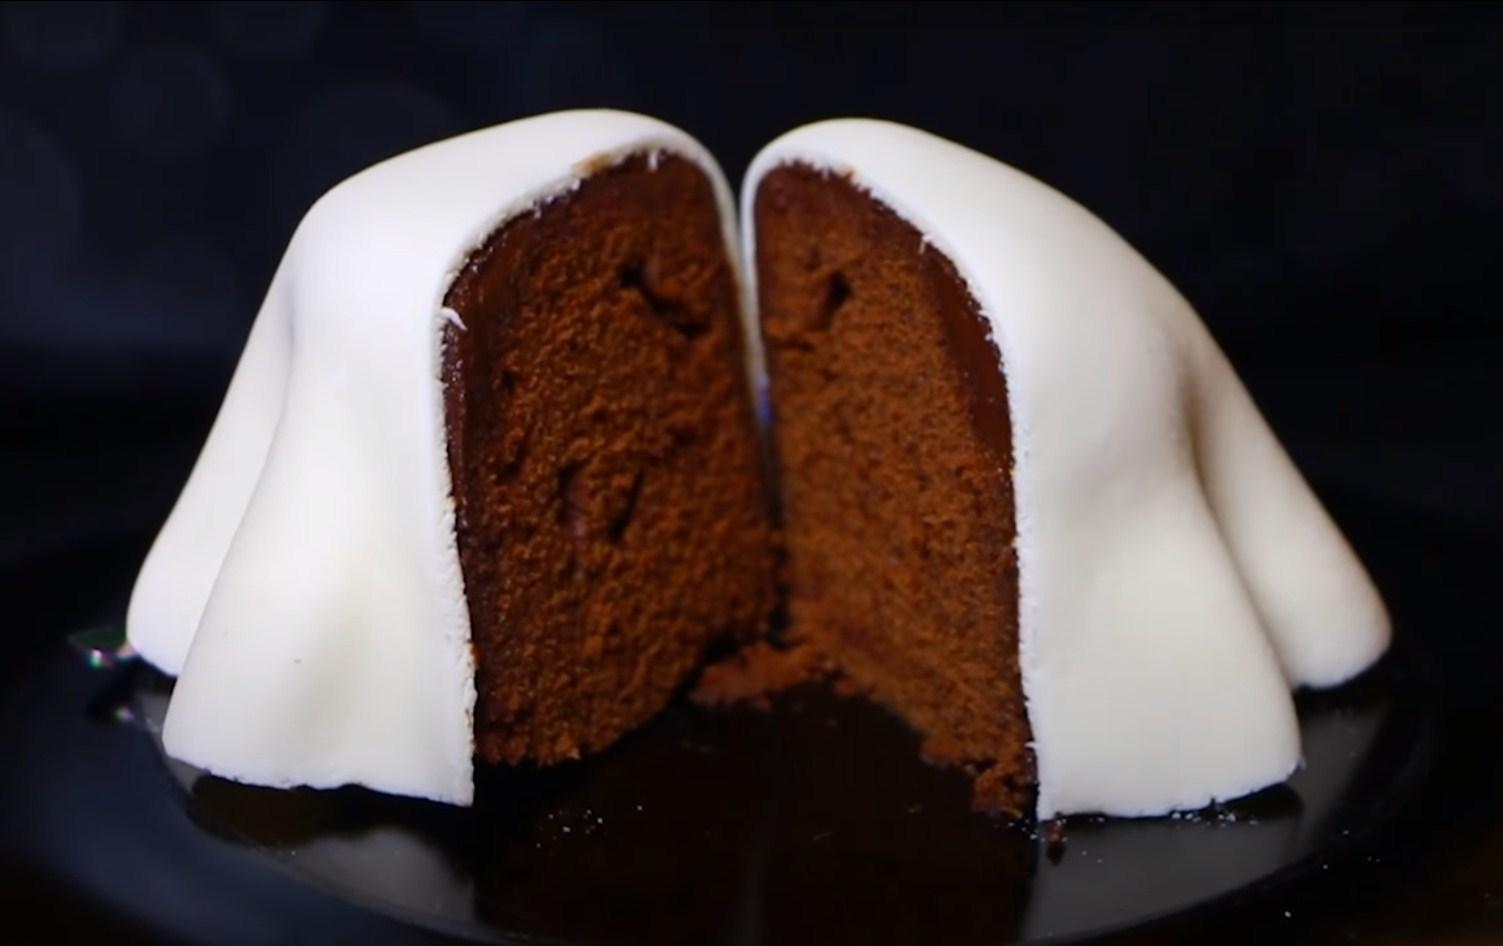
Ghost Cake
This dessert will impress both adults and children. The cake is delicious and tender, and the unique decoration will make it a true highlight of any Halloween dinner.
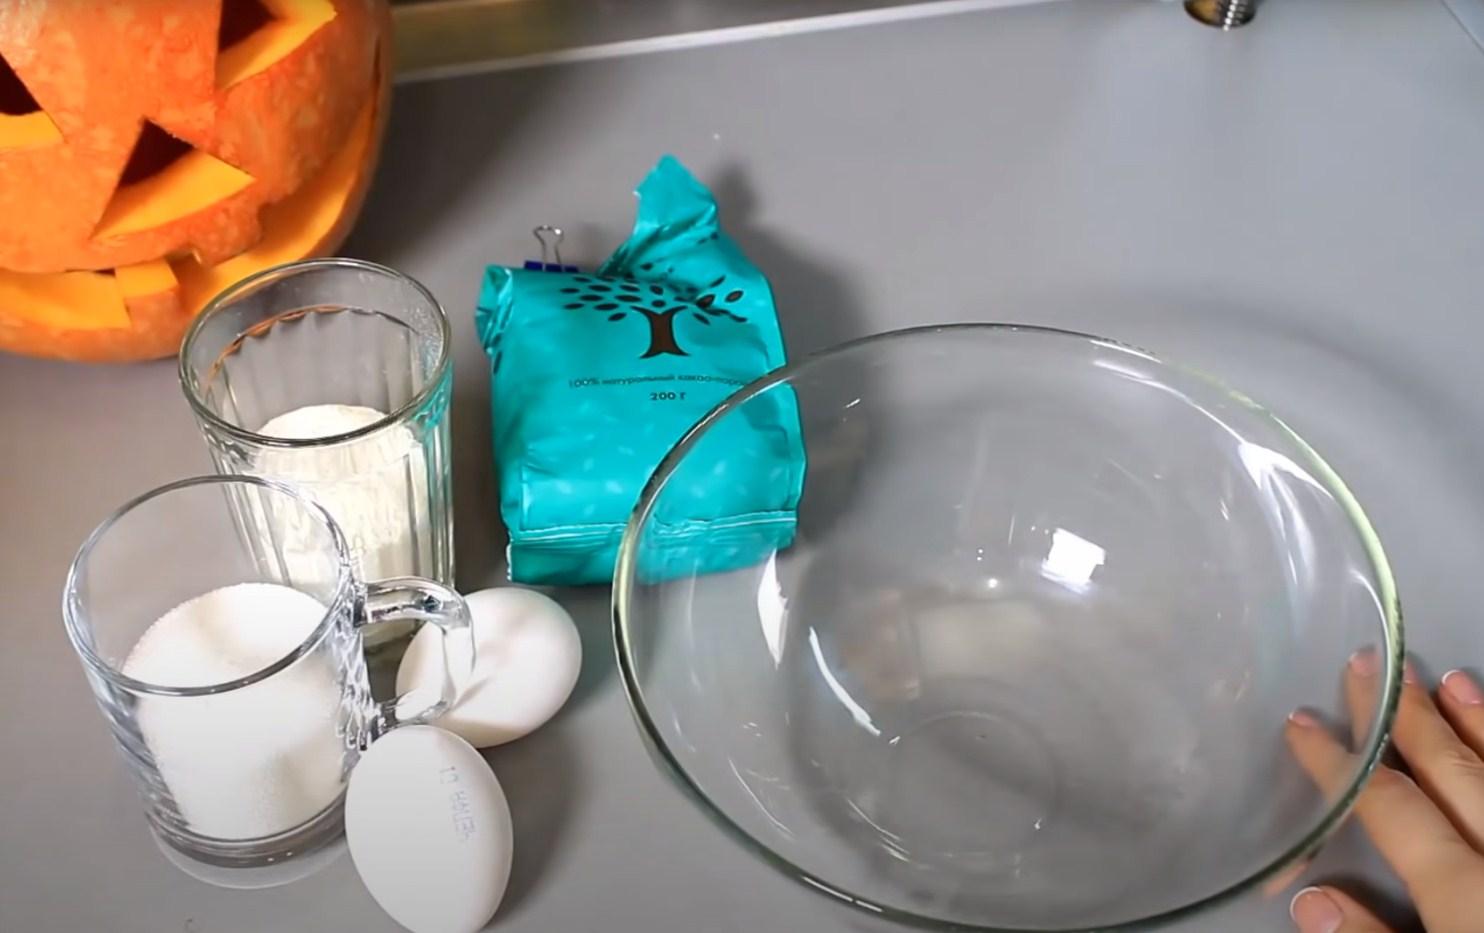
Ingredients
Biscuit:
- Dark chocolate – 40 g
- Butter – 2 tbsp.
- Egg – 1 pc.
- Milk – 2 tbsp.
- Sugar – 3 tbsp.
- Flour – 3 tbsp.
- Baking powder – 1/4 tsp.
Ganache:
- Dark chocolate – 60 g
- Cream (30%) – 4 tbsp.
Mastic:
- Marshmallows – 50 g
- Powdered sugar – 50 g
- Butter – 1/2 tbsp.
- Black gel food coloring or melted dark chocolate
Cooking time: 40-60 minutes
Servings: 1
Step-by-step recipe
Step 1
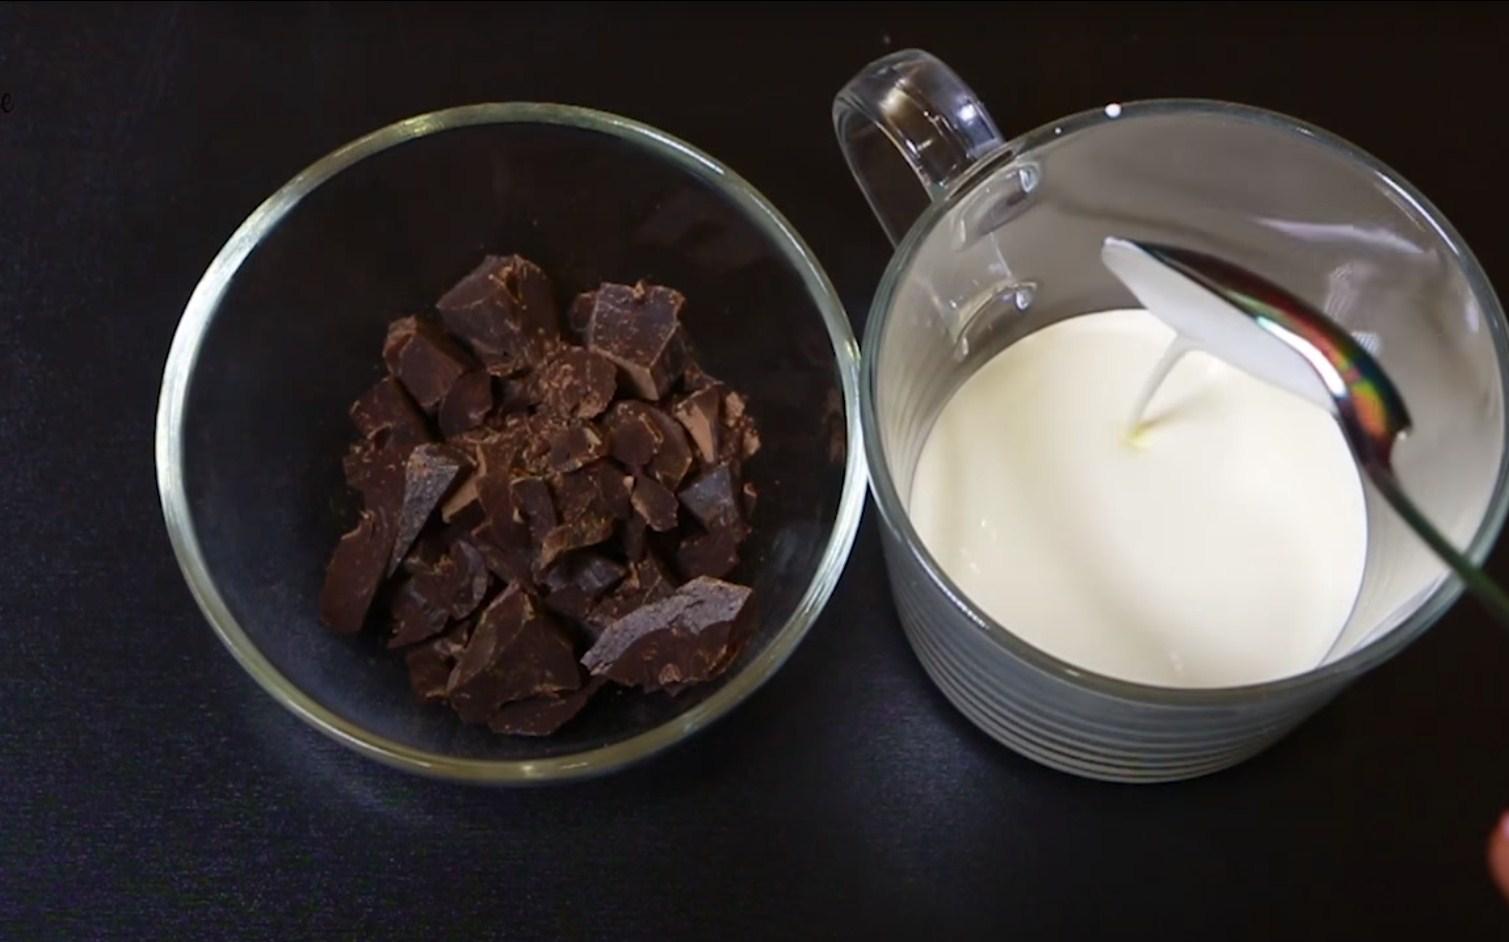
We prepare all the necessary ingredients for making cakes.
Step 2
Chop the chocolate.
Step 3
Pour the cream into a deep container and microwave it for 30 seconds until the cream almost boils.
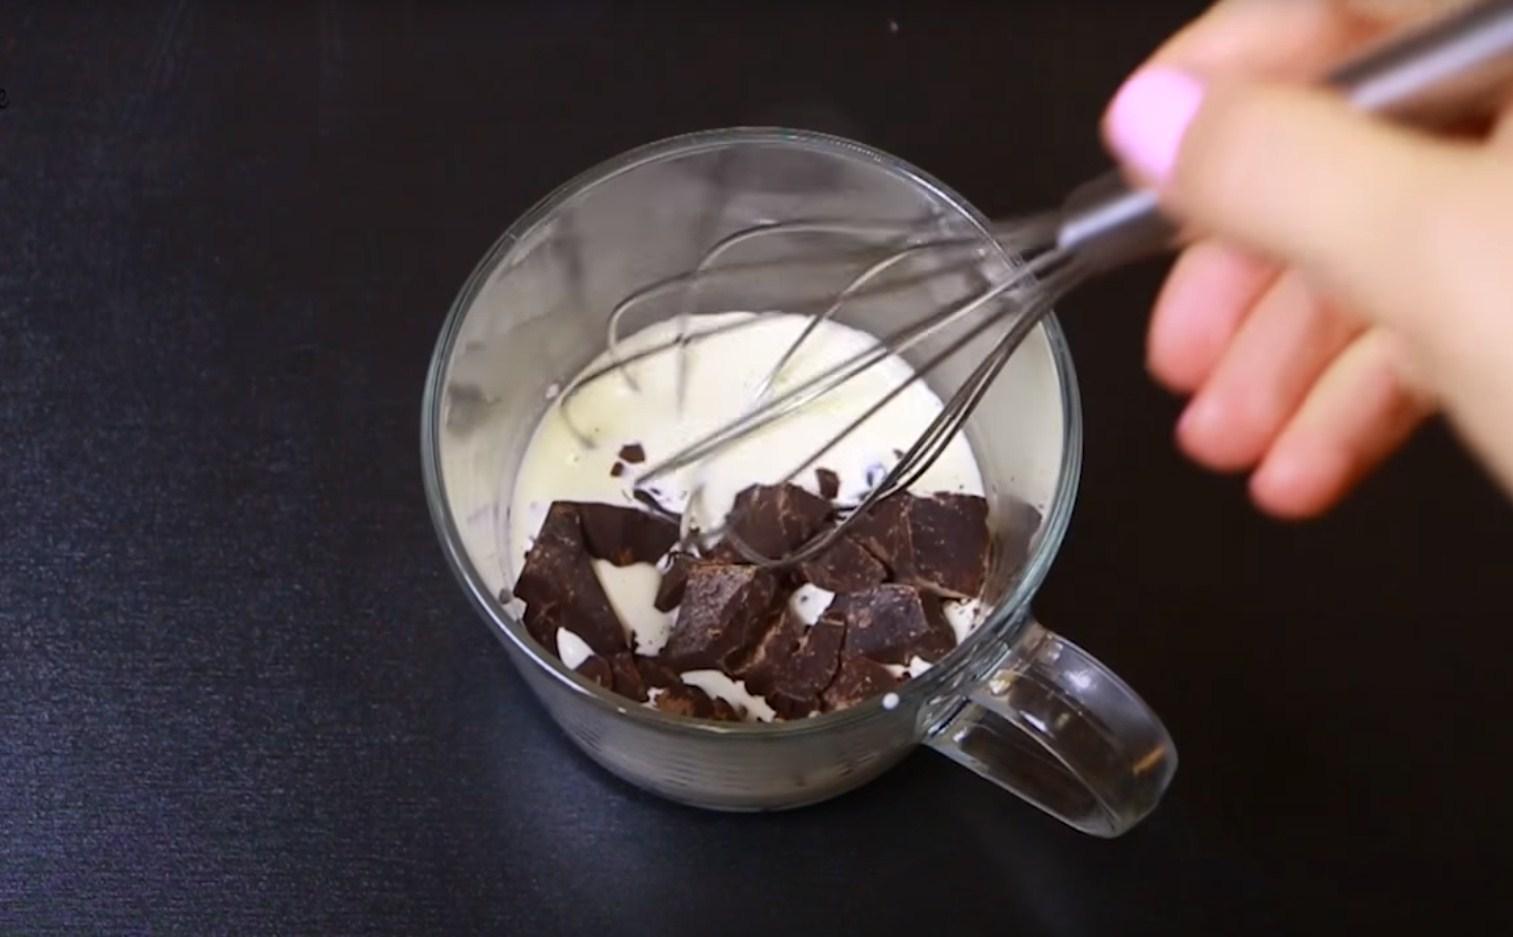
Step 4
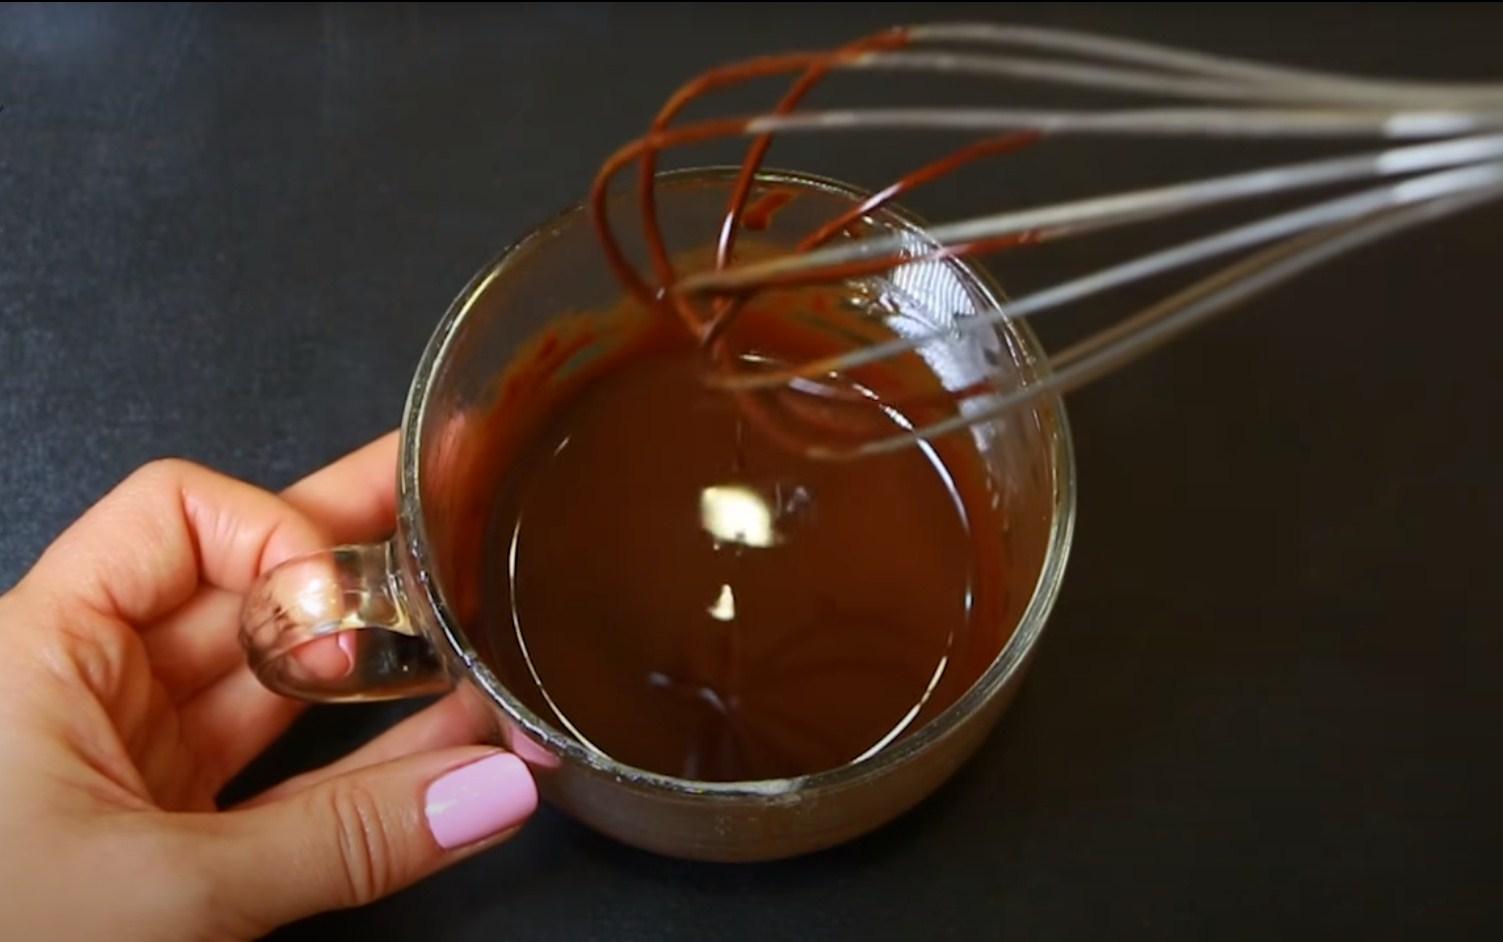
Add chopped chocolate to the hot cream and mix thoroughly until smooth.
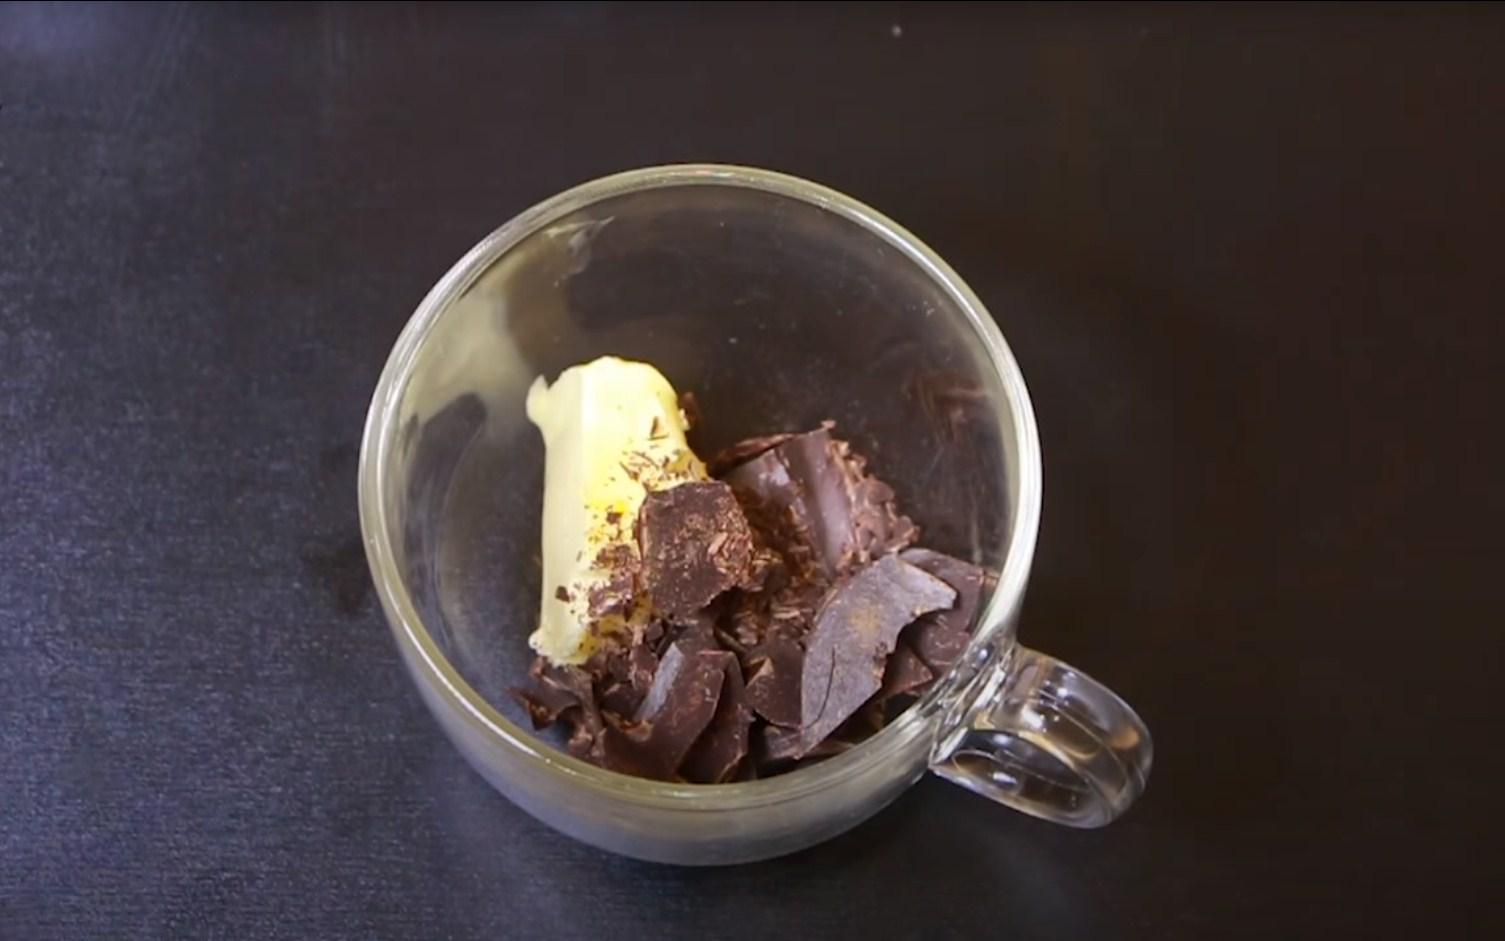
Step 5
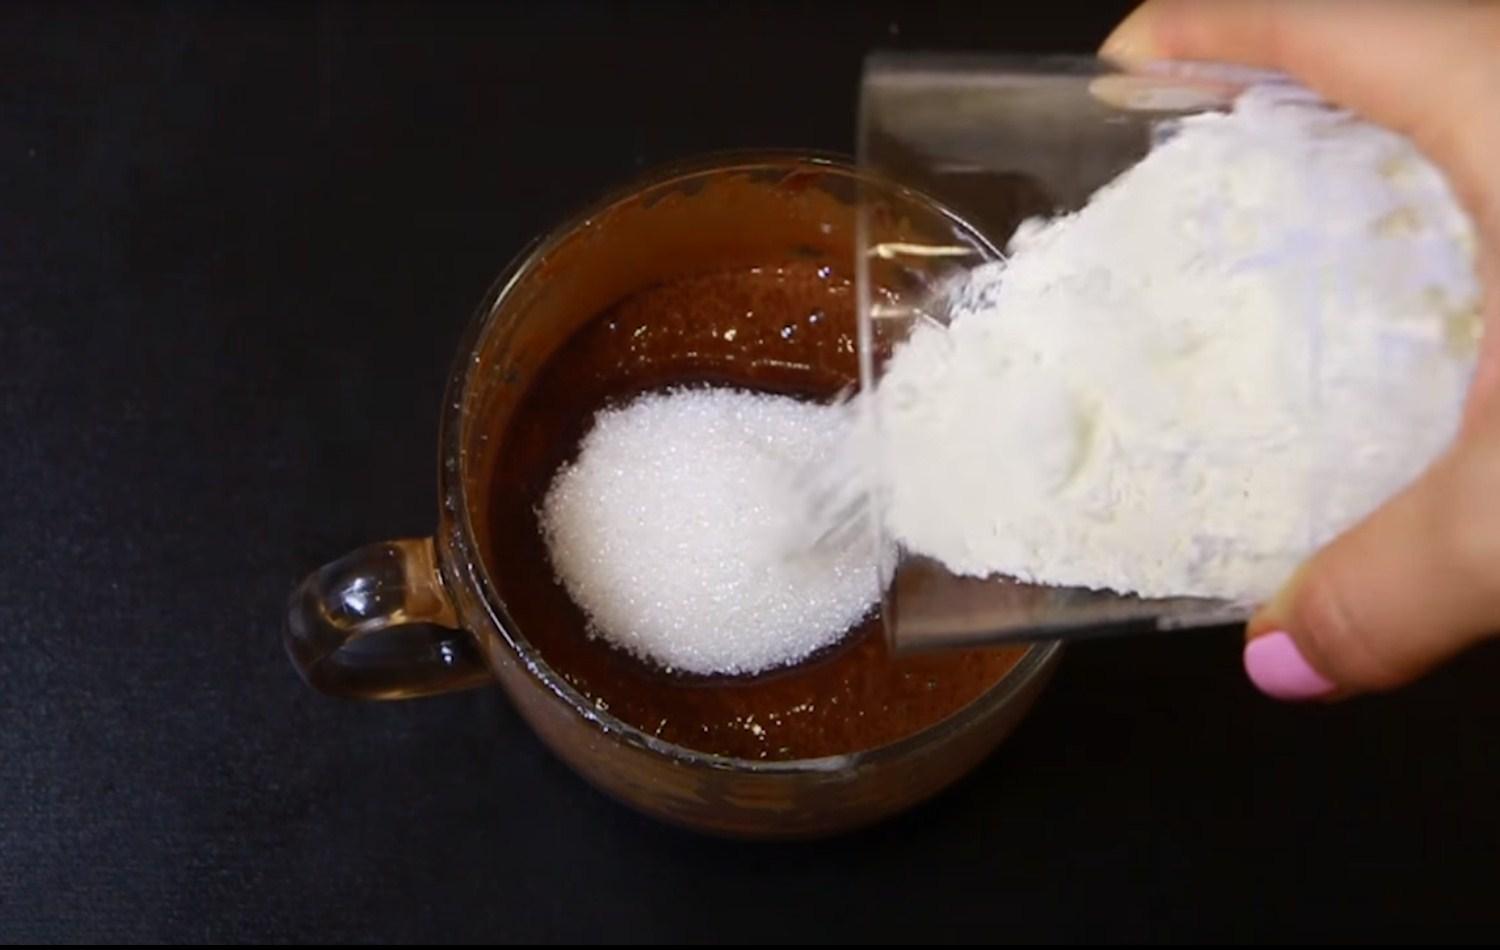
In another mug, combine the butter and chopped dark chocolate. Microwave for 10-20 seconds until the butter melts.
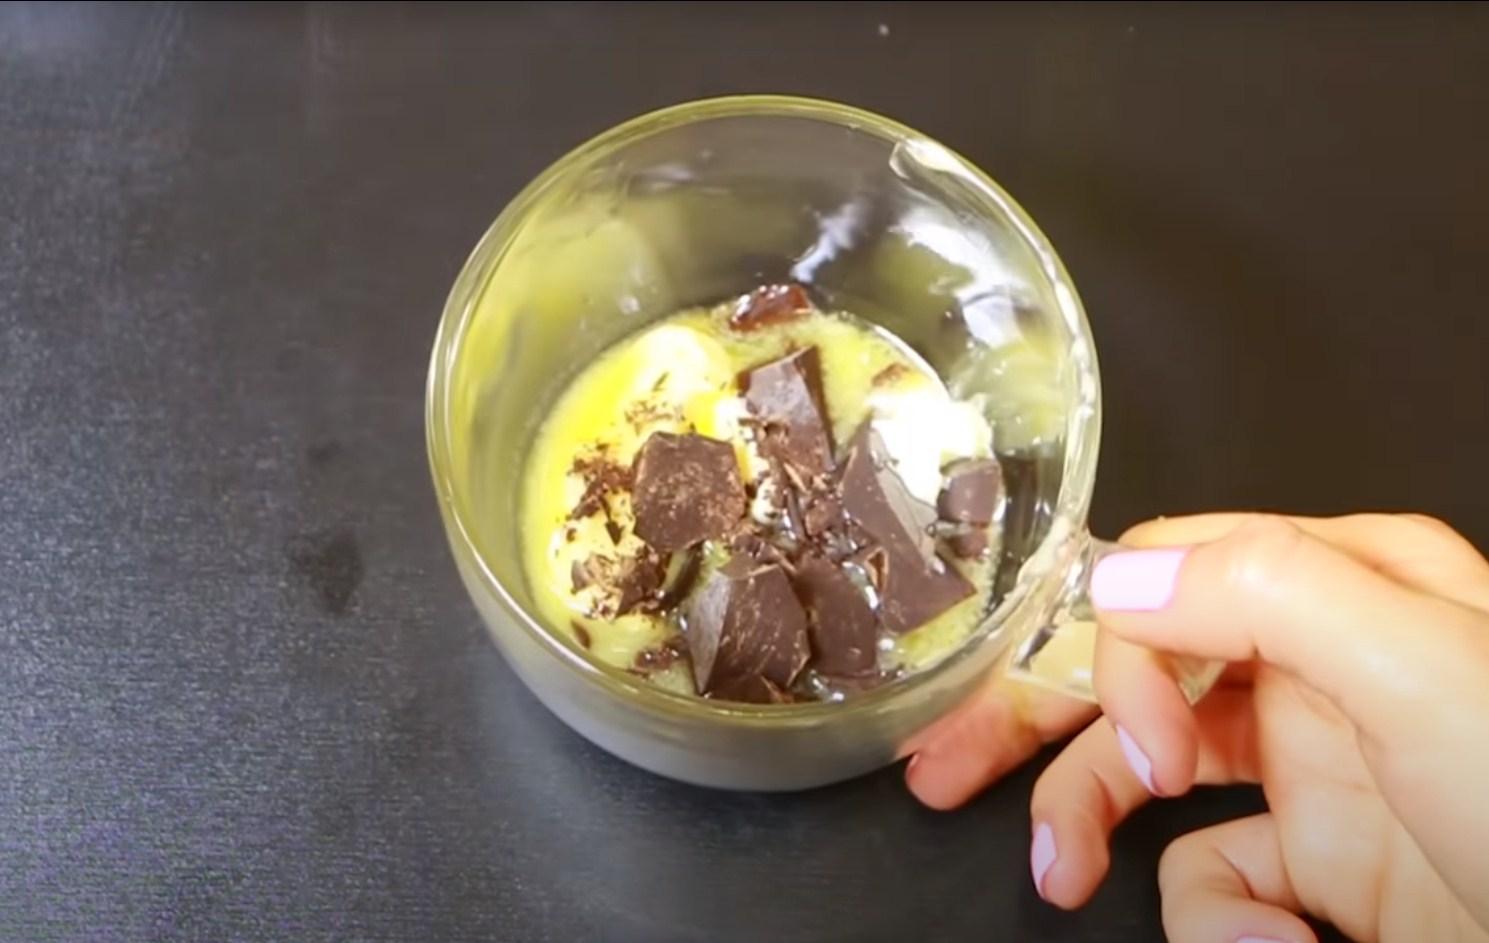
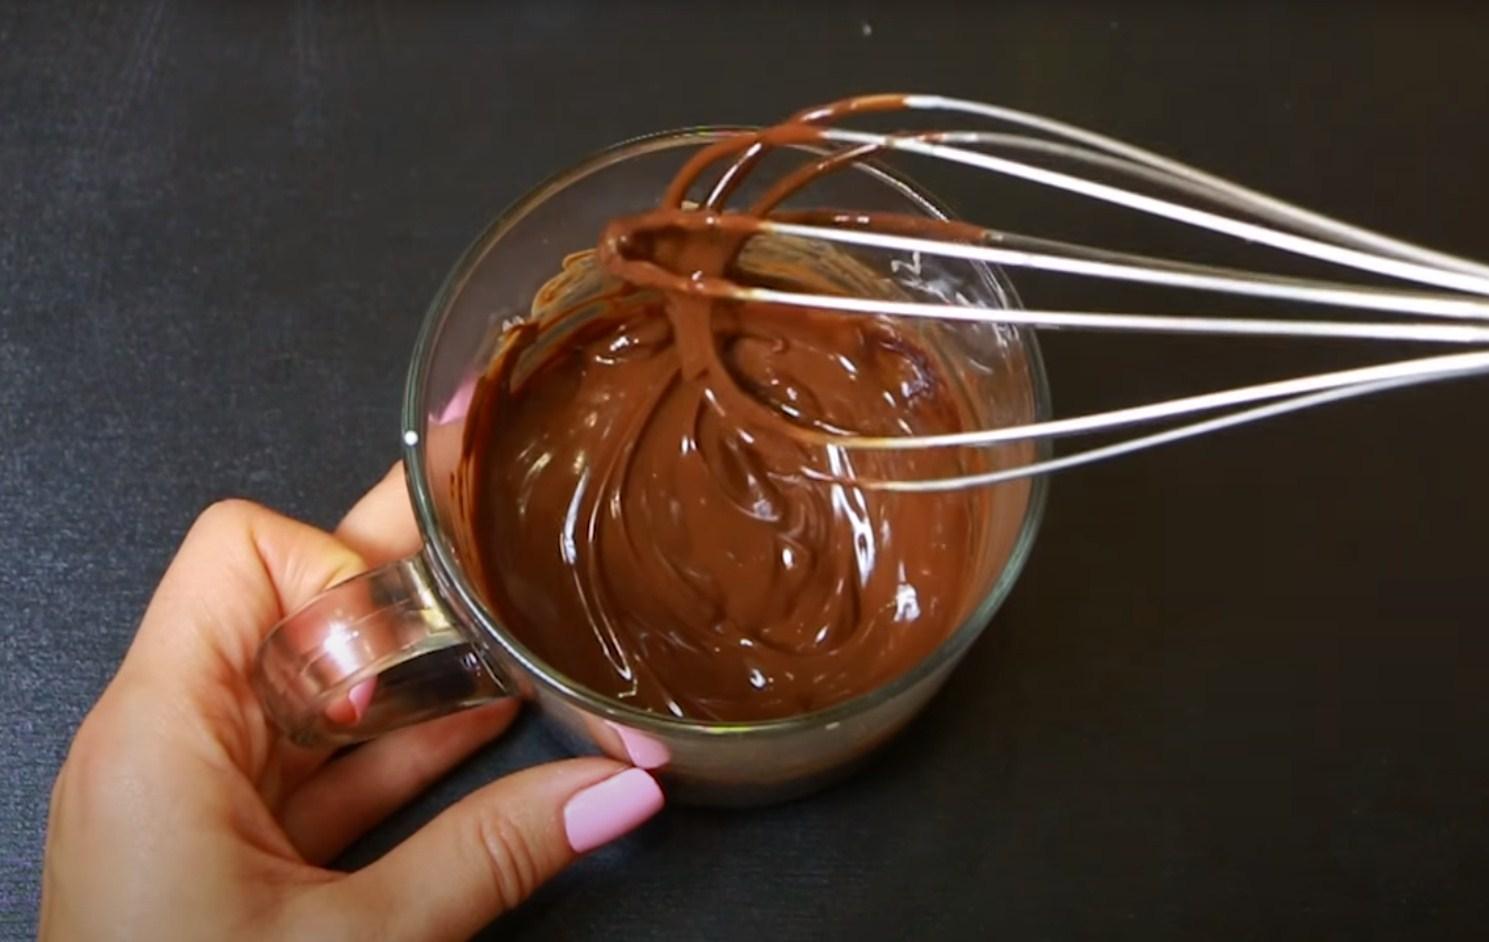
Step 6
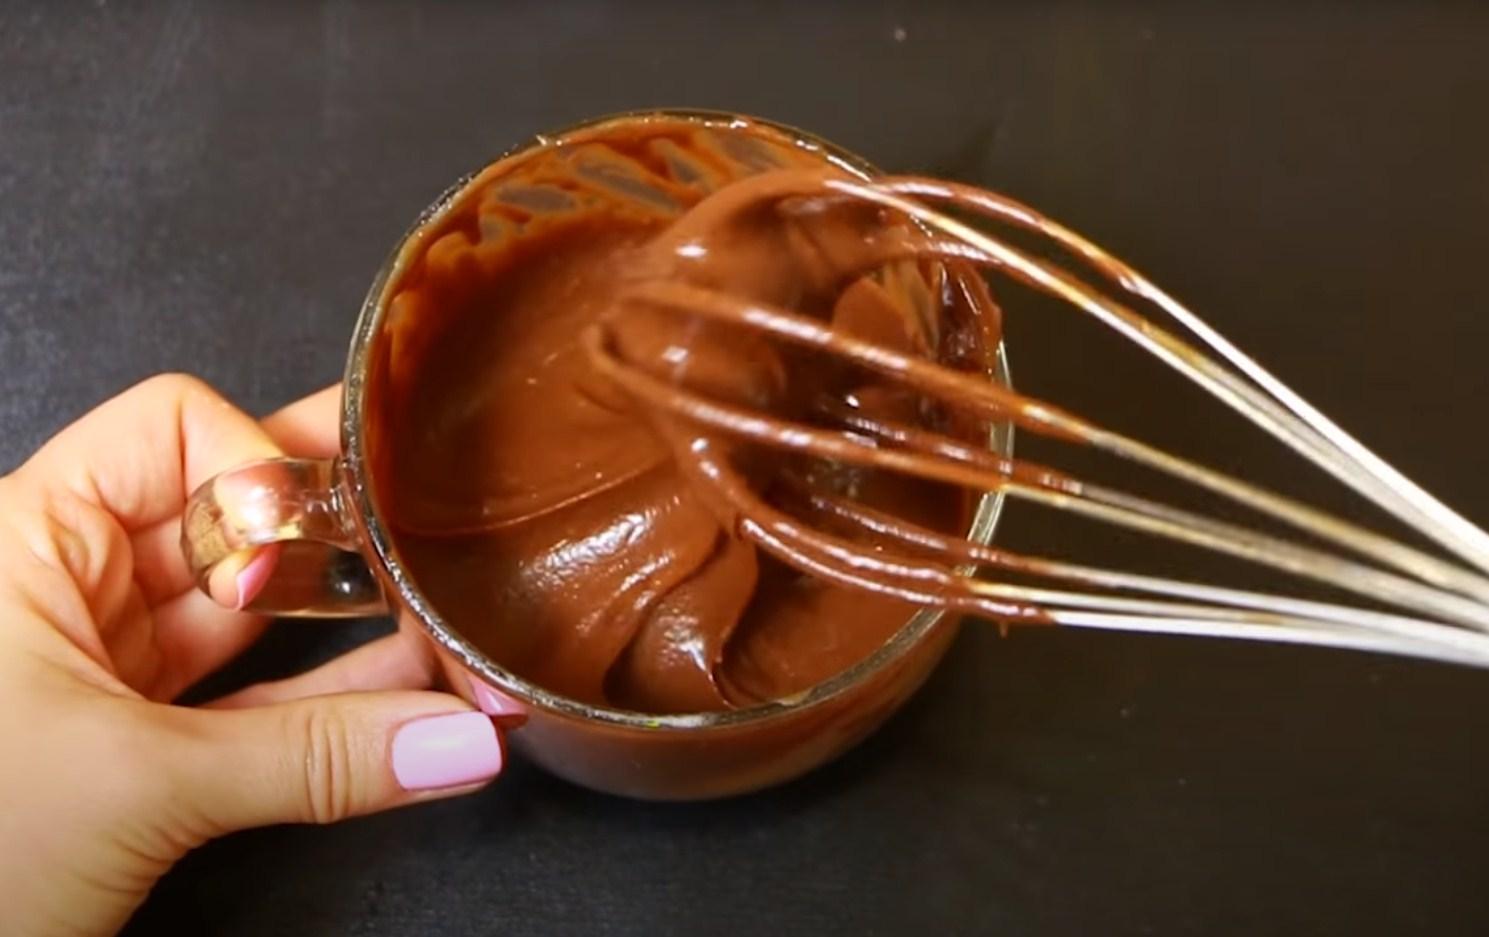
Stir the chocolate and cream mixture until smooth.
Step 7
Add the egg and milk and whisk the mixture thoroughly.
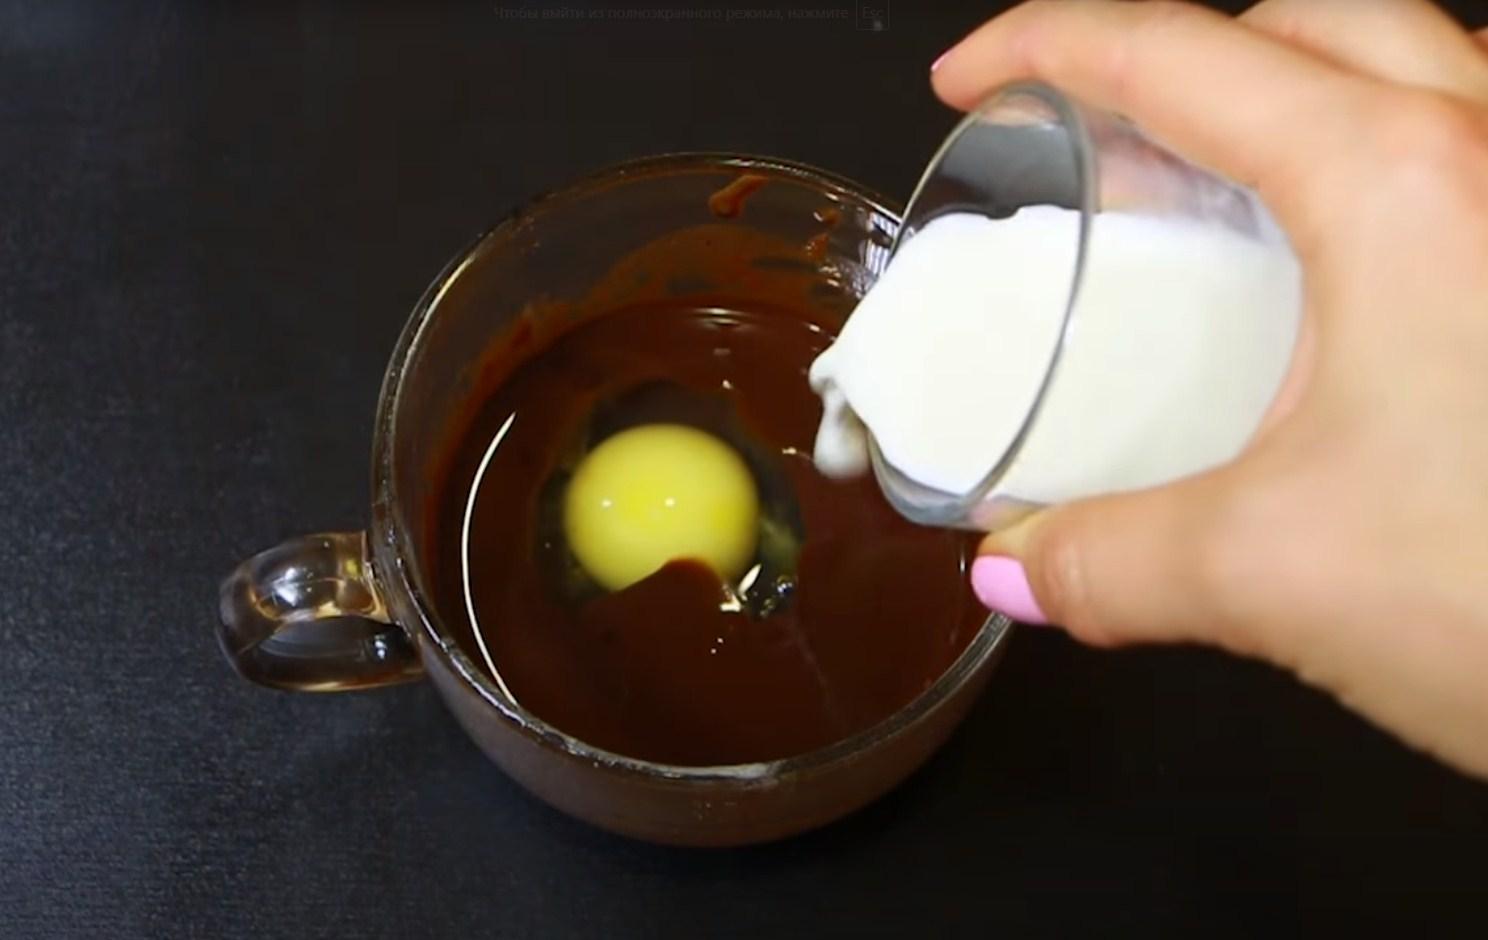
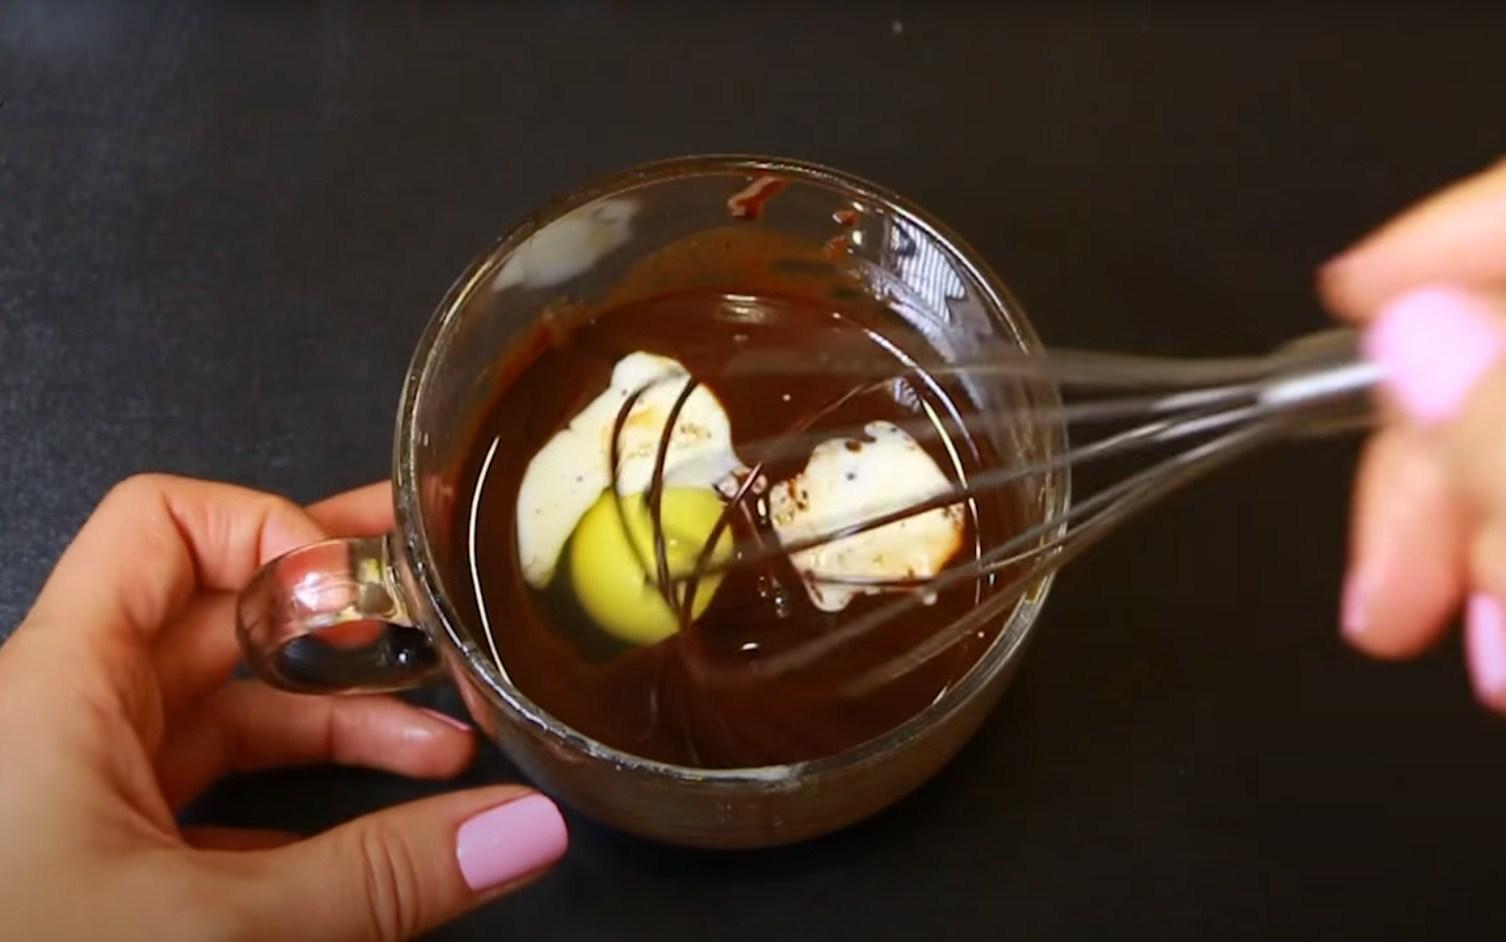
Step 8
Add sugar, salt, flour, and baking powder. Beat until smooth.
Step 9
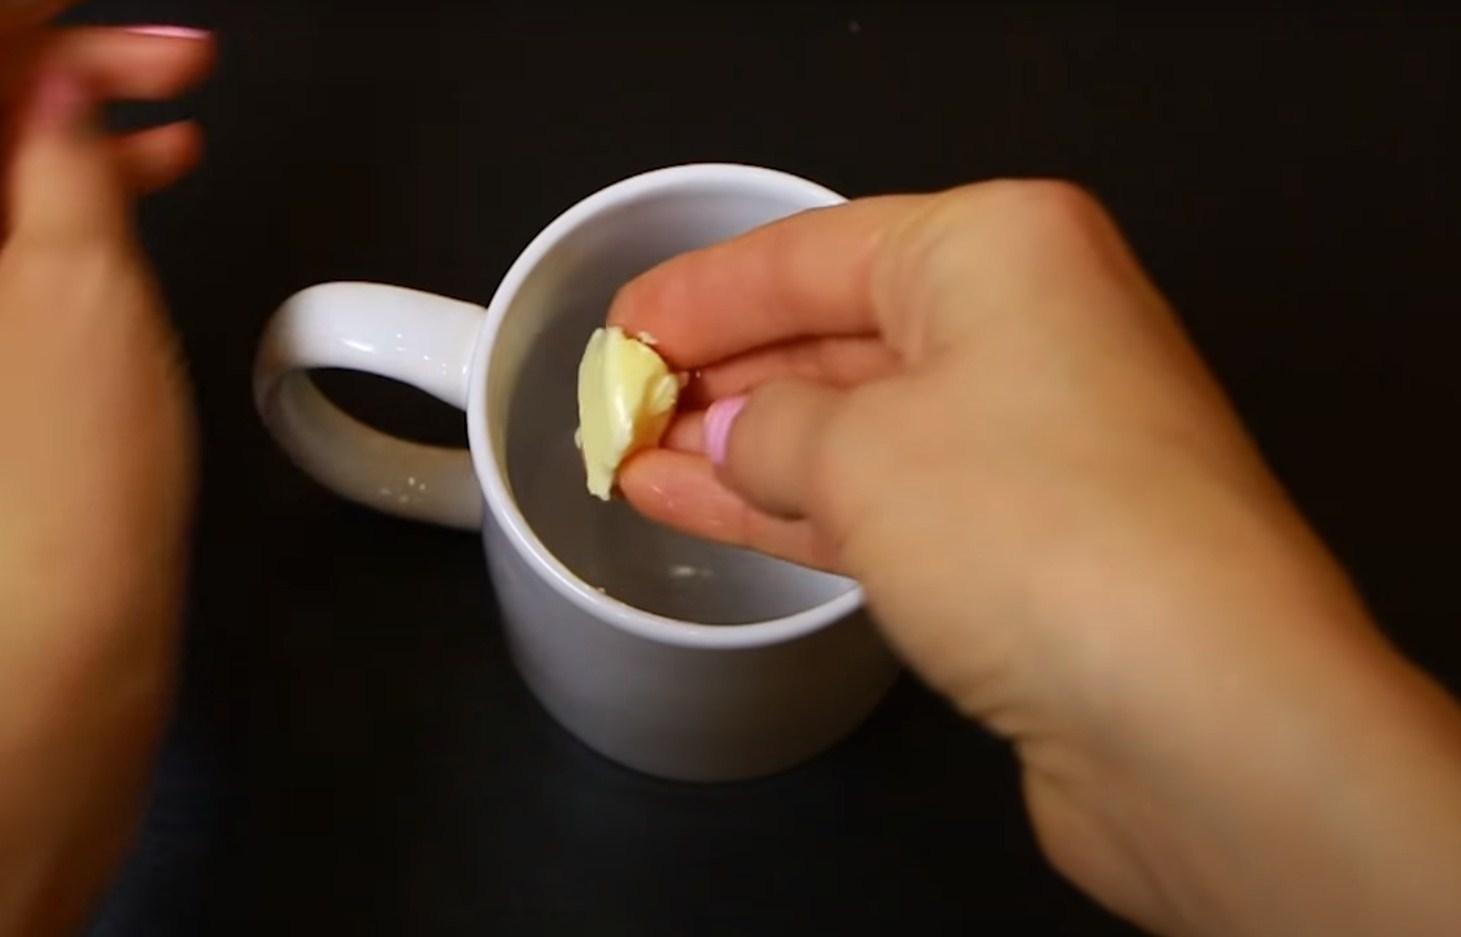
Take a sponge cake pan with a capacity of at least 350 ml. Grease the bottom and sides with butter.
Step 10
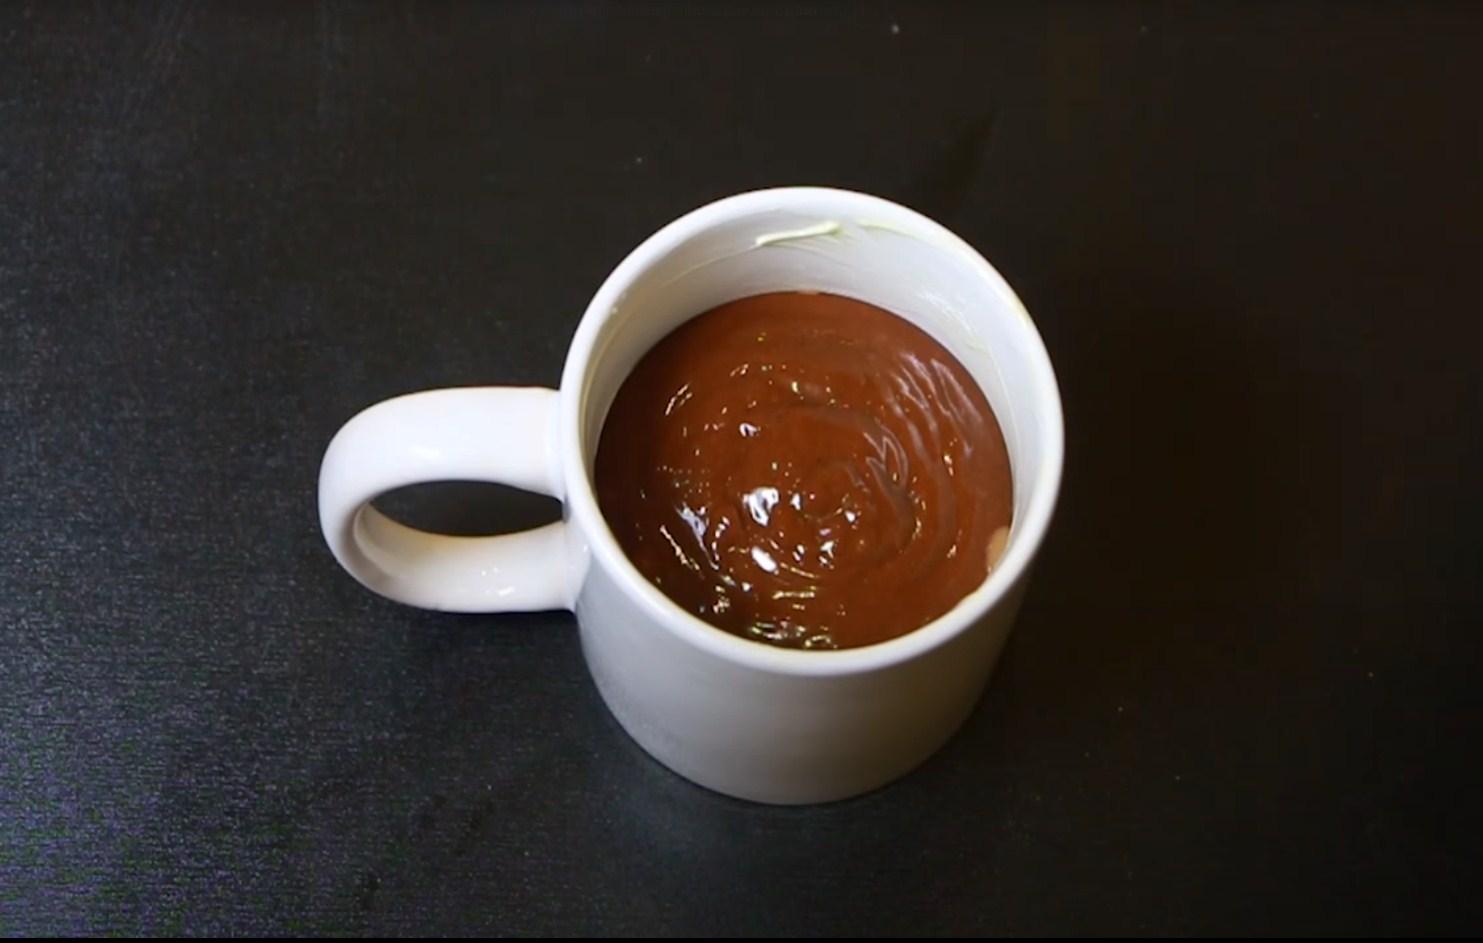
Pour the chocolate mixture into the prepared mug, filling the baking dish no more than halfway. Microwave for 2-3 minutes at 600 watts.
Step 11
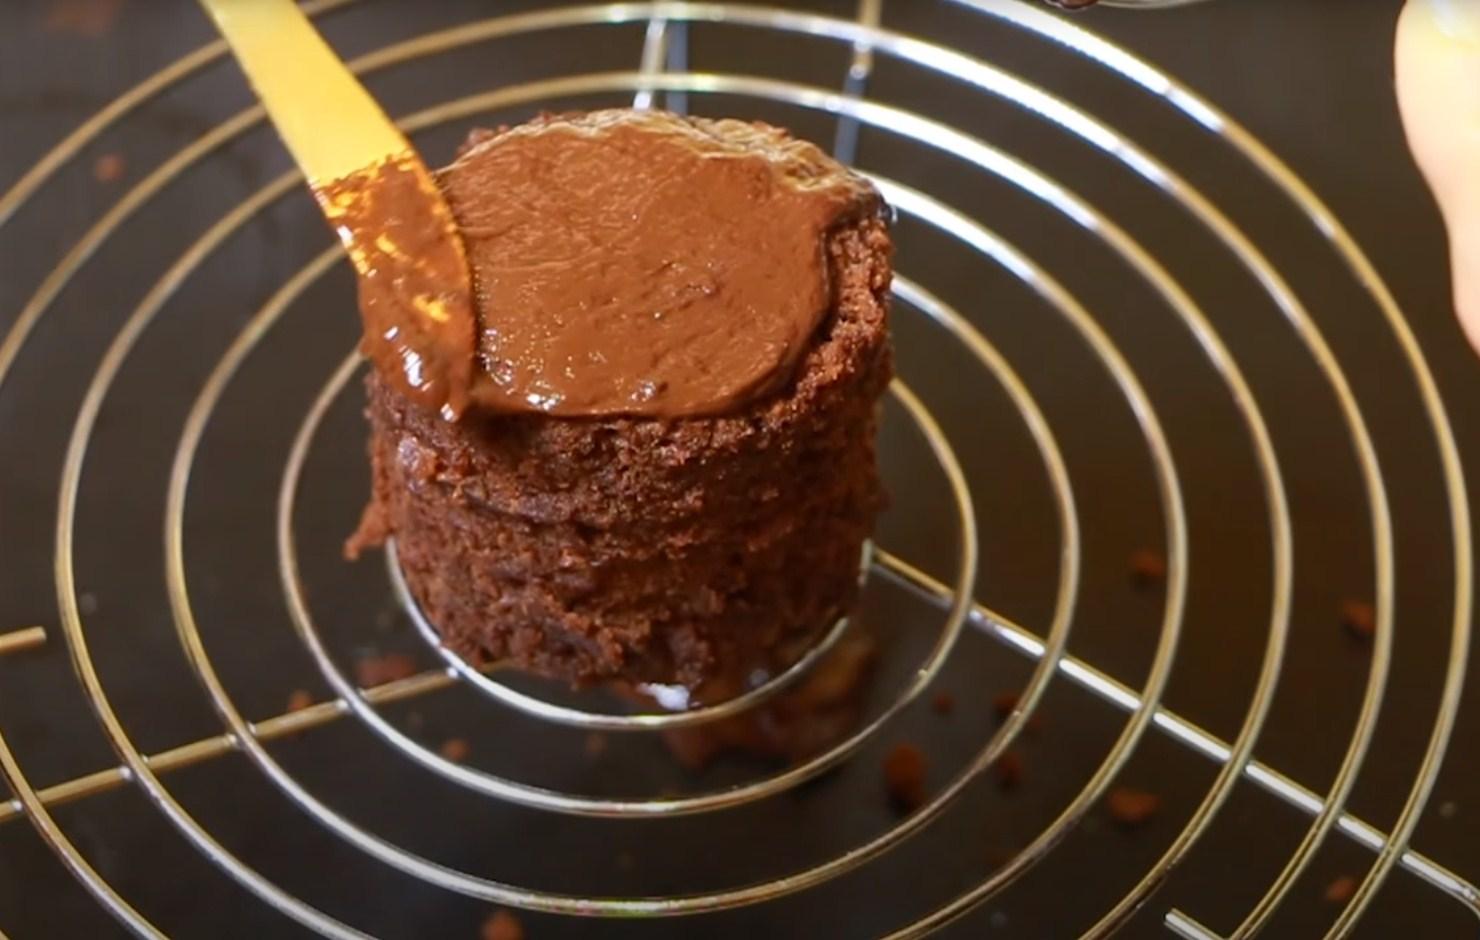
We take the resulting cake out of the mug and place it on a wire rack to cool.

Step 12
Cover the cake with chocolate cream on all sides.
Step 13
Let's start preparing the mastic.
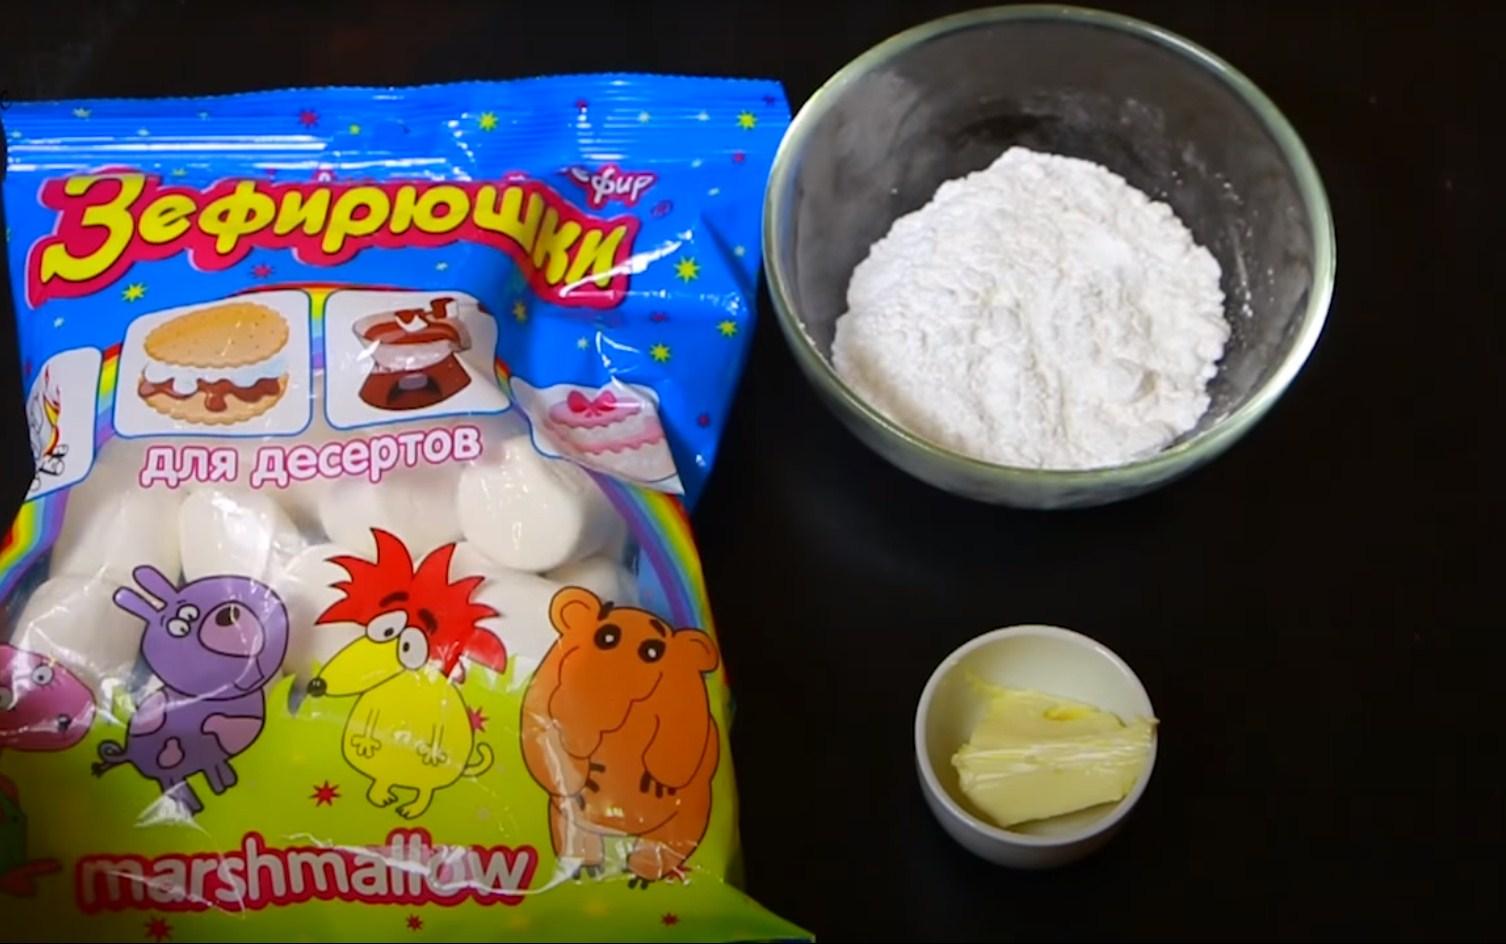
Step 14
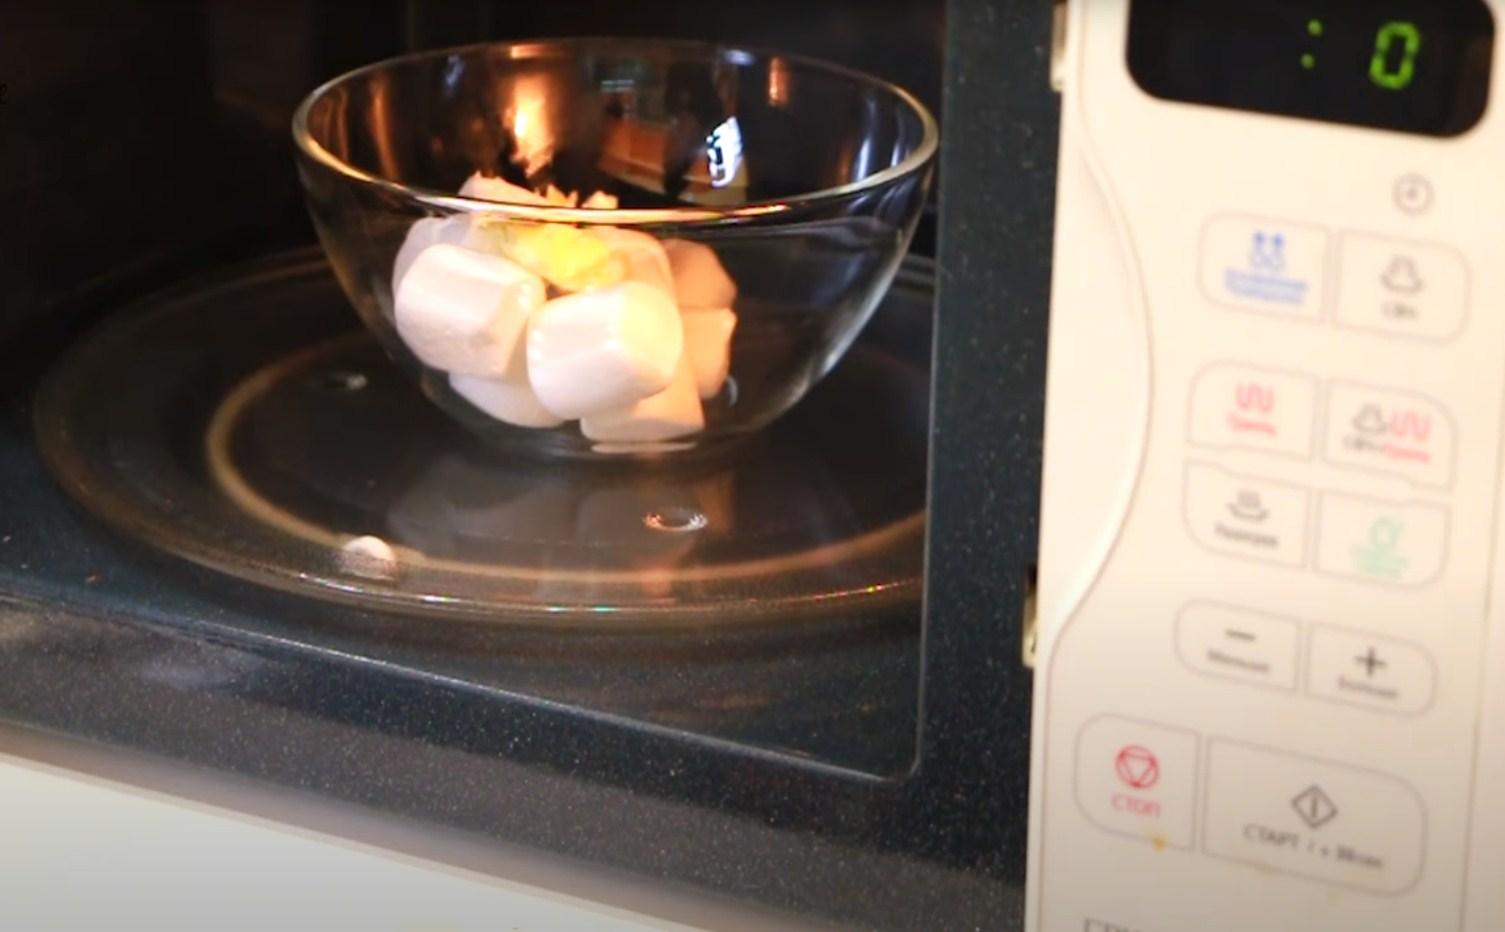
Place the marshmallows and butter in a bowl and microwave for 30 seconds.
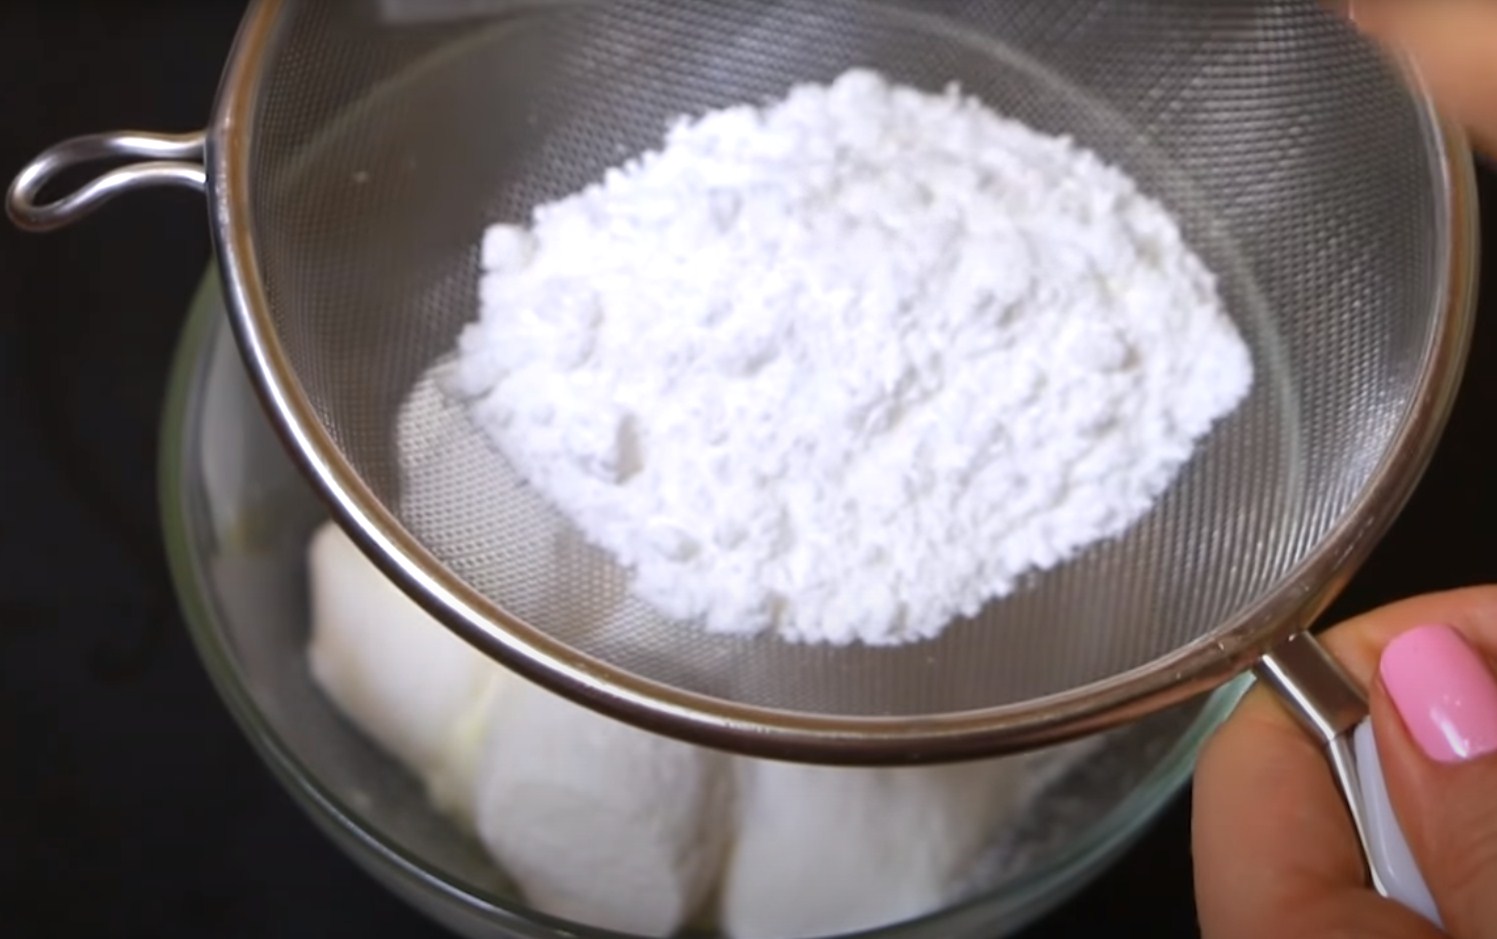
Step 15
Add sifted powdered sugar to the melted marshmallows. Mix thoroughly, first with a spoon, then with your hands. Continue adding powdered sugar until the fondant no longer sticks to your hands and forms a smooth ball. Wrap the fondant in plastic wrap and refrigerate until cool.
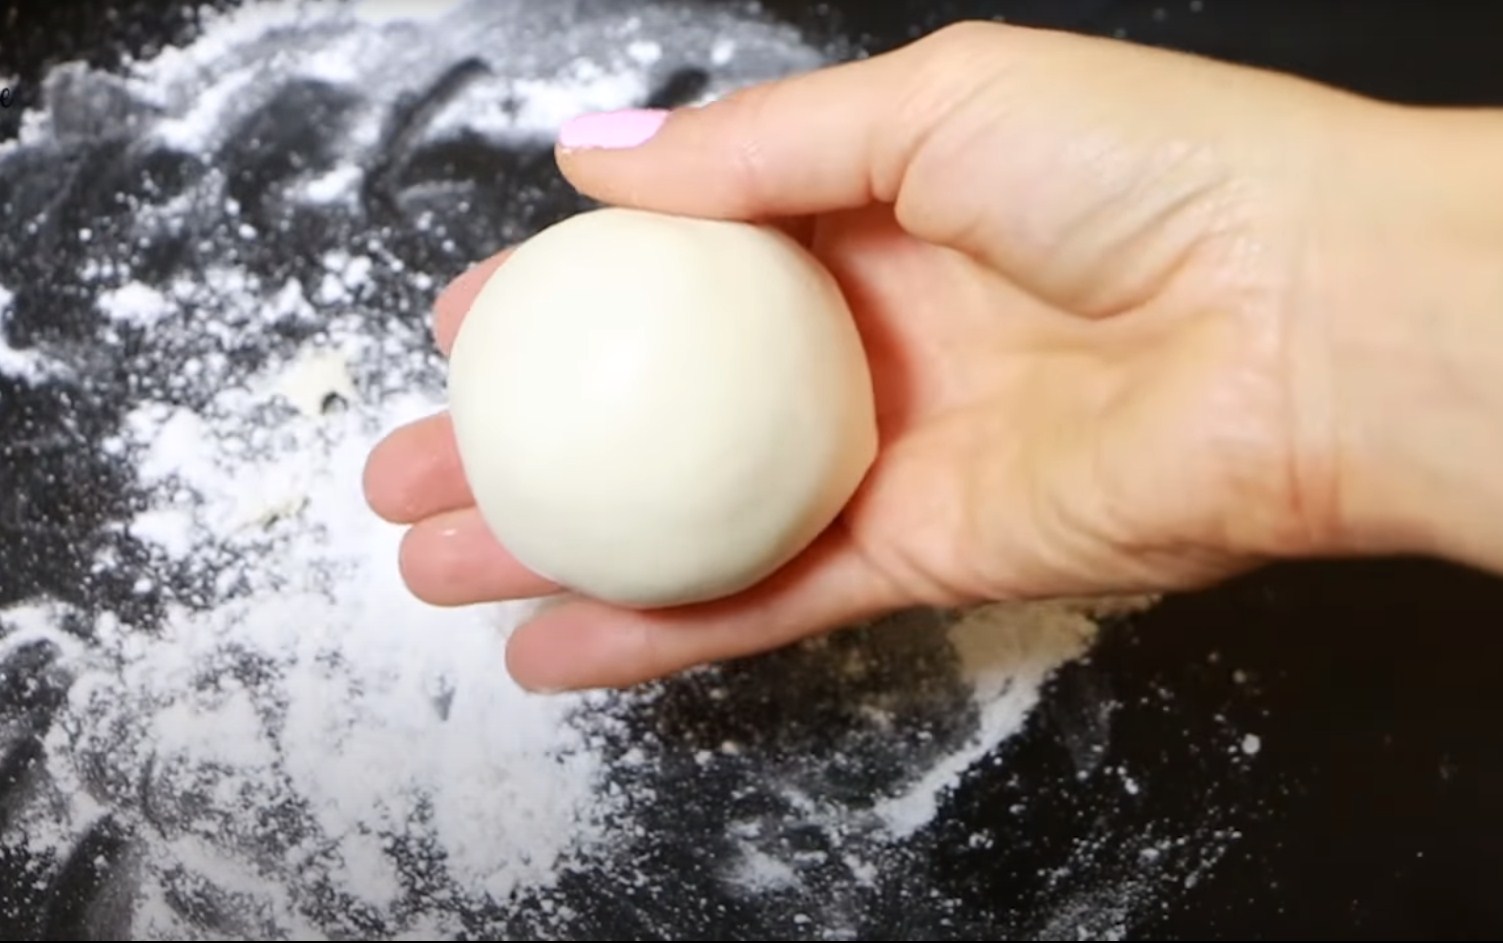
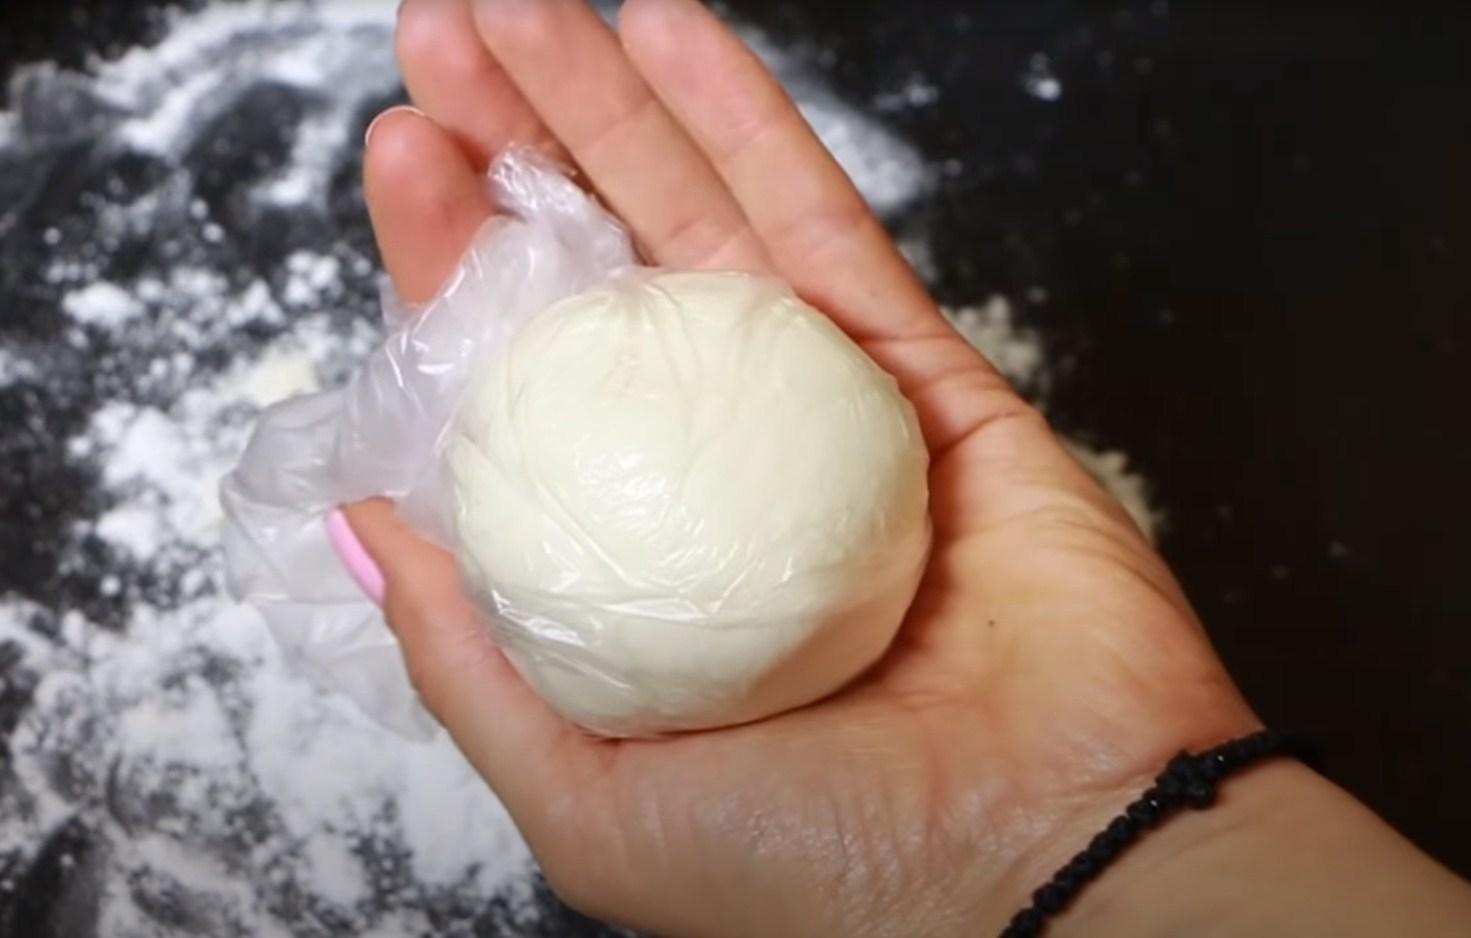
Step 16
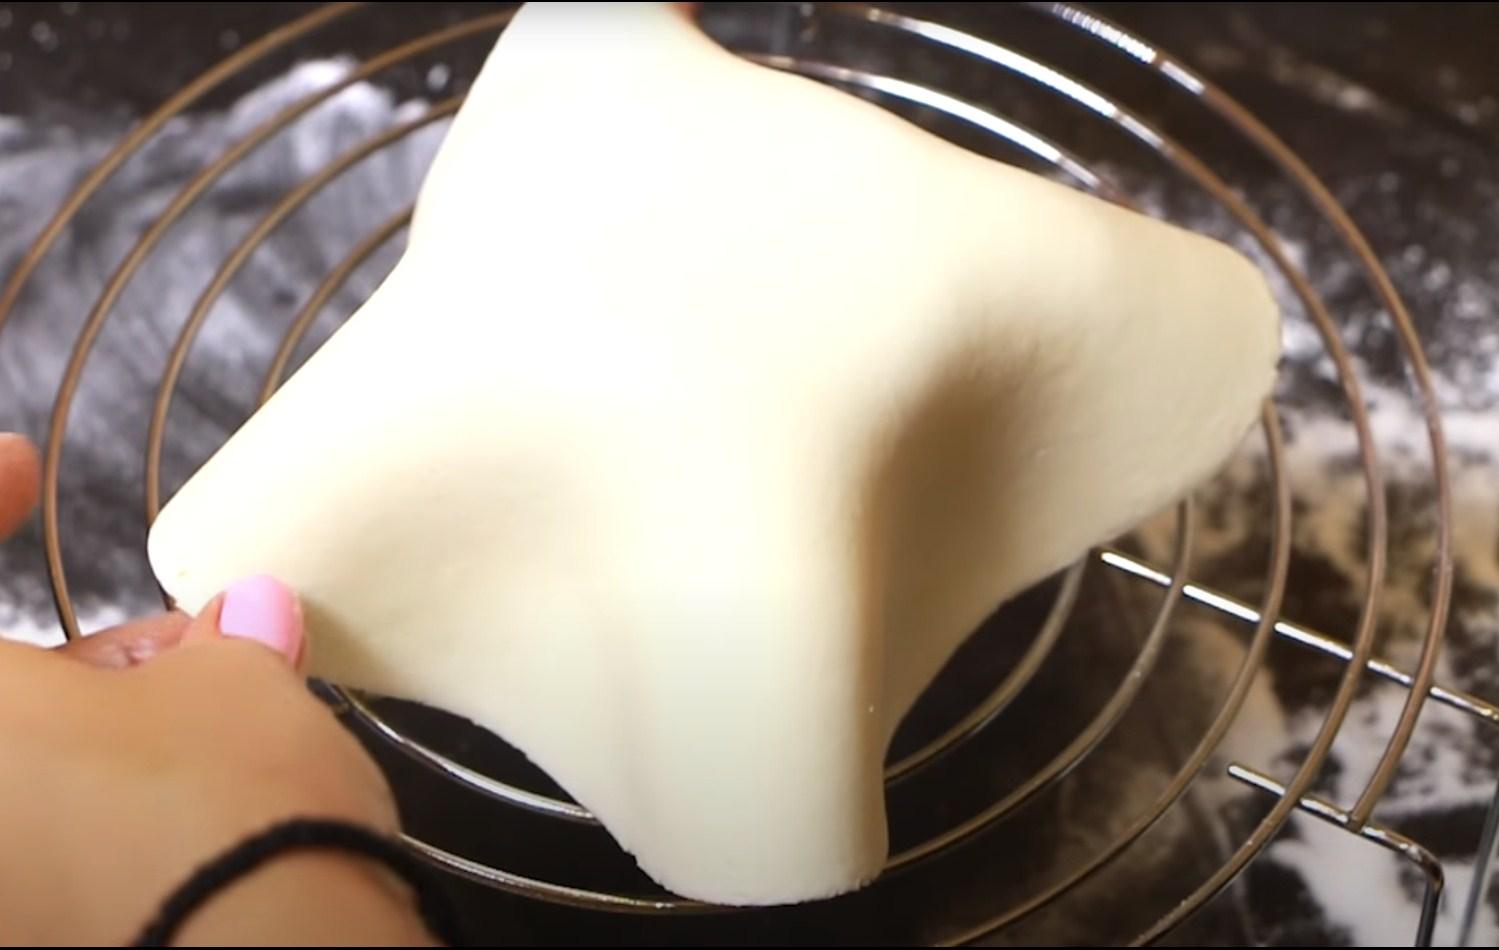
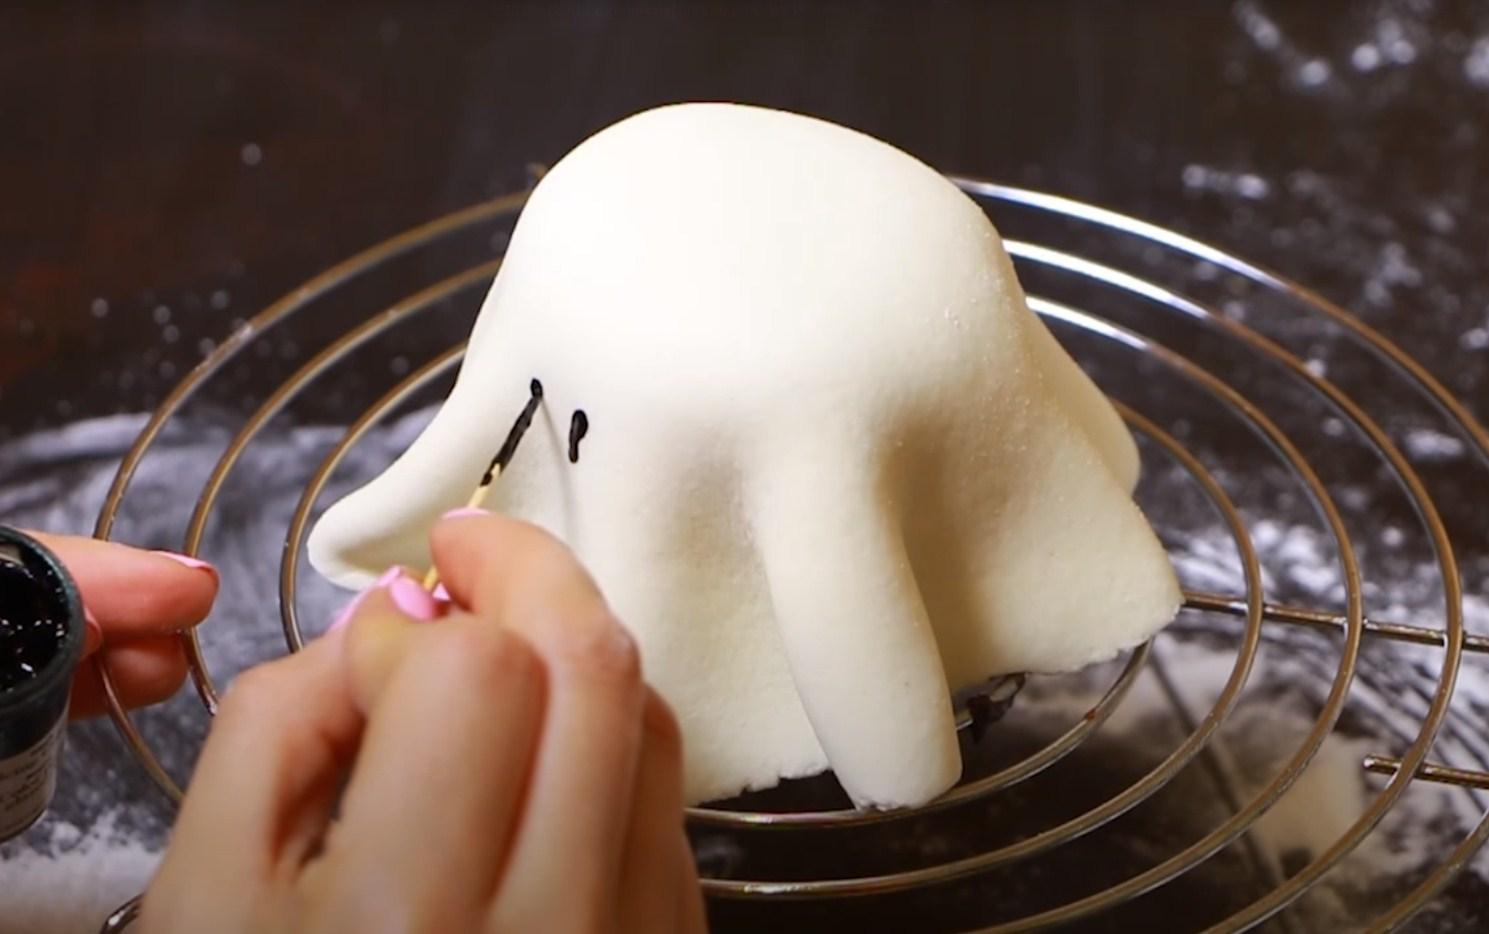
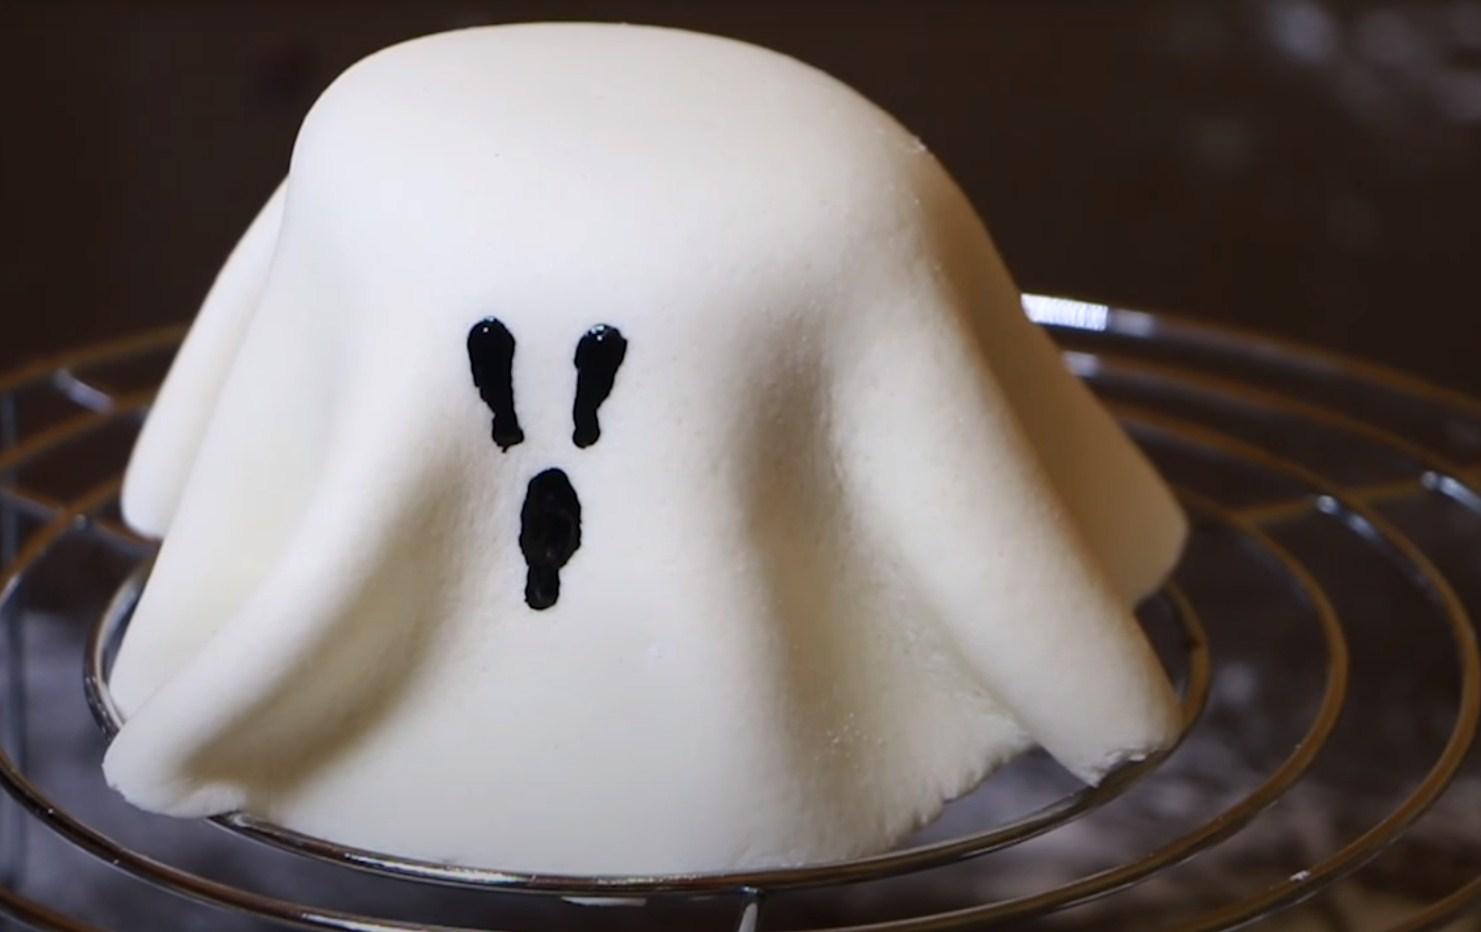
Roll the cooled mastic into a circle on a table dusted with powdered sugar and cover it with the cooled sponge cake. Shape the mastic into the desired shape.
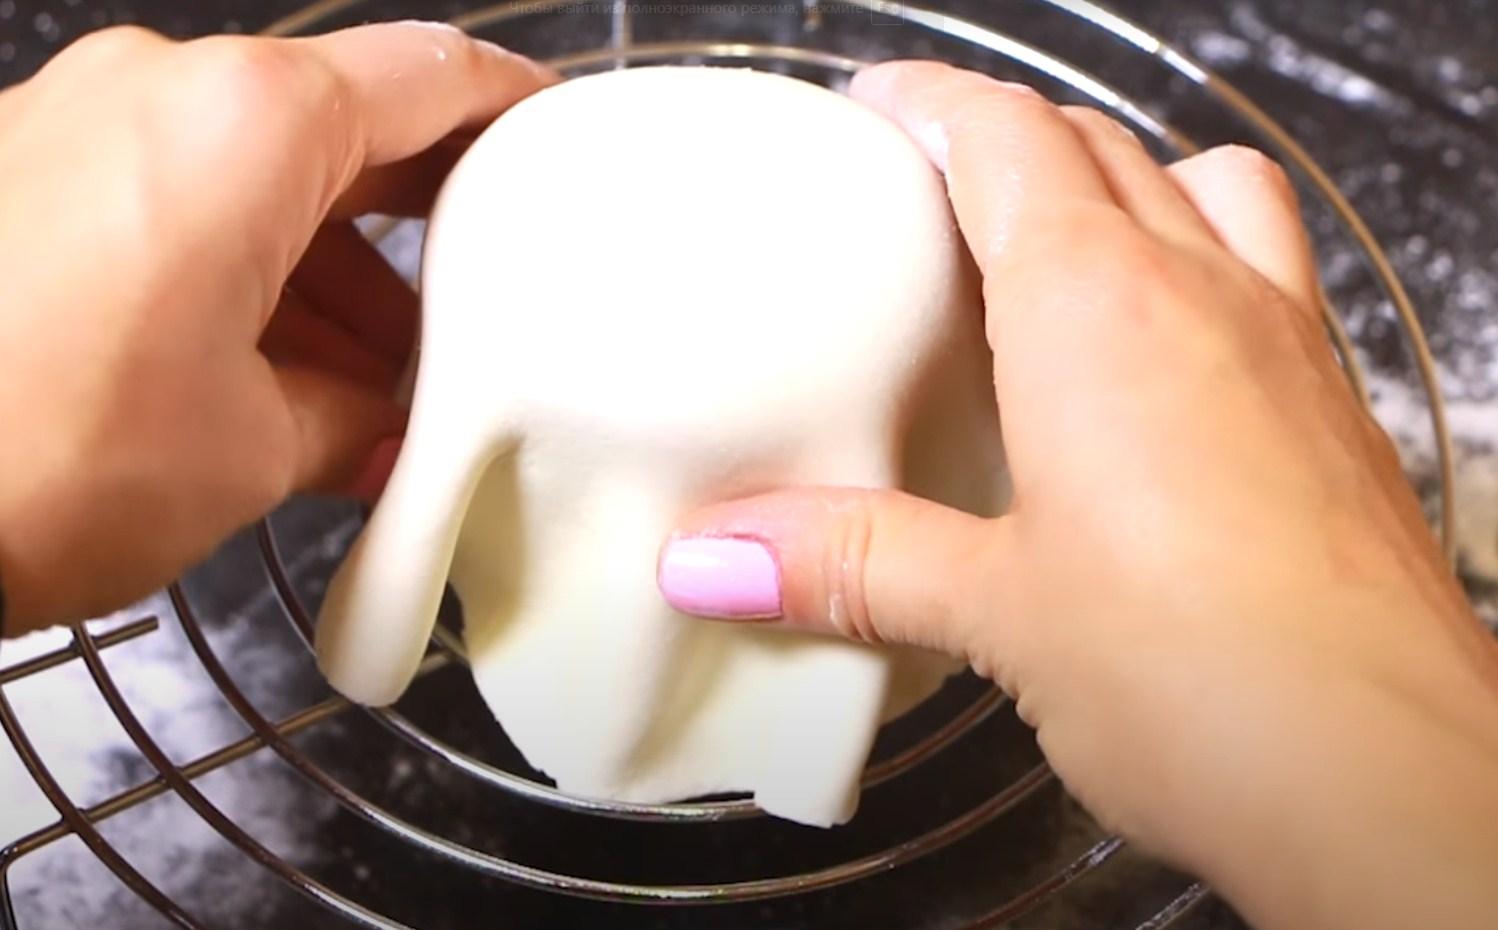
Step 17
Using a toothpick and gel food coloring, draw a ghost face on the fondant. The "Ghost" cake is ready! It's a great Halloween baking idea for kids.
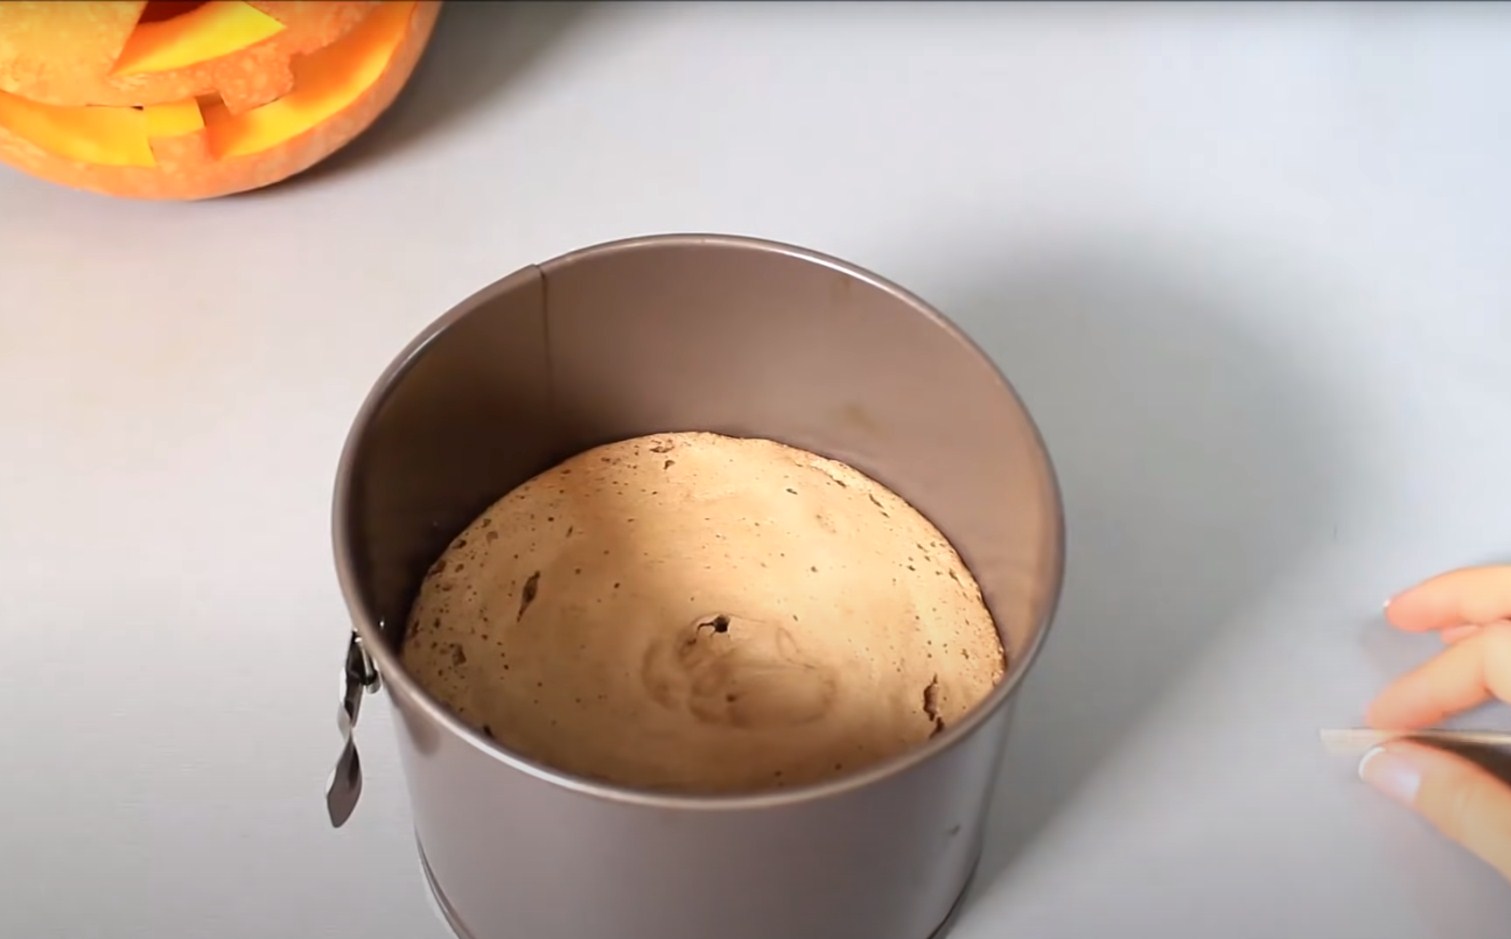
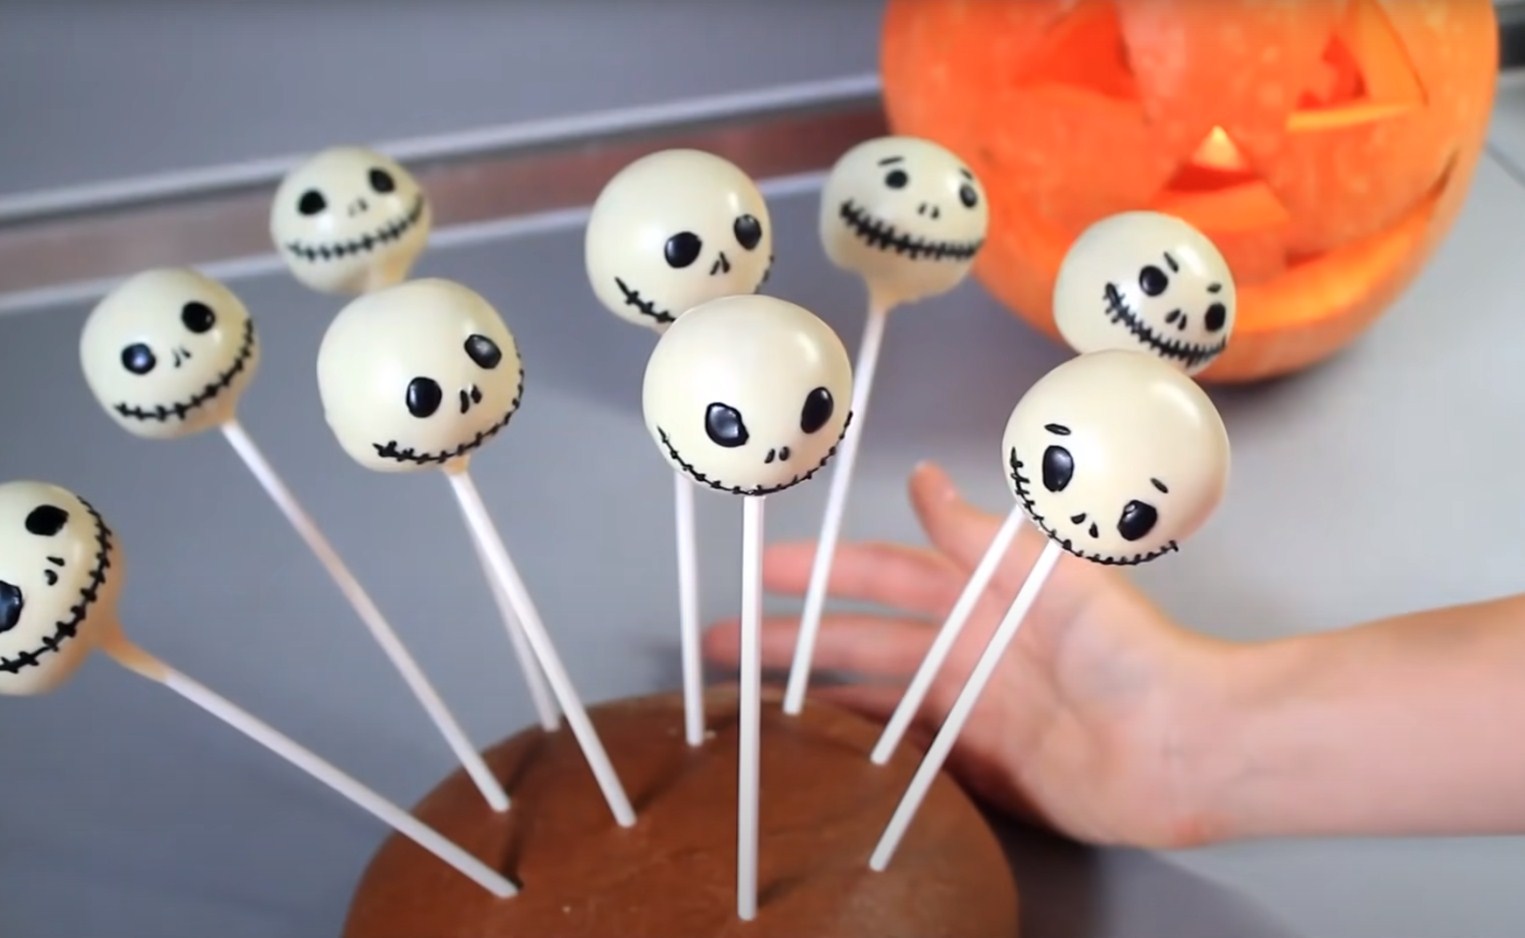
Skull Cake Pops for Halloween
Cake pops are a unique and delicious dessert that looks stunning on any holiday table. They're perfect as a festive treat and a Halloween table decoration. Let's try making these sweet treats ourselves.
Ingredients
Biscuit:
- Eggs – 2 pcs.
- Flour – 1/2 cup
- Sugar – 1/2 cup
- Cocoa – 2 tbsp.
Cream:
- Butter – 50 g
- Powdered sugar – 50 g
- Cream (20%) – 40 g
Glaze
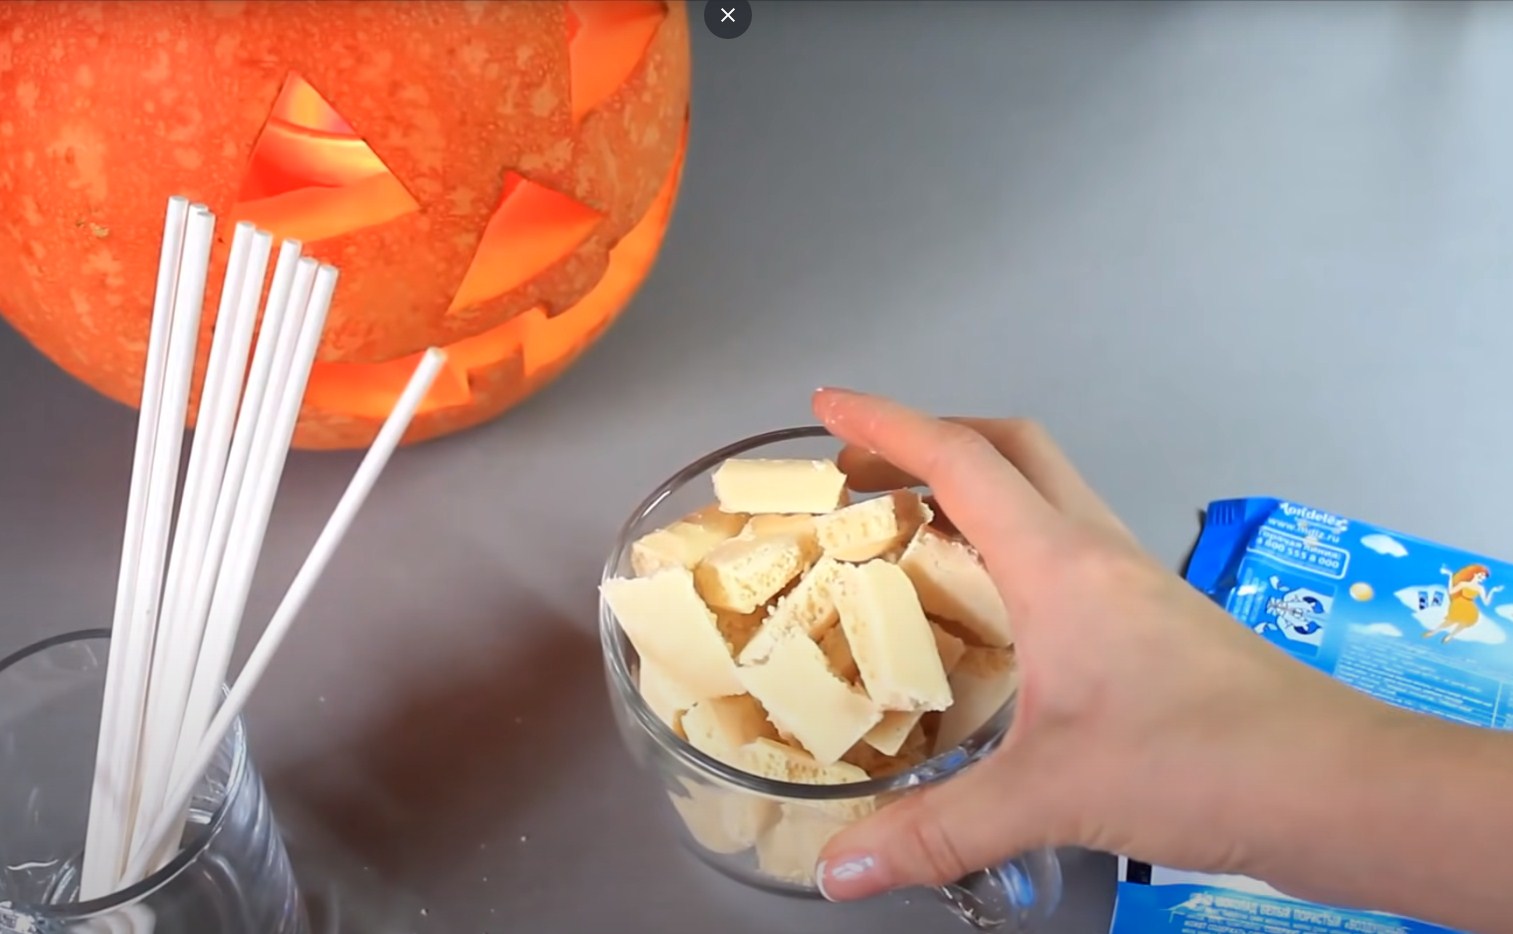
- White chocolate – 300 g
- Food coloring
- Cake pop sticks or skewers
Cooking time: 40-60 minutes
Servings: 10
Step-by-step recipe
Step 1
We prepare all the necessary ingredients for baking the biscuit.
Step 2
Beat eggs and sugar using a mixer.
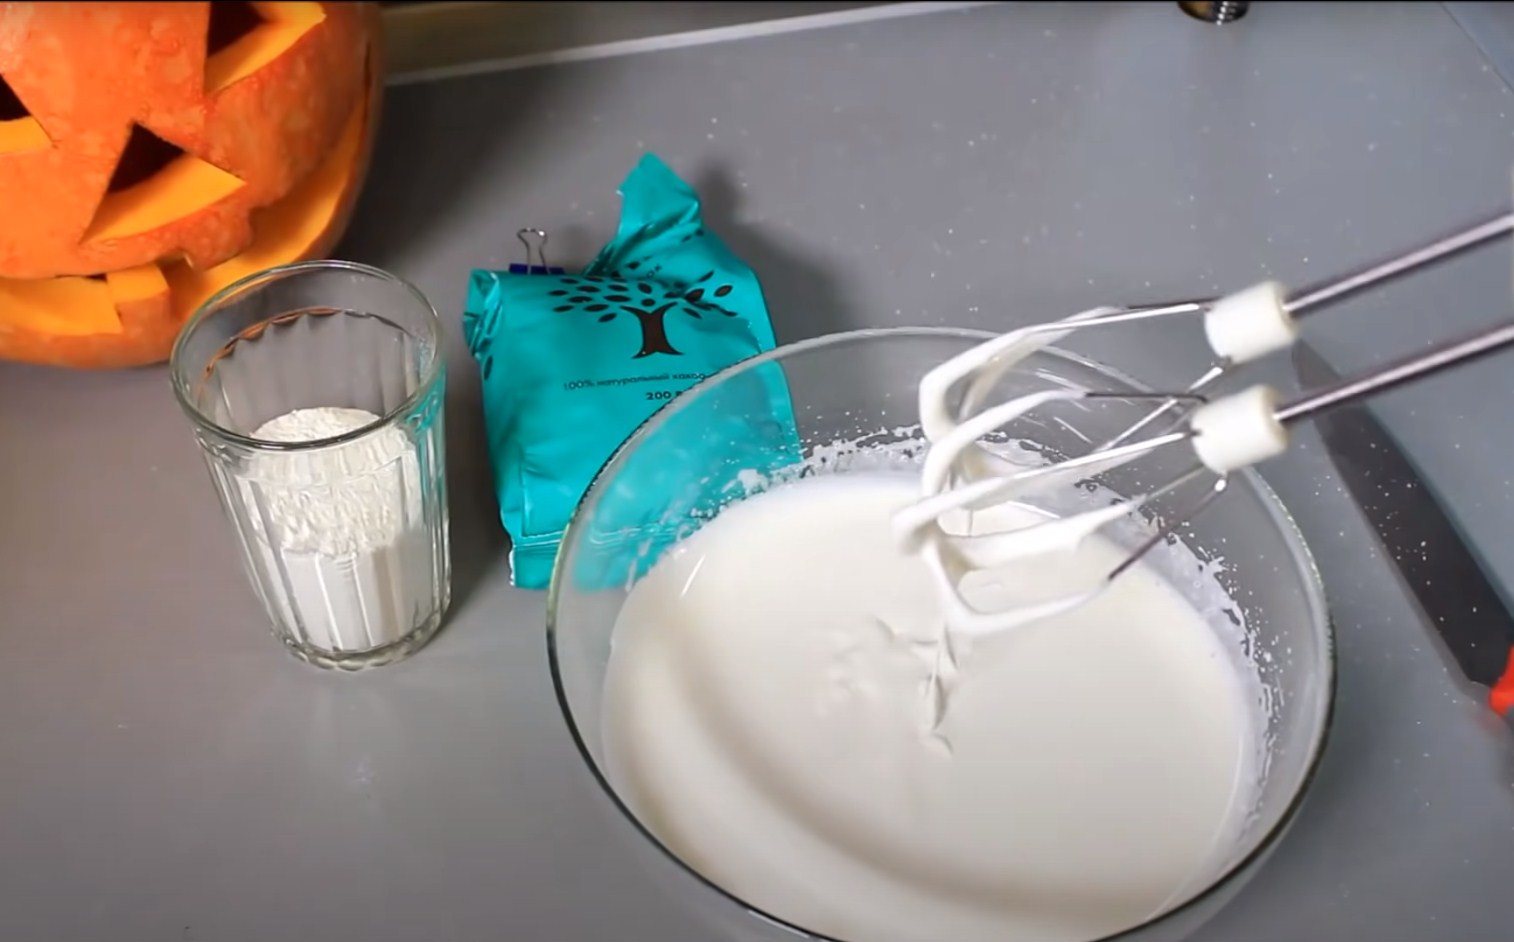
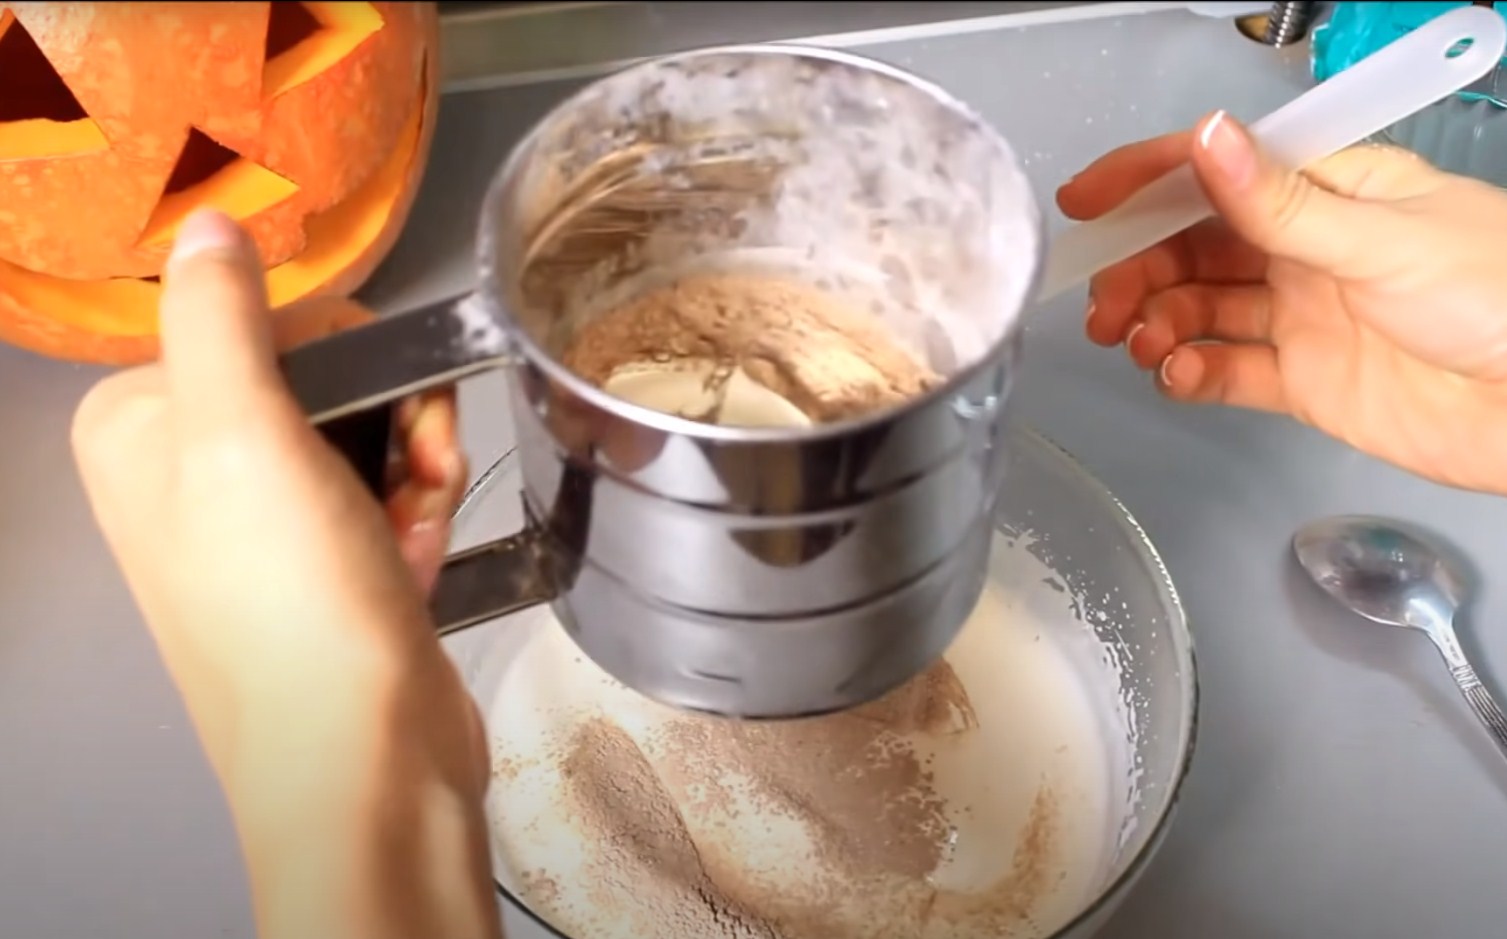
Step 3
Mix the flour with cocoa and sift it into the egg mixture. Gently stir until smooth.
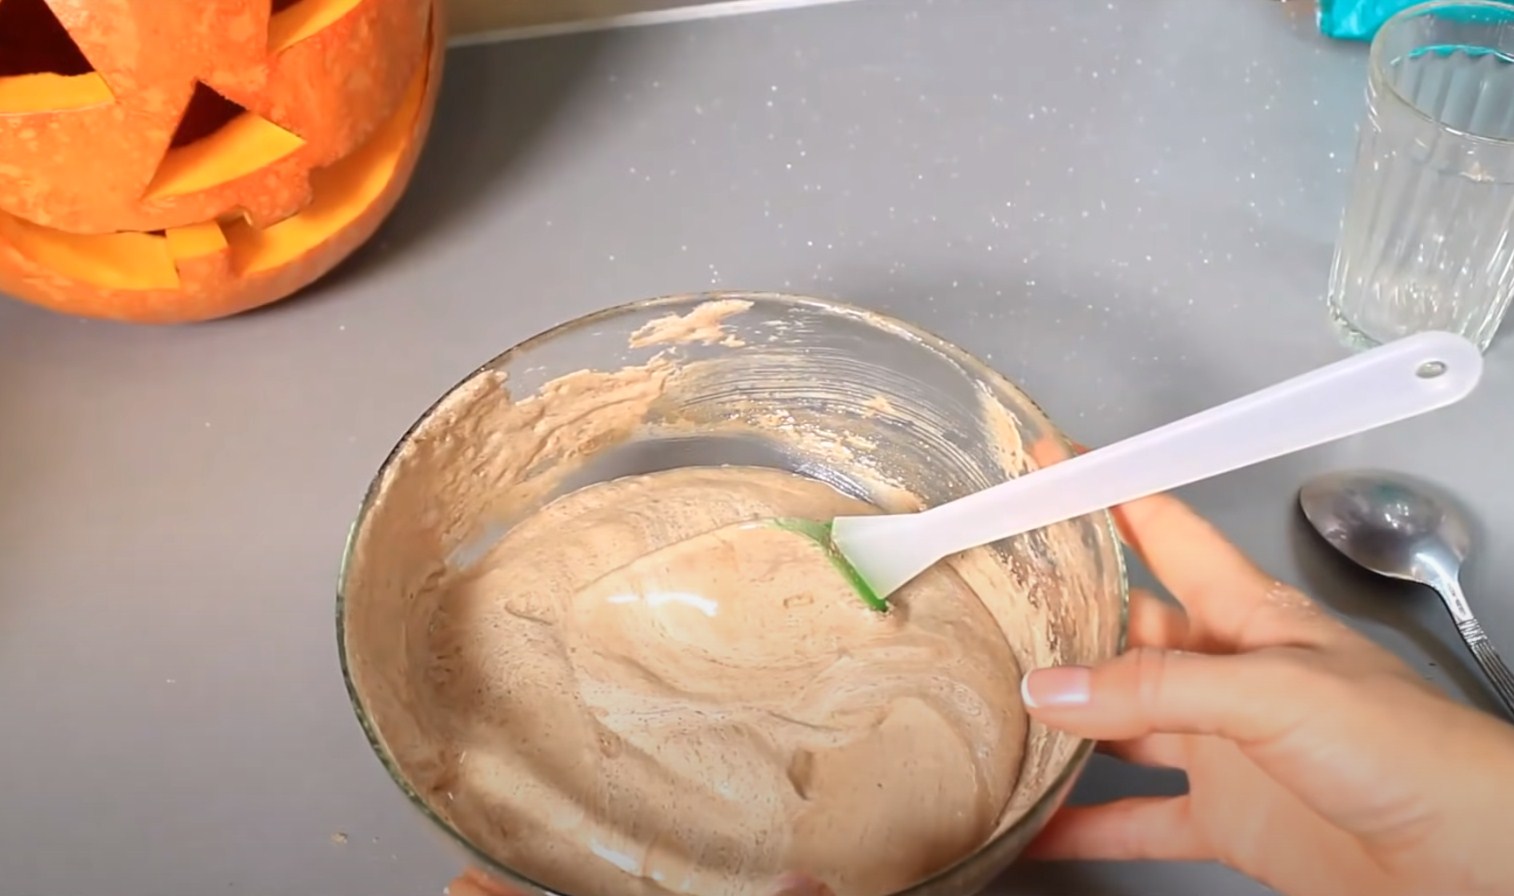
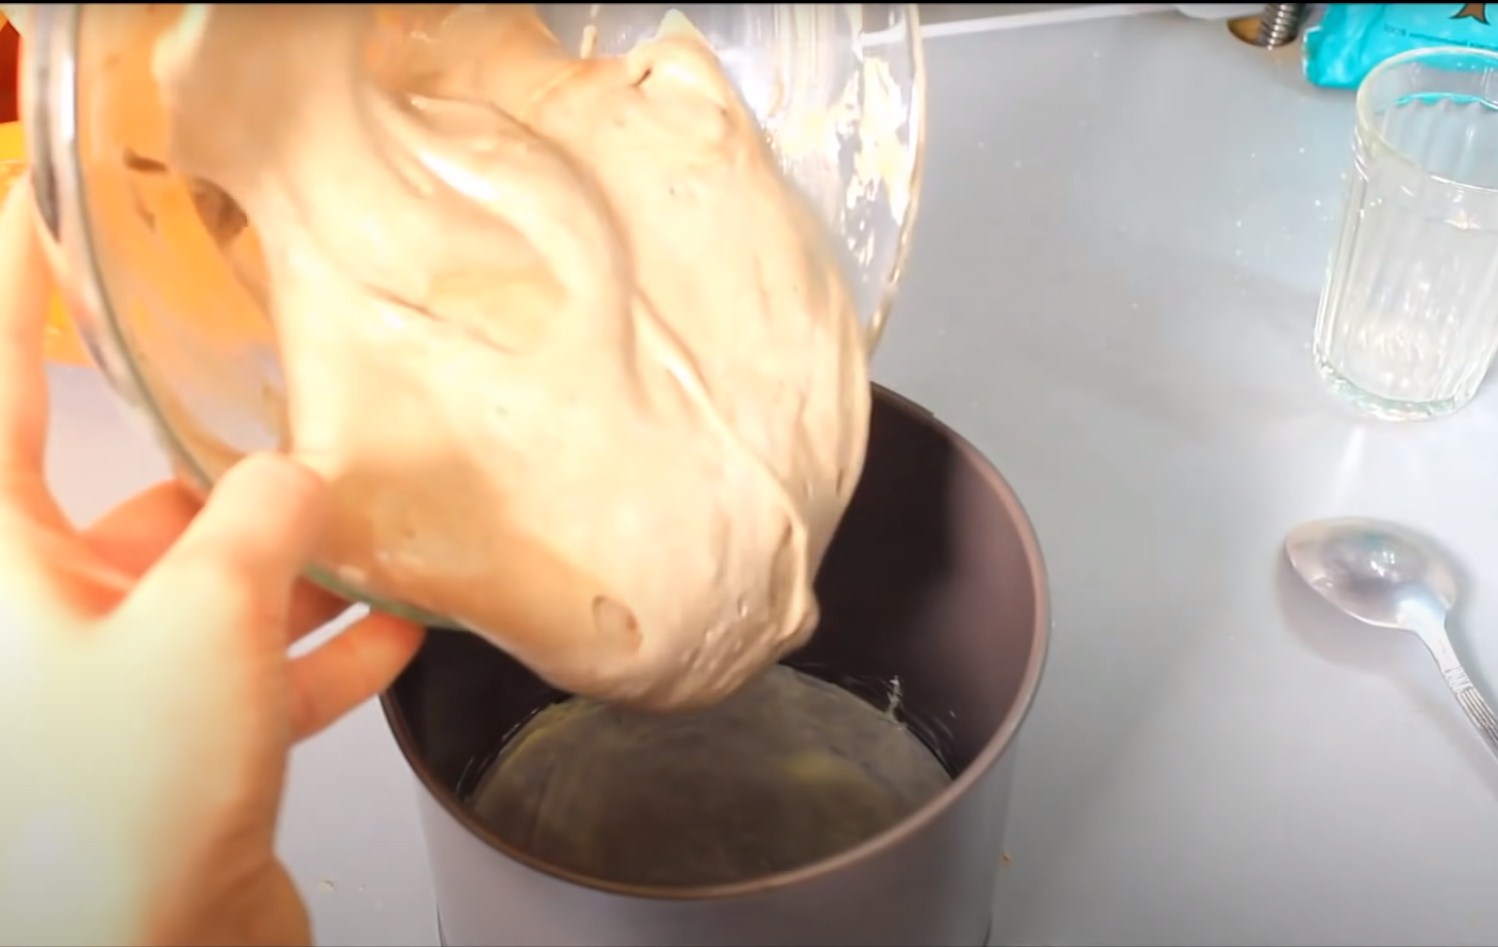
Step 4
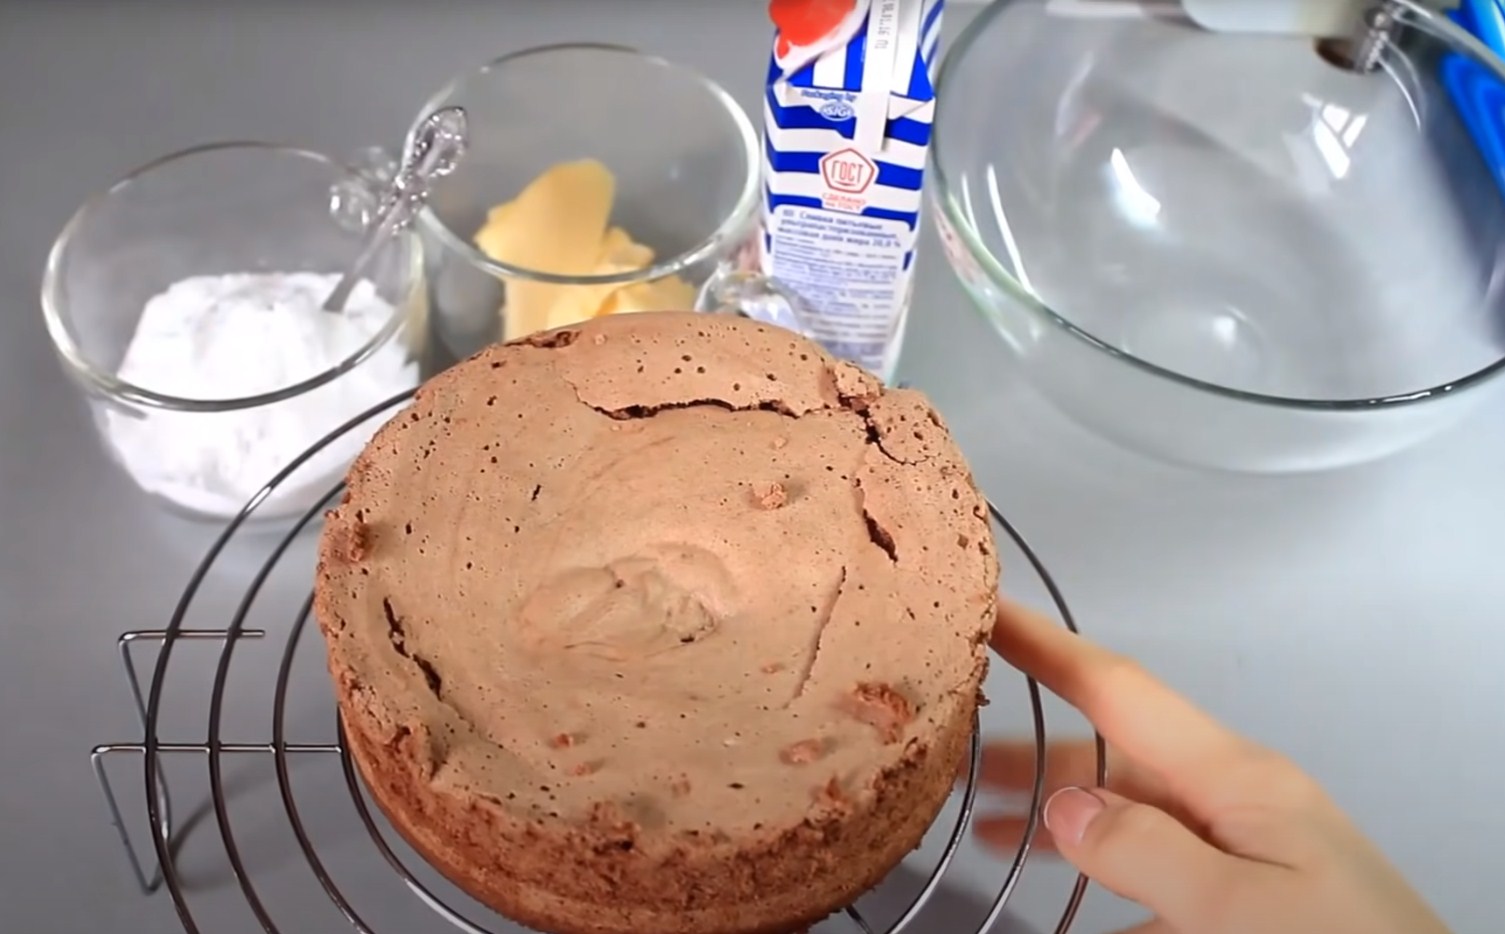
Line the bottom of a springform pan with parchment paper and grease with butter. Place the dough into the pan.
Step 5
Place in the oven for 20-30 minutes. Check for doneness with a toothpick. Cool the finished sponge cake and remove from the pan.
Step 6
Cut off the hard crust from the biscuit and leave it in a separate container.
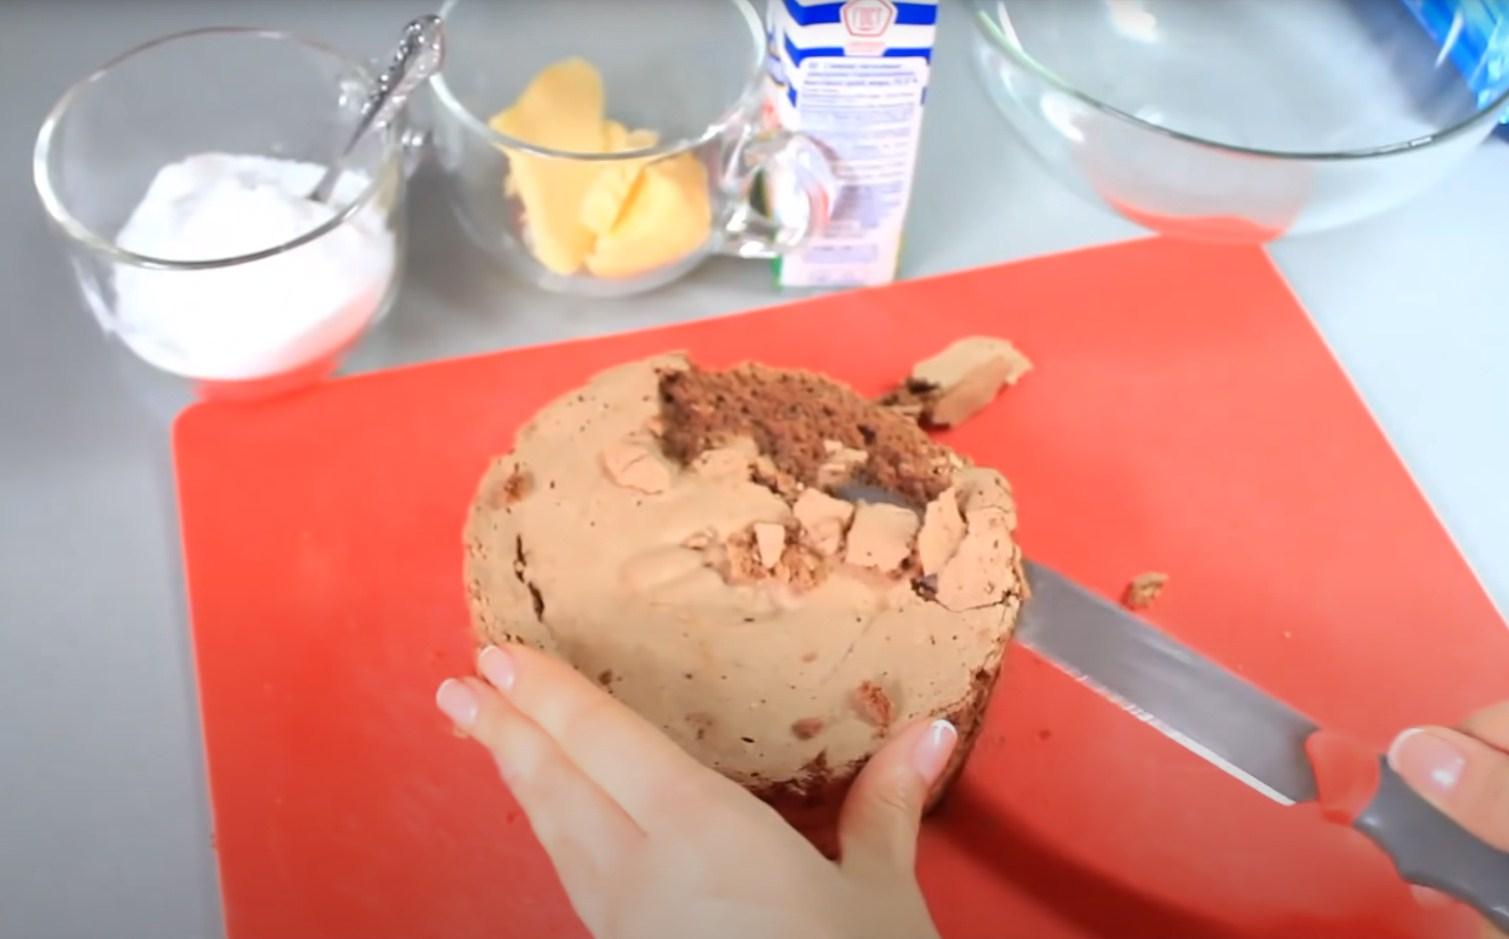
Step 7
Crush the biscuit with your hands or a blender into fine crumbs.
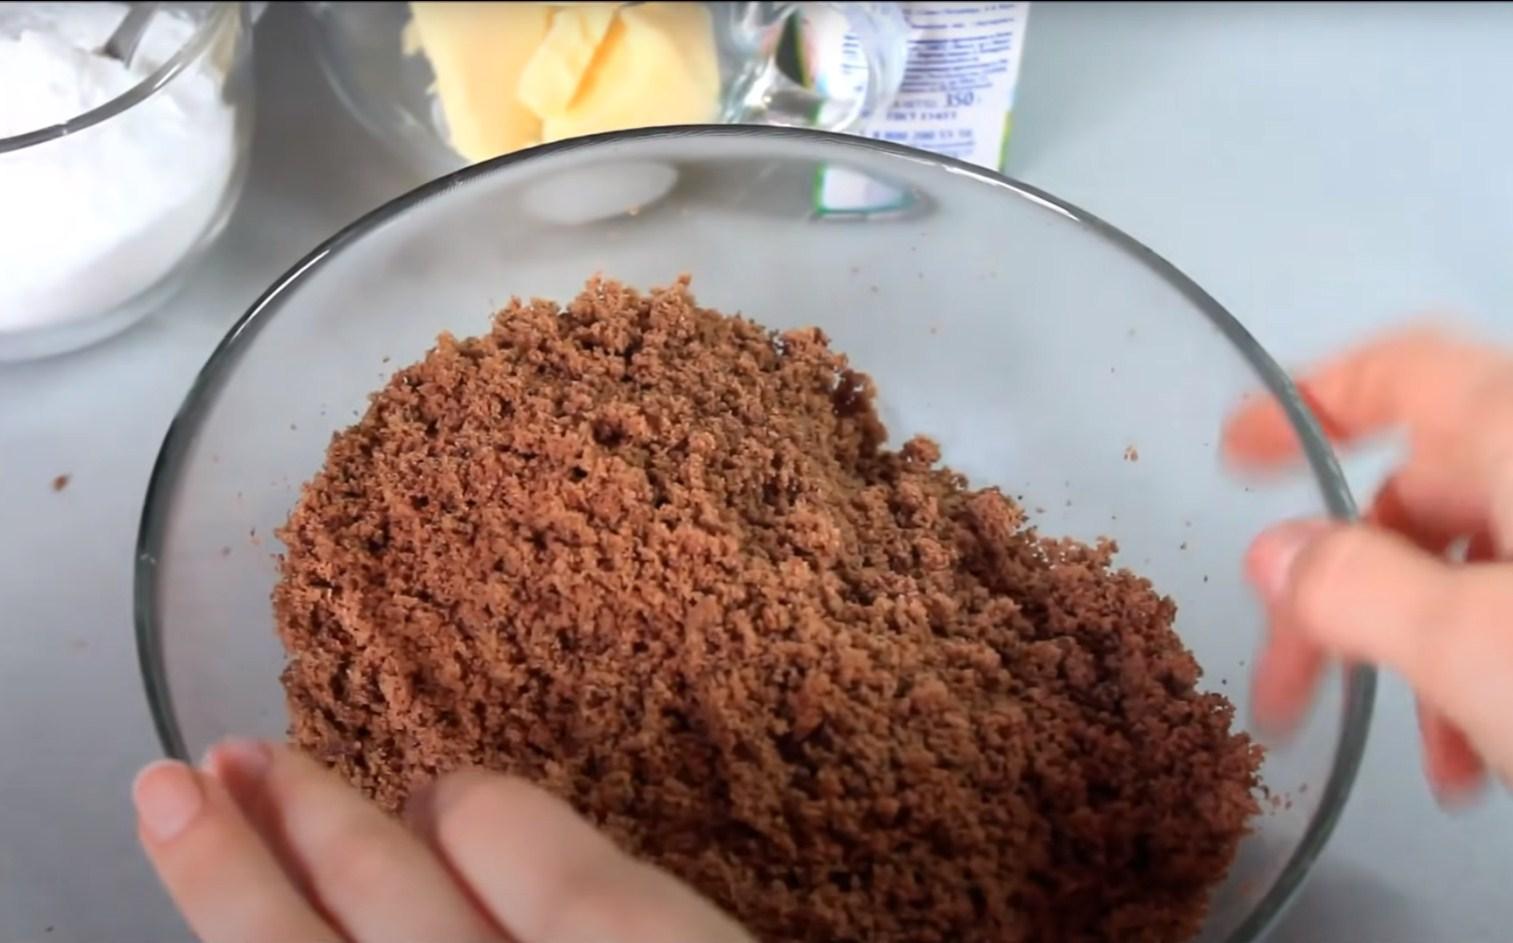
Step 8
Let's start making the cream. Add the powdered sugar to the butter and mix thoroughly. Pour in the cream and beat with a mixer. The butter cream is ready.
Step 9
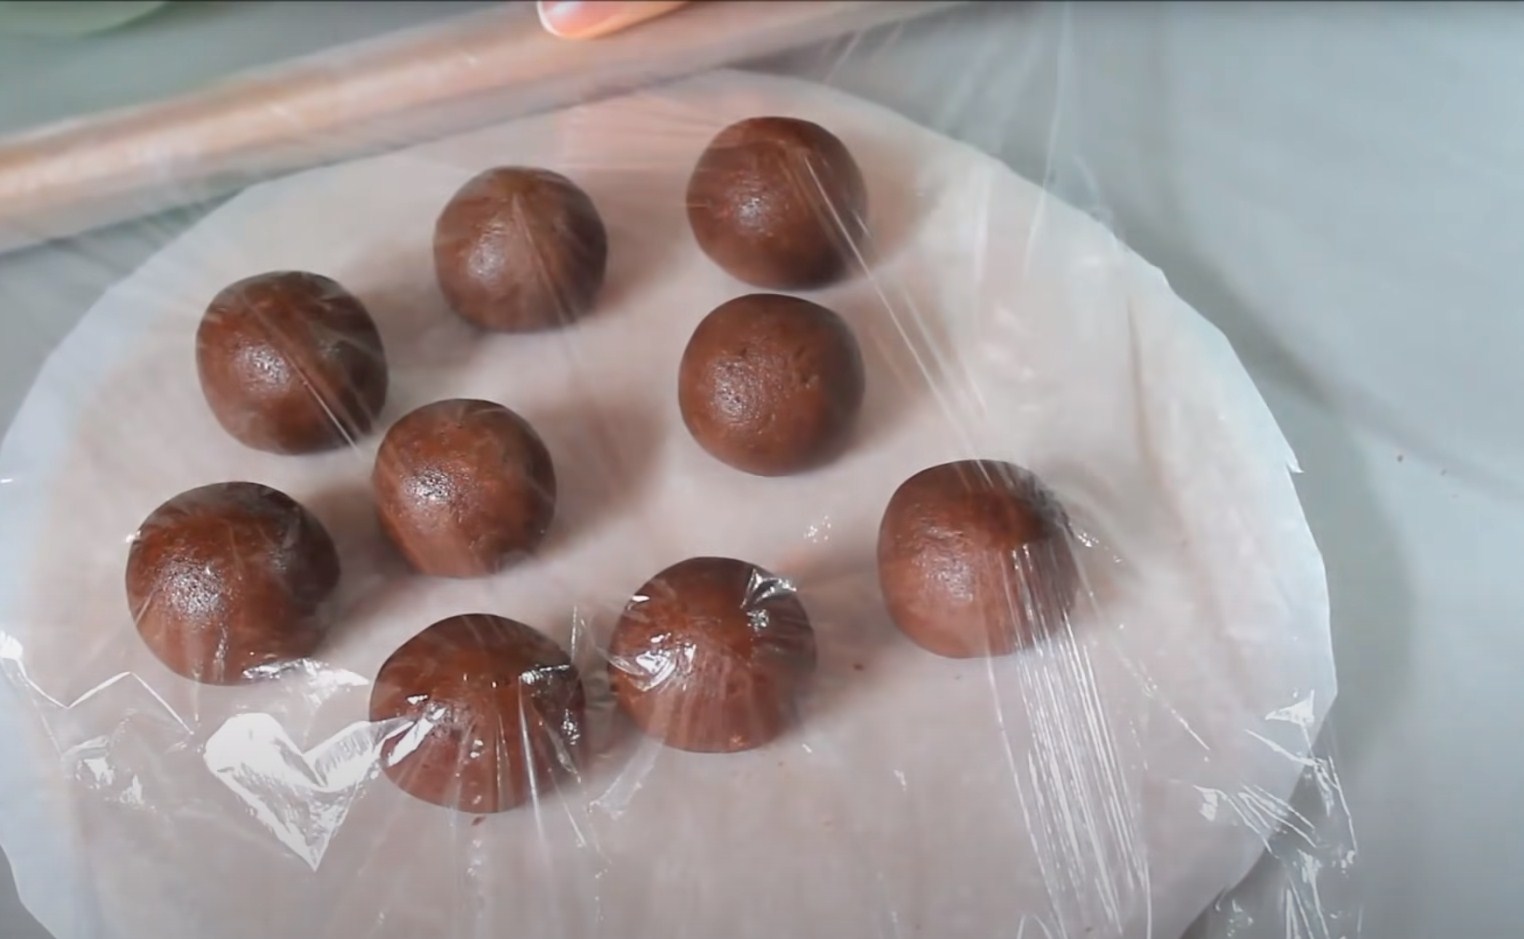
Soak the biscuit crumbs in the cream. Add the cream gradually and mix thoroughly. Continue kneading the cream into the biscuit mixture until you can form a smooth ball.
Step 10
Roll out balls of equal shape. Cover with cling film and place in the freezer for 30 minutes or in the refrigerator for 3 hours until completely cool.
Step 11
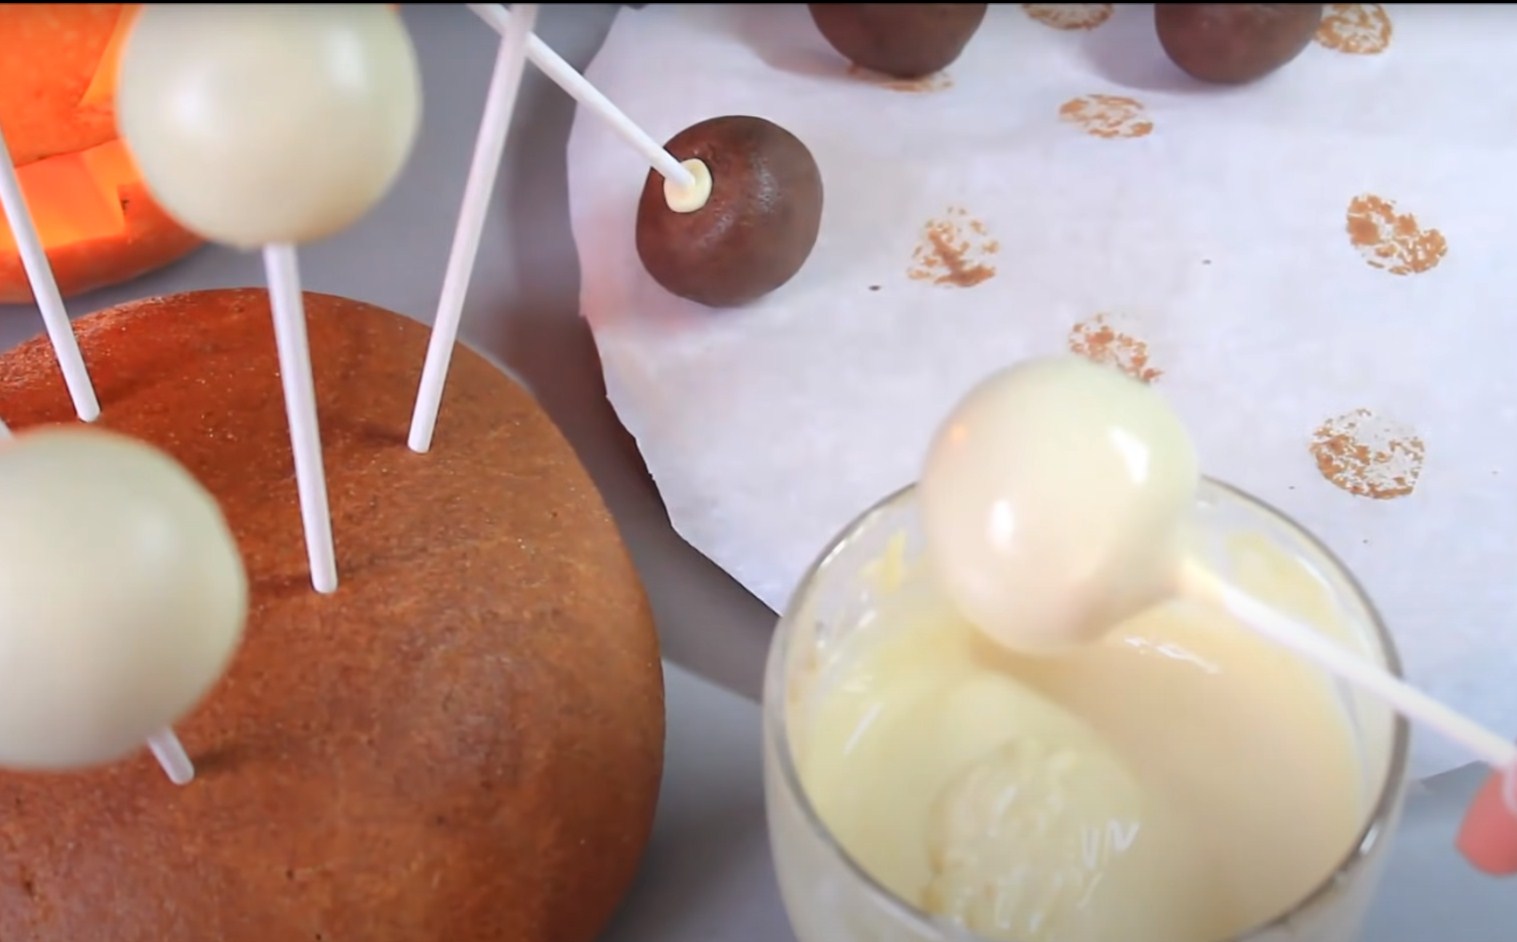
Prepare the glaze. Break the white chocolate into small pieces and place it in the microwave or over a double boiler to melt.
Step 12
Remove the completely cooled balloons and attach the sticks to them using warm icing. Dip the tip of the stick into the icing and poke the balloon. The icing hardens quickly on the cold sponge cake, and the stick adheres securely to the balloon.
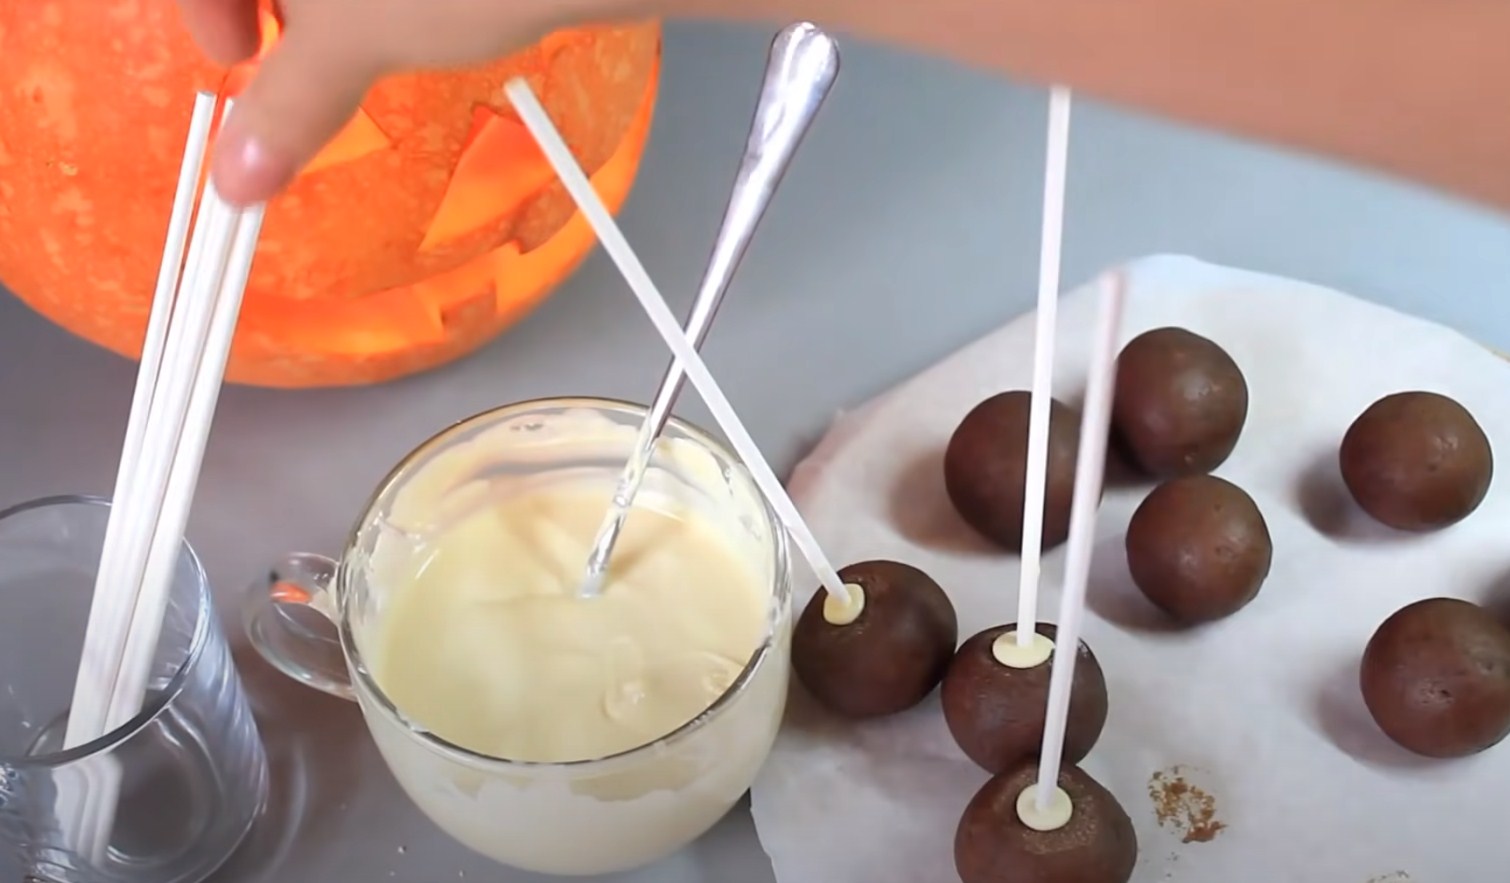
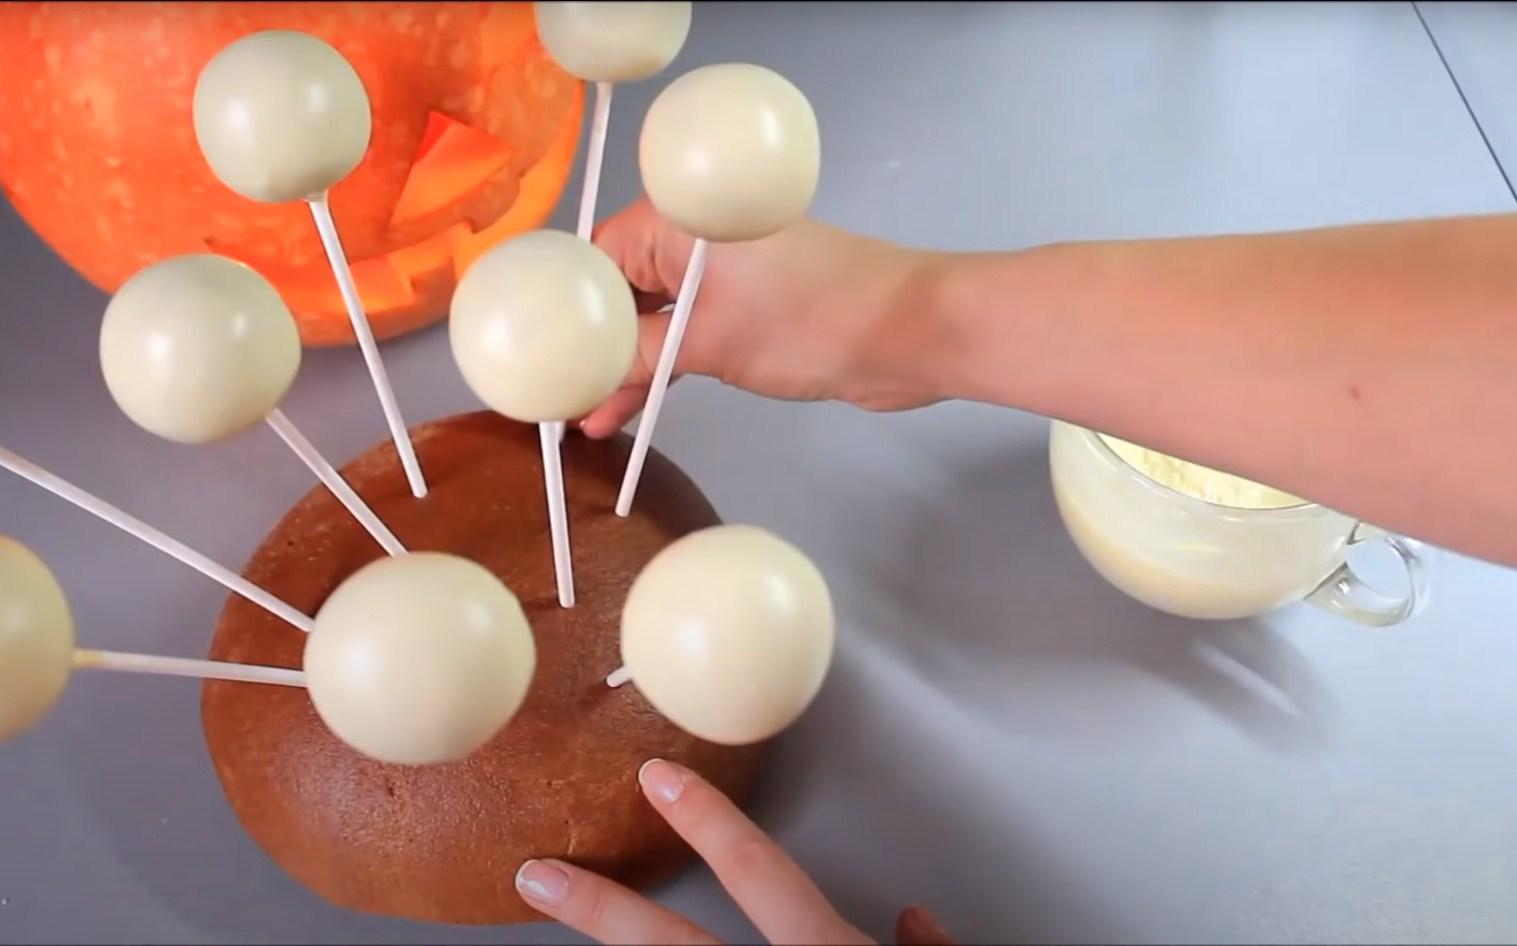
Step 13
Dip each ball, one at a time, into the white chocolate glaze and let it set. For ease of use, you can stick the cake pops into a loaf of bread or a styrofoam box.
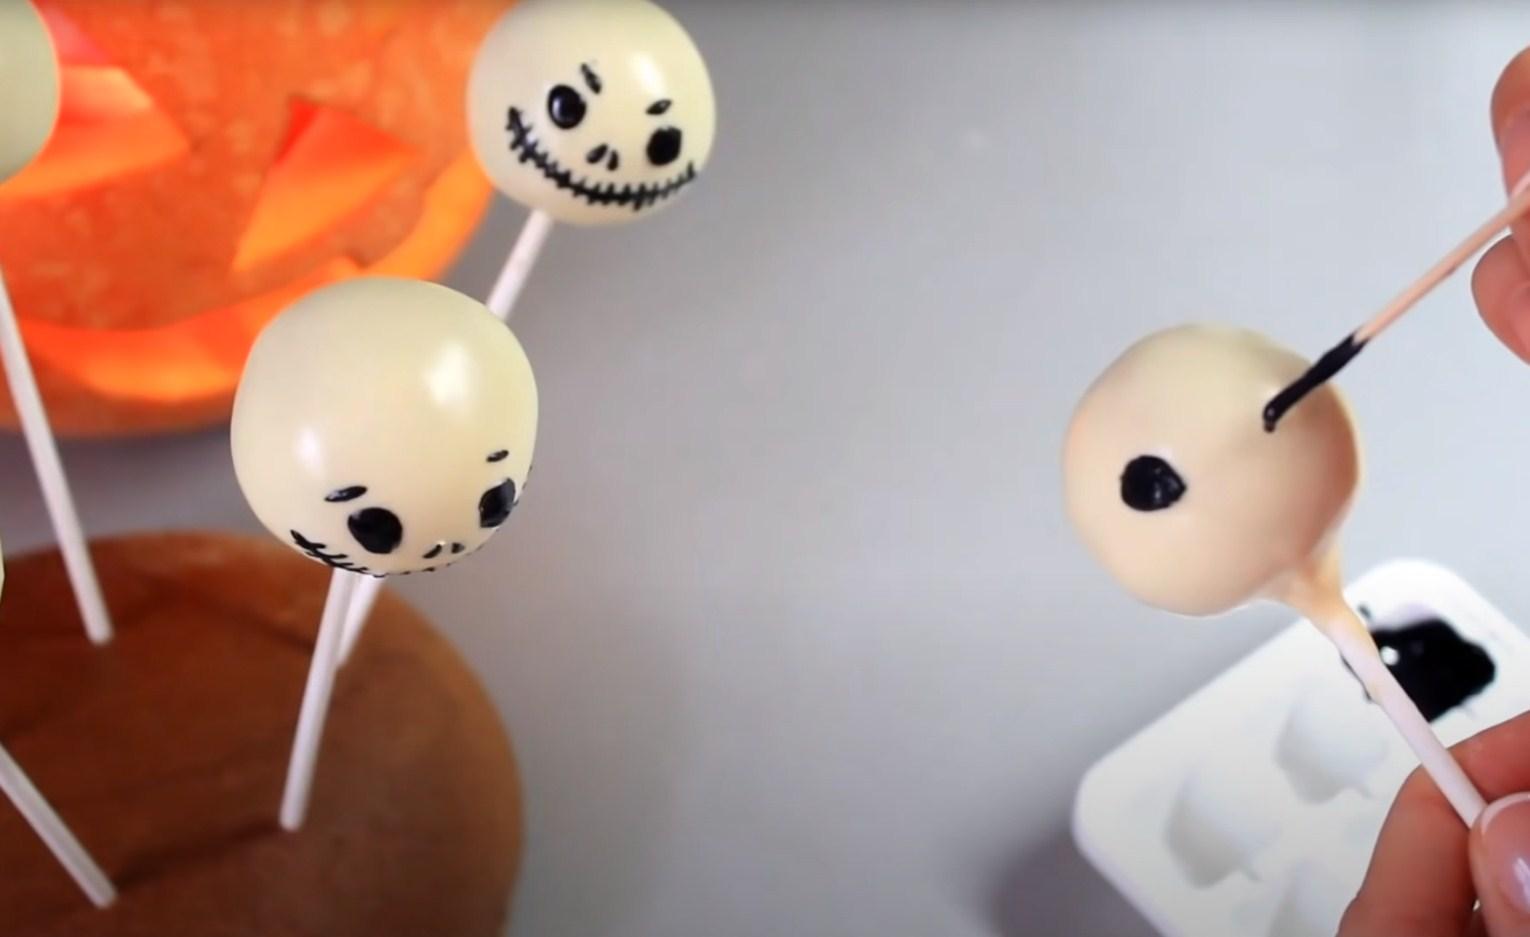
Step 14
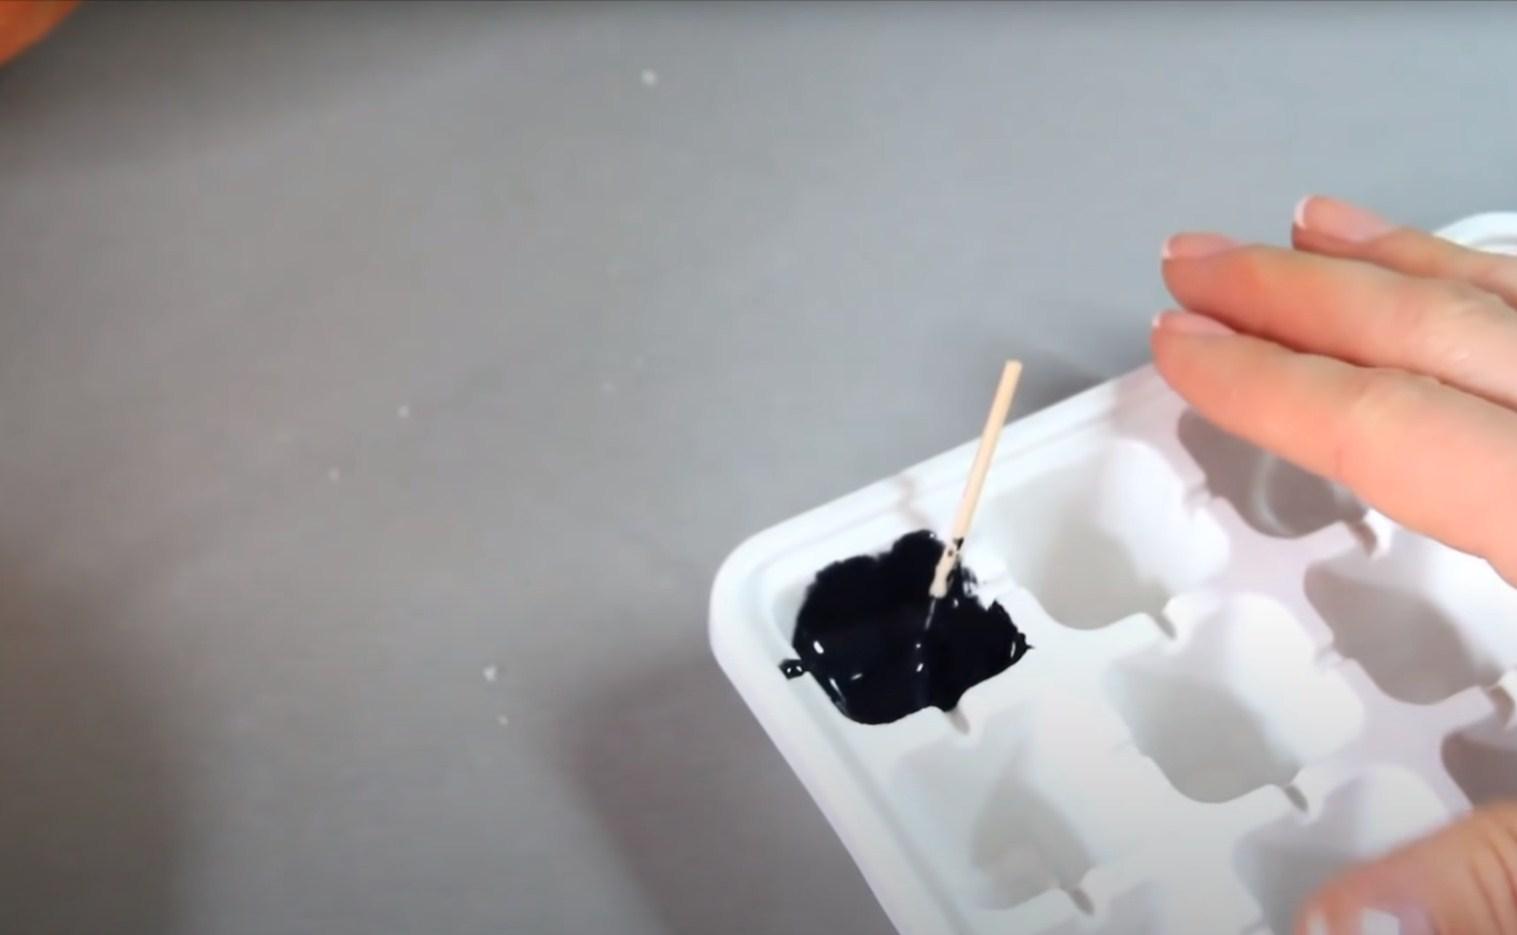
Let's start decorating. In a small bowl, mix together a teaspoon of powdered sugar, a few drops of egg white, and a drop of black food coloring. Use the resulting coloring to draw scary faces on our cake pops.
Pumpkin pie for Halloween
Spiced pumpkin pie is a traditional Halloween dish. It's served as a dessert at the holiday table. I offer you a simple Halloween pumpkin pie recipe and a wonderful decoration idea. Your guests will be delighted with this dessert.
Ingredients
For the test:
- Flour - 200 g
- Salt - a pinch
- Butter - 100 g
- Water (cold) - 5 tbsp.
For the filling:
- Pumpkin - 500 g
- Egg C1 - 1 pc.
- Egg yolks - 3 pcs
- Condensed milk - 150 g
- Cinnamon - ½ tsp.
- Nutmeg - ¼ tsp.
- Cloves - ¼ tsp.
- Salt - a pinch
For decoration:
- Chocolate glaze (or chocolate) - 50-70 g
Cooking time: 1 hour 30 minutes
Servings: 1 (for a mold with a diameter of 20-22 cm)
Step-by-step recipe
Step 1
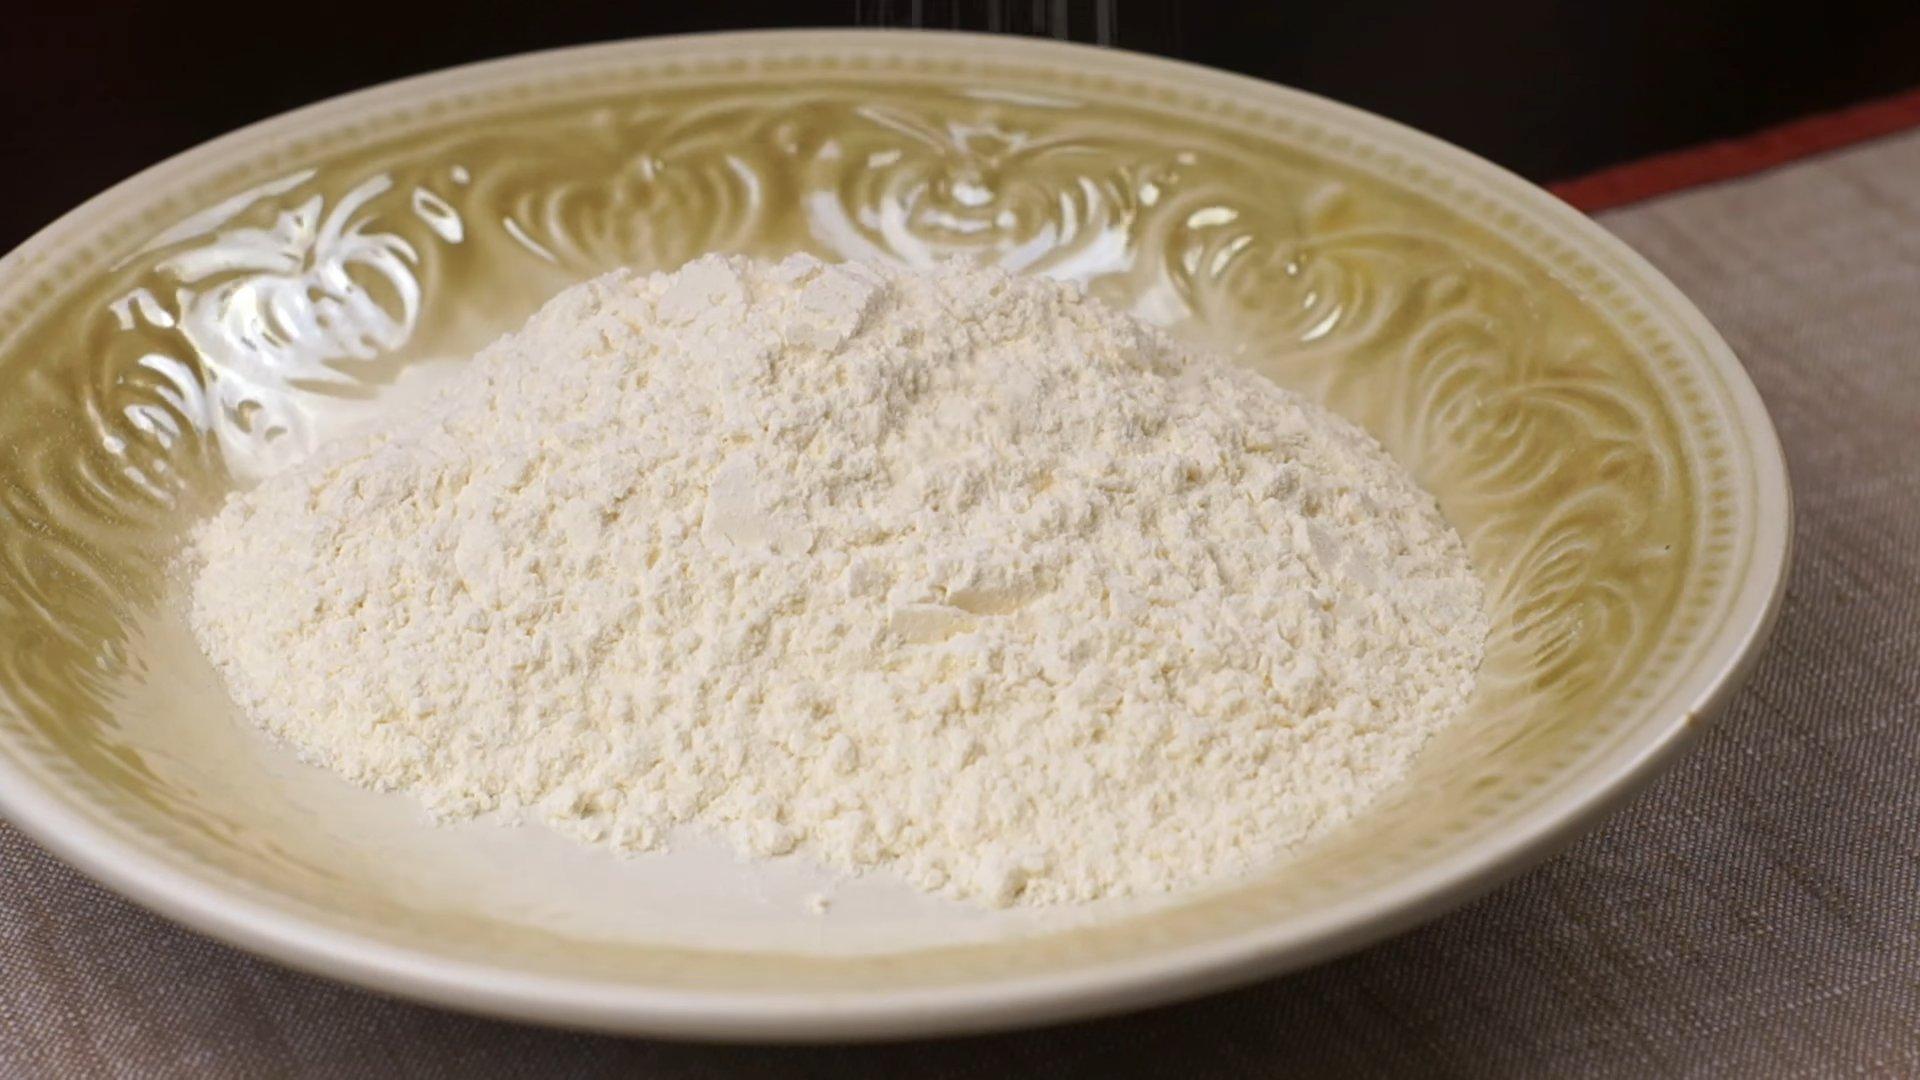
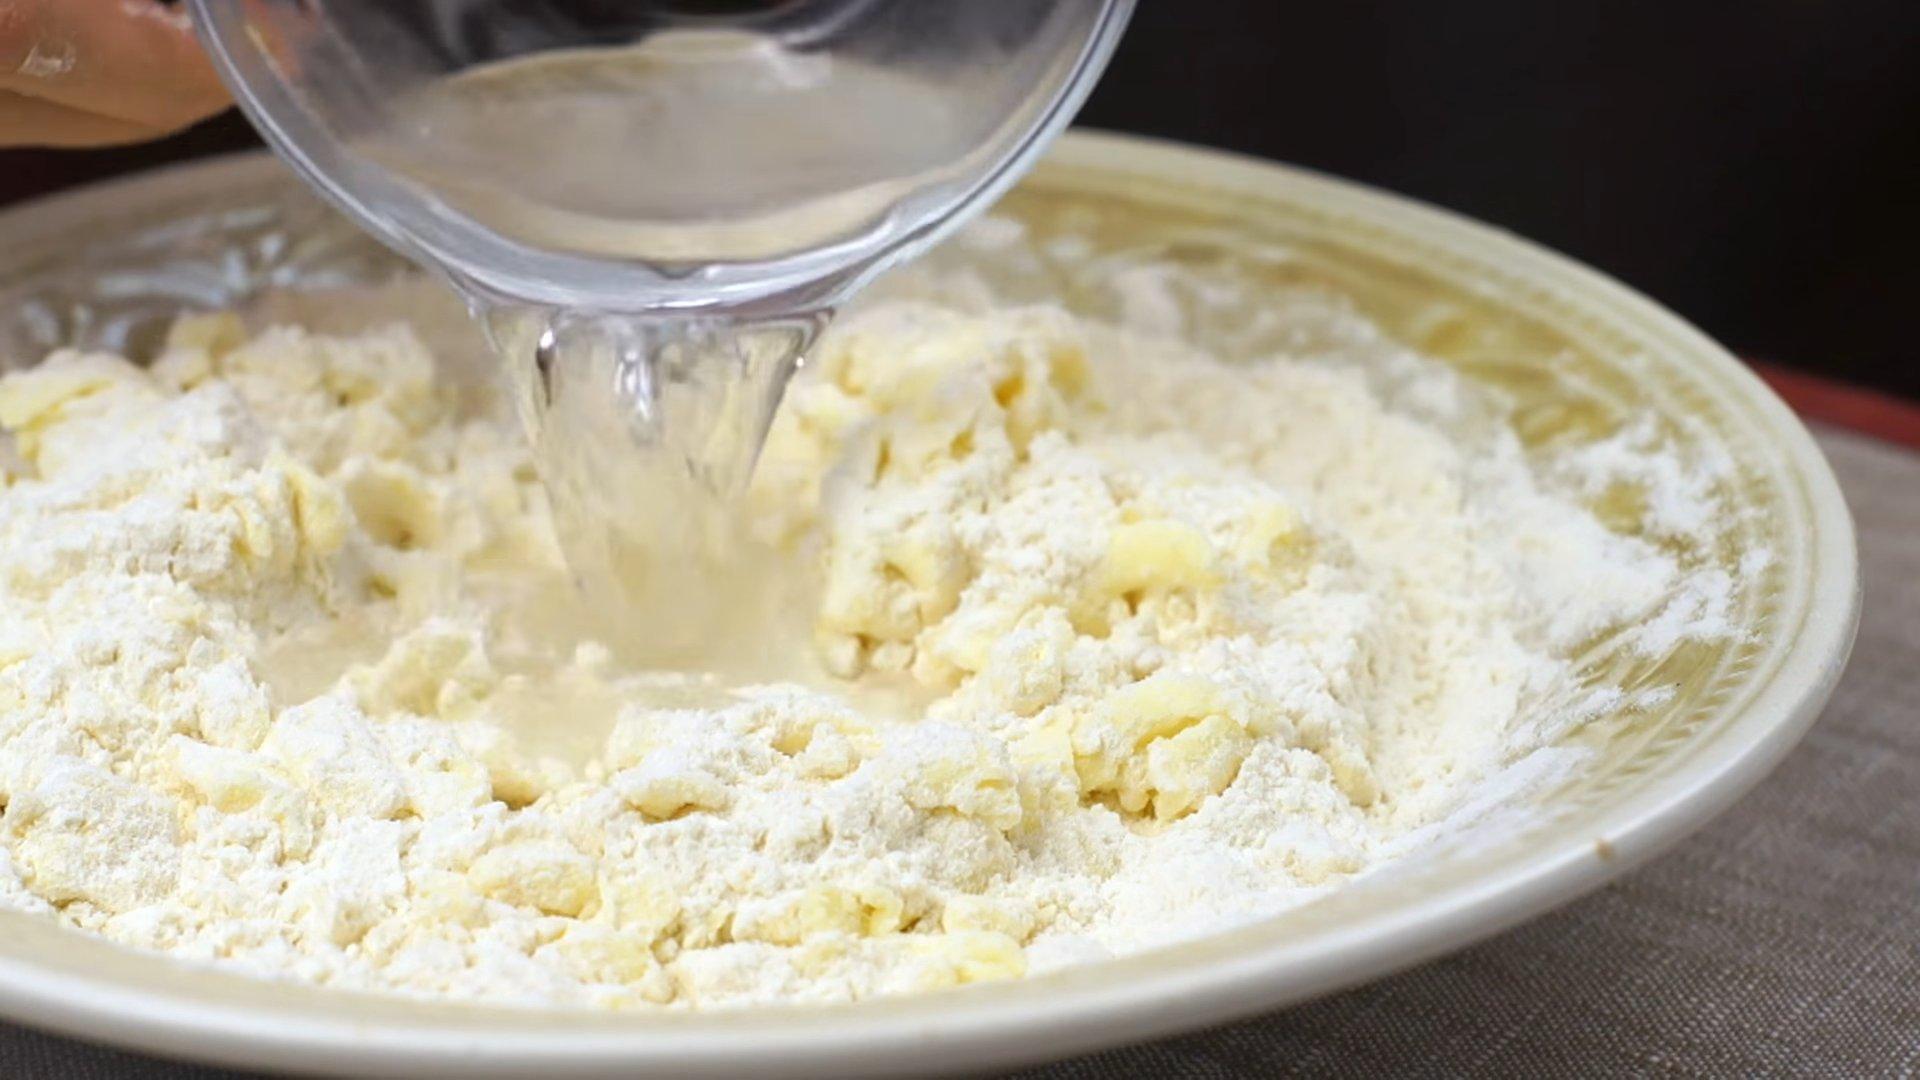
Pour the flour into a deep bowl or plate, add a pinch of salt and mix.
Step 2
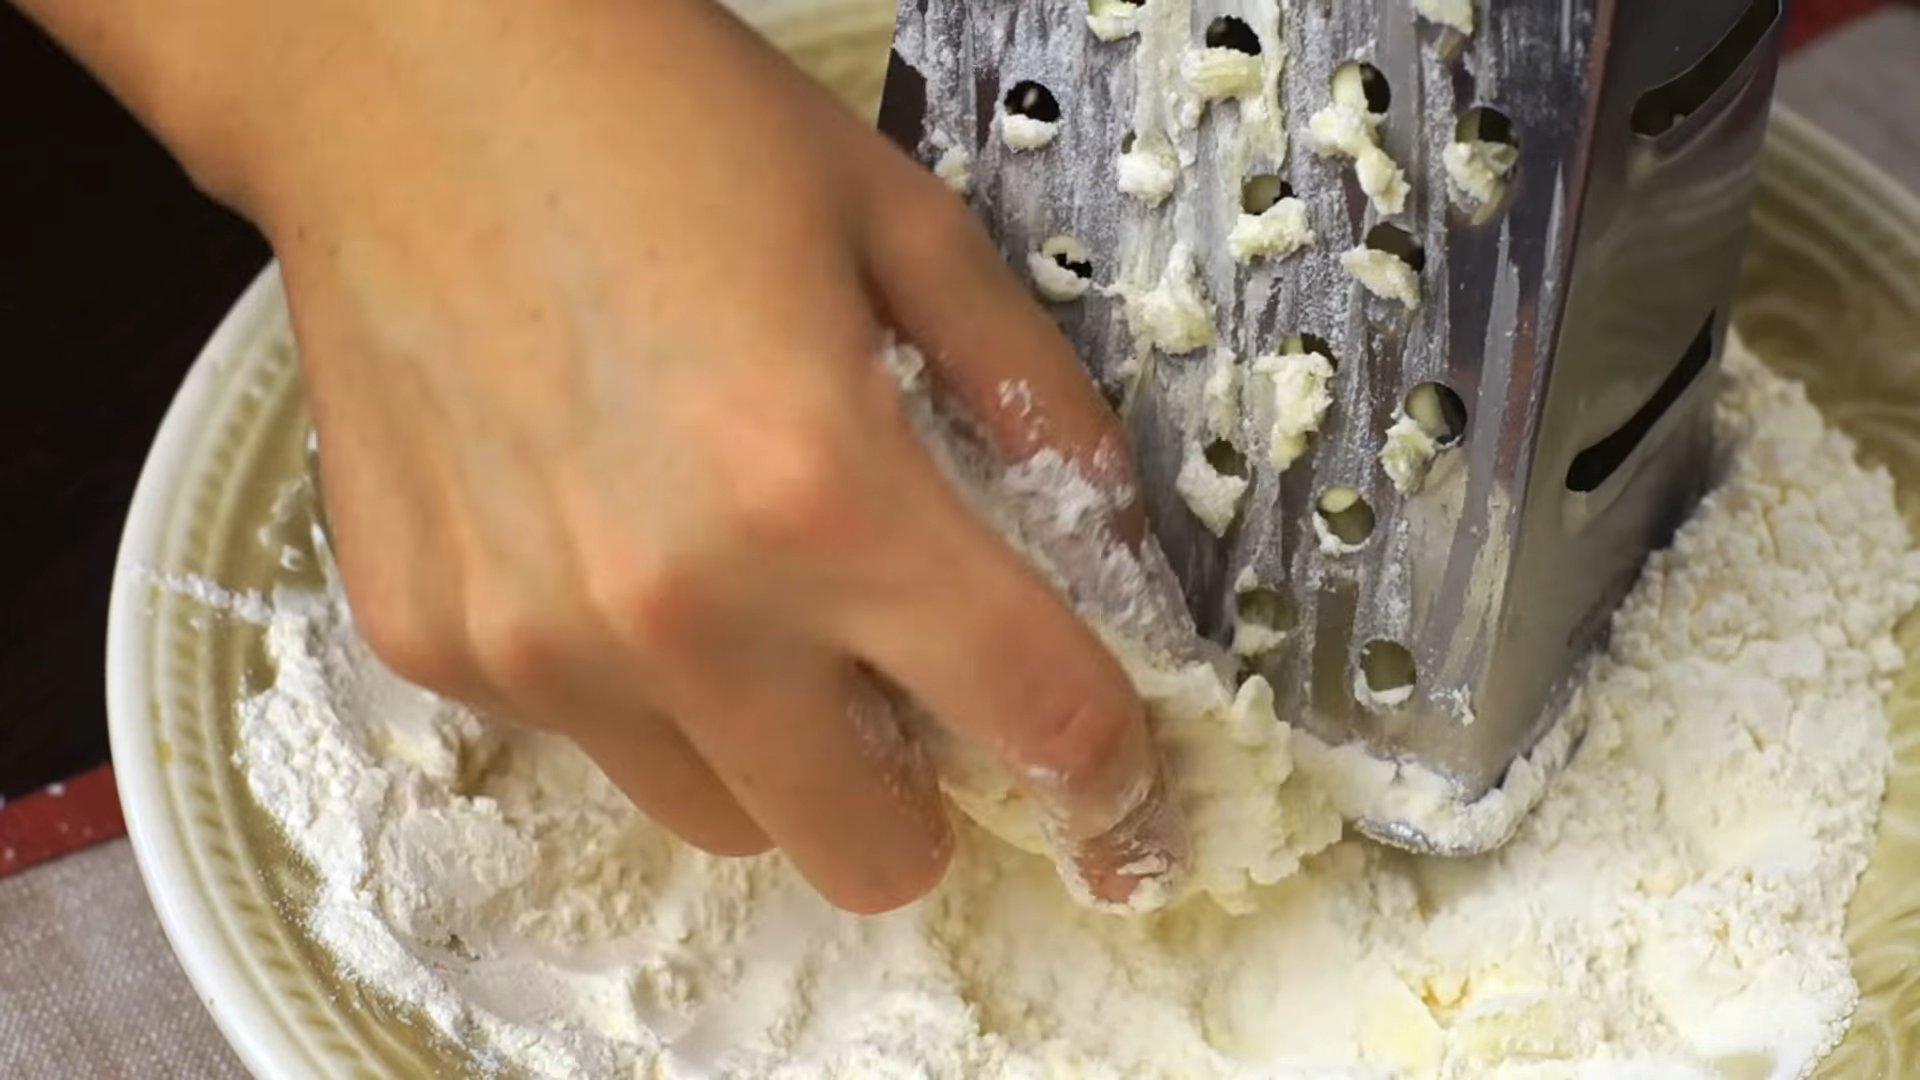
Grate the chilled butter on a coarse grater and add to the flour.
Step 3
Pour ice water into the resulting mixture.
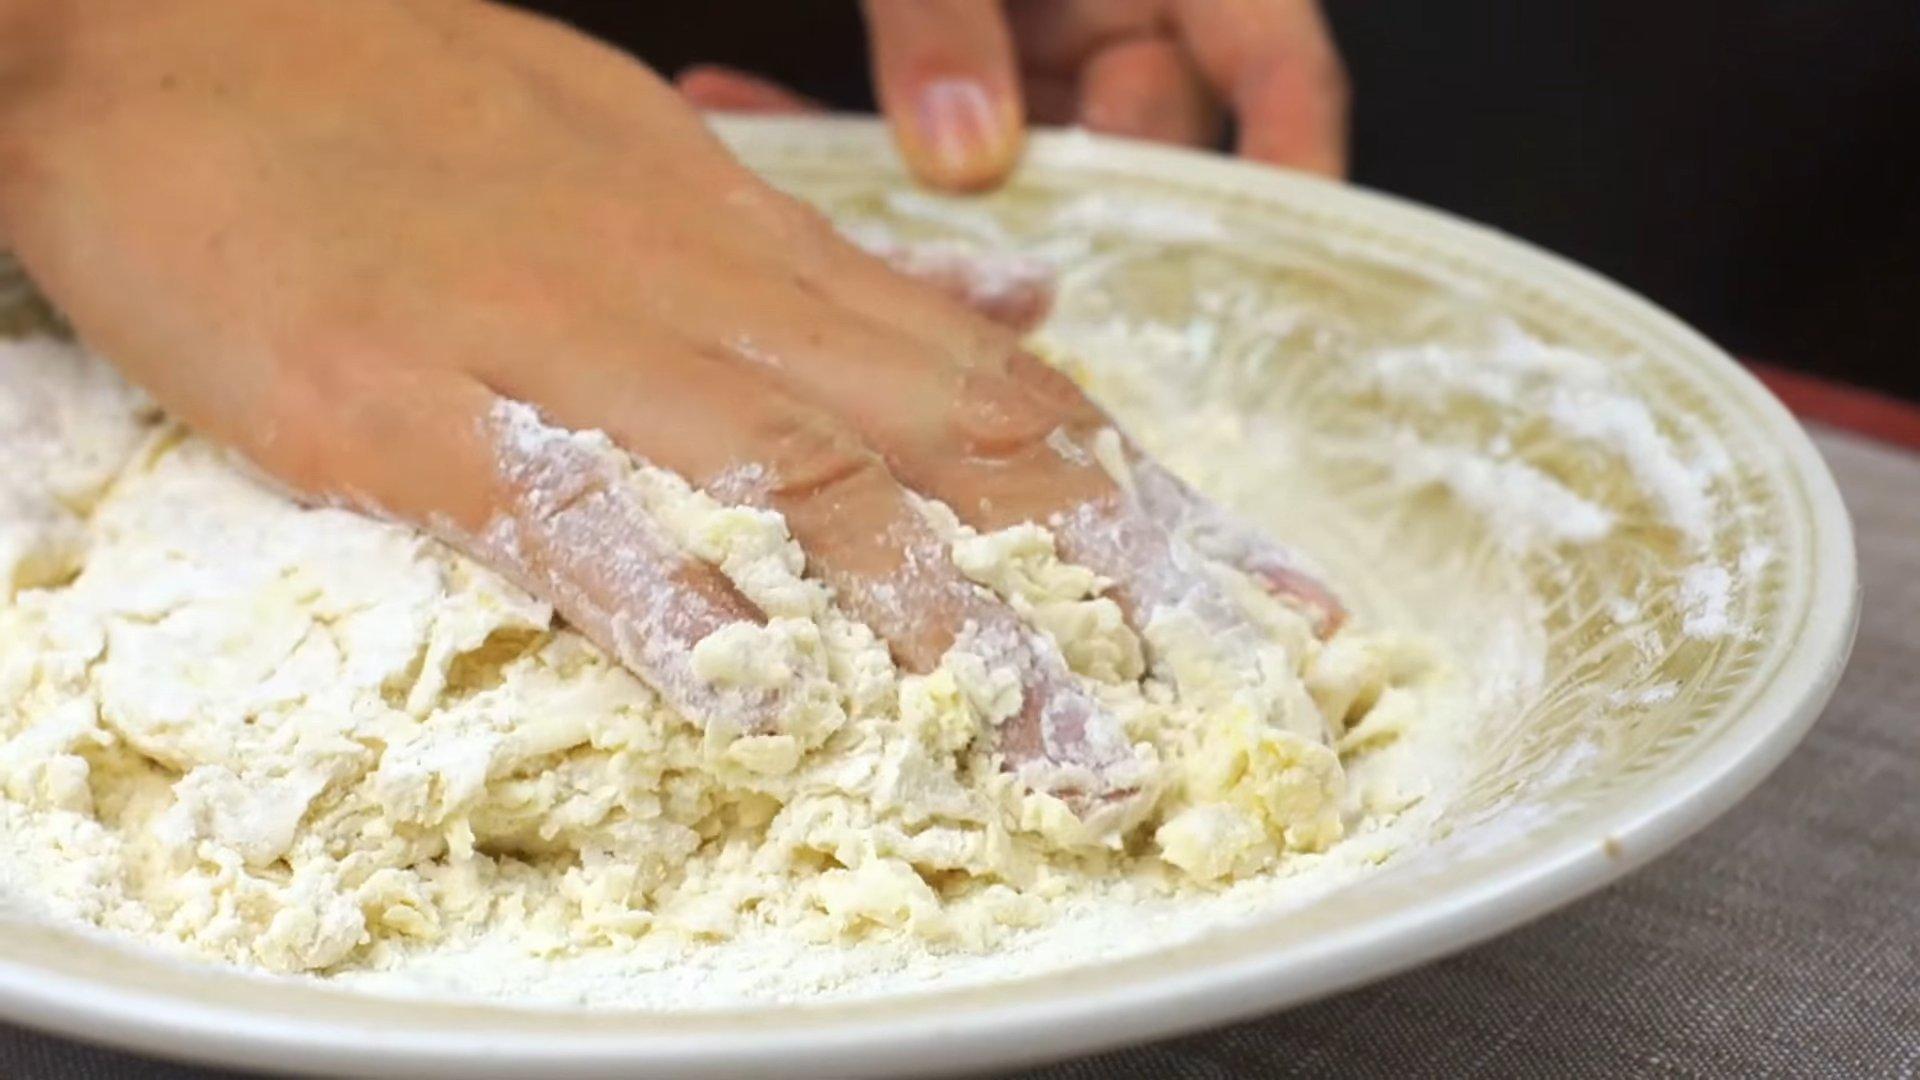
Step 4
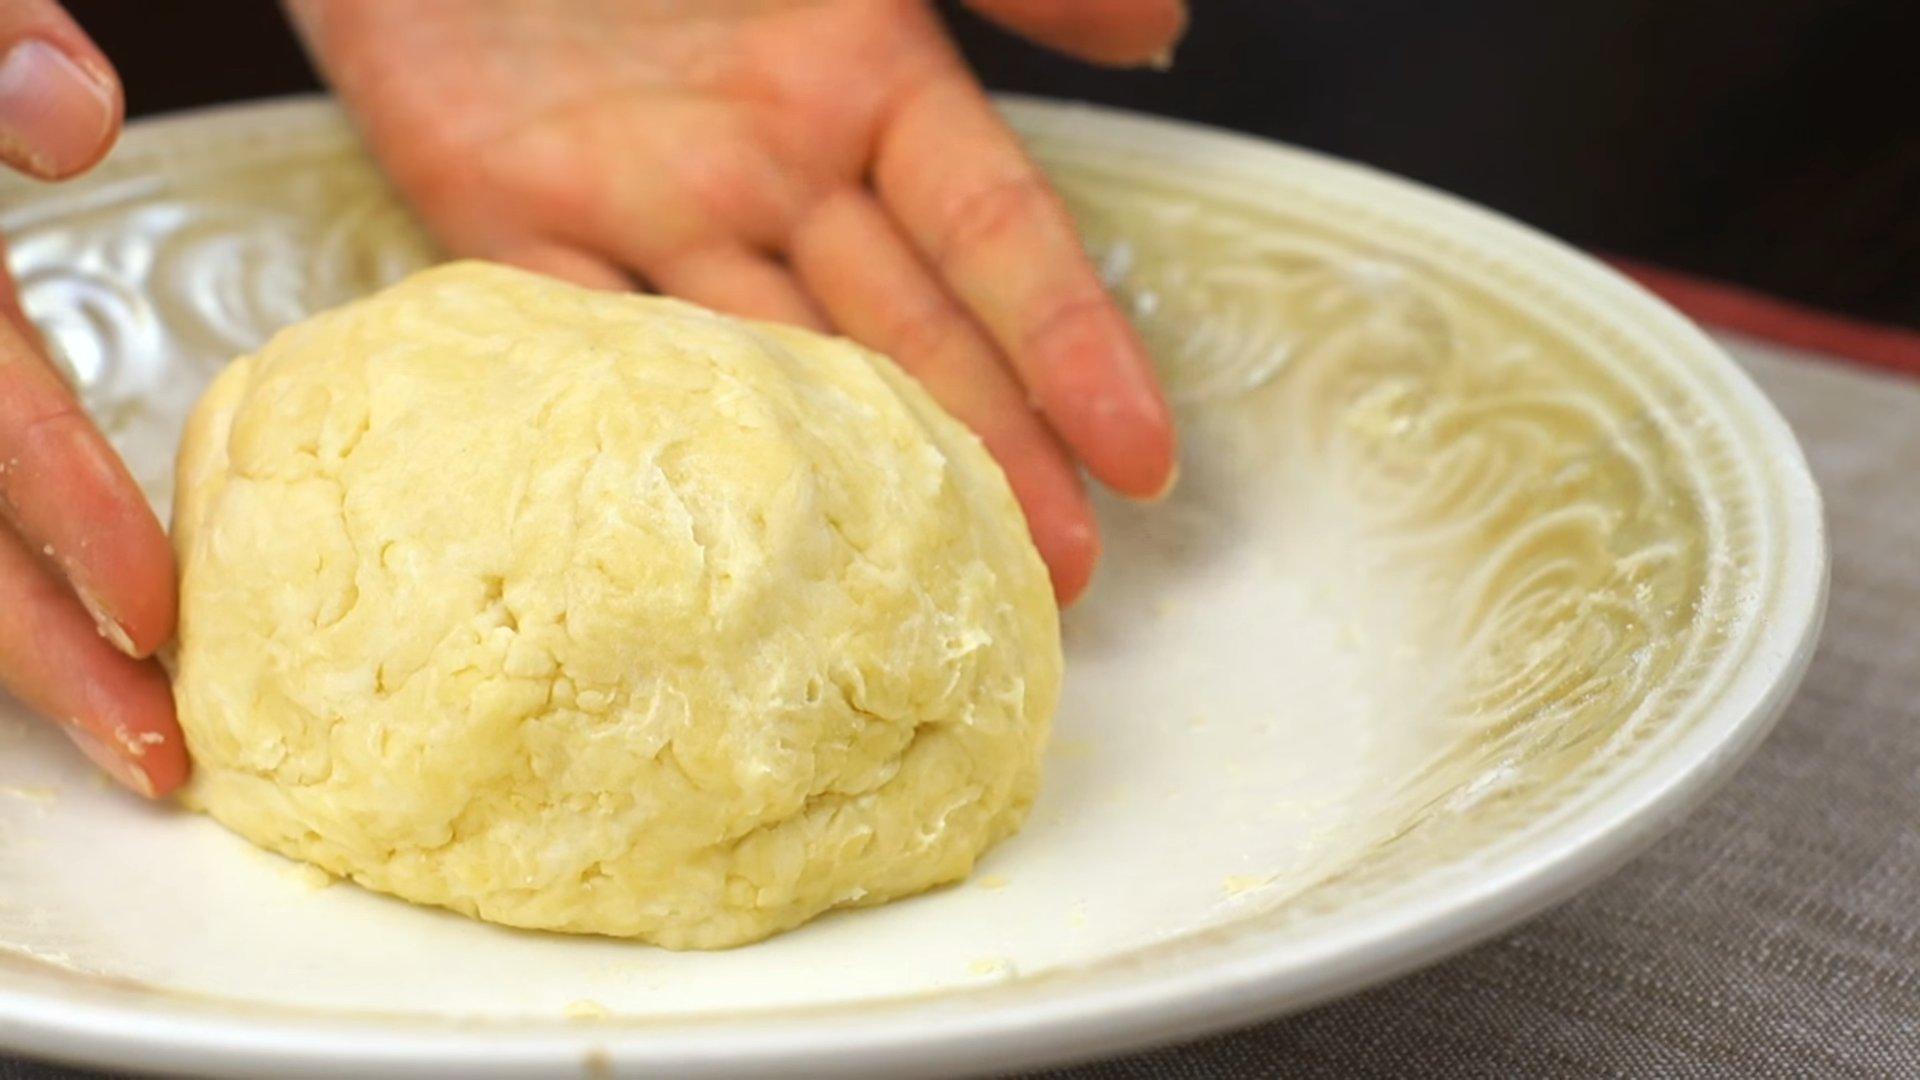
Gently knead the dough with your hands.
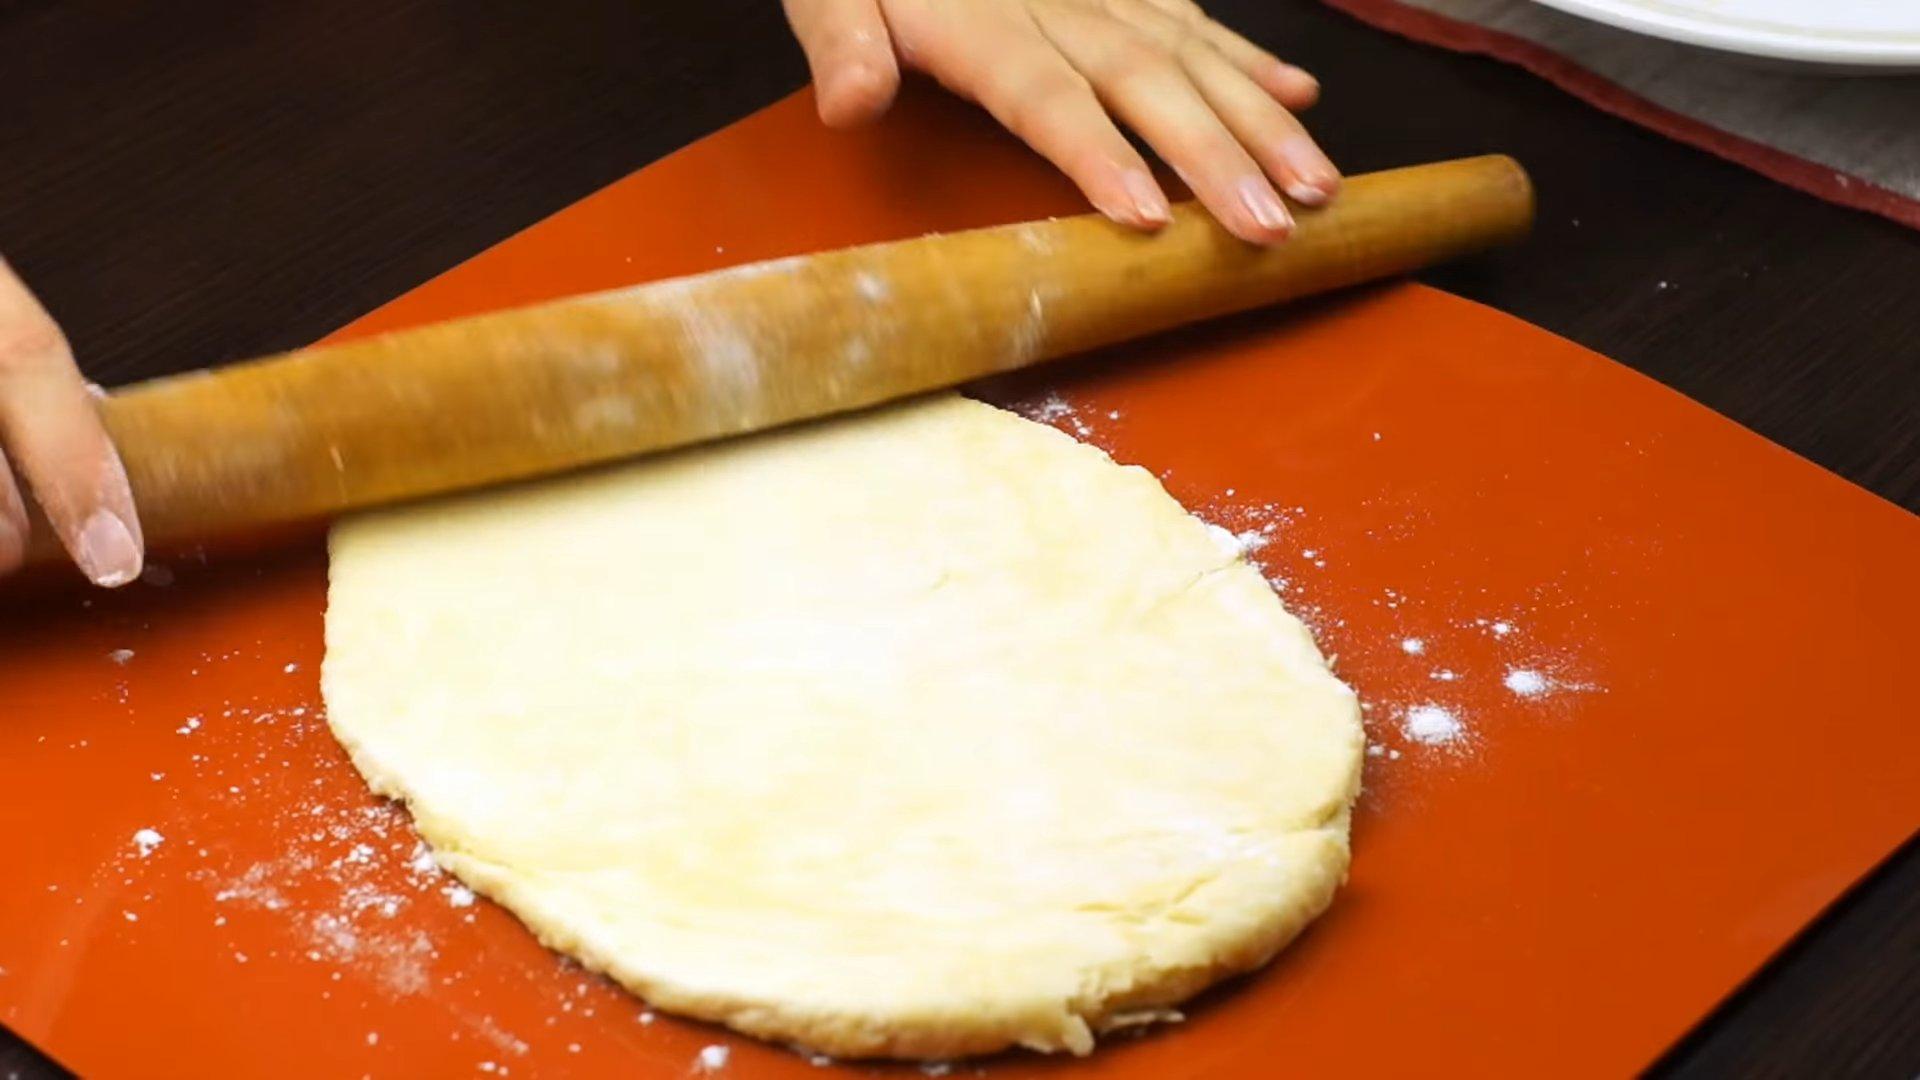
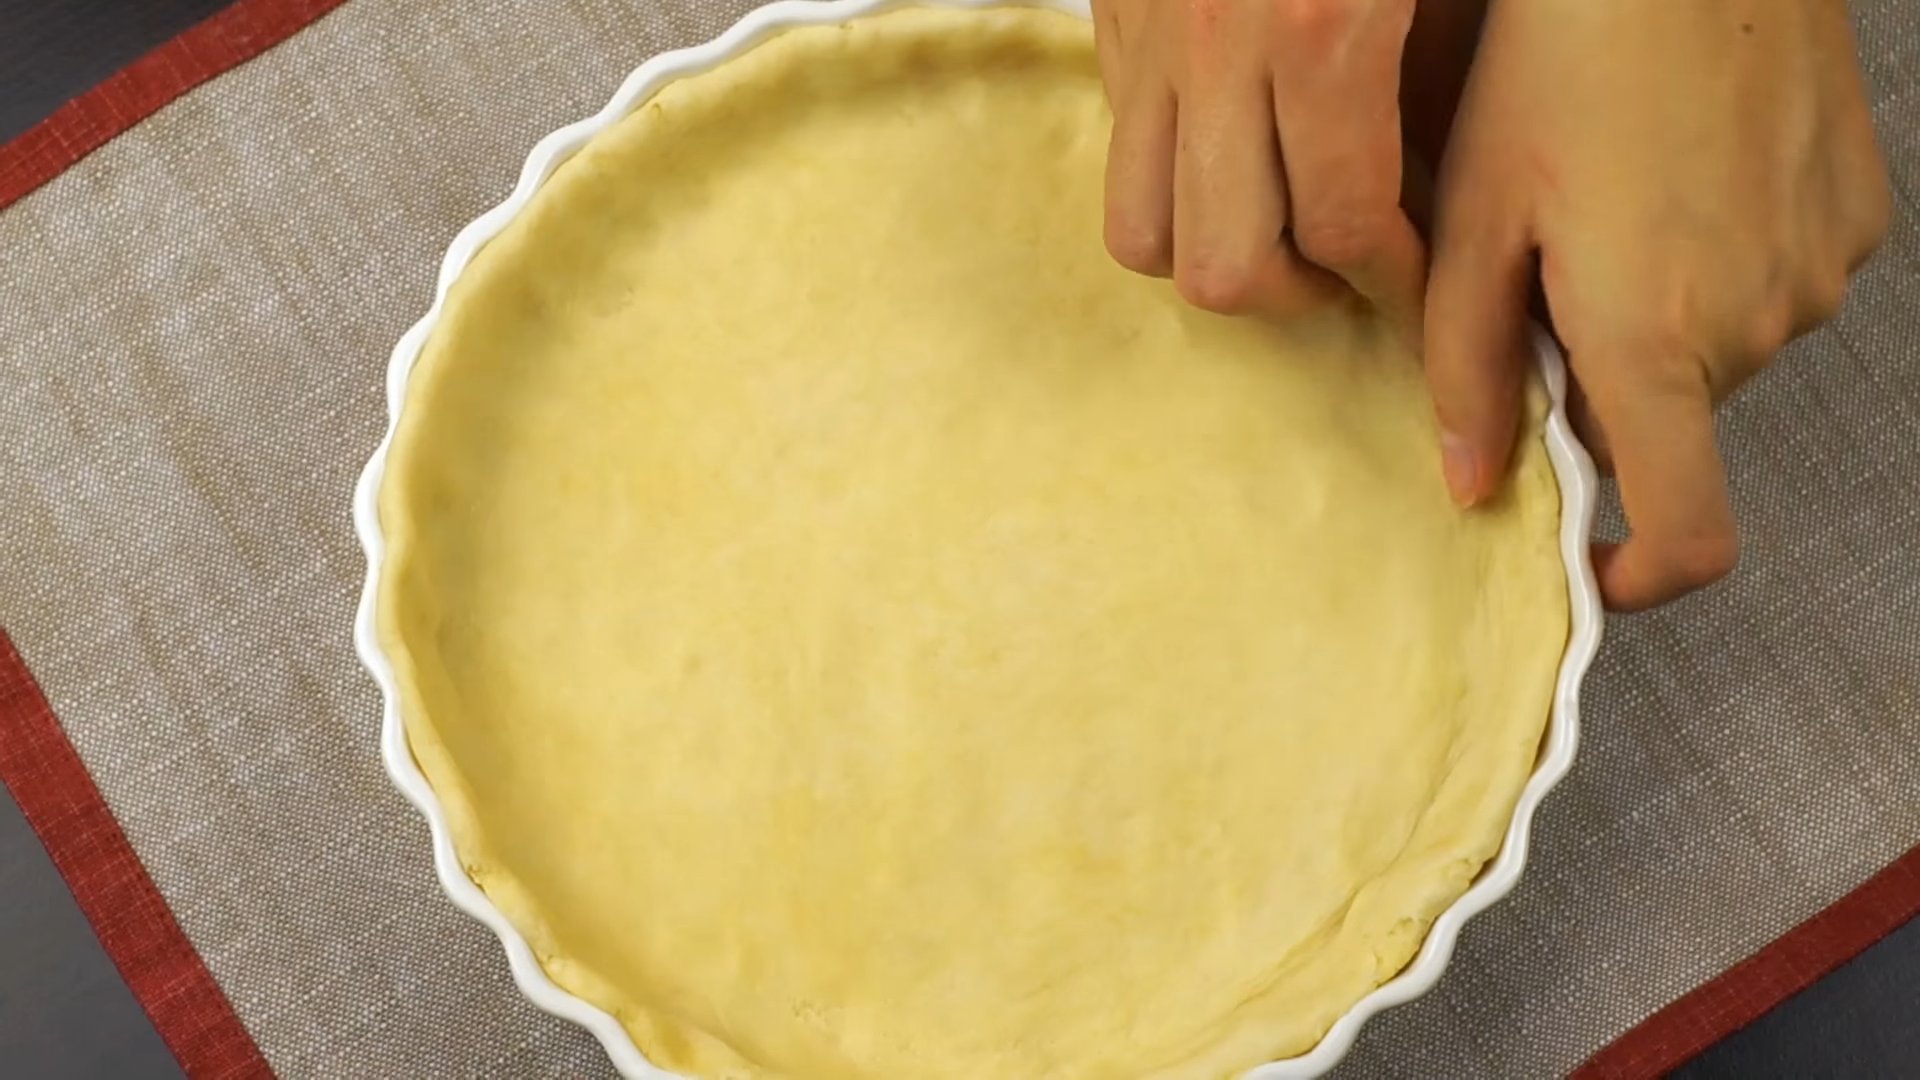
Step 5
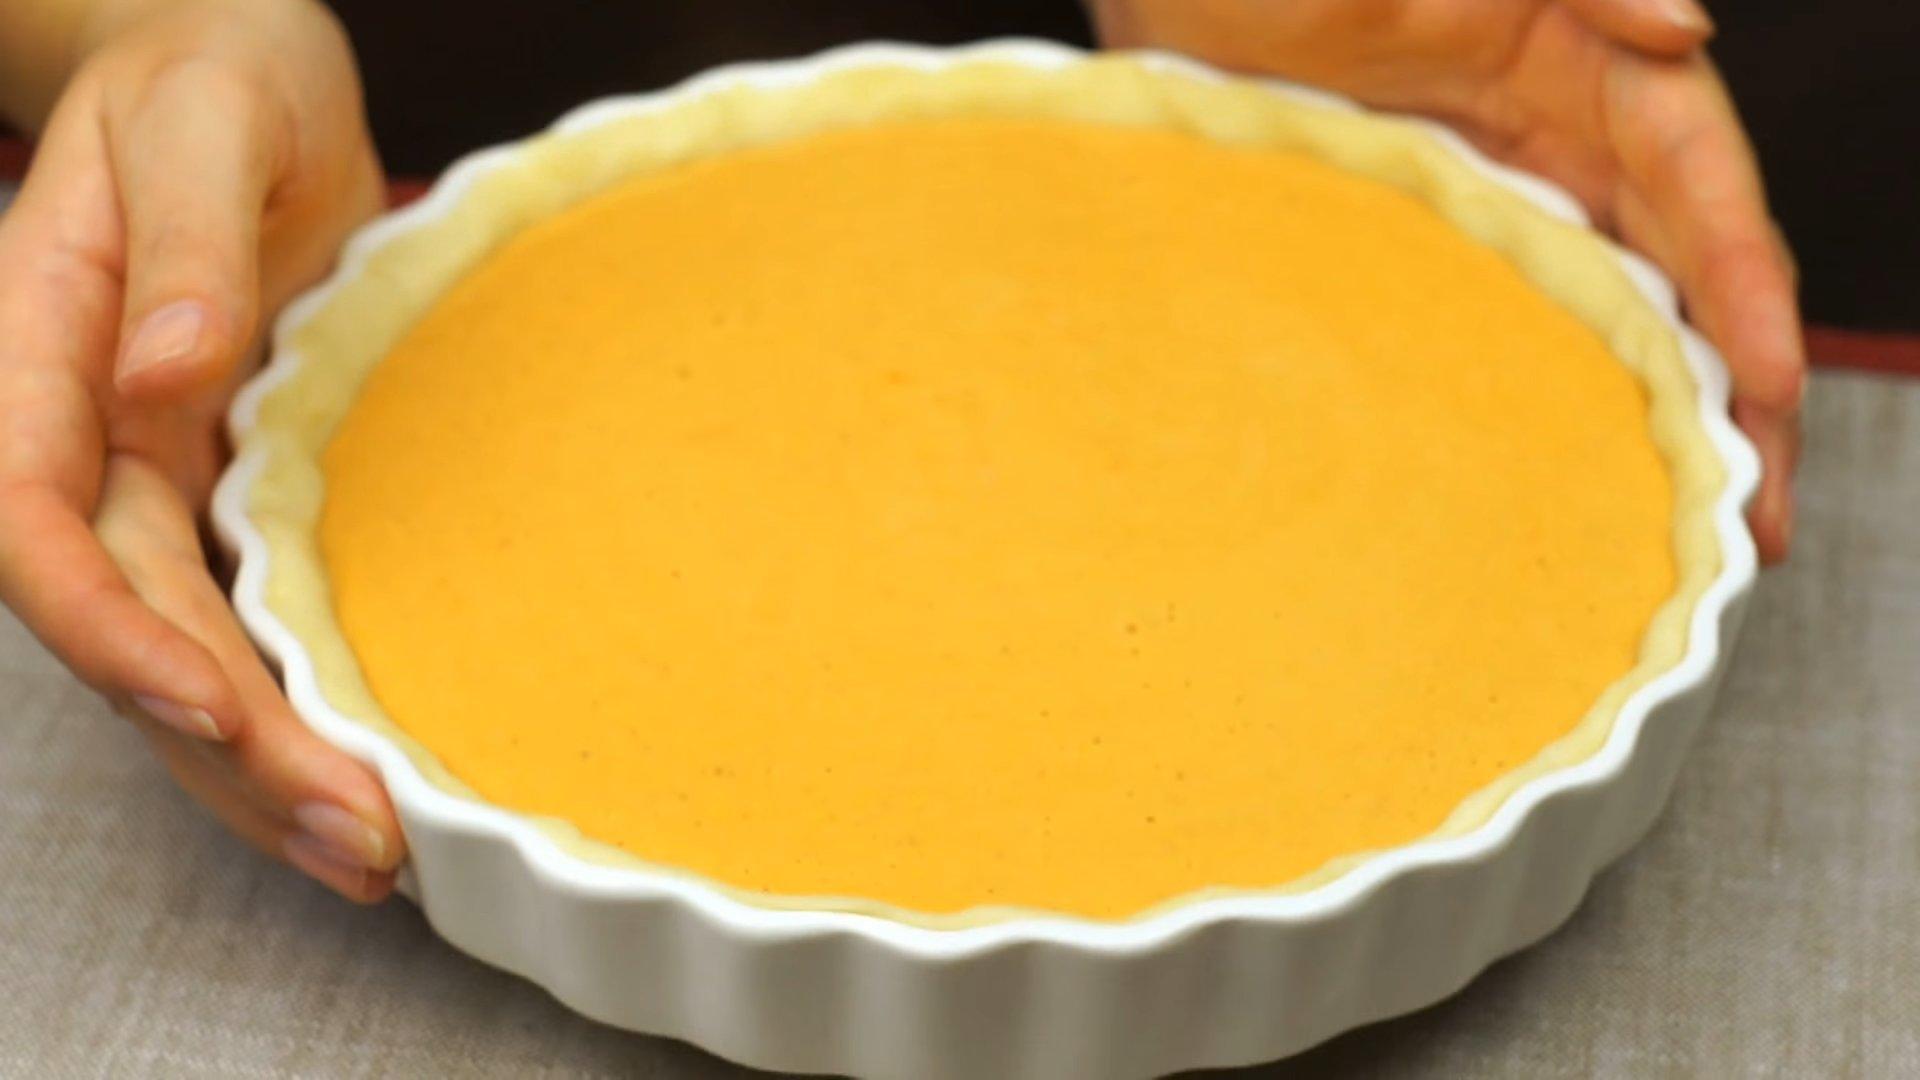
Roll out the dough into a circle, place it in the pan, distribute it evenly and make edges.
Step 6
Peel and seed the pumpkin, cut into small slices and bake in the oven at 180 degrees for 40 minutes.

Step 7
Place the cooled pumpkin into a blender bowl, add the egg, yolks, condensed milk and spices.

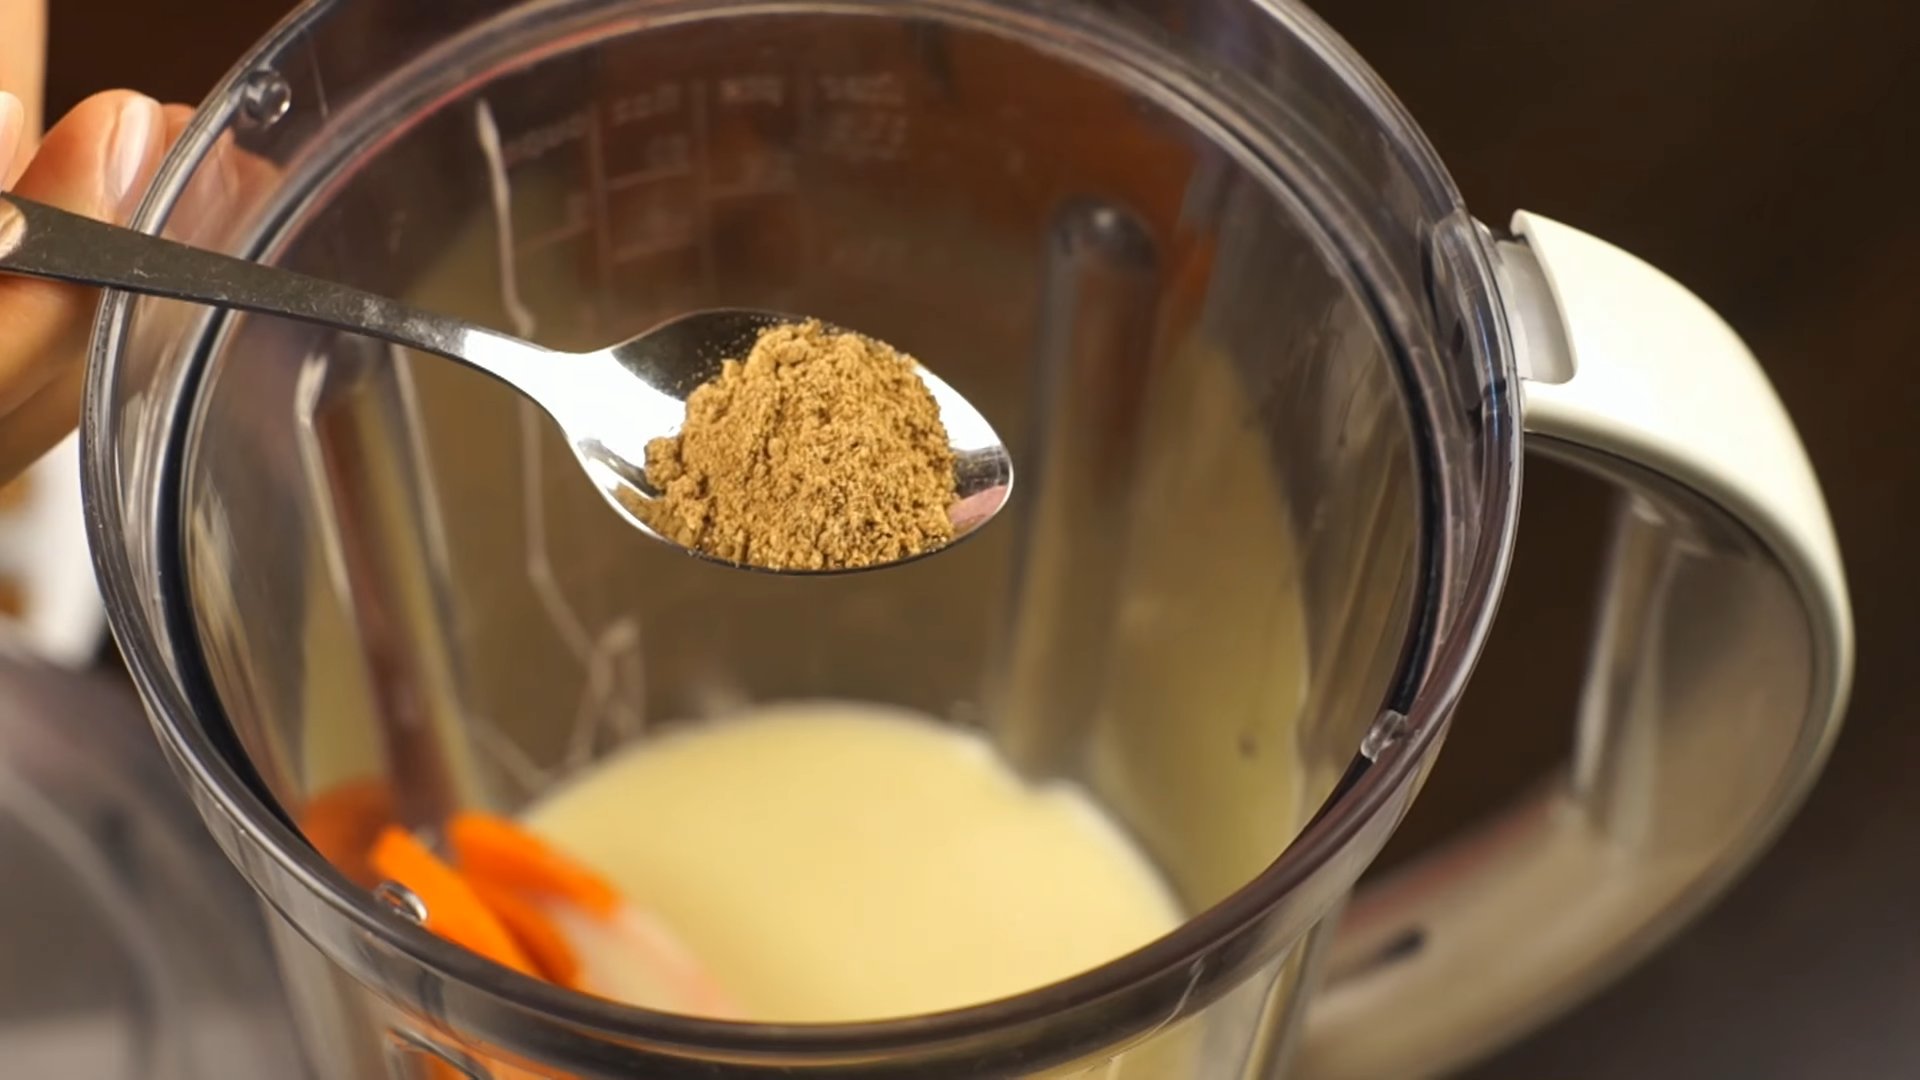
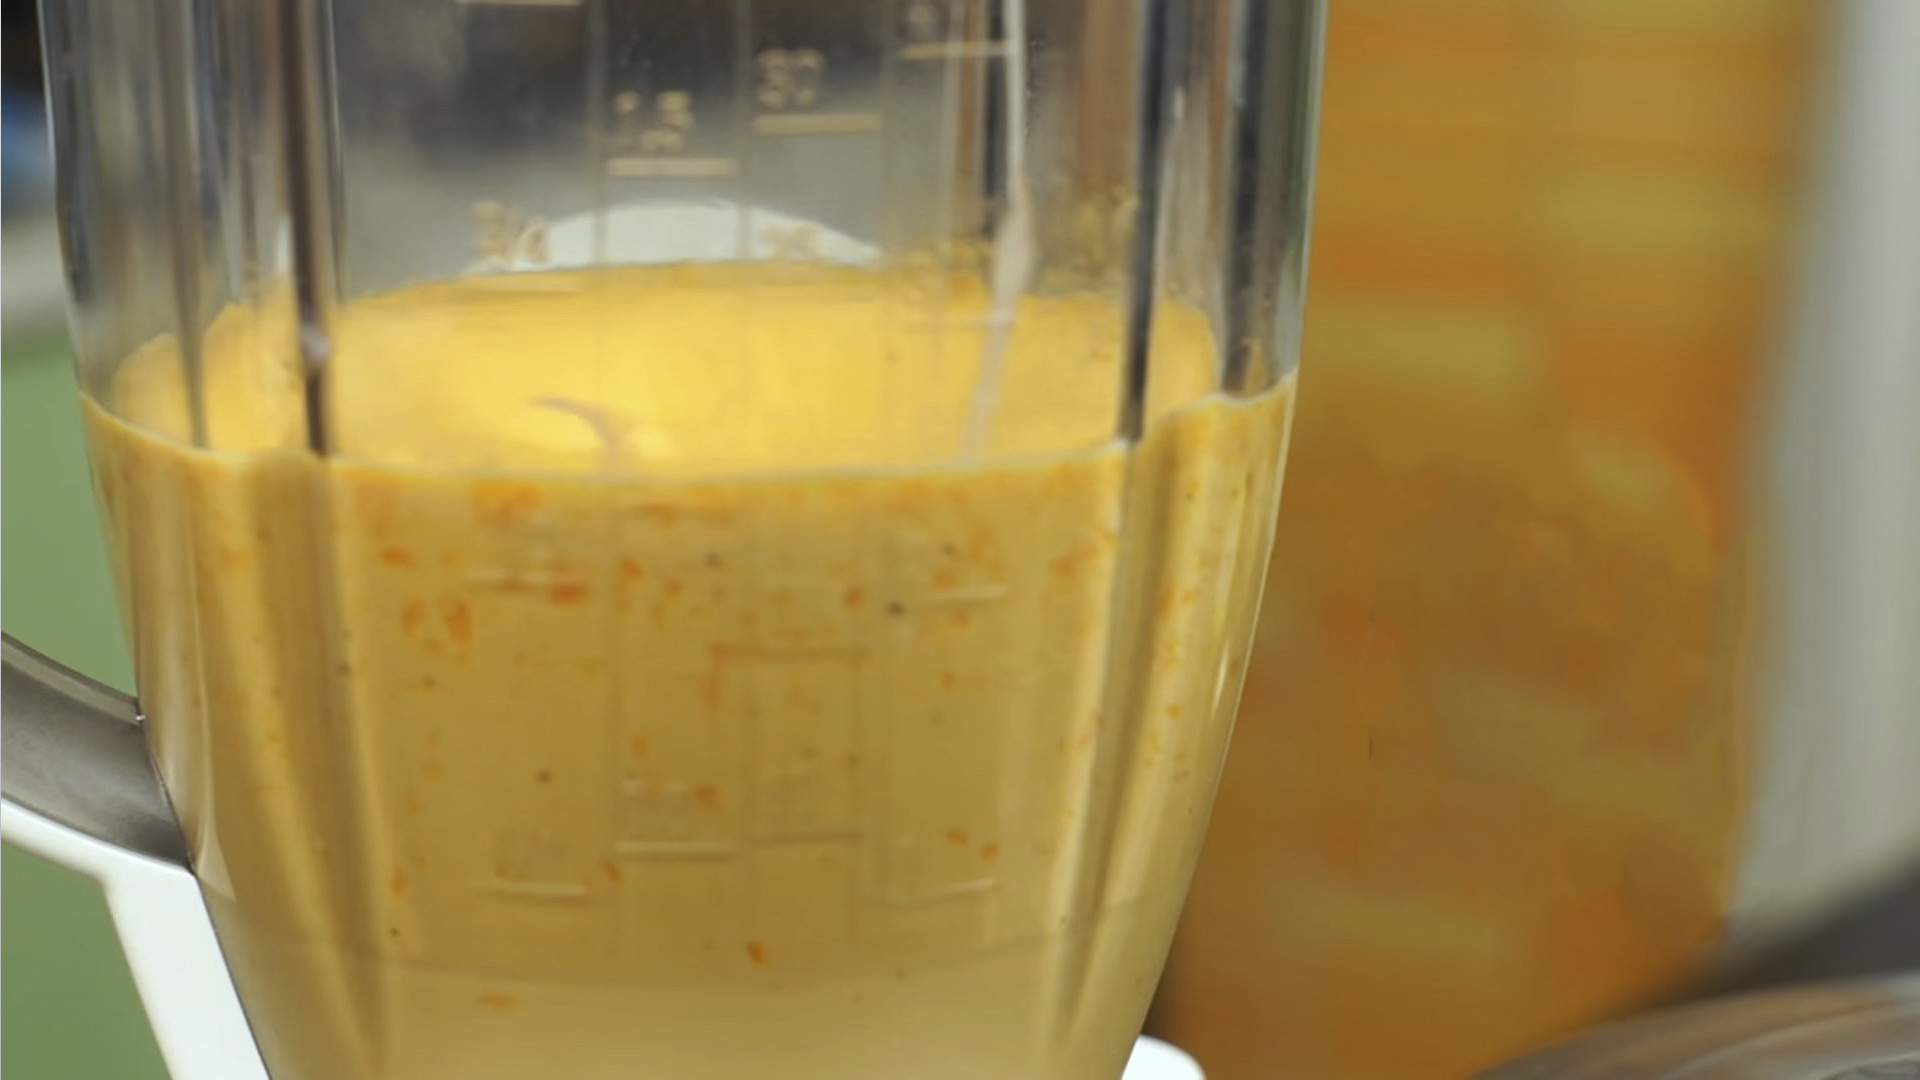
Step 8
Beat the pumpkin mixture until smooth.
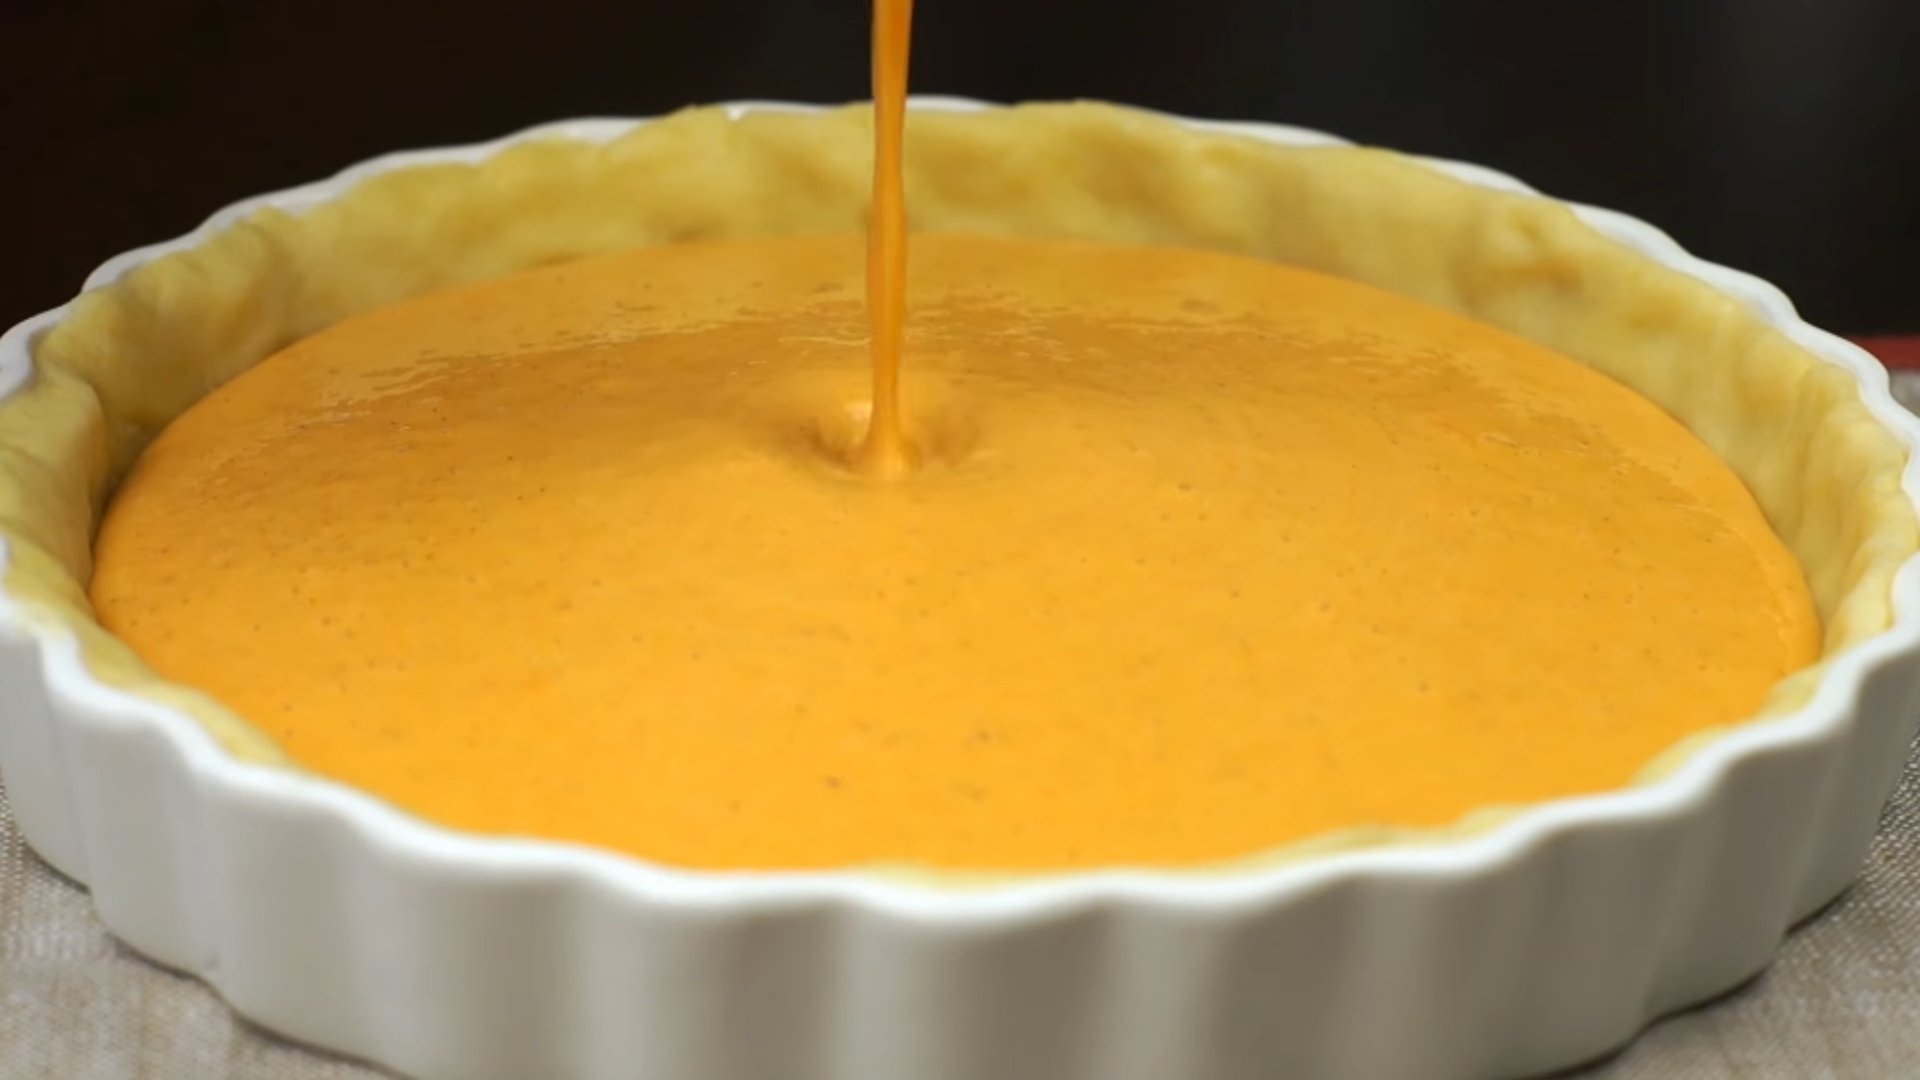
Step 9
Pour the prepared filling onto the dough.
Step 10
Bake the pie for the first 15 minutes at 200 degrees, then reduce it to 180 and bake for another 30 minutes.
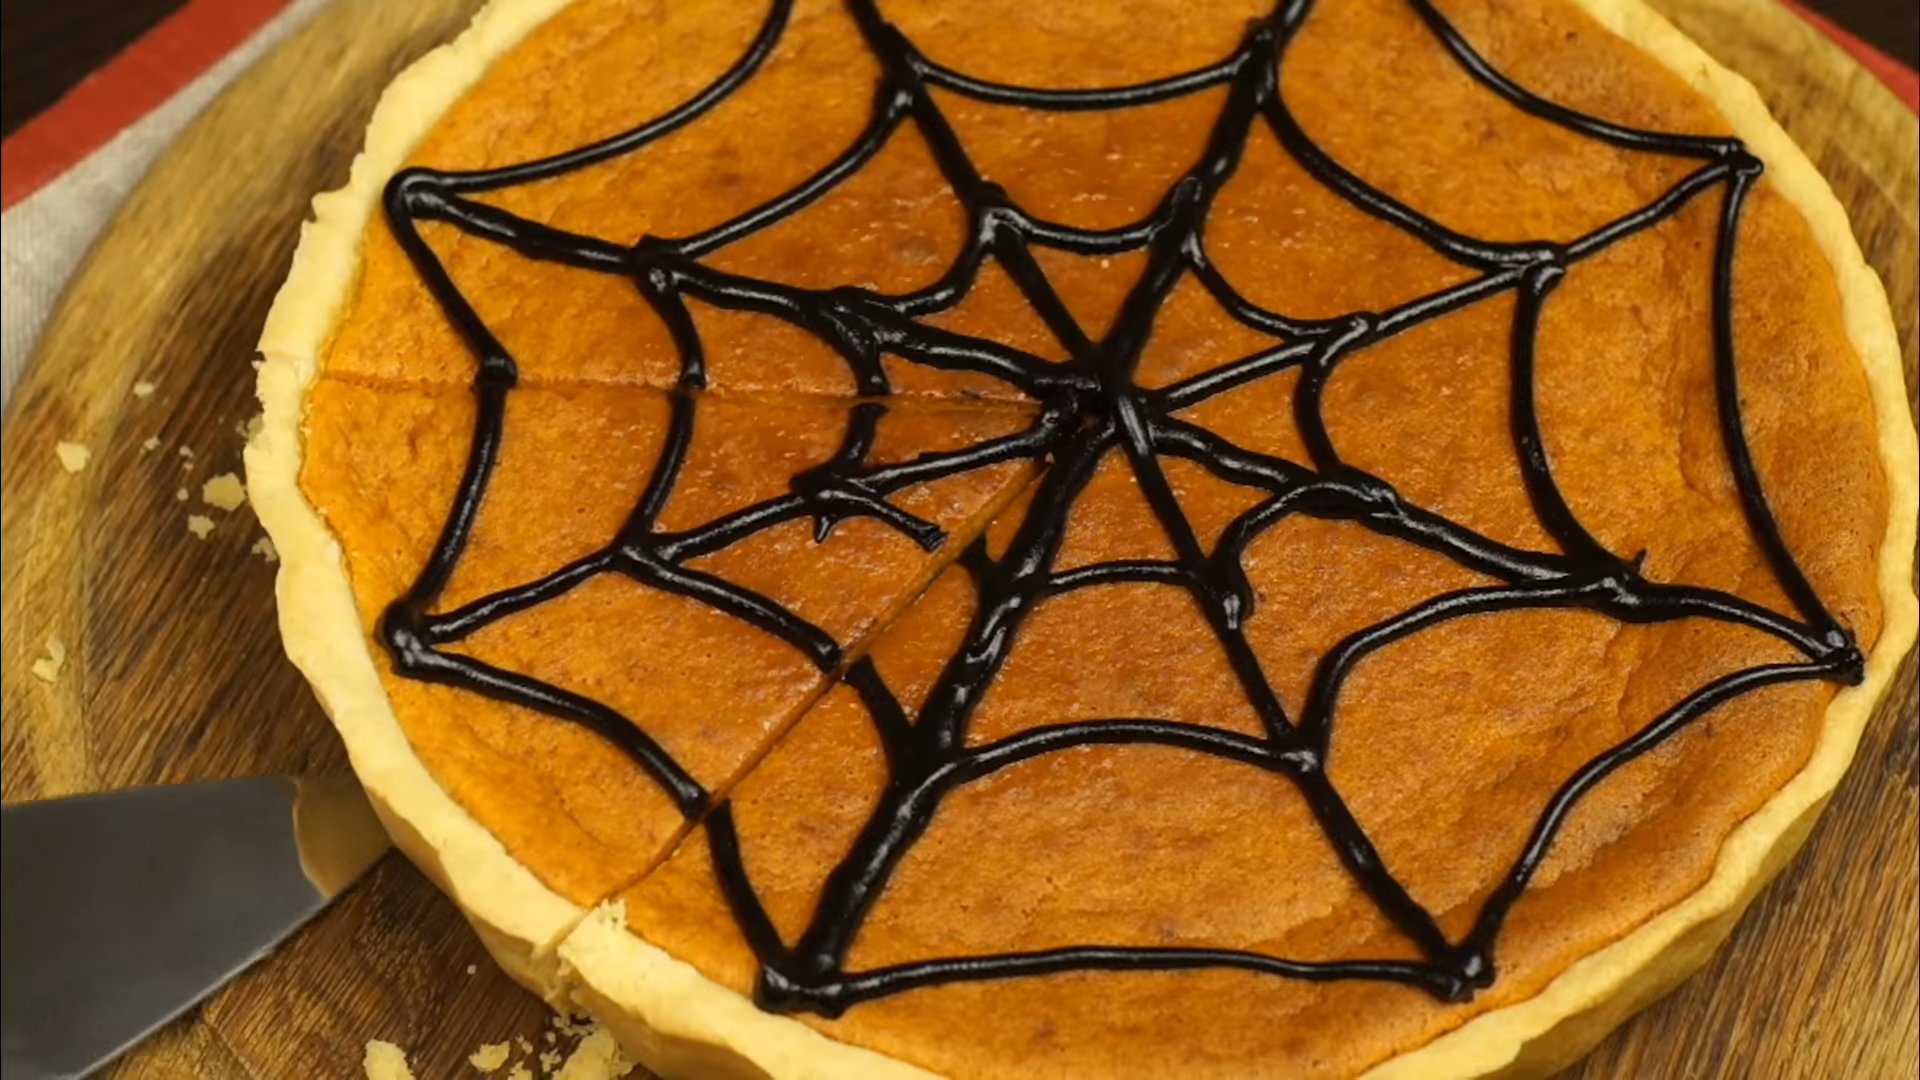
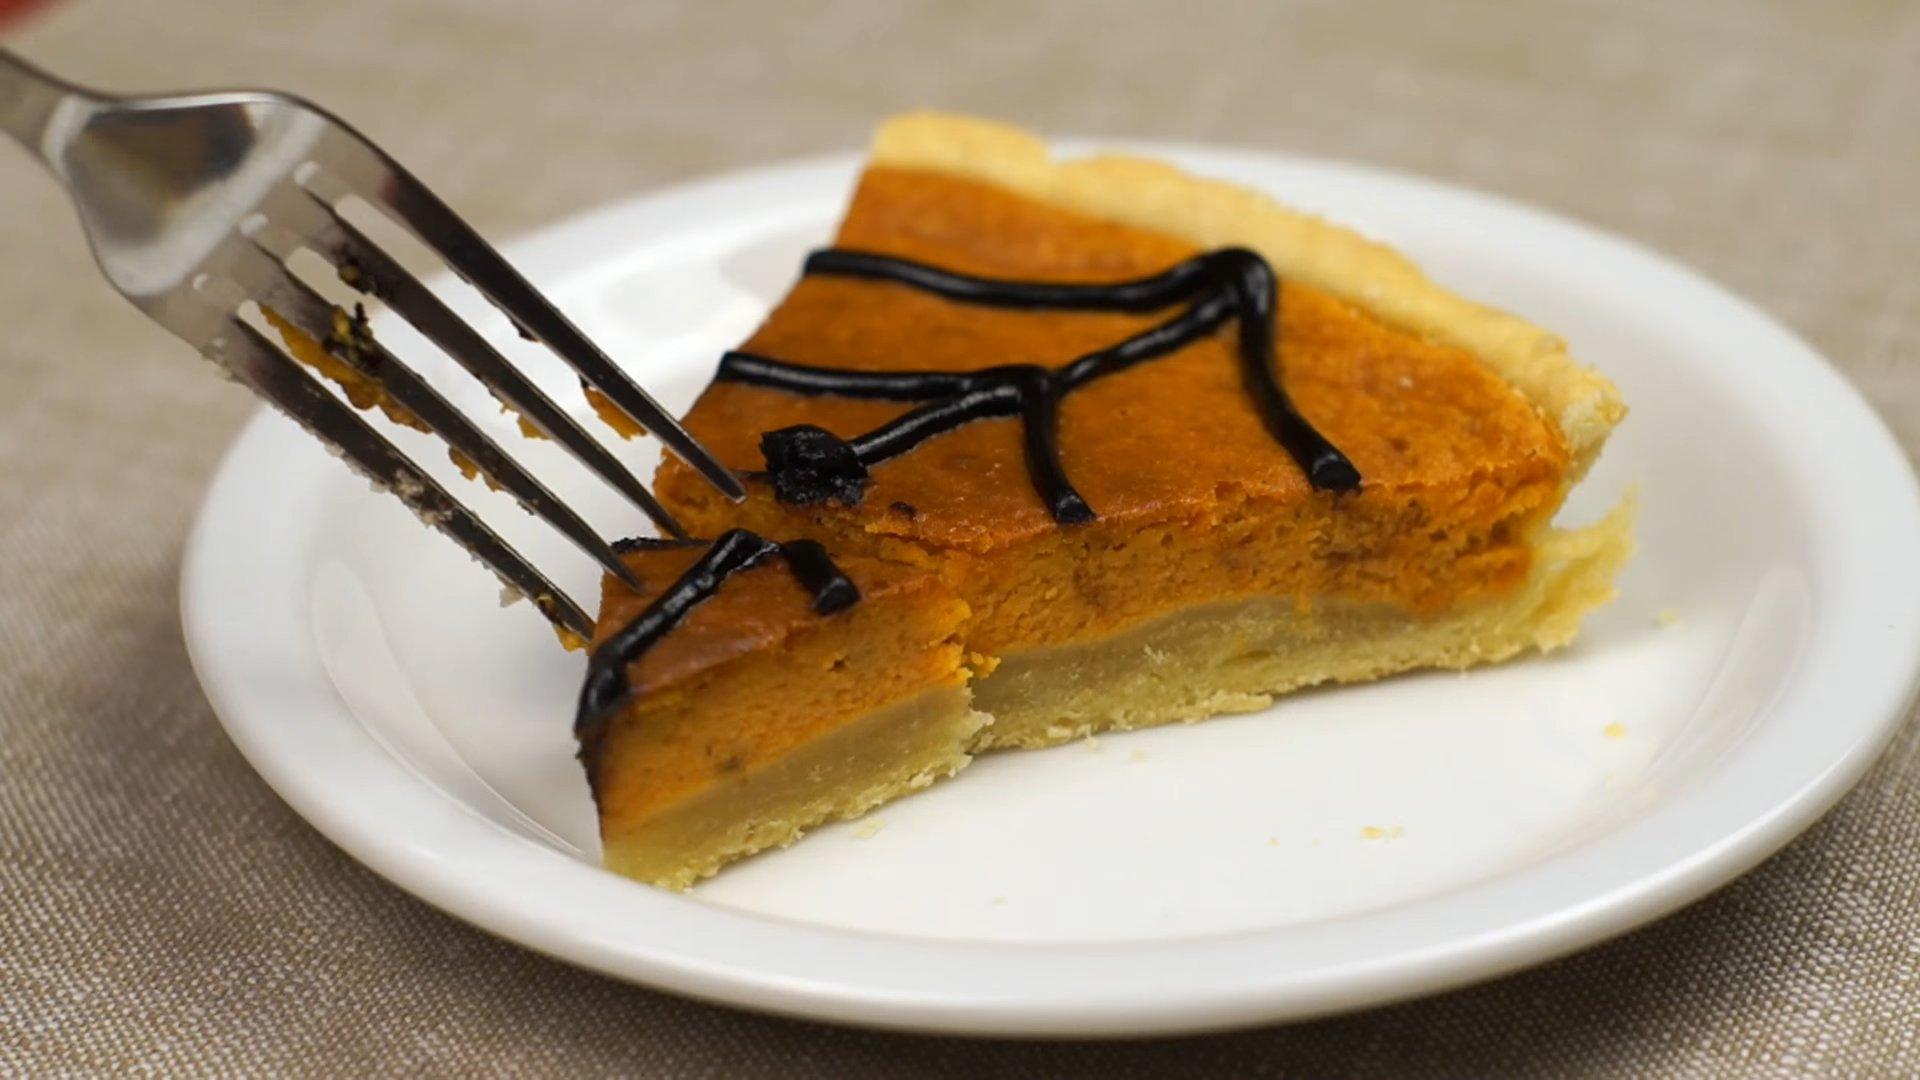
Step 11
Let the finished cake cool thoroughly, then draw a spider web on it using chocolate icing. You can use ready-made icing or melt some dark chocolate.

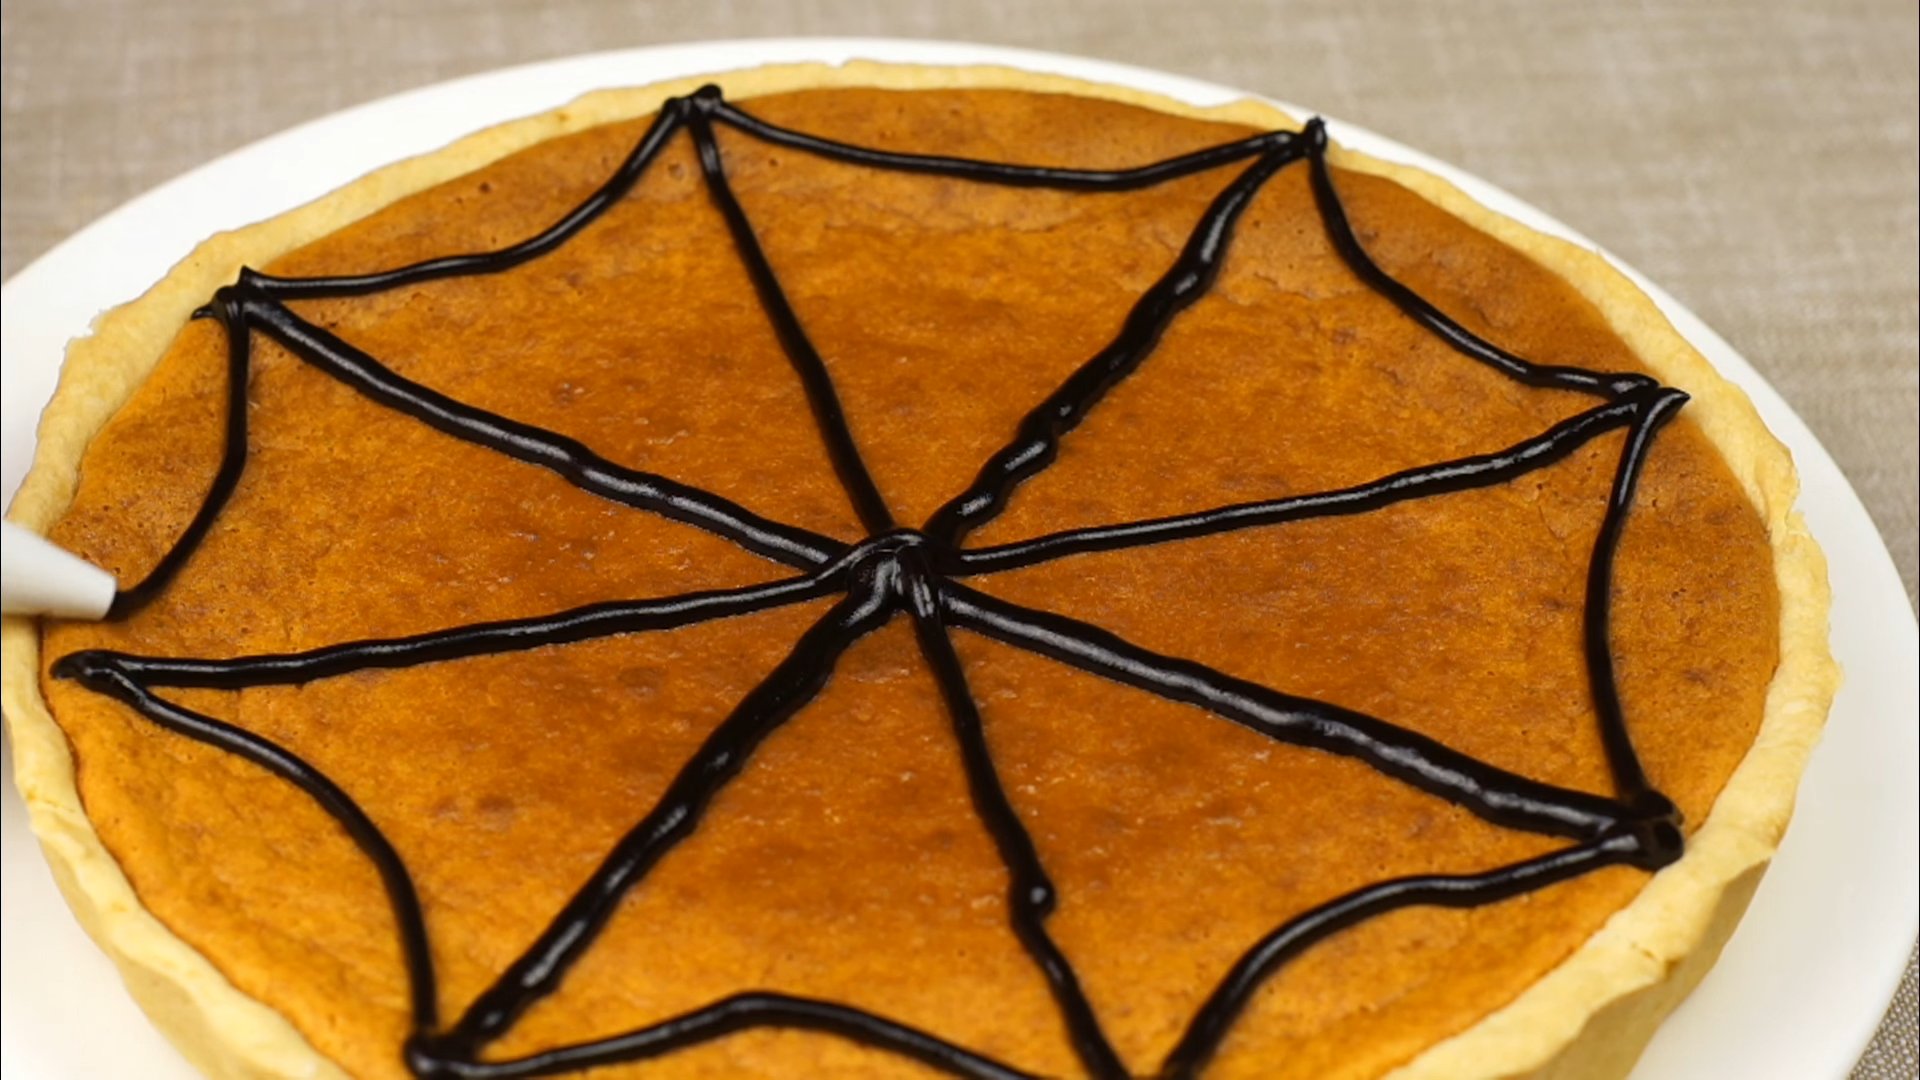
Step 12
The original pumpkin pie for Halloween is ready.
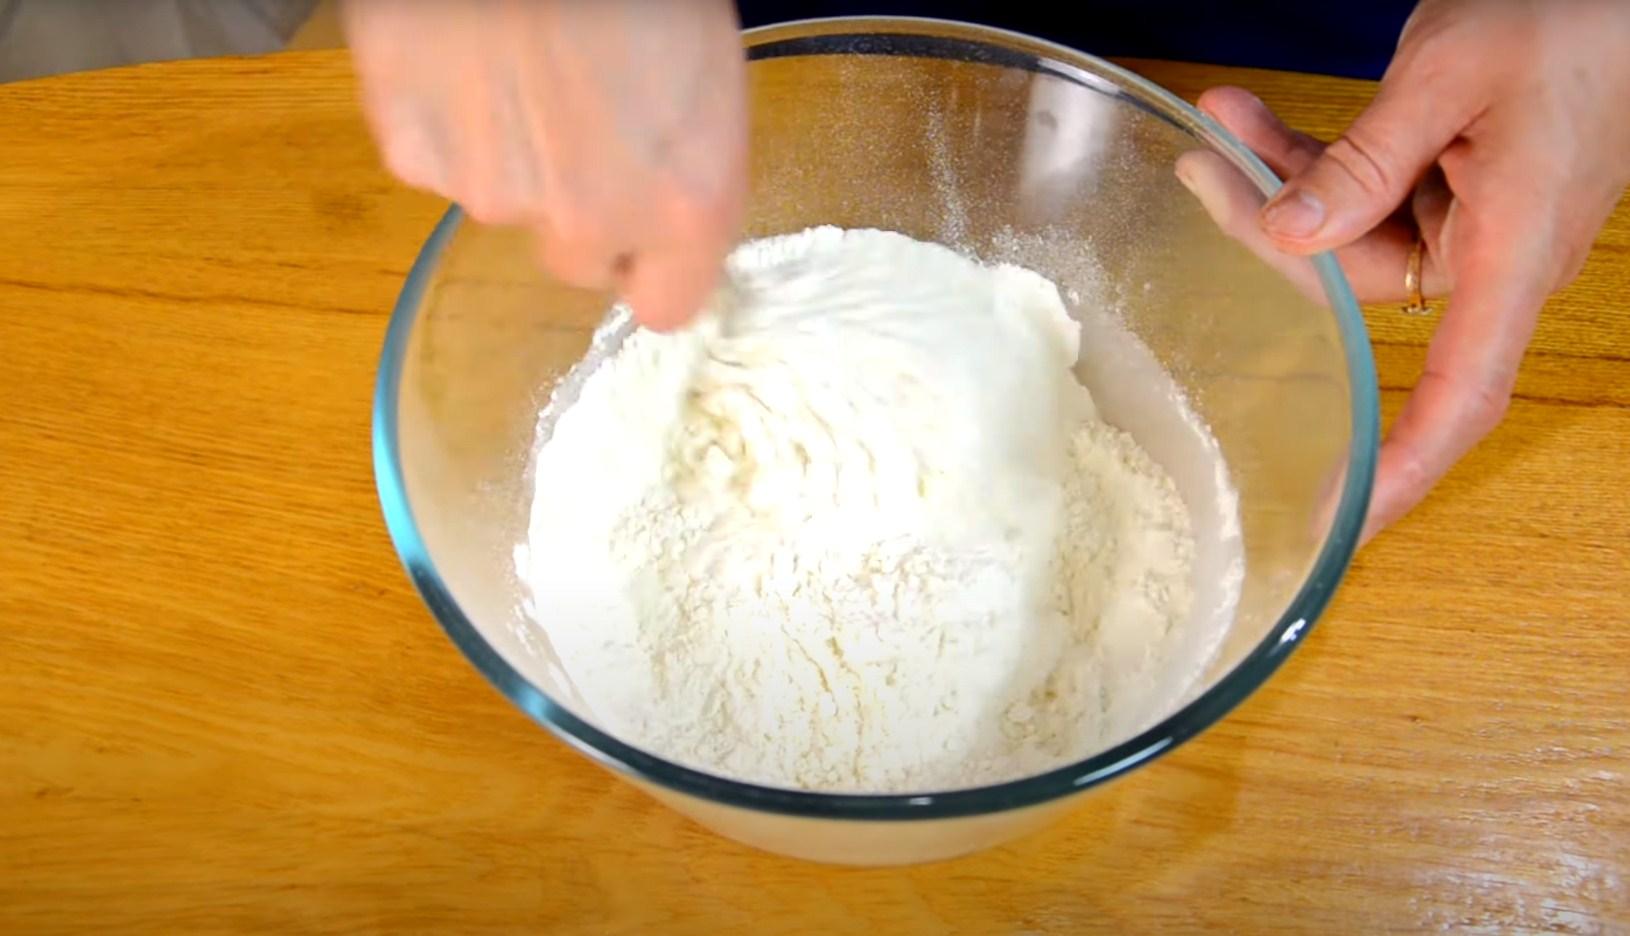
Witch Fingers Cookies
This dessert is easy to make, but it looks very original. If you want to impress your guests, be sure to make this dish for Halloween.
Ingredients
- Flour – 300-400 g
- Butter – 150 g
- Sugar – 100 g
- Egg – 1 pc.
- Baking powder – 1 tsp.
- Salt - a pinch
- Vanillin - a pinch
- Almonds – 100 g
- Chocolate for coloring
Cooking time: 40-60 minutes
Servings: 10 (30 cookies)
Step-by-step recipe
Step 1
Add the dry ingredients to the sifted flour: baking powder, salt, and vanilla sugar. Mix.
Step 2
Add sugar, a pre-beaten egg, and melted butter to the dry mixture. Stir first with a spoon, then by hand, until smooth. Cover the dough with a napkin and let it rest for 20 minutes.
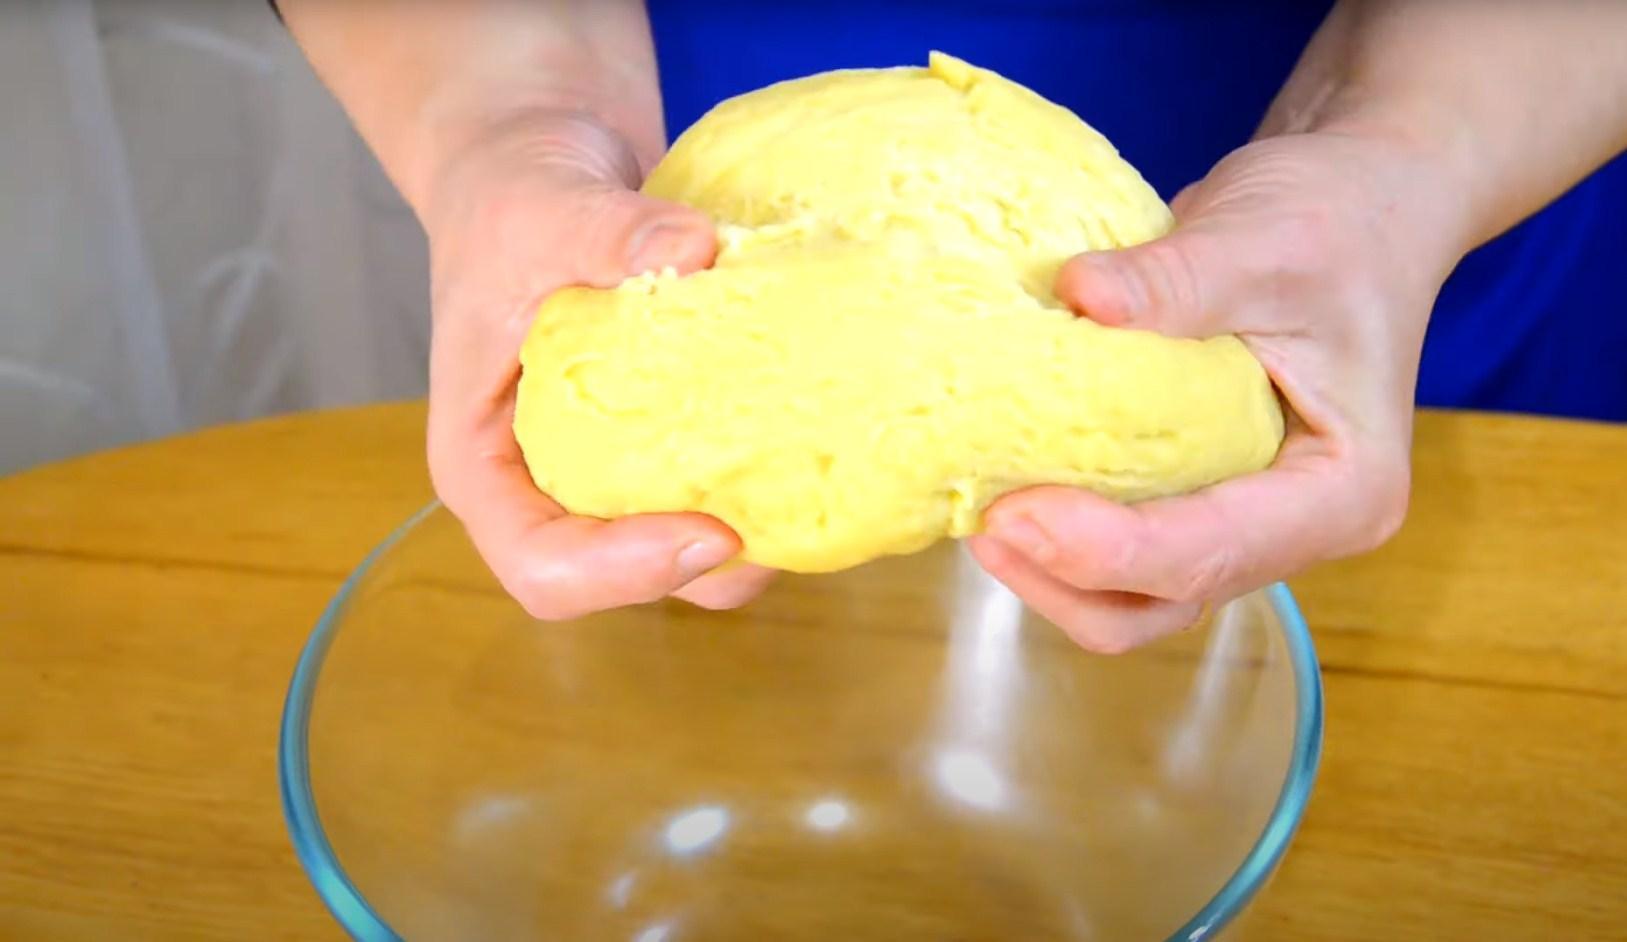
Step 3
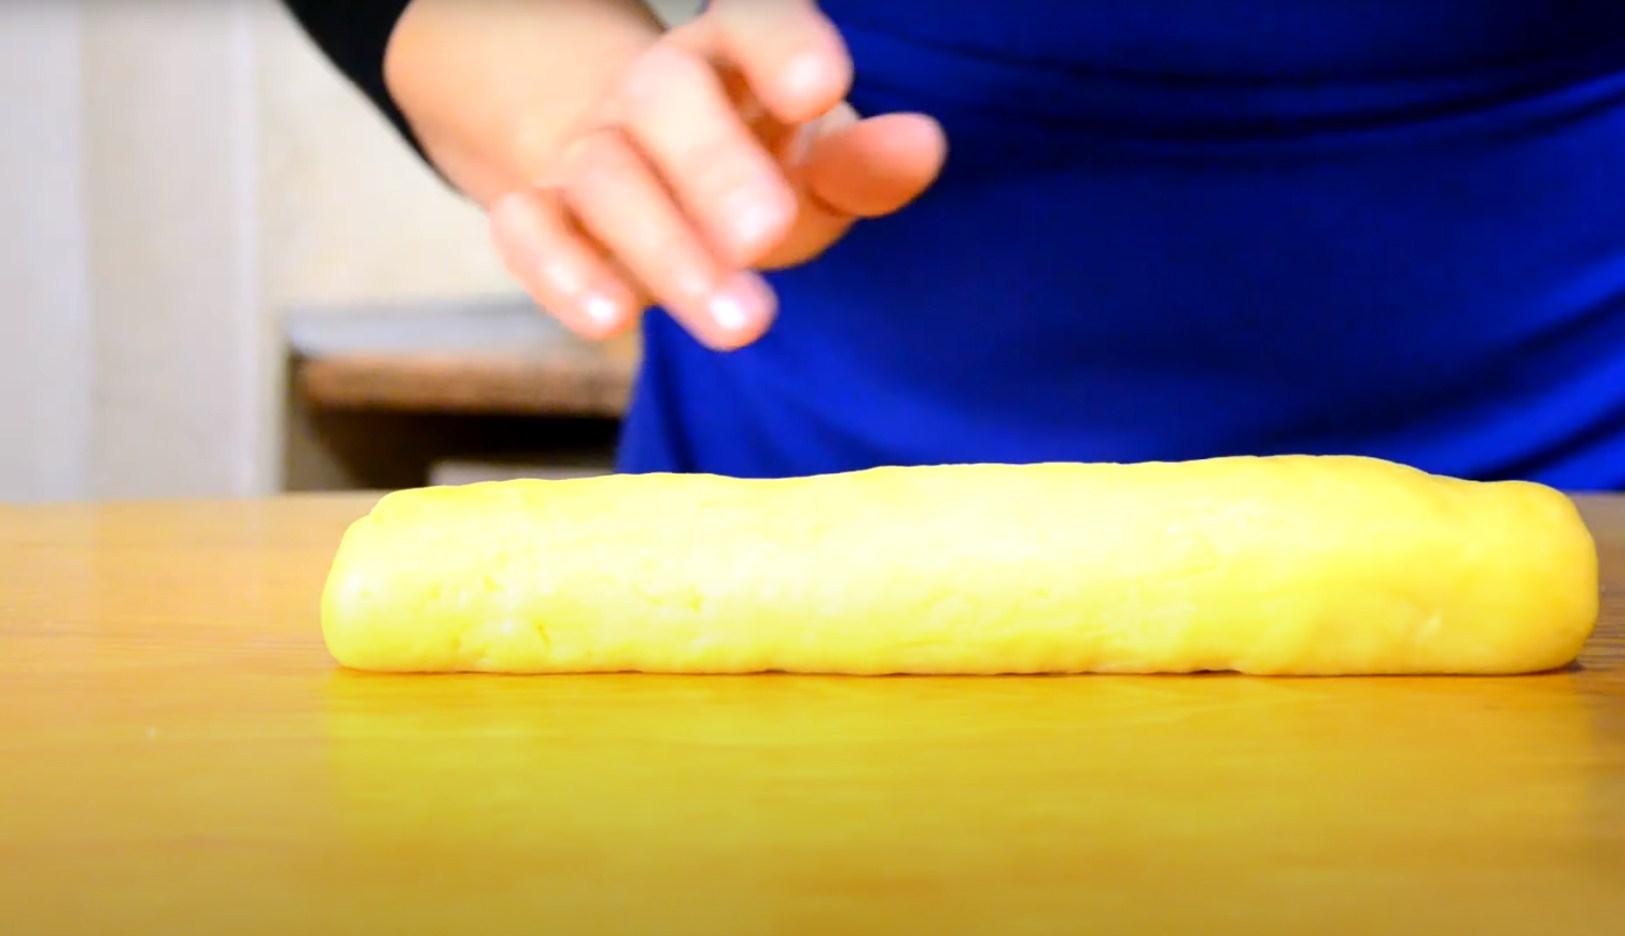
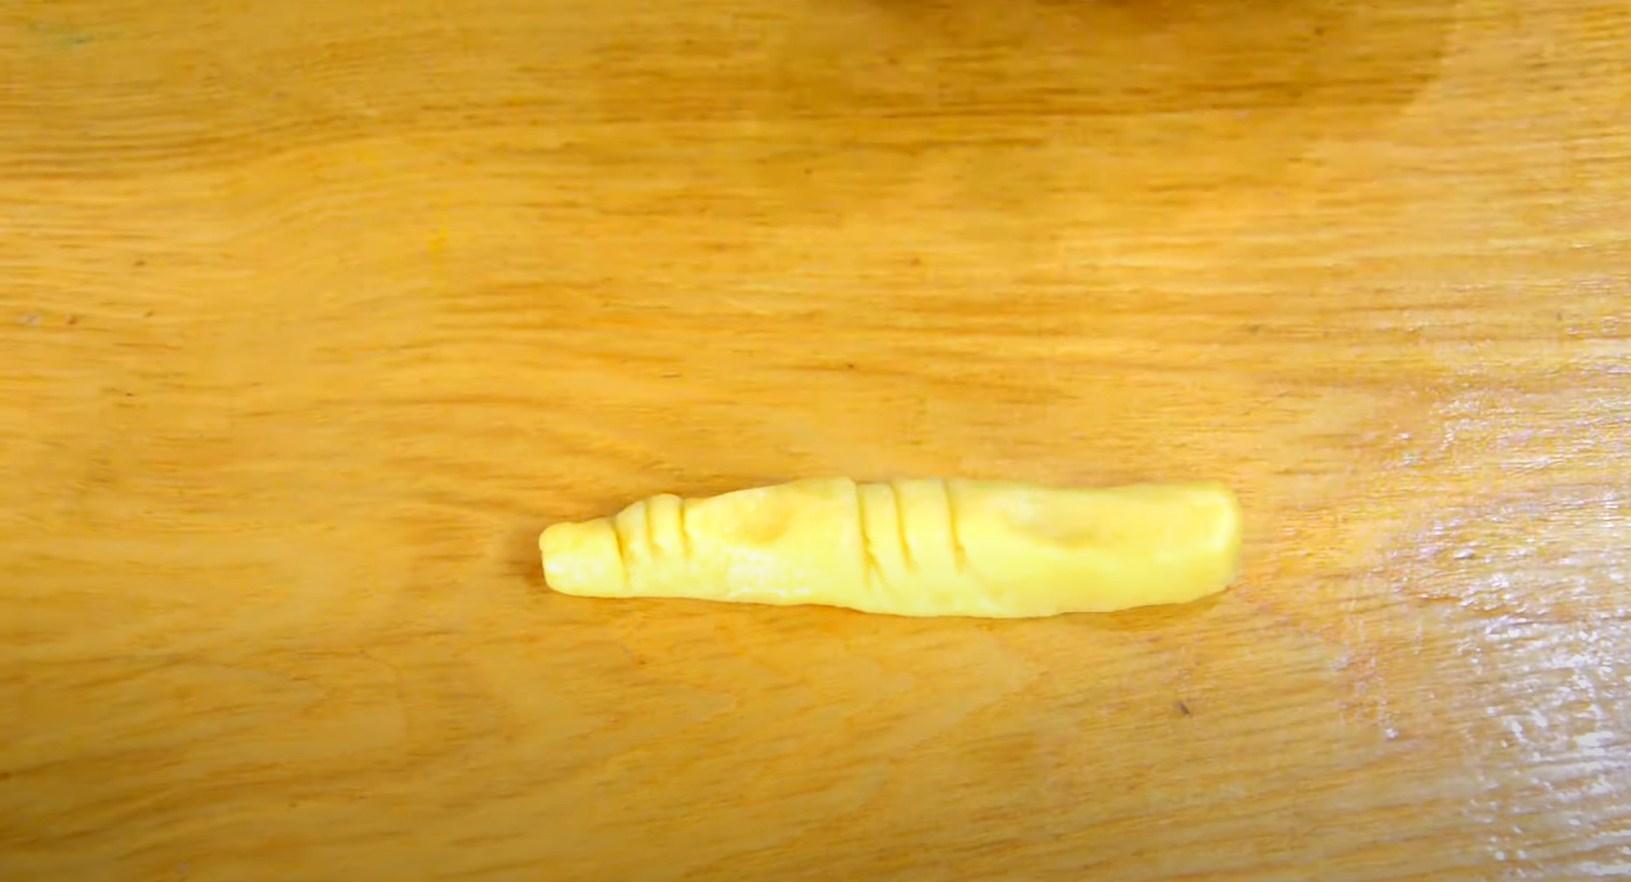
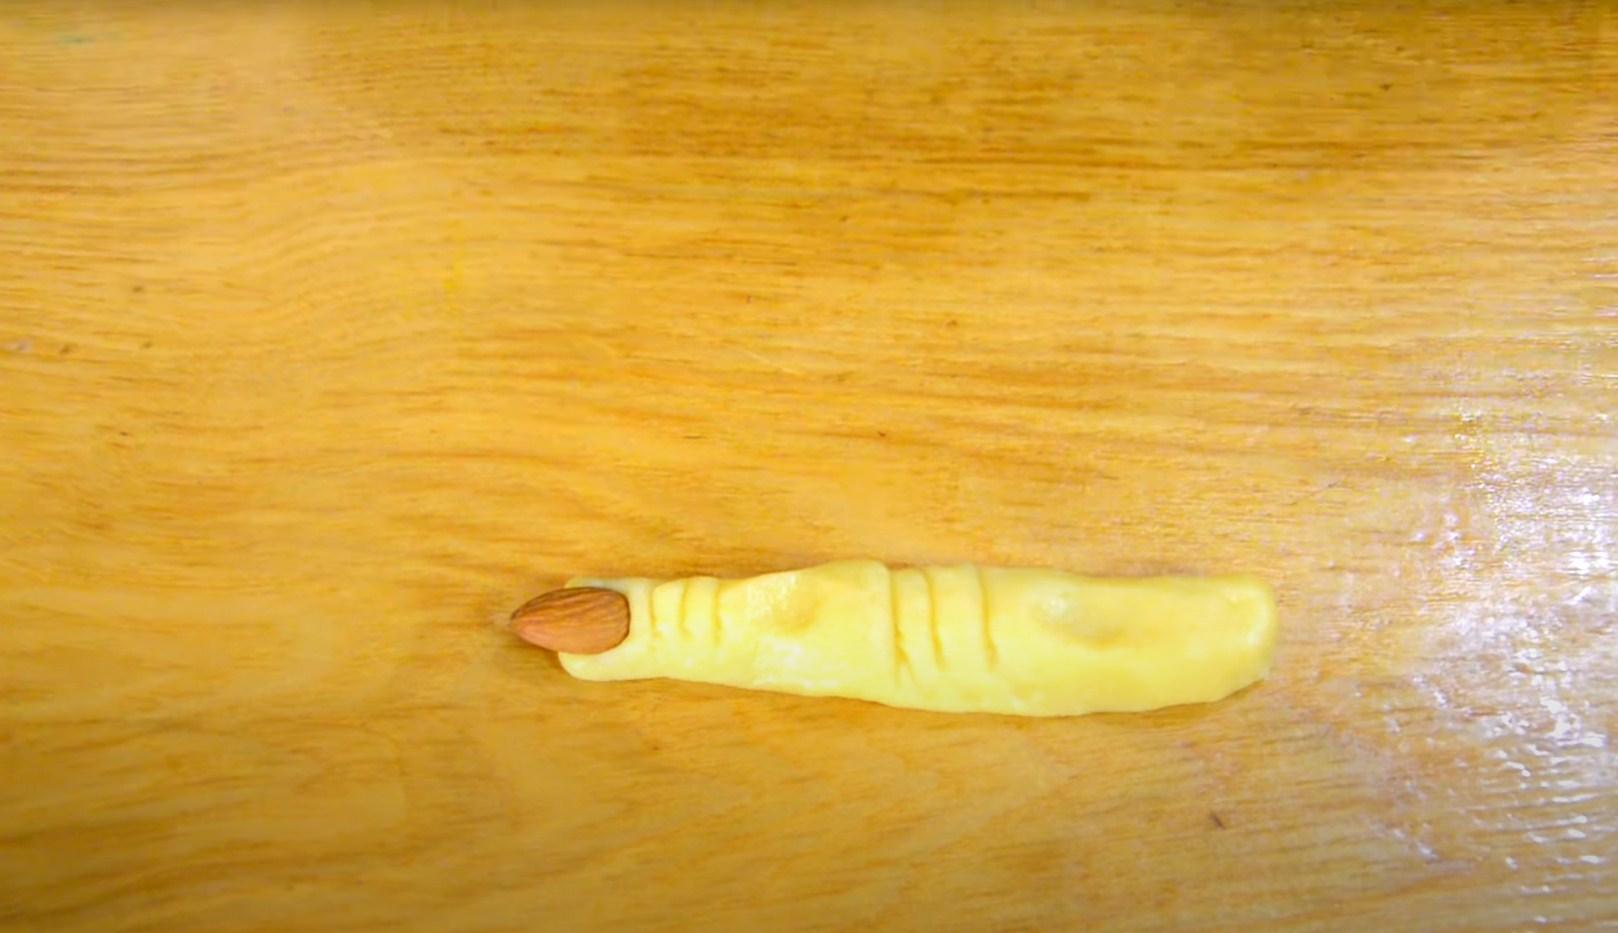
Form a sausage from half of the dough and cut it into small equal pieces.
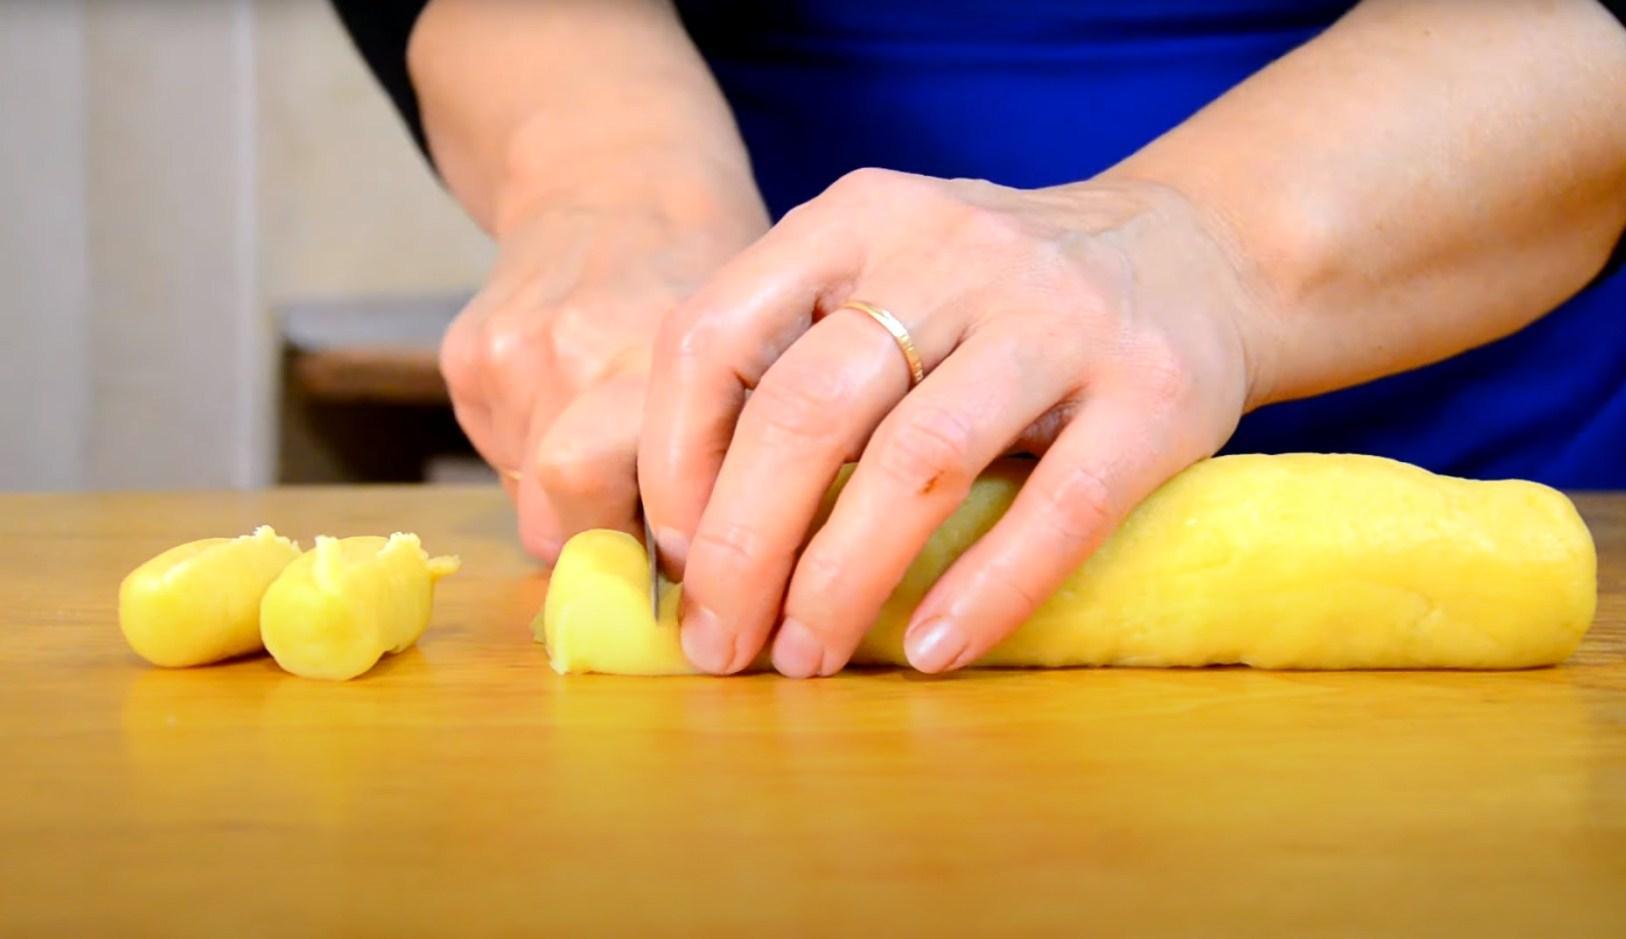
Step 4
Roll each piece into a finger-shaped shape. Use a knife to create the appropriate folds. Place an almond on the edge of the "finger," forming a nail. Repeat this process with the rest of the dough.
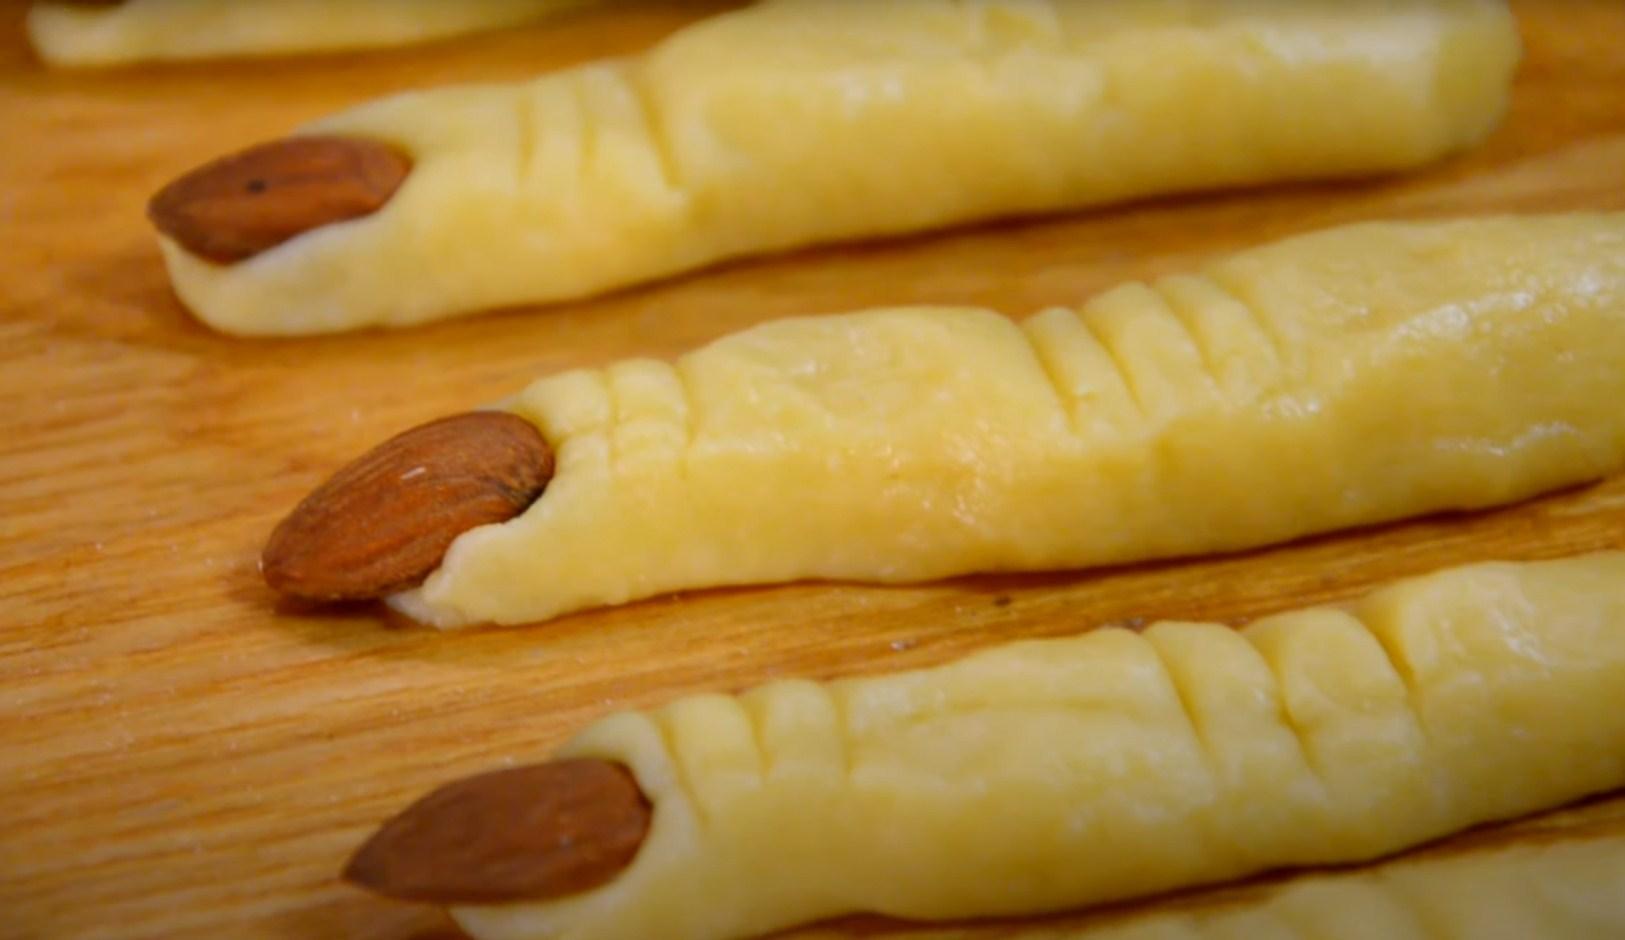
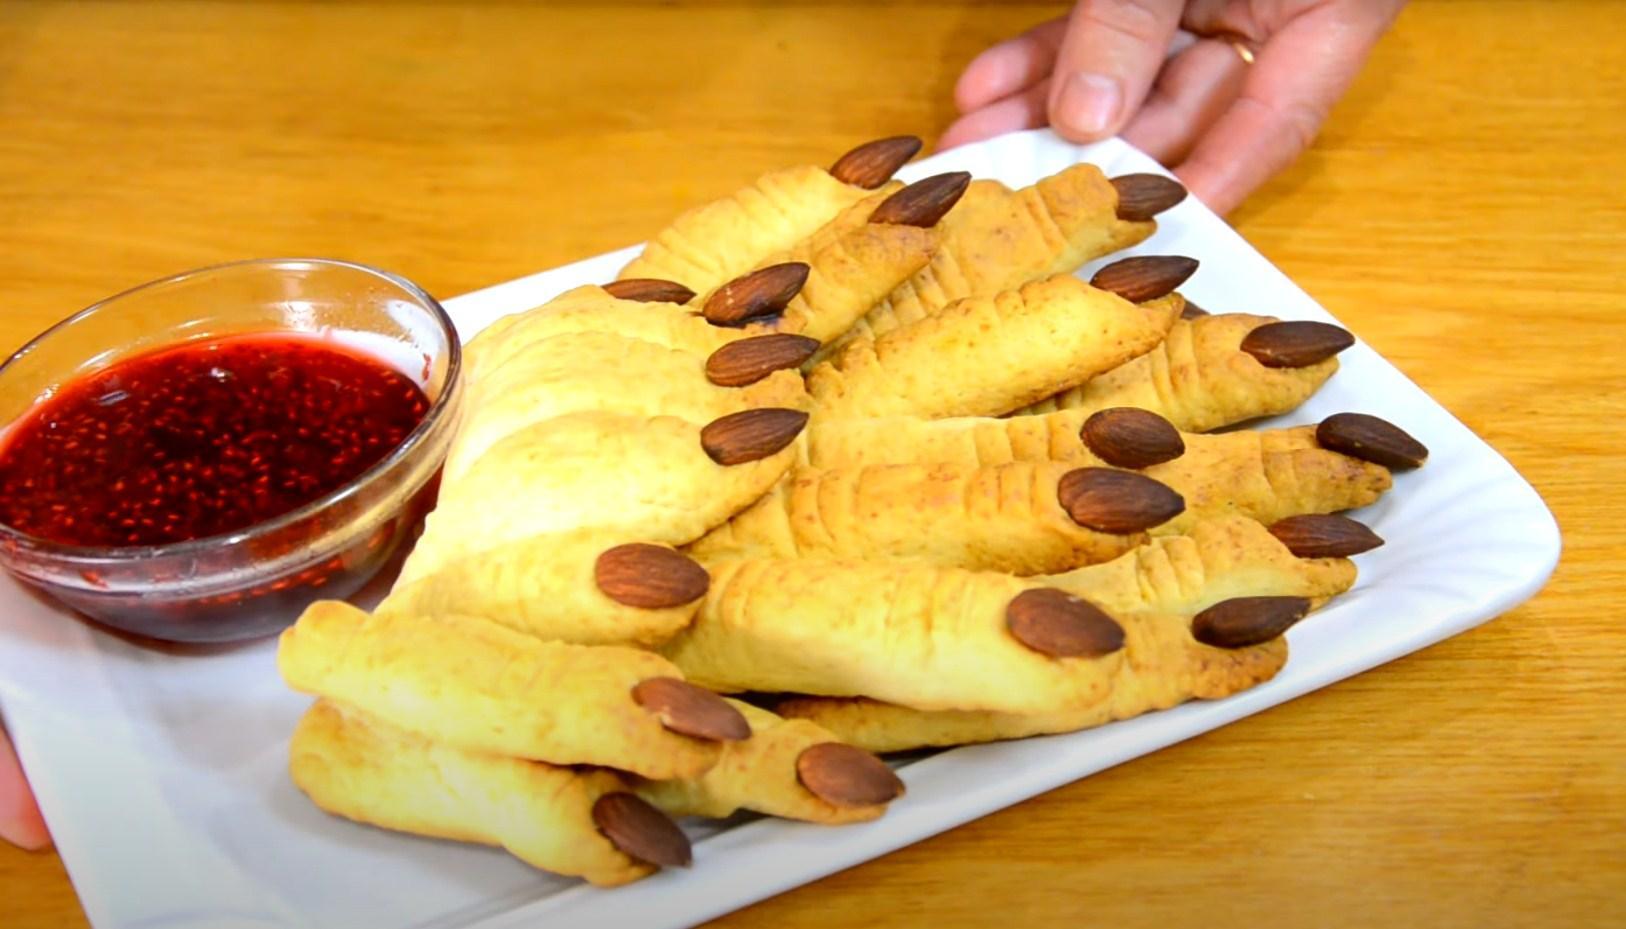
Step 5
Place the "fingers" on a baking sheet and bake in the oven at 220 degrees Celsius for 20 minutes. Serve the finished cookies with red jam.
More Halloween dessert ideas, plus another cookie optionWitch's fingers", look for it on our website.
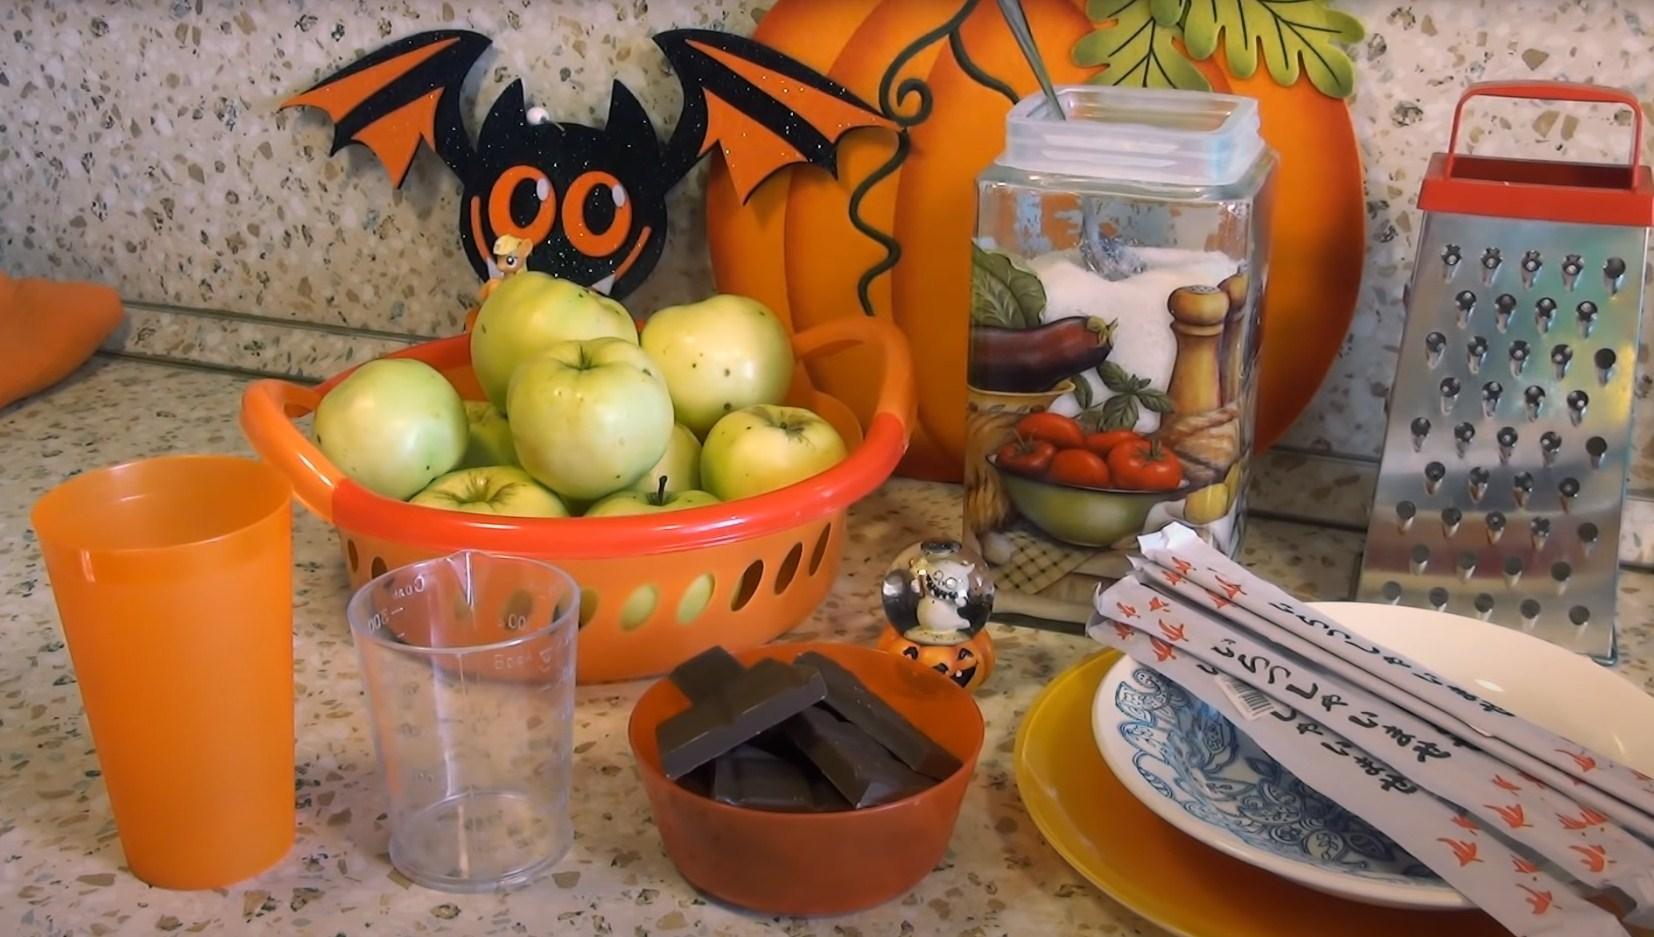
Caramel apples for Halloween
This is a traditional Halloween dish. Be sure to try making this delicious and healthy dessert.
Ingredients
- Apples – 10 pcs.
- Sugar – 2 tbsp.
- Chocolate – 100 g
- Sticks – 10 pcs.
Cooking time: 40-60 minutes
Servings: 10
Step-by-step recipe
Step 1
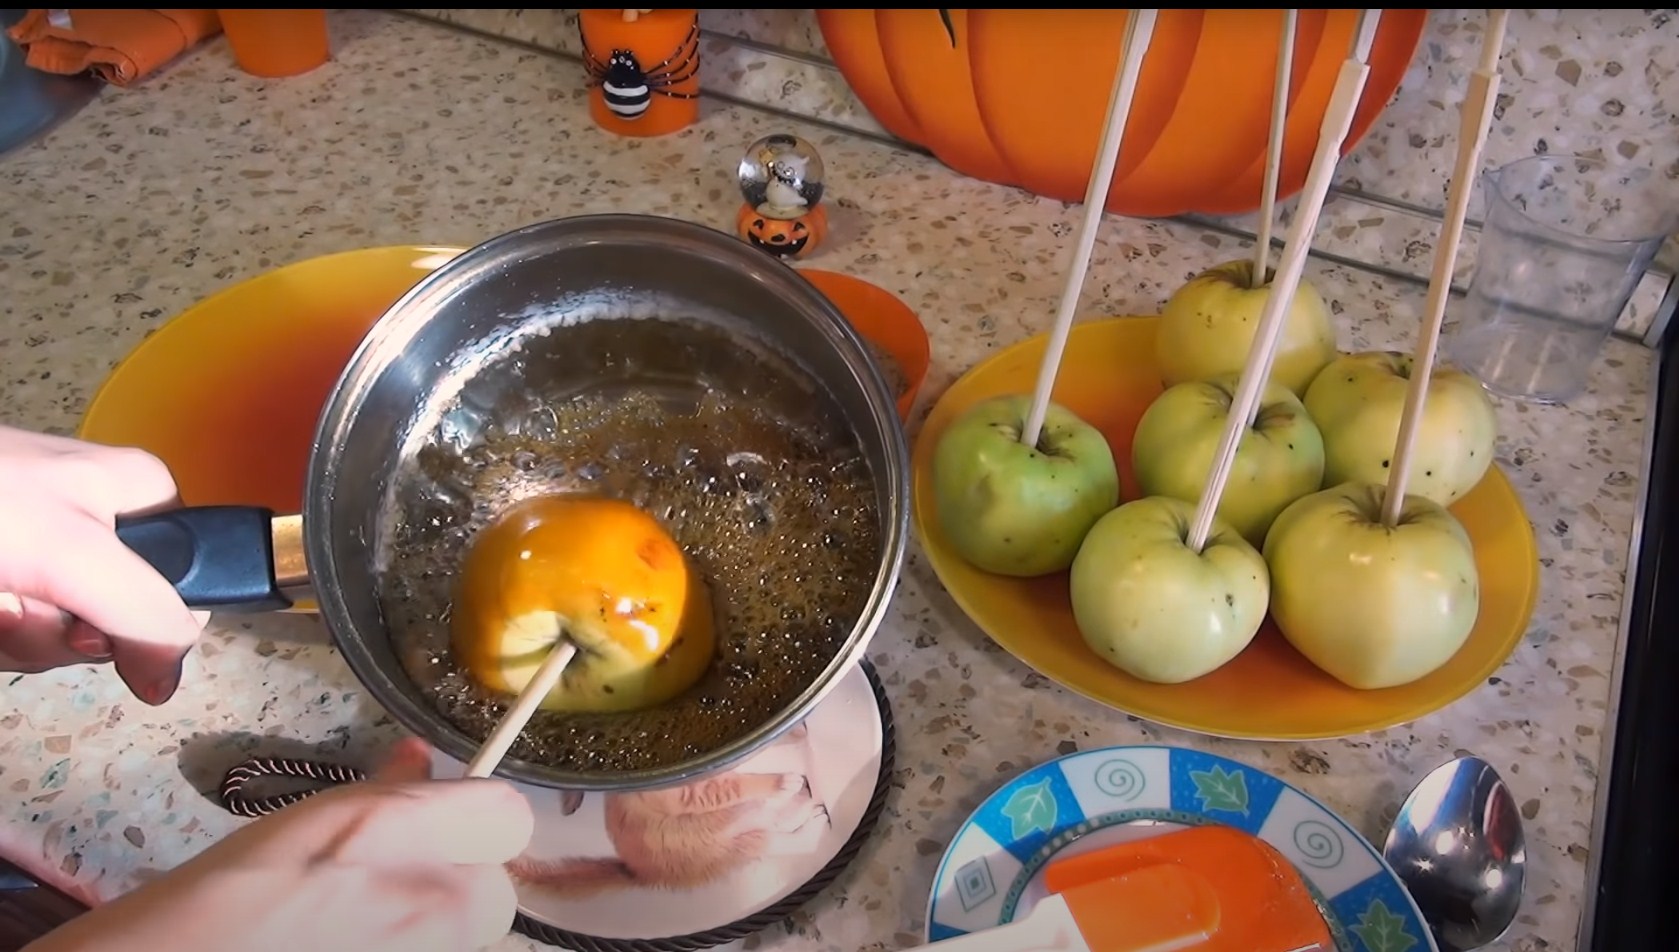
We prepare all the necessary ingredients and equipment for making the dessert.
Step 2
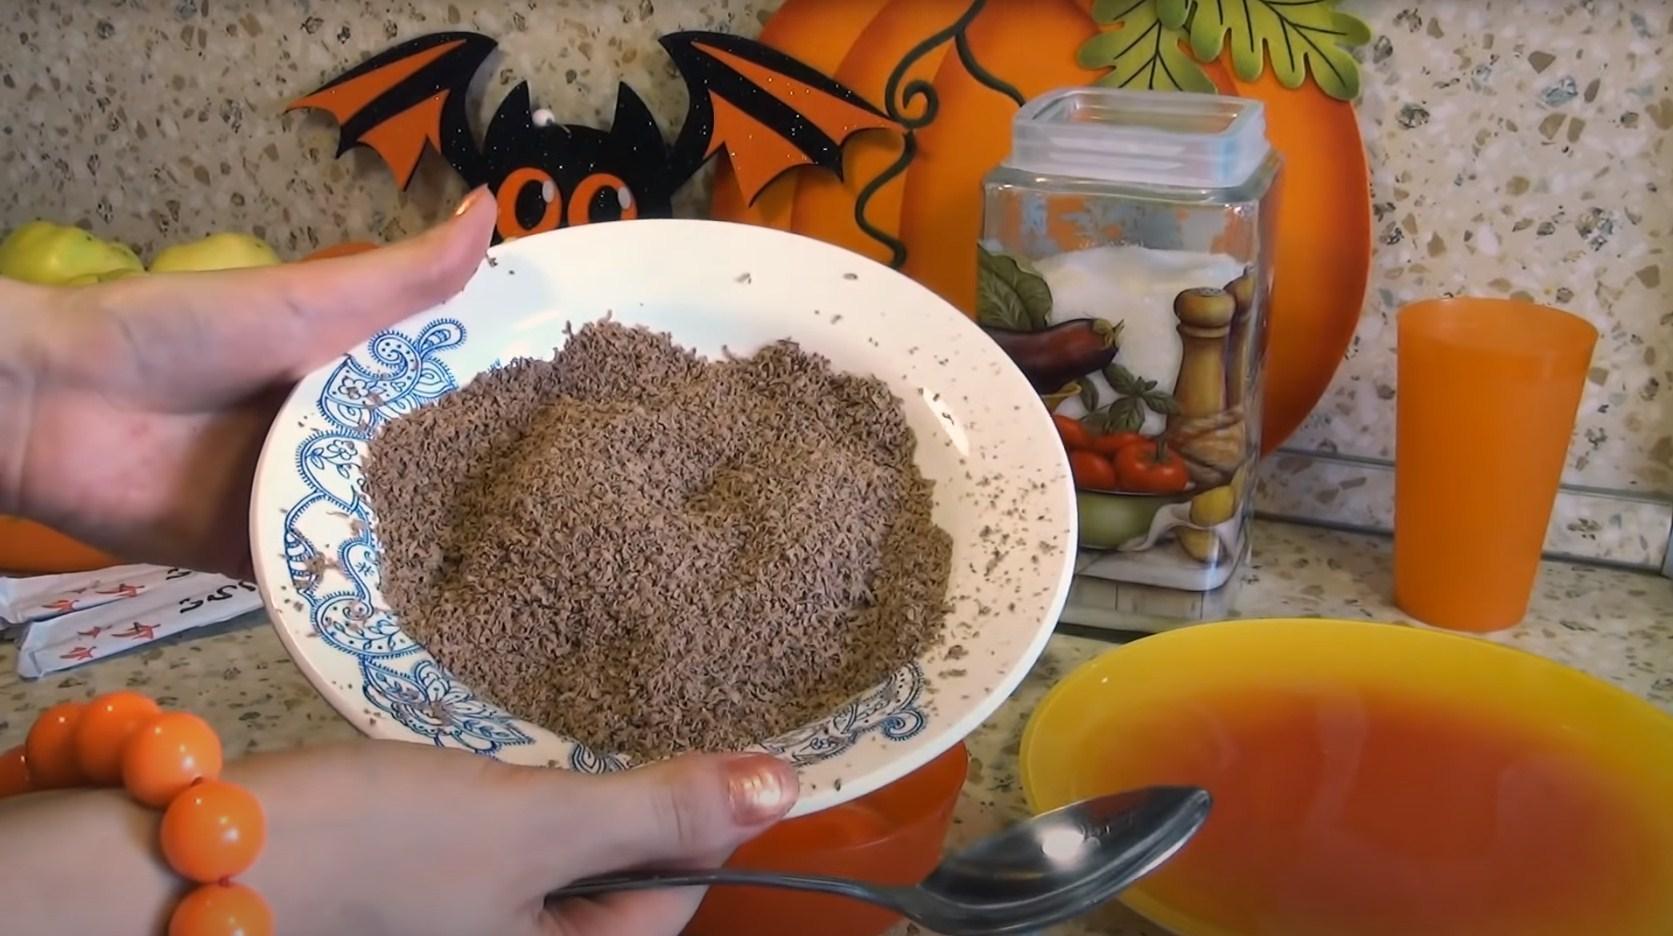
Grate the chocolate on a fine grater.
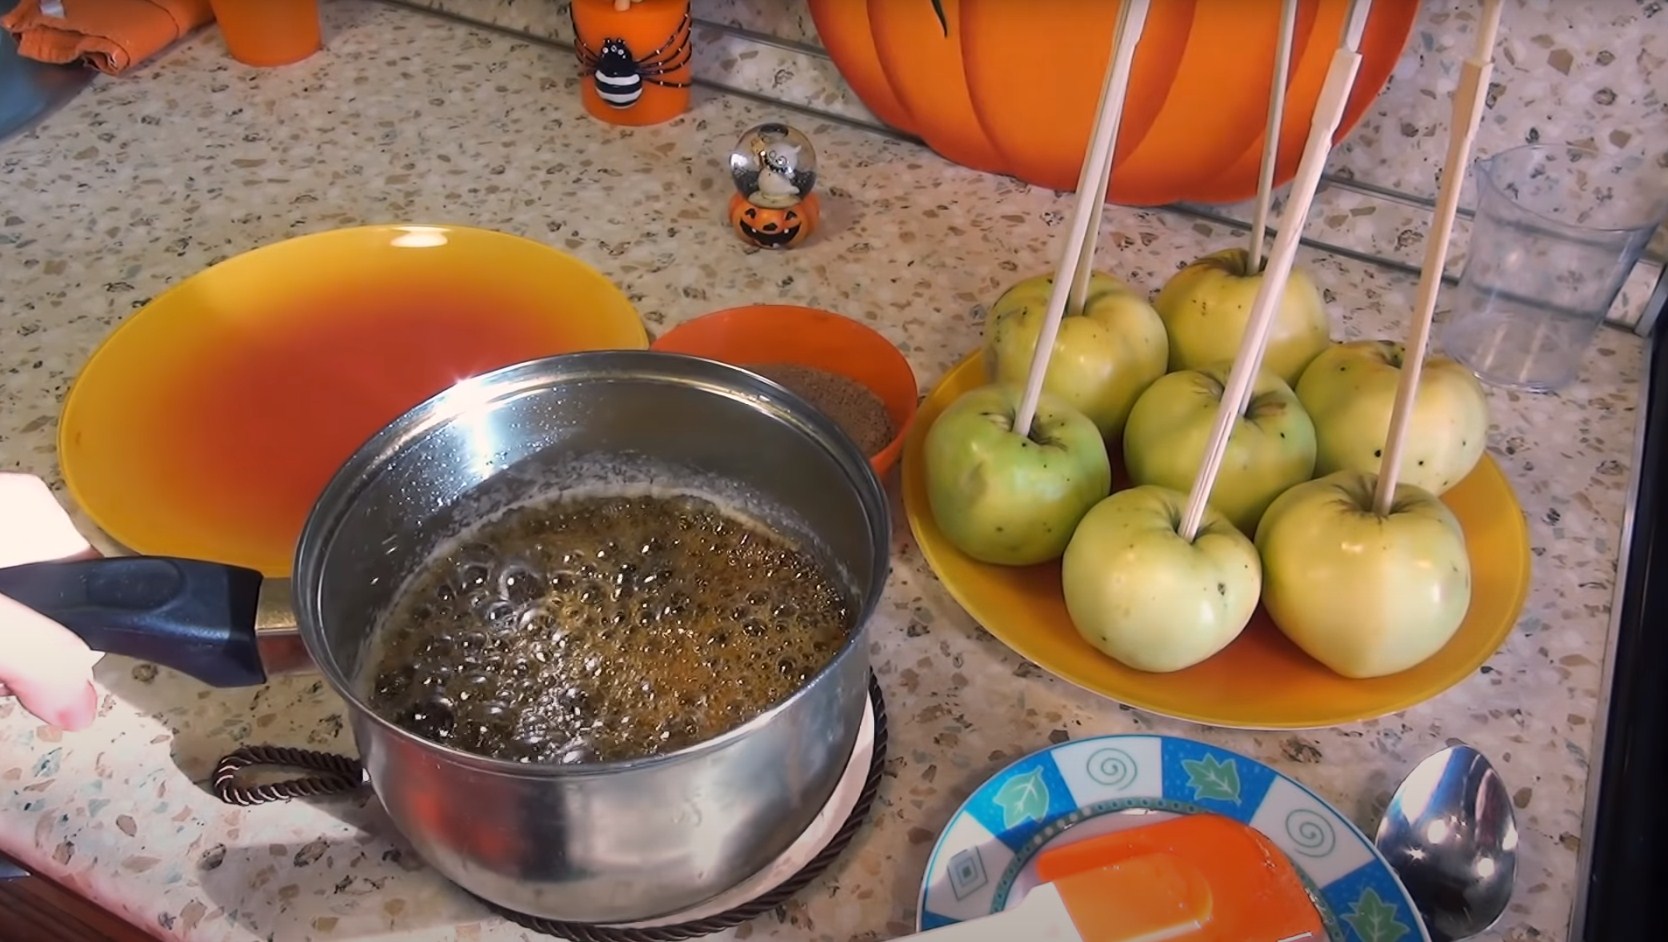
Step 3
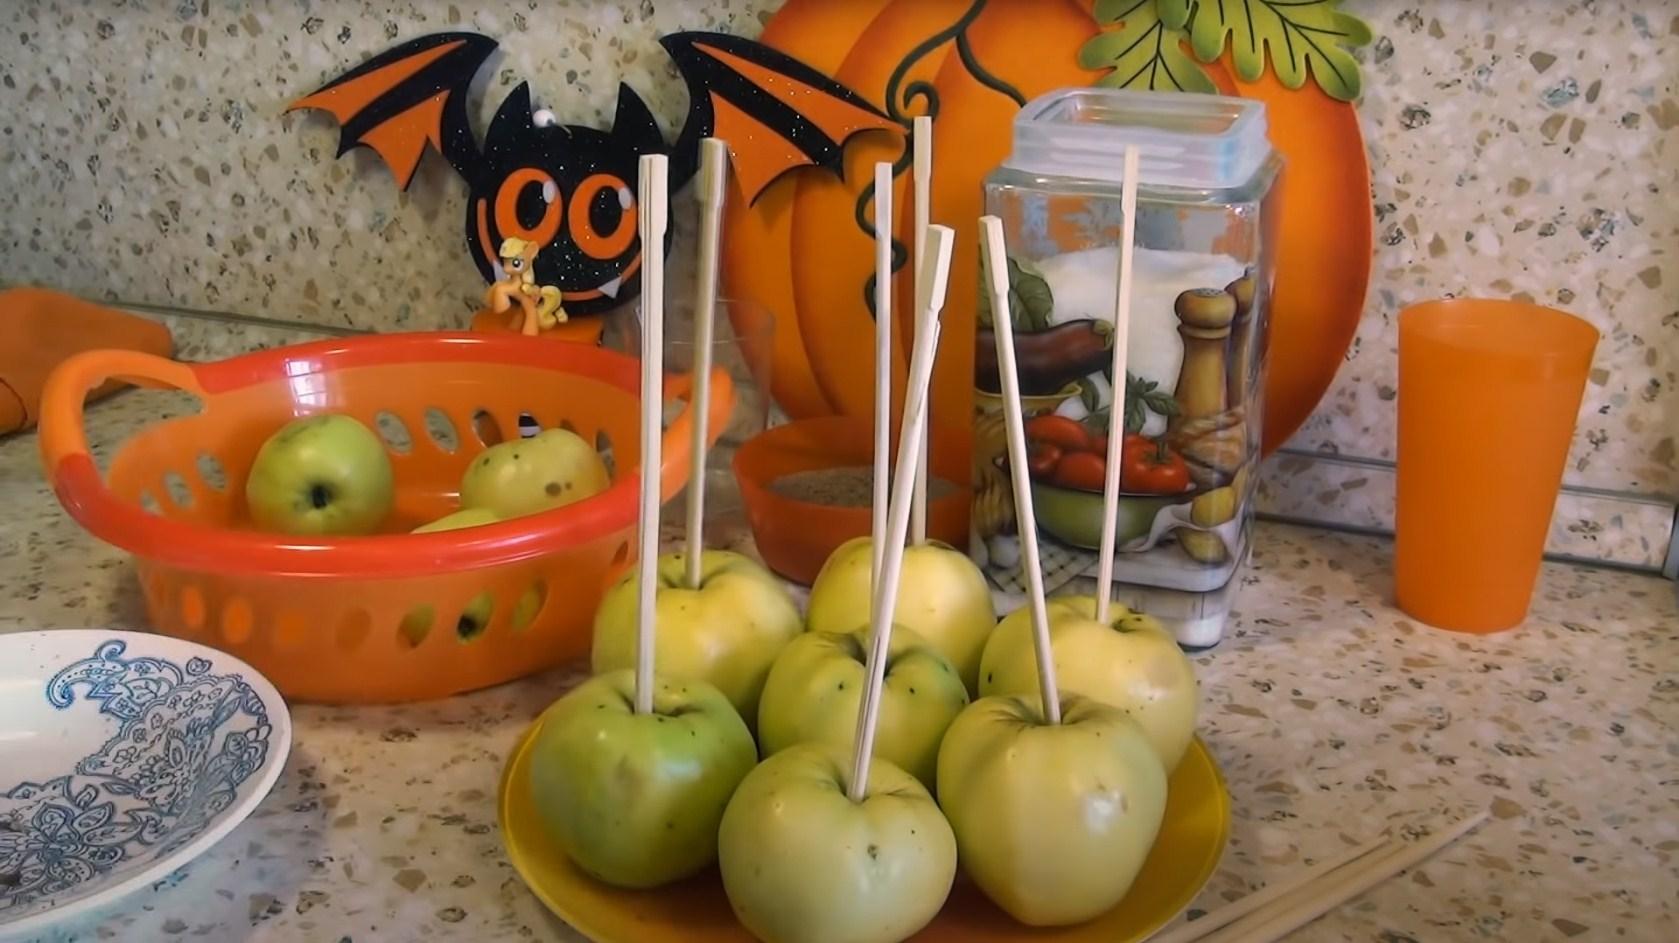
Wash the apples. Dry them thoroughly. Thread each apple onto a stick. Pierce deeply enough, but not all the way through, so the apples hold securely.
Step 4
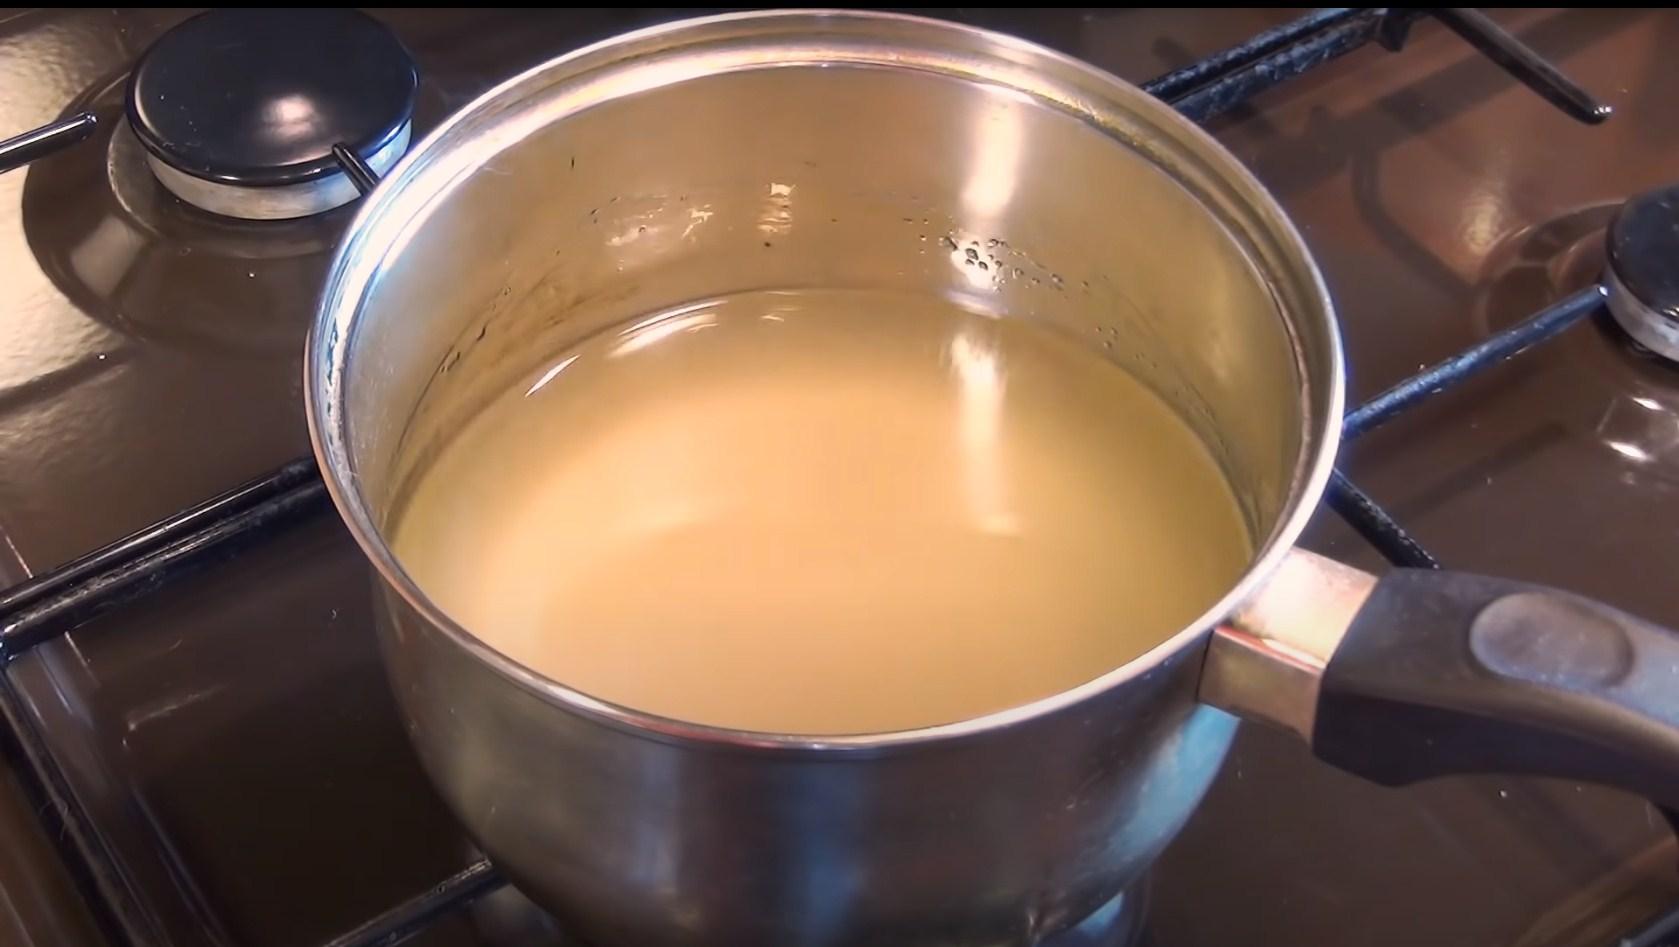
Prepare the caramel. Place the sugar in a heavy-bottomed saucepan and add a glass of water.
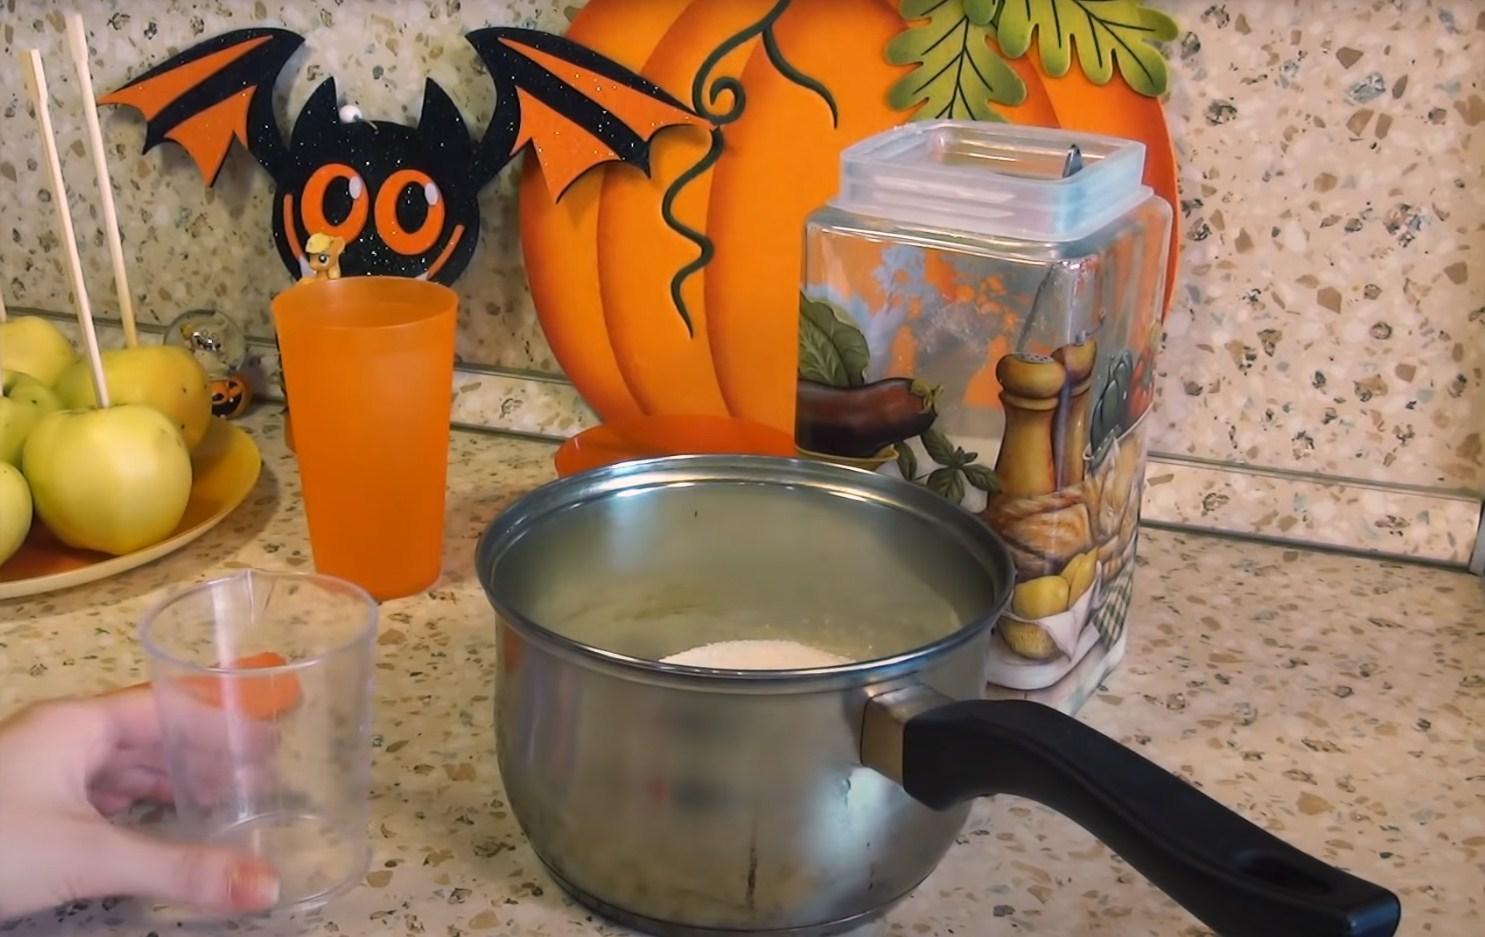
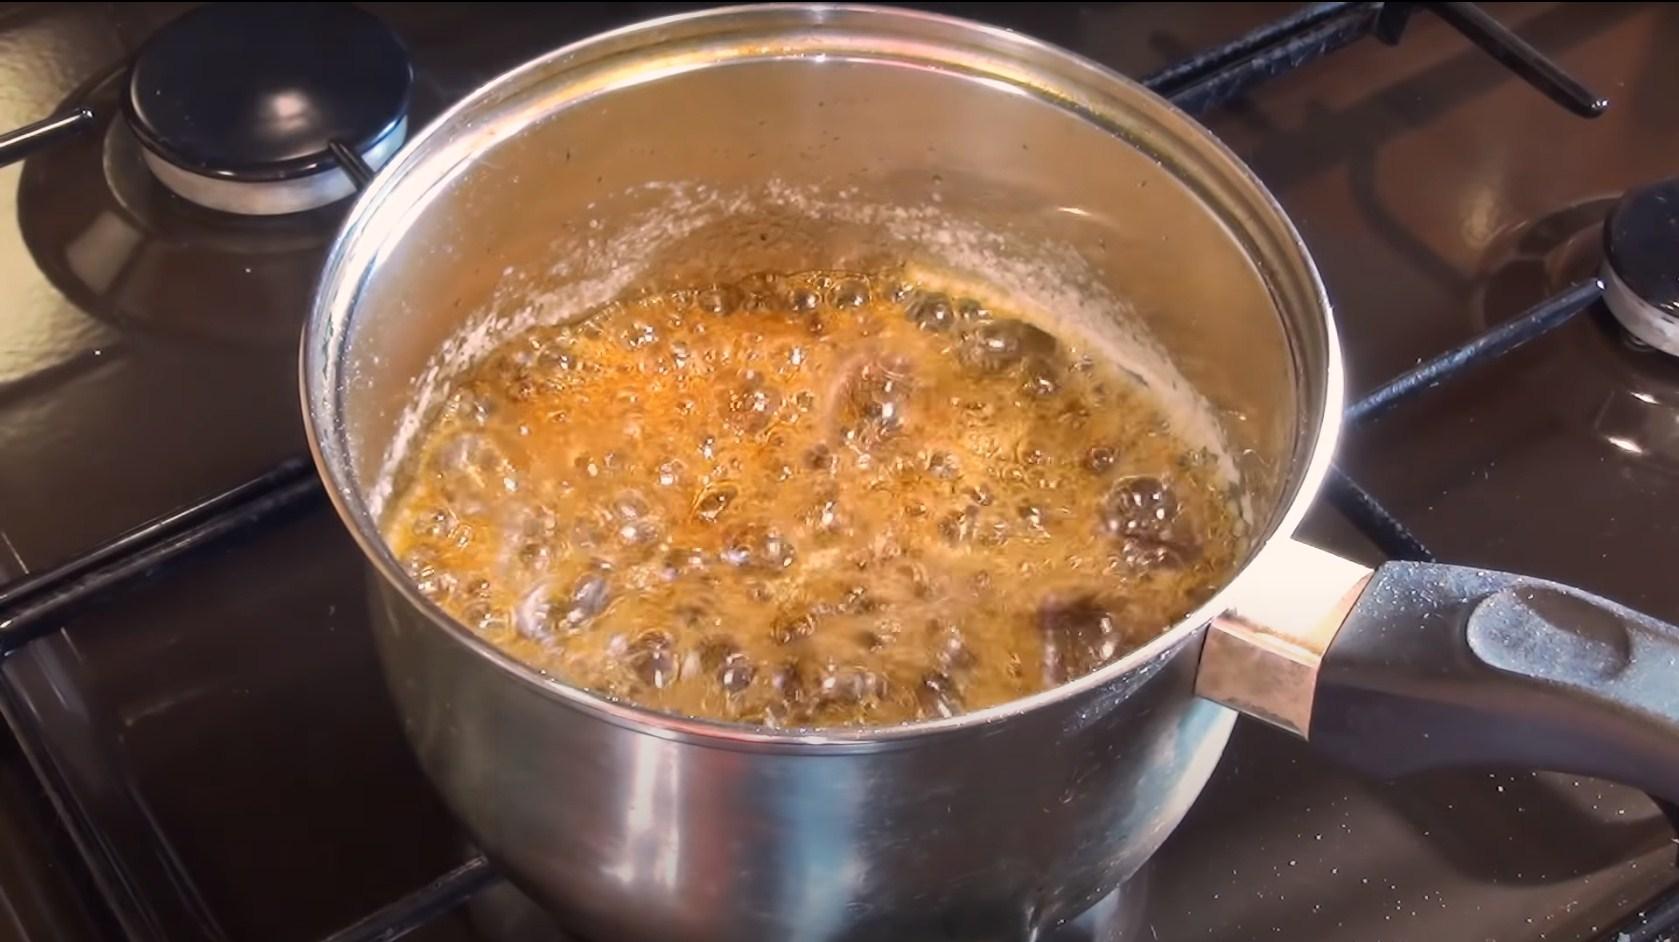
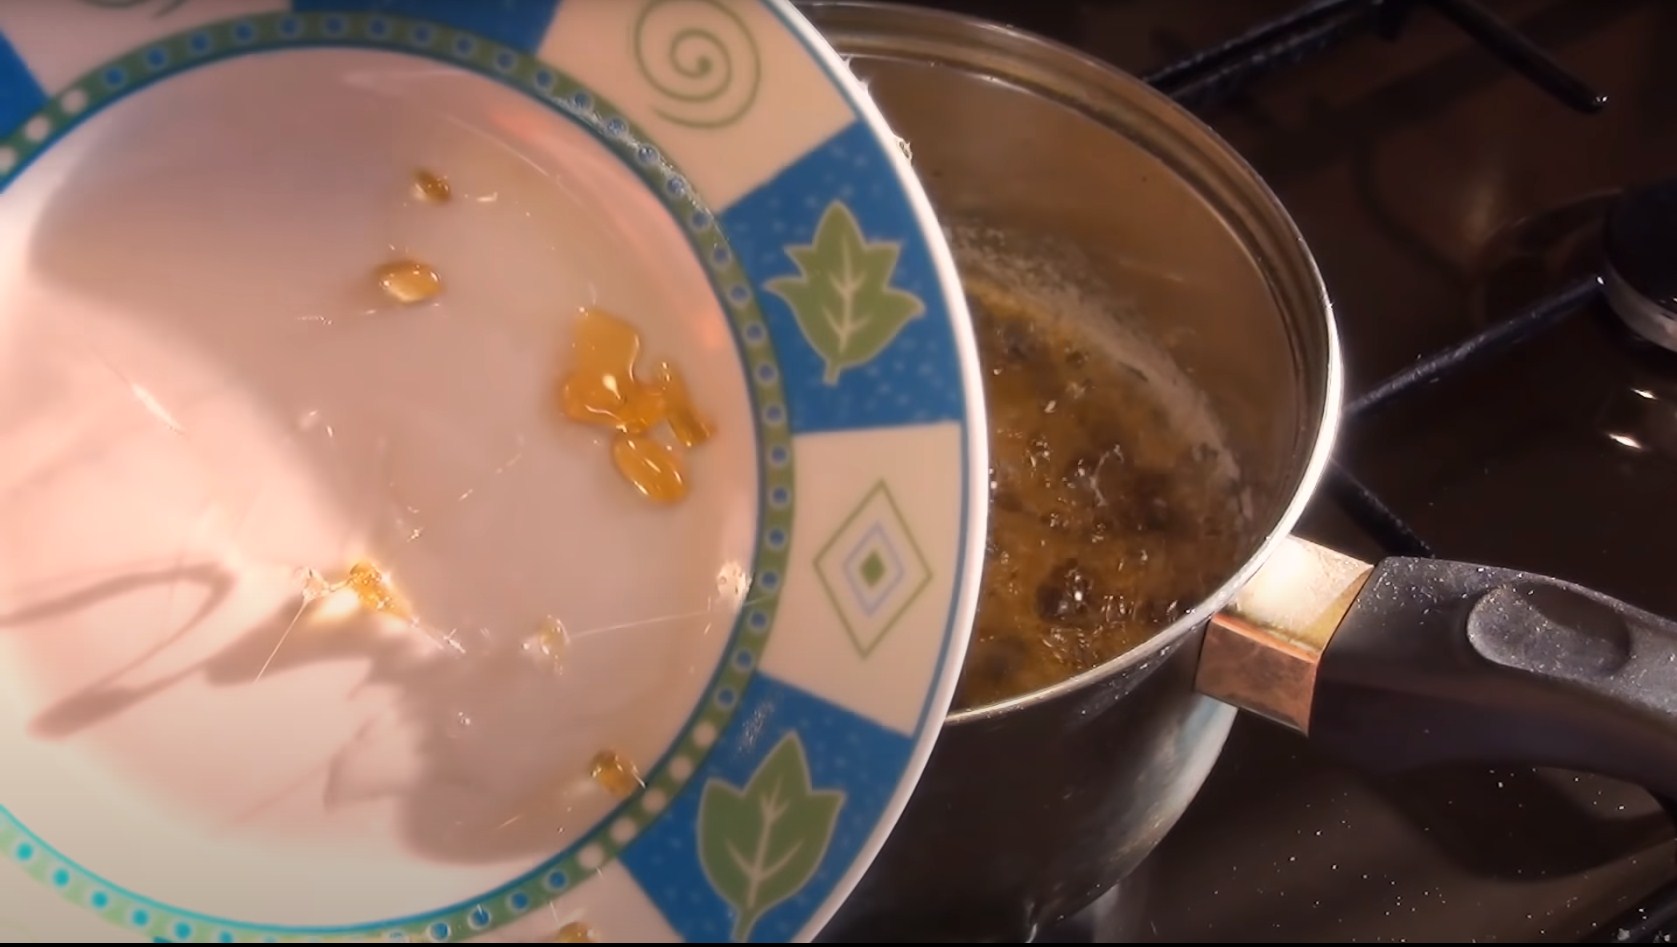
Step 5
Place the pan over low heat and stir well until the sugar dissolves. Then let the caramel simmer for 30-40 minutes until golden brown. The finished caramel will harden quickly if you drop it onto a saucer or into a glass of cold water.
Step 6
Remove the pan from the stove. Before the caramel begins to thicken, dip each apple into it and swirl it around. Then, dip it into the bowl of chocolate chips.
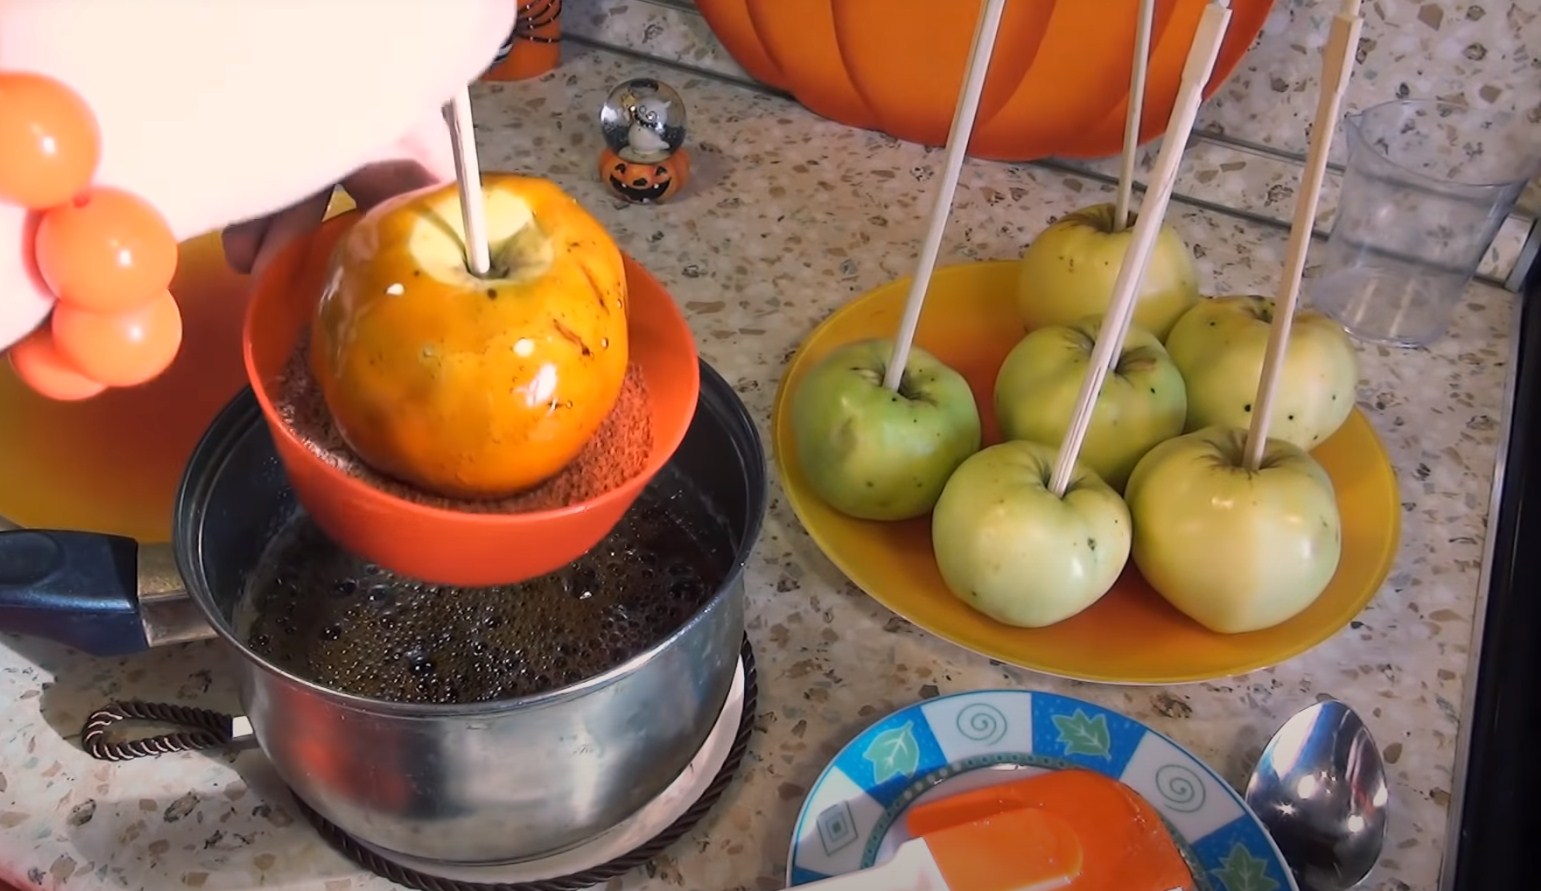
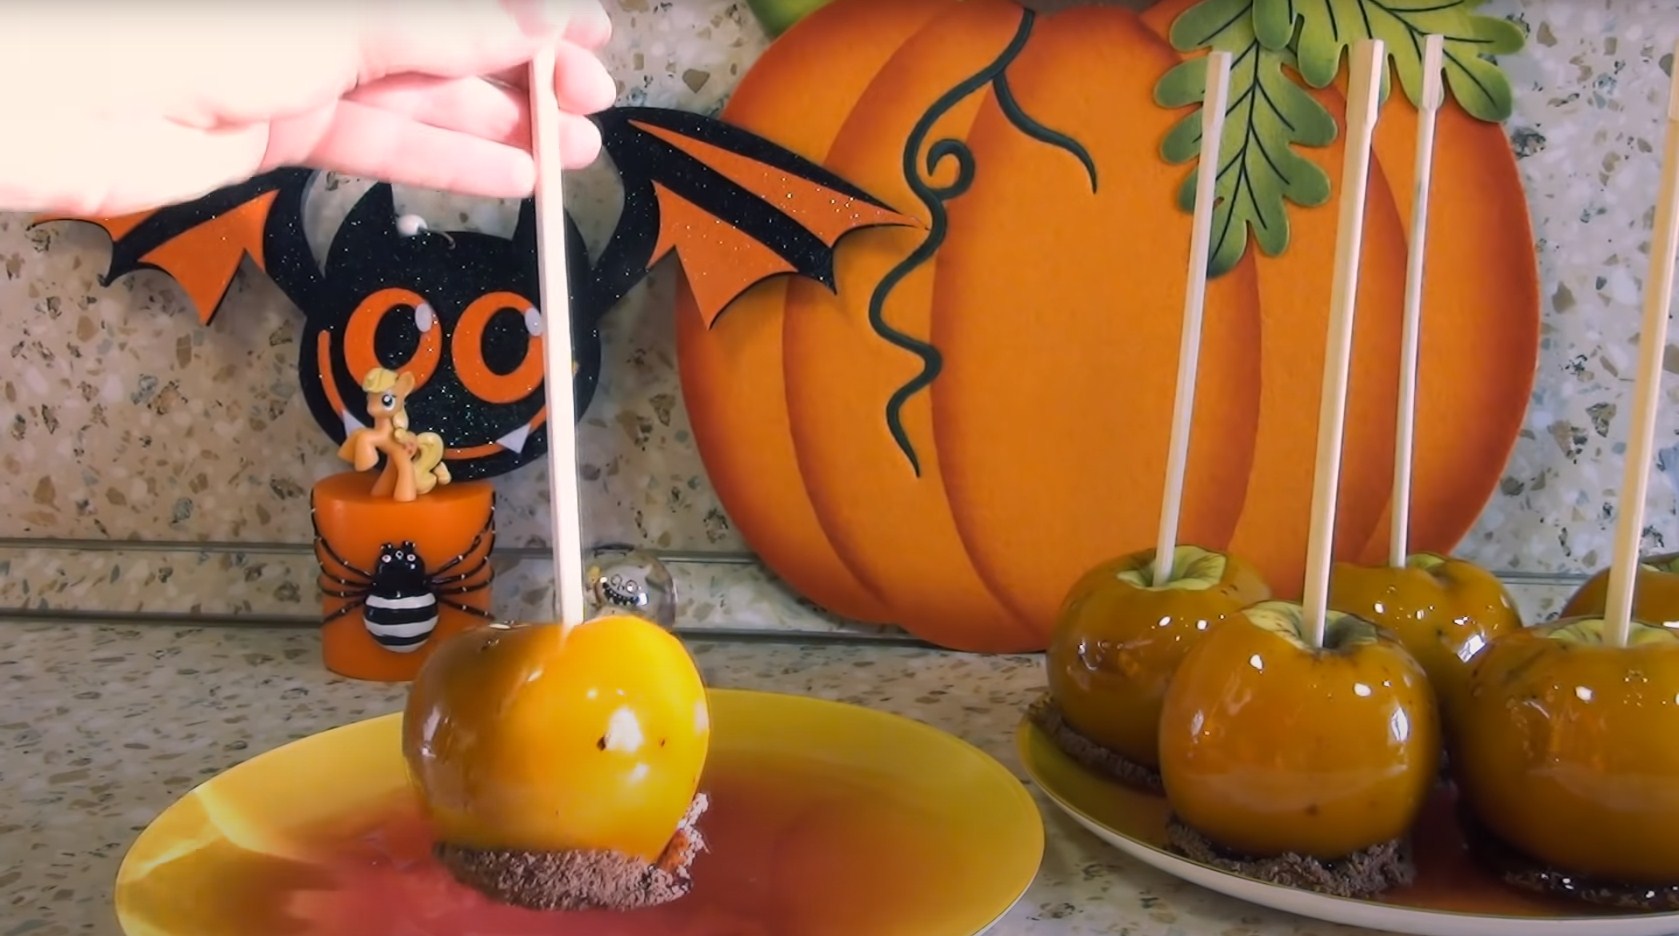
Step 7
Delicious caramel apples are ready! You can use food coloring to give the caramel different colors.
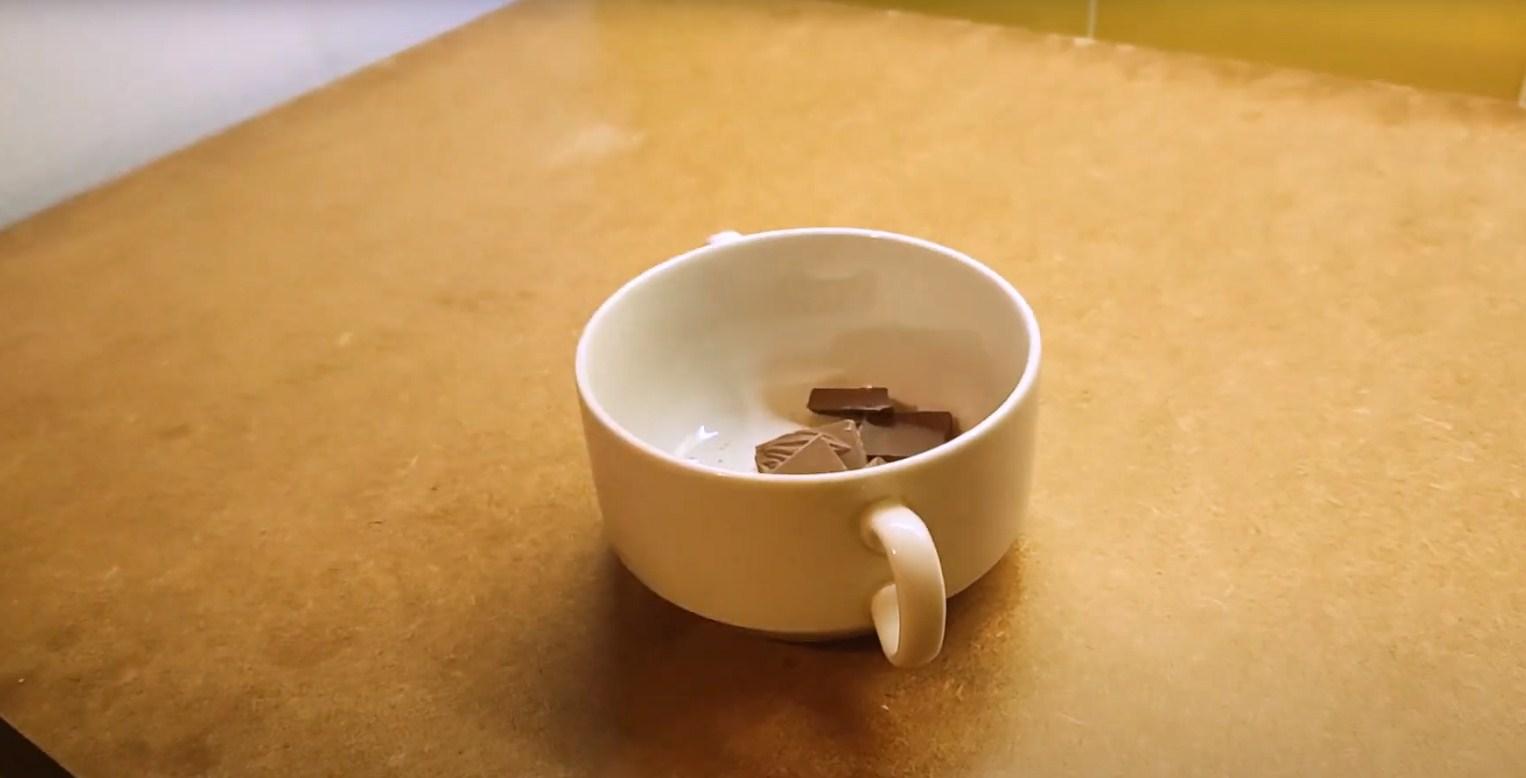
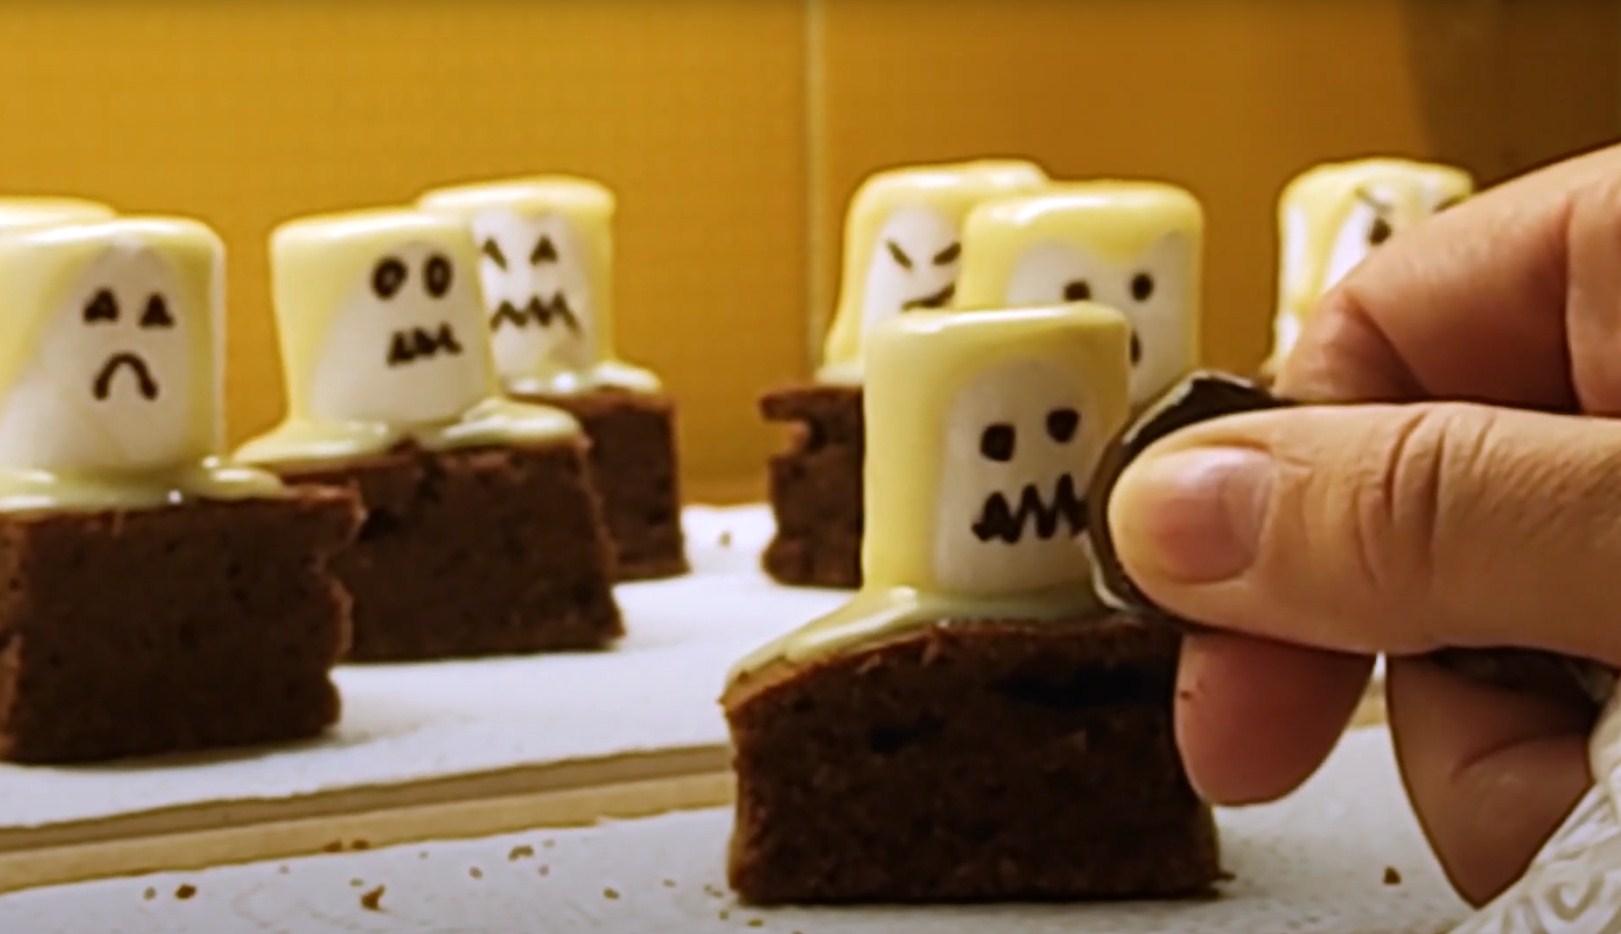
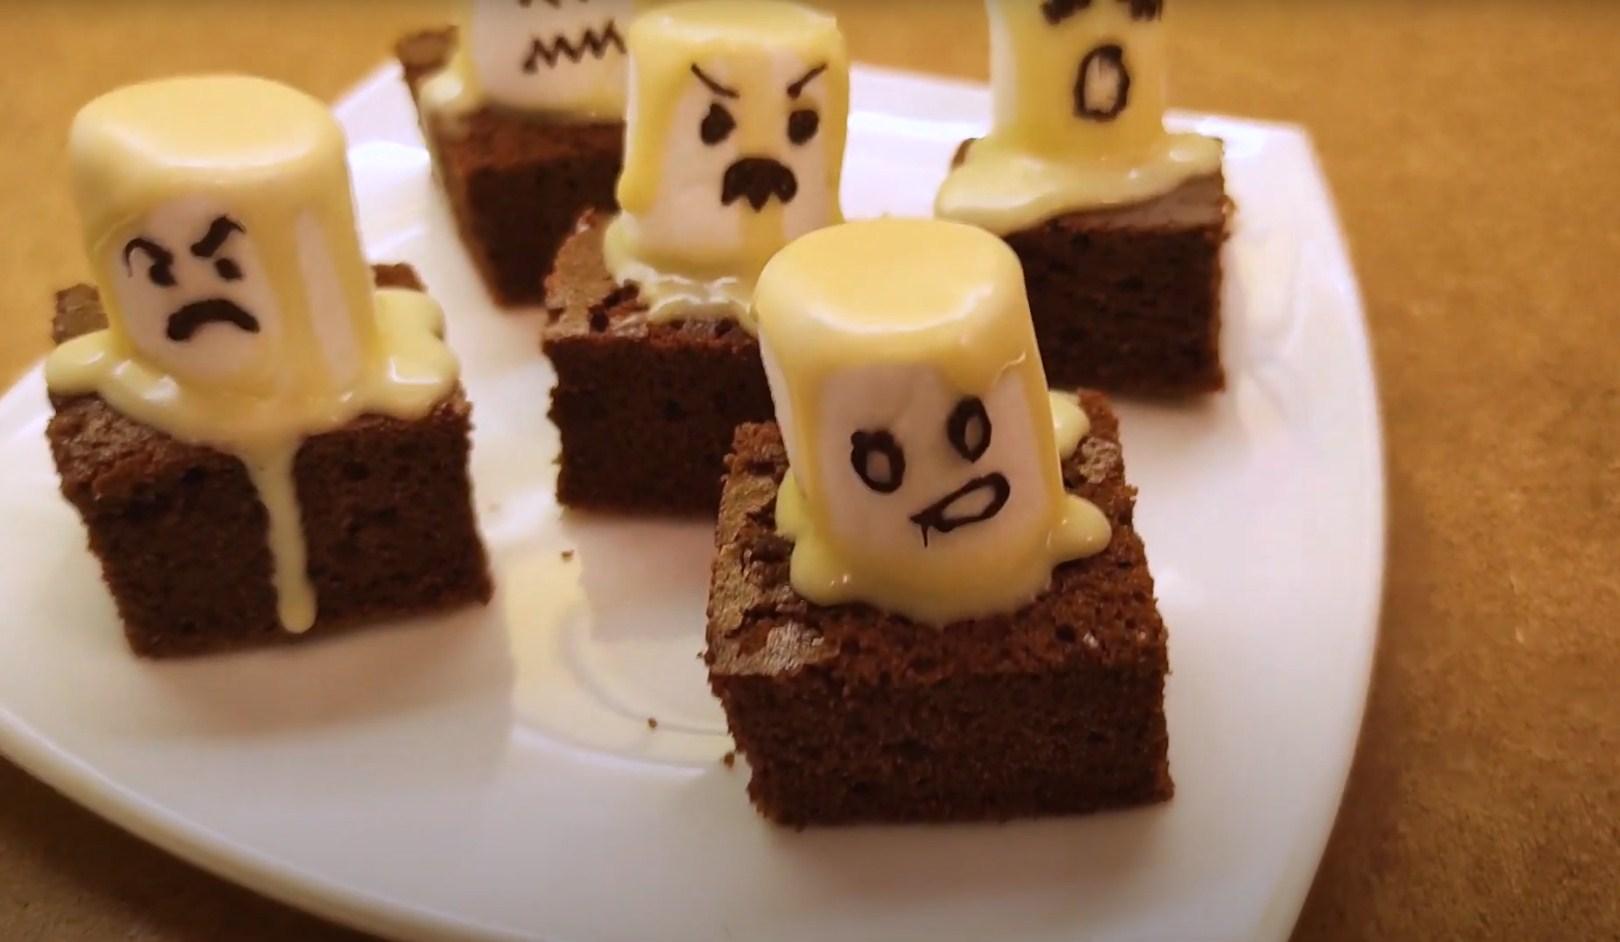
Brownie Ghosts
These chocolate brownie cookies have a vibrant flavor and a pleasant aroma. They're just the right amount of sweet, perfect for chocolate lovers. Paired with a unique decoration, they're perfect for a Halloween party.
Ingredients
- Flour – 160 g
- Sugar – 160 g
- Eggs – 2 pcs.
- Cocoa powder – 30 g
- Cream (20%) – 180 ml
- Vegetable oil – 70 ml
- Marshmallows – 20-25 pcs.
- Baking powder – 8 g
- Vanilla sugar – 1 tbsp.
- White chocolate – 150 g
- Cream (for glaze) – 30 ml
- Dark chocolate – 30 g
Cooking time: 40-60 minutes
Servings: 10
Step-by-step recipe
Step 1
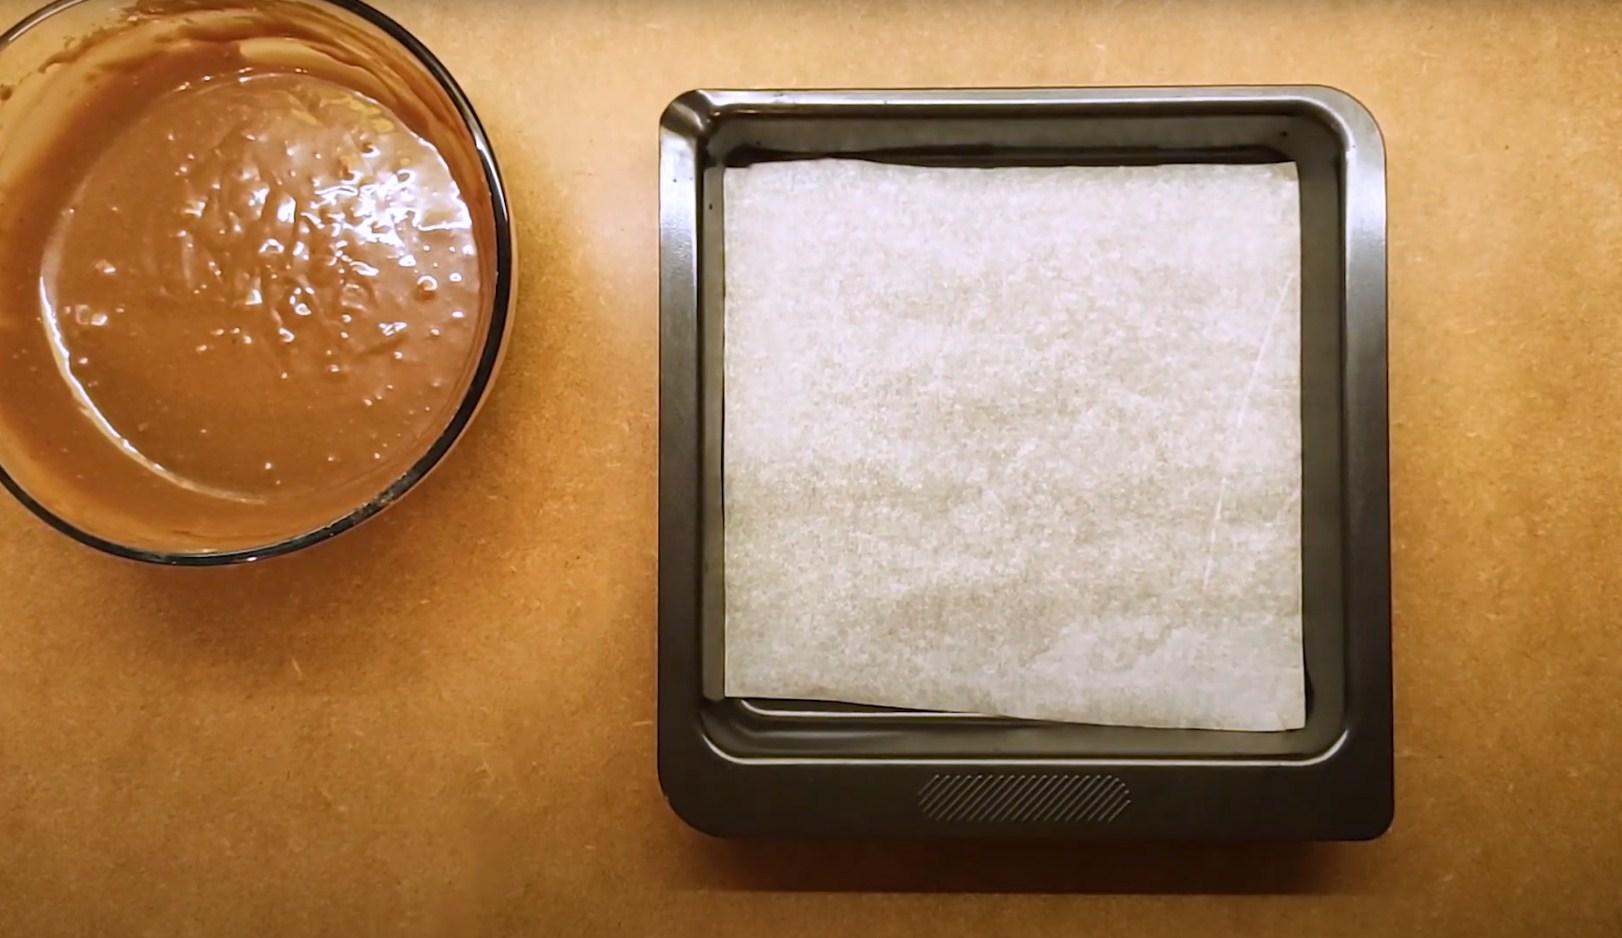
We prepare the necessary products and utensils.
Step 2
Beat eggs with sugar and vanilla sugar.
Step 3
Add the cream, flour, and cocoa powder to the egg mixture. Whisk until smooth.

Step 4
Add vegetable oil. Mix well again.
Step 5
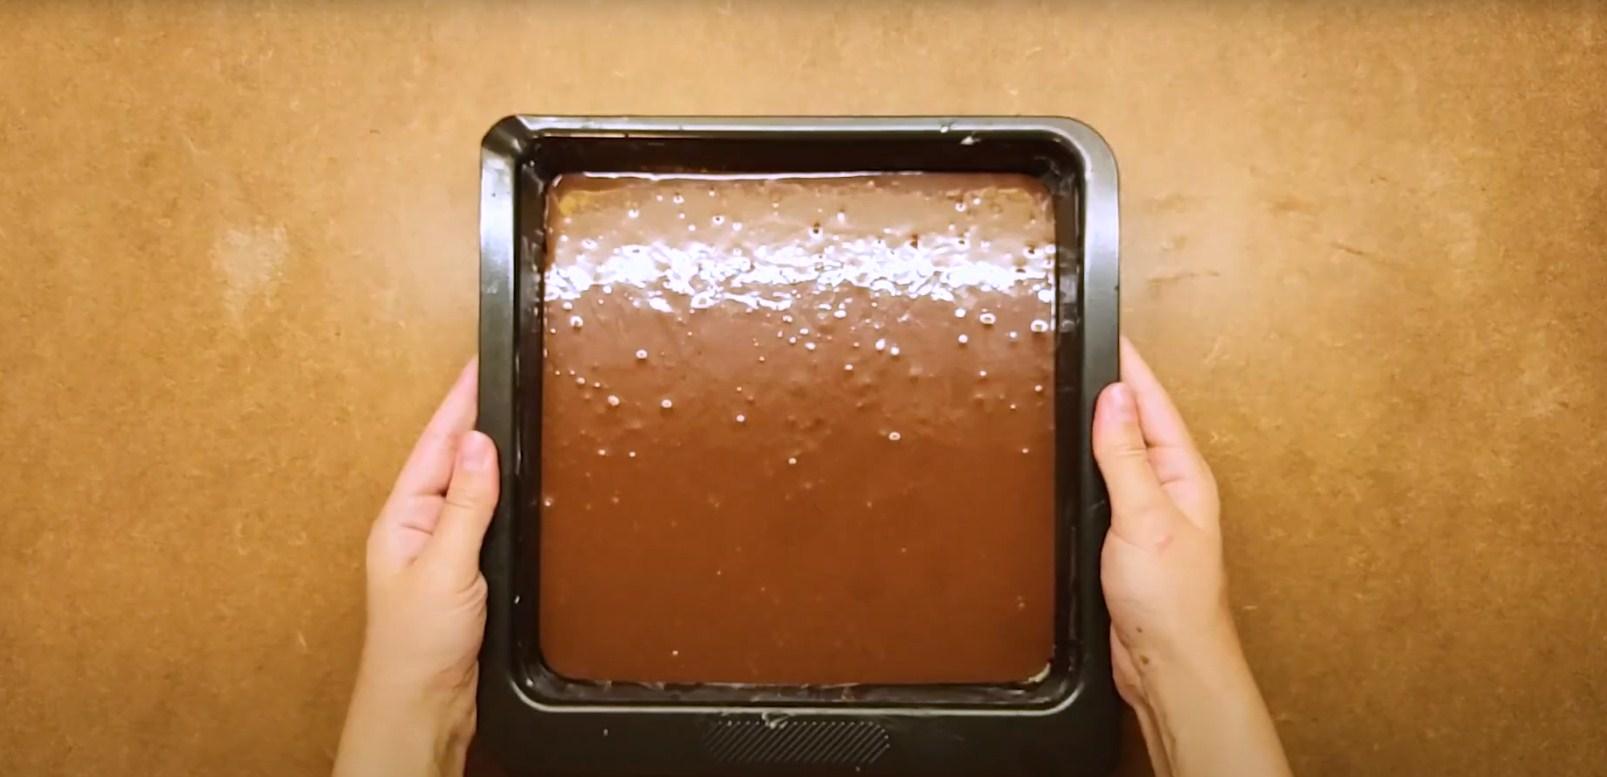
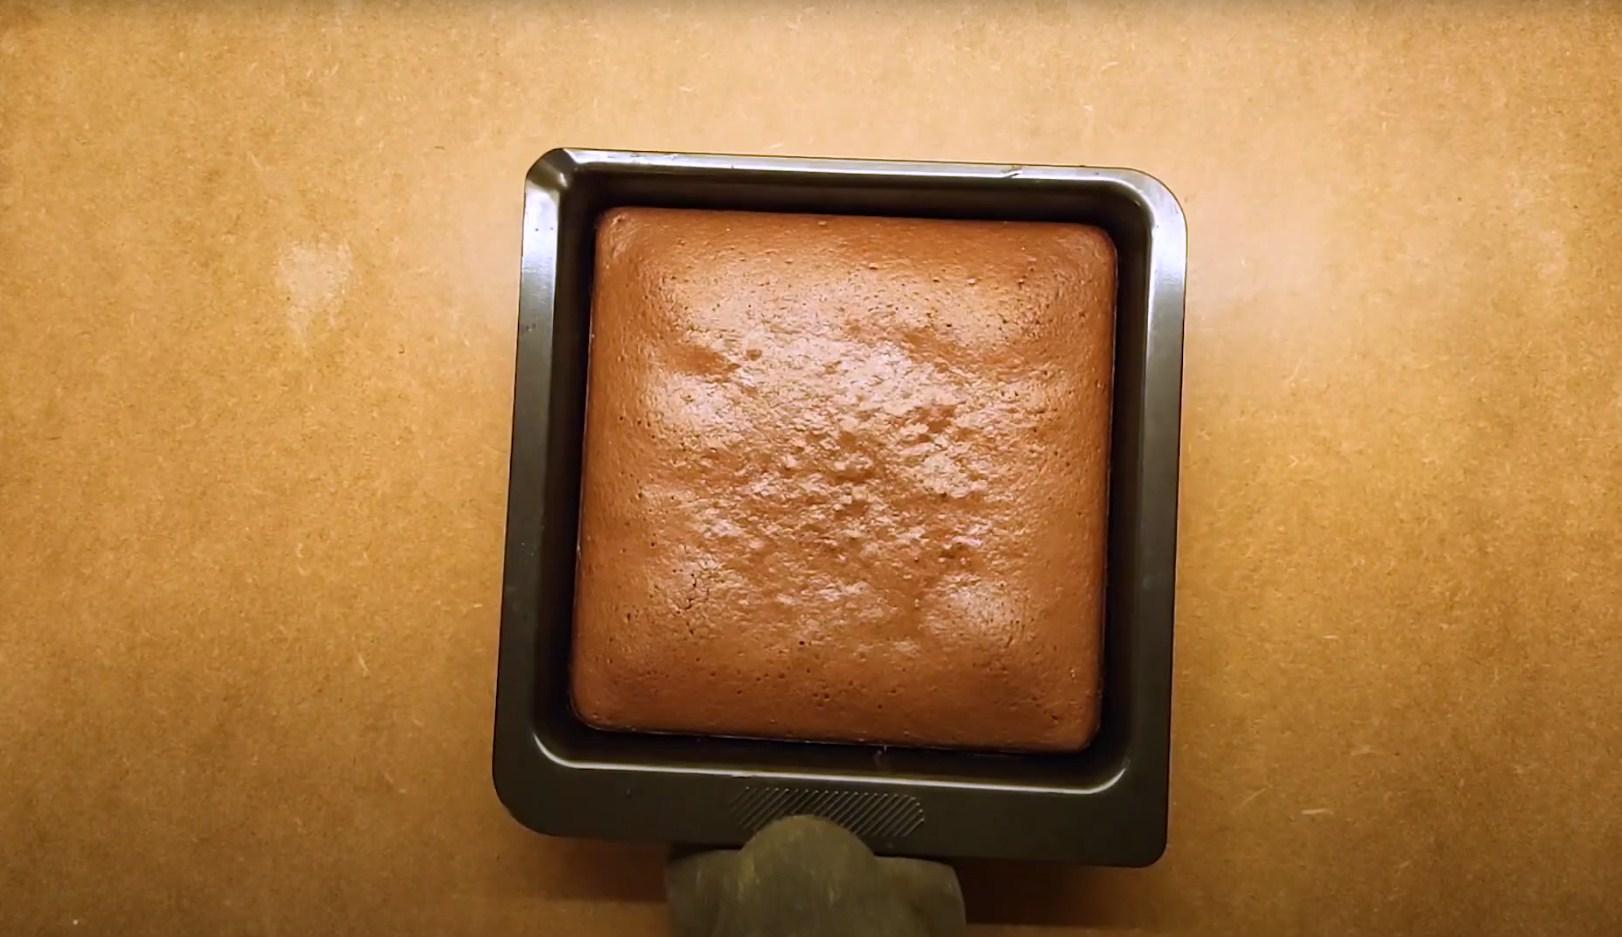
Line a baking sheet with parchment paper and lightly grease with butter. Pour the batter into the pan and bake in a preheated oven at 180 degrees Celsius for 25-30 minutes.
Step 6
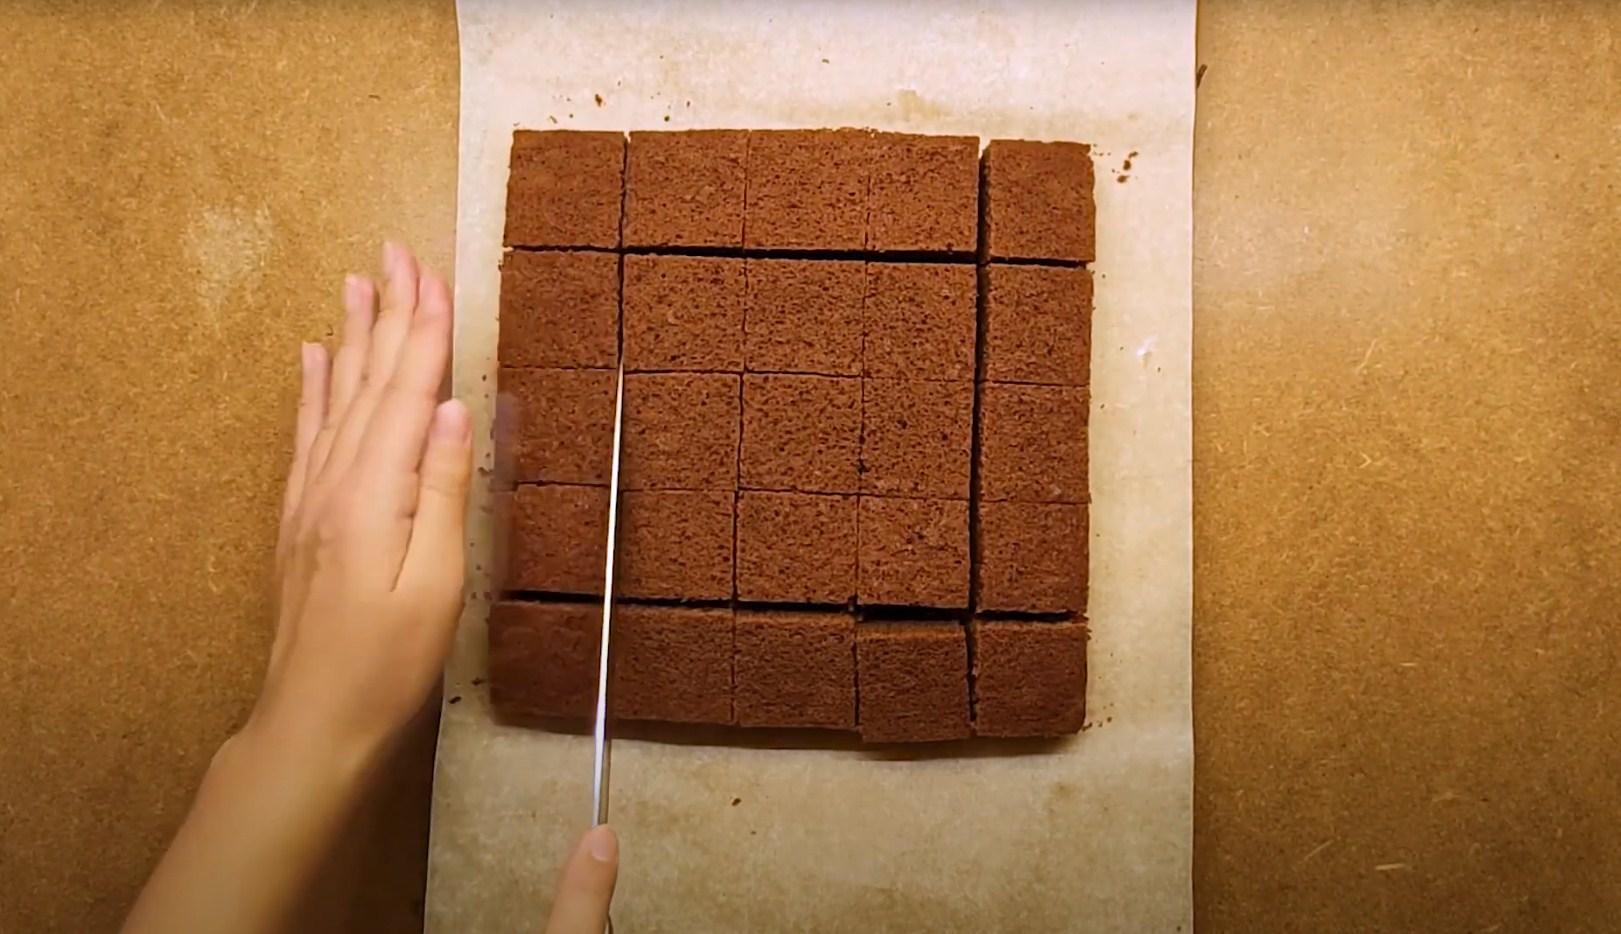
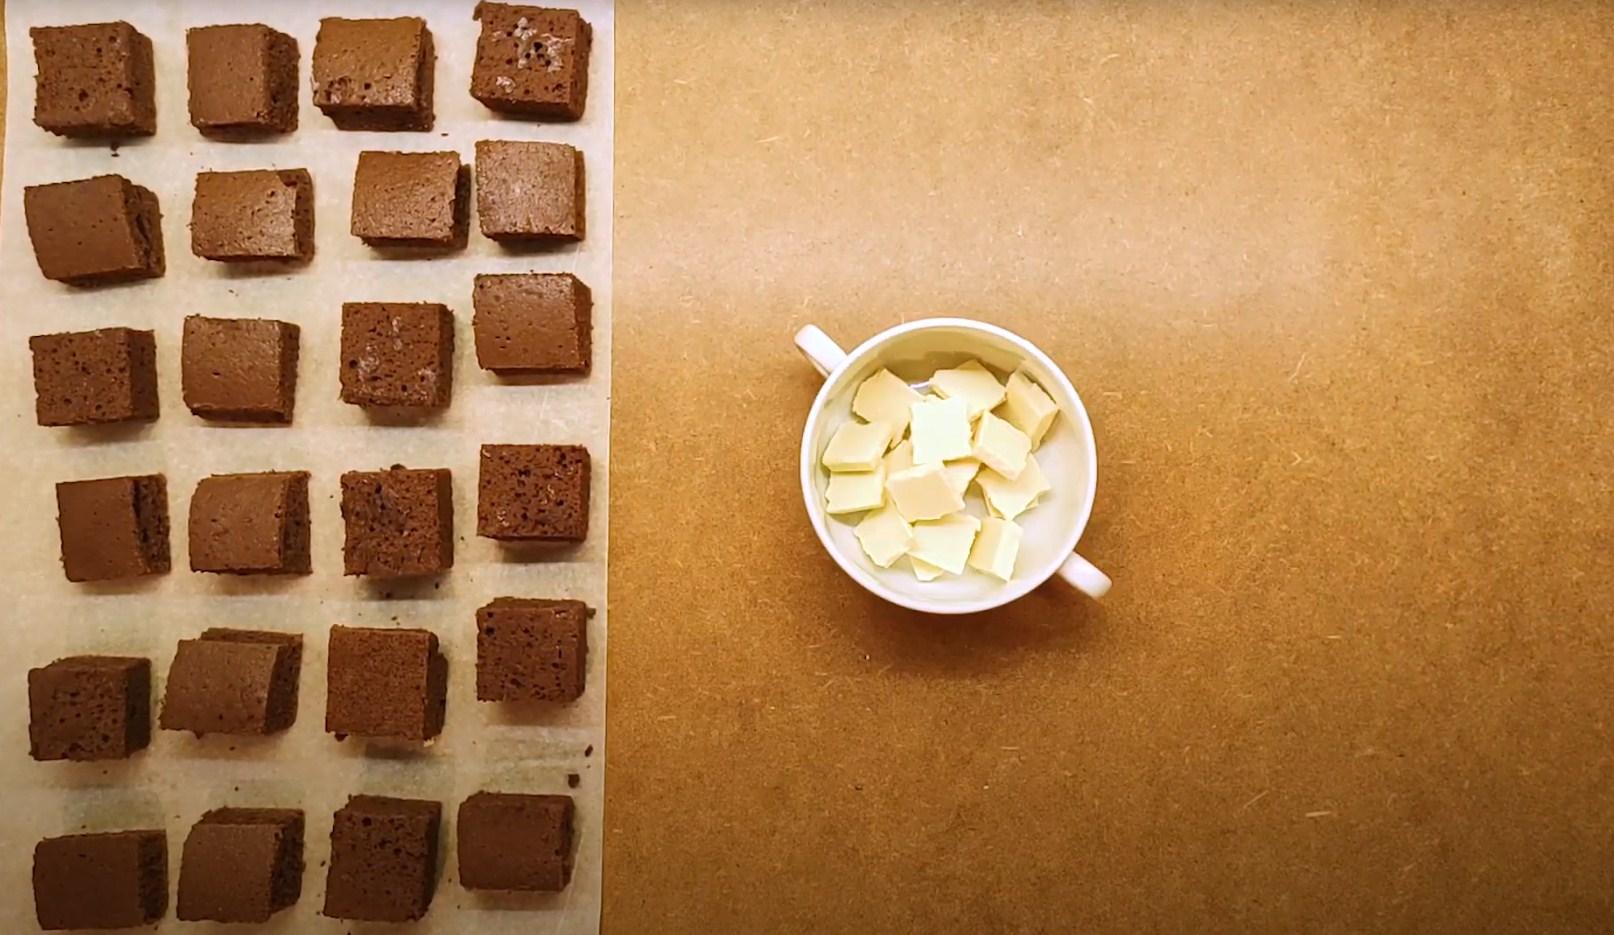
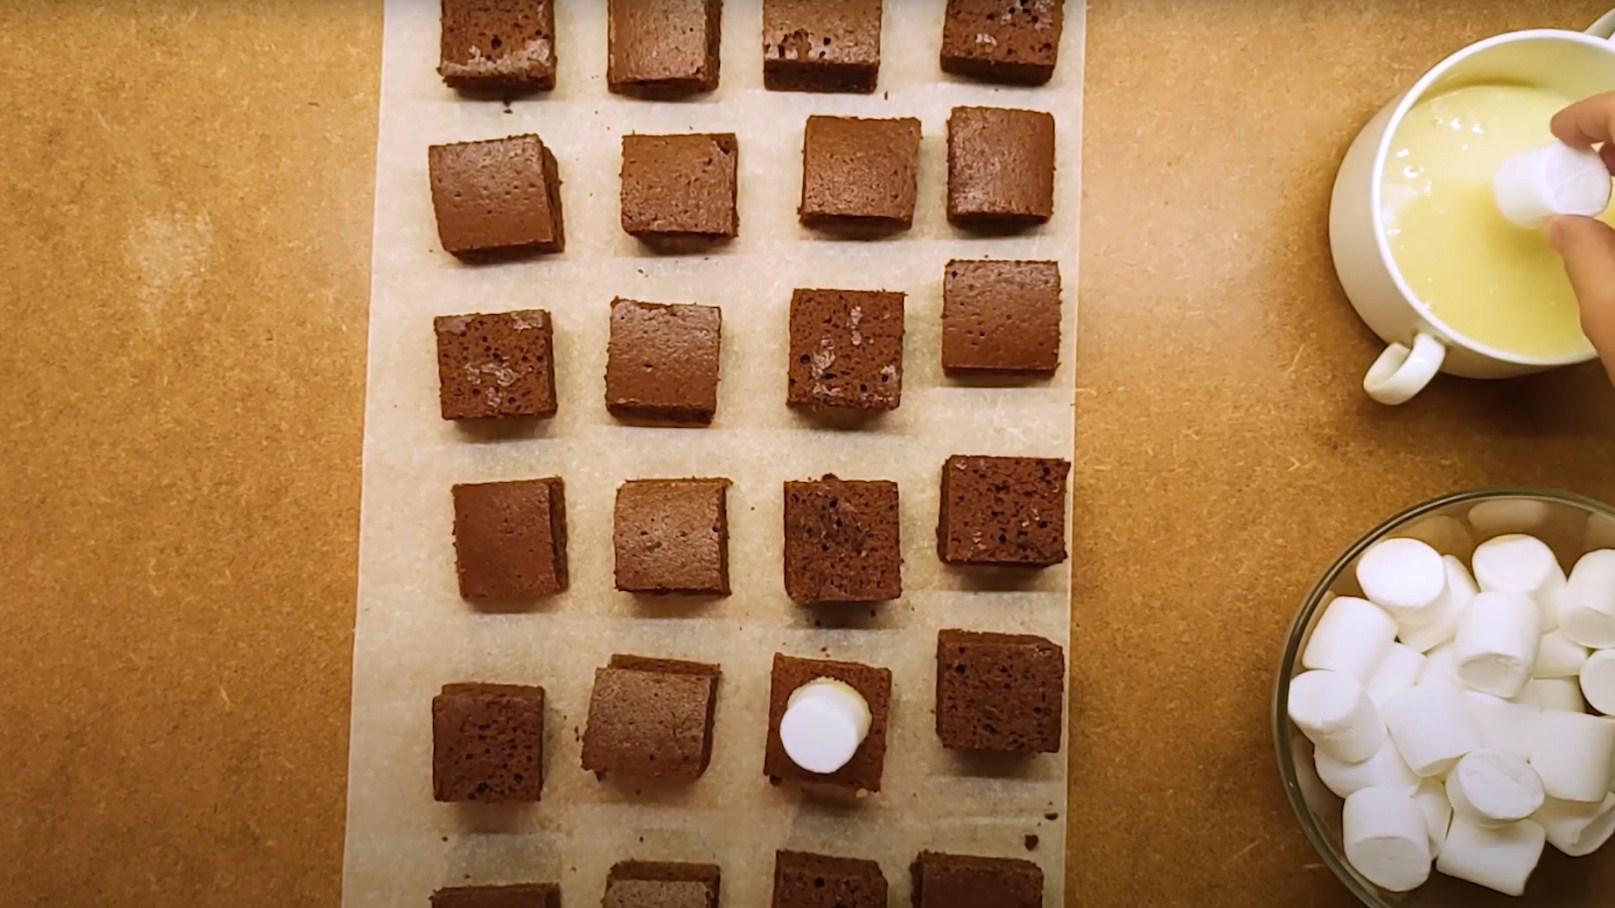
Cut the finished brownie into small equal squares.
Step 7
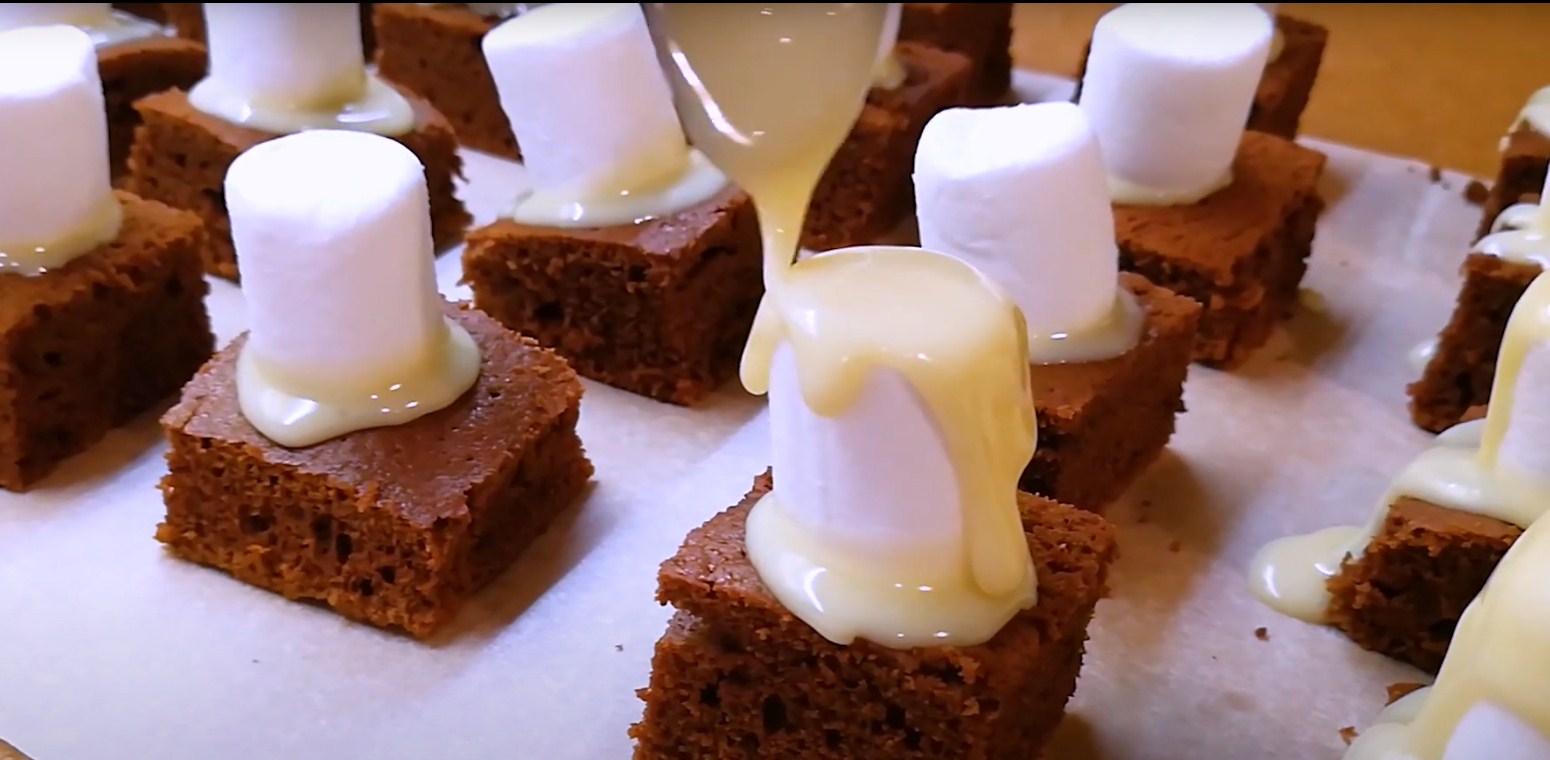
Prepare the glaze. Break the white chocolate into small pieces, add the cream, and microwave or heat over a double boiler until the chocolate melts.
Step 8
Take a marshmallow, dip one edge in melted white chocolate, and attach it to the sponge cake. Drizzle the remaining chocolate over the marshmallows. Refrigerate for an hour until the glaze has completely set.
Step 9
Melt a small amount of dark chocolate and pour it into a piping bag. Remove the brownies from the refrigerator and draw faces on our ghosts. A delicious and impressive Halloween dessert is ready!