Halloween Cake: 10 Step-by-Step Recipes + 30 Decorating Options

Content
Halloween is one of the most mystical and popular holidays worldwide. People start preparing for it as early as mid-October: people buy souvenirs, decorate houses, cafes, and shops, and prepare costumes. But what's a holiday without cake?
In this collection, I've compiled the best Halloween cake recipes, along with interesting ideas for decorating festive baked goods. Choose your favorite and surprise your friends and family with a unique dessert.
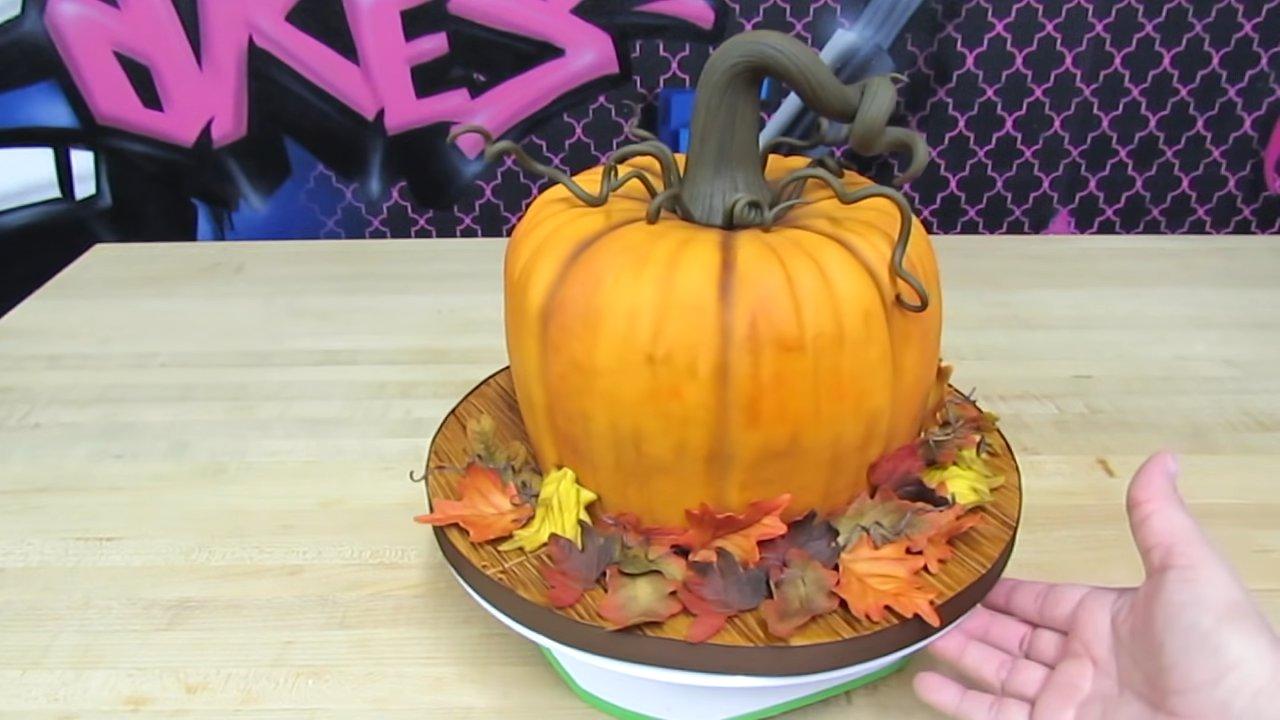
Pumpkin Cake for Halloween
- Proteins: 10.2 g
- Fats: 8.4 g
- Carbohydrates: 15 g
- Total time:
-
Complexity:
This is a complex recipe. Only try it if baking cakes is your usual go-to.
- Number of servings: 1
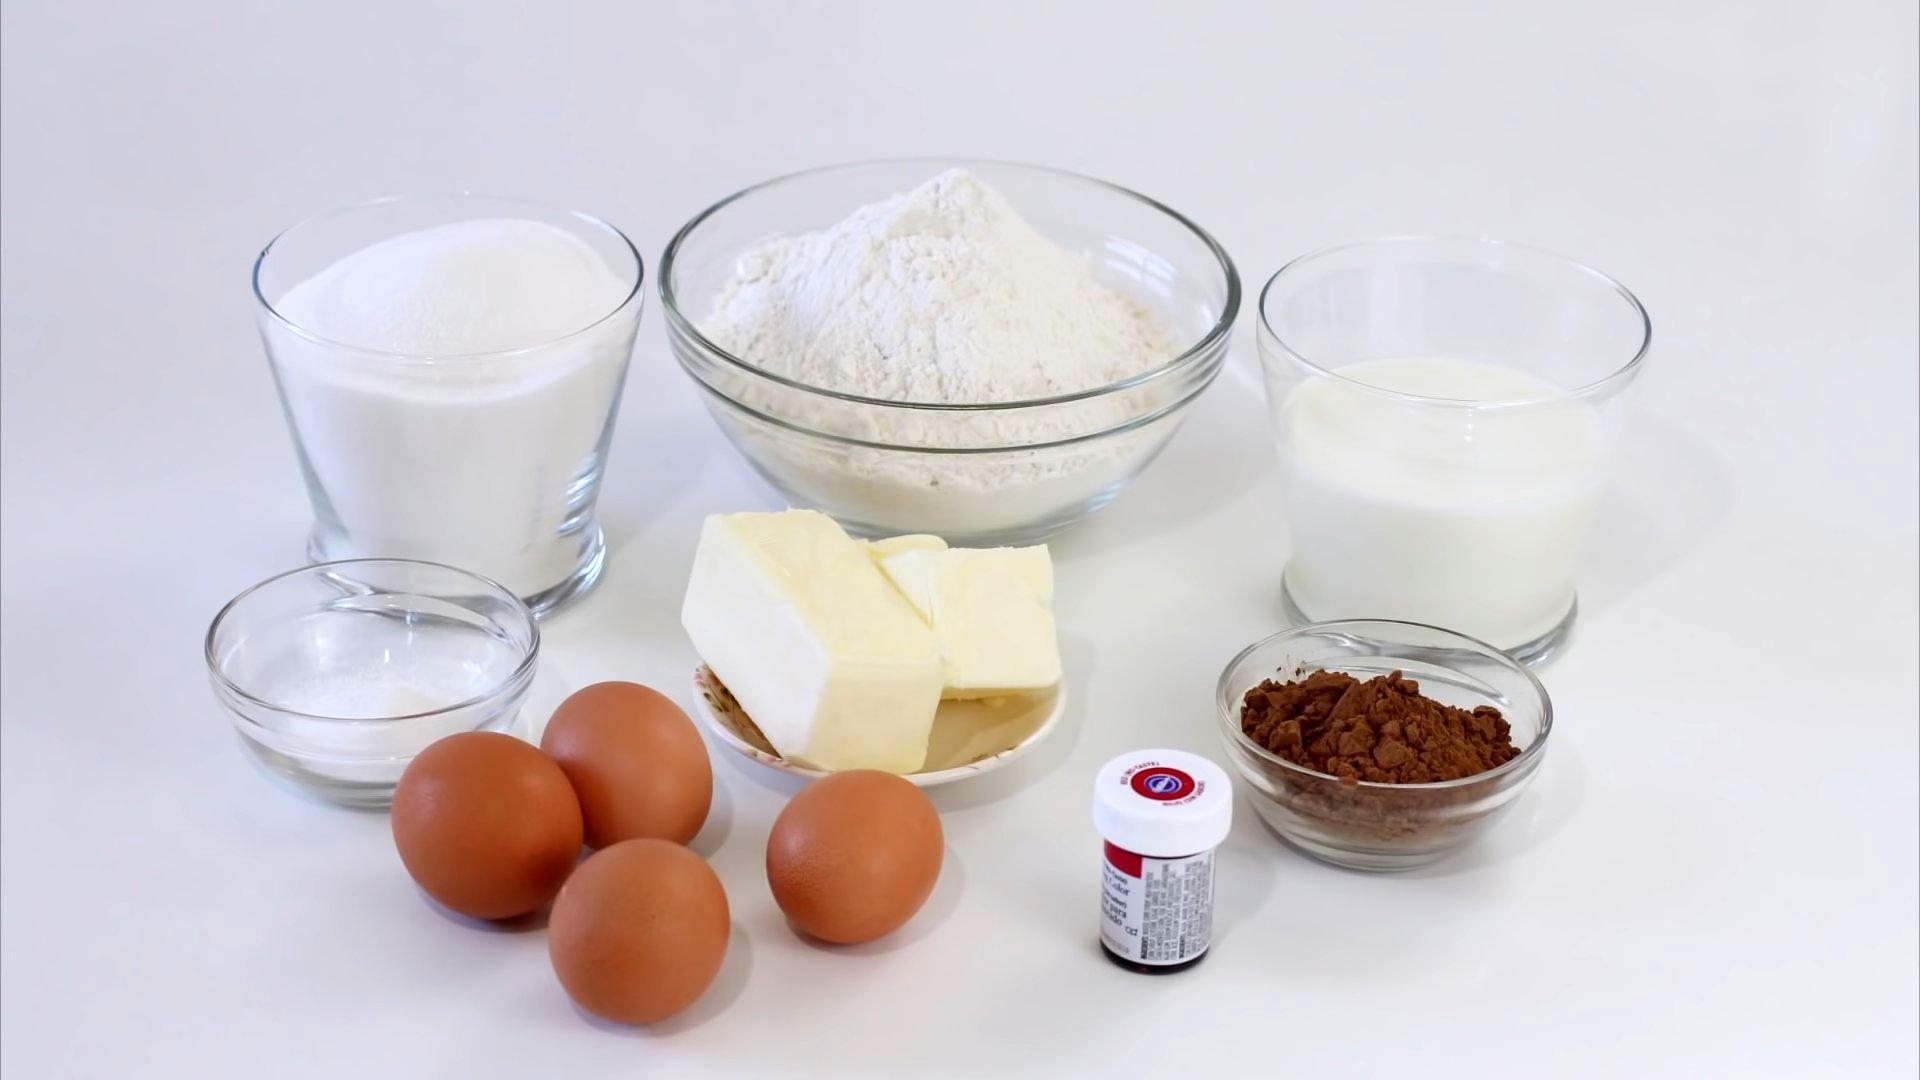
Ingredients
-
Egg C16 pcs
-
Sugar300 G
-
Vegetable oil300 ml
-
Milk300 ml
-
Baking powder15 G
-
Flour450 G
-
Chocolate chips200 G
-
Vanillin3 G
-
White chocolate500 G
-
Cream 33%250 ml
-
Cream cheese250 G
-
Peanut butter160 G
-
Dark chocolate (callets)60 G
-
Dark chocolate500 G
-
Butter250 G
-
Mastic450 G
-
Dry dye5 G
-
Confectionery glue5 G
Preparation

Prepare the ingredients for the biscuit.

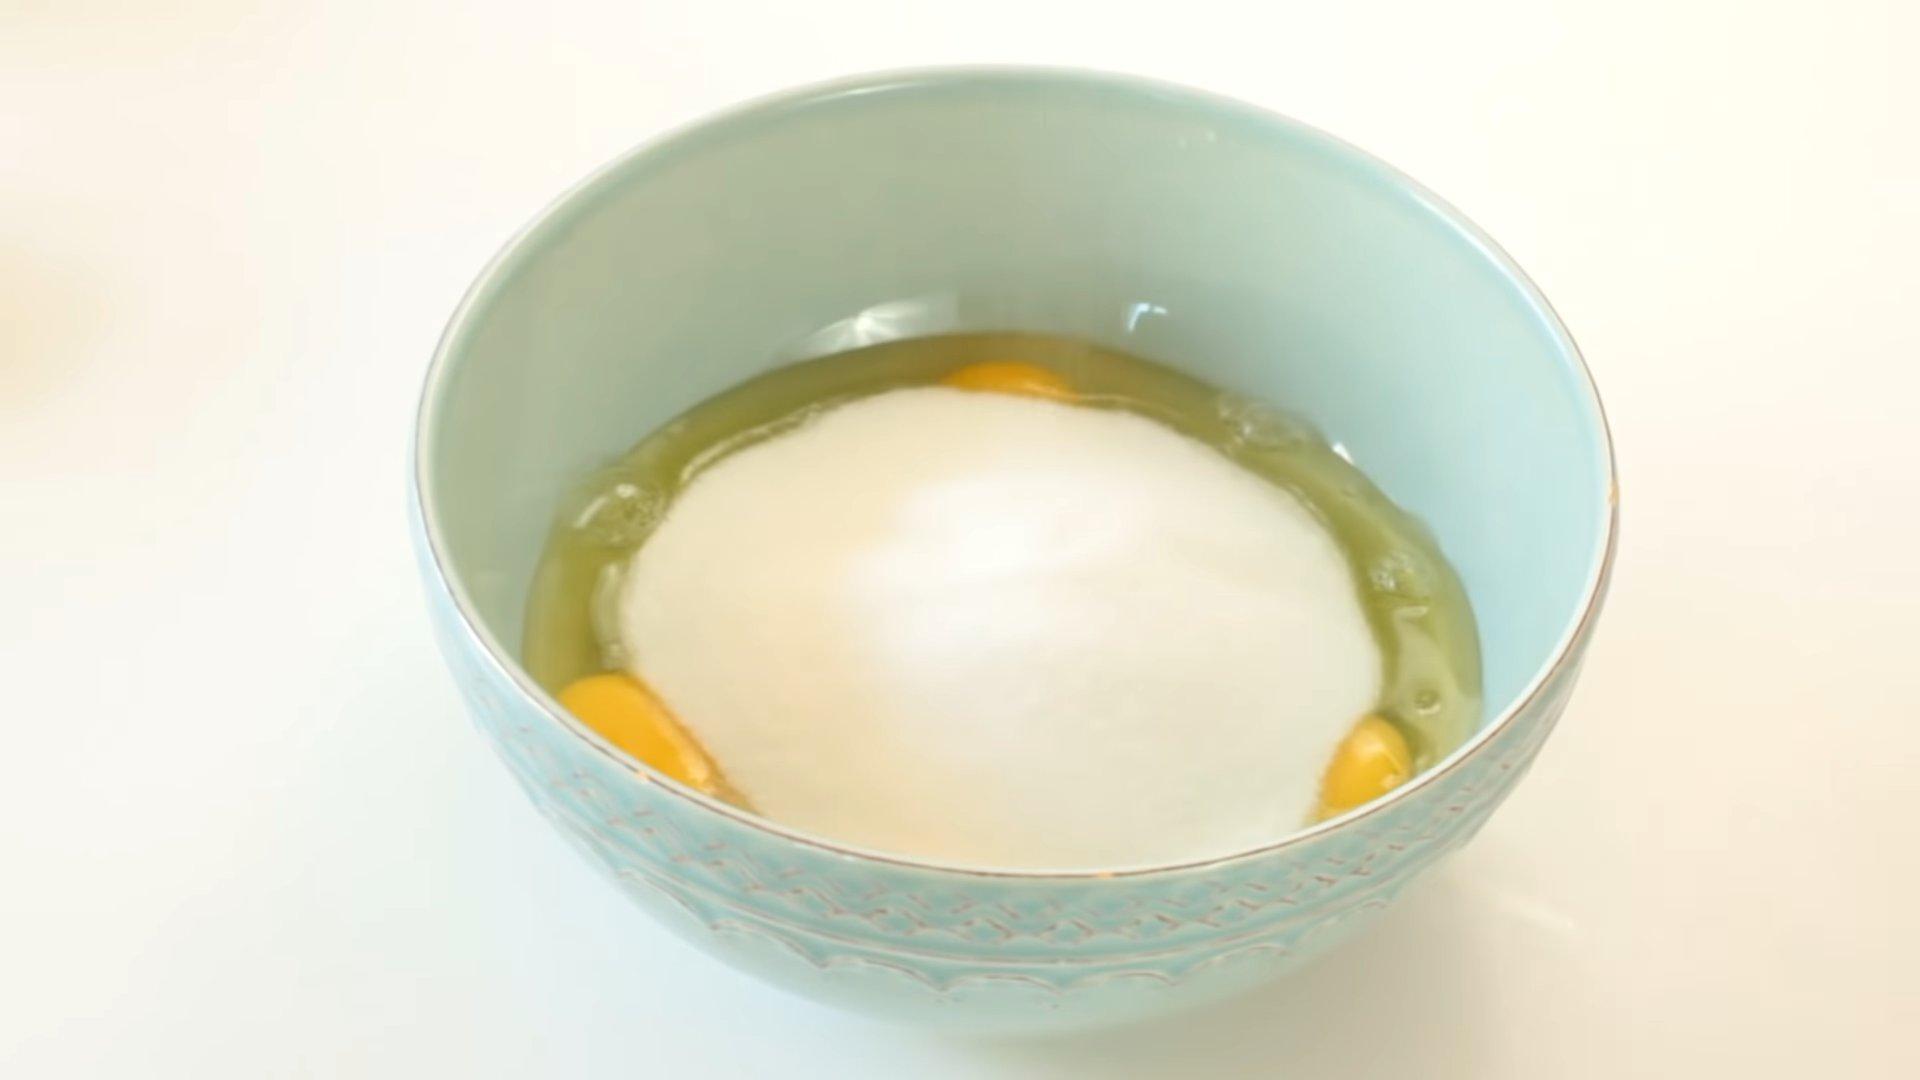
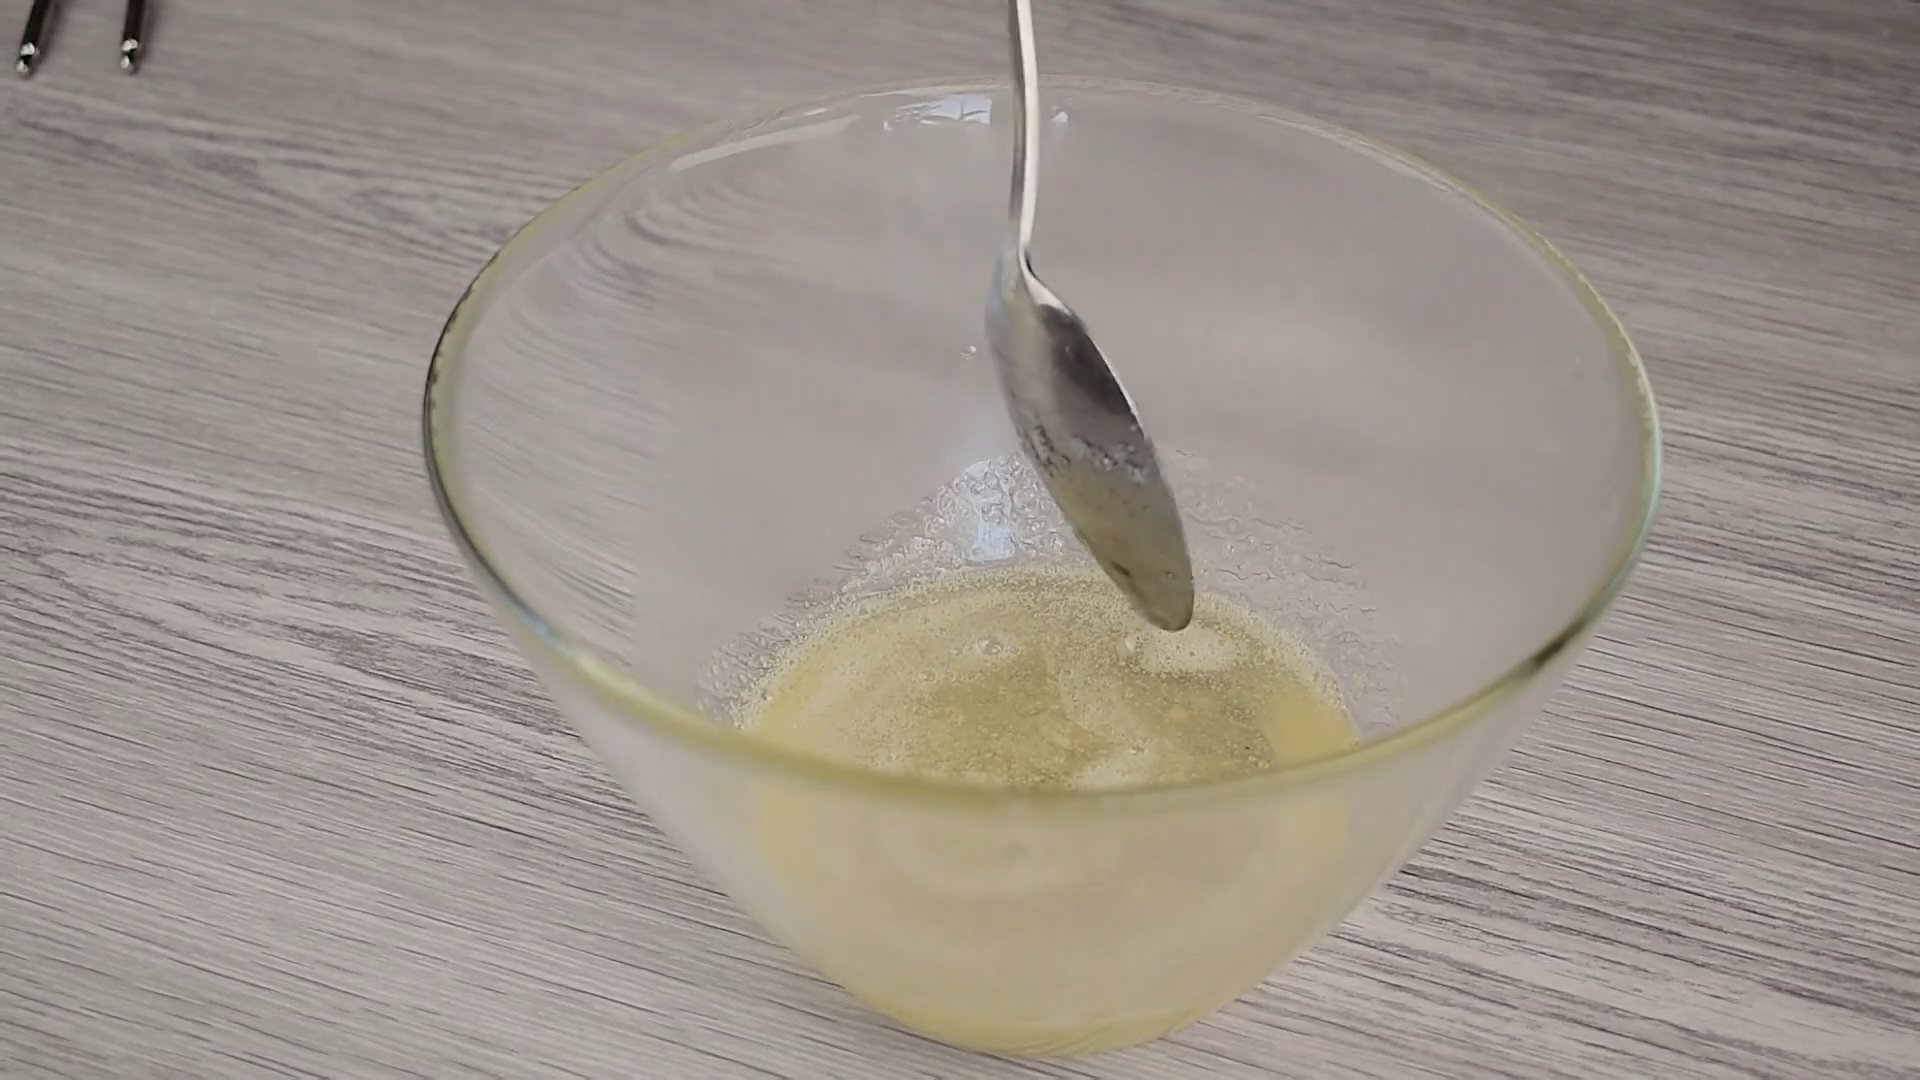
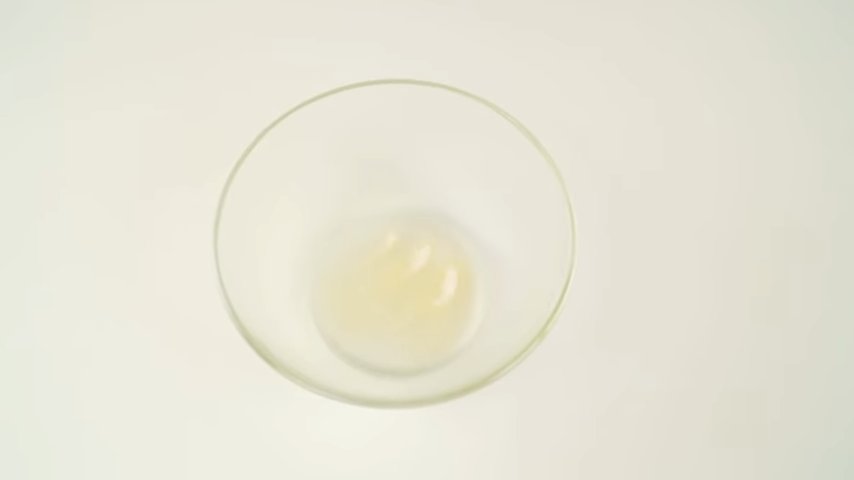
Break the eggs into a bowl and add sugar.

Beat until fluffy.

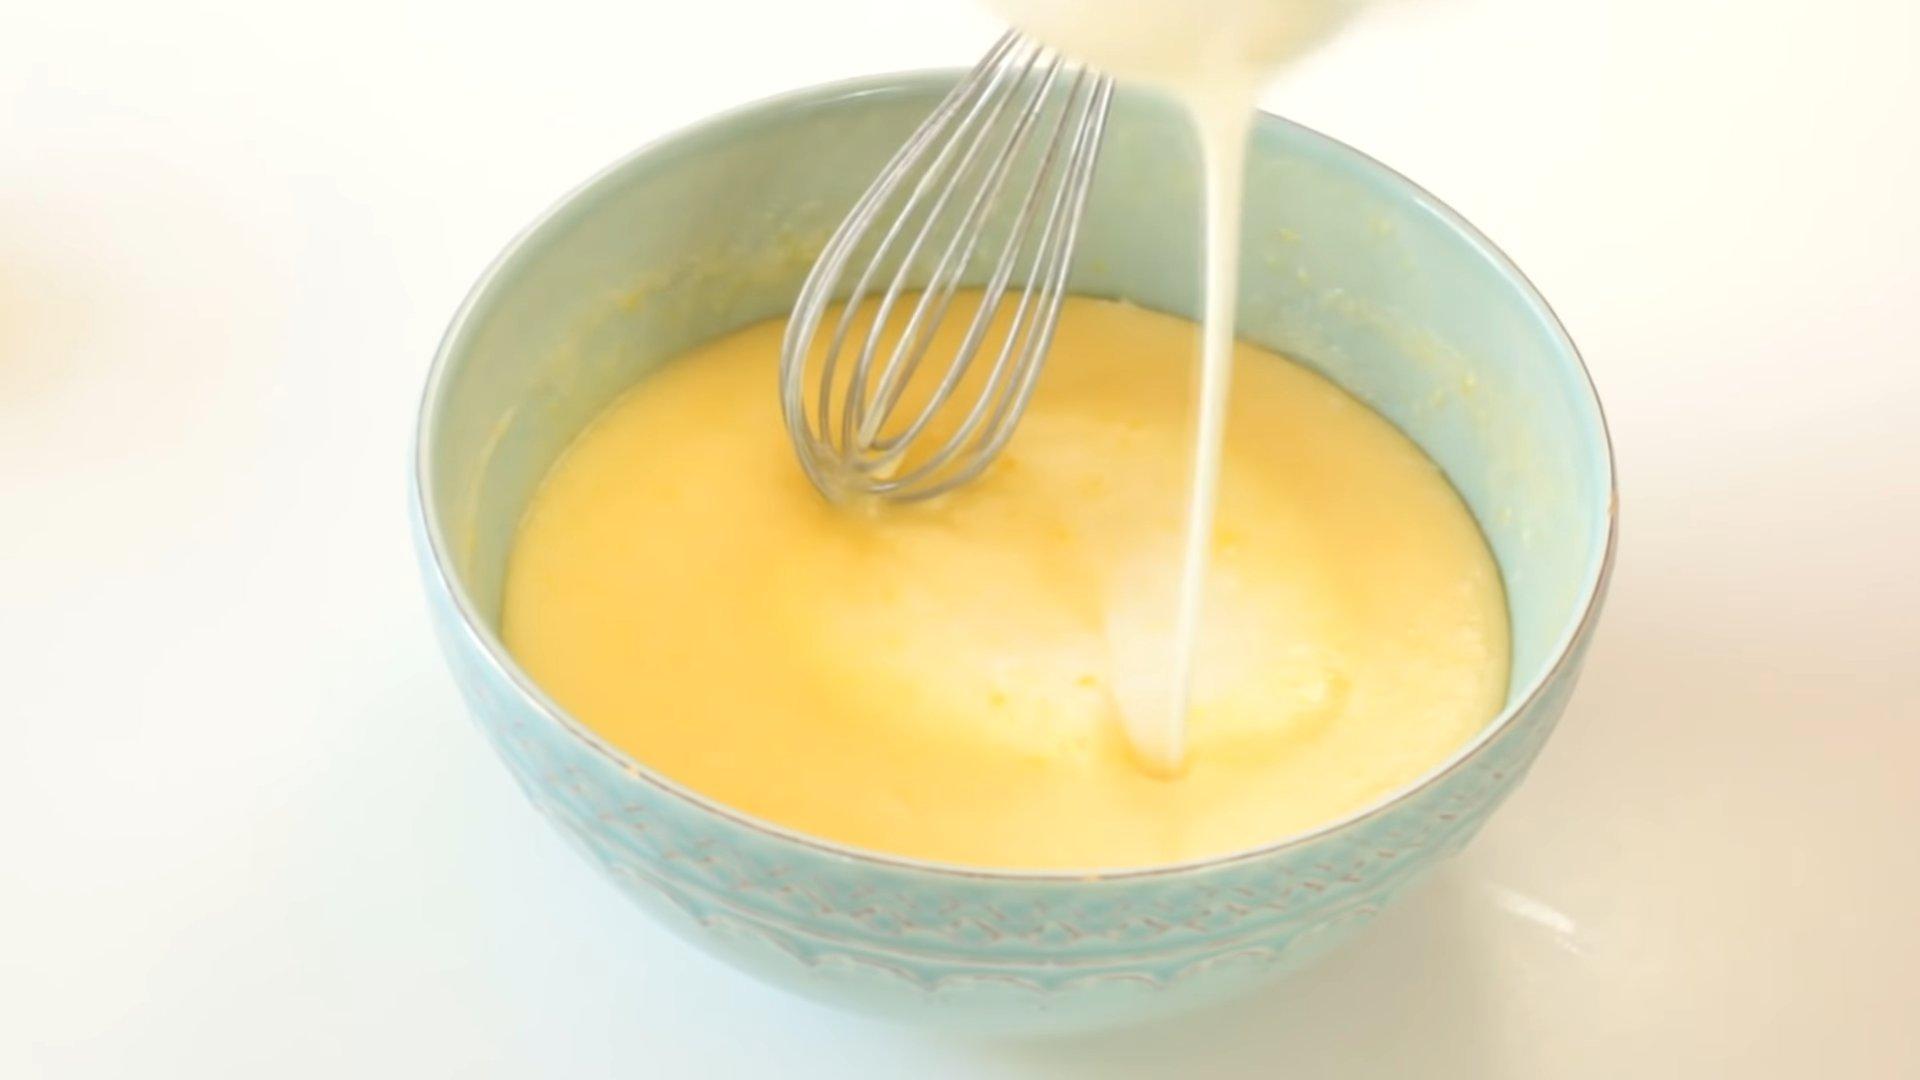
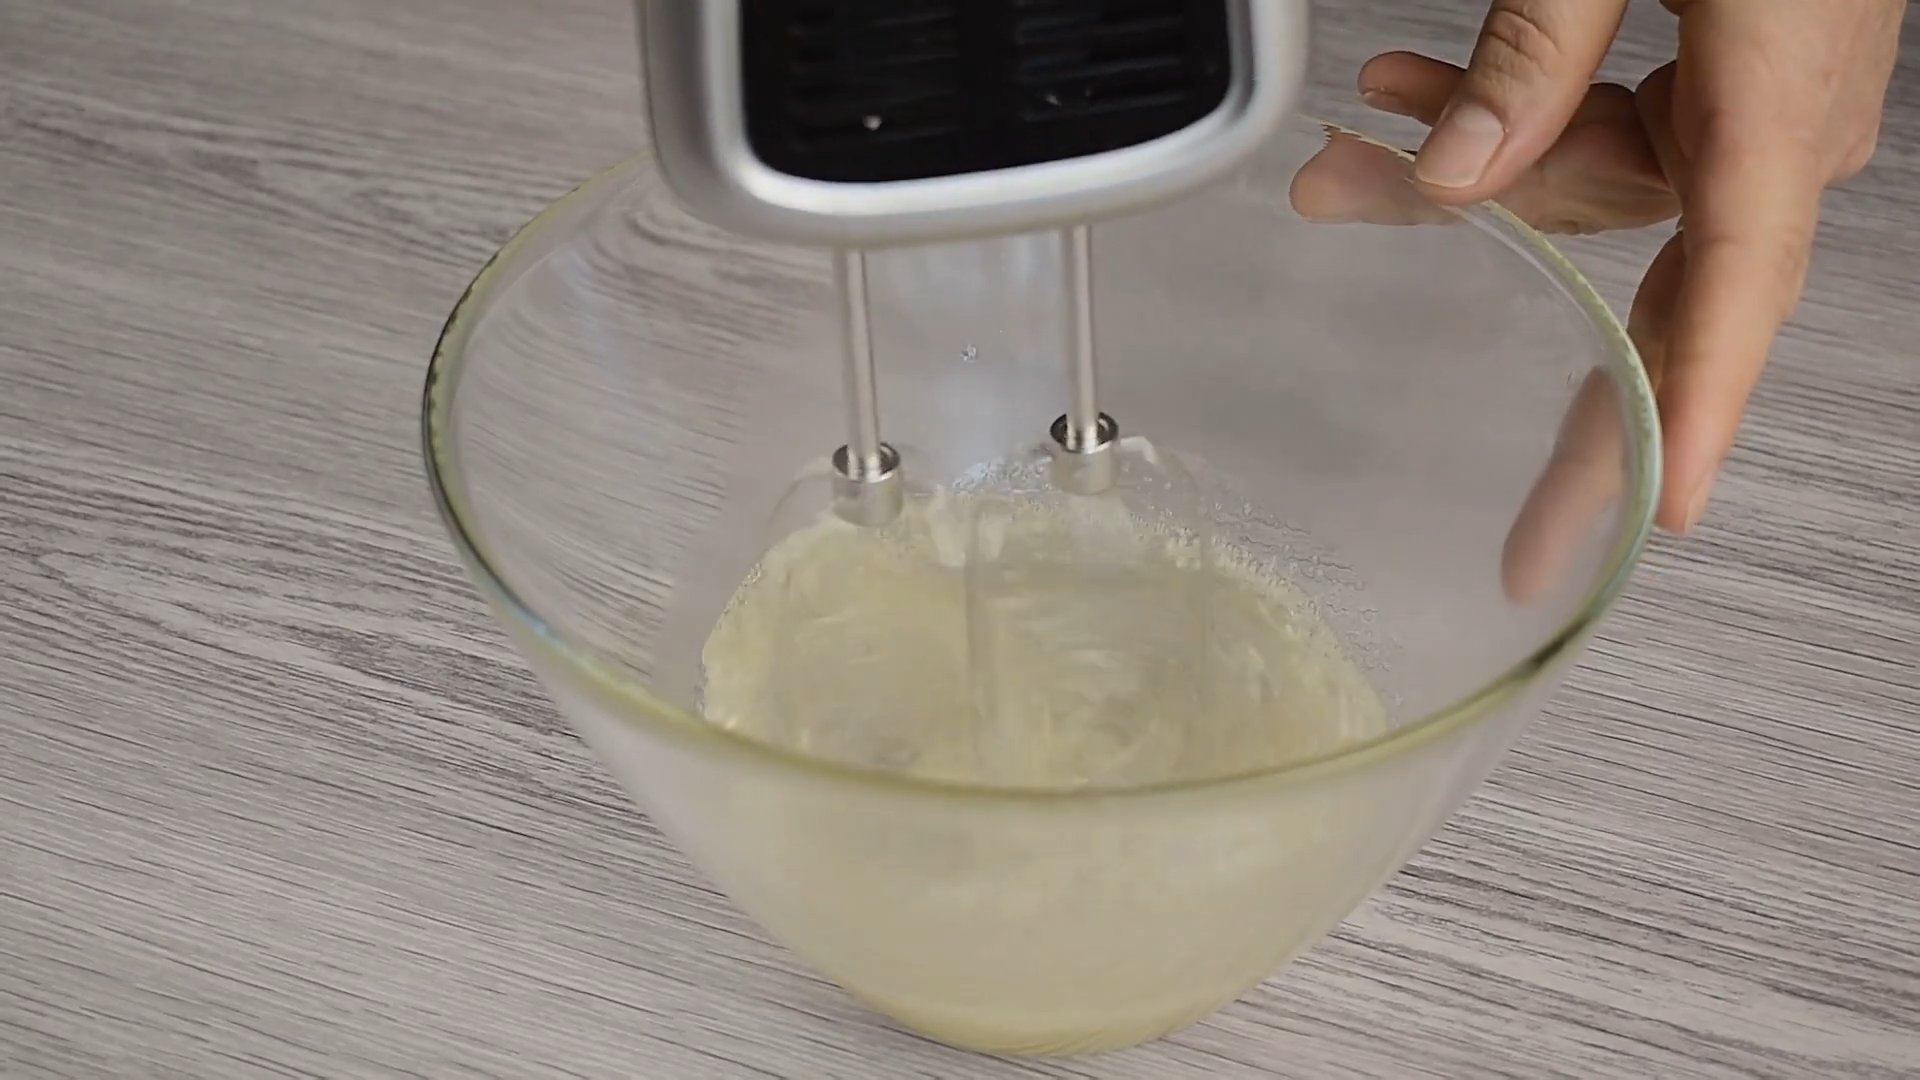
Pour milk and vegetable oil into the egg mixture.

Mix well with a whisk.

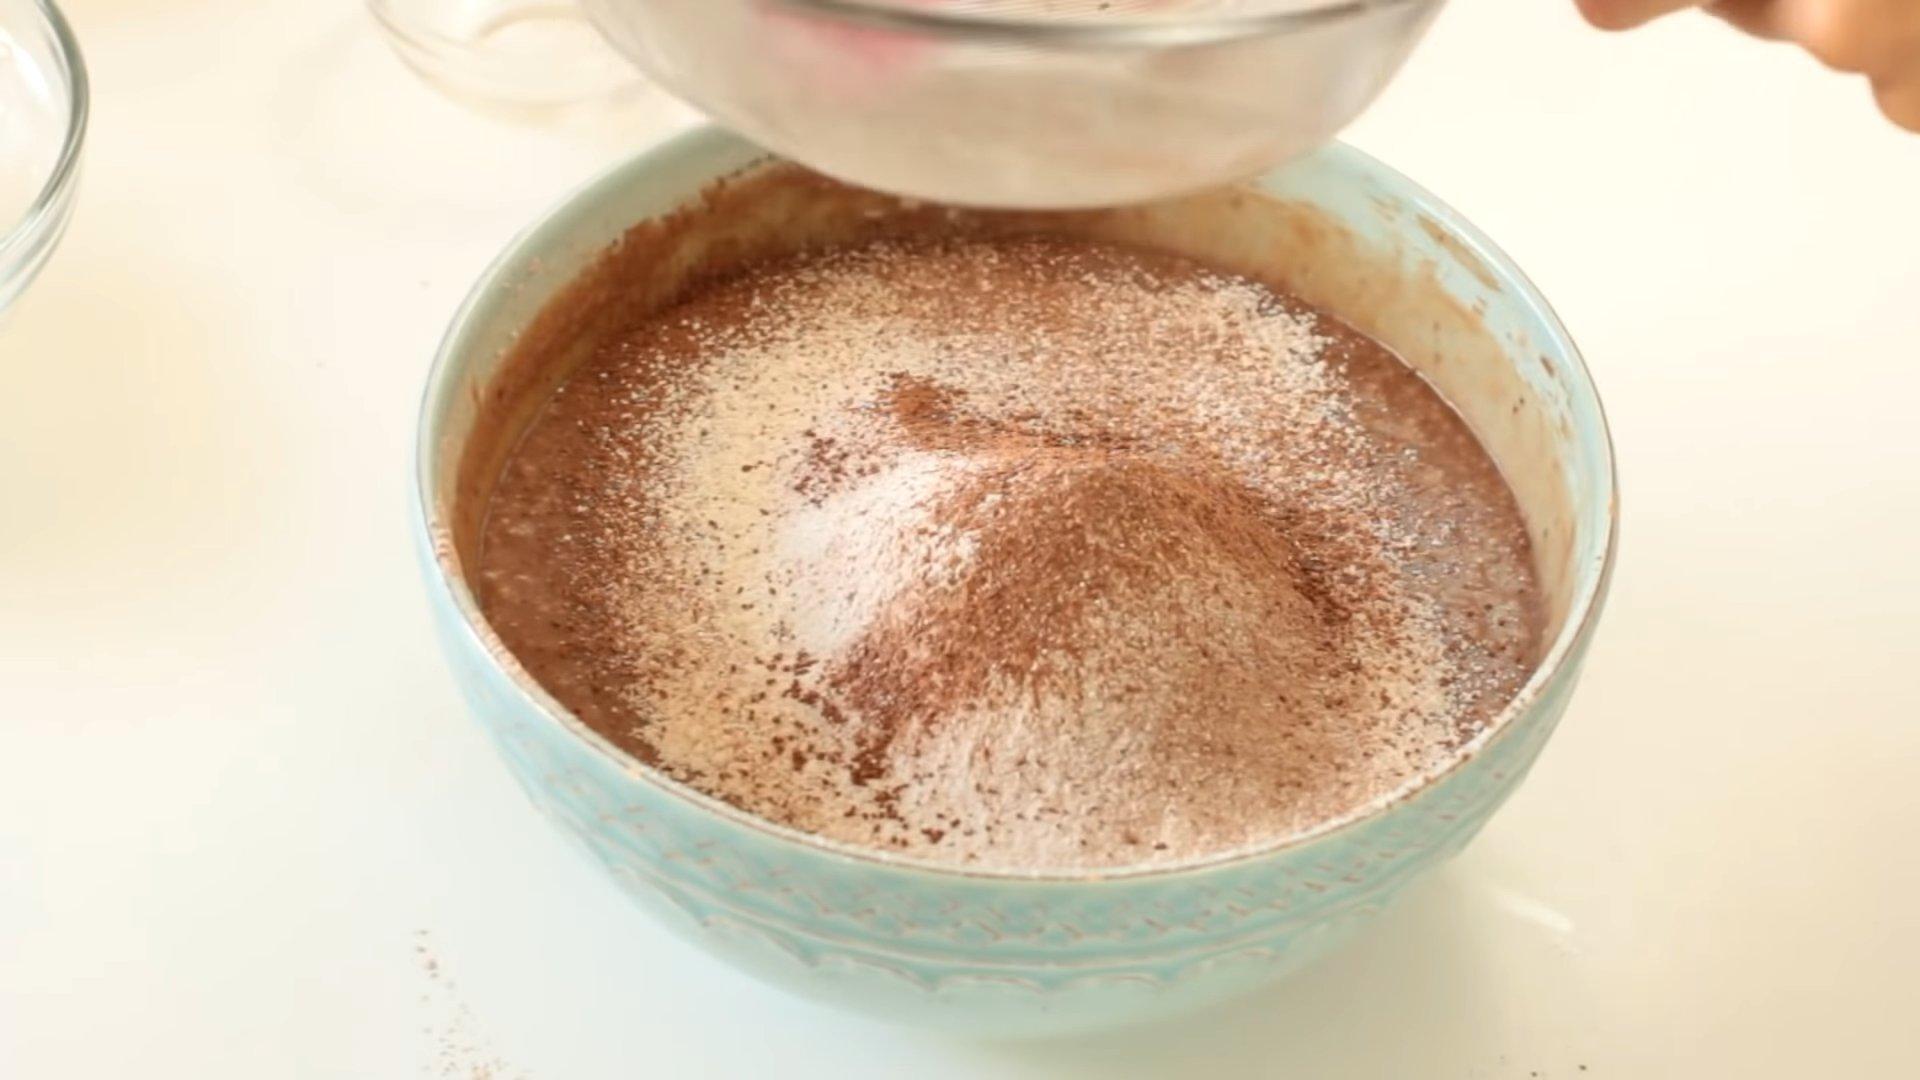
Add flour and baking powder and mix until smooth.

Then add the chocolate chips and mix well again.

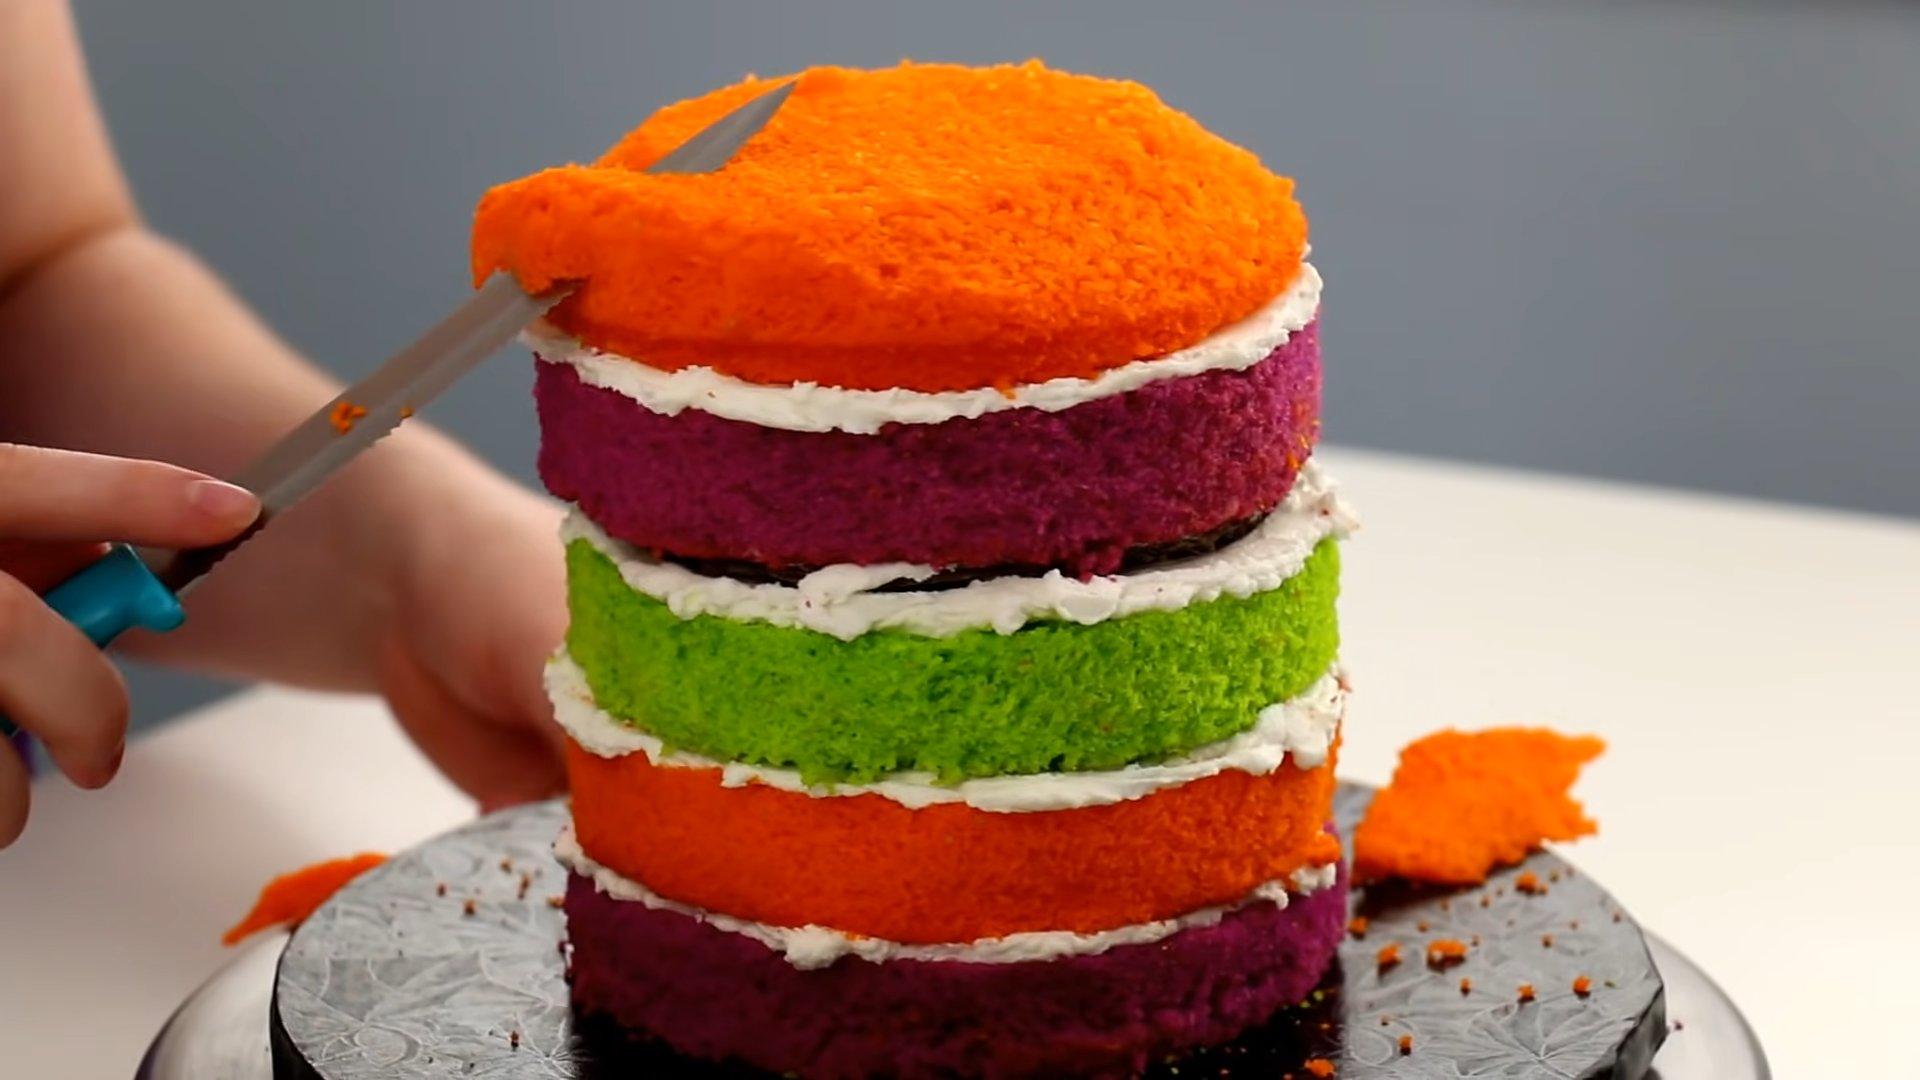
Divide the resulting dough evenly into 2 pans and bake the cakes at 170 degrees for 40 minutes.

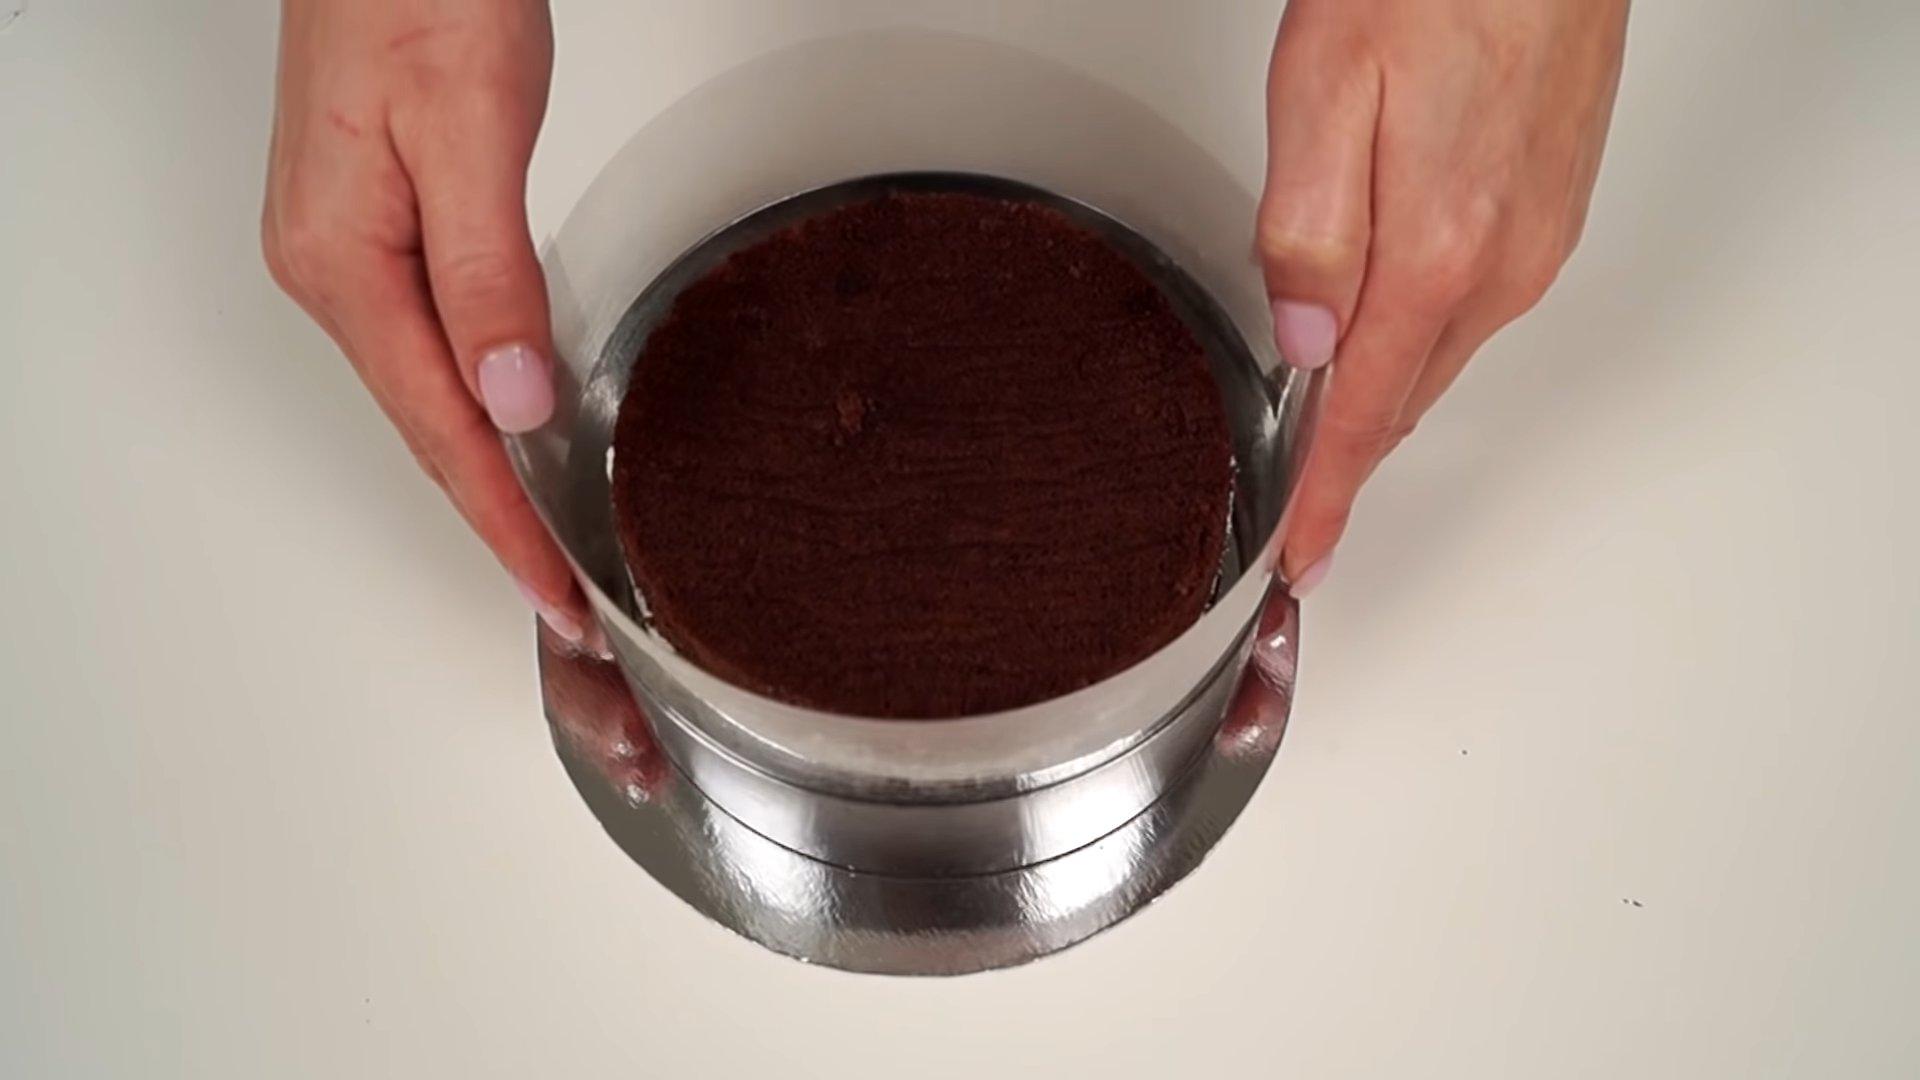
Cool the finished sponge cake completely in the pan, then stretch it out, wrap it in cling film and put it in the refrigerator for several hours.

After cooling, divide each sponge cake into 3 parts. You should have 6 identical layers.

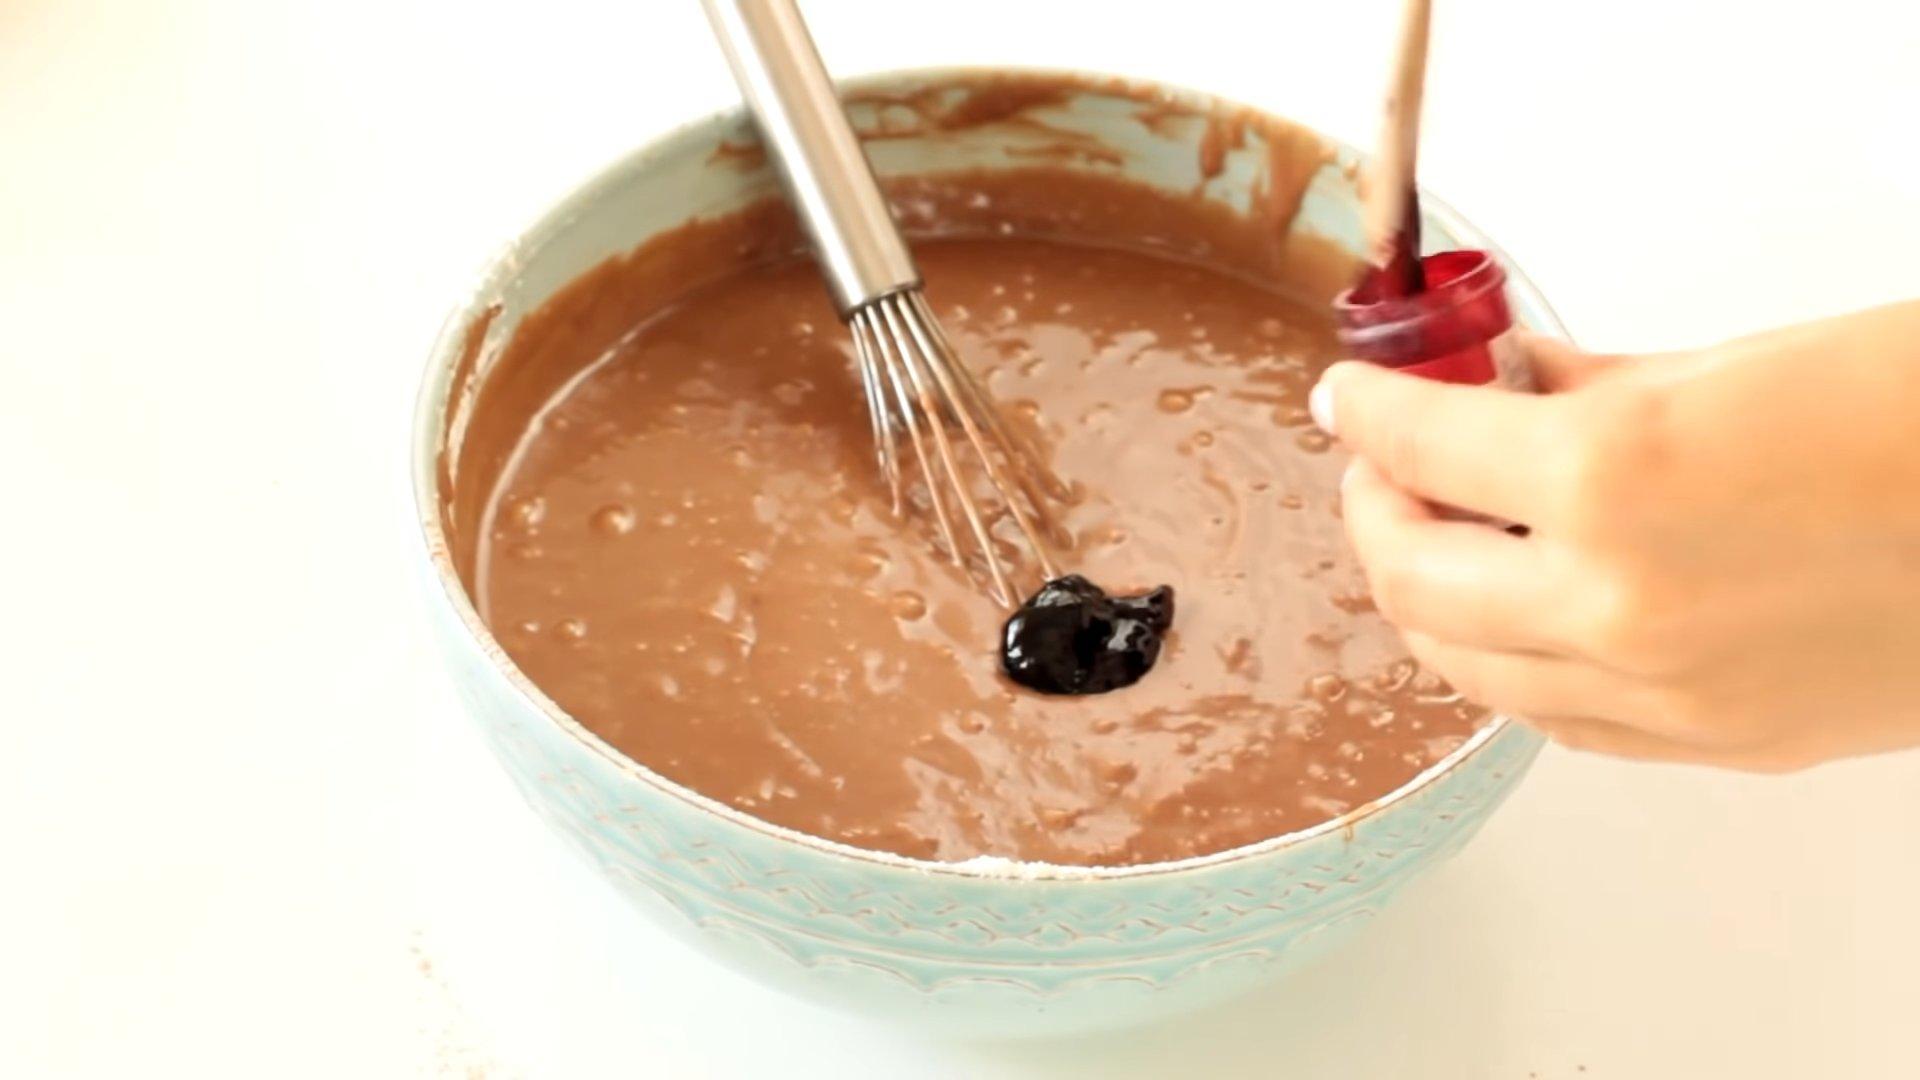
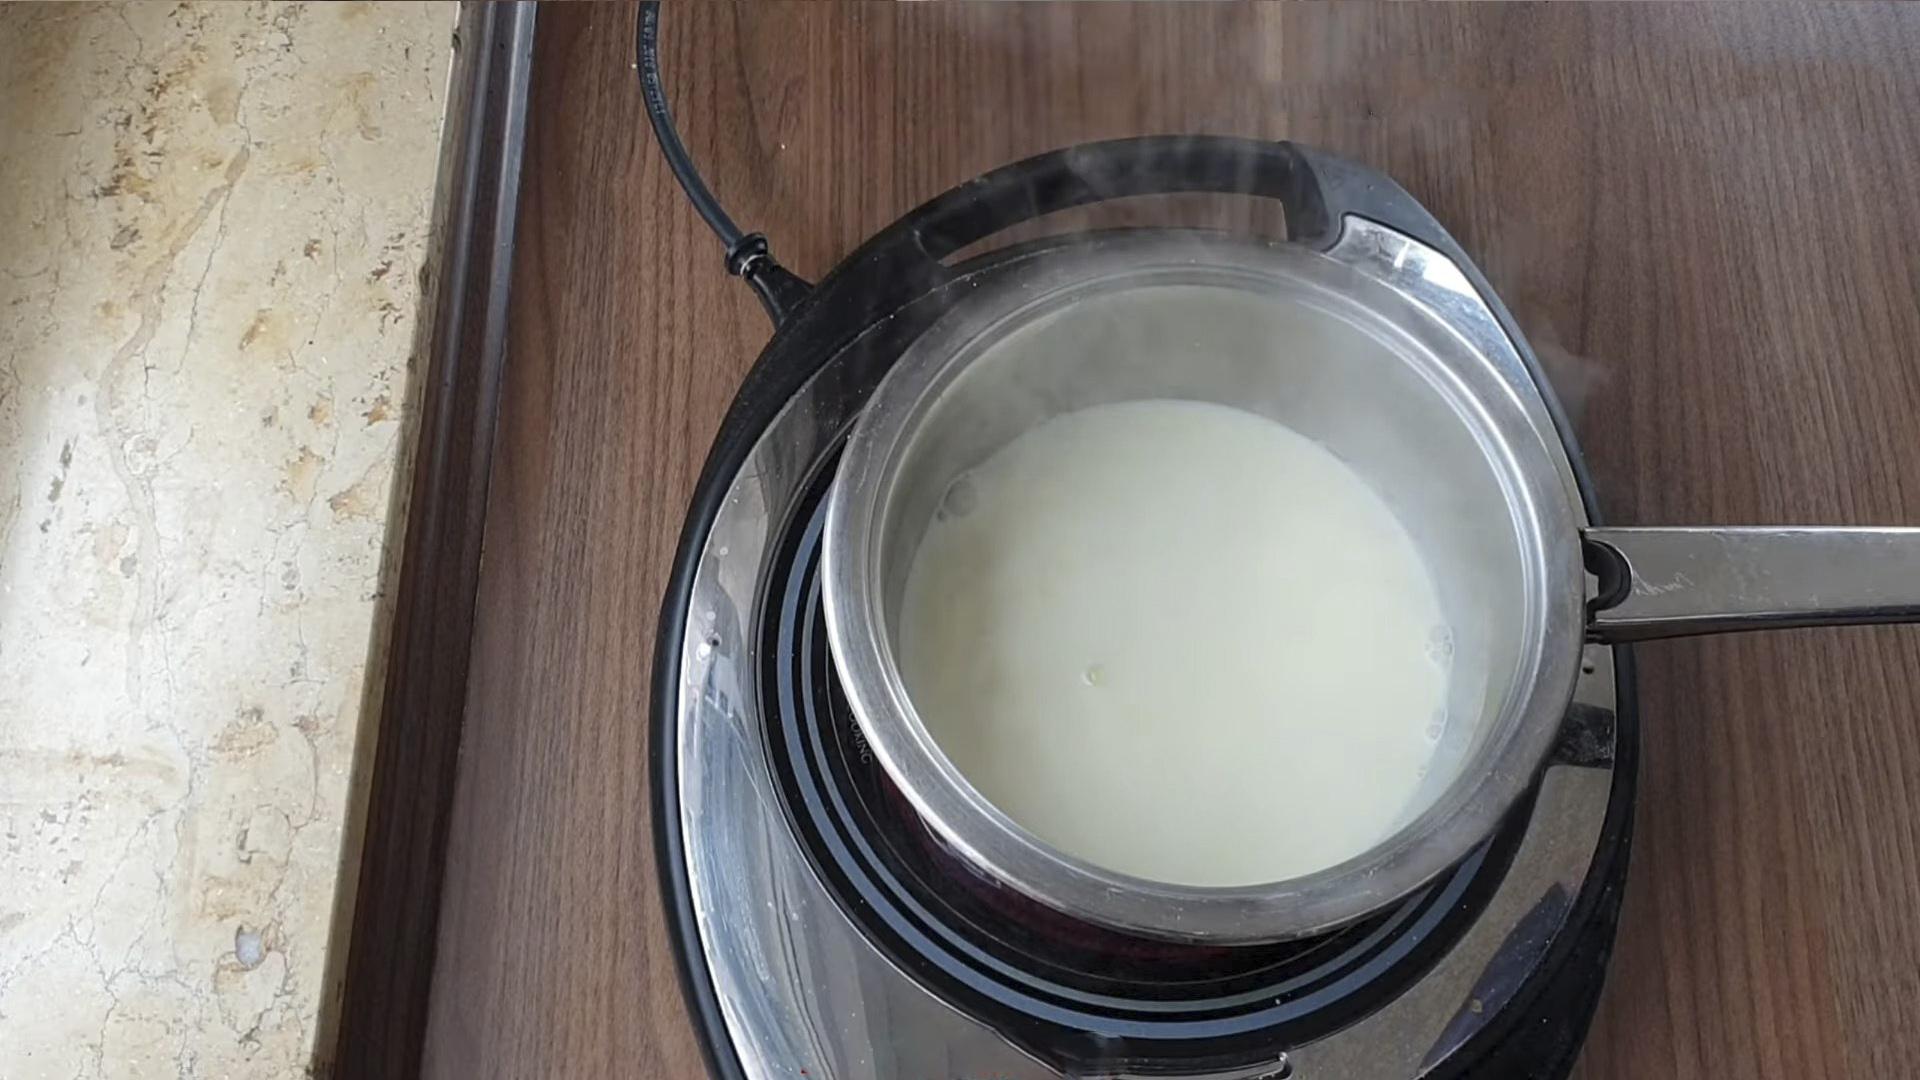
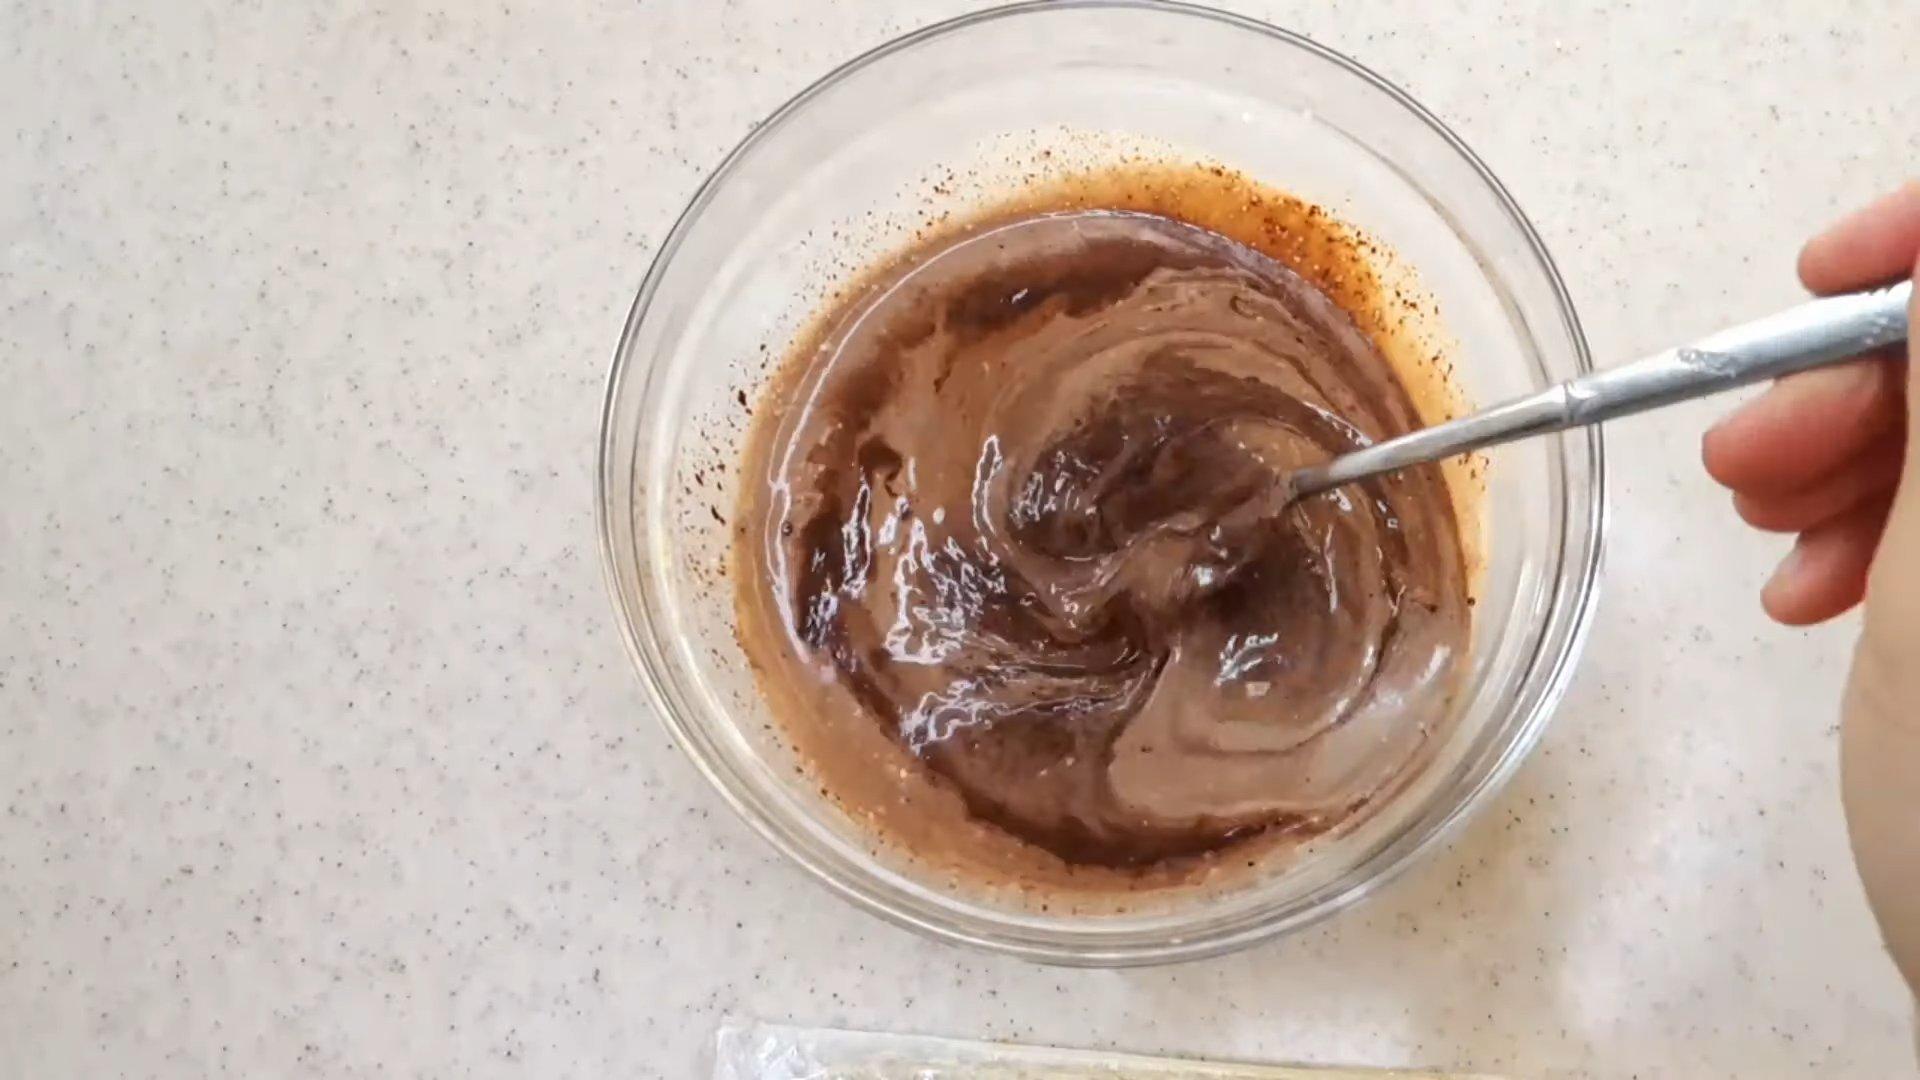
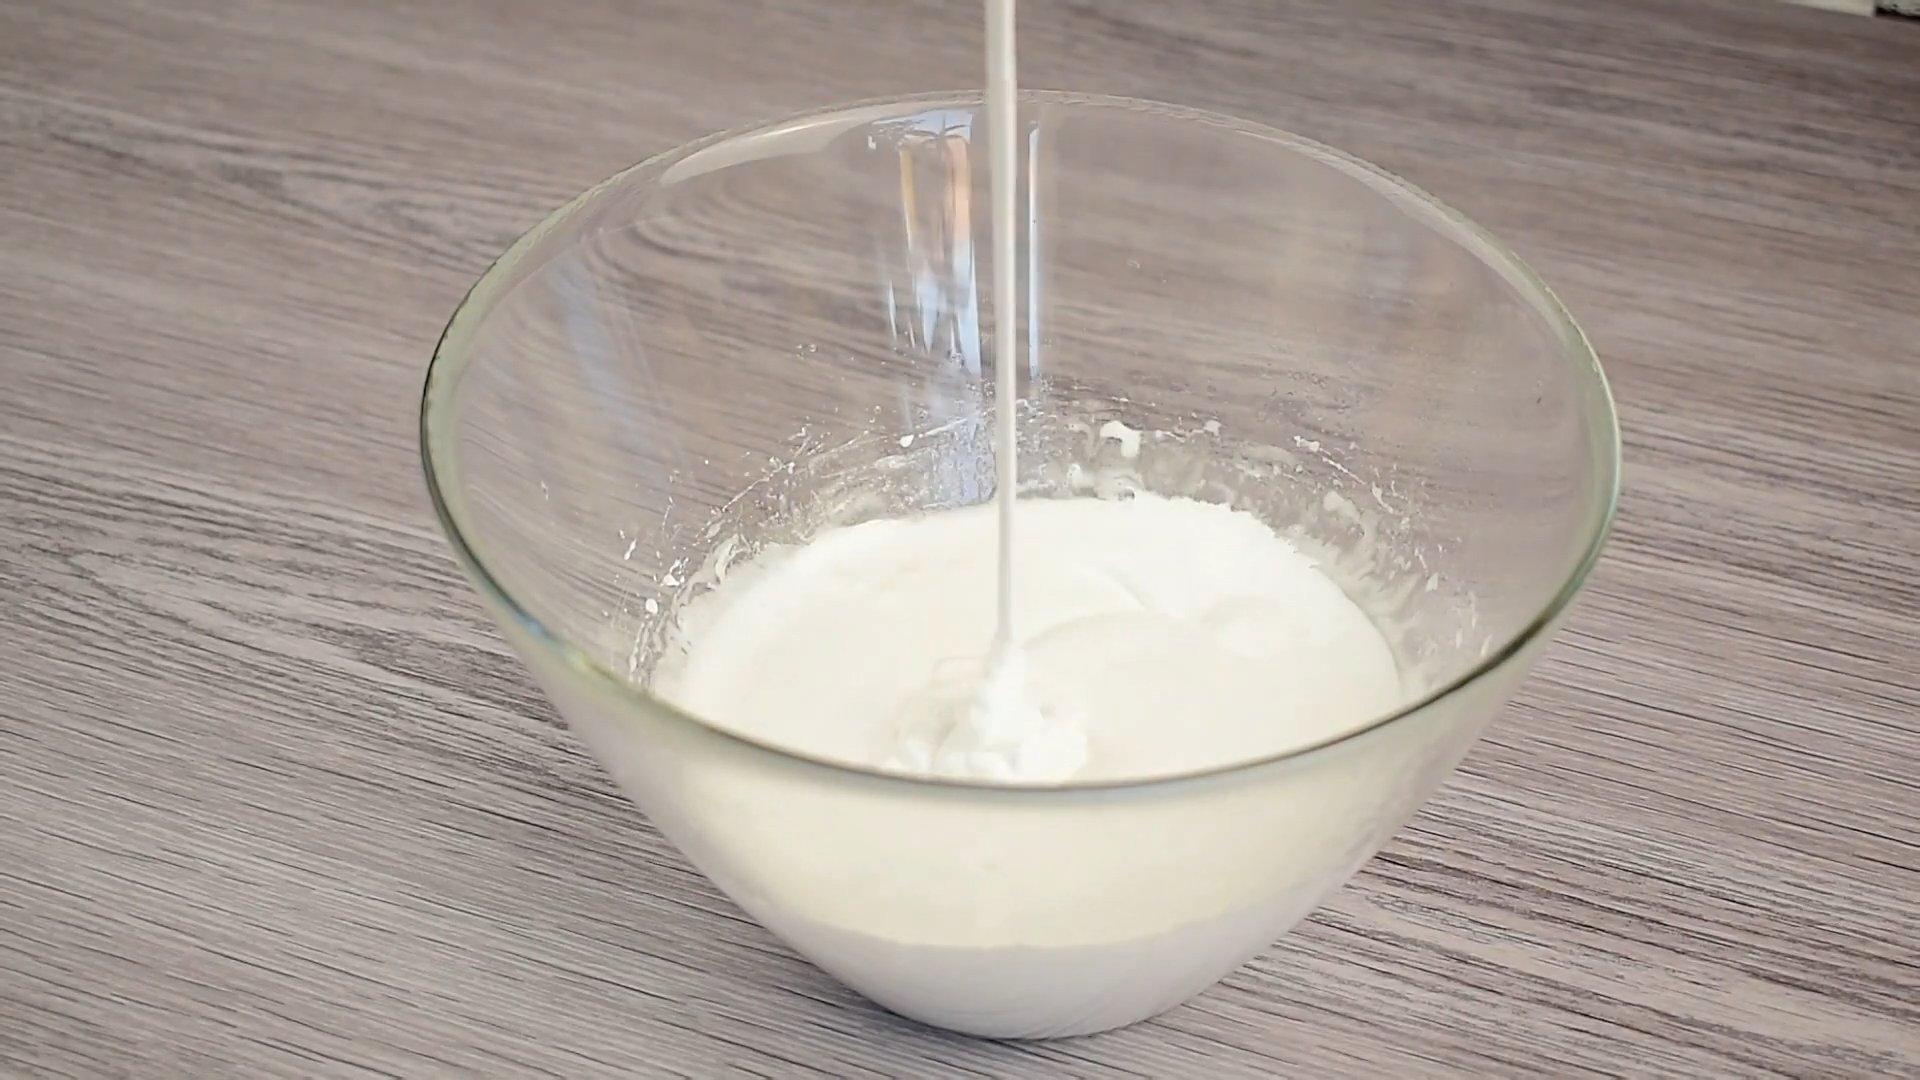
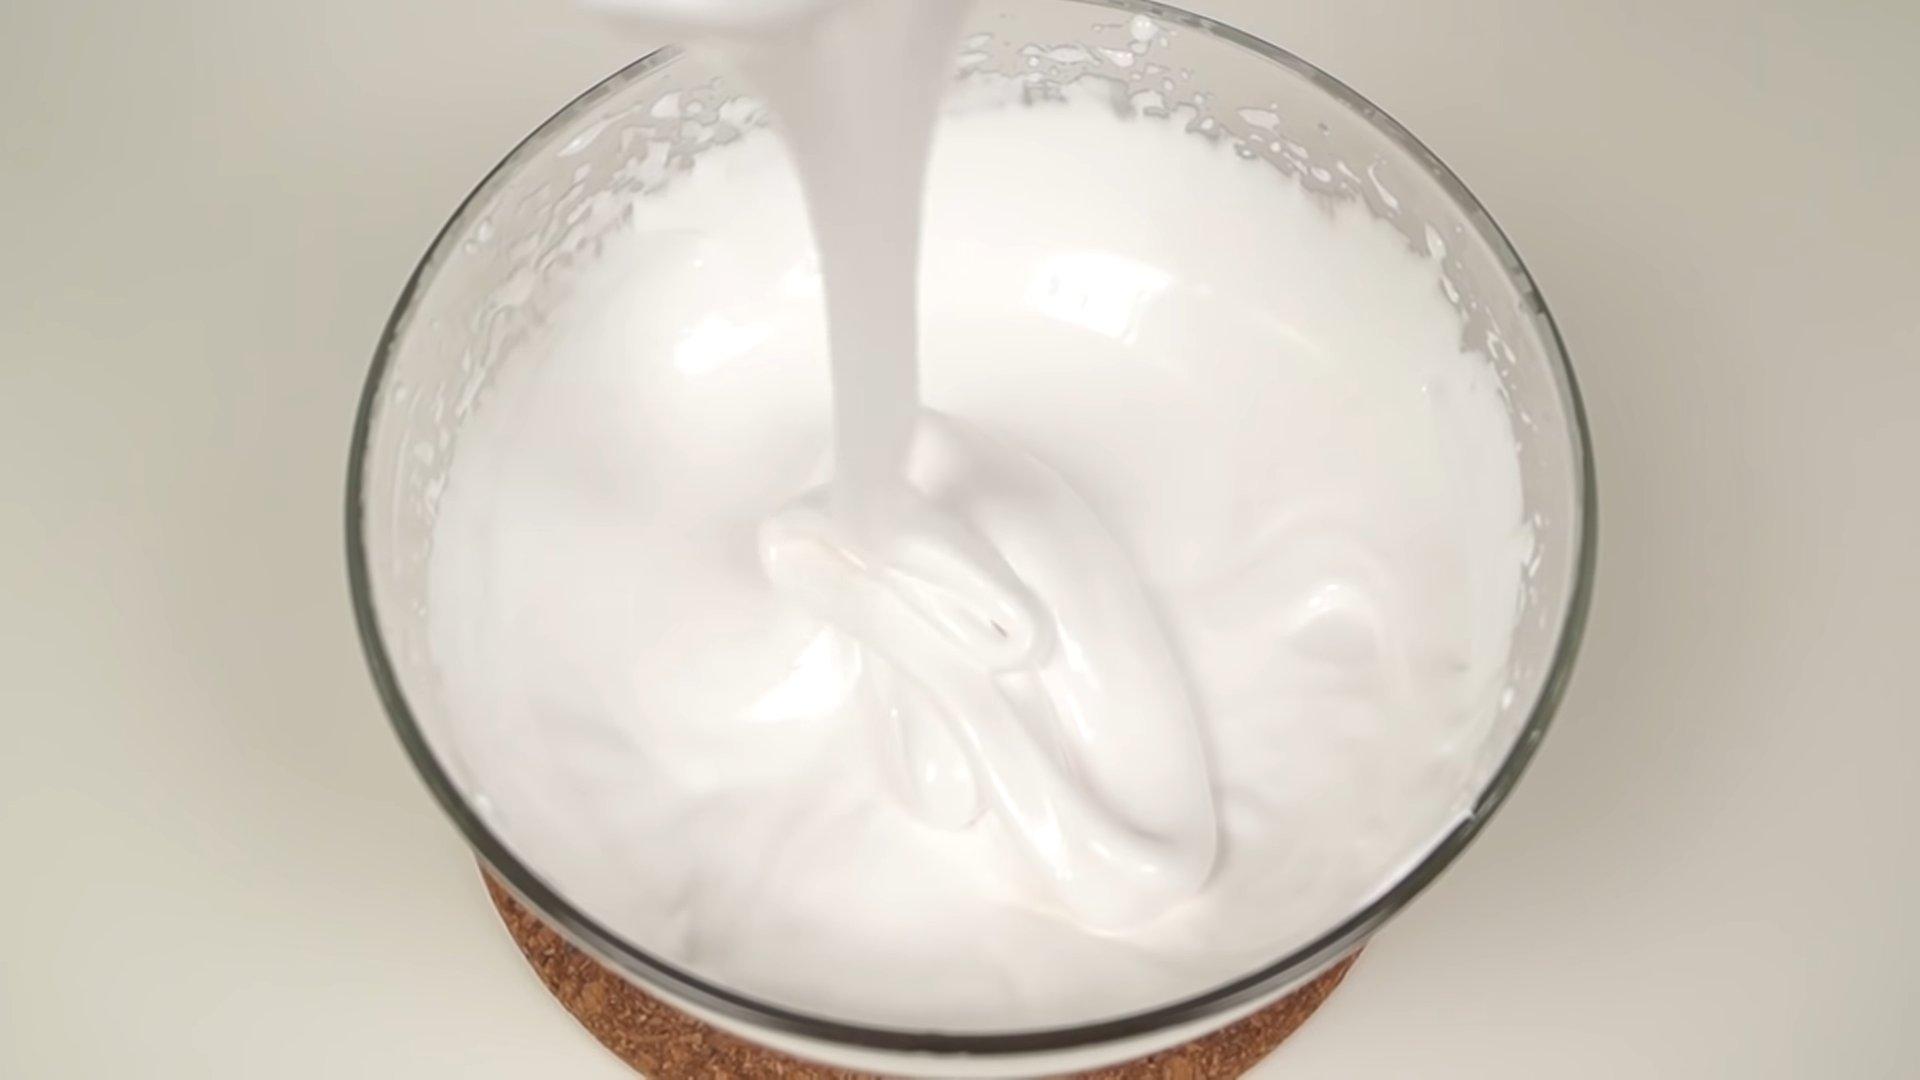
Let's prepare the ganache for the cream. It's best to do this ahead of time. Bring the heavy cream to a boil and pour it over the white chocolate. Let it sit for a couple of minutes, then whisk until smooth.

Cover with cling film and put in the refrigerator, preferably overnight.

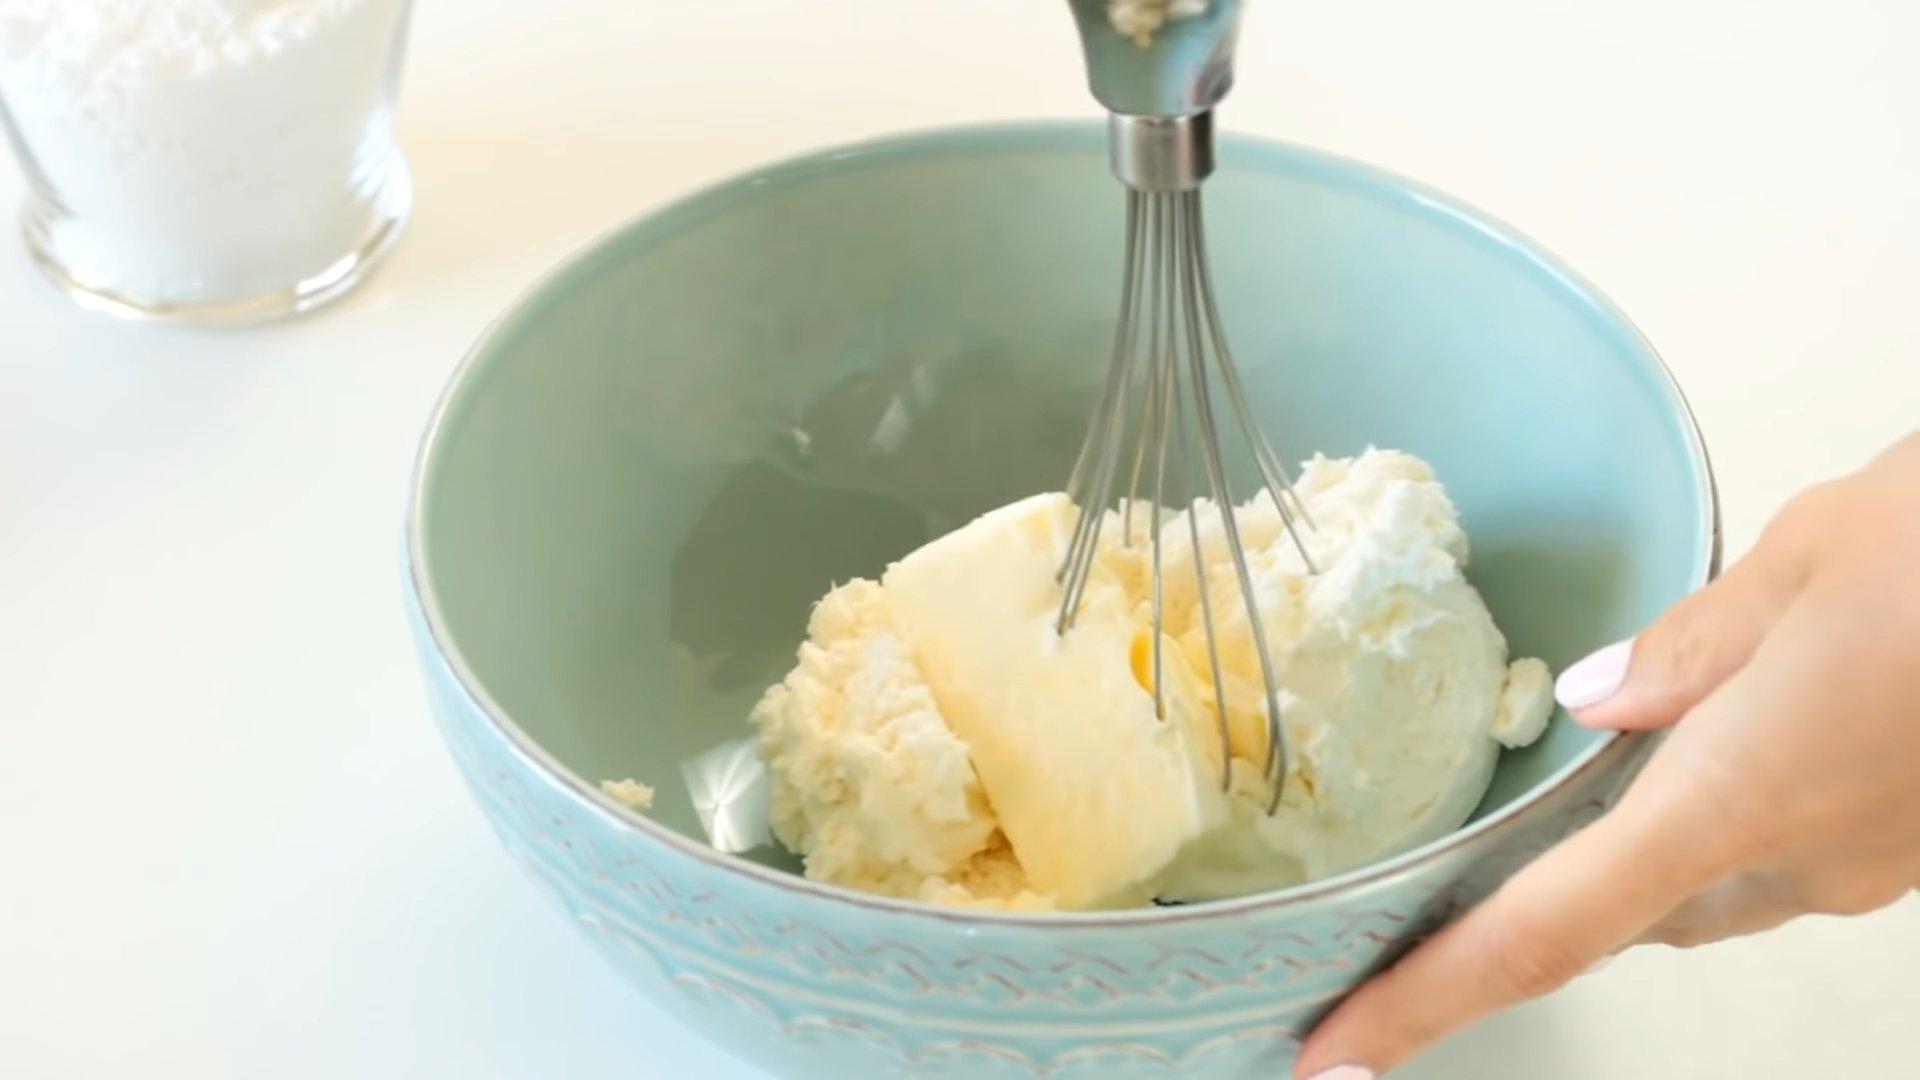
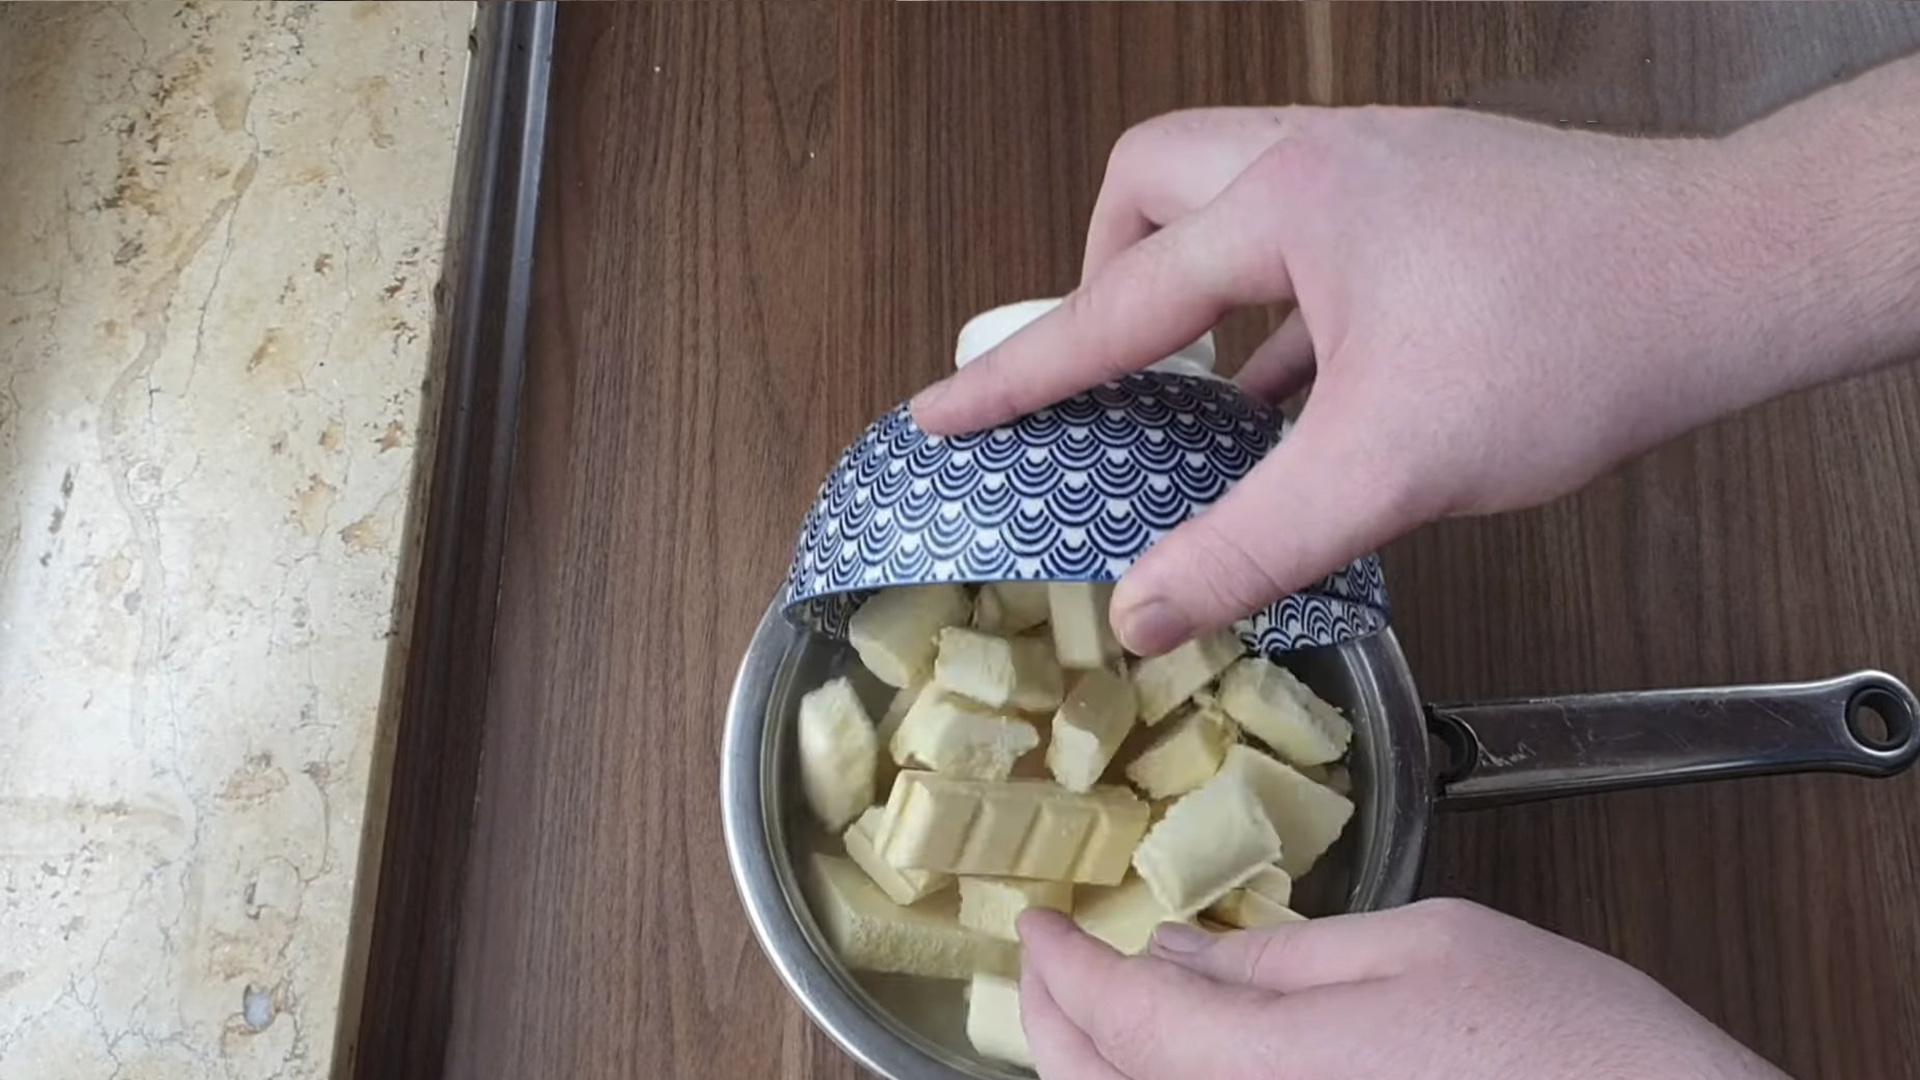
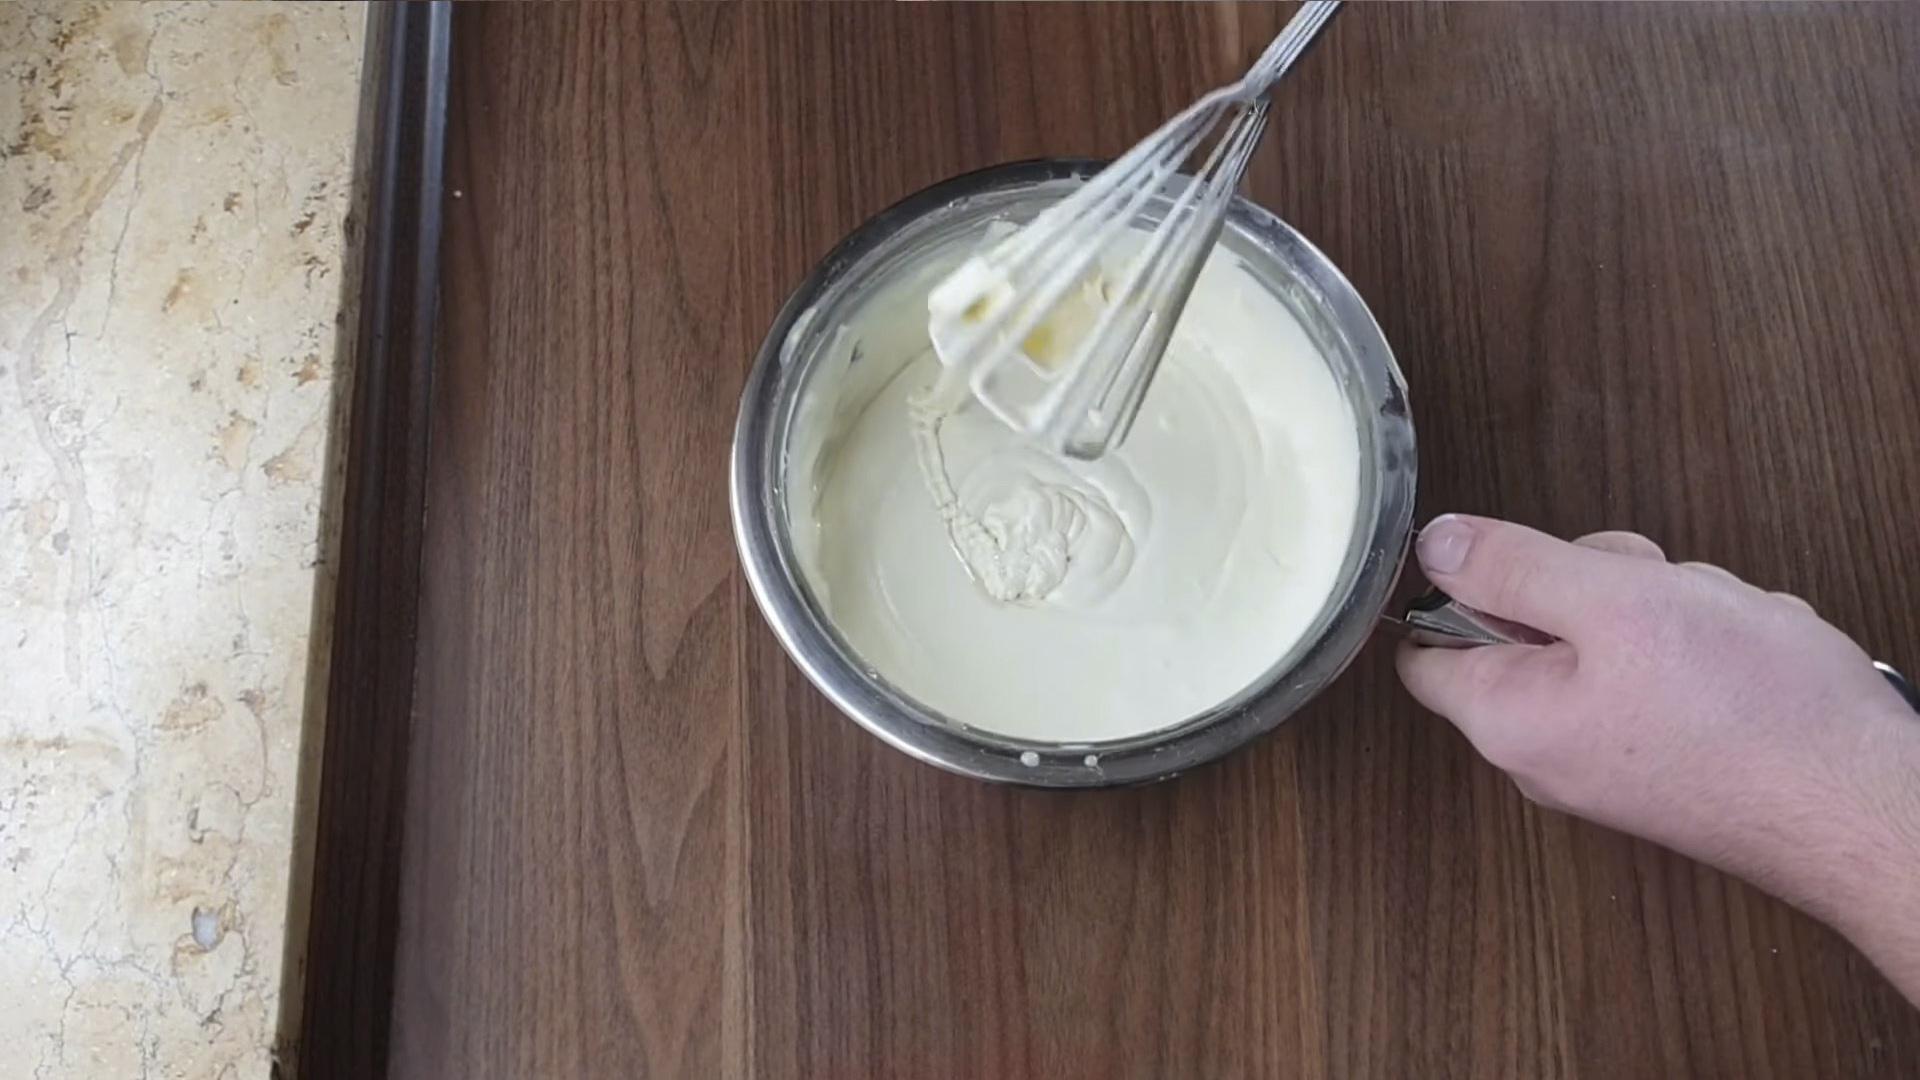
Prepare the ingredients for the cream.

Place cream cheese and peanut butter in a deep bowl.

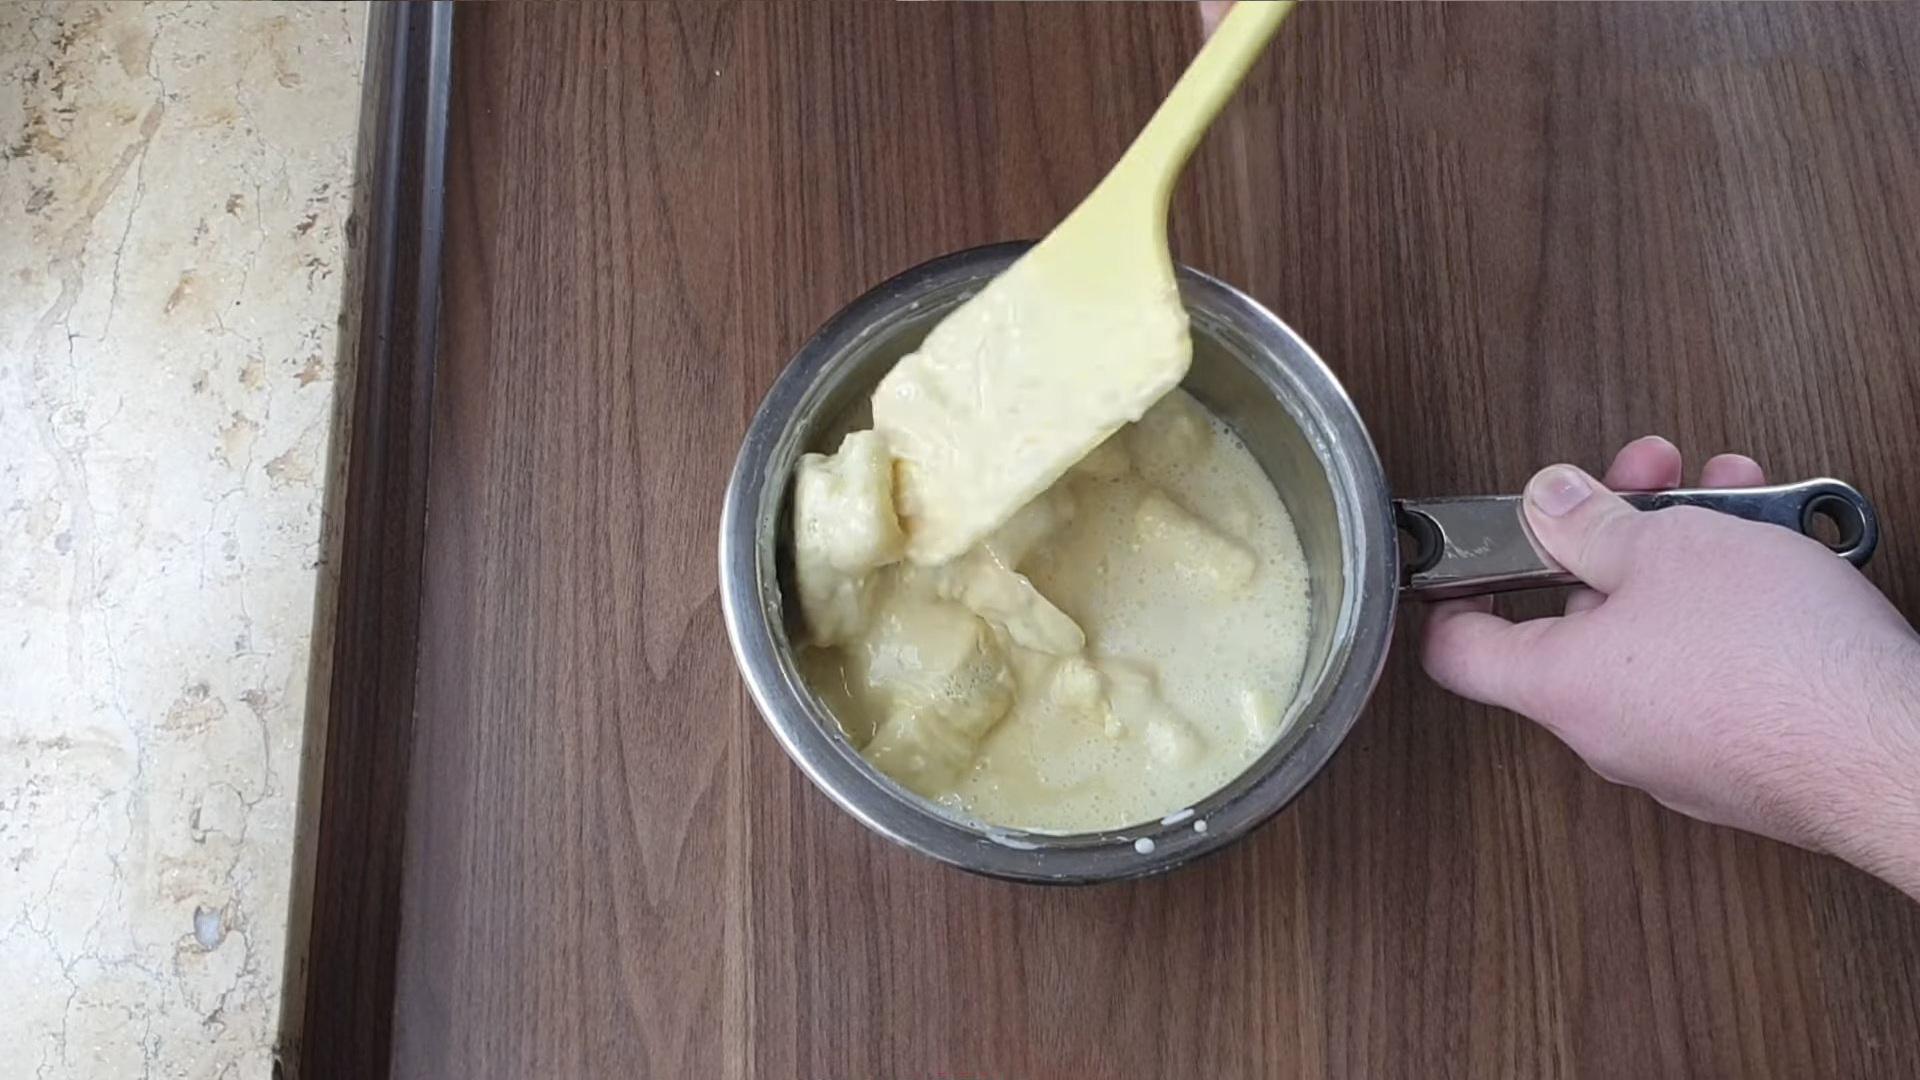
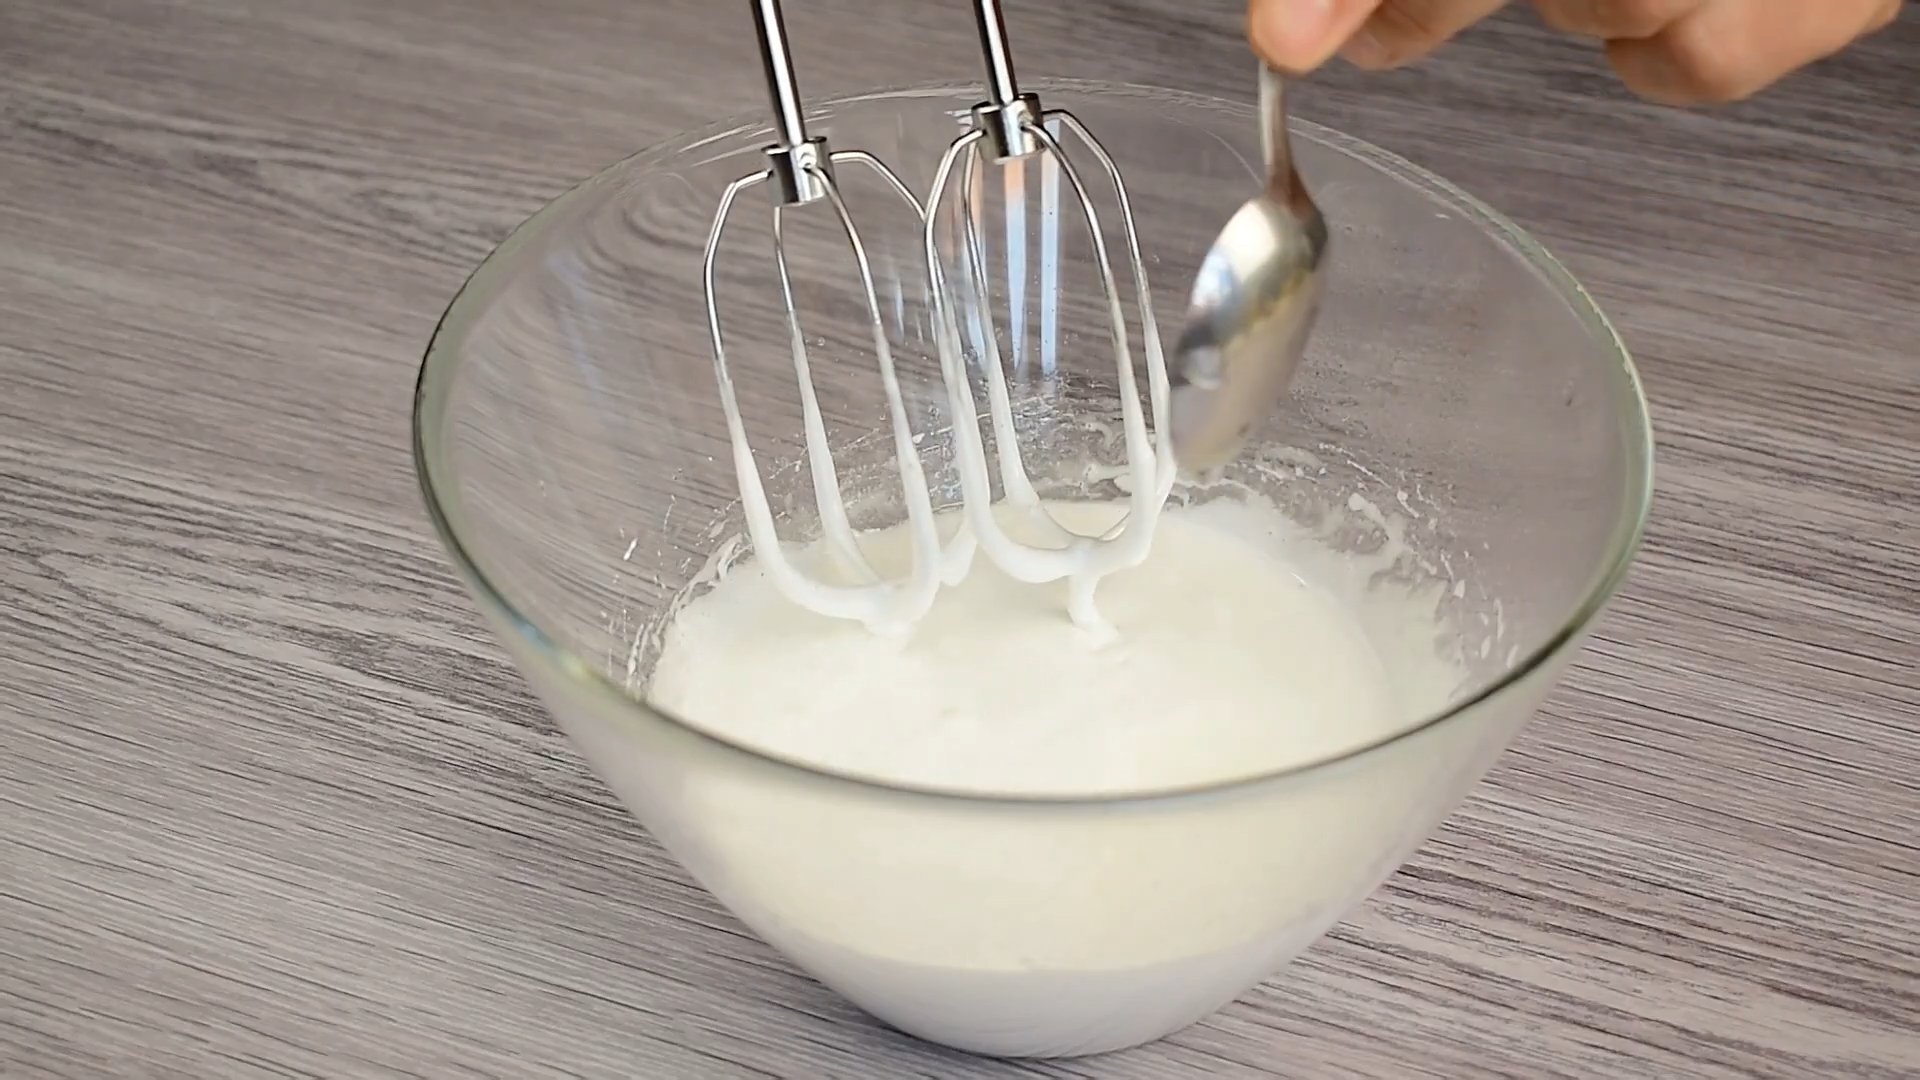
Mix the ingredients well and add the cooled ganache to them.

Beat the mixture at low speed with a mixer until smooth.

The cream is ready.

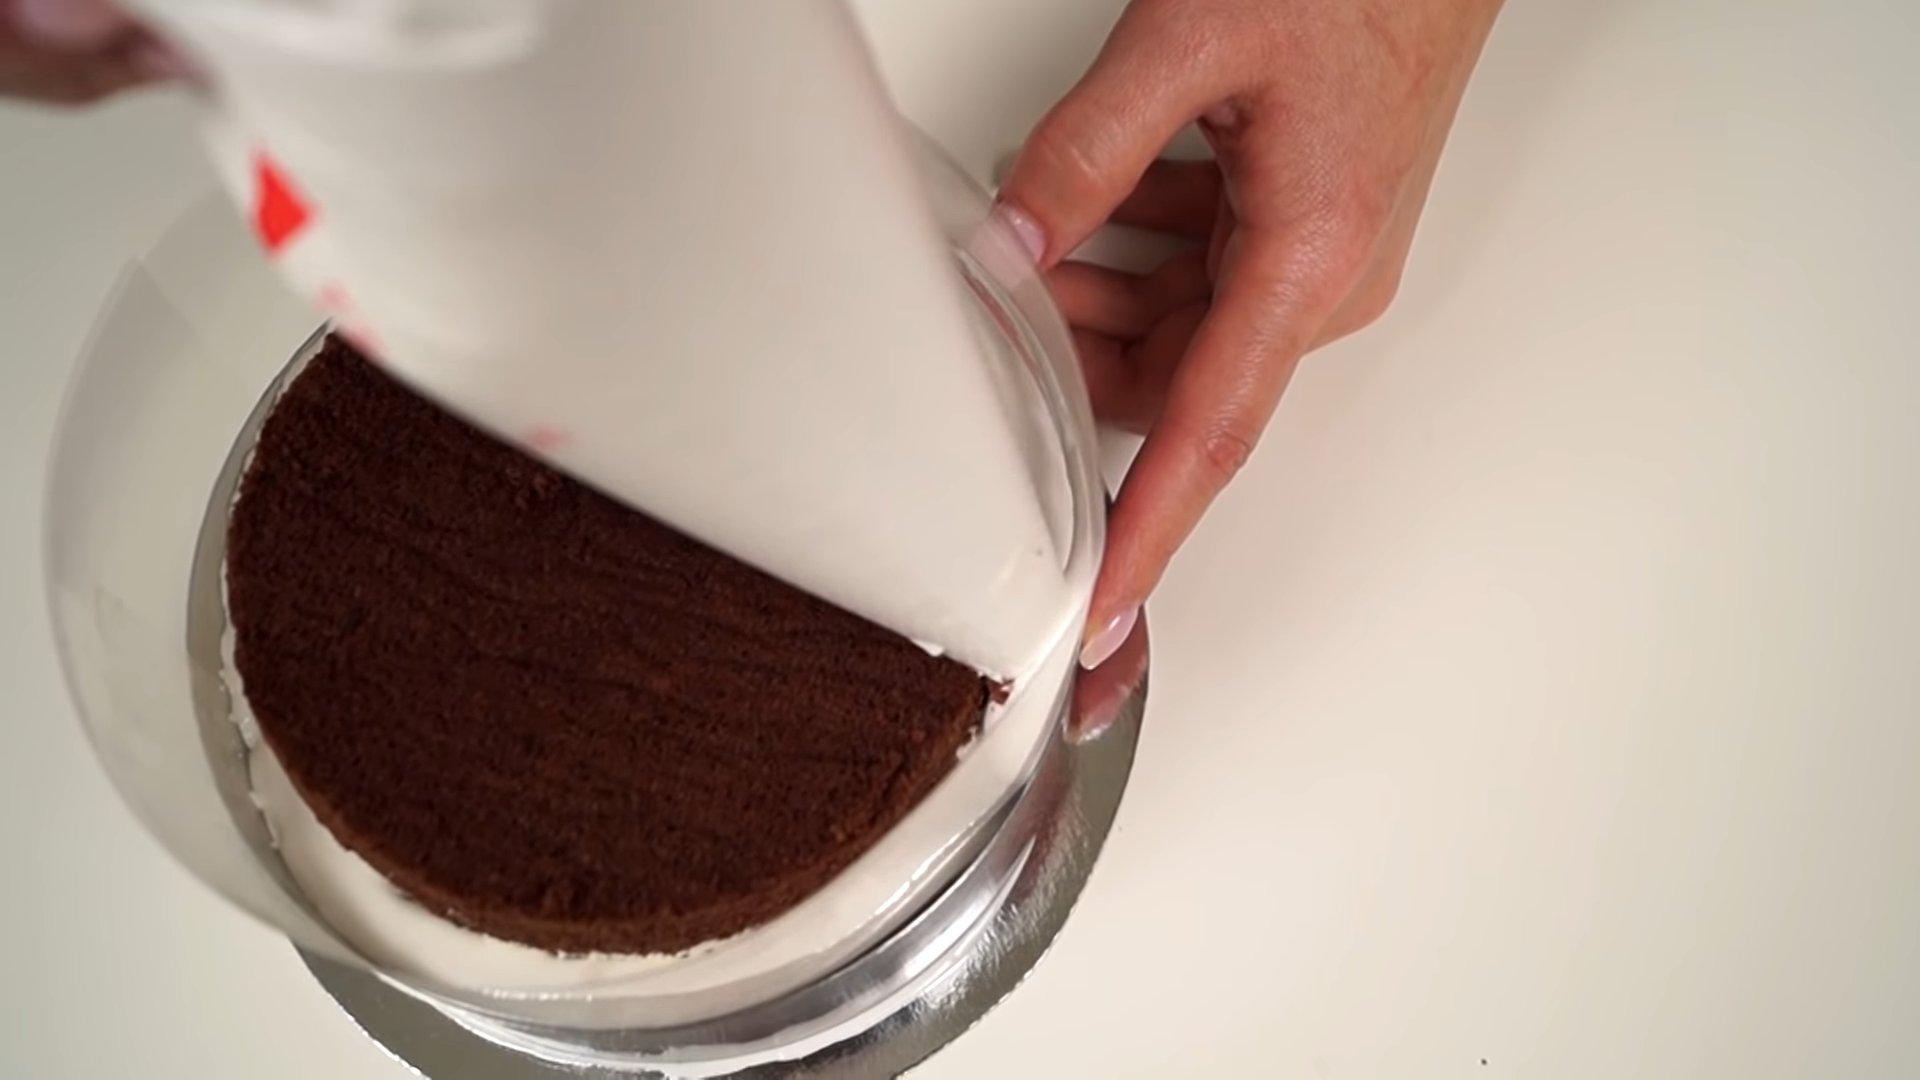
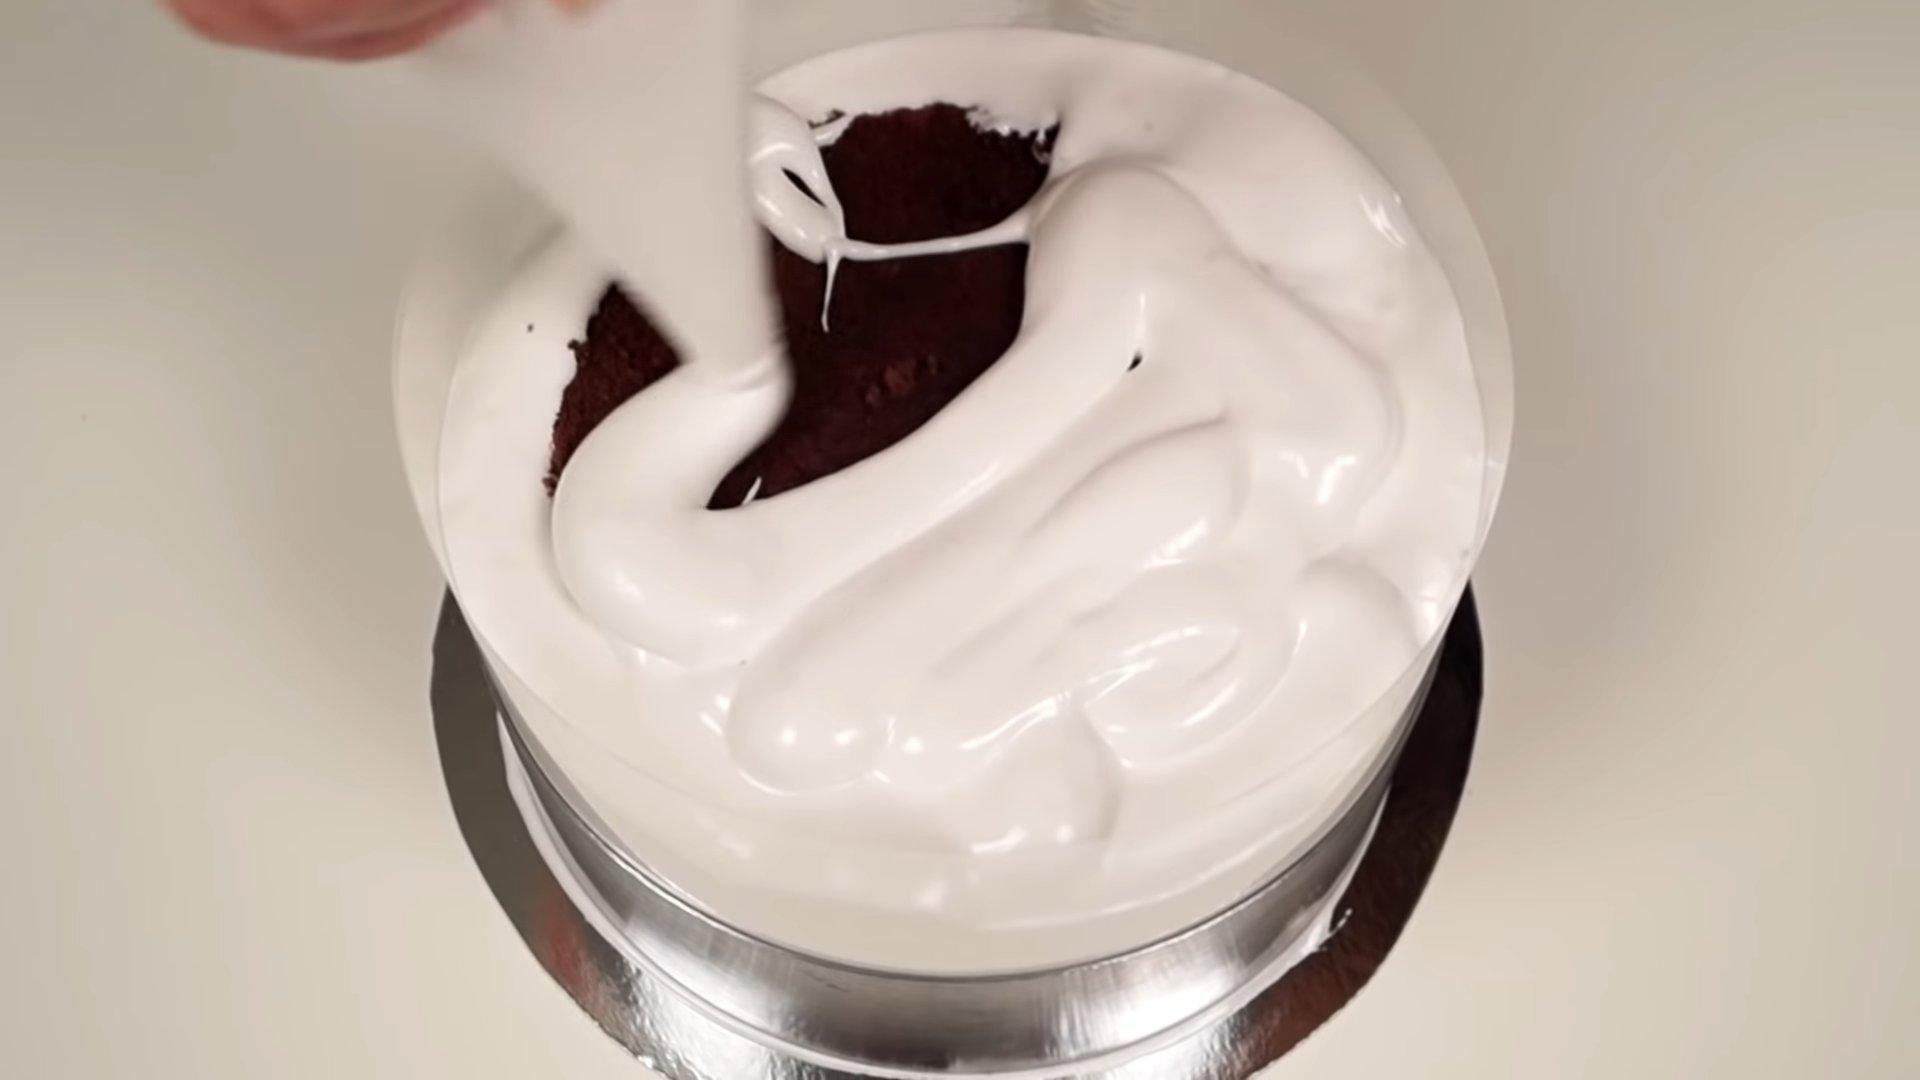
Let's begin assembling the cake. Carefully coat each layer with cream and sprinkle grated chocolate on top.

Wrap the cake in acetate film or parchment, press it into a ring and put it in the refrigerator.

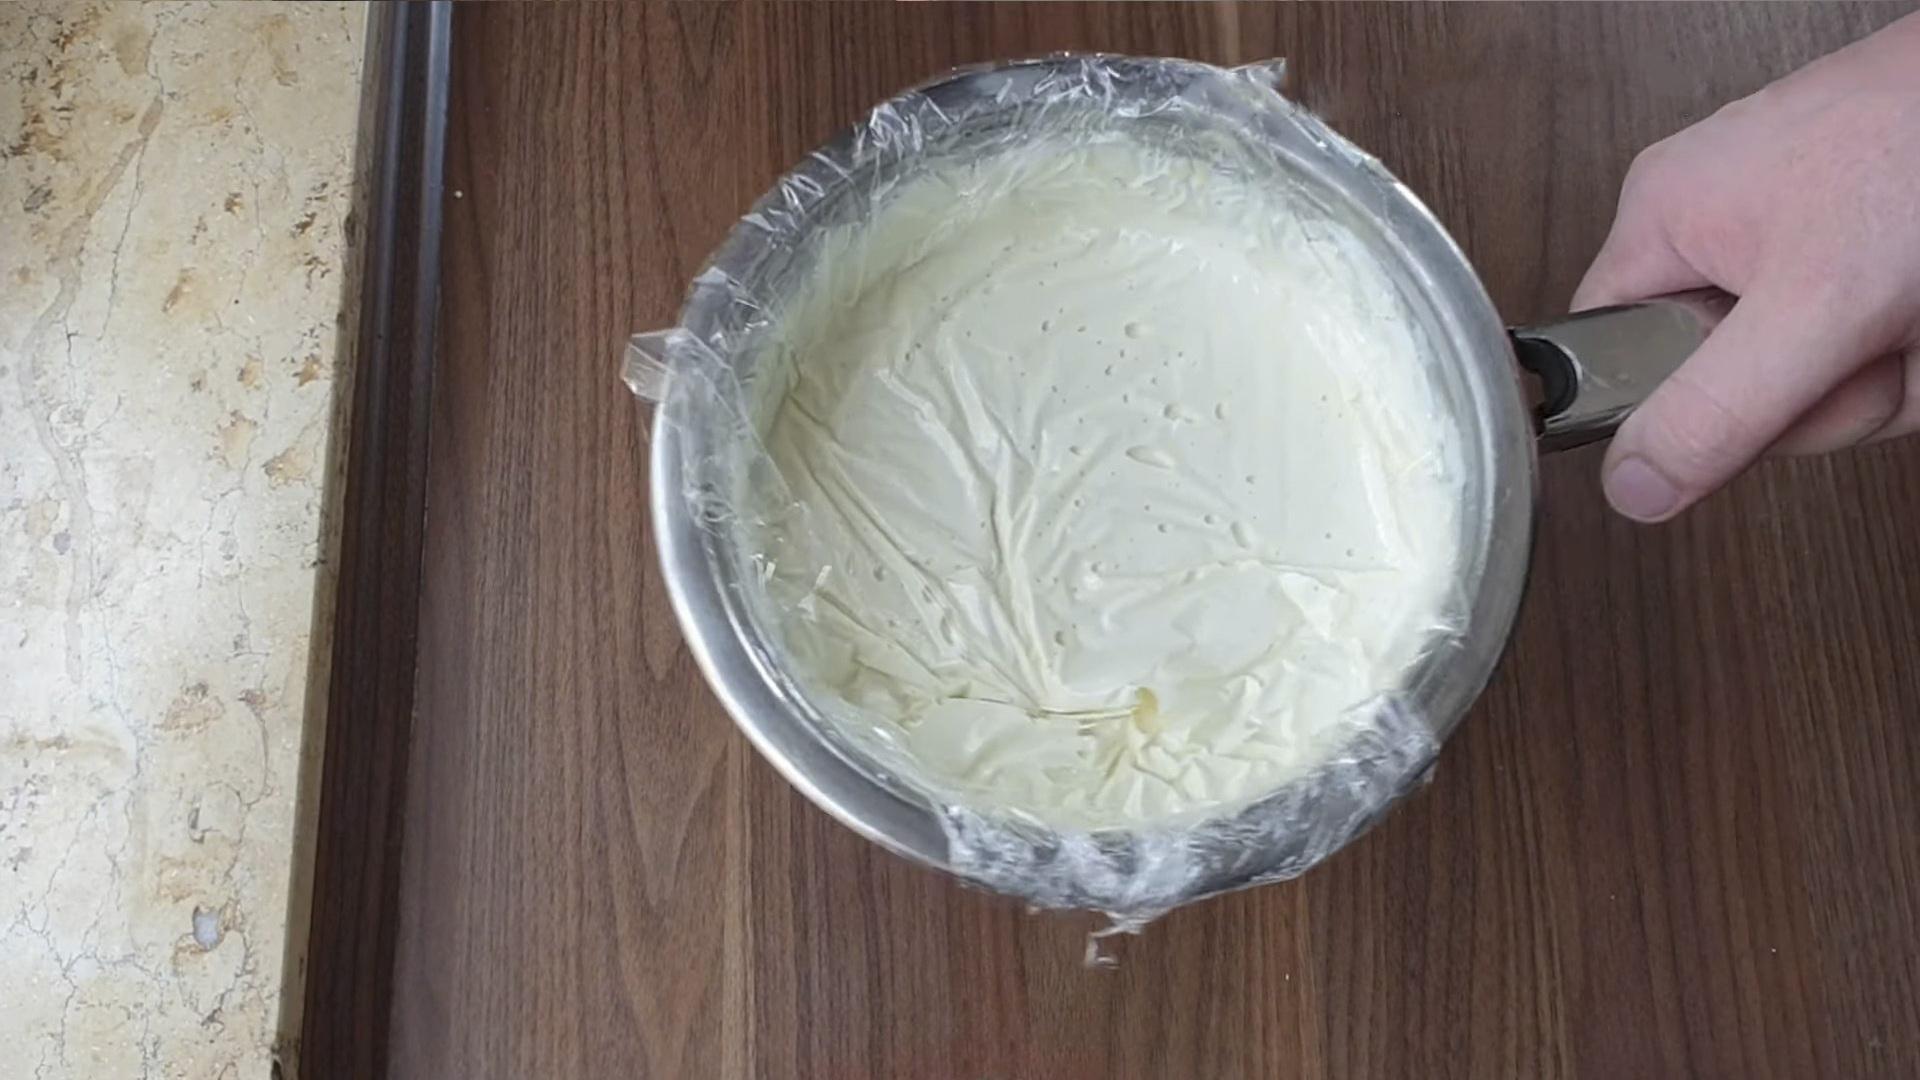
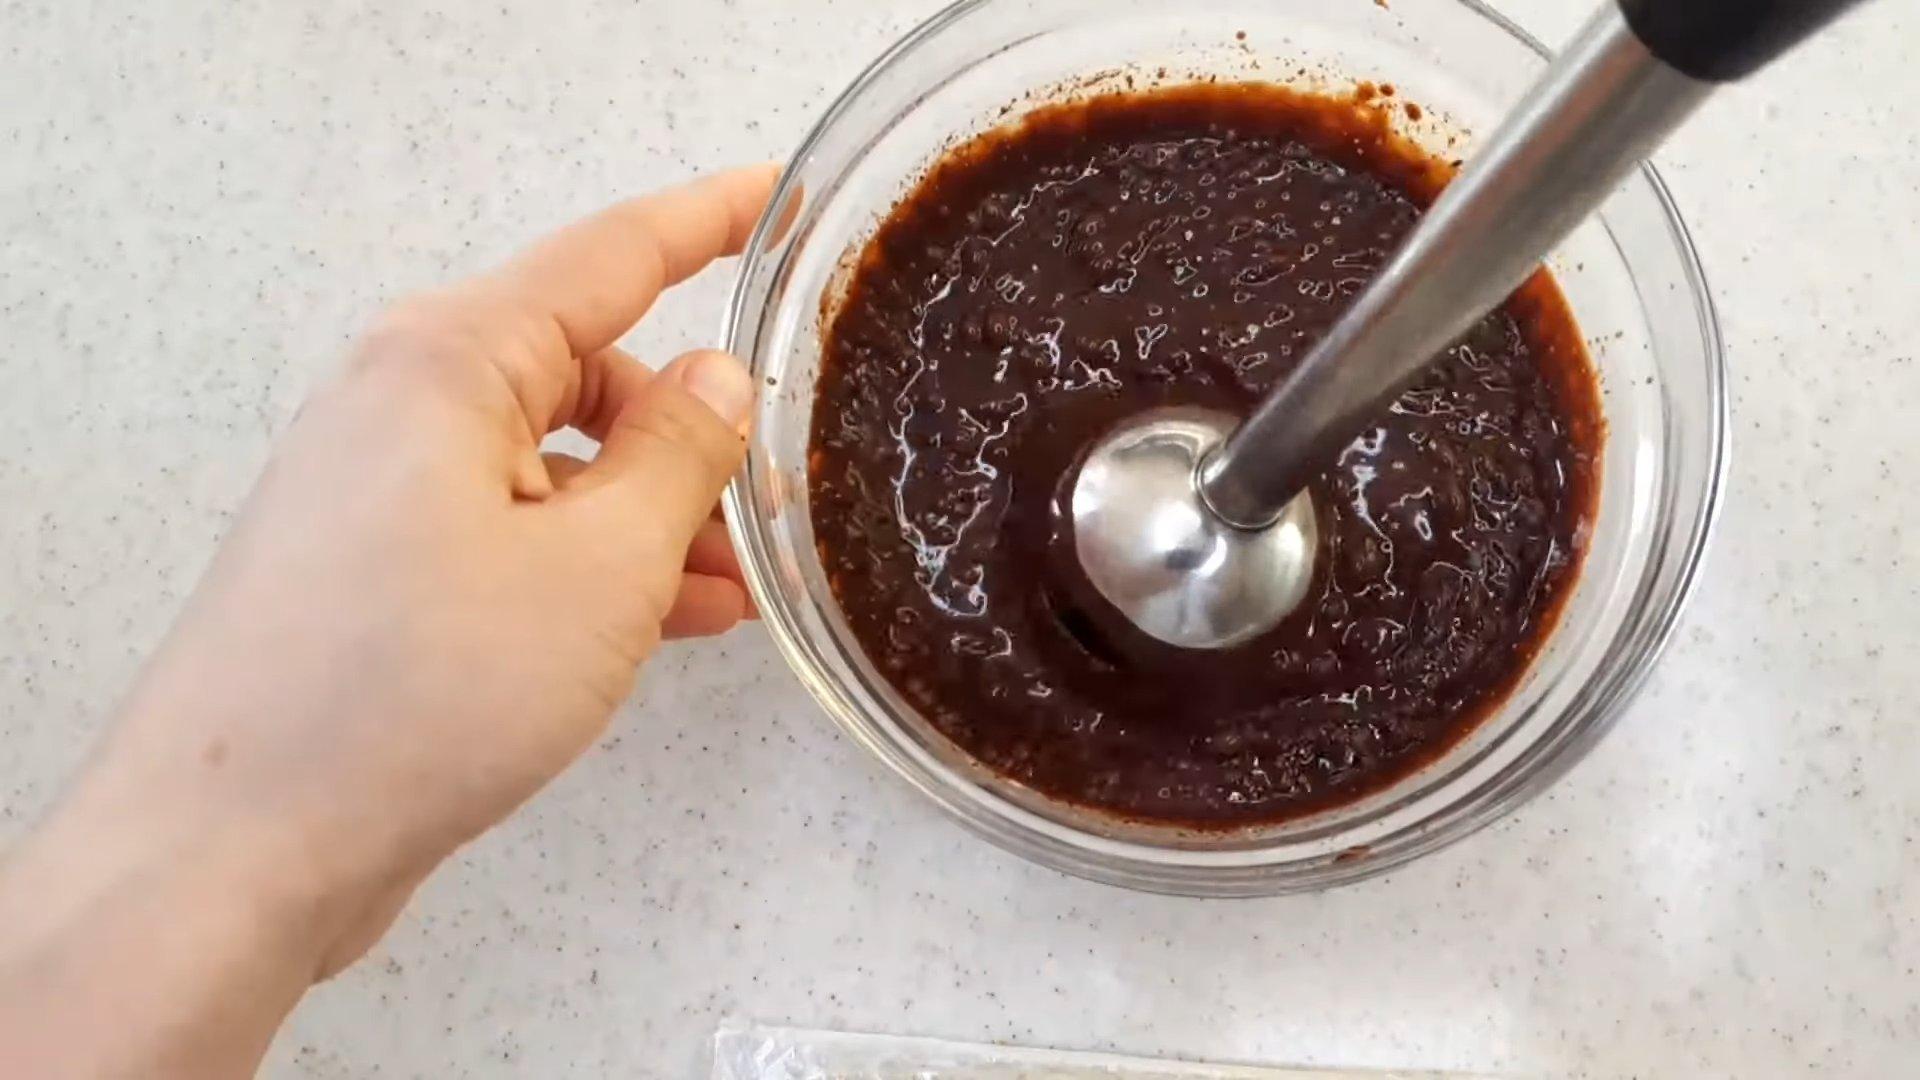
Prepare the ganache to smooth out the cake. Melt the dark chocolate in the microwave or over a double boiler, add the butter, and stir until smooth.

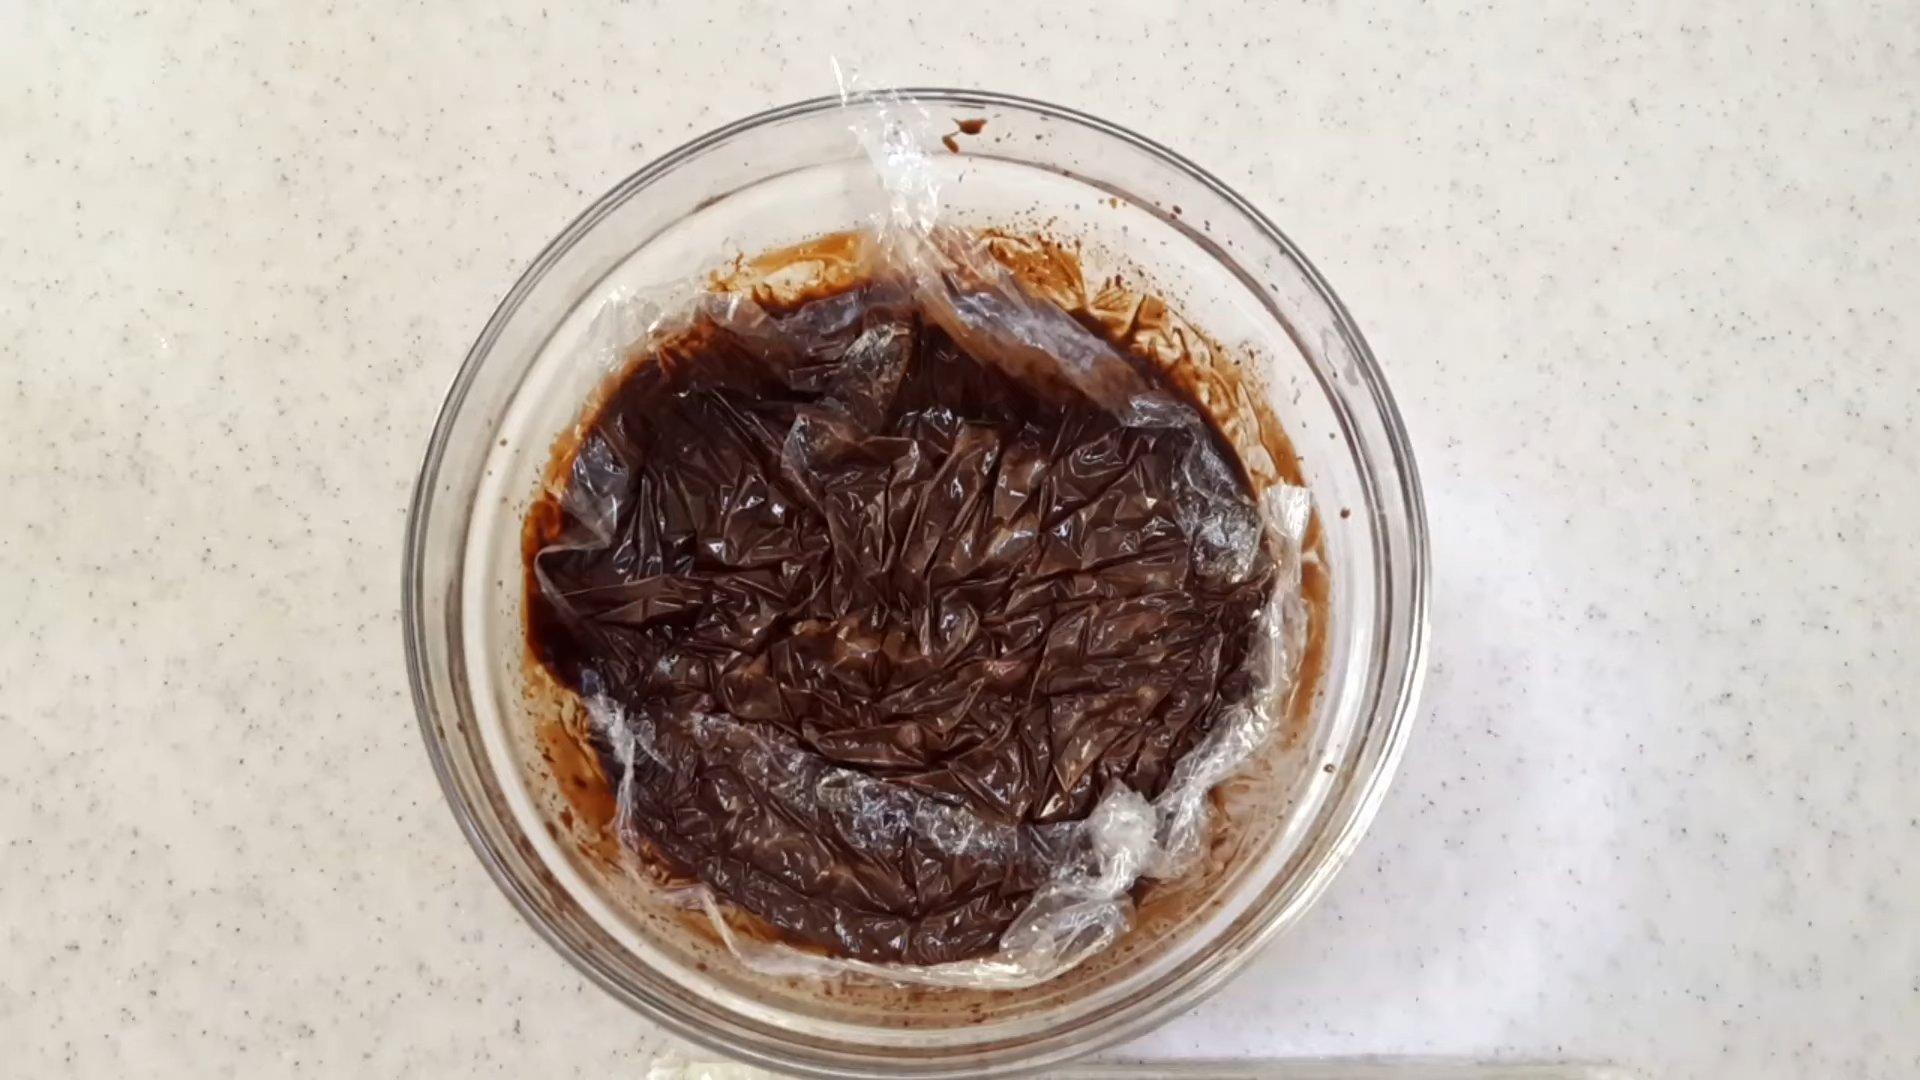
Then cover with cling film in contact and leave to cool.

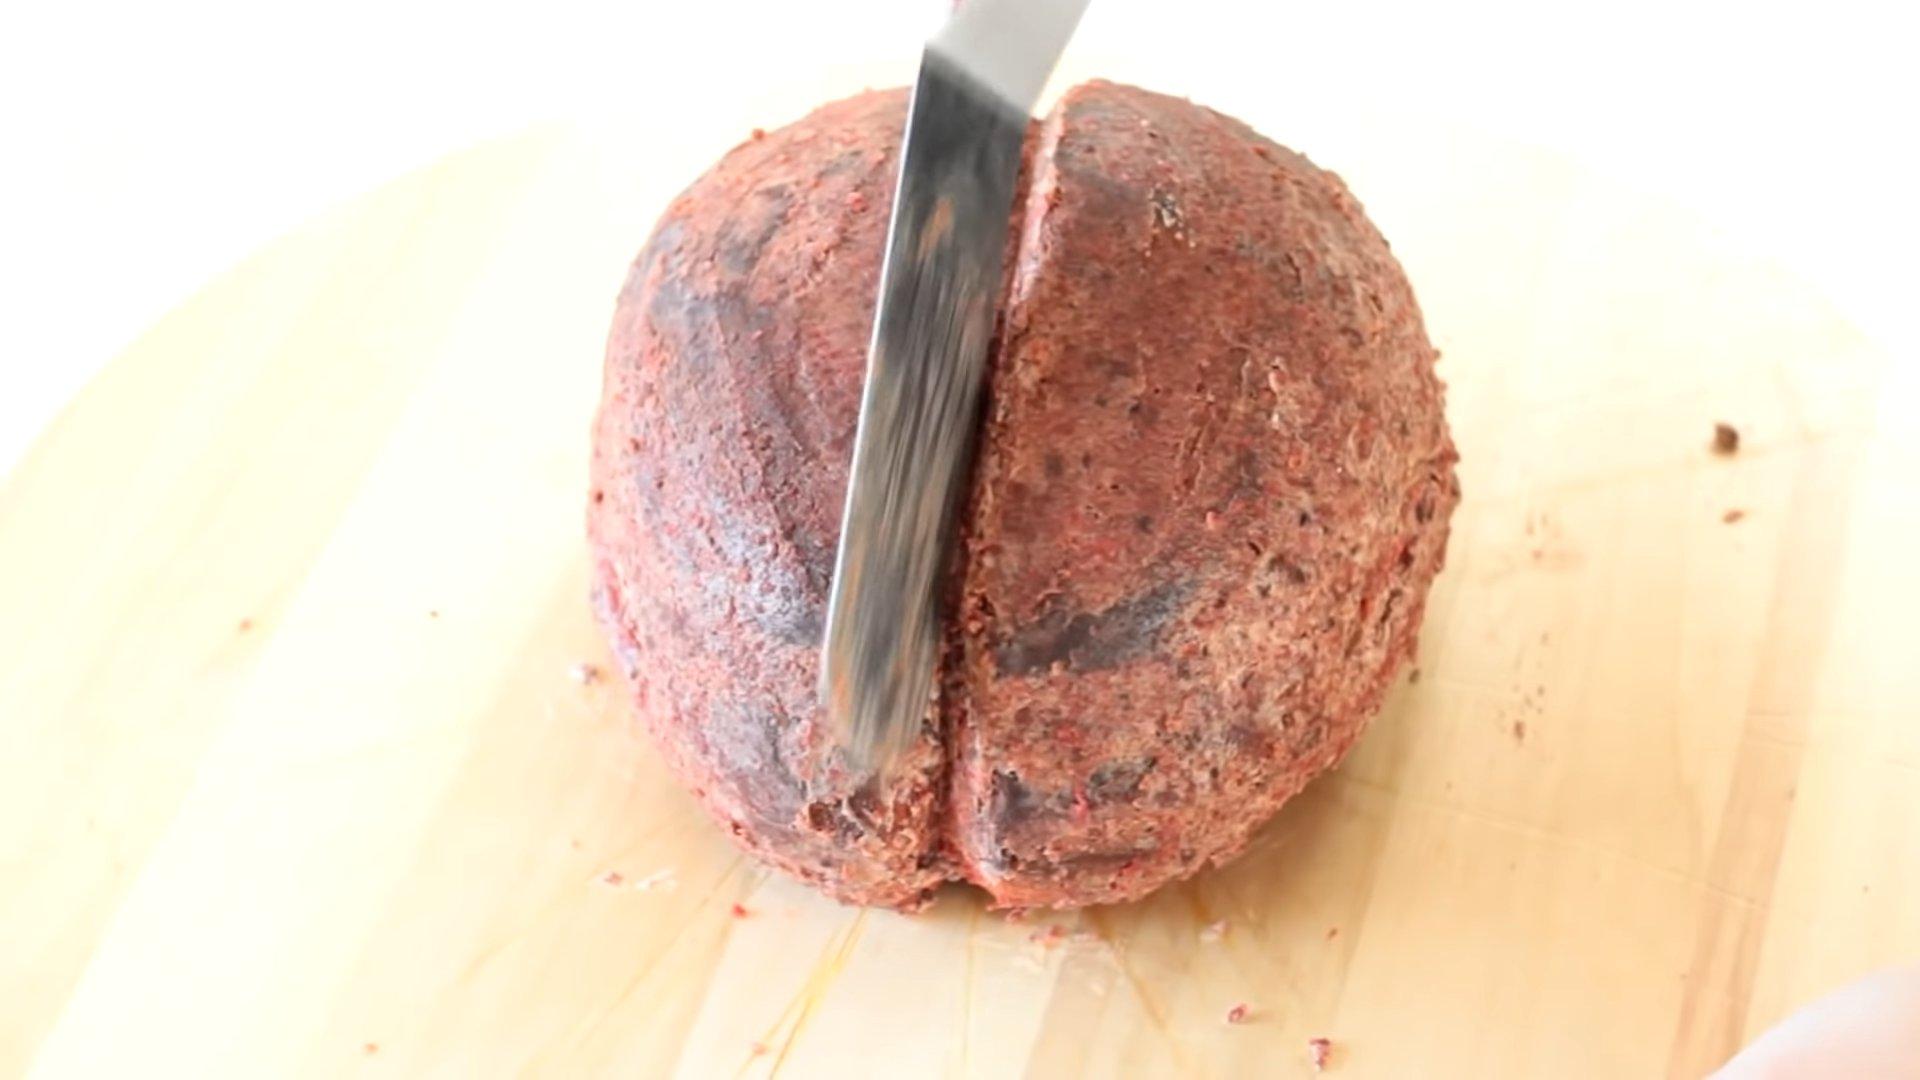
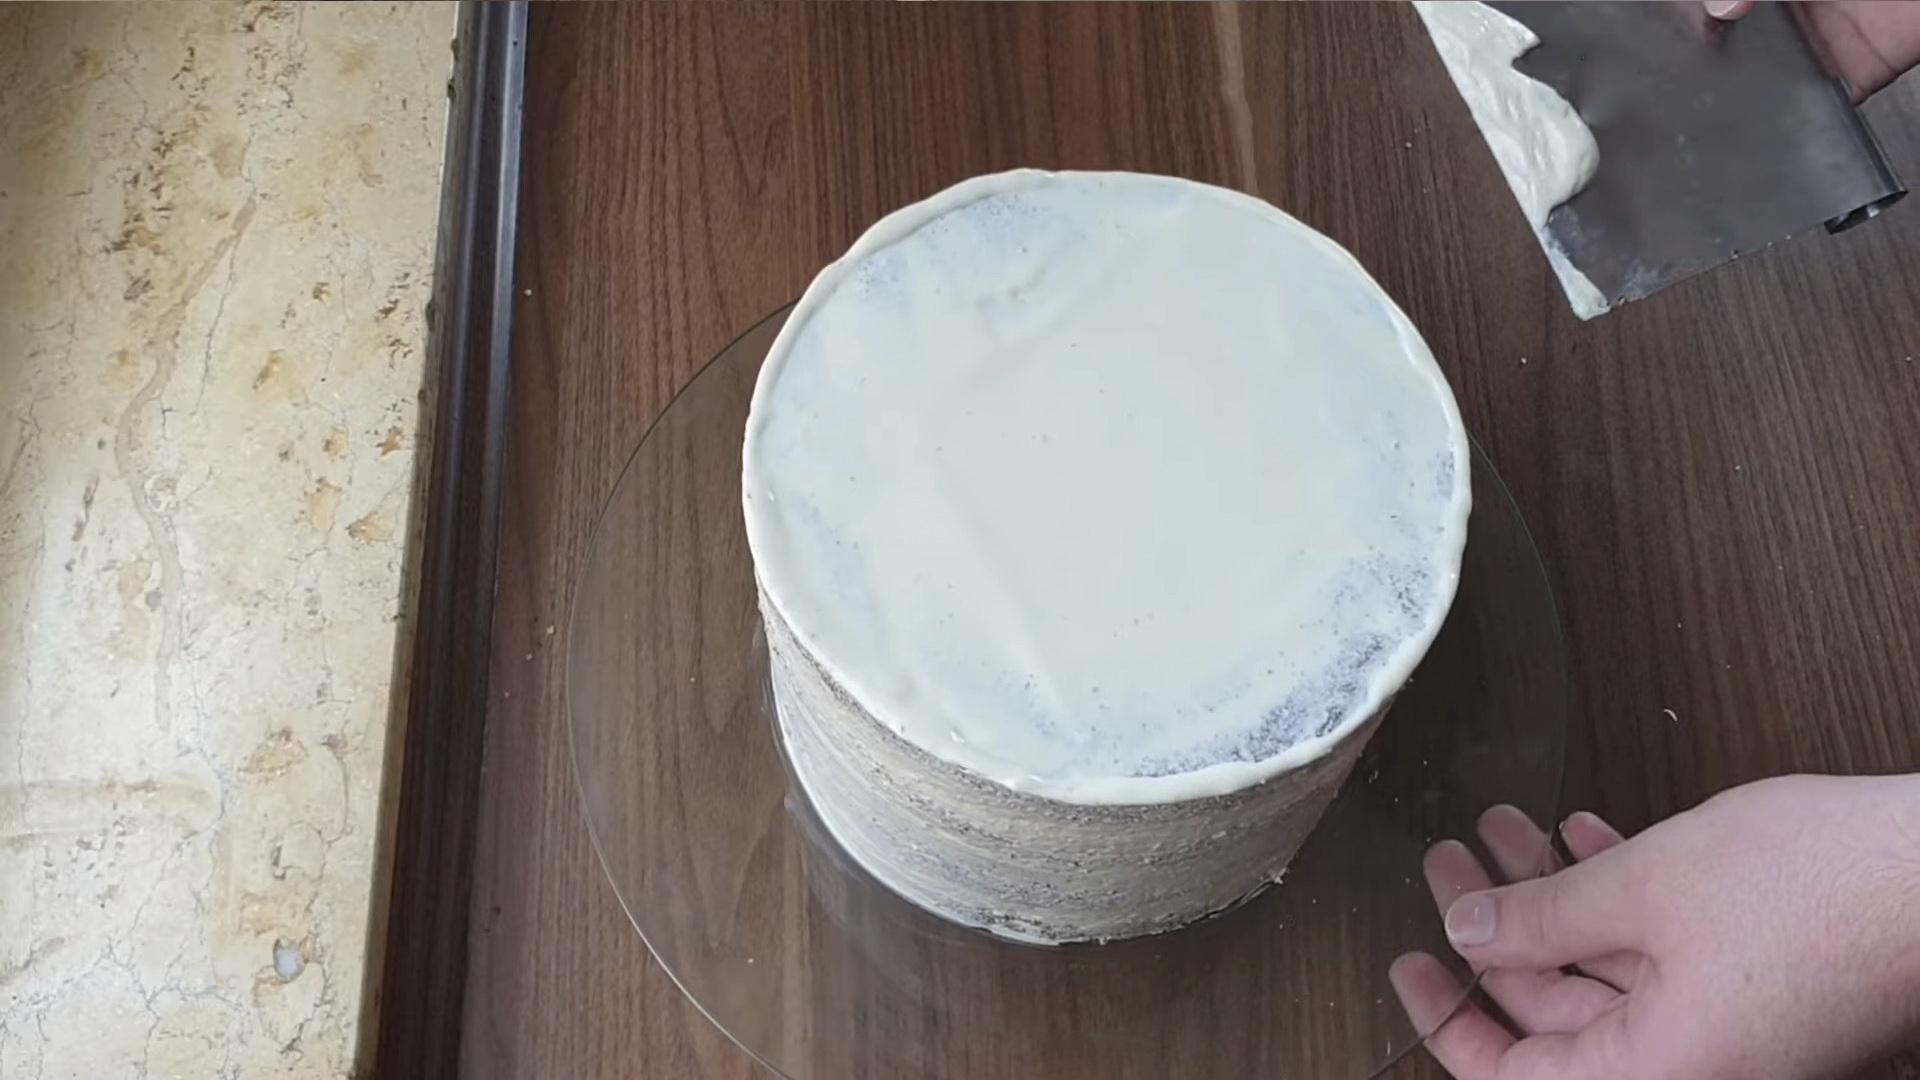
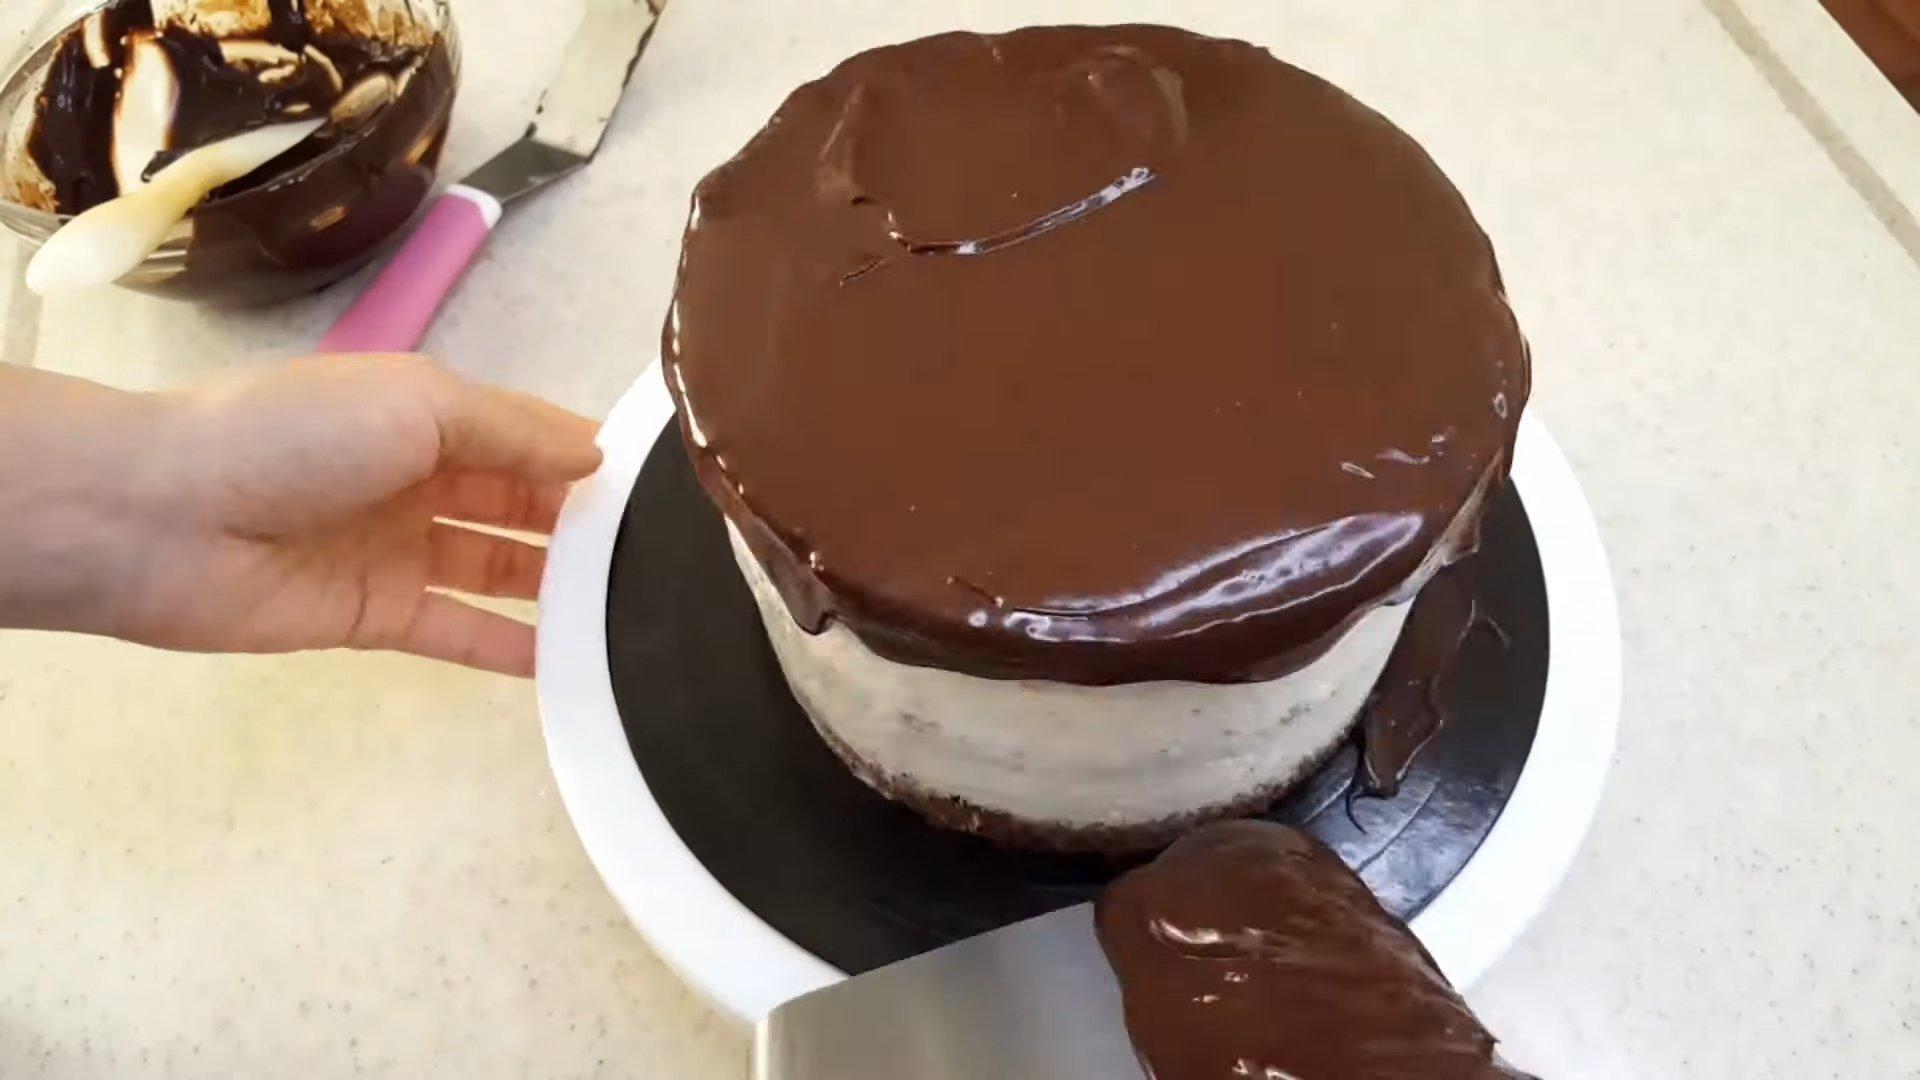
We take the cake out of the ring.

Using a knife, we give it the shape of a round pumpkin.

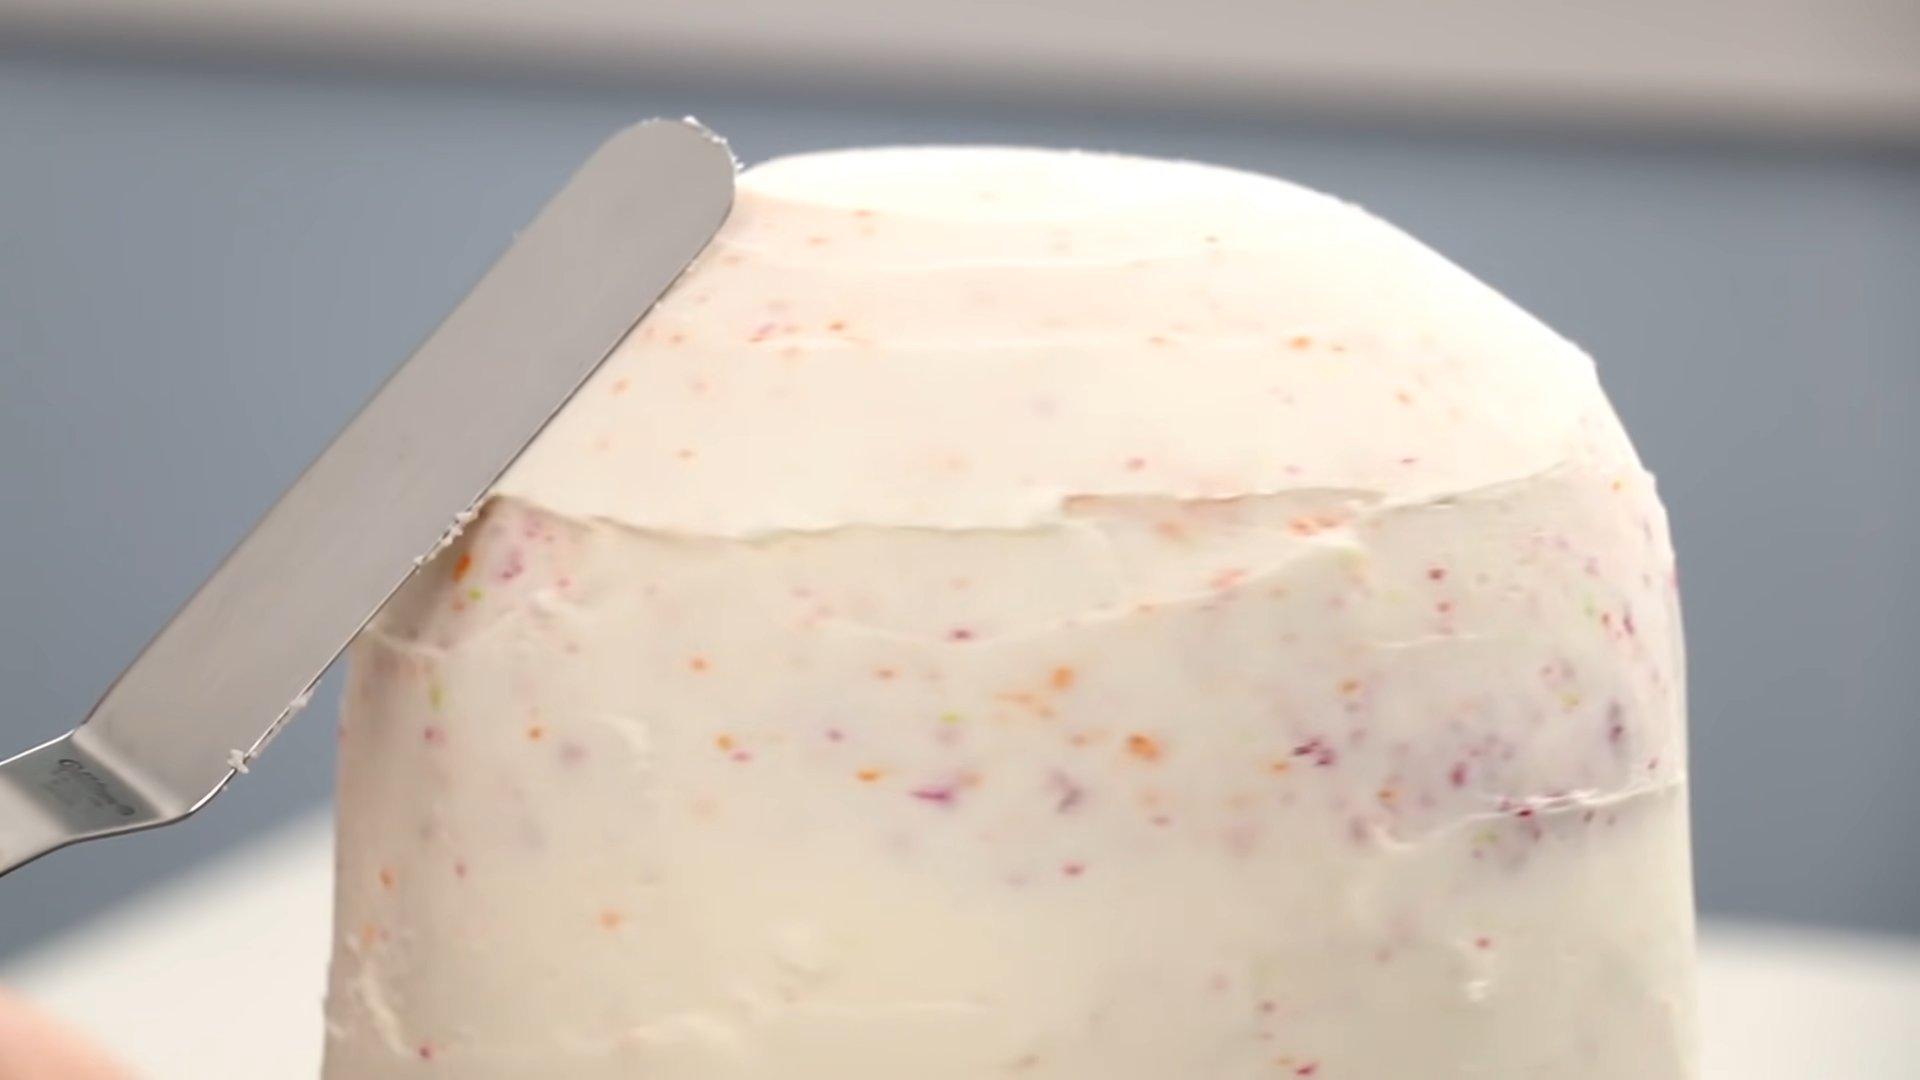
Smooth the surface of the cake with the cooled ganache using a spatula, acetate film or a knife.

We put the cake in the refrigerator to let the ganache cool.

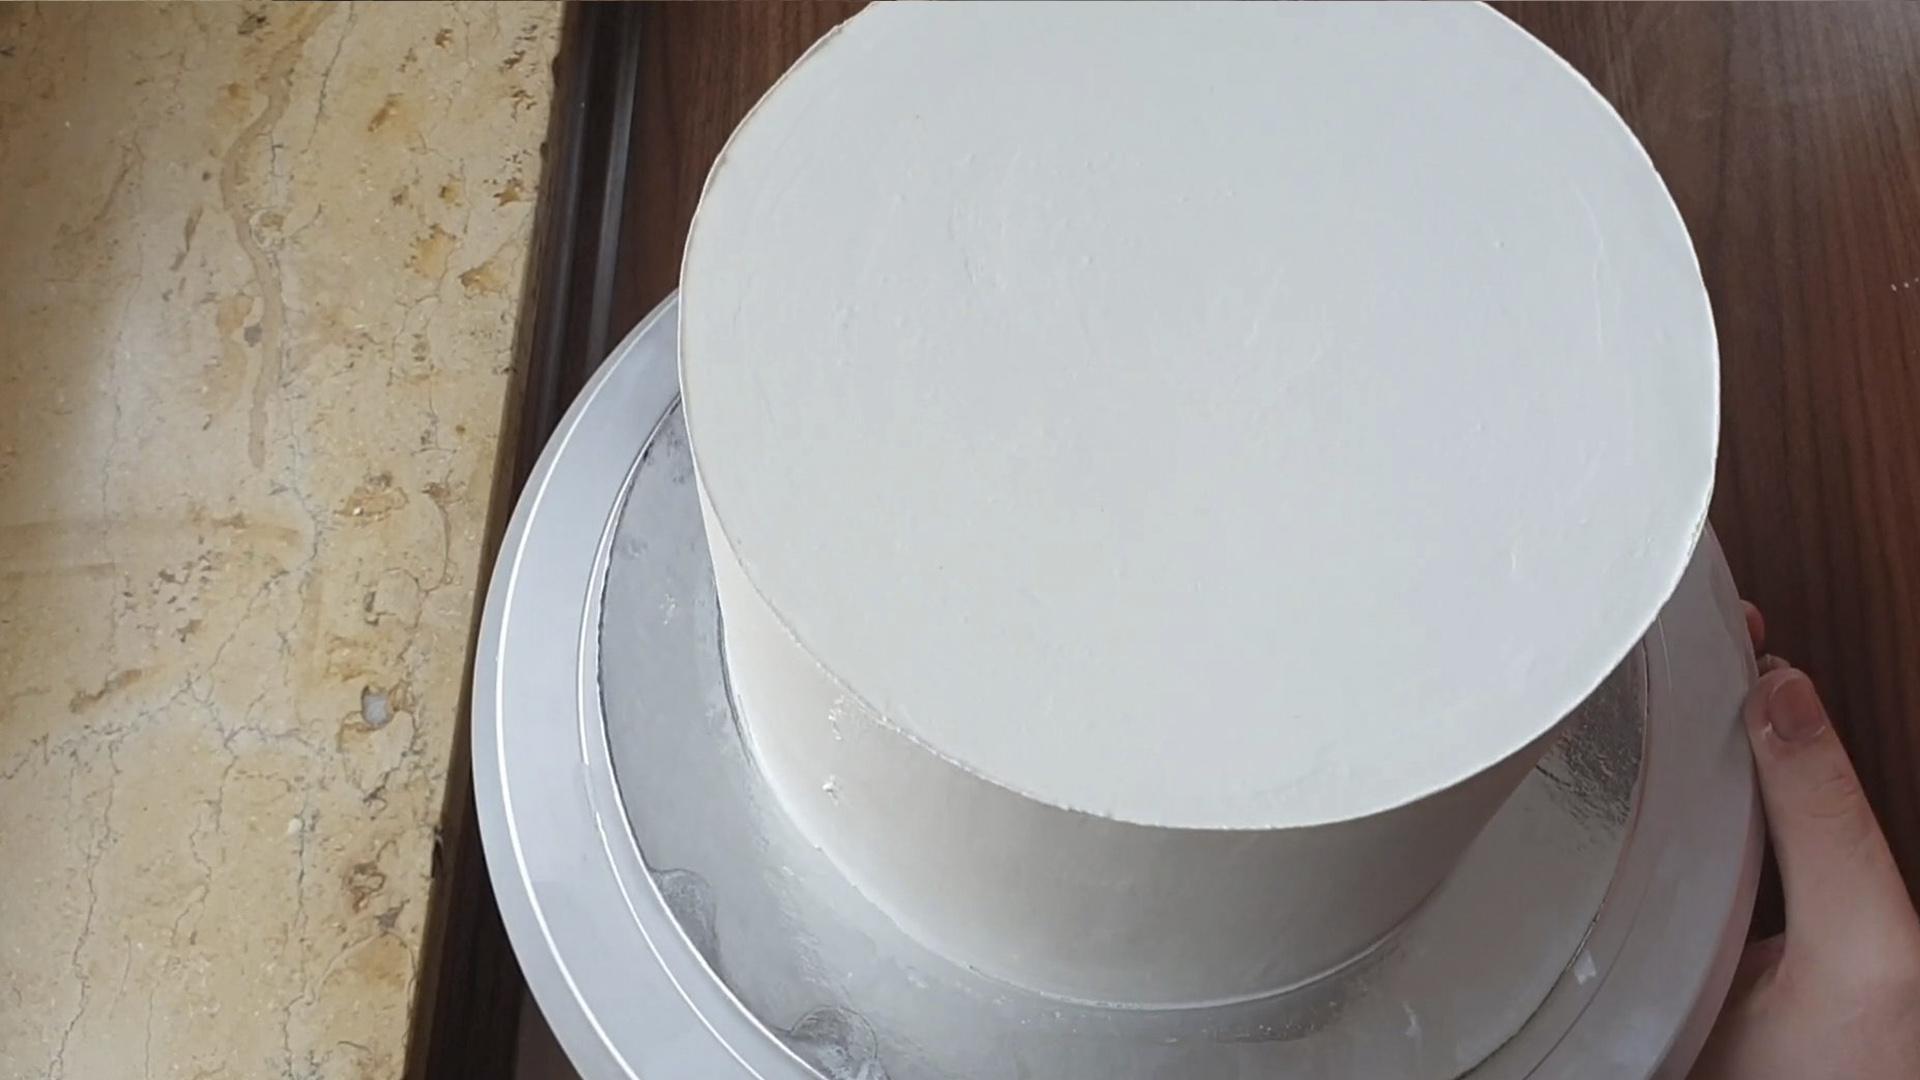
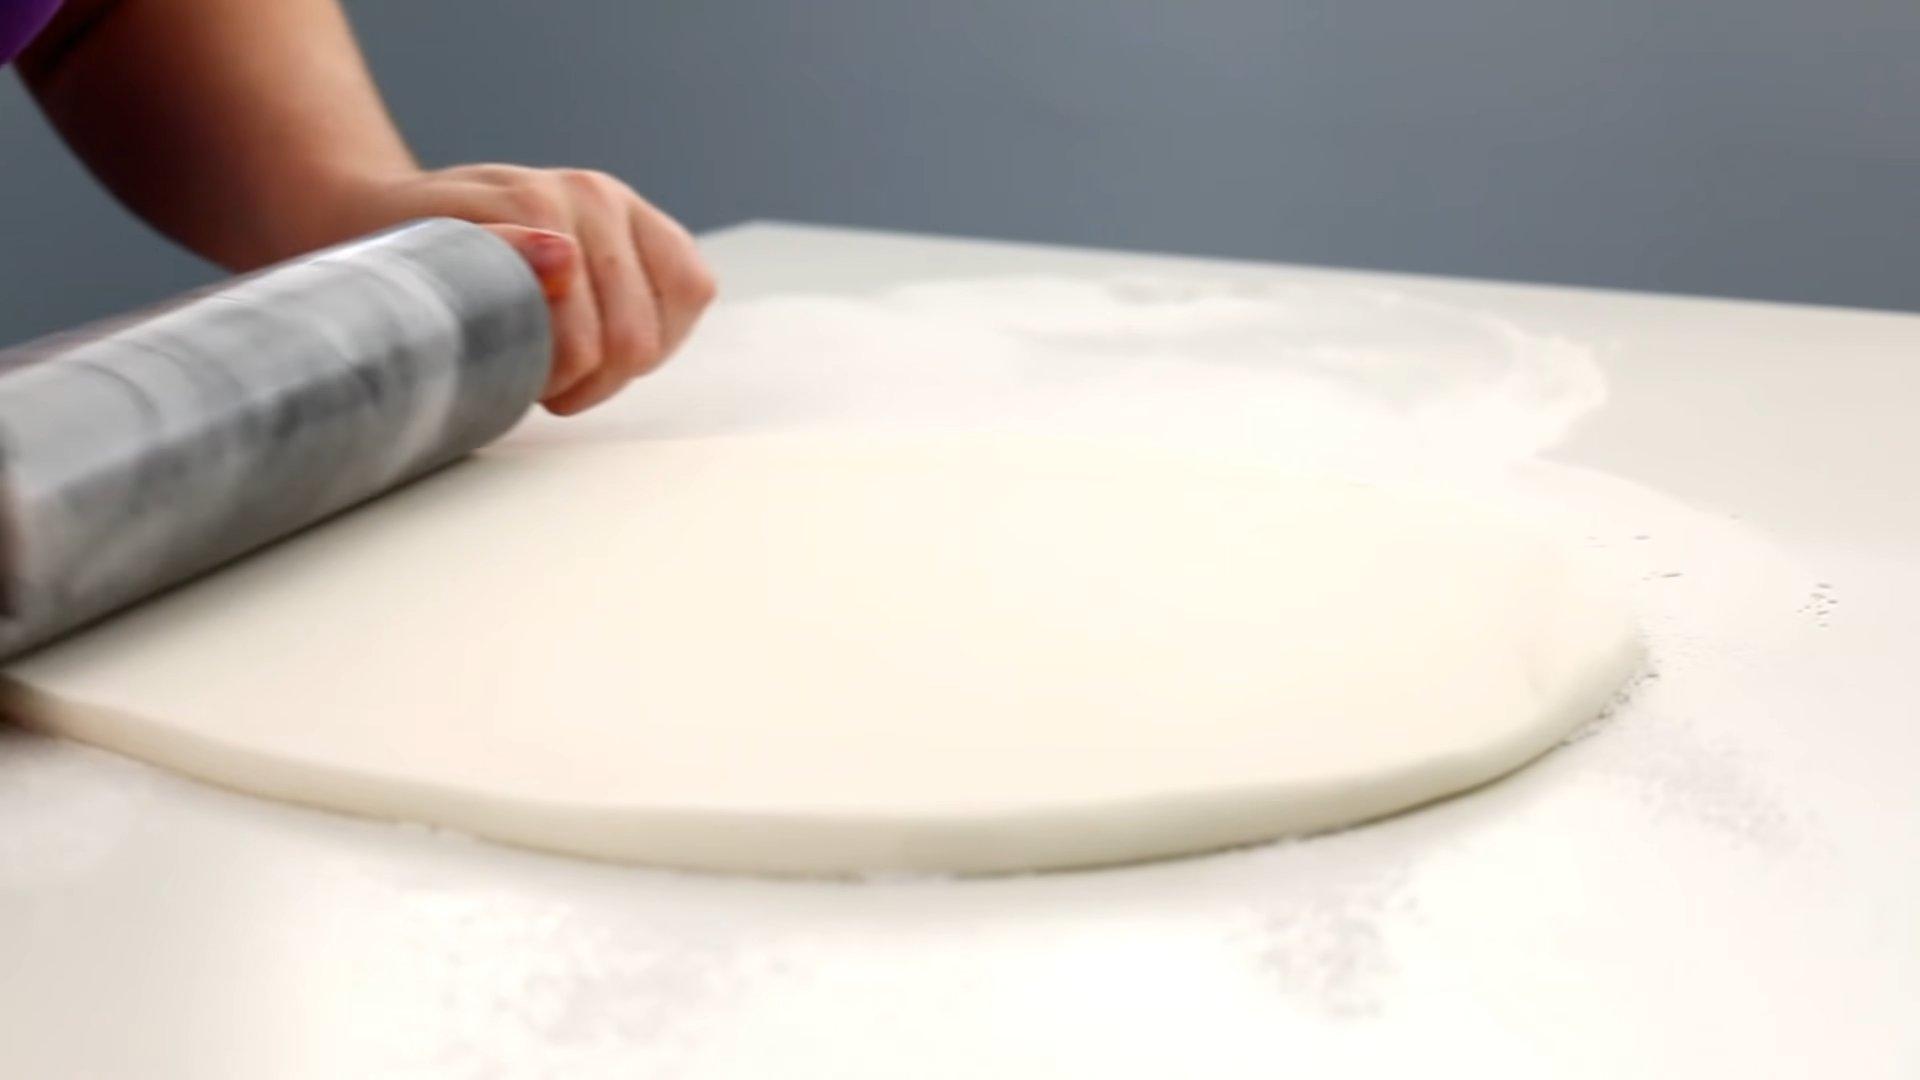
Meanwhile, roll out the orange mastic to 5 mm and cover the cake with it.

We smooth it out well and cut off the excess.

Using special tools (stacks), we create stripes on our pumpkin.

If you don't have stacks, you can try replacing them with straws, toothpicks, or other similar improvised means.

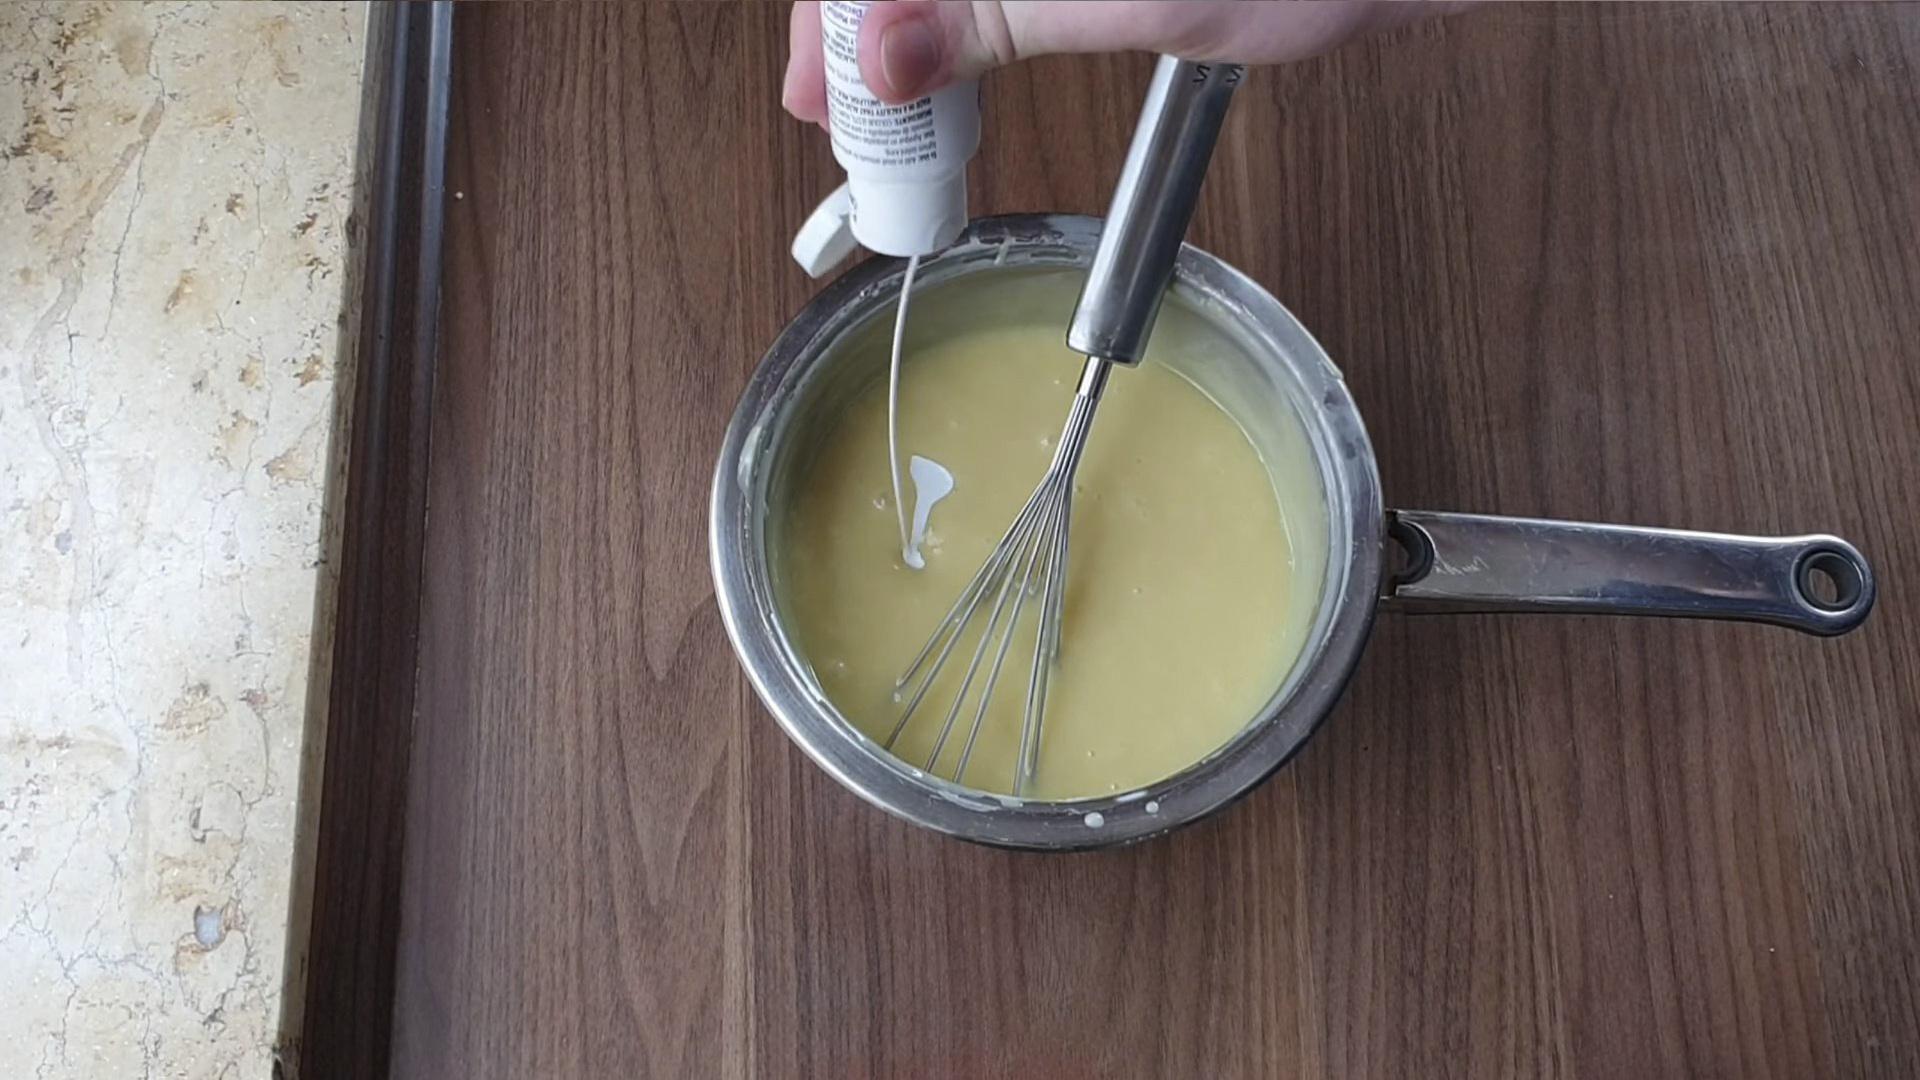
We take food colorings: brown, flesh-colored, orange.

Lightly tint the pumpkin.

We make the stalk from brown mastic.

And we also tint it with food coloring.

Roll out the black mastic and cut out a mouth from it.

Then the eyes of the Halloween pumpkin.

We attach the fondant decorations to the pumpkin. We secure the stem with a long skewer.

We glue the mouth and eyes with confectionery glue.

The original, beautiful and extremely delicious Pumpkin cake for Halloween is ready.

You can serve it on a festive table.
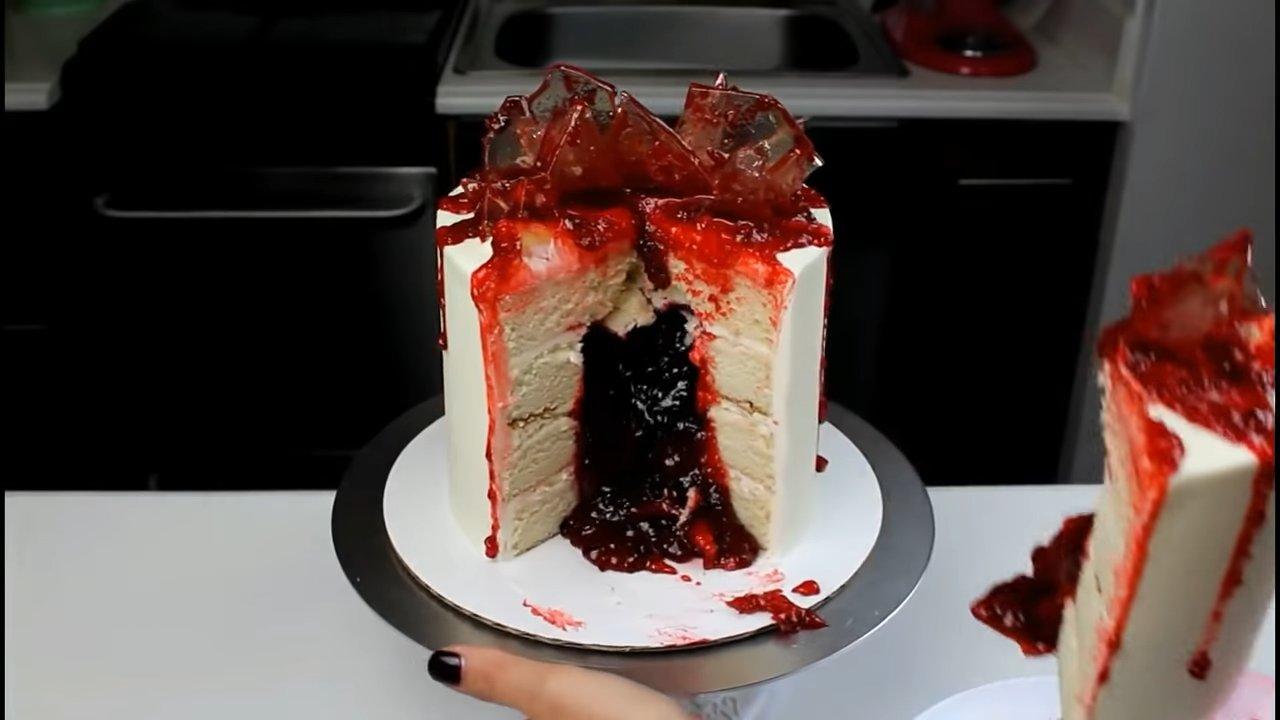
Realistic Brain Cake
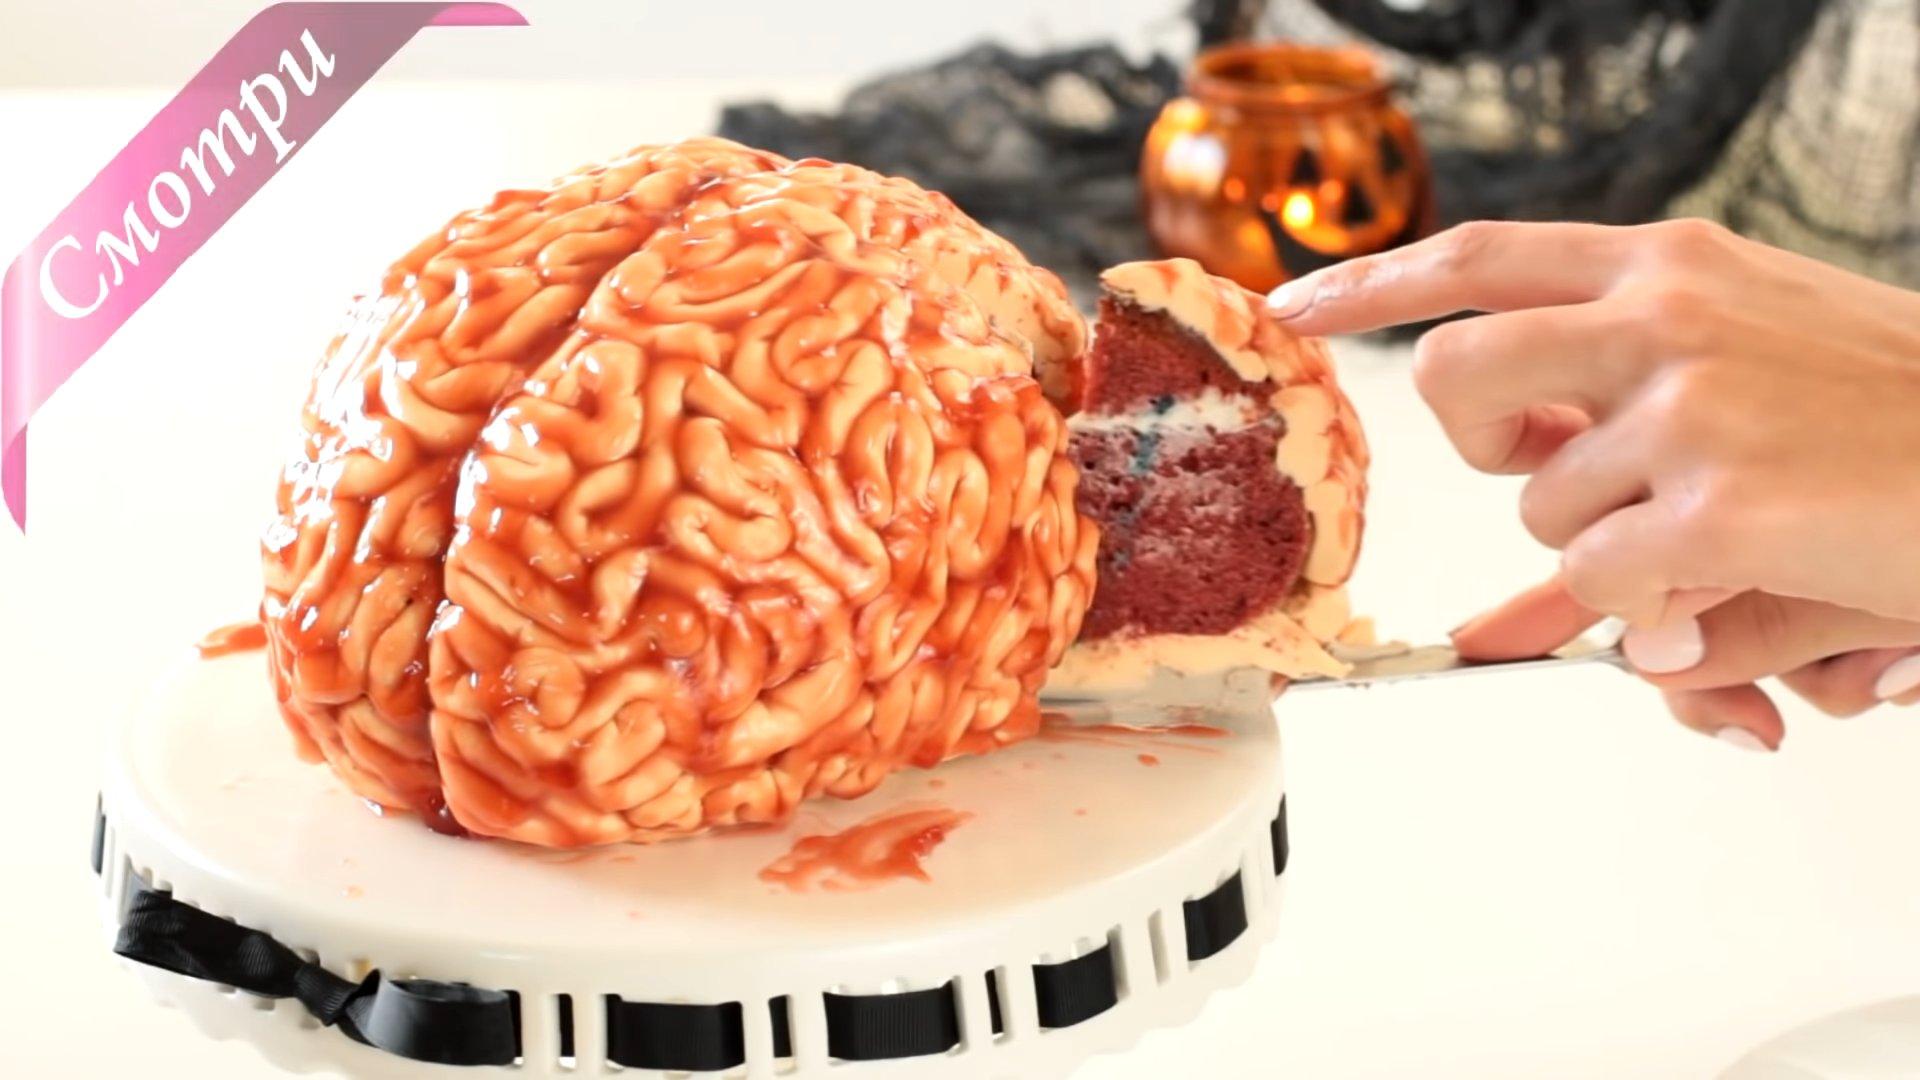
Organizing a Halloween party and need some inspiration? Make a realistic "Brains" cake using this recipe. This unique dessert will perfectly complement the holiday theme and will delight everyone. This treat is based on the popular and delicious "Red Velvet" cake, decorated with fondant.
Ingredients
Cakes:
- Flour - 375 g
- Eggs C1 - 5 pcs.
- Butter - 180 g
- Sugar - 450 g
- Kefir - 300 ml
- Cocoa - 2-3 tbsp.
- Baking powder - 2 tsp.
- Salt - 1 tsp.
- Gel food coloring (red) - 2-3 tsp.
Cream:
- Cream cheese - 200 g
- Butter - 220 g
- Powdered sugar - 300 g
Decor:
- White mastic
- Gel food coloring (flesh) - 2 tsp.
- Strawberry jam - 2-3 tbsp.
Cooking time: 3 hours
Servings: 1
Step-by-step recipe
Step 1
Prepare the ingredients for the biscuit.
Step 2
Break eggs into a deep bowl, add sugar and salt and mix.
Step 3
Add melted butter and room temperature kefir to the egg mixture and whisk until smooth.
Step 4
Add flour, baking powder, and cocoa to the resulting mixture and stir until smooth. Sift these ingredients through a sieve to avoid lumps.
Step 5
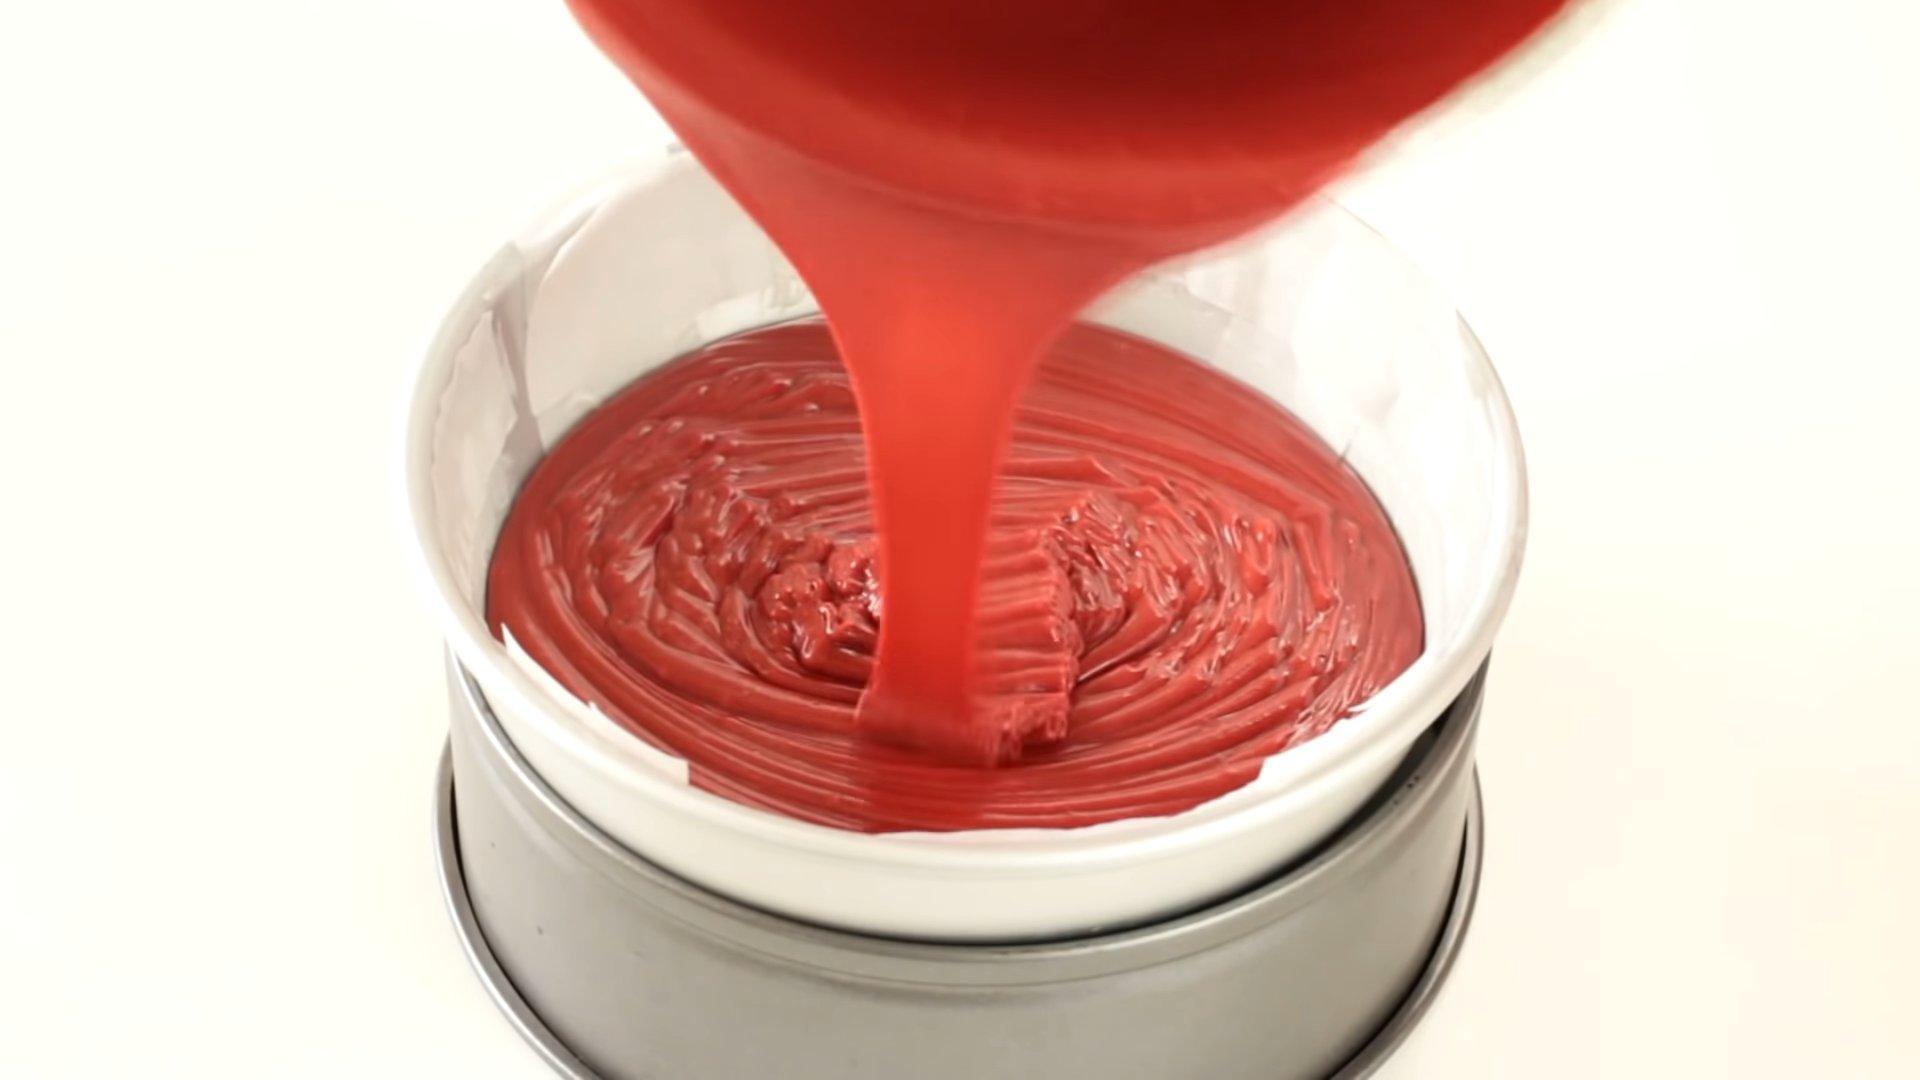
To give the dough a bloody hue, add red food coloring and mix well.
Step 6
Pour the batter into a hemispherical mold and bake at 180 degrees Celsius for 1.5-2 hours. Check the cake's doneness with a long wooden skewer.
Step 7
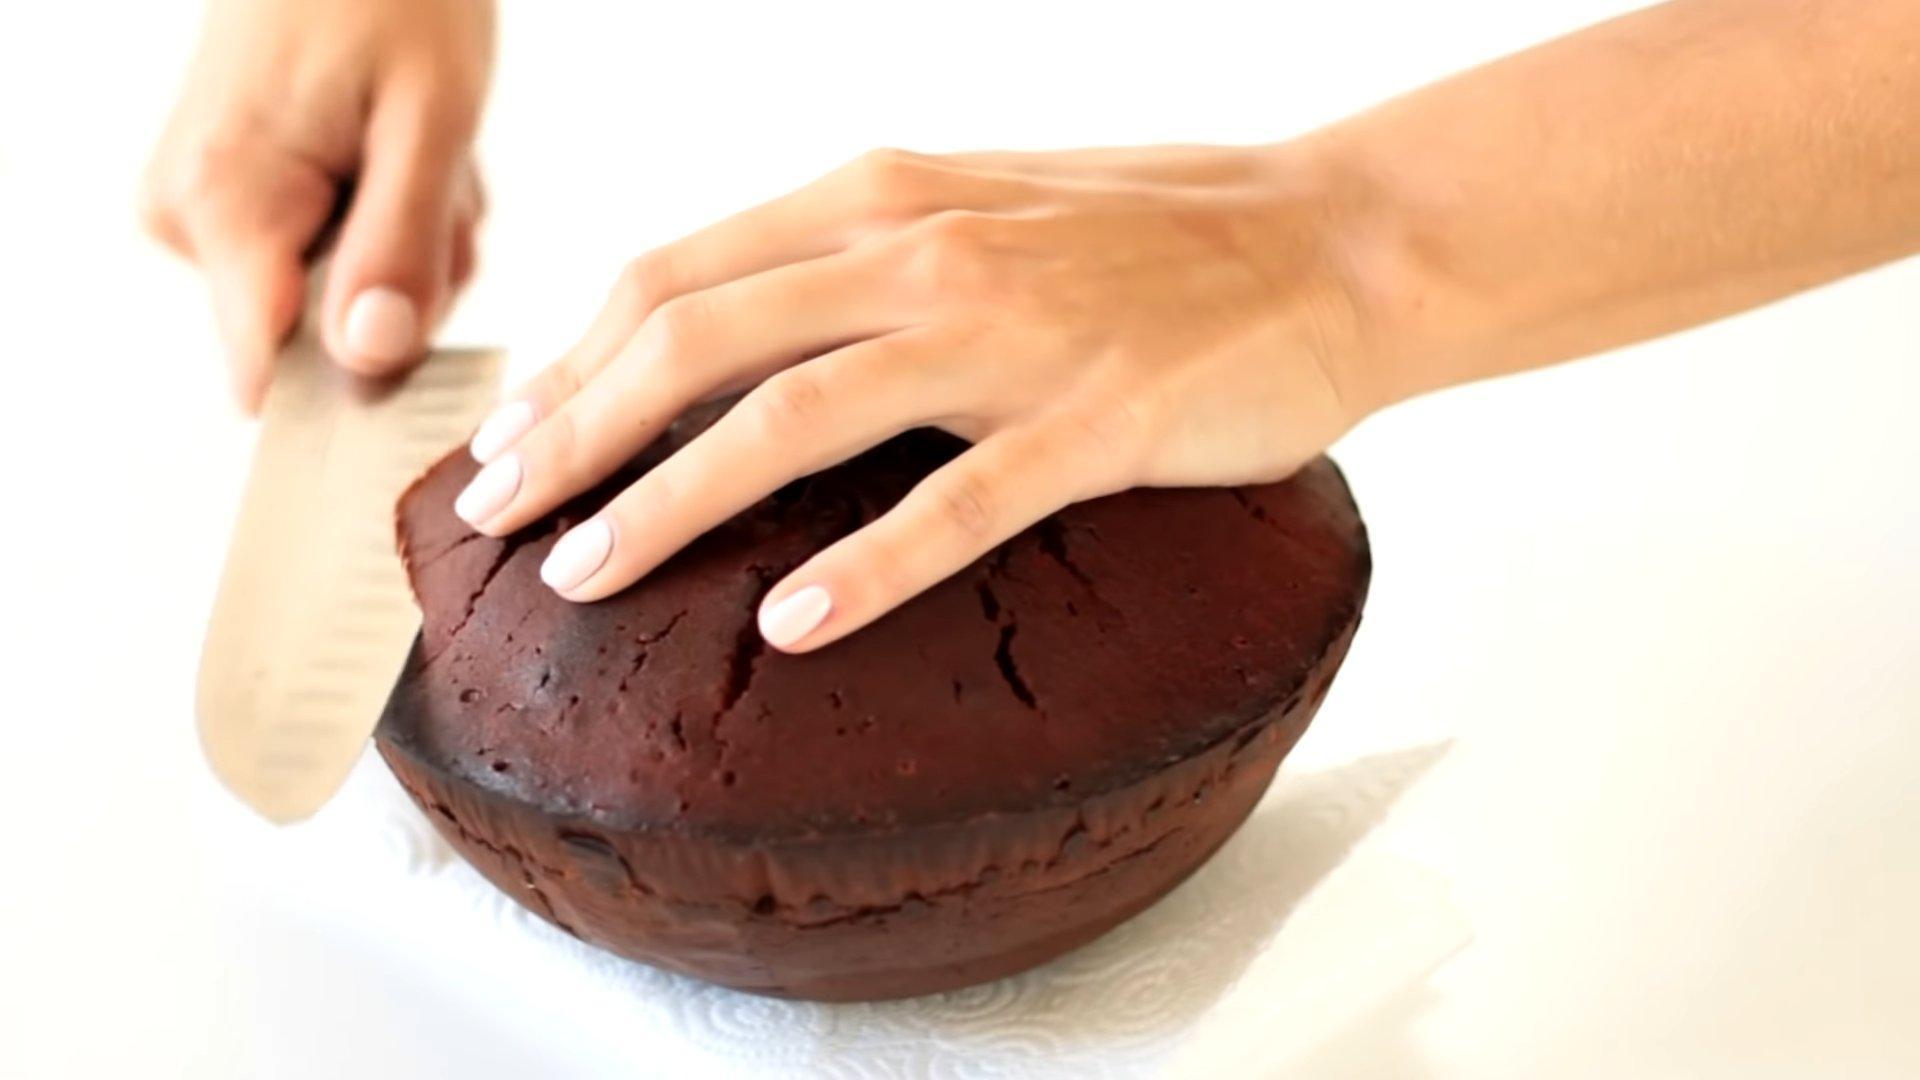
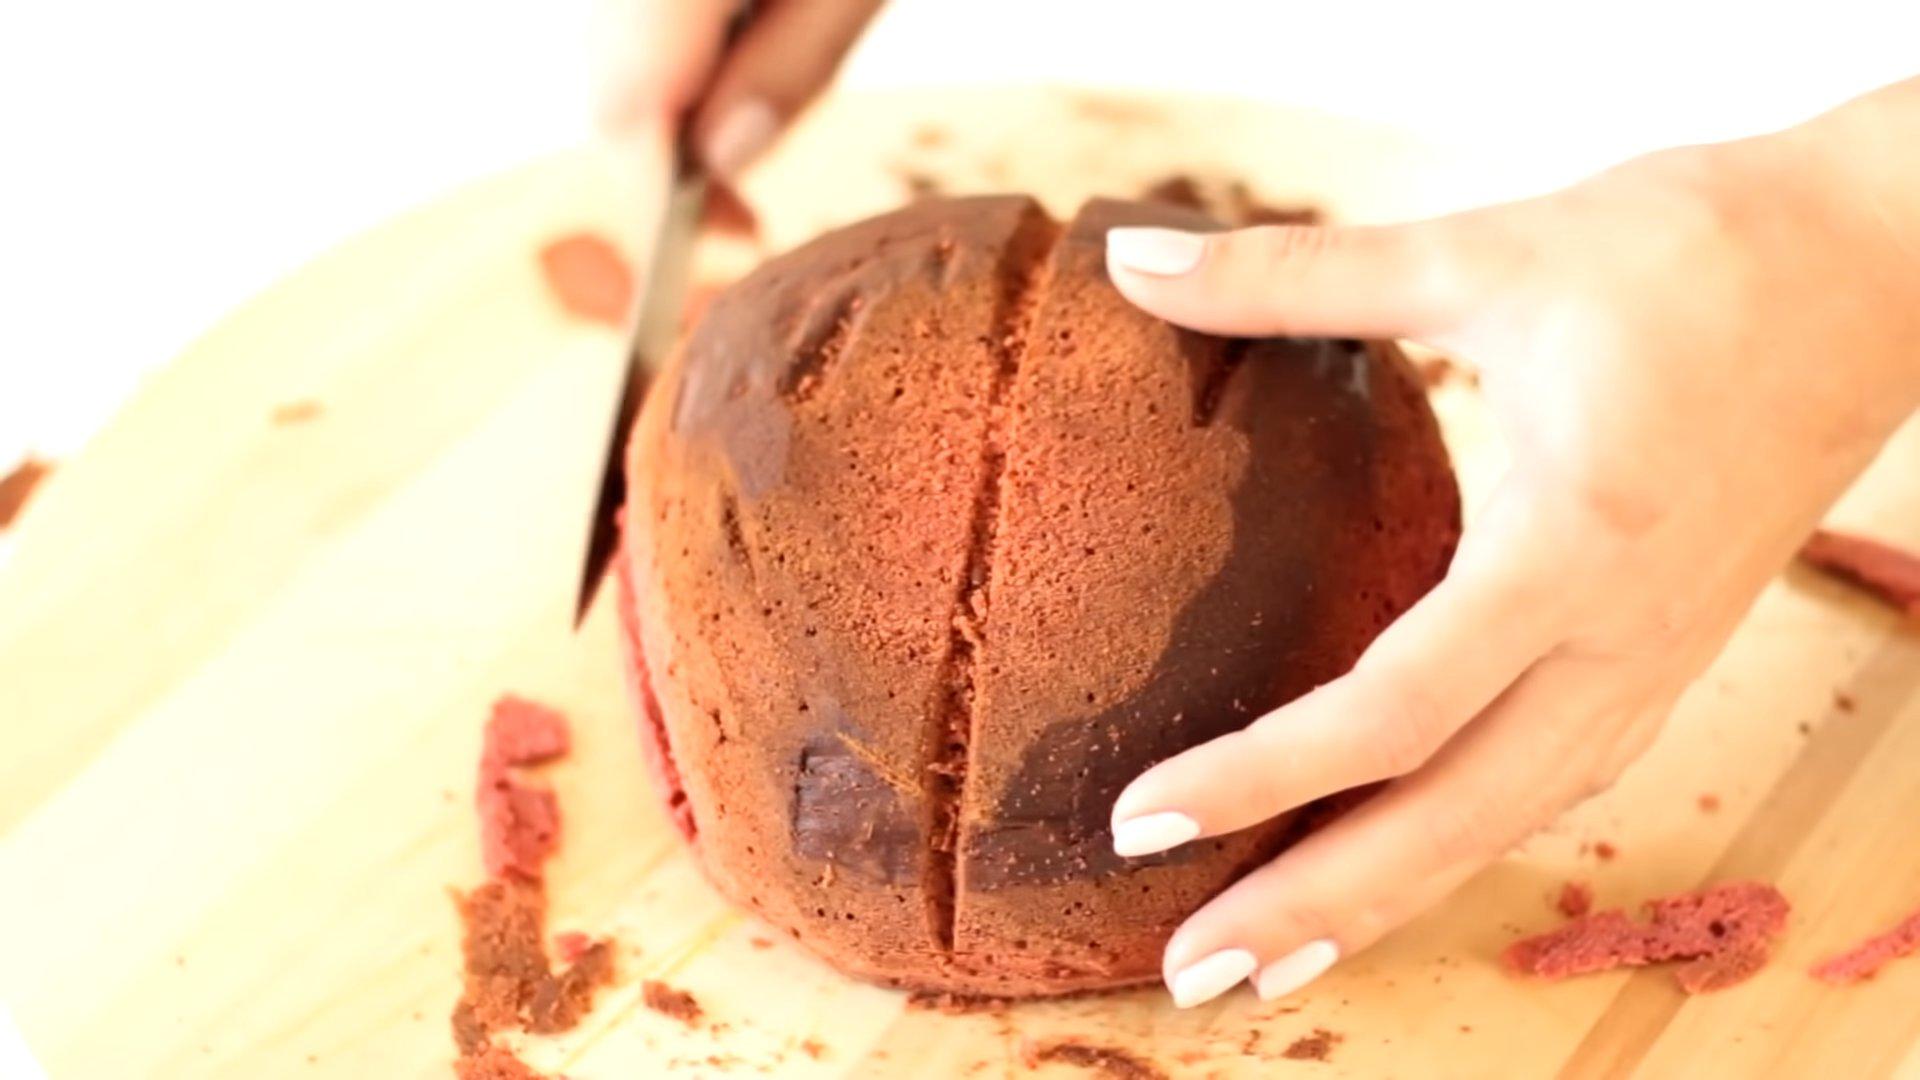
Let the finished sponge cake cool. Then, using a knife, shape it into a human brain. Set aside any scraps; we'll need them later.
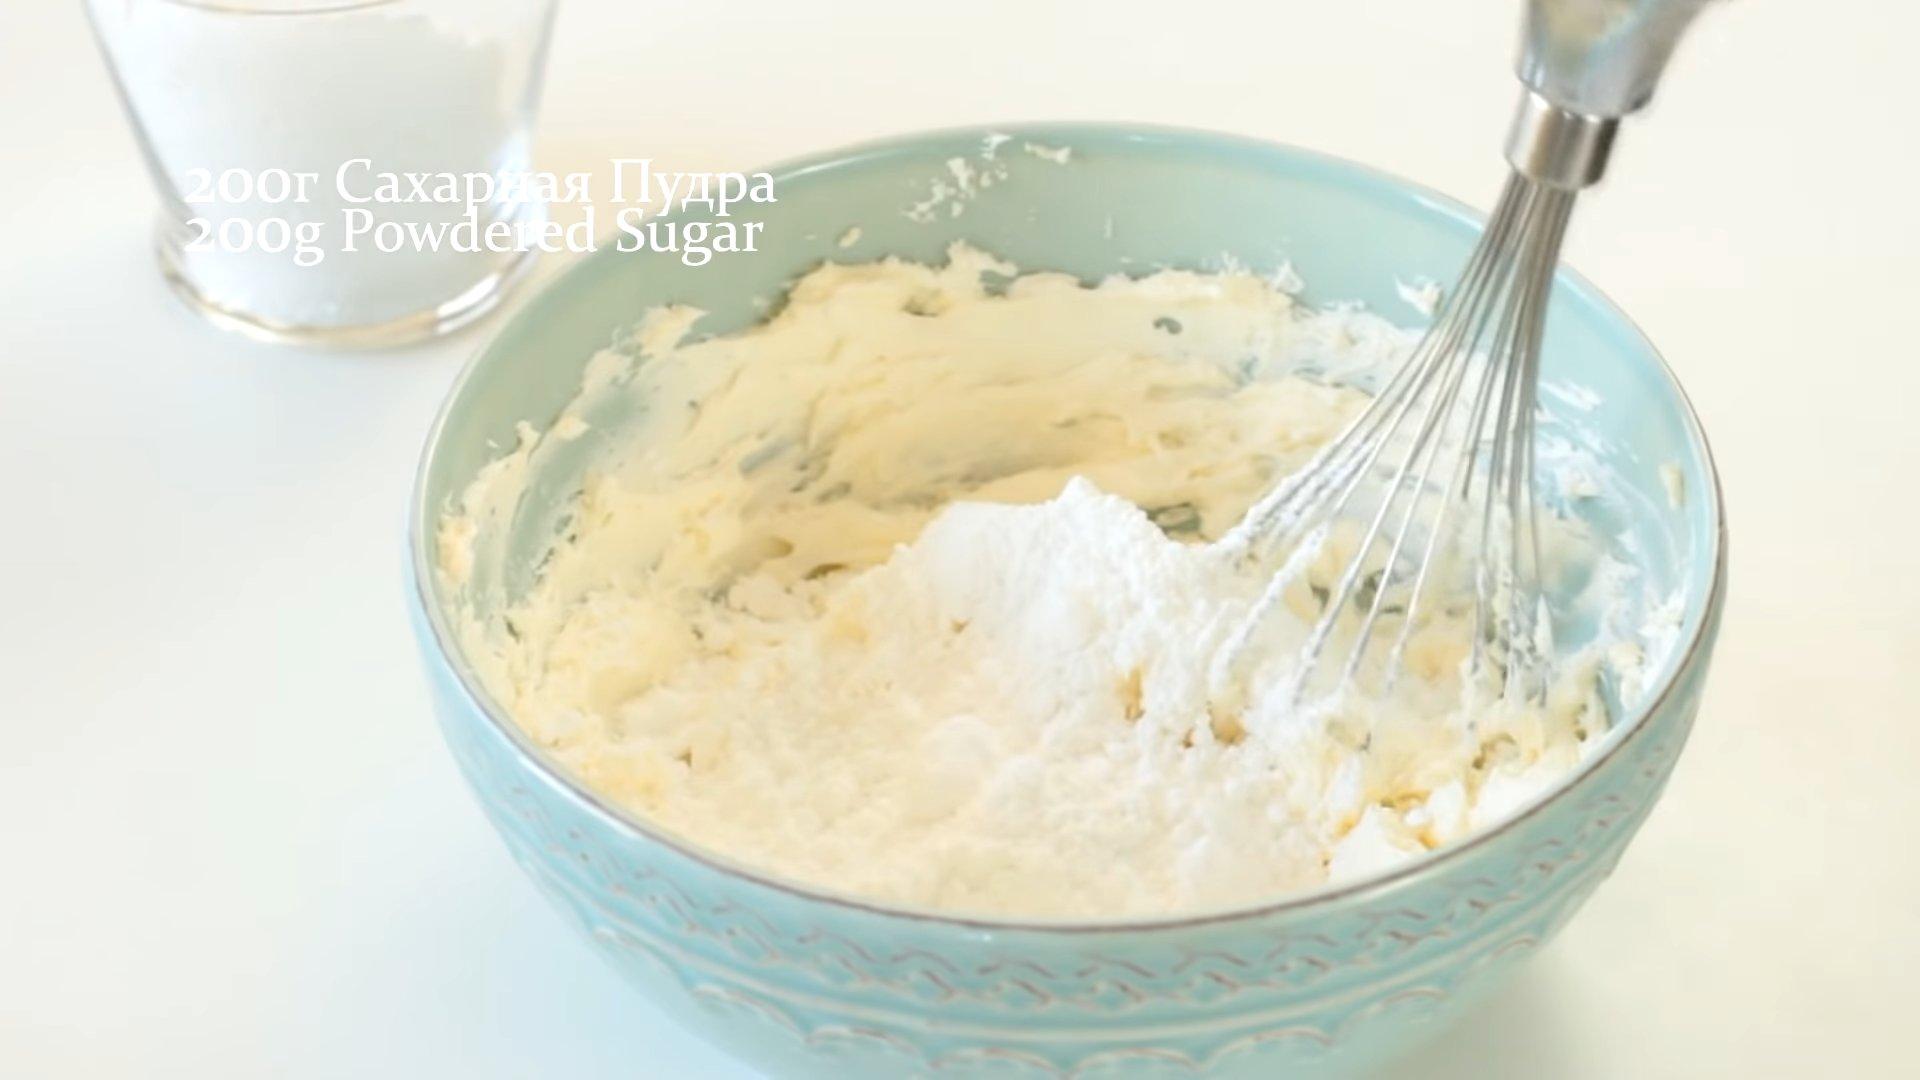
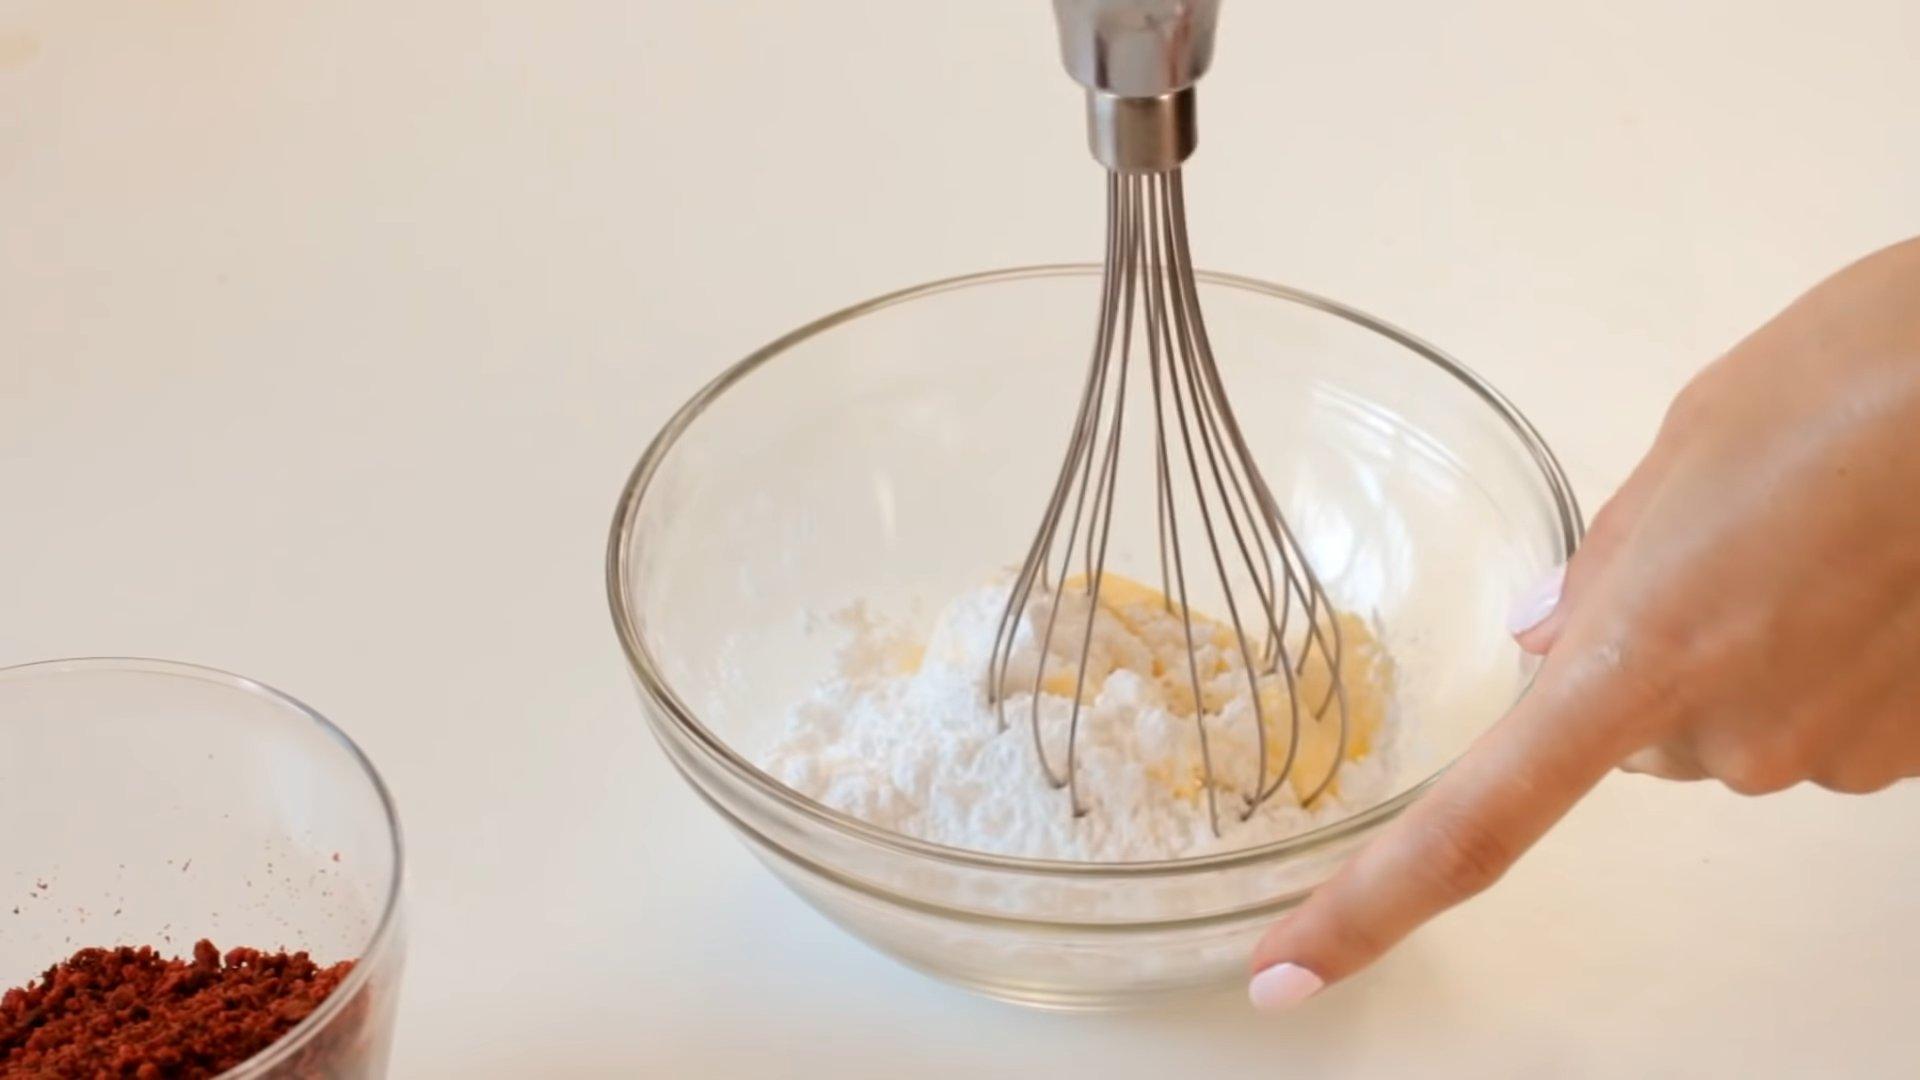
Step 8
Let's make the frosting. In a deep bowl, combine the cream cheese and 120 g of butter and beat on low speed with a mixer. Gradually add 200 g of powdered sugar and mix thoroughly until smooth.
Step 9
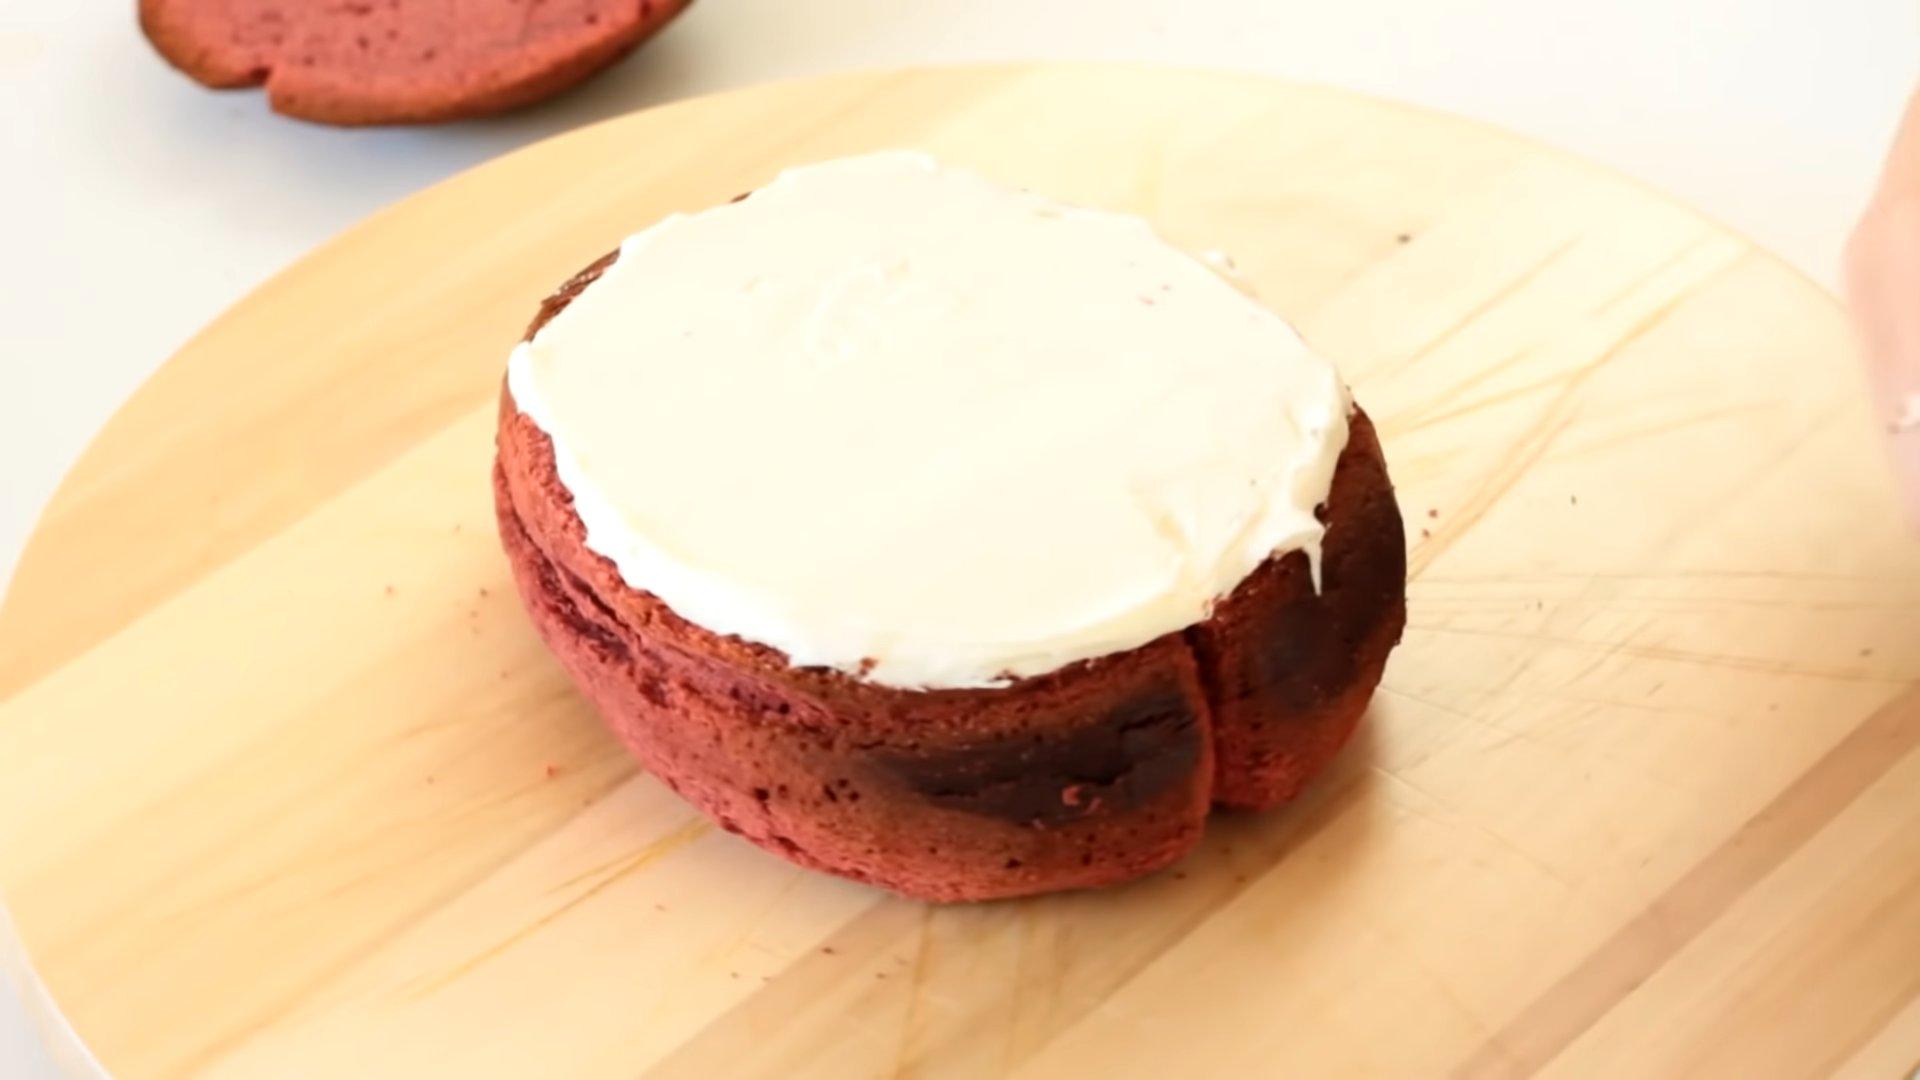
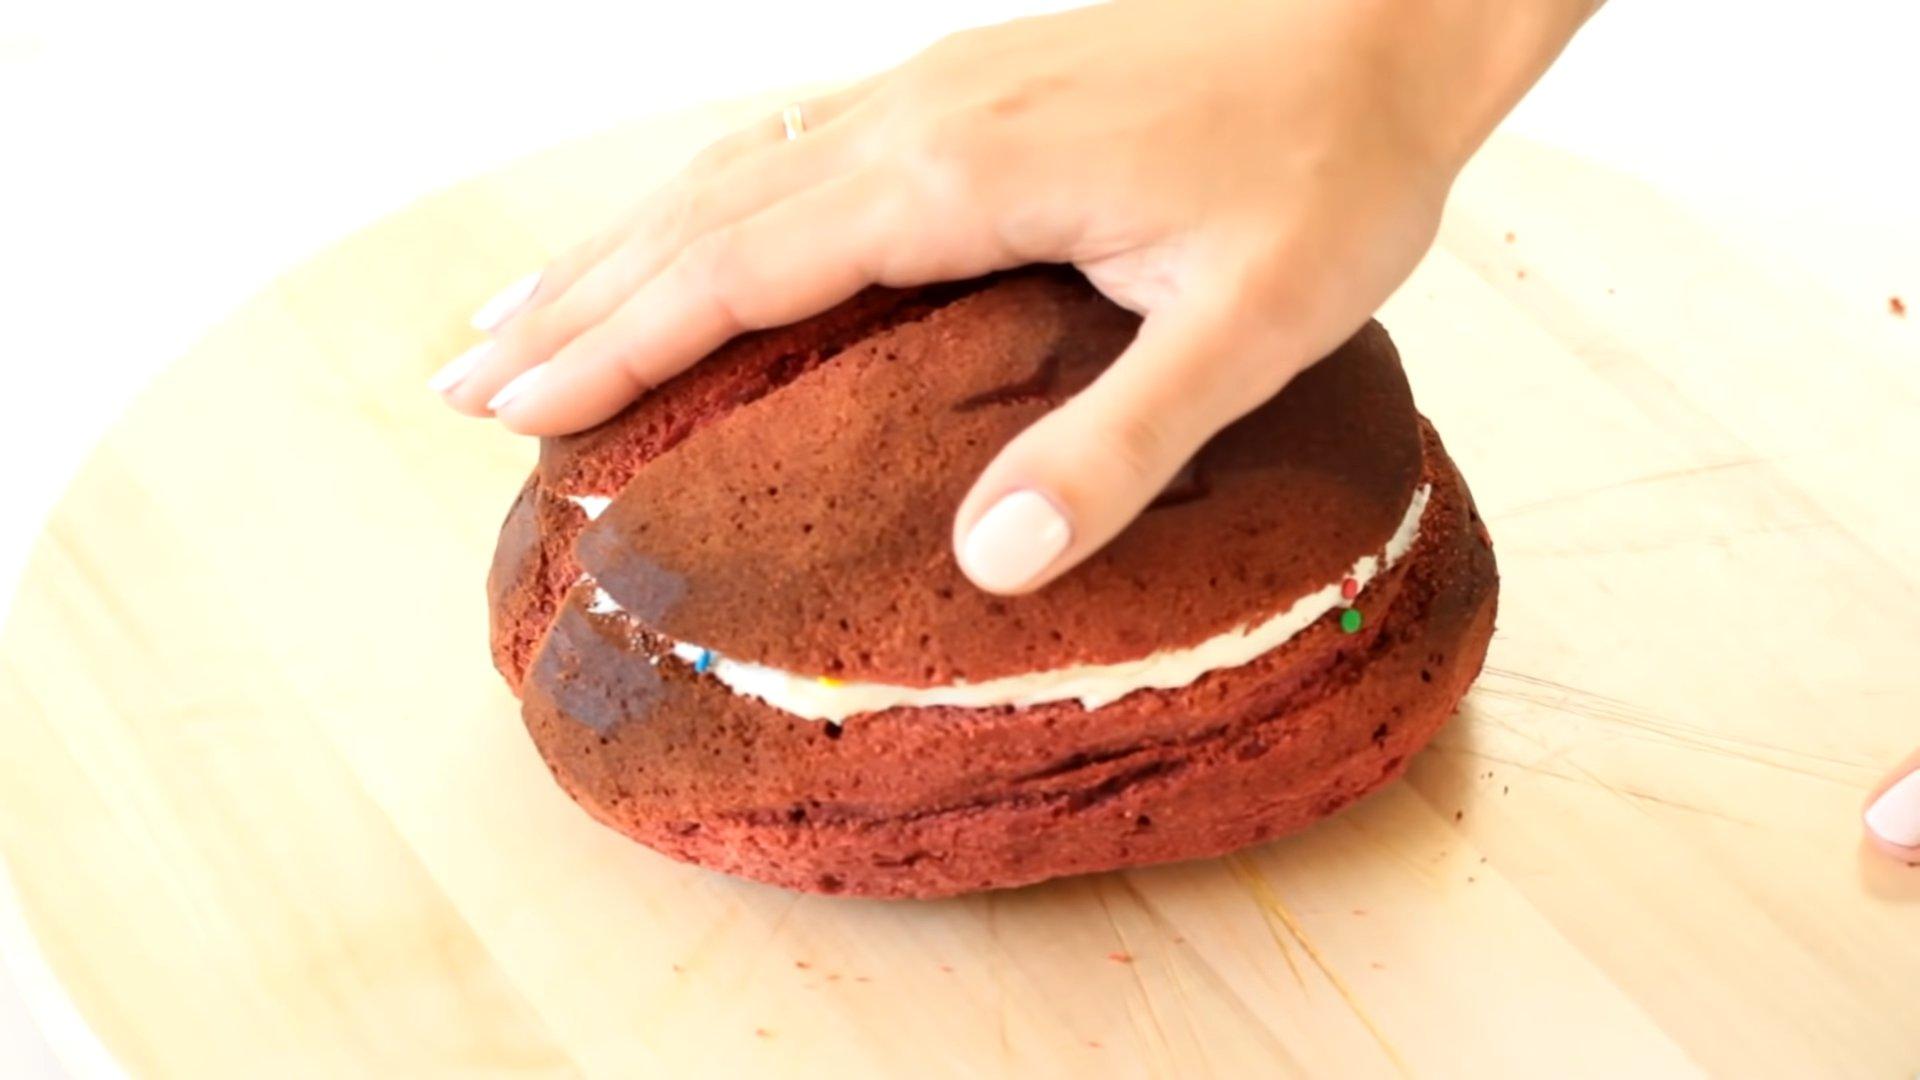
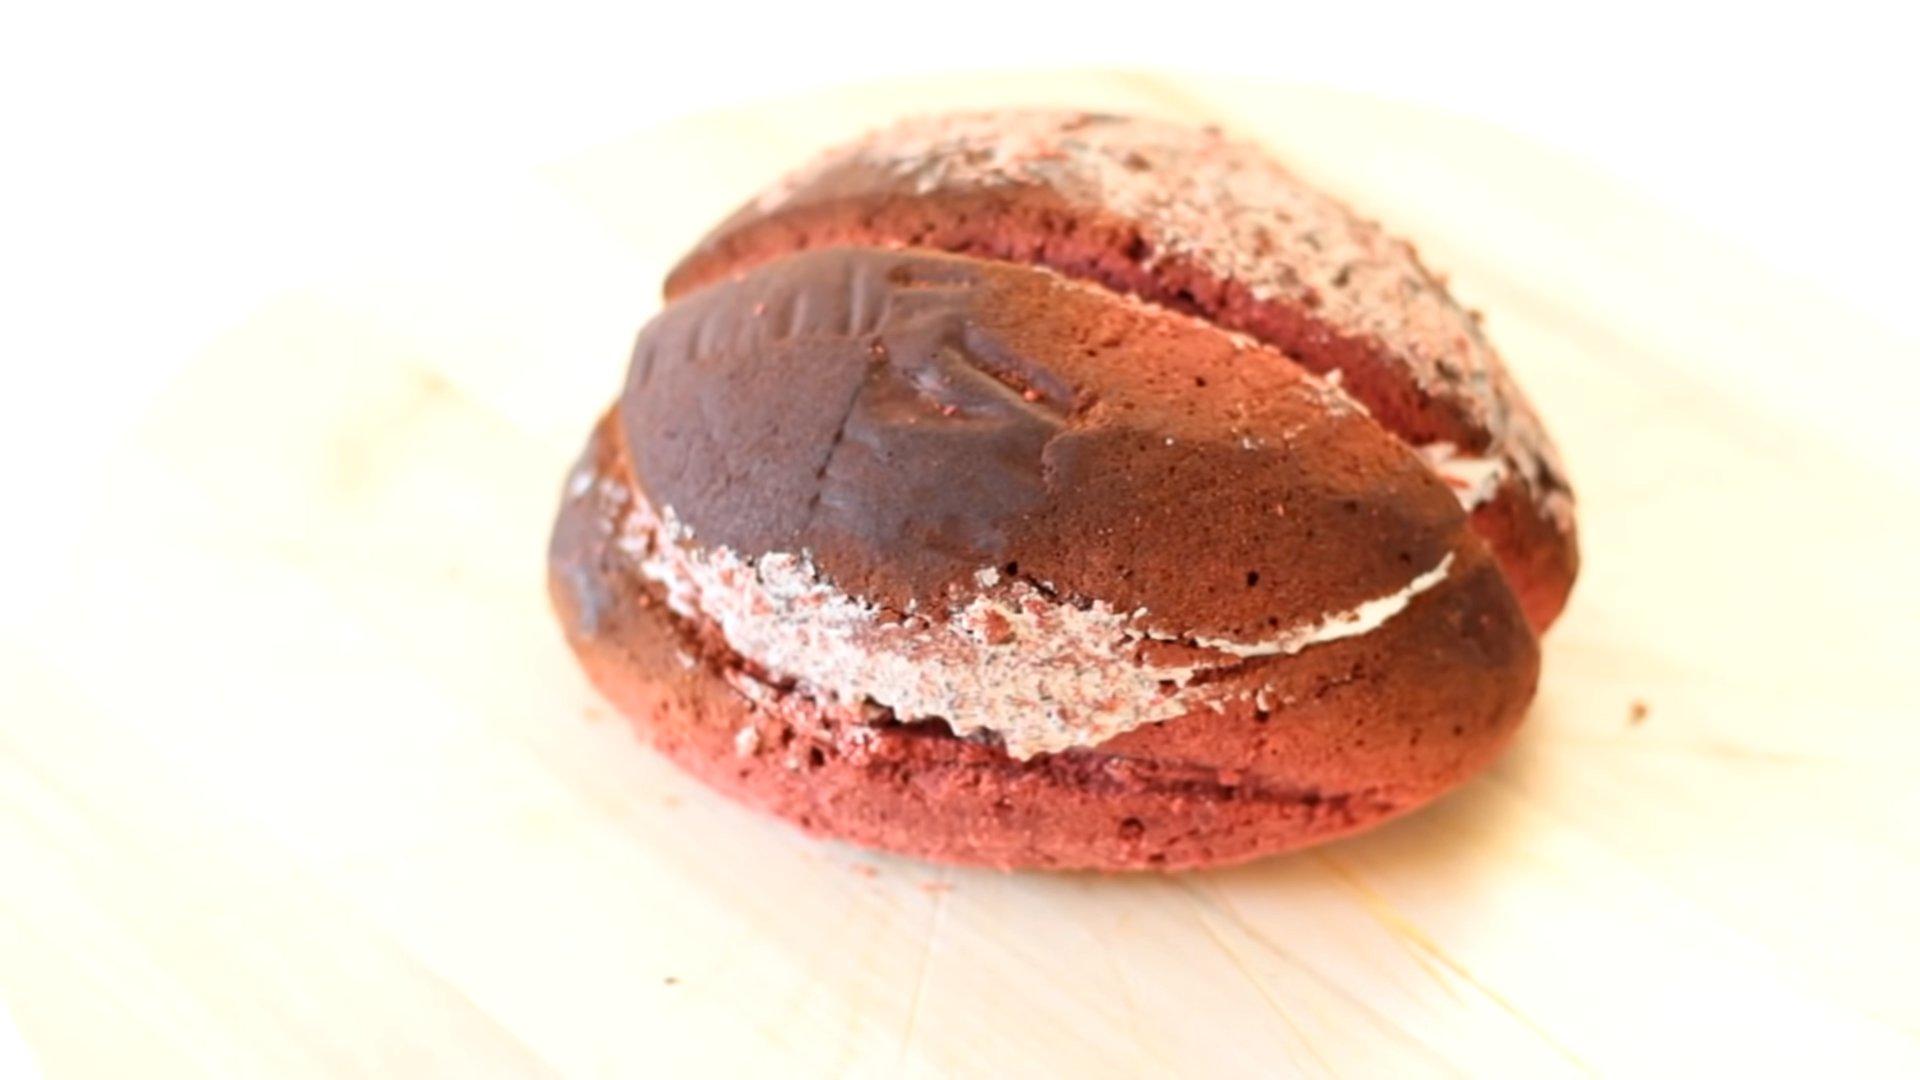
Cut the sponge cake in half. Spread the buttercream evenly over the bottom layer and cover with the top layer.
Step 10
Grind the biscuit scraps in a blender.
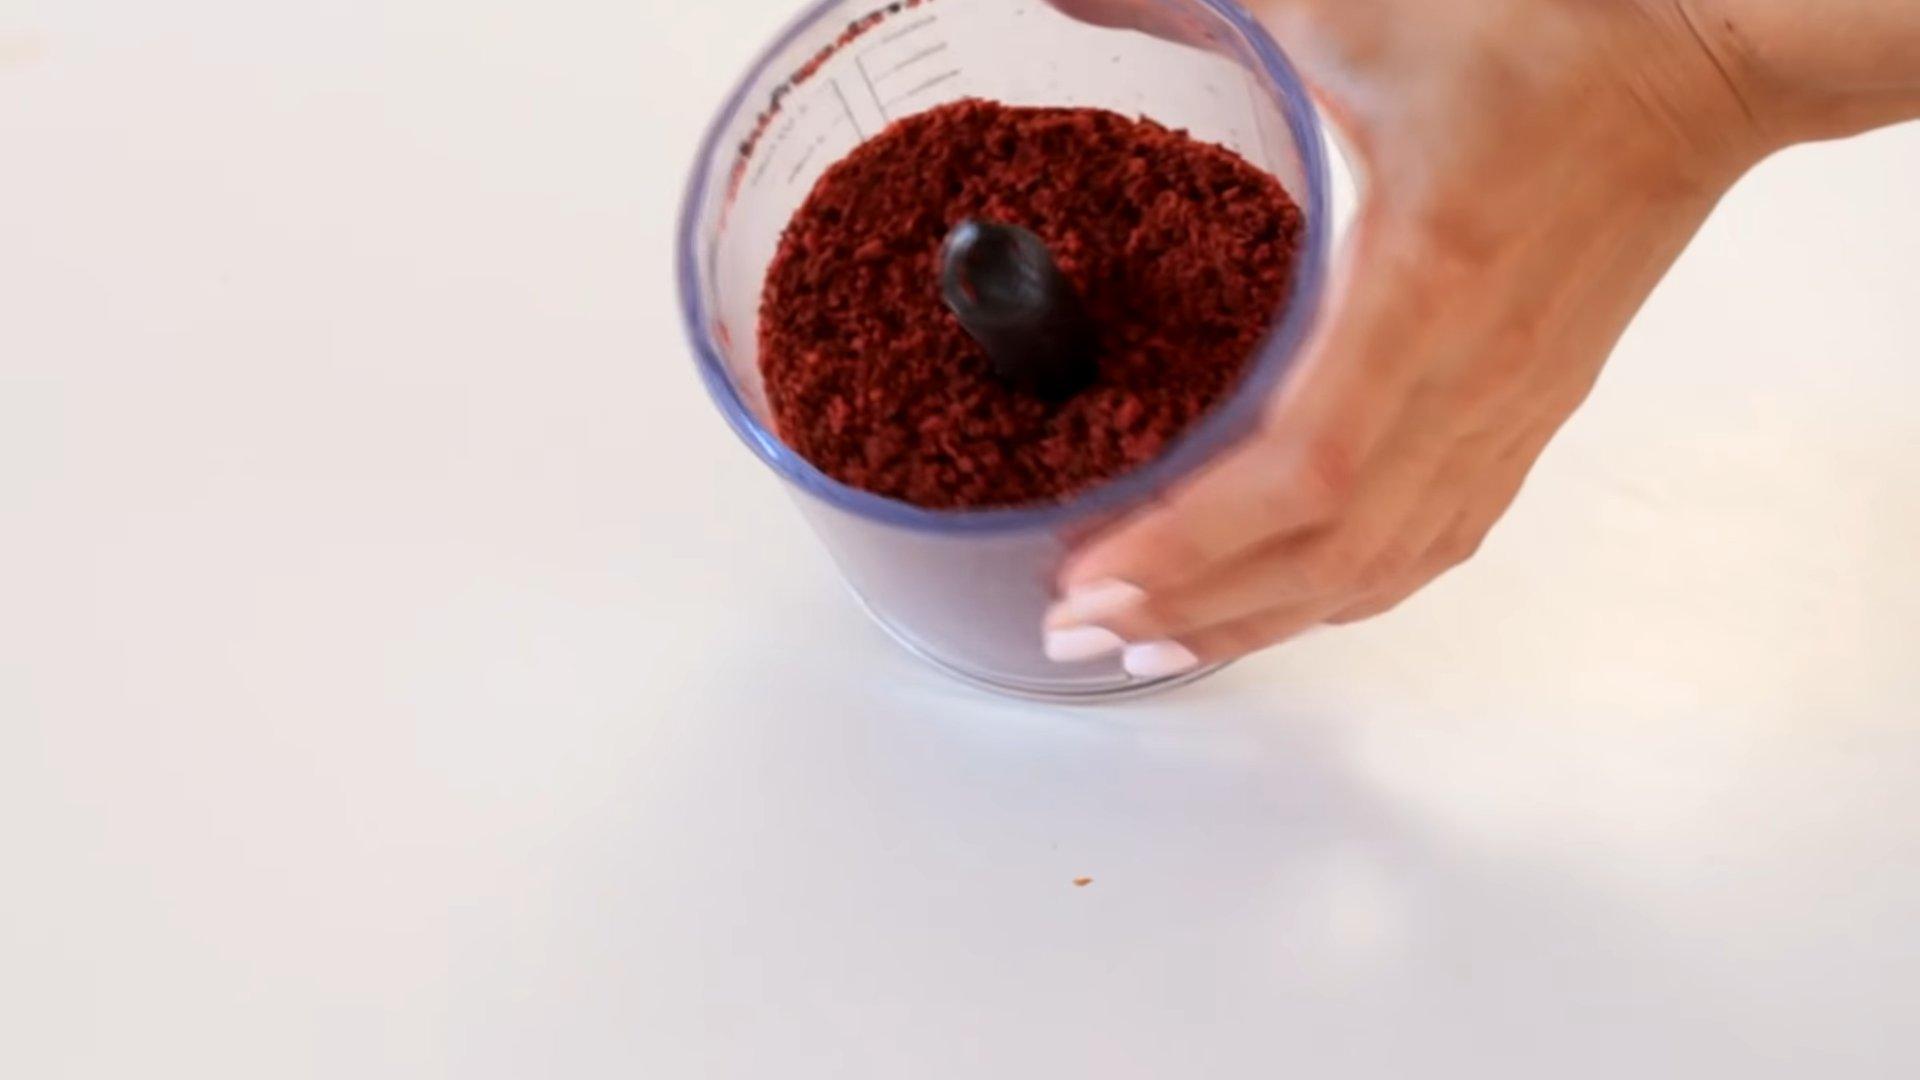
Step 11
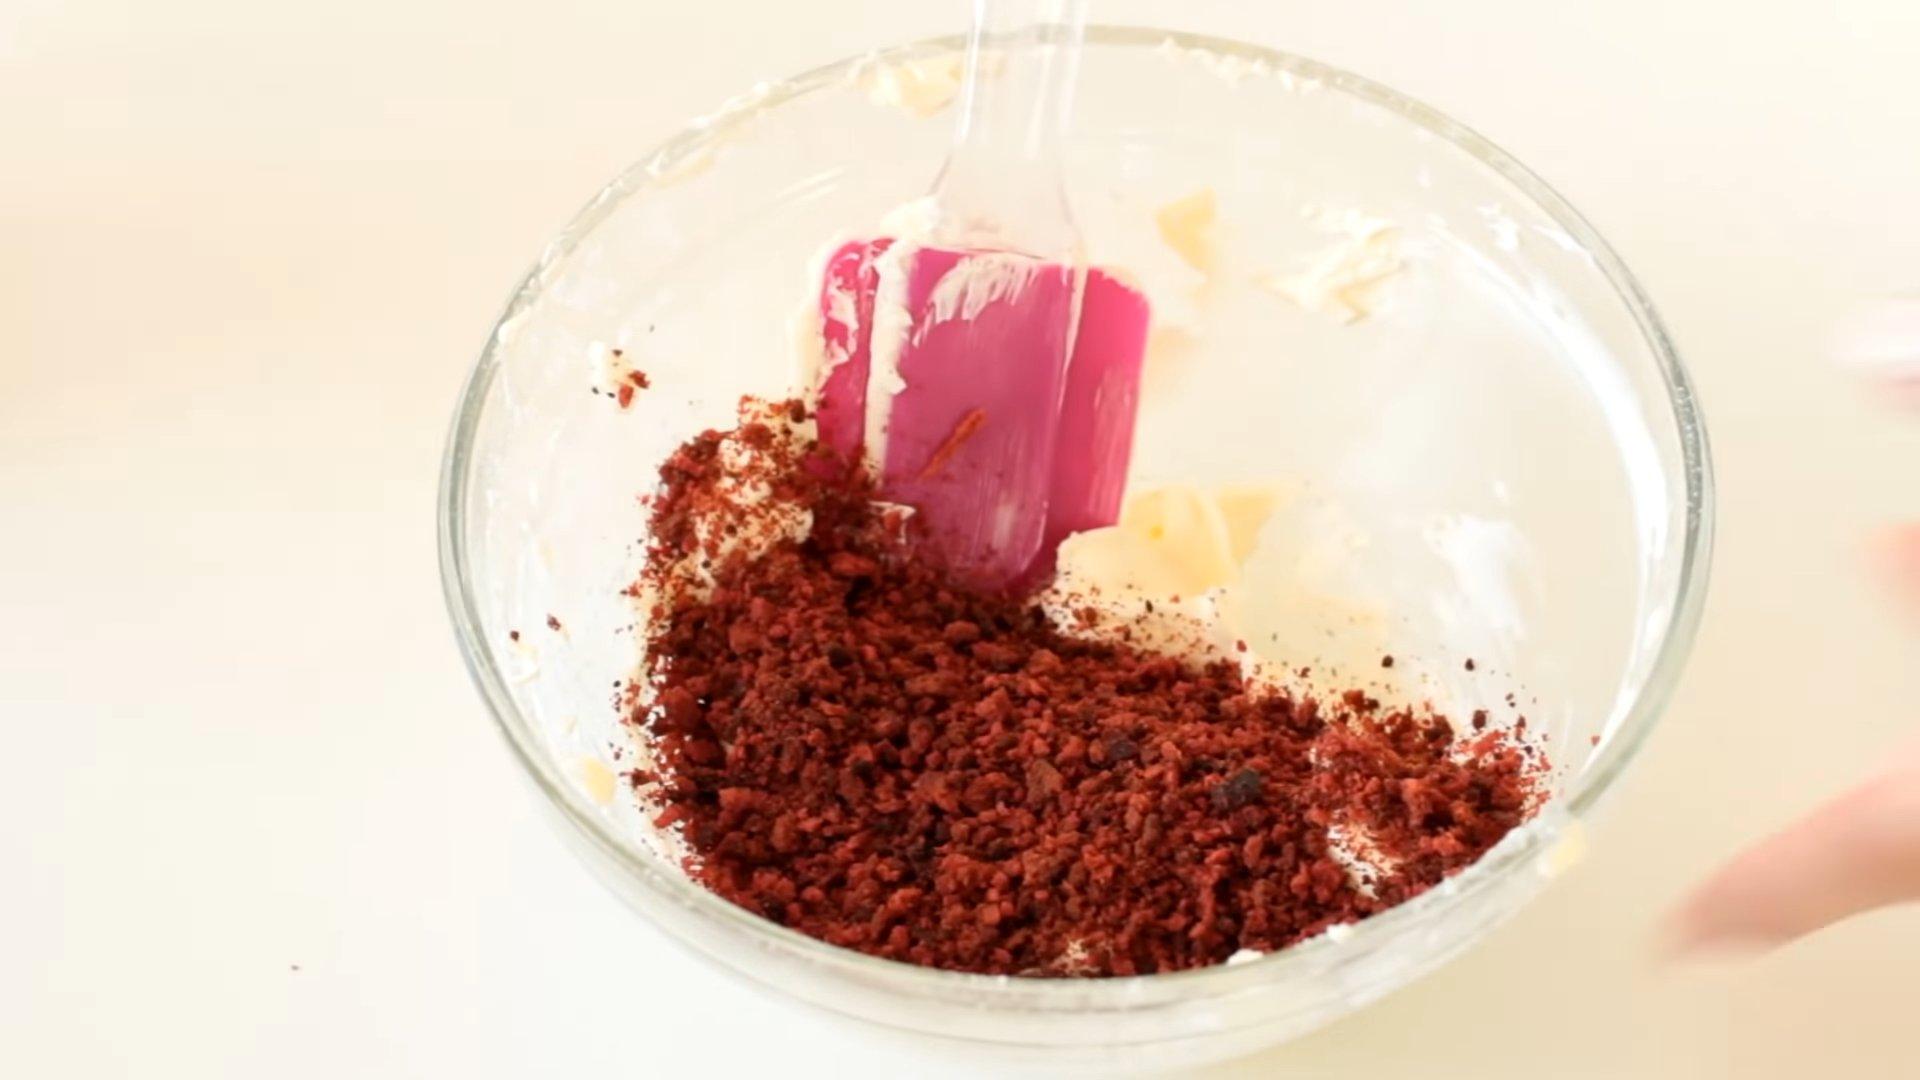
Place the remaining butter and powdered sugar in a separate bowl.
Step 12
Beat the butter and powdered sugar with a mixer, add the crushed biscuit crumbs and mix until smooth.

Step 13
Using the resulting butter cream, carefully level the surface of the cake.
Step 14
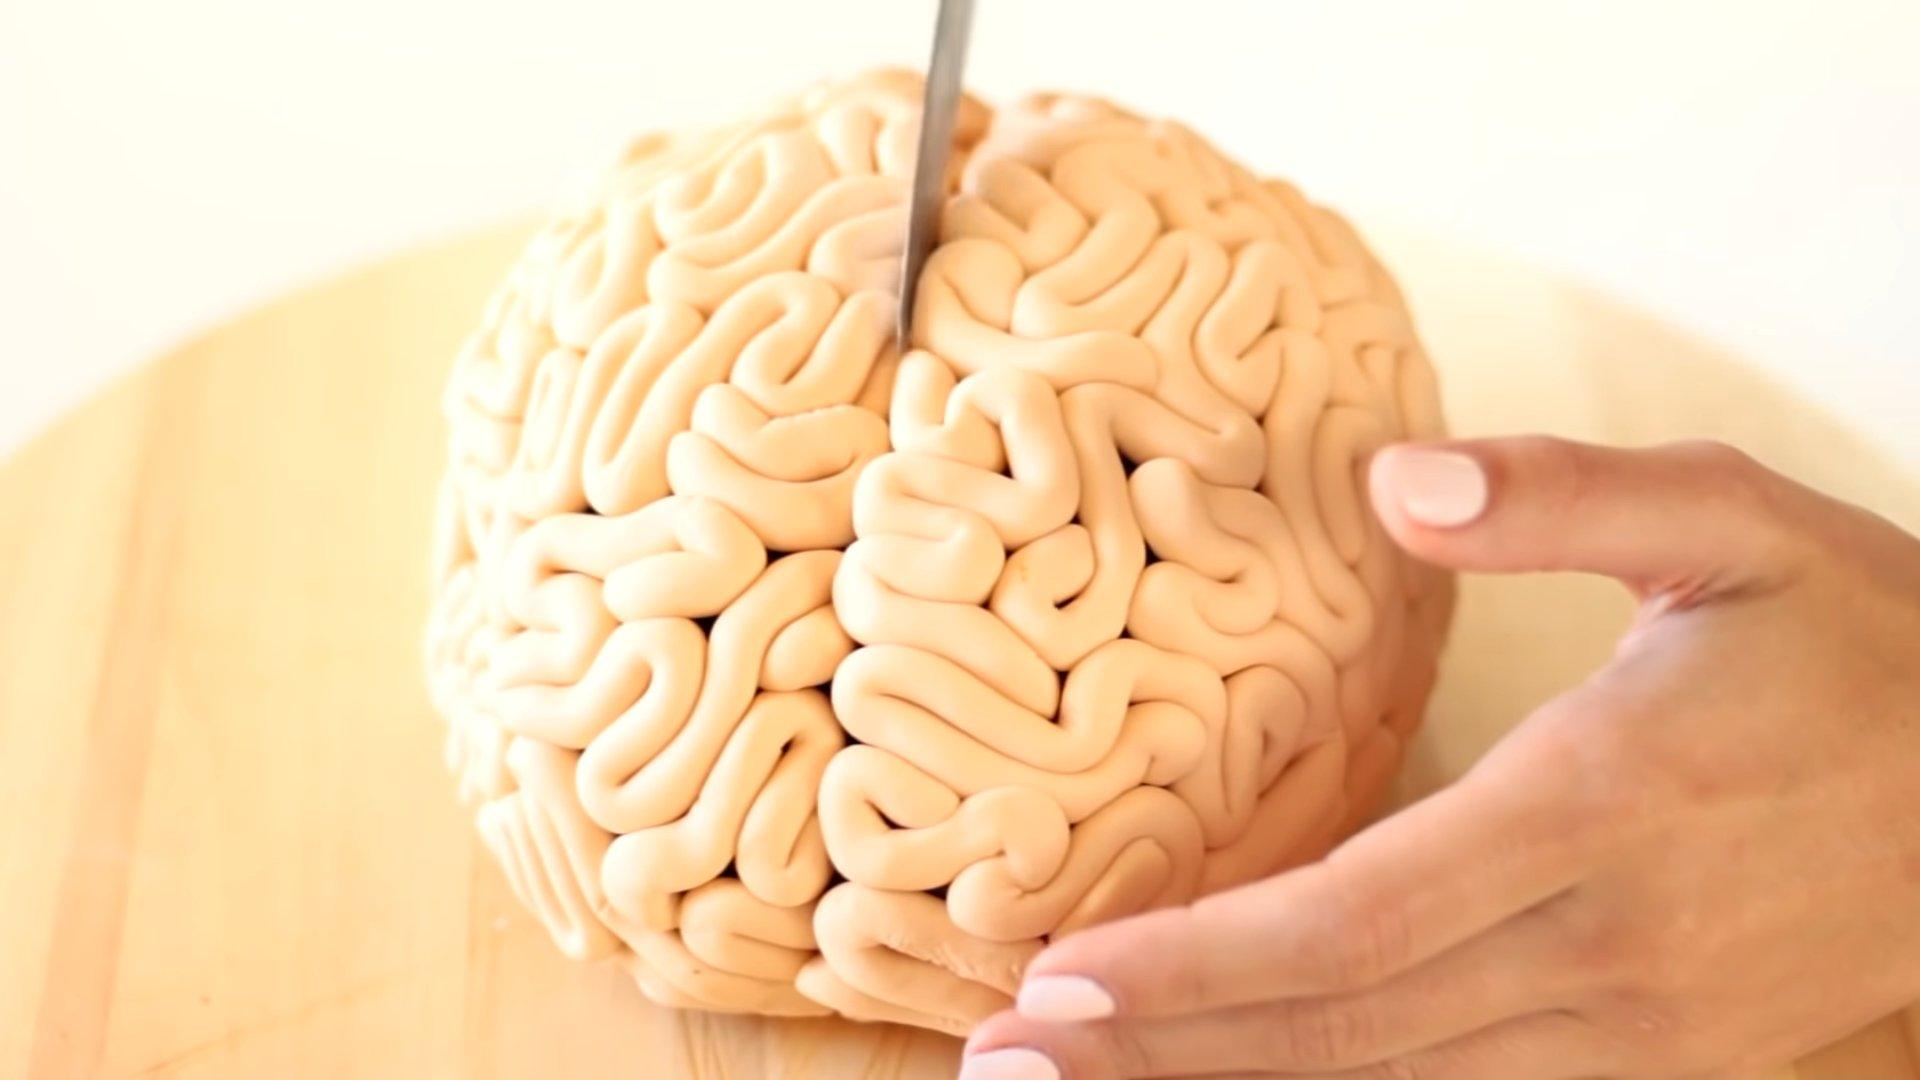
We color the white mastic with food coloring to a flesh color and use it to make the “convolutions” of the brain.
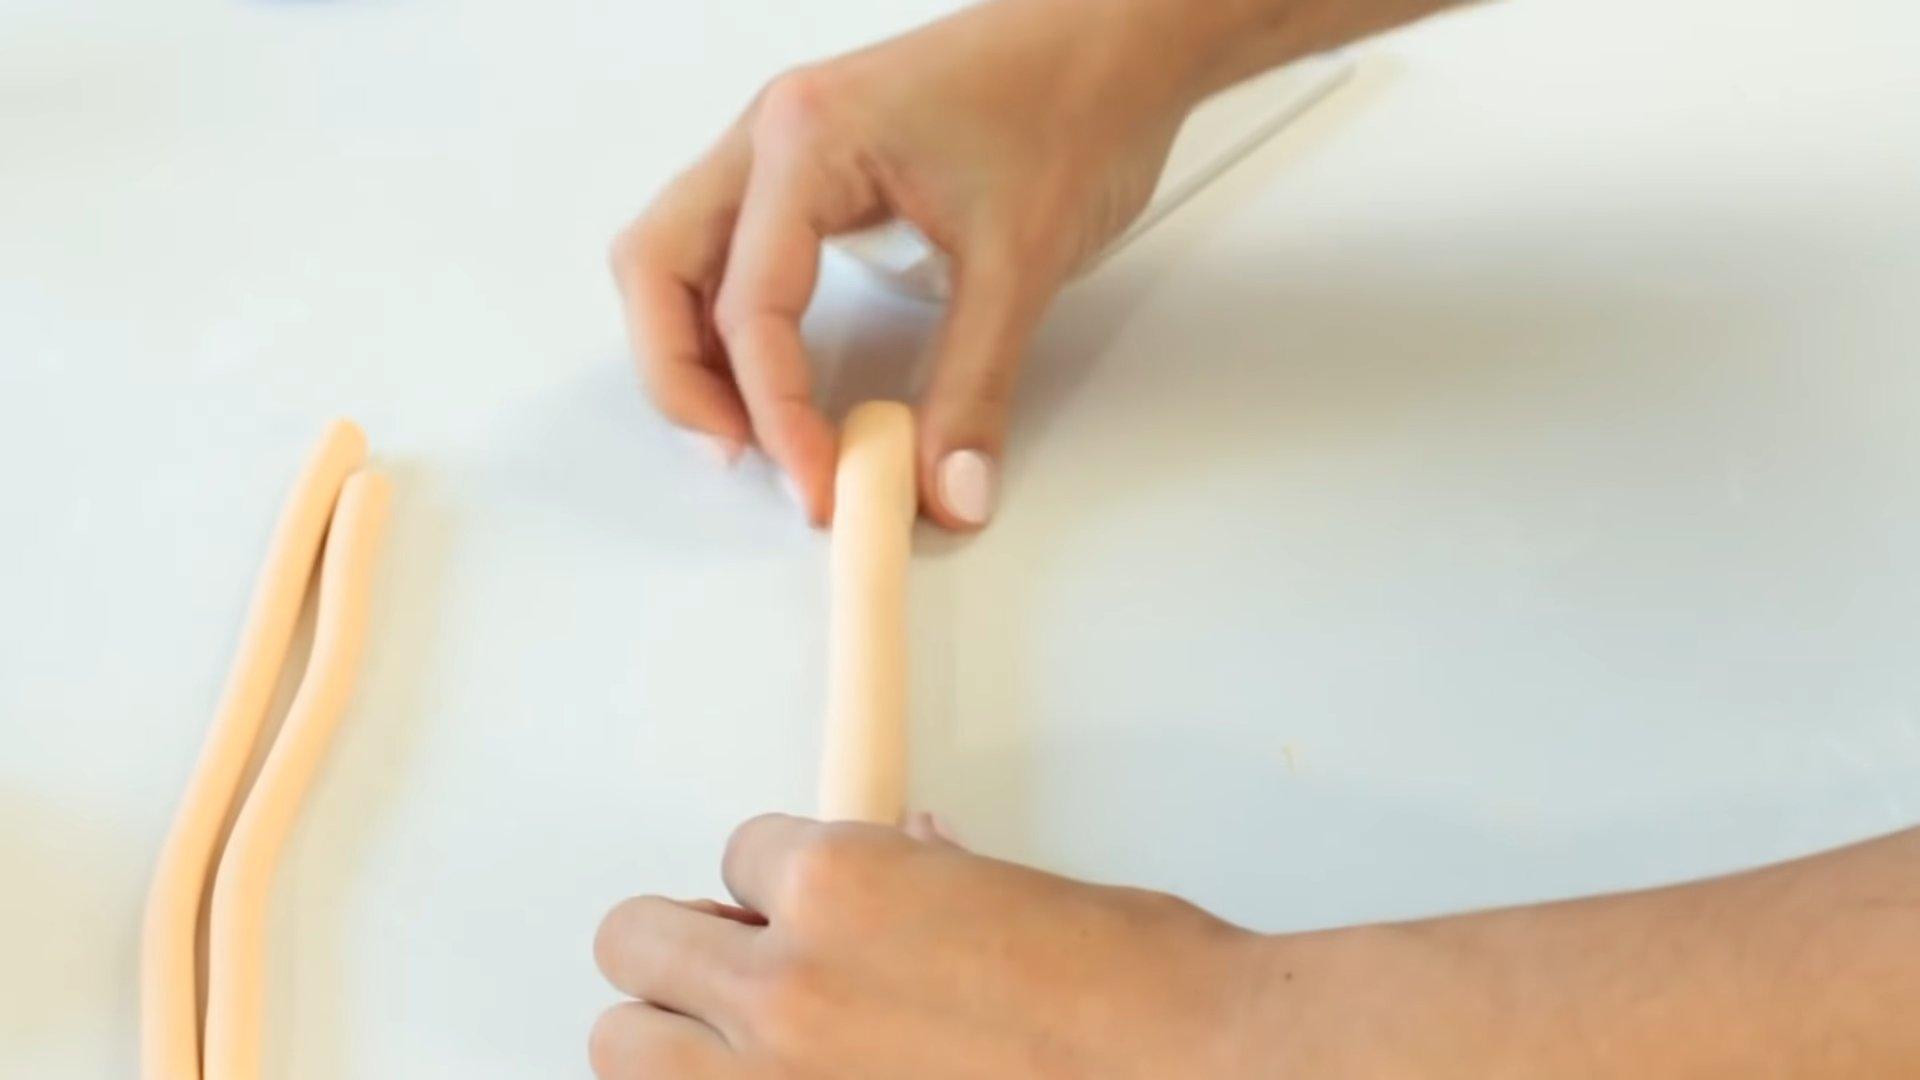
Step 15
We lay out the “convolutions” on the cake, forming random patterns, without symmetry.
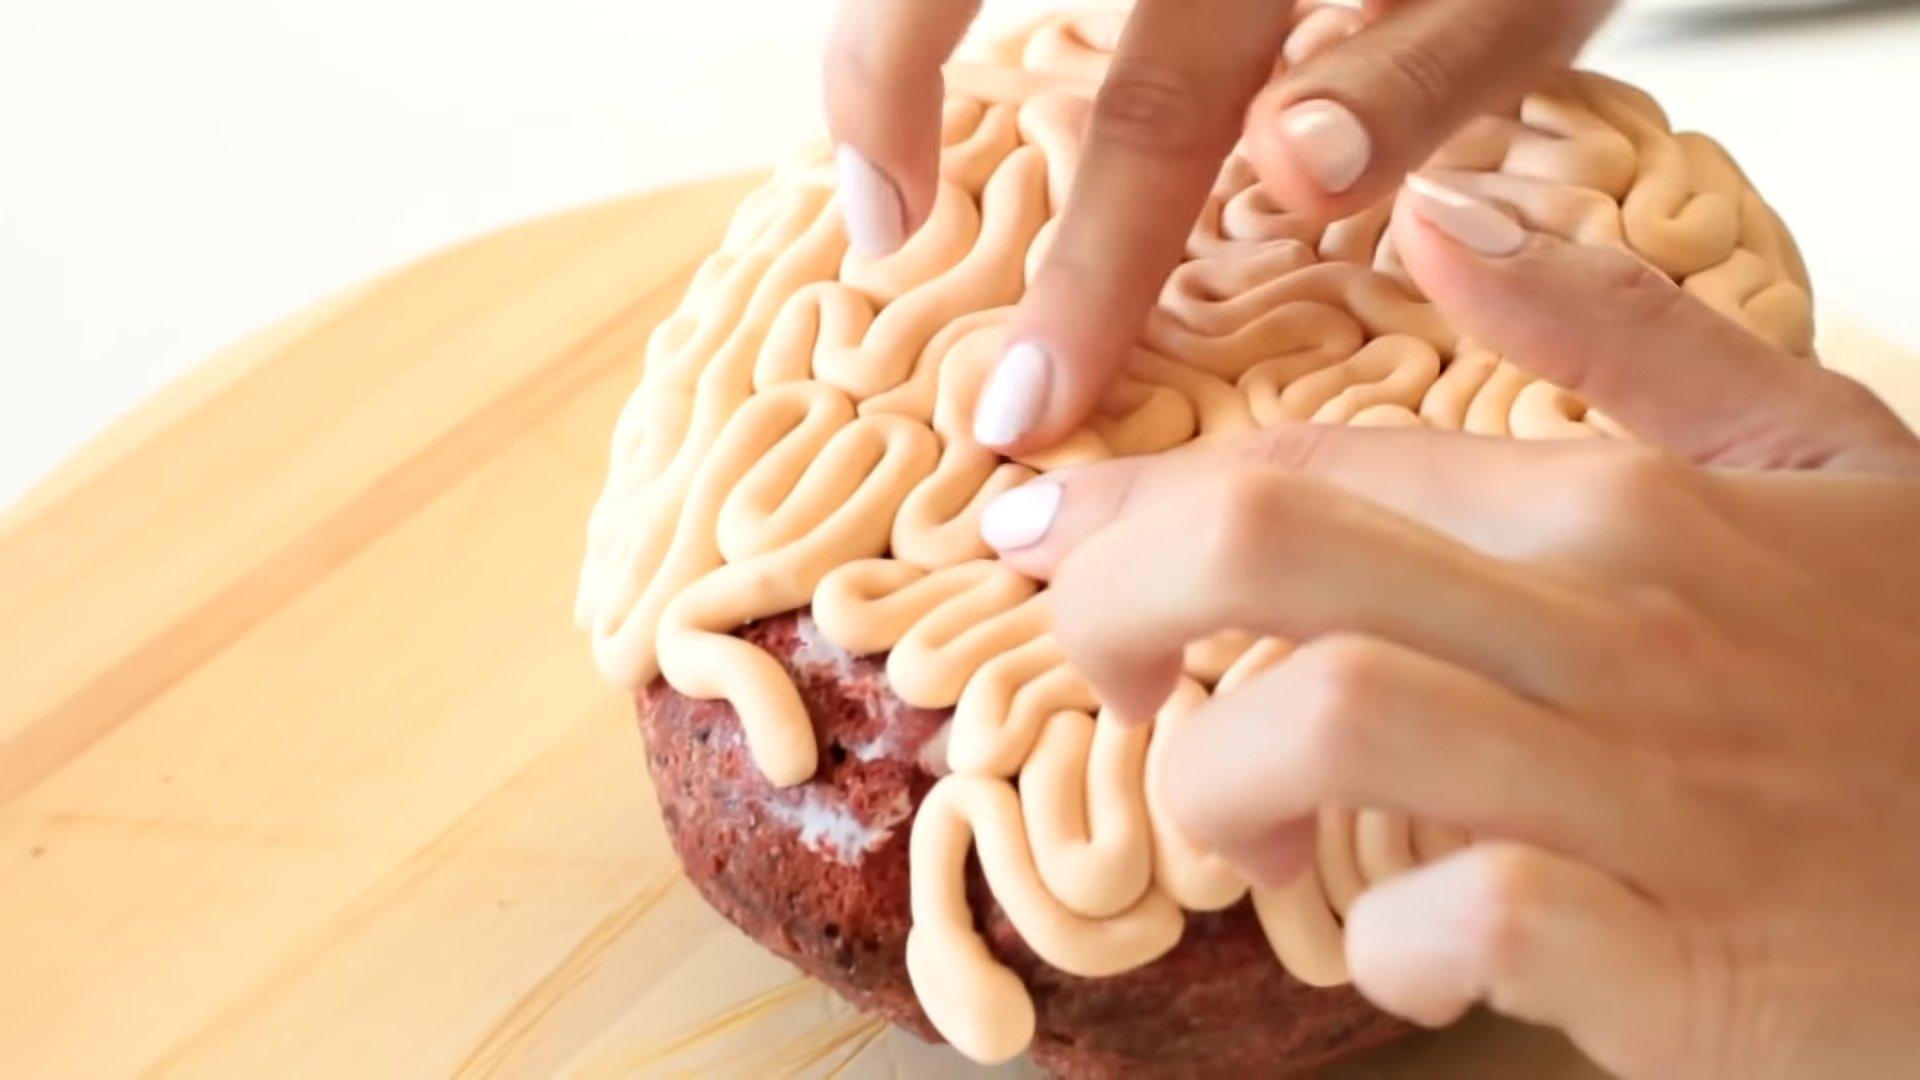
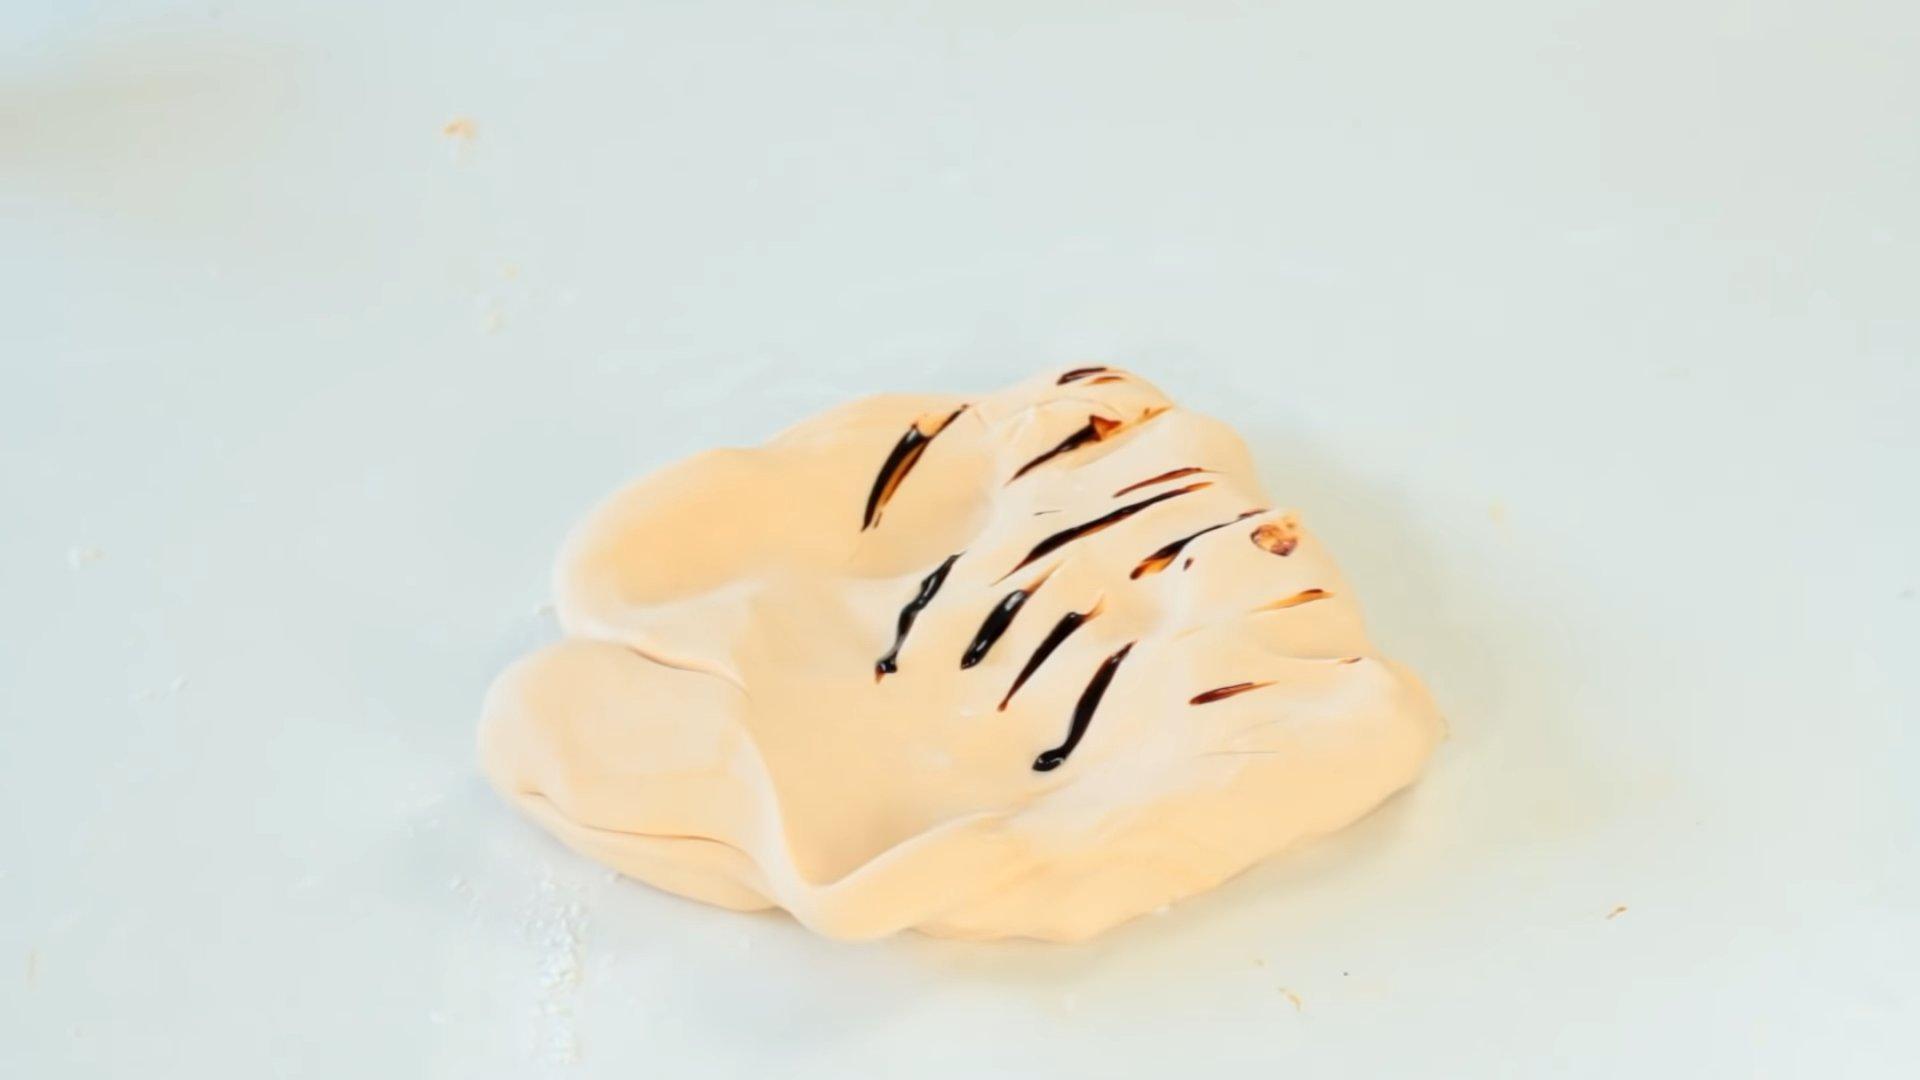
Step 16
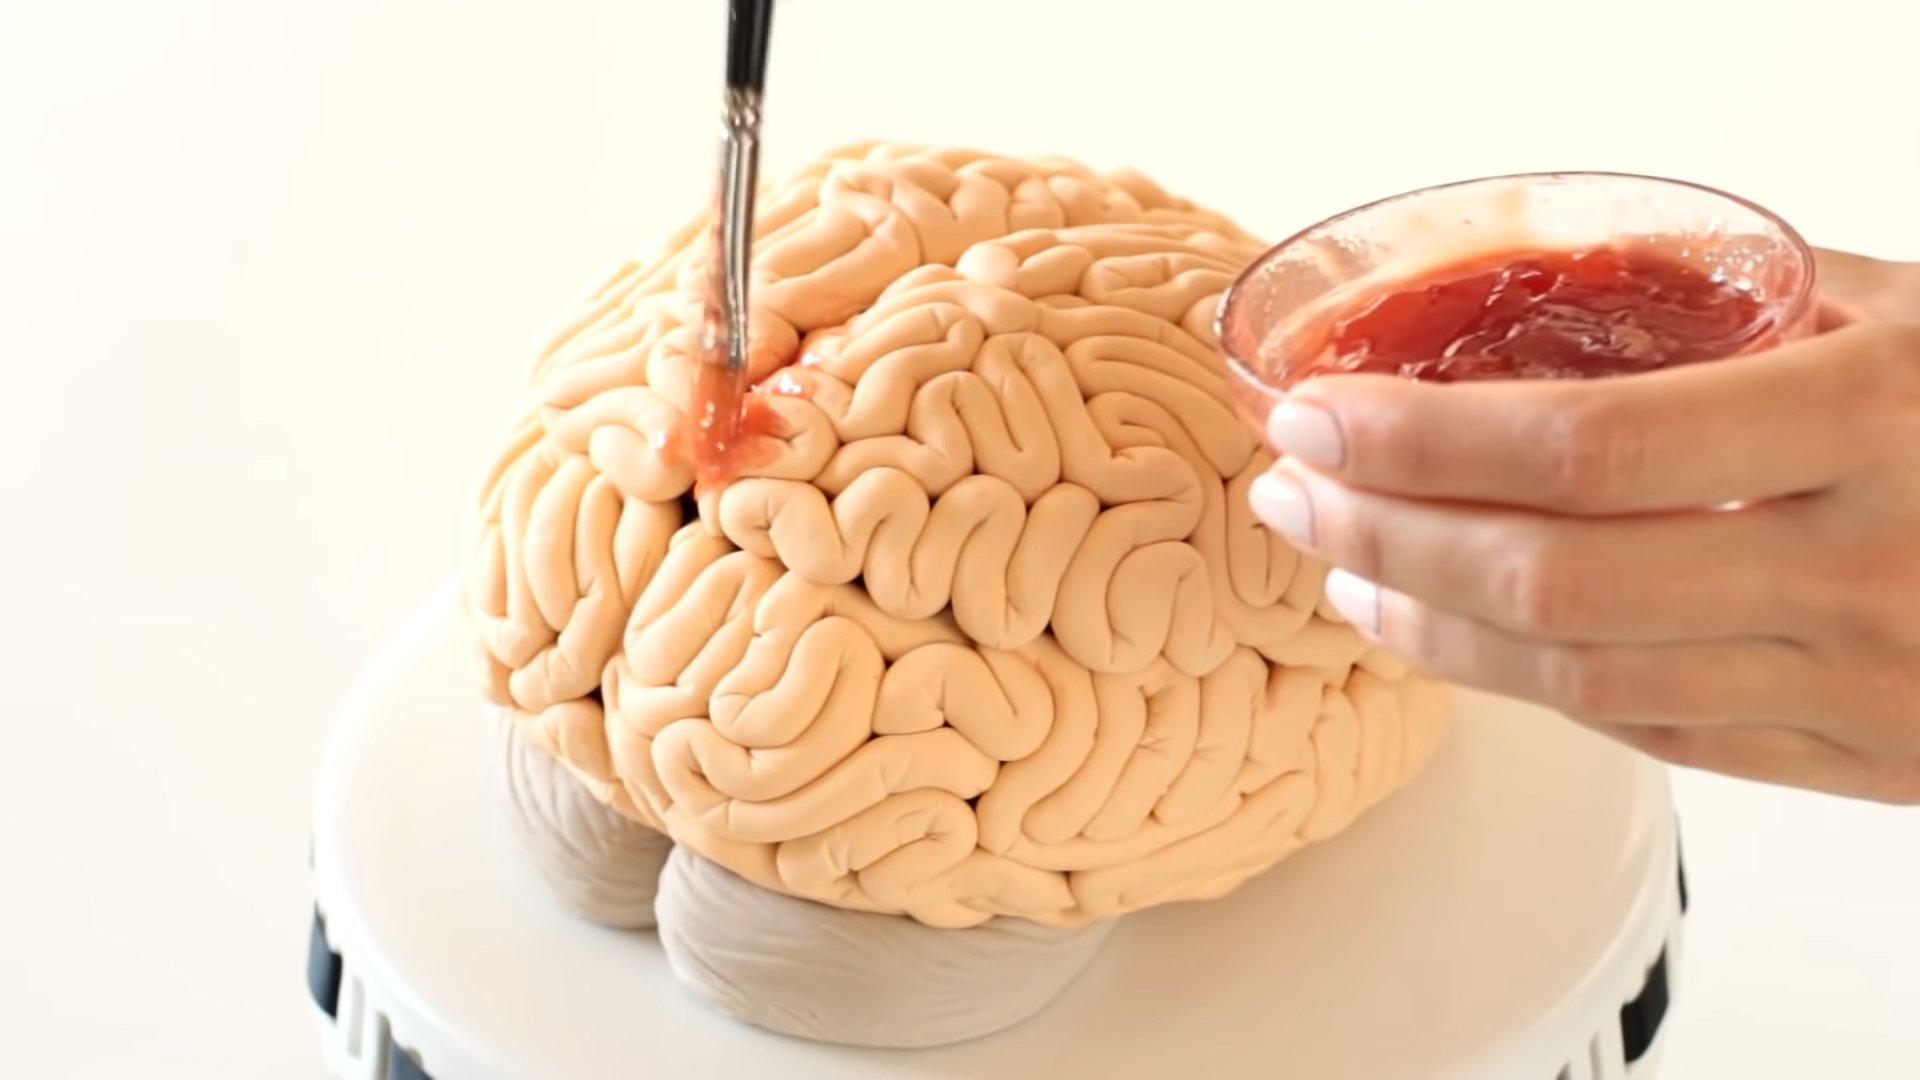
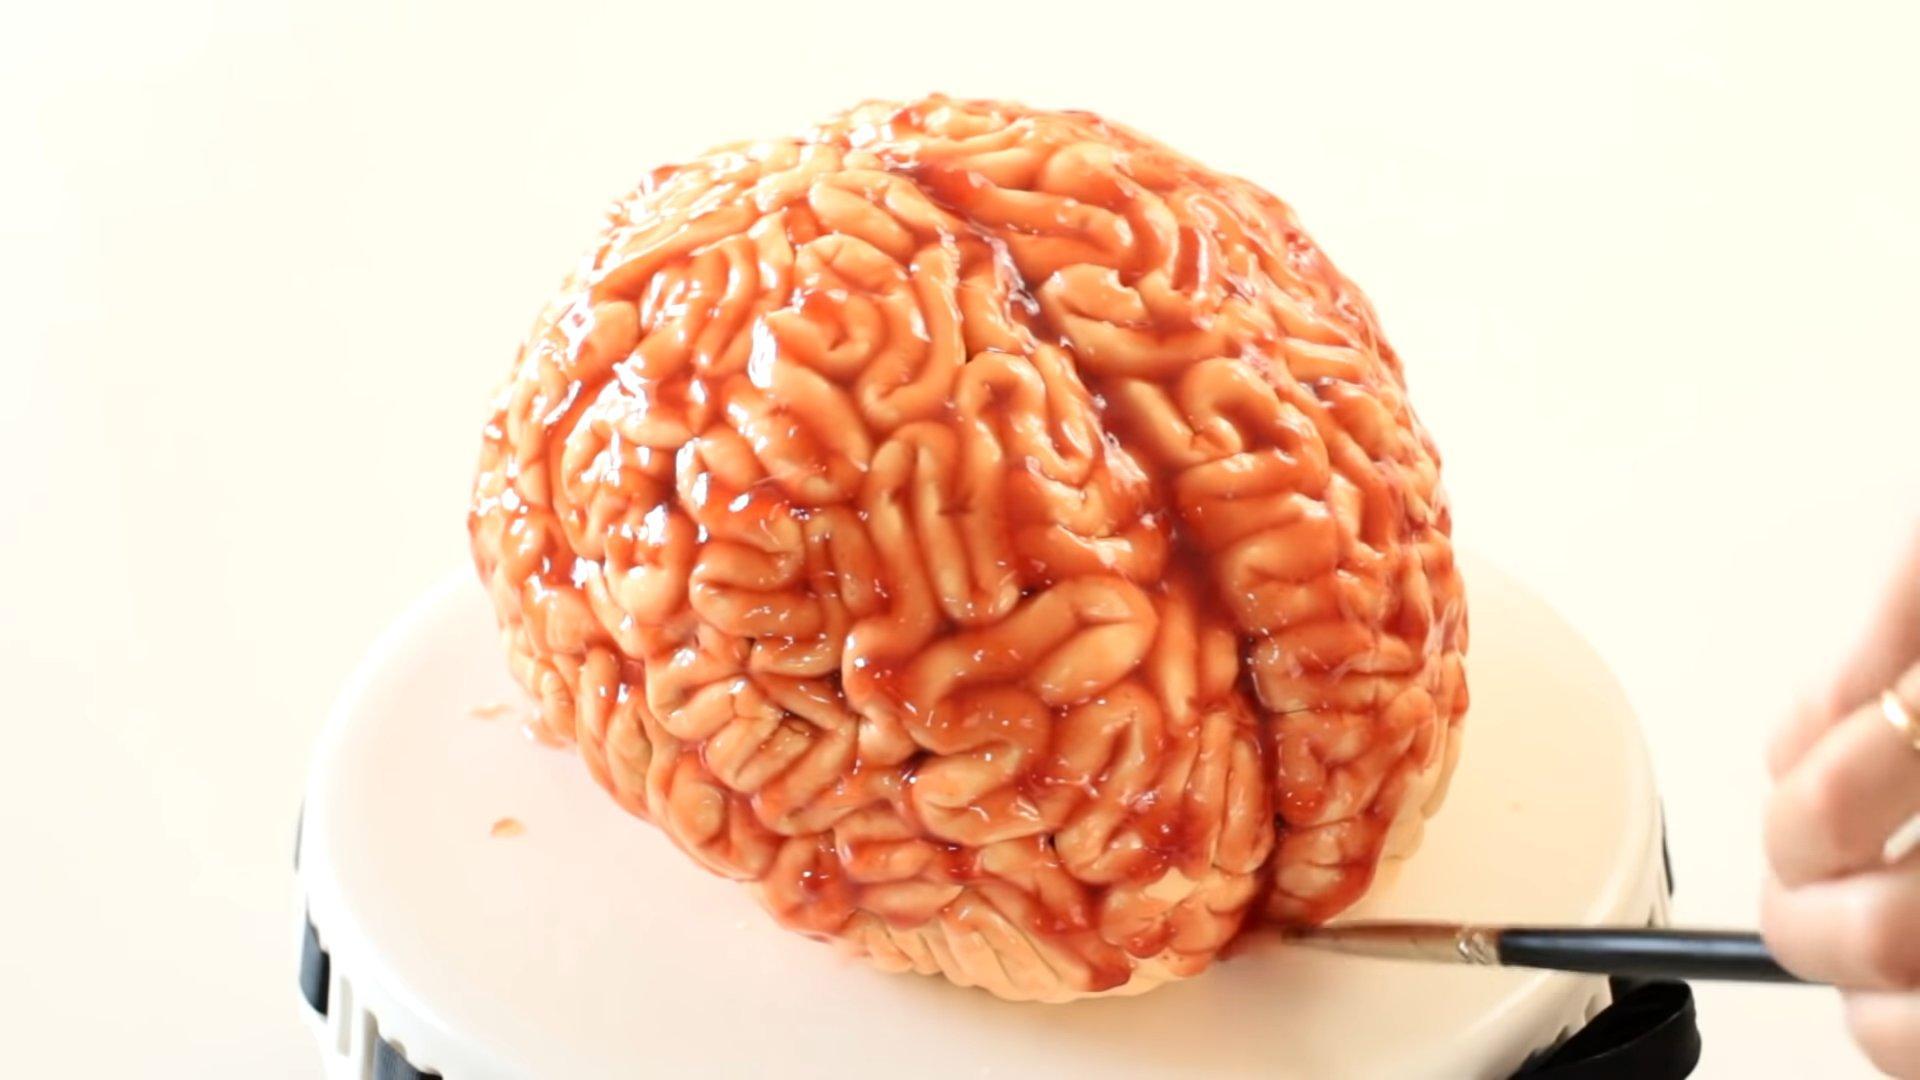
To make the brain look more realistic, we apply strawberry jam to the mastic.
Step 17
The unique and delicious "Brains" cake for your Halloween party is ready. Let it soak for a bit and then serve.
Cake with a knife
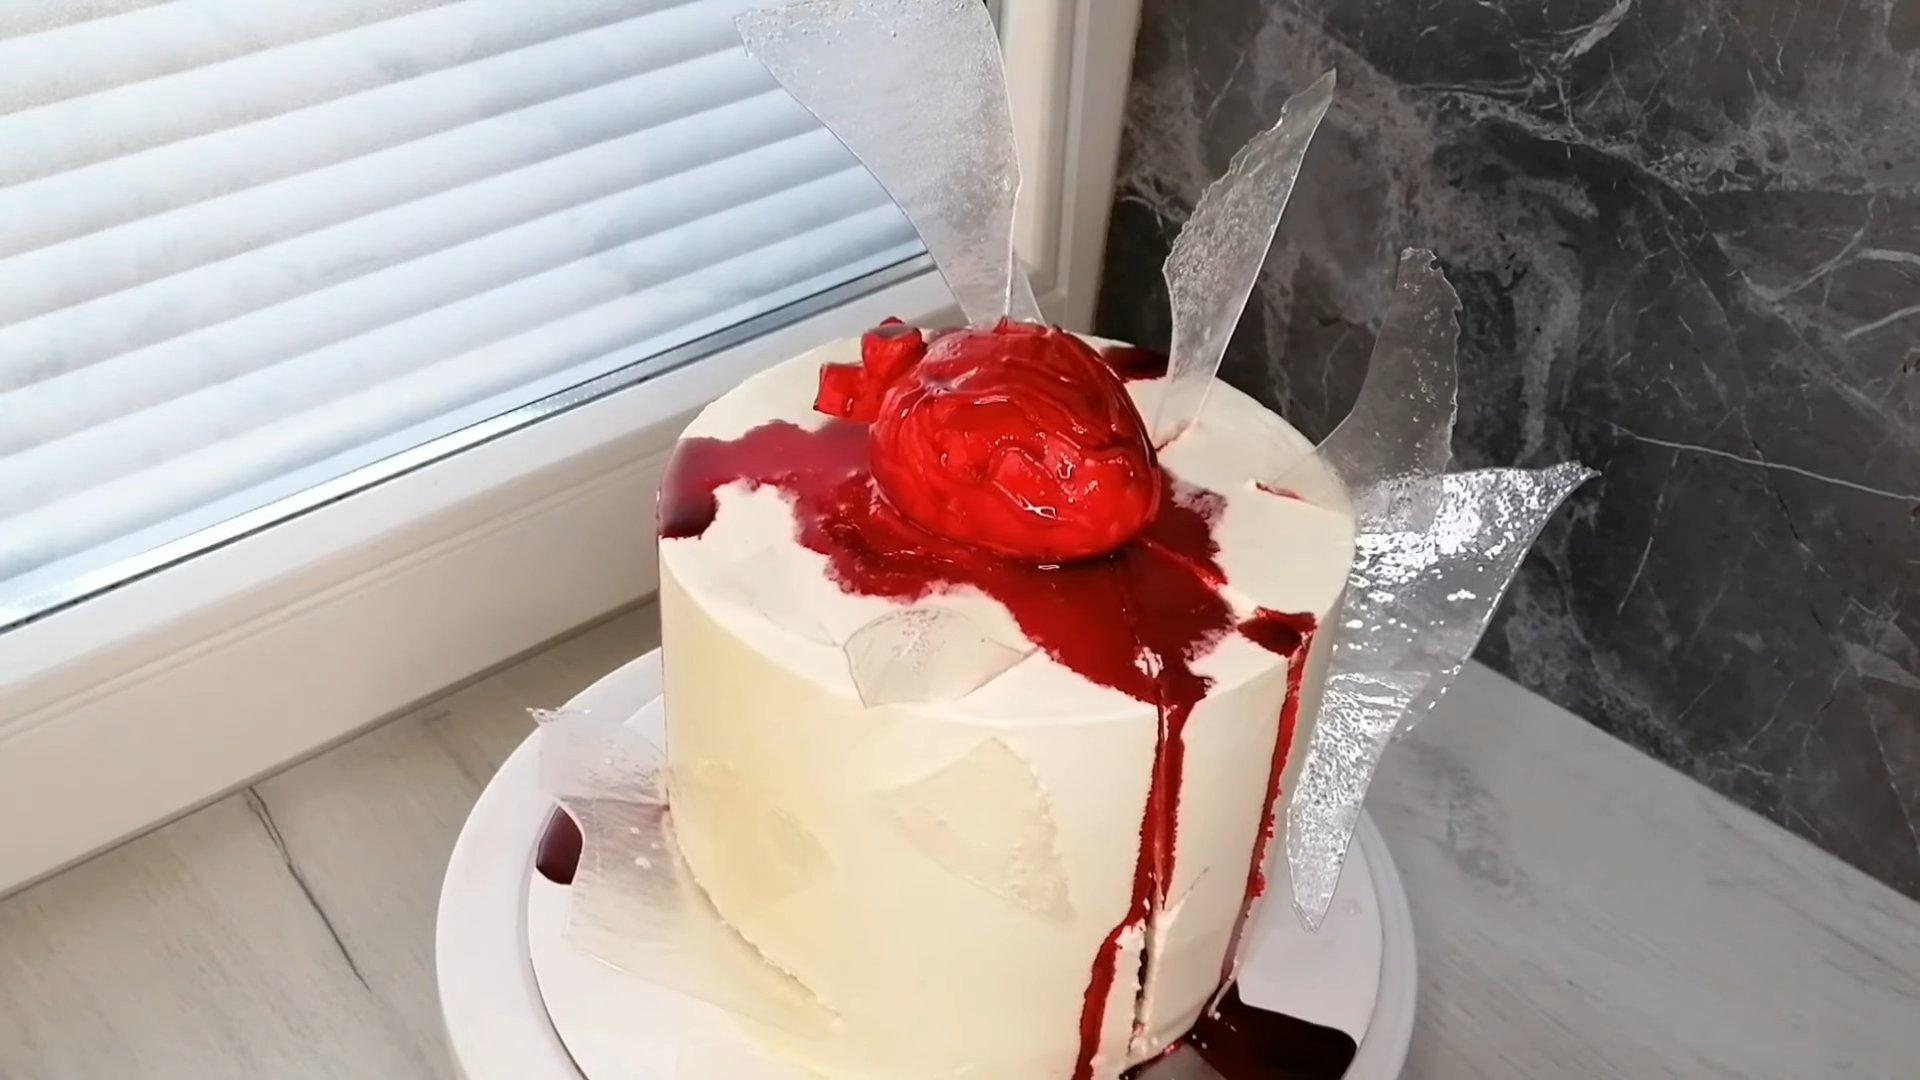
I'm offering you another wonderful Halloween dessert design idea. This spooky knife cake will definitely please your guests. You can use your favorite sponge cake for the base. The key is to make sure it's tall enough and holds its shape well.
Ingredients
- White chocolate - 600 g
- Cream 33-35% - 200 ml
- Sugar - 150 g
- Water - 40 ml
- Glucose syrup - 4 tbsp.
- Gel dyes - white, red, blue
- Knife
Cooking time: 1 hour + time for cake preparation
Servings: 1 (for decorating a cake 13 cm high and 18 cm in diameter)
Step-by-step recipe
Step 1
Prepare the ganache to smooth out the cake. Pour the cream into a saucepan, place over low heat, and bring to a simmer.
Step 2
Remove the hot cream from the heat, add the white chocolate and mix well.
Step 3
When the mixture has become homogeneous, color it white using gel food coloring and mix well again.
Step 4
Cover the finished ganache with cling film and place in the refrigerator for several hours.
Step 5
Spread a thin layer of chilled ganache on the finished cake and smooth the surface with a spatula or knife. Refrigerate the cake until the ganache has cooled.
Step 6
Apply a second, thicker layer of ganache, smooth the surface of the cake again and place it in the refrigerator.
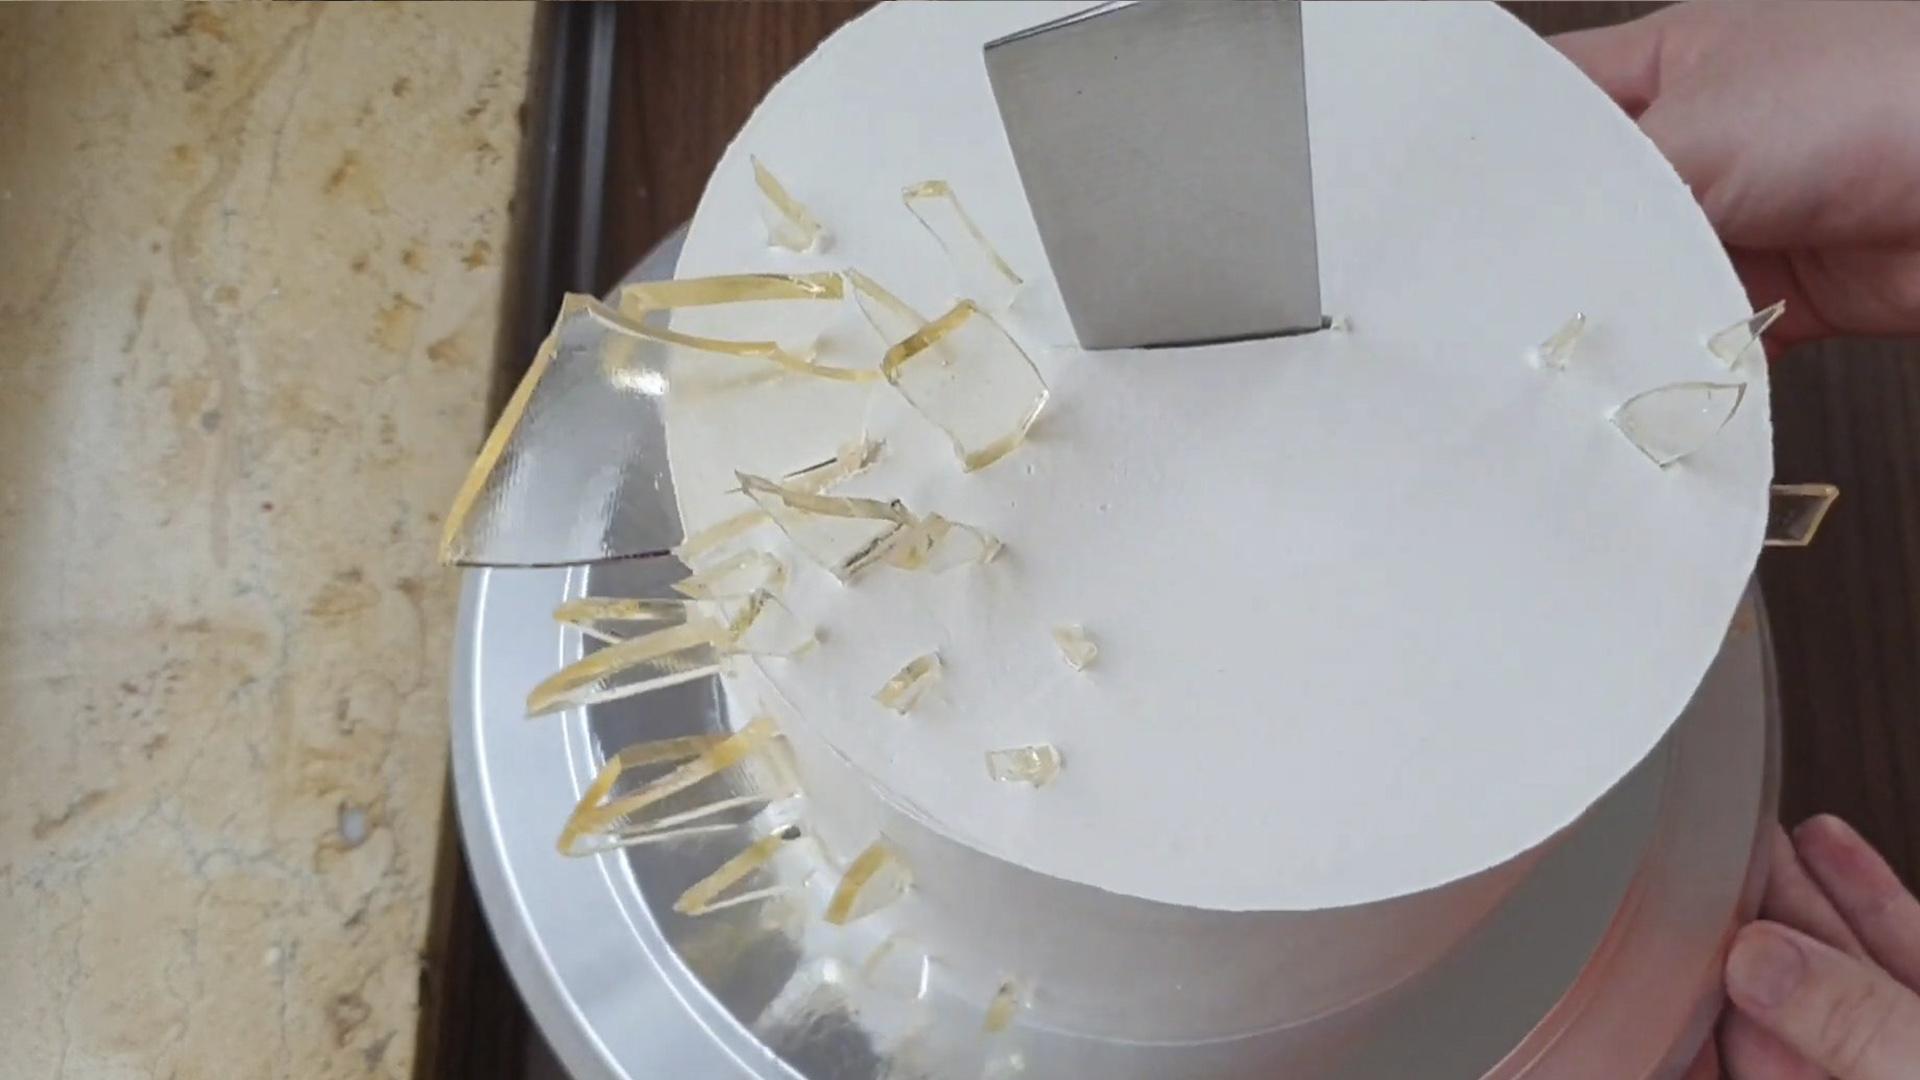
Step 7
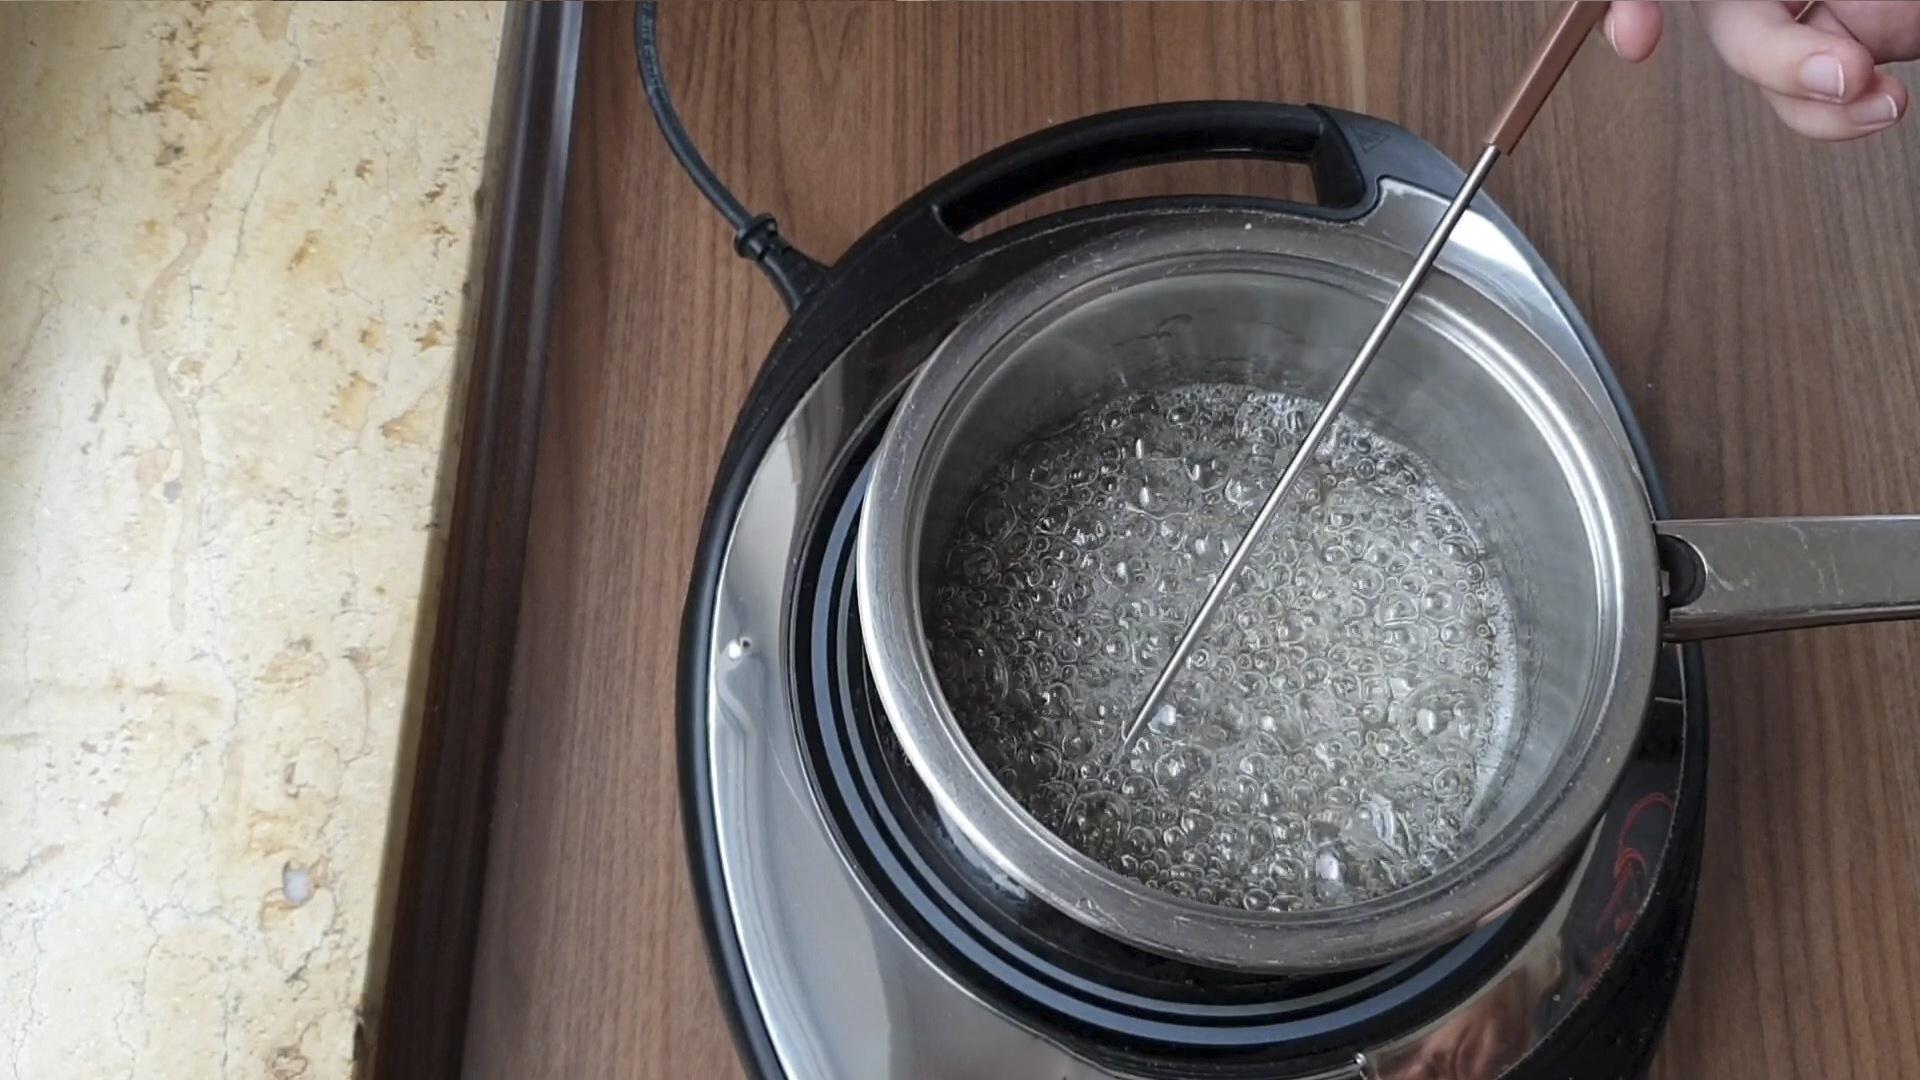
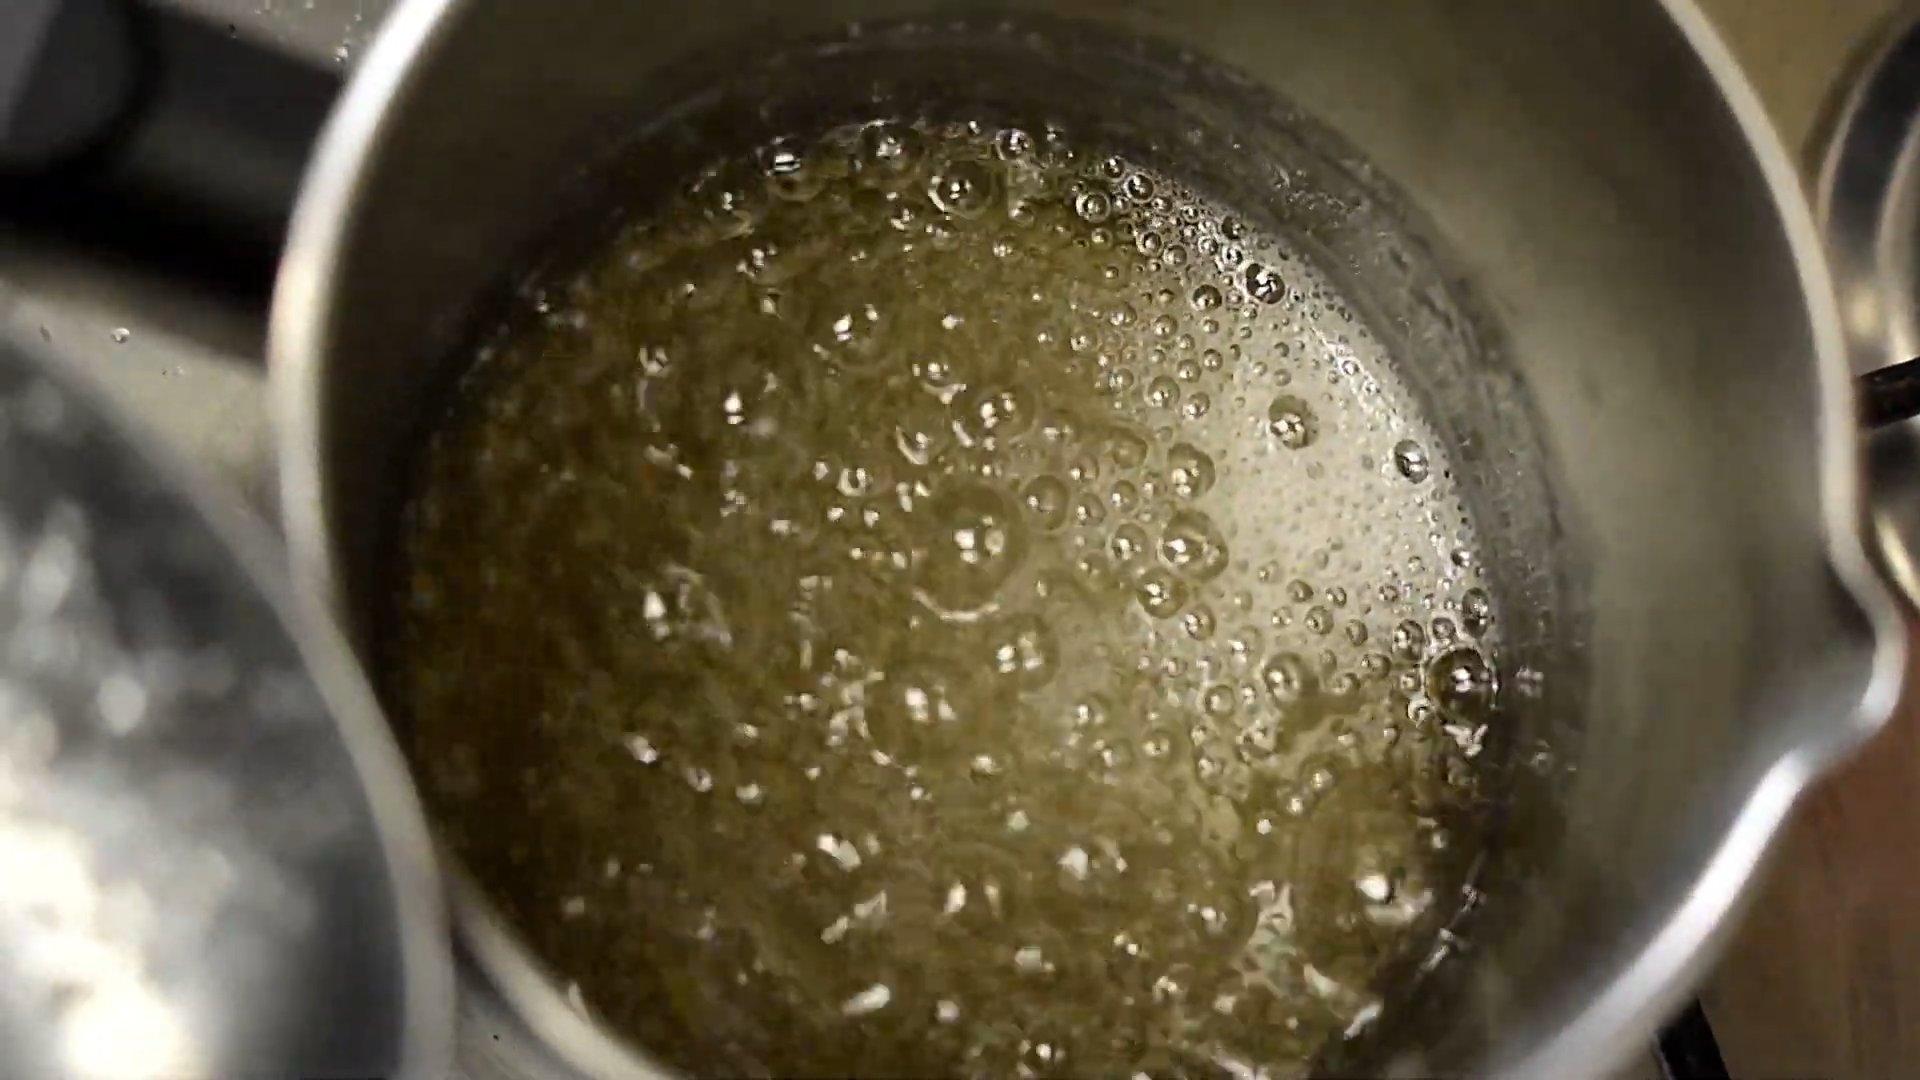
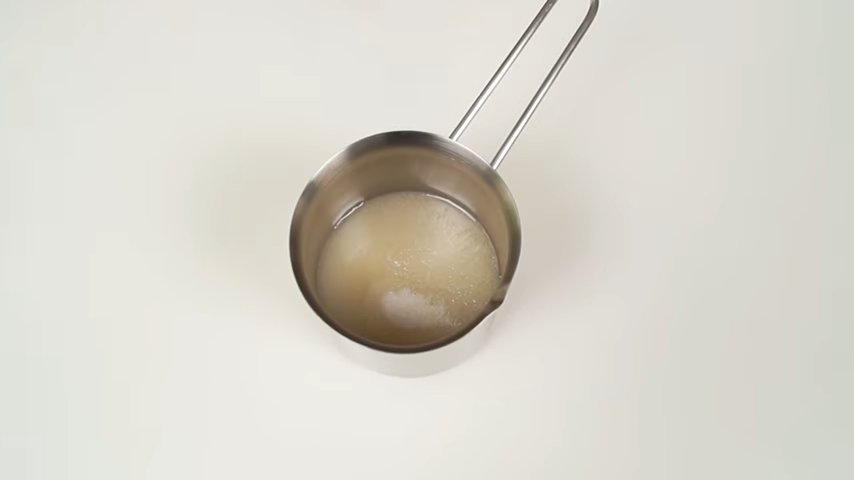
Let's prepare the broken glass shards. Pour water into a saucepan, add sugar, and one tablespoon of glucose syrup.

Step 8
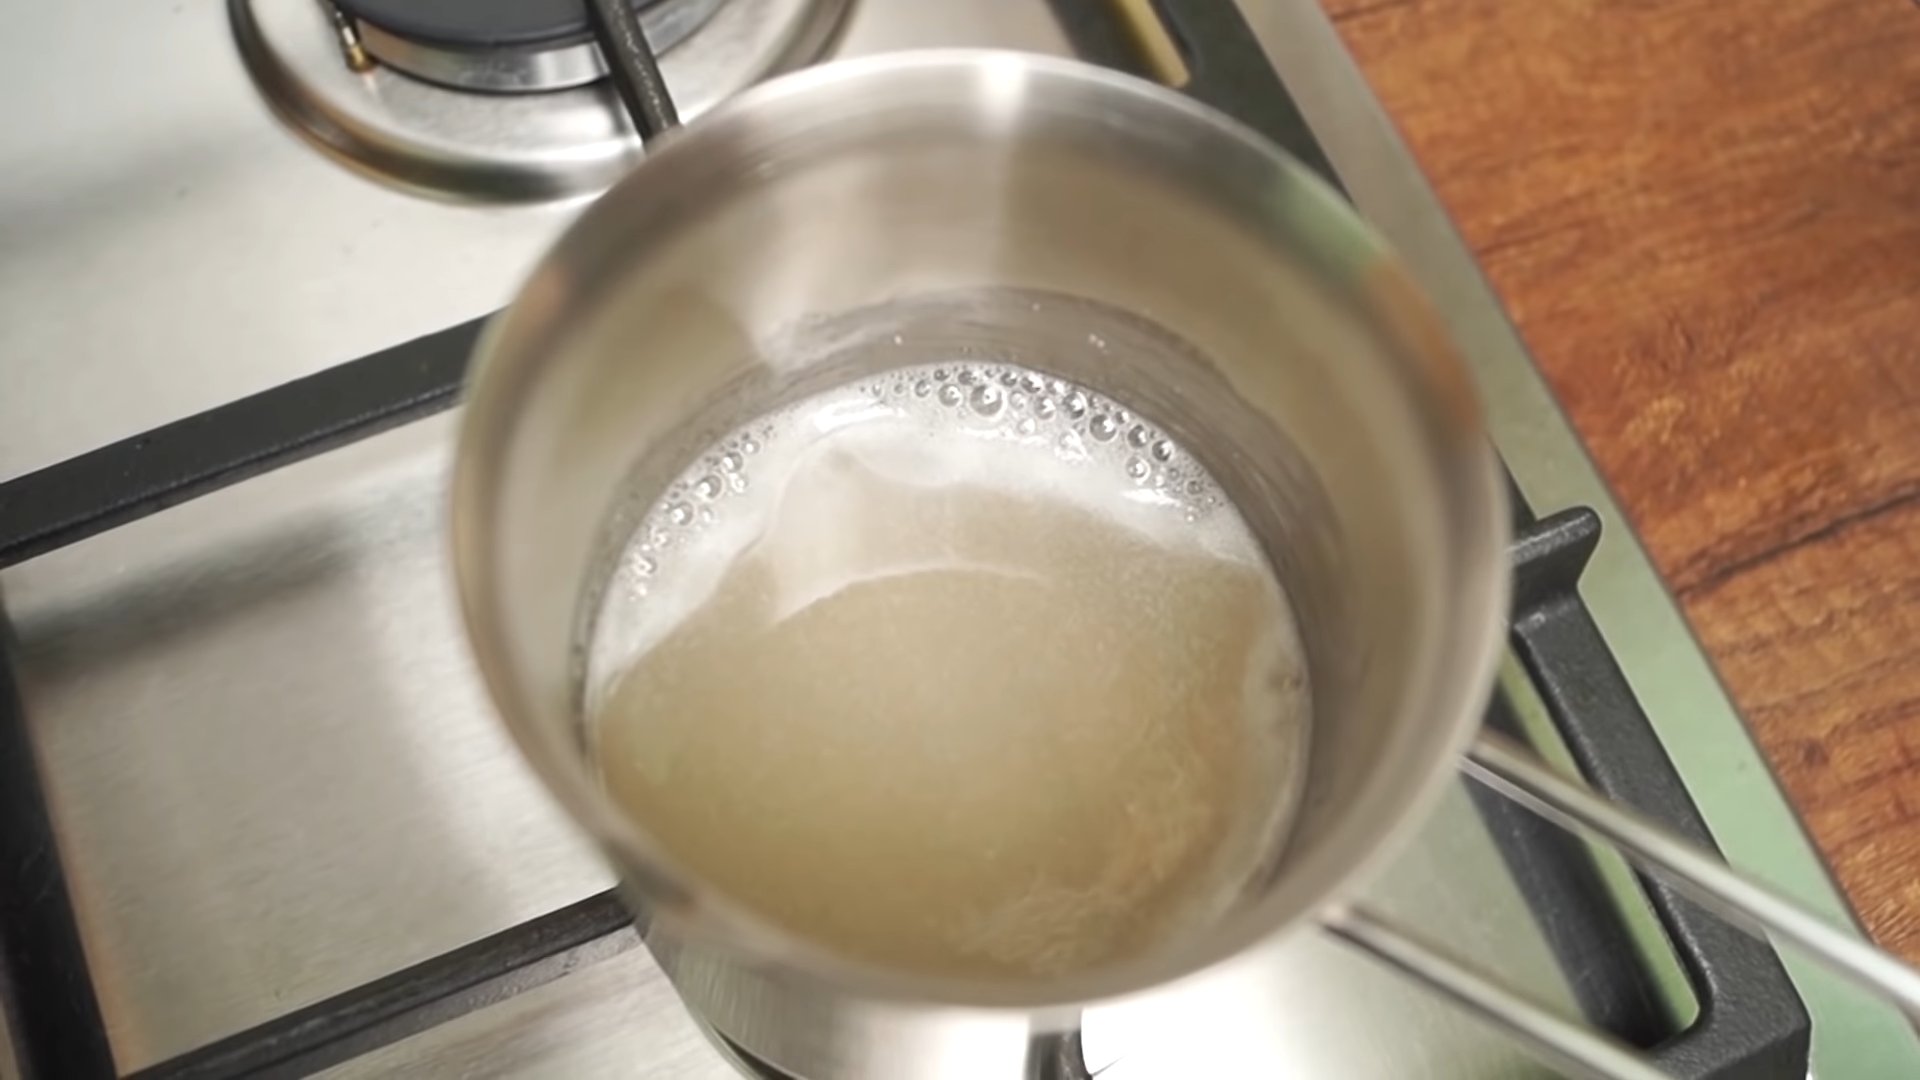
Place the saucepan over medium heat and simmer the syrup for 10 minutes. The syrup should reach a temperature of 145 degrees Celsius (285 degrees Fahrenheit). If you don't have a thermometer, you can test the syrup's readiness by dropping a small amount into cold water. If it caramelizes immediately, the syrup is ready.
Step 9
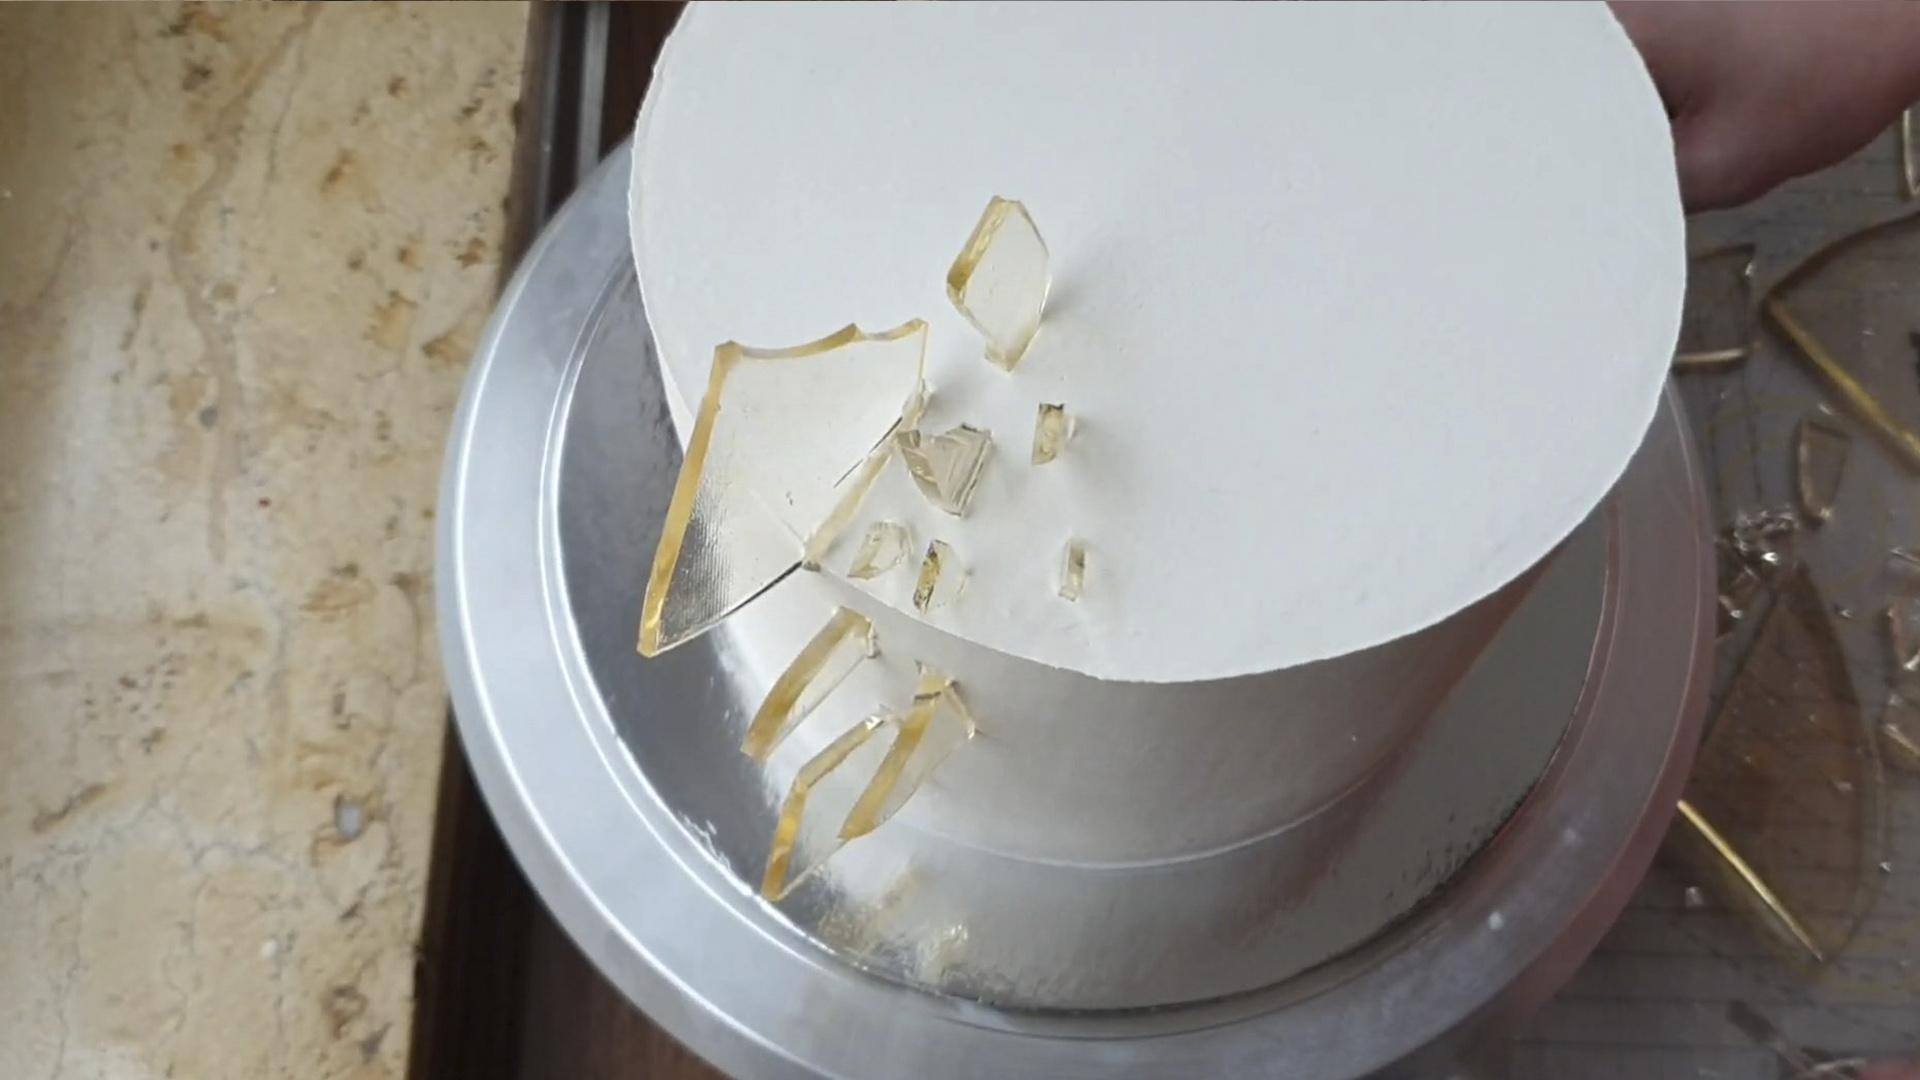
Pour the finished caramel onto a silicone mat, spread it evenly and leave to cool.
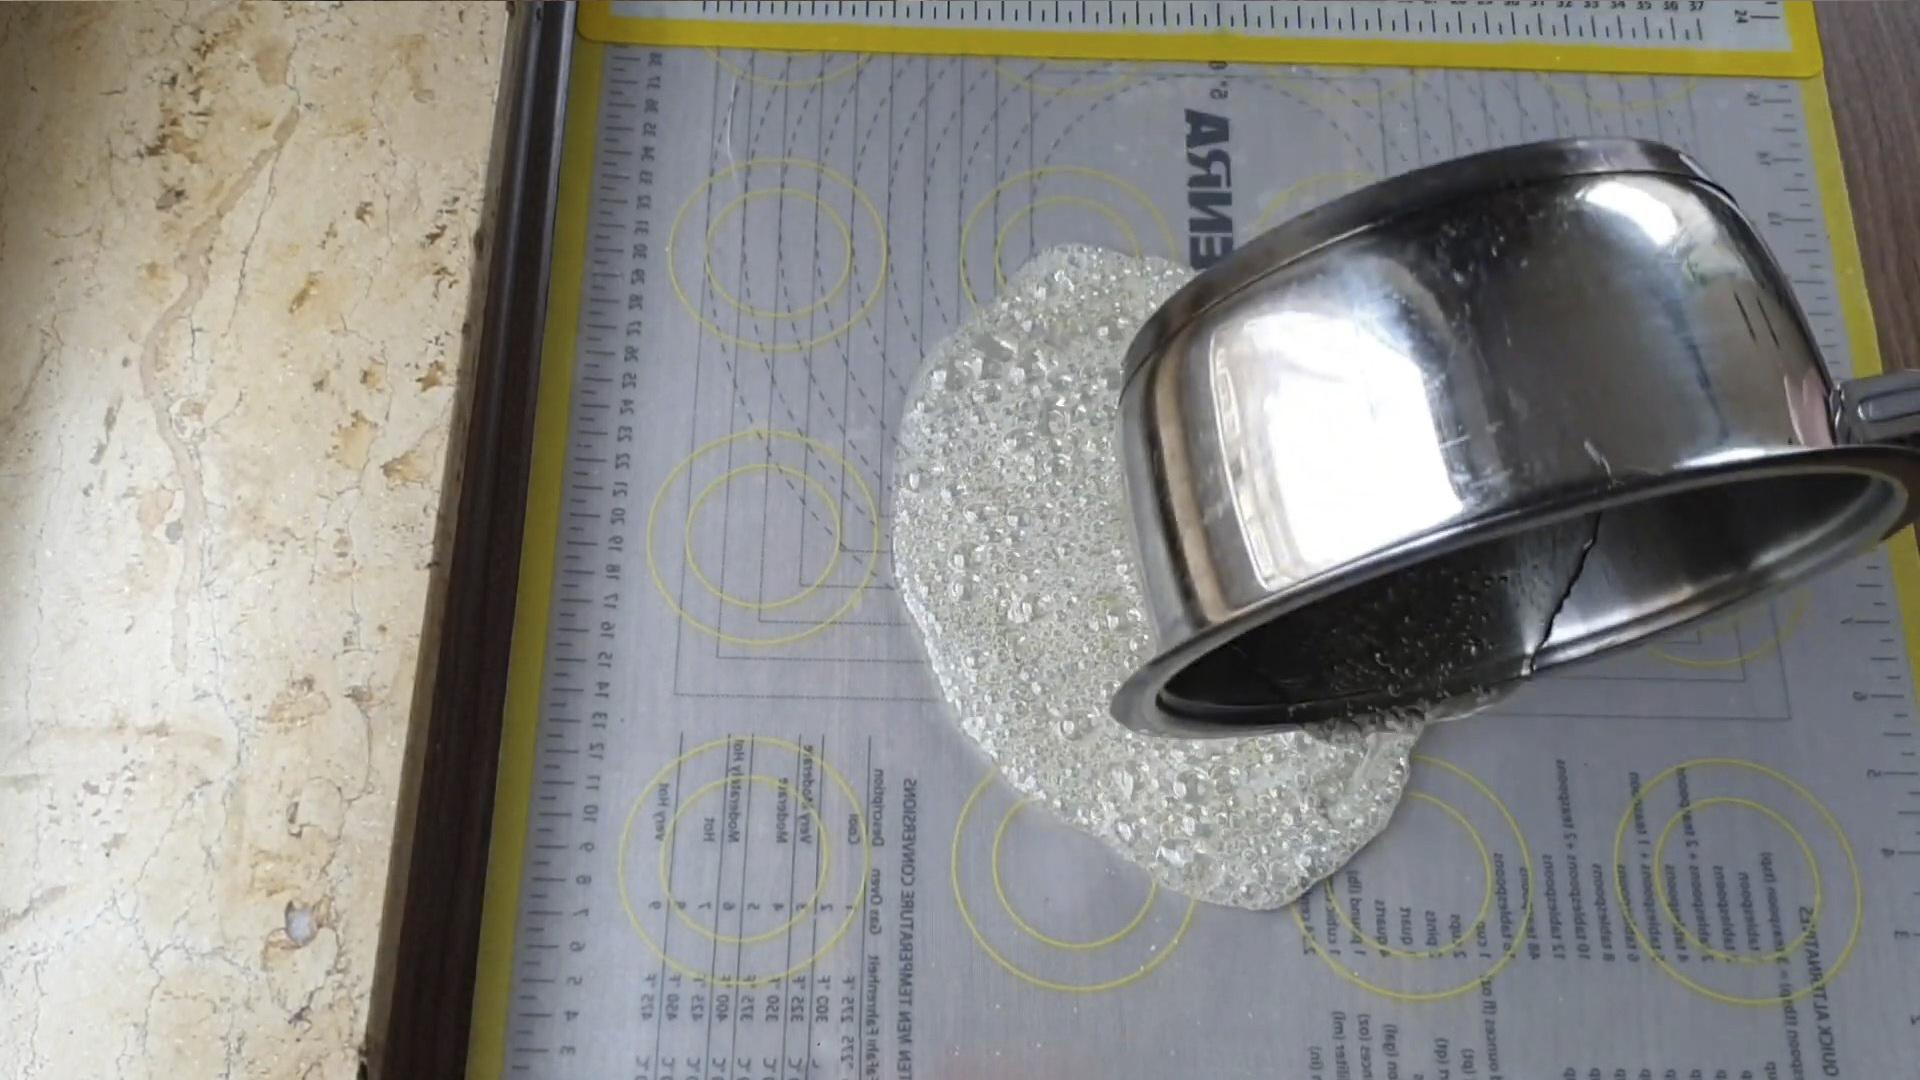
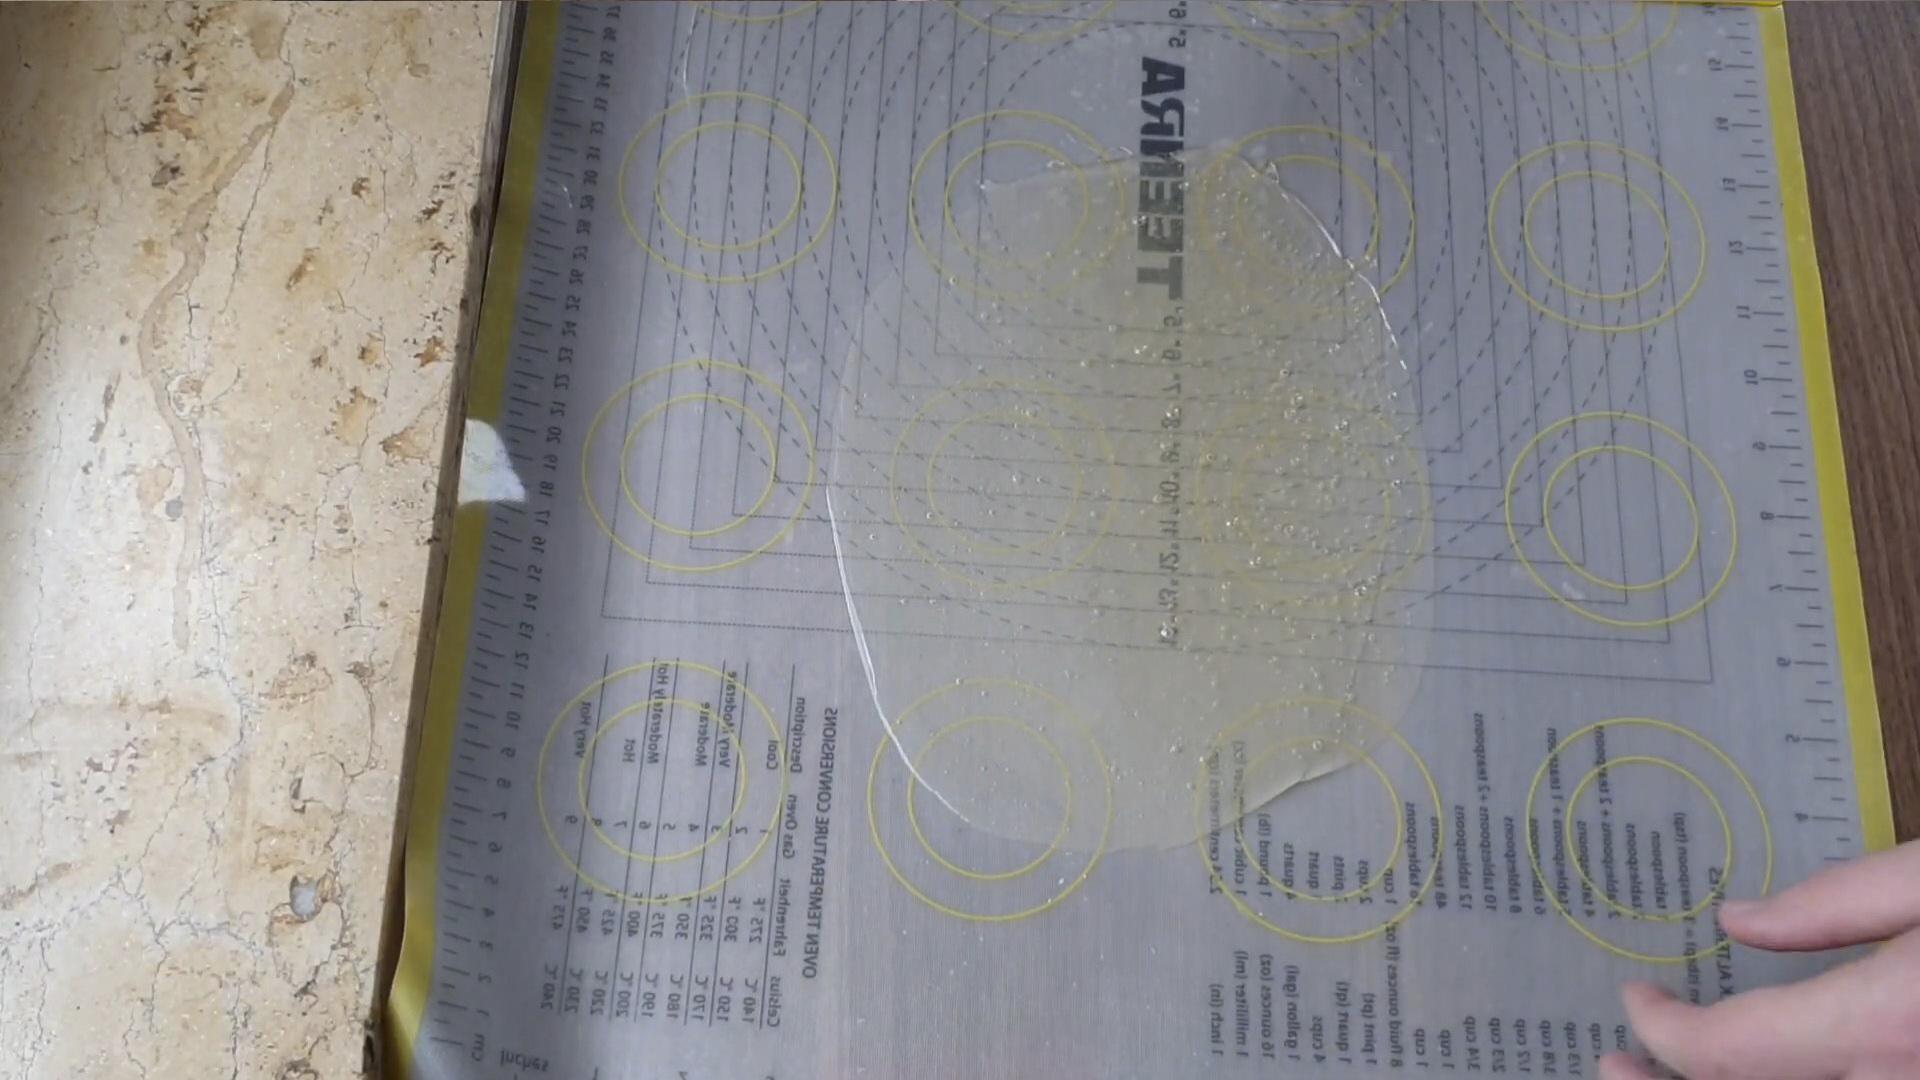
Step 10
When the caramel has cooled, carefully remove it from the silicone mat and throw it on the table.
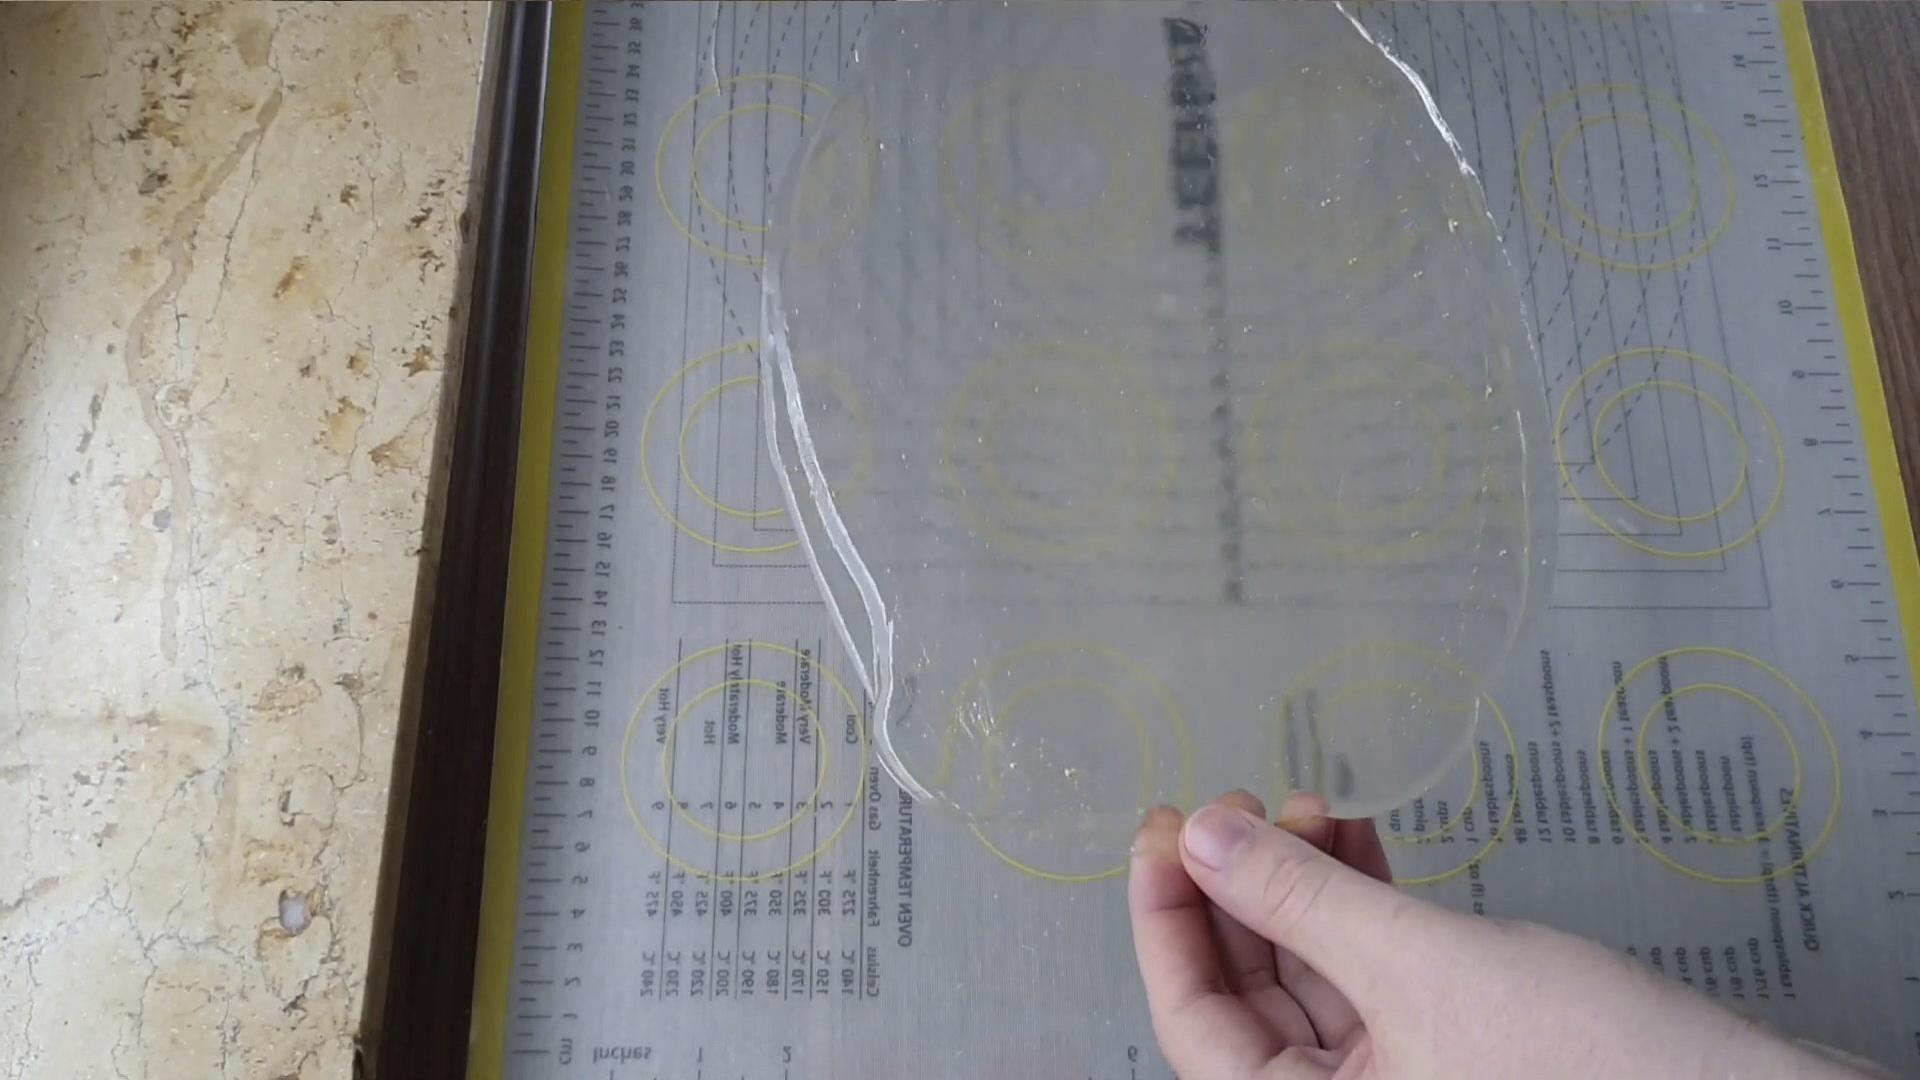
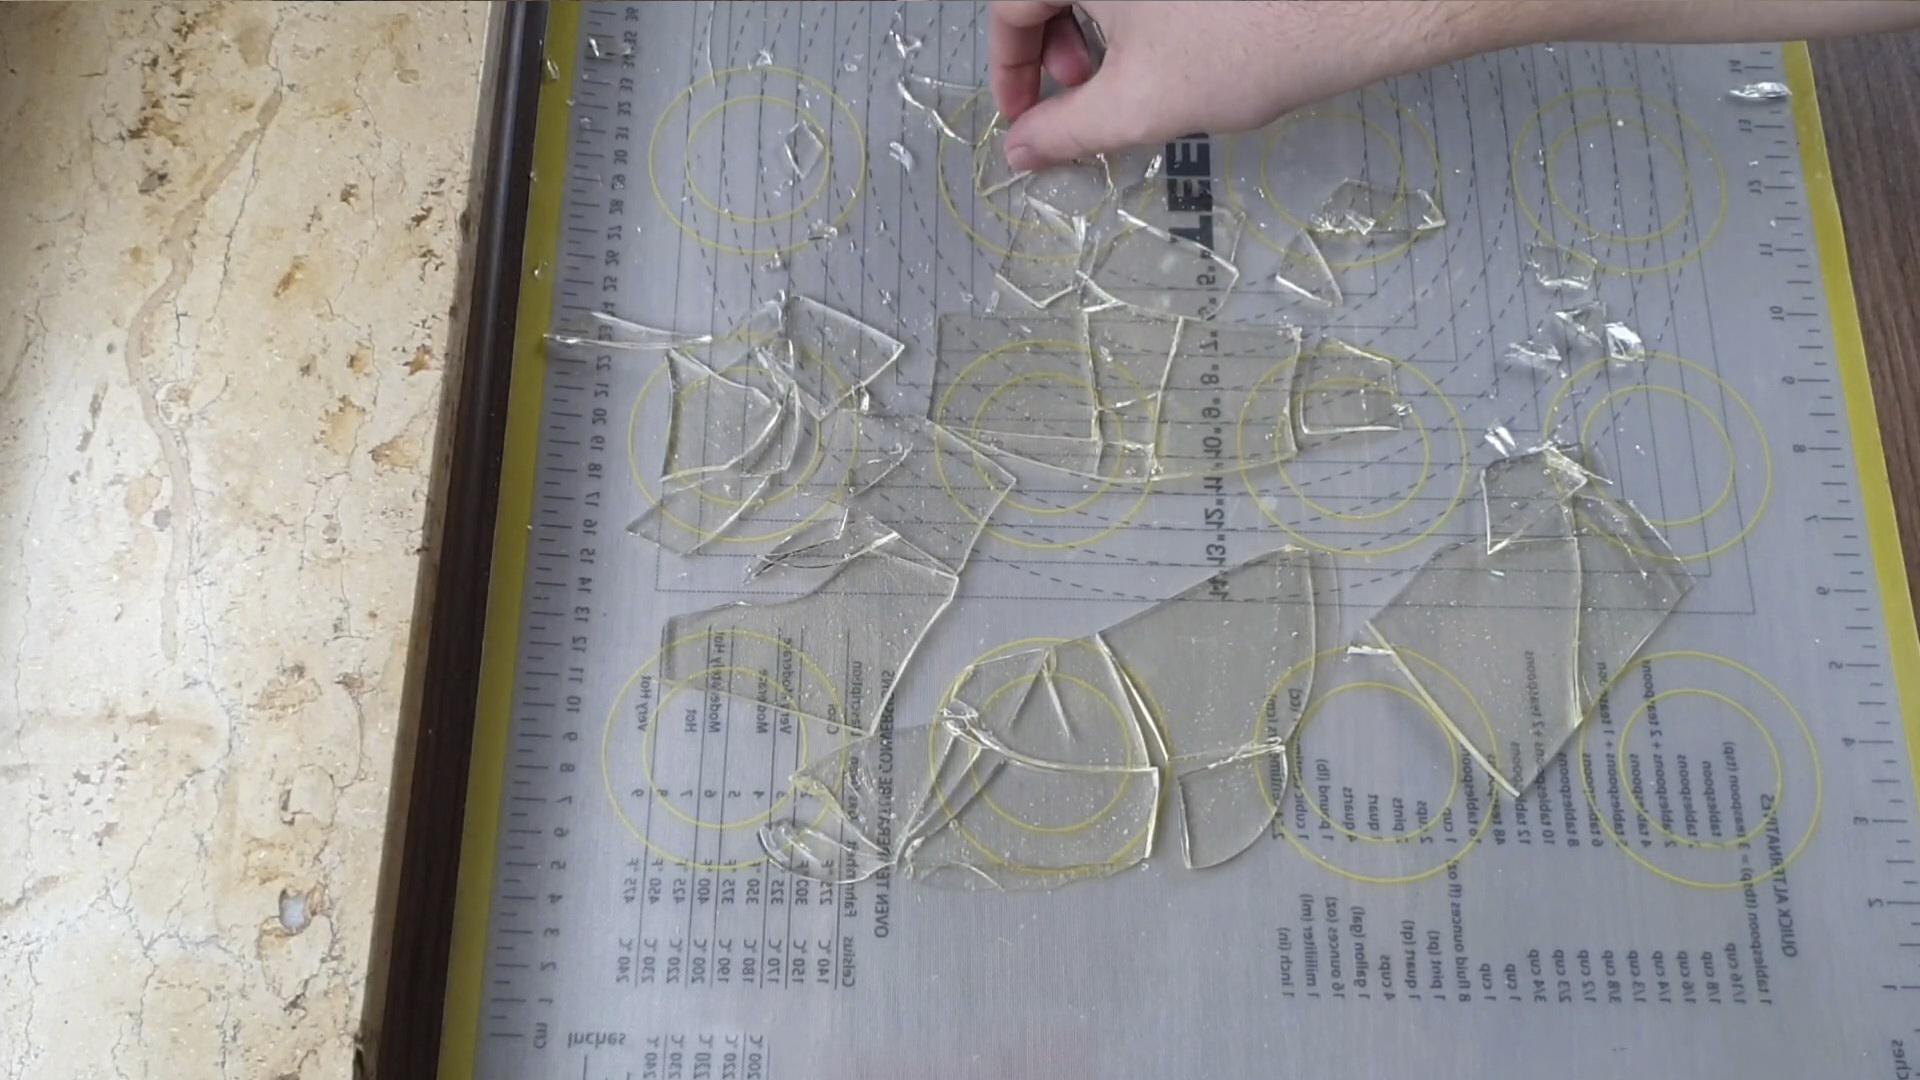
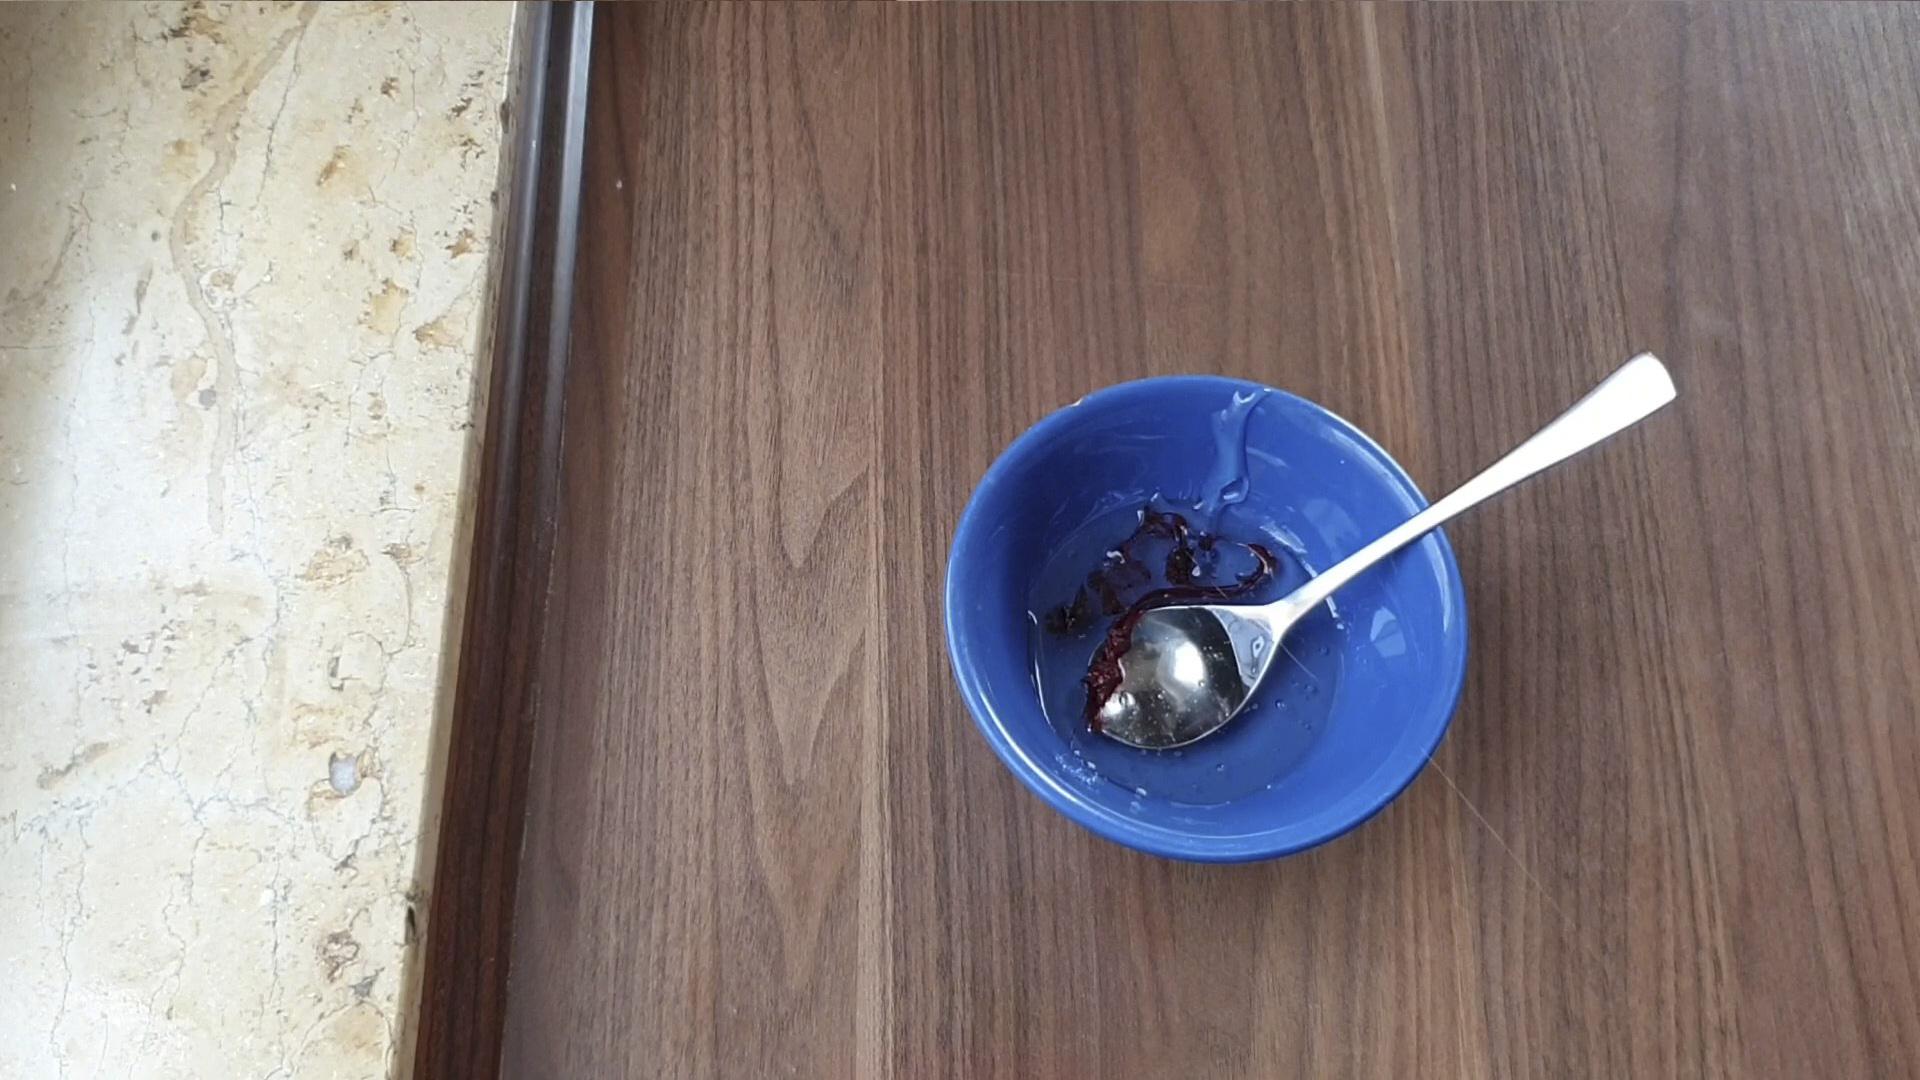
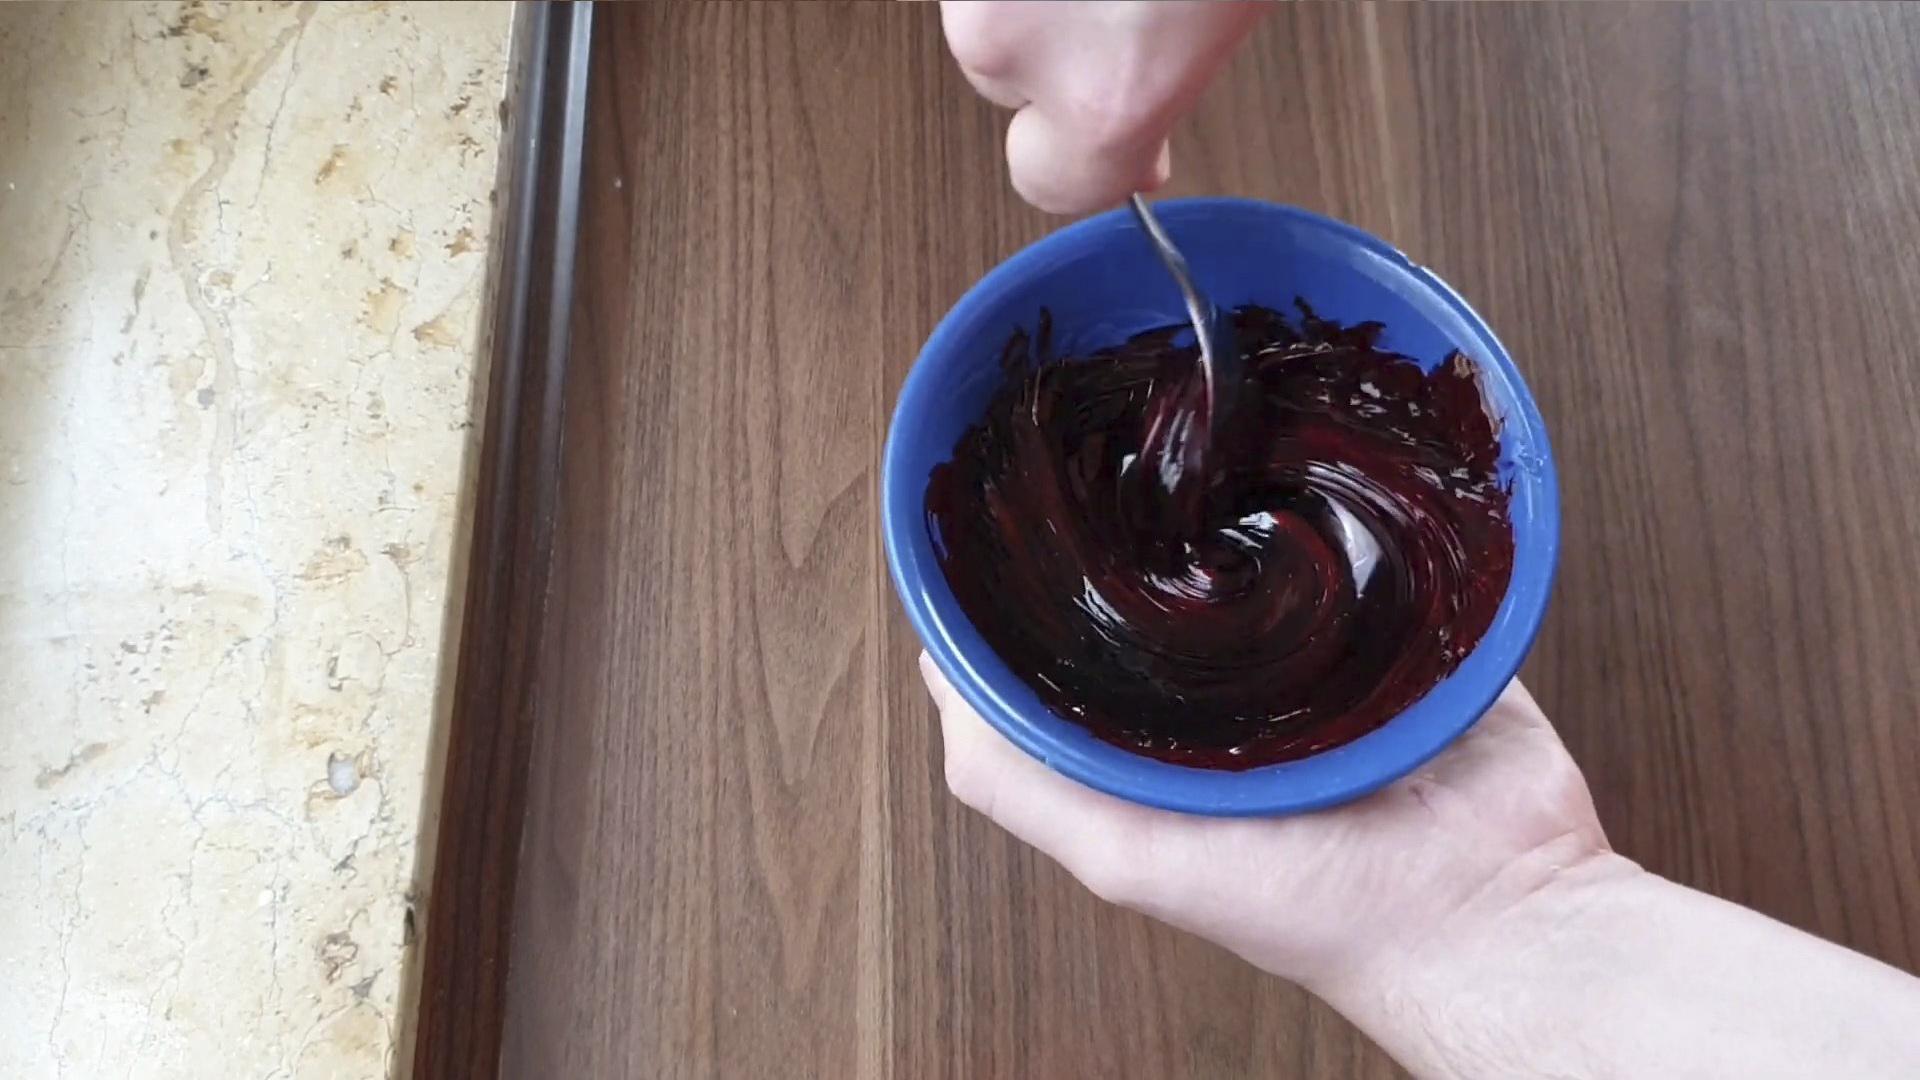
Step 11
Next, let's prepare the artificial blood. Mix the remaining glucose syrup with a few drops of red gel food coloring and a drop of blue.
Step 12
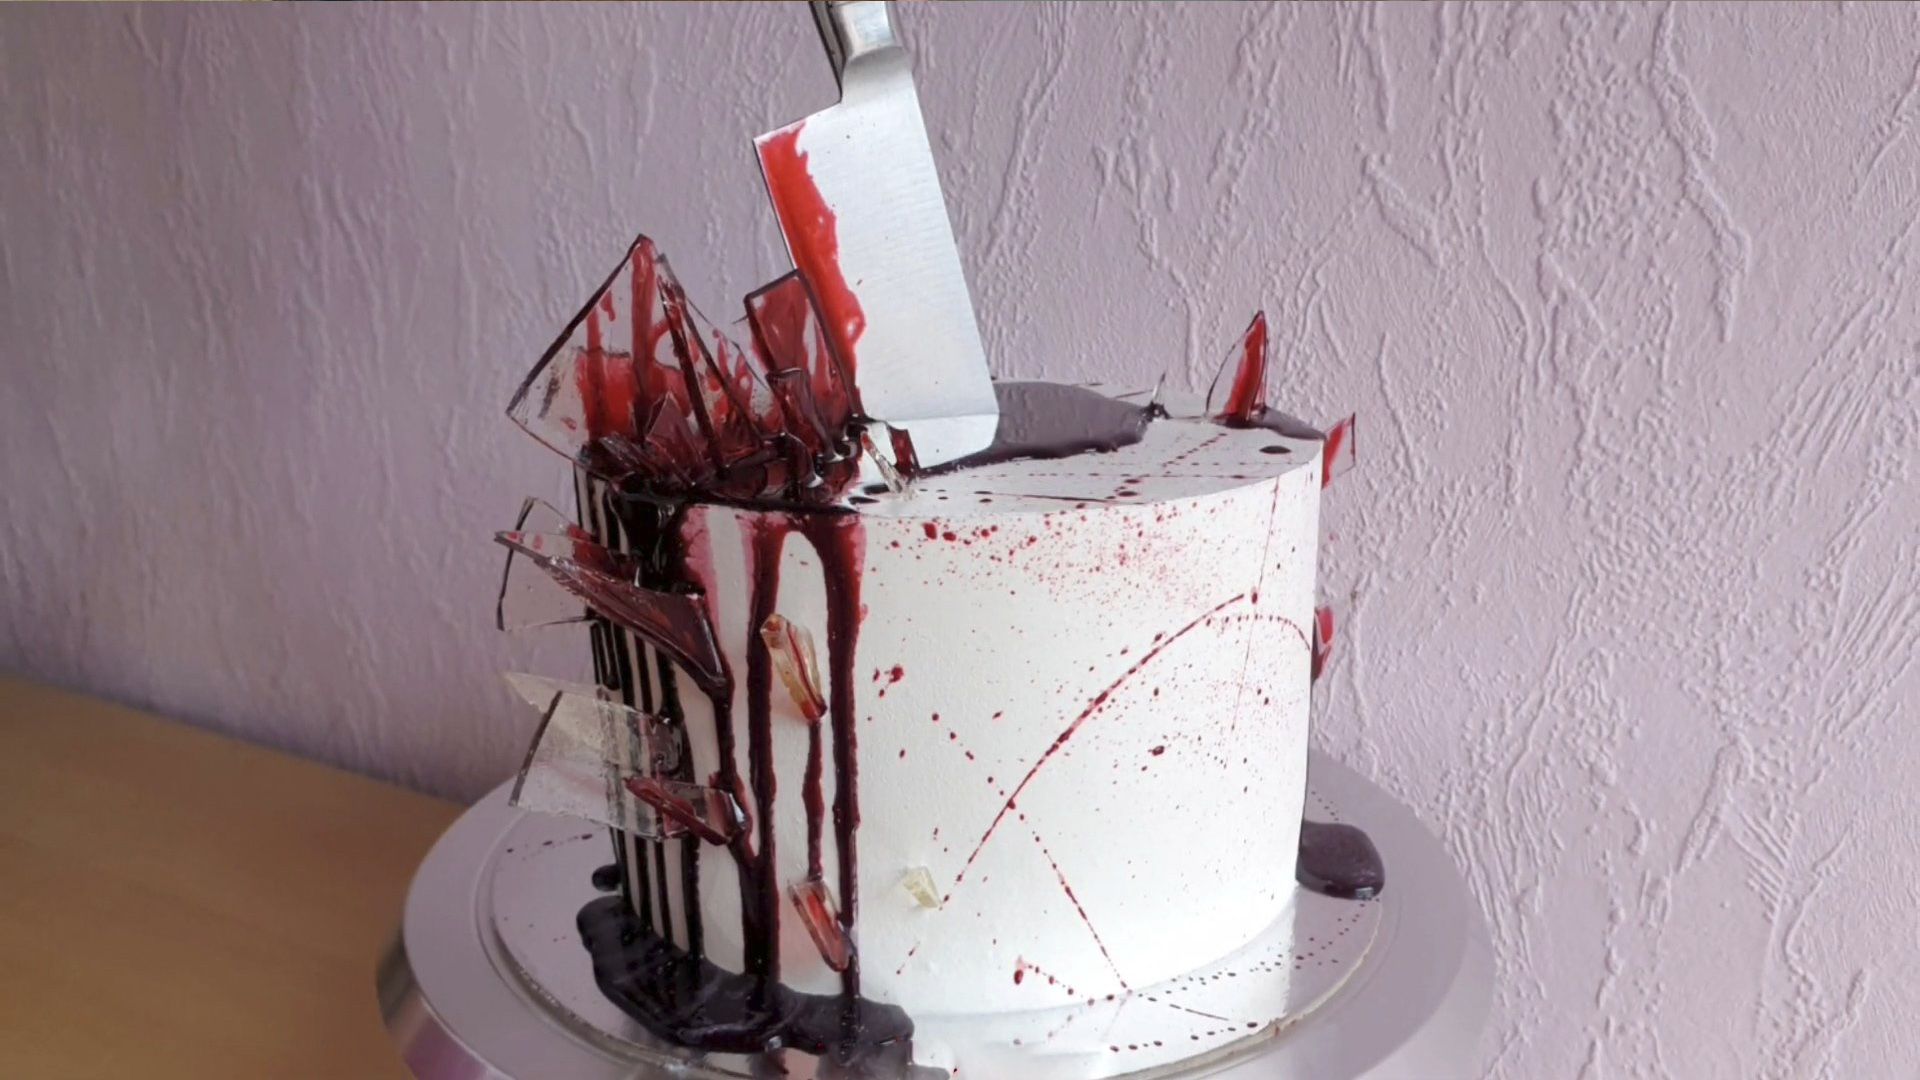
Remove the cake from the refrigerator and begin layering the caramel shards. Insert a large kitchen knife into the center of the cake.
Step 13
Place the glucose syrup in a pastry bag and apply it to the cake to imitate blood.

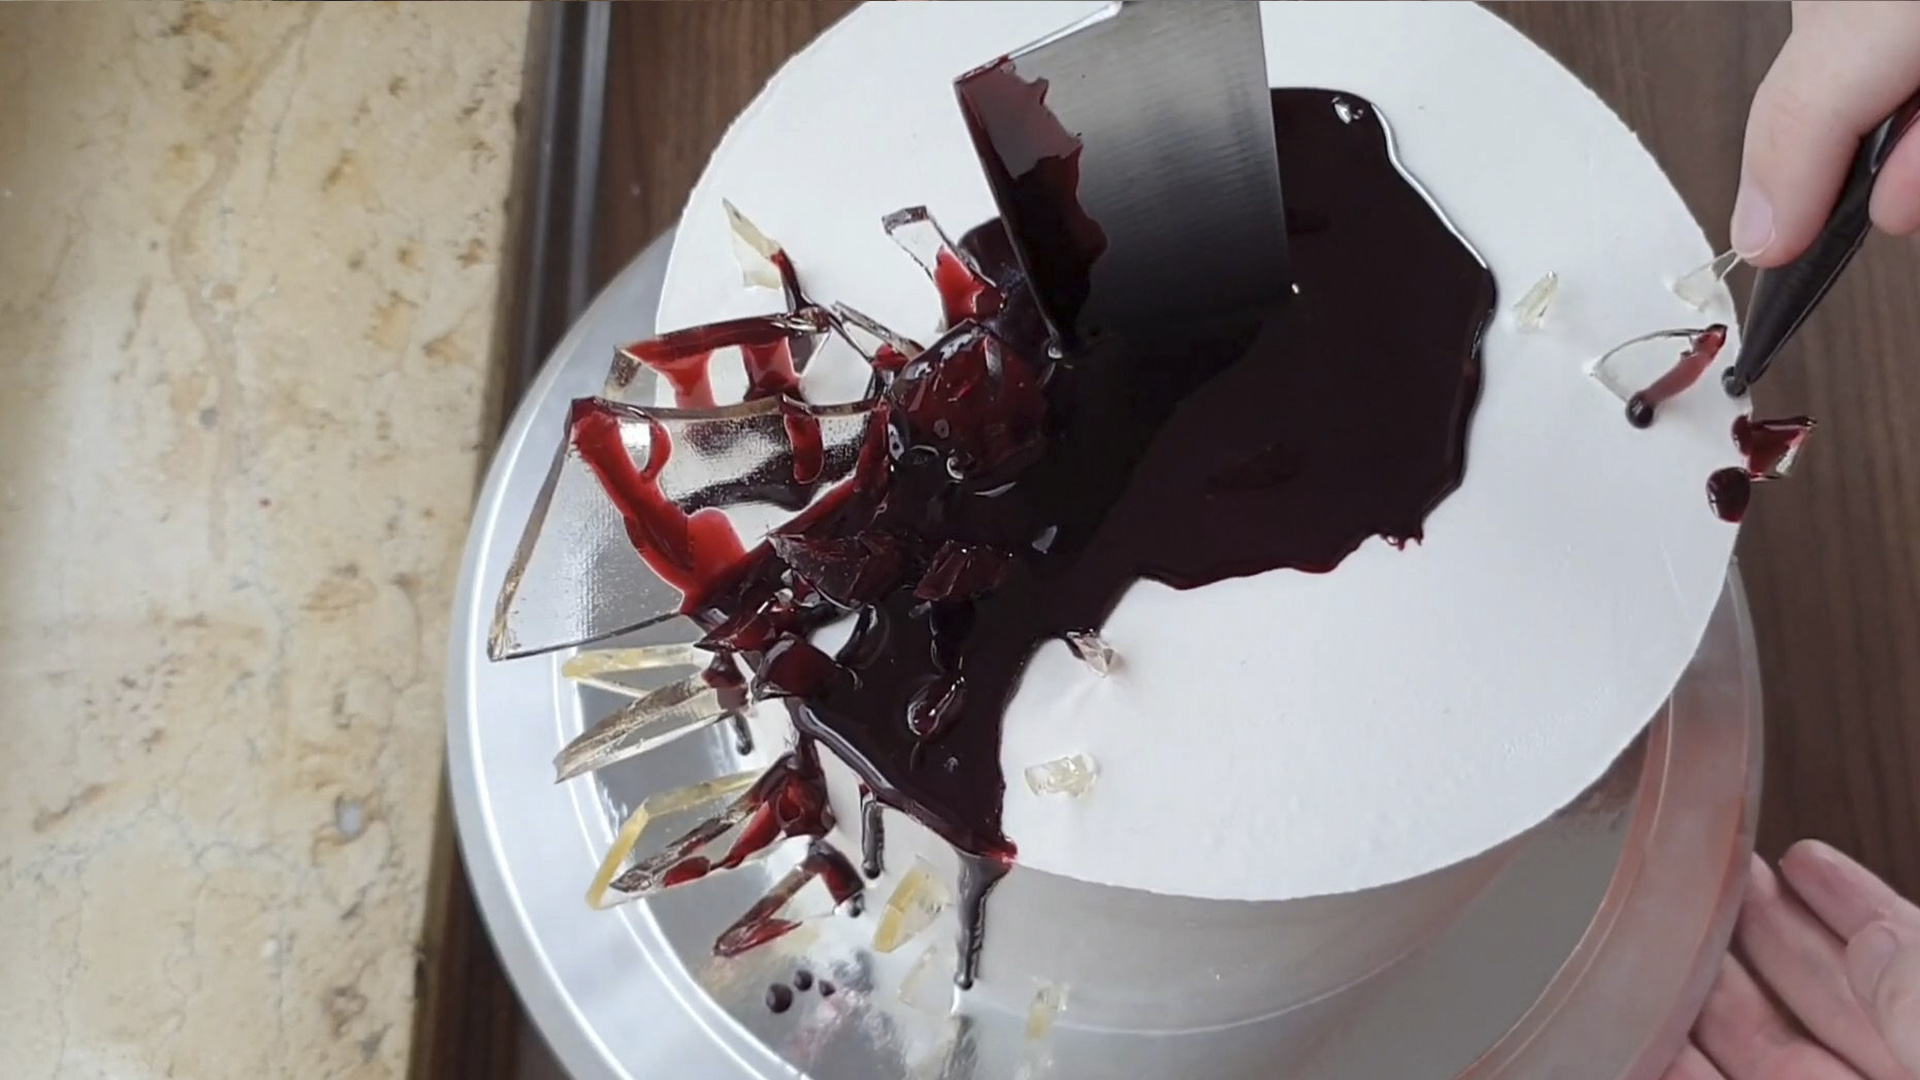
Step 14
The creepy knife cake for Halloween is ready.
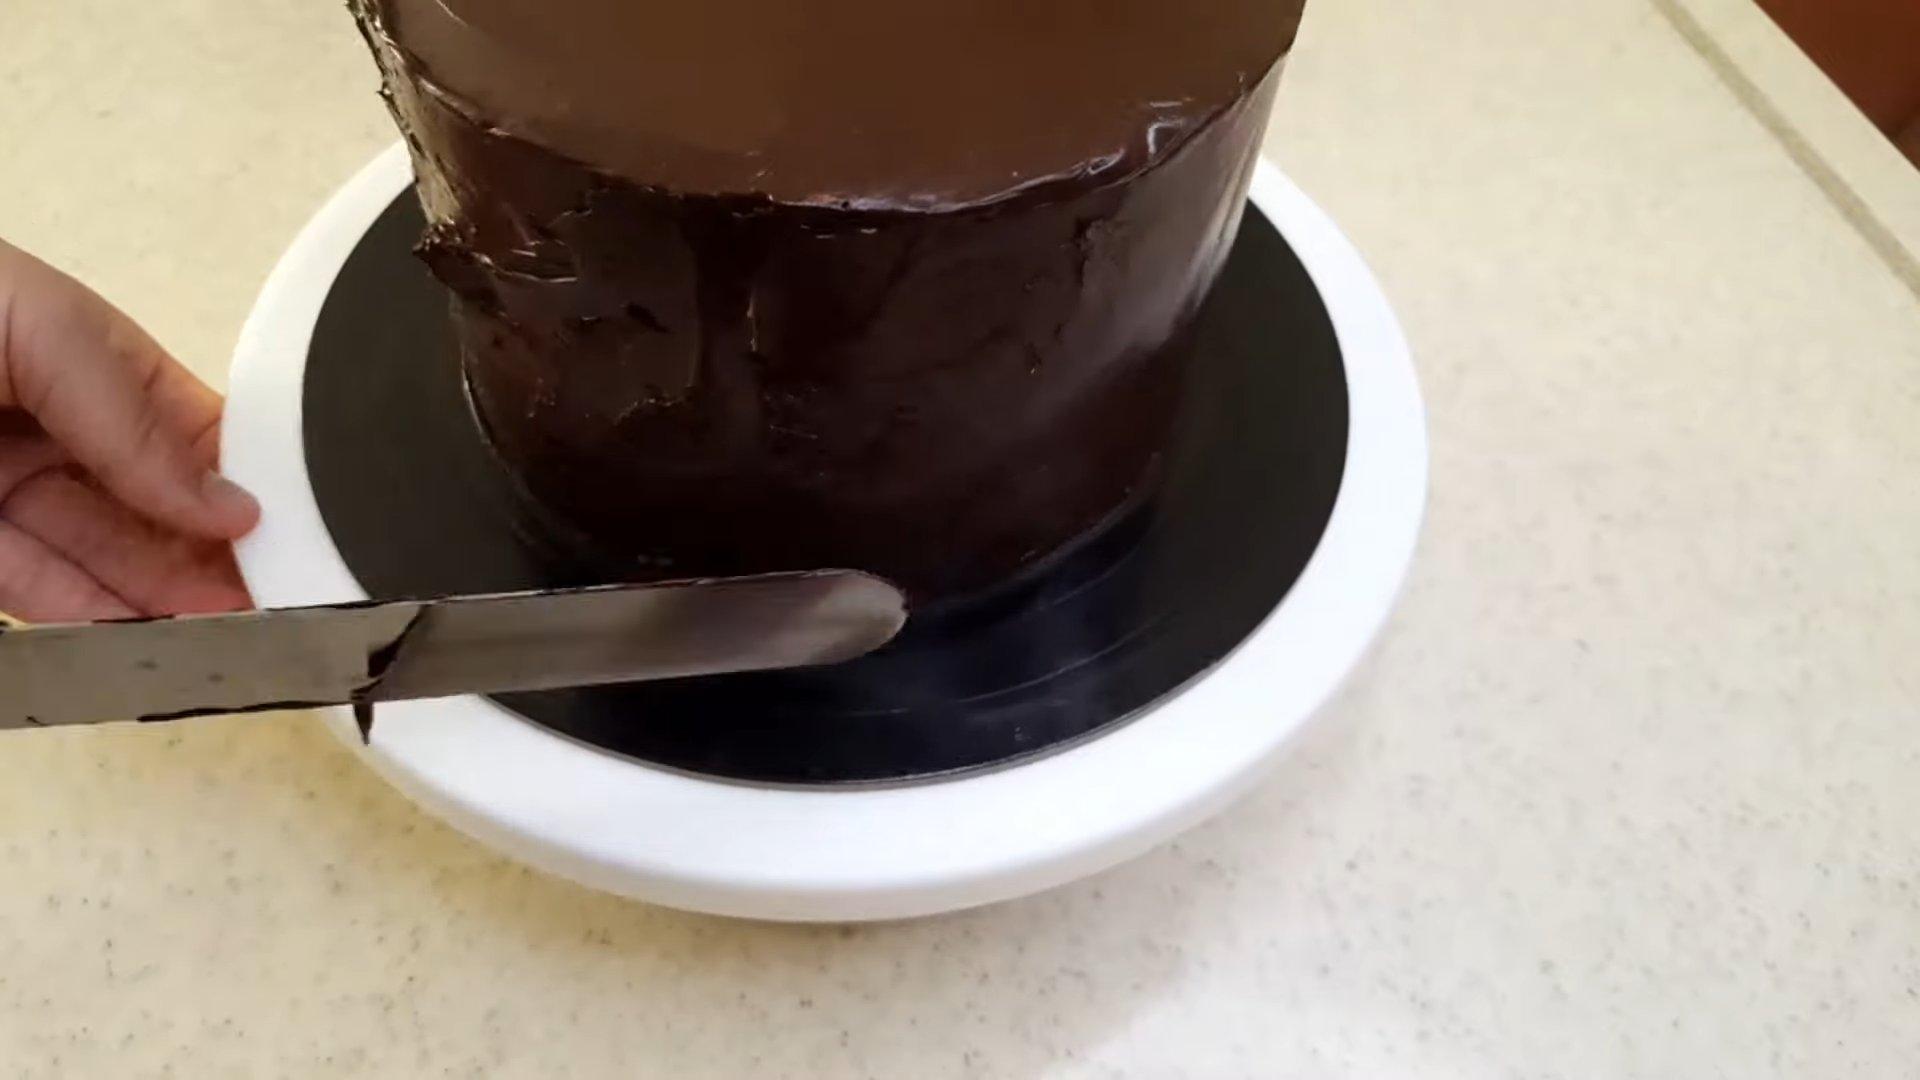
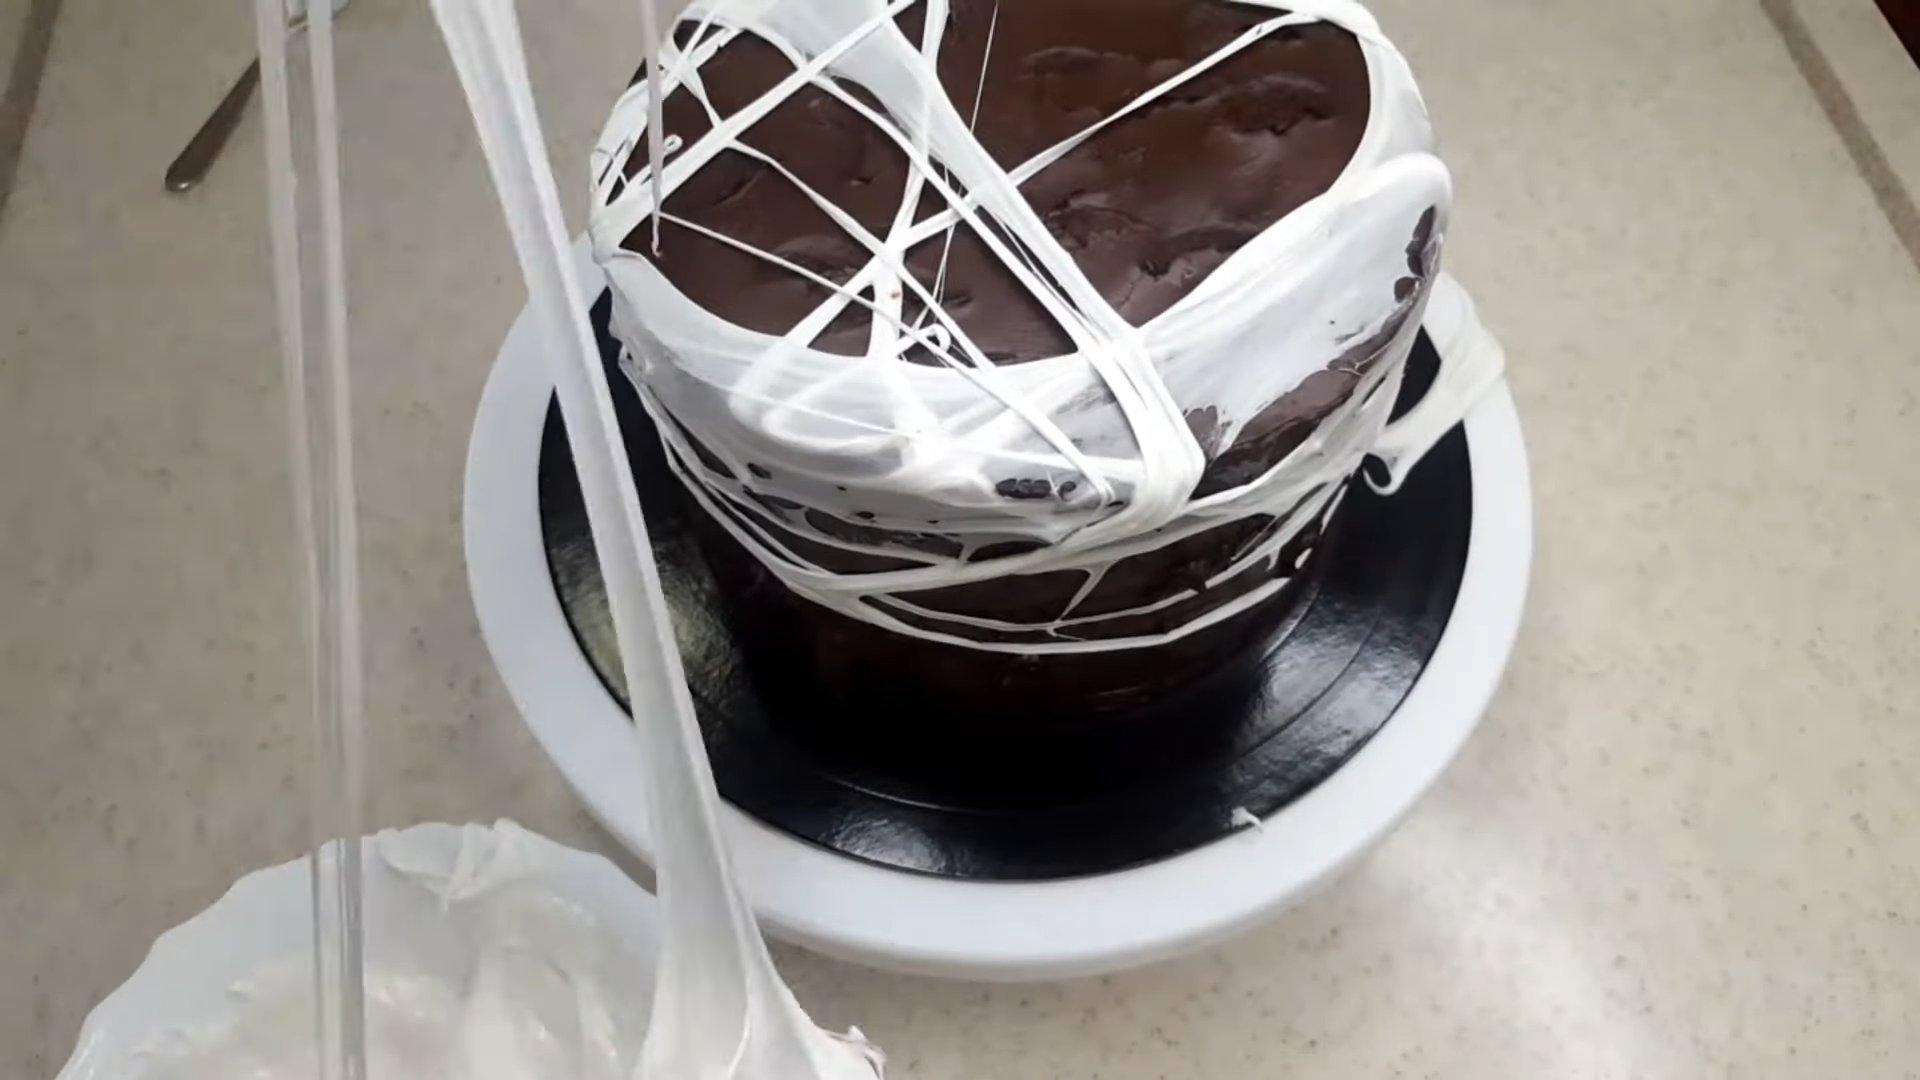
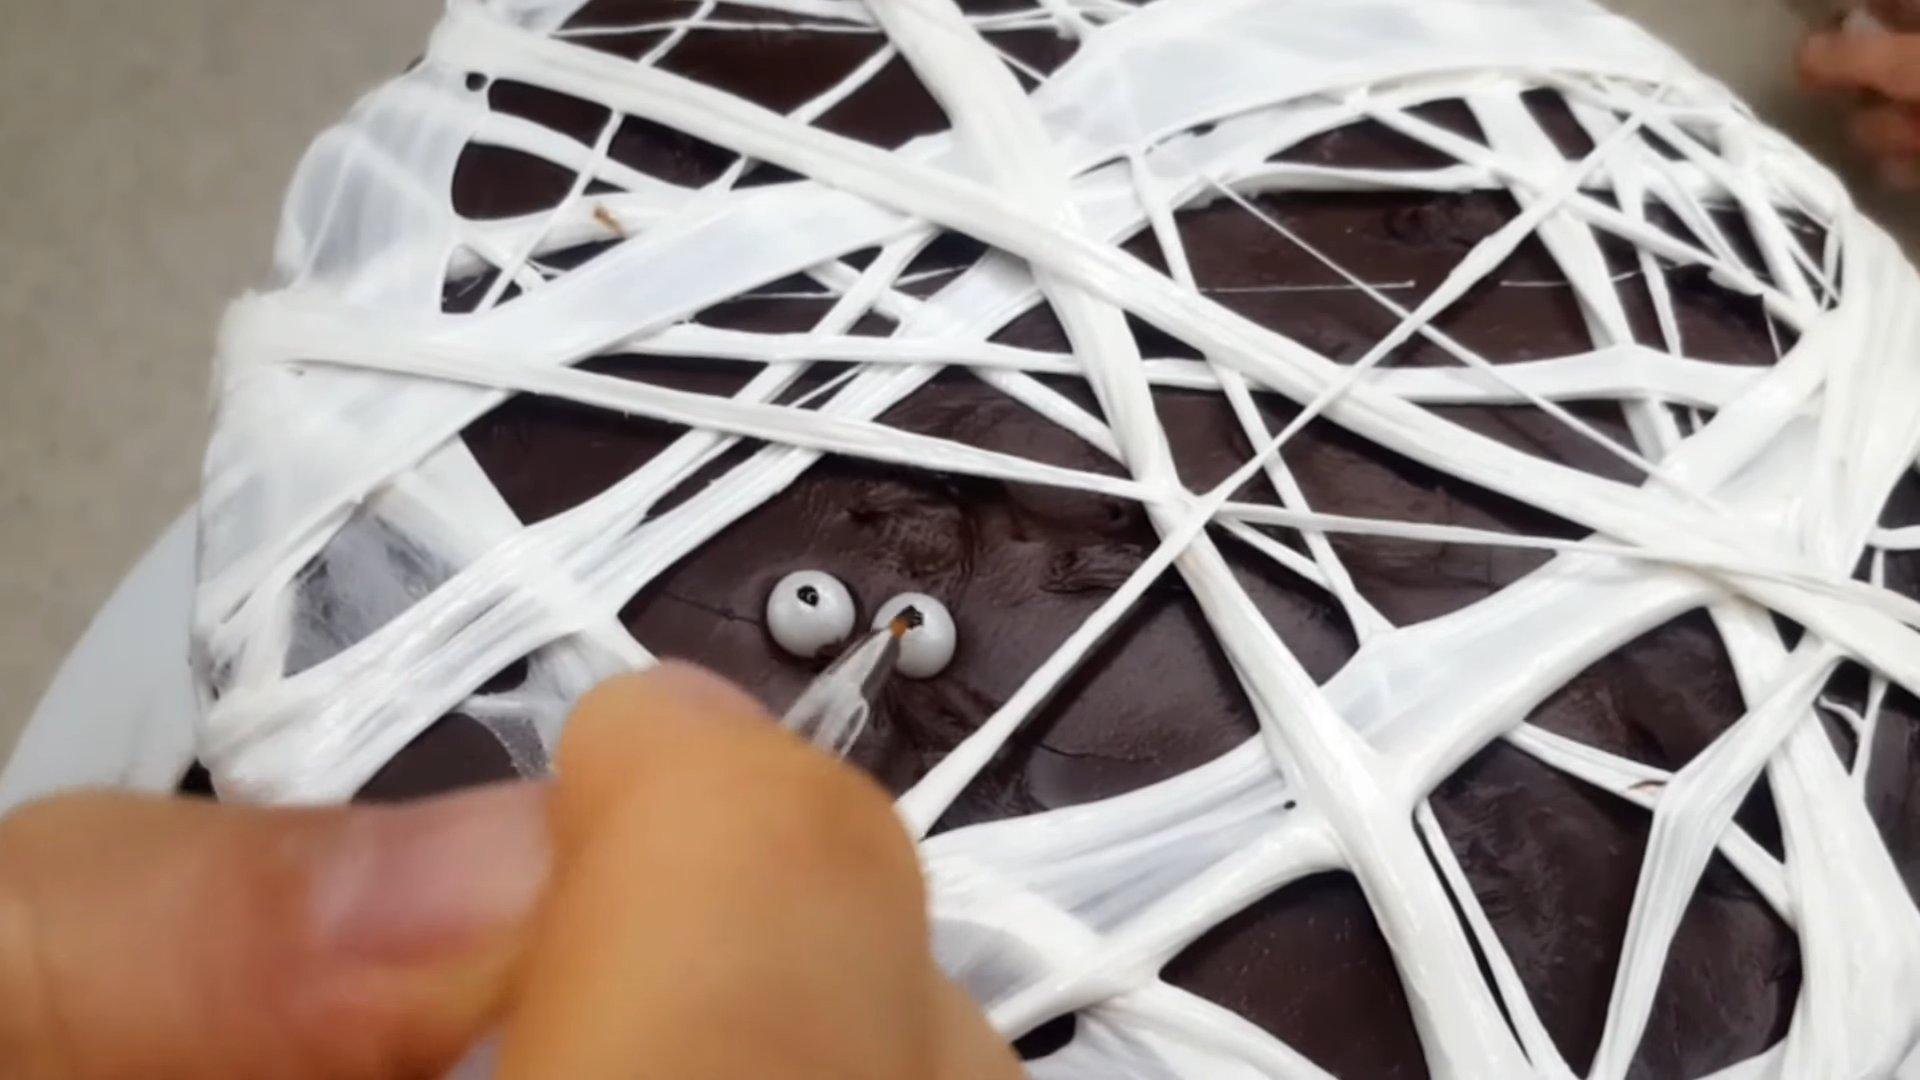
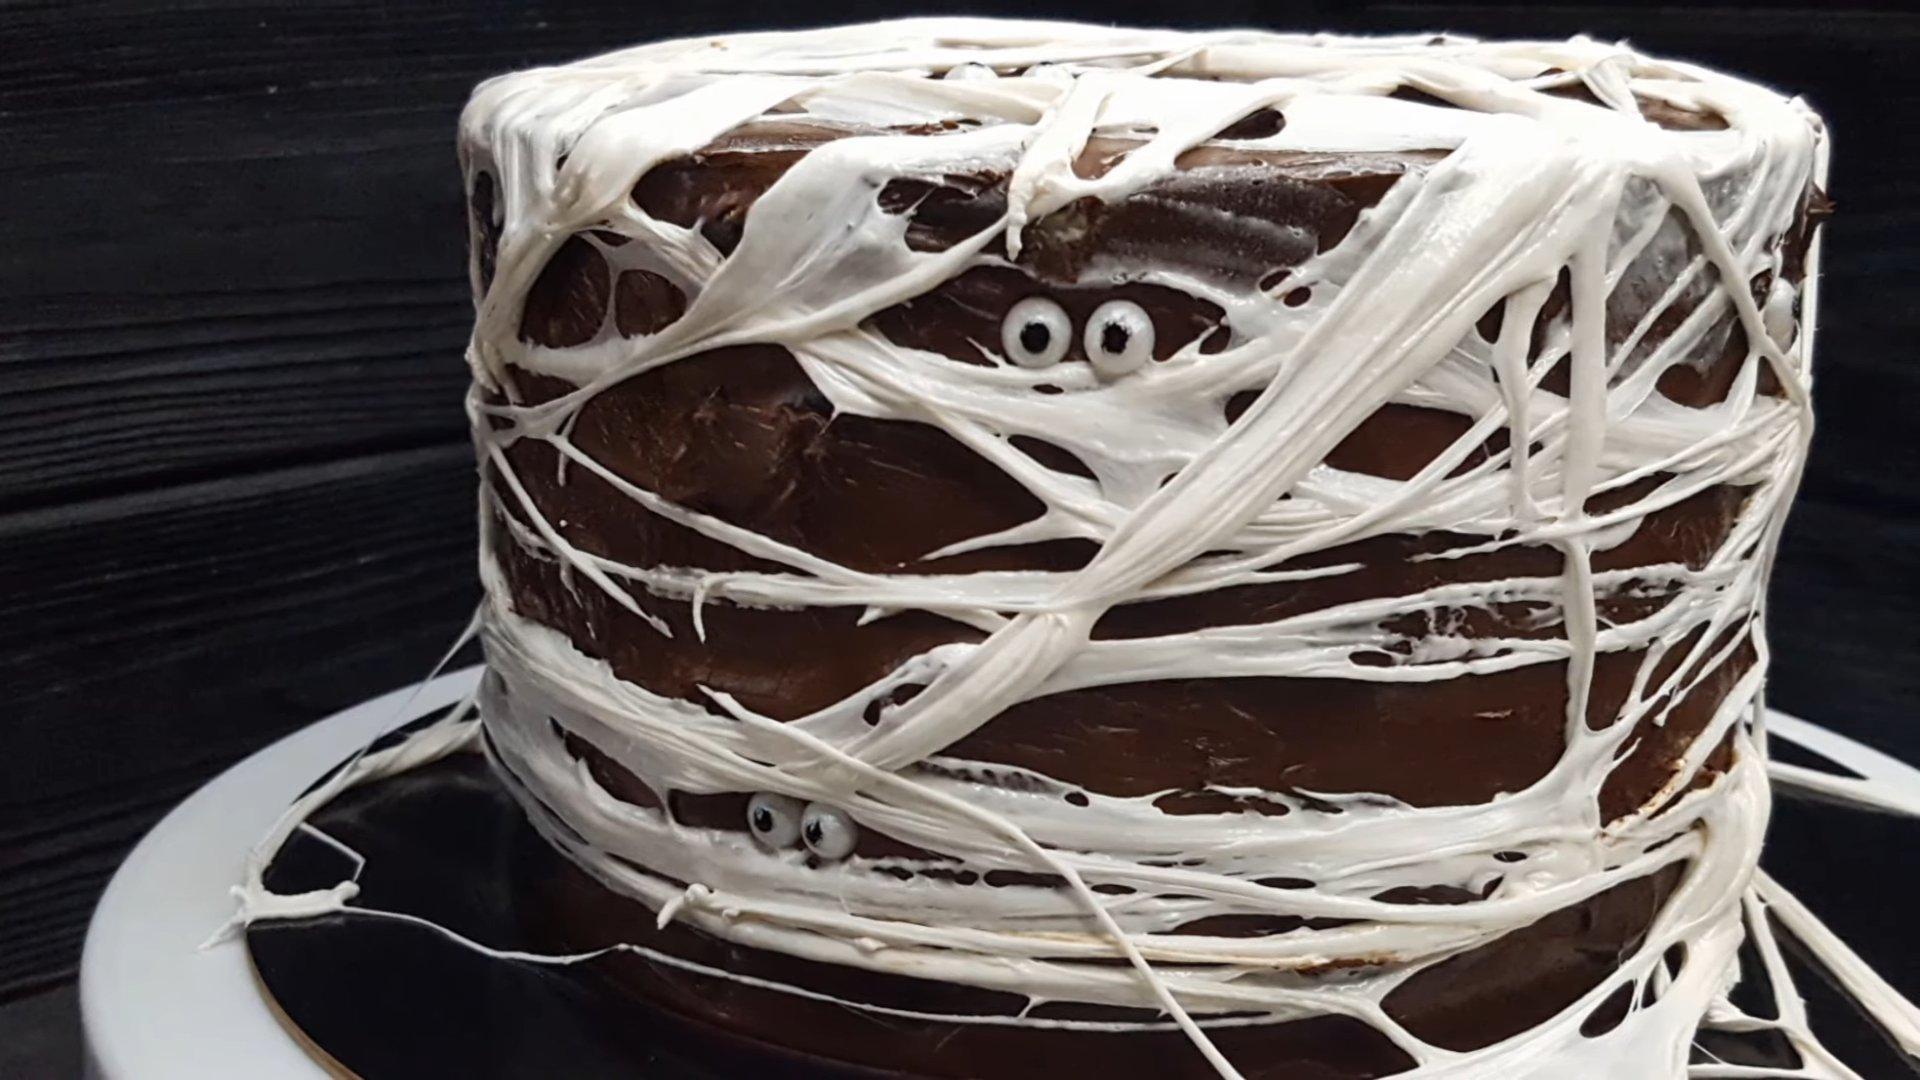
Mummy Cake
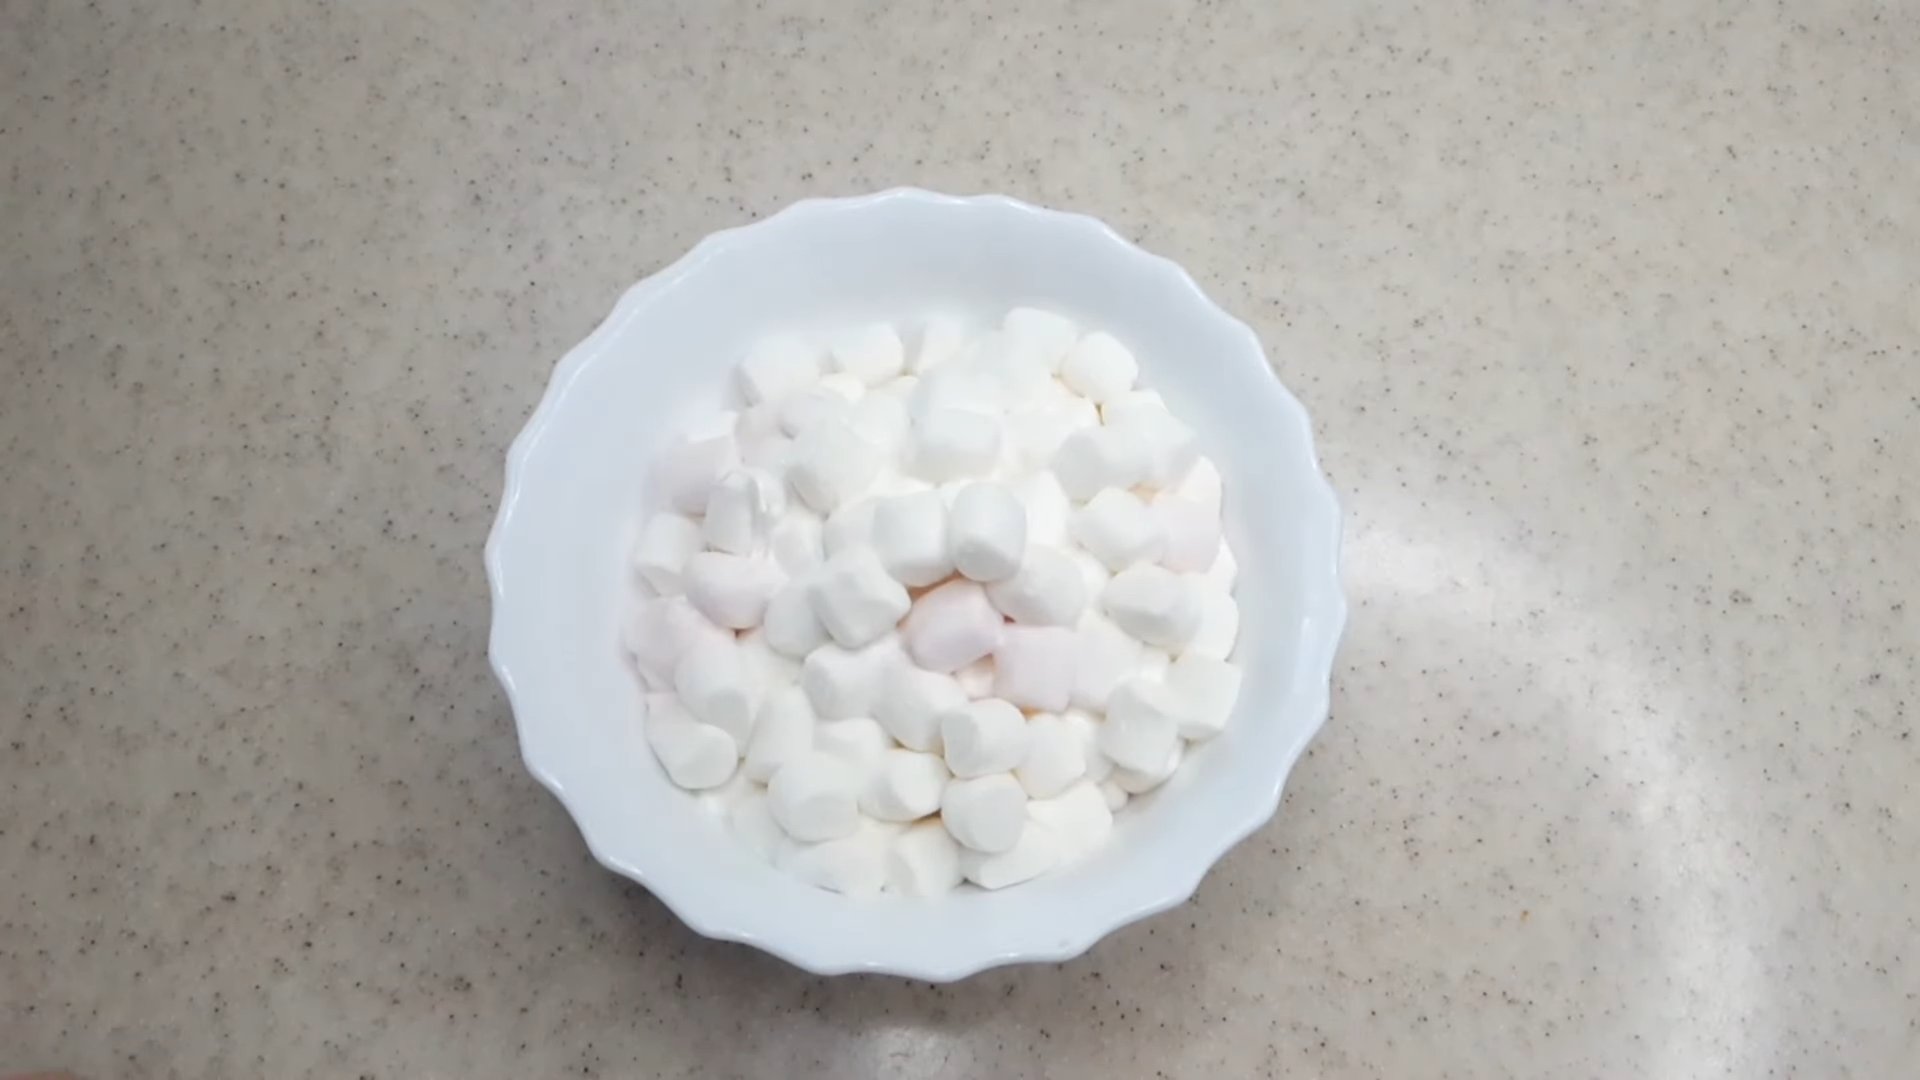
This is another fun Halloween cake design idea. To create the "Mummy," you'll need just a few time and ingredients. Any tall sponge cake can be used as a base. We'll smooth it out with ganache and decorate it with fluffy marshmallows. You'll definitely be delighted with the results.
Ingredients
- Cream 33% - 150 ml
- Dark chocolate - 150 g
- White marshmallows - 200-300 g
- Sugar beads - 10-14 pcs.
- Gel food coloring - black
Cooking time: 1 hour 30 minutes
Servings: 1
Step-by-step recipe
Step 1
Prepare the ganache. Combine the cream and chocolate in a glass bowl.
Step 2
Mix the ingredients and heat the mixture in the microwave in several stages, stirring thoroughly each time.
Step 3
To make the cream smooth, blend it.
Step 4
Cover the finished ganache with cling film and place in the refrigerator for 1 hour.
Step 5
Using the cooled ganache, carefully level the surface of the cake.
Step 6
Place the marshmallows in a separate glass bowl, heat them slightly in the microwave and stir until smooth.
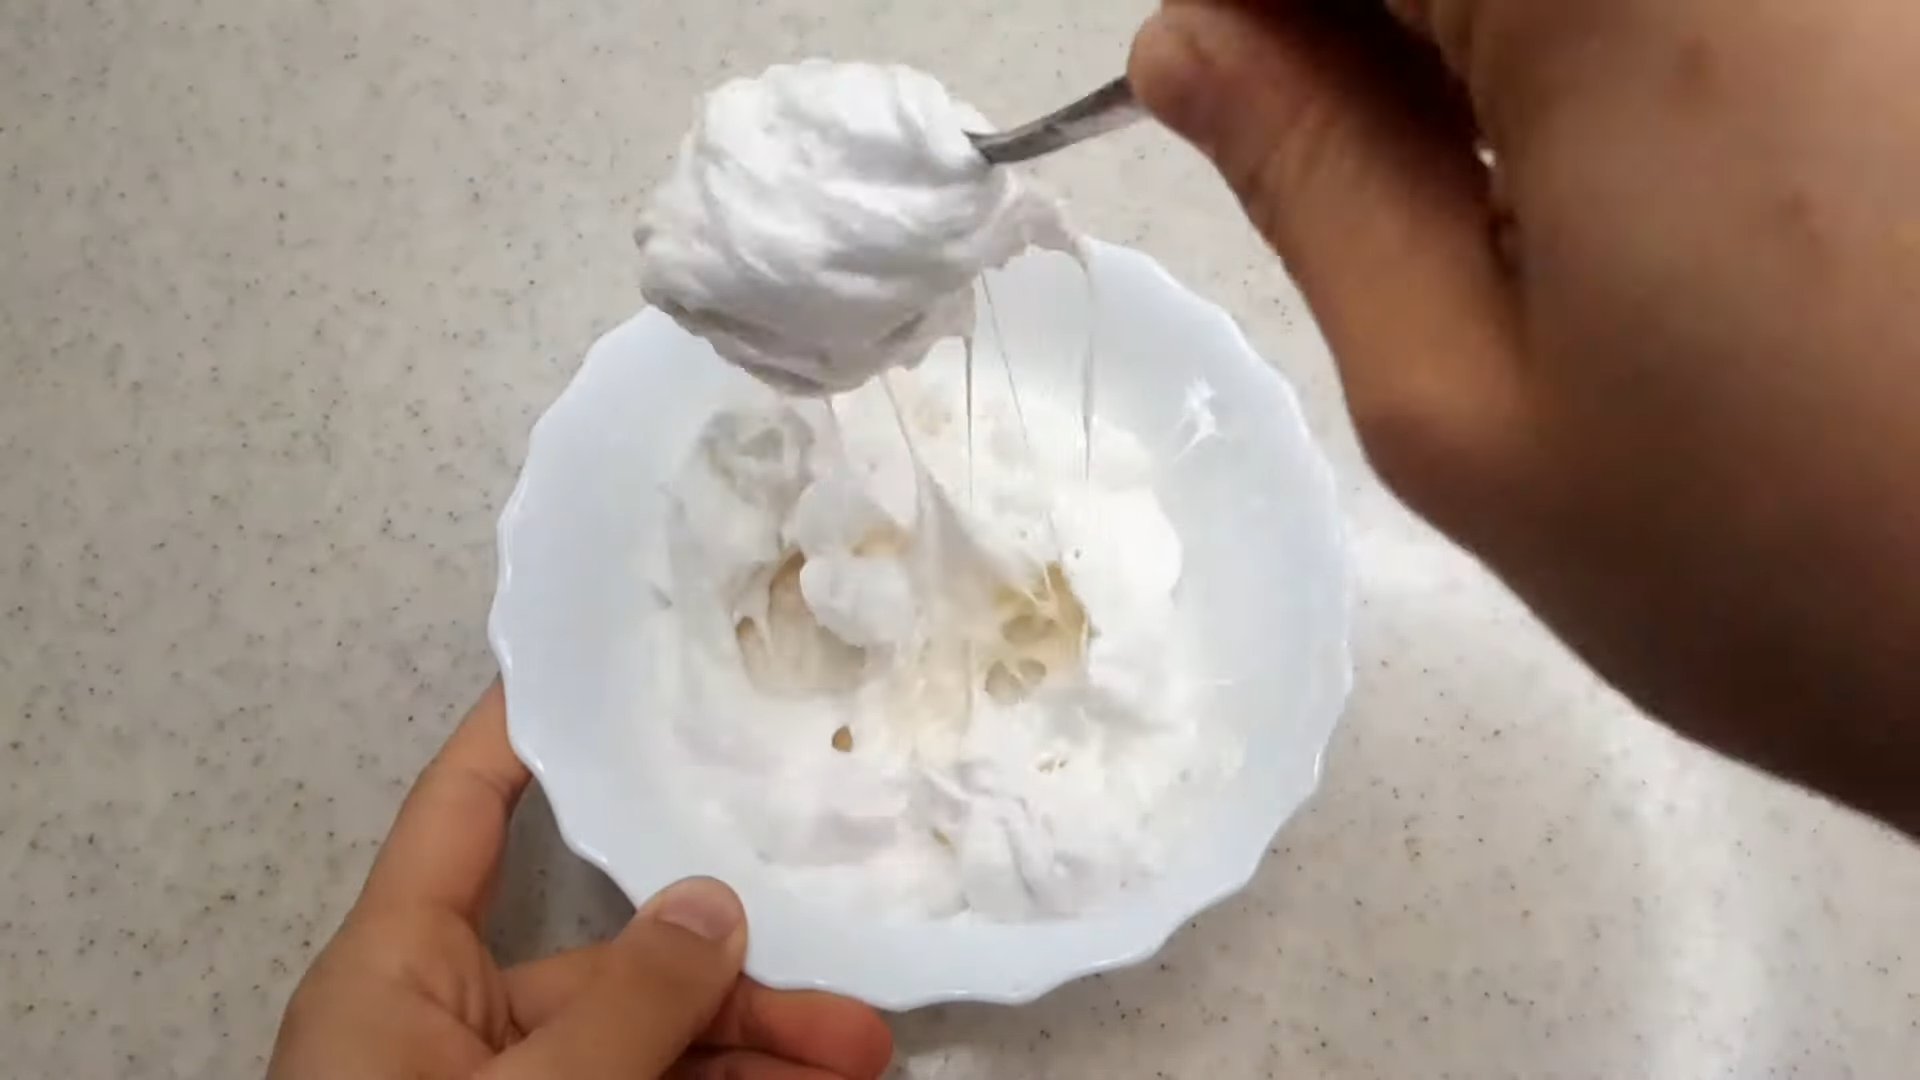
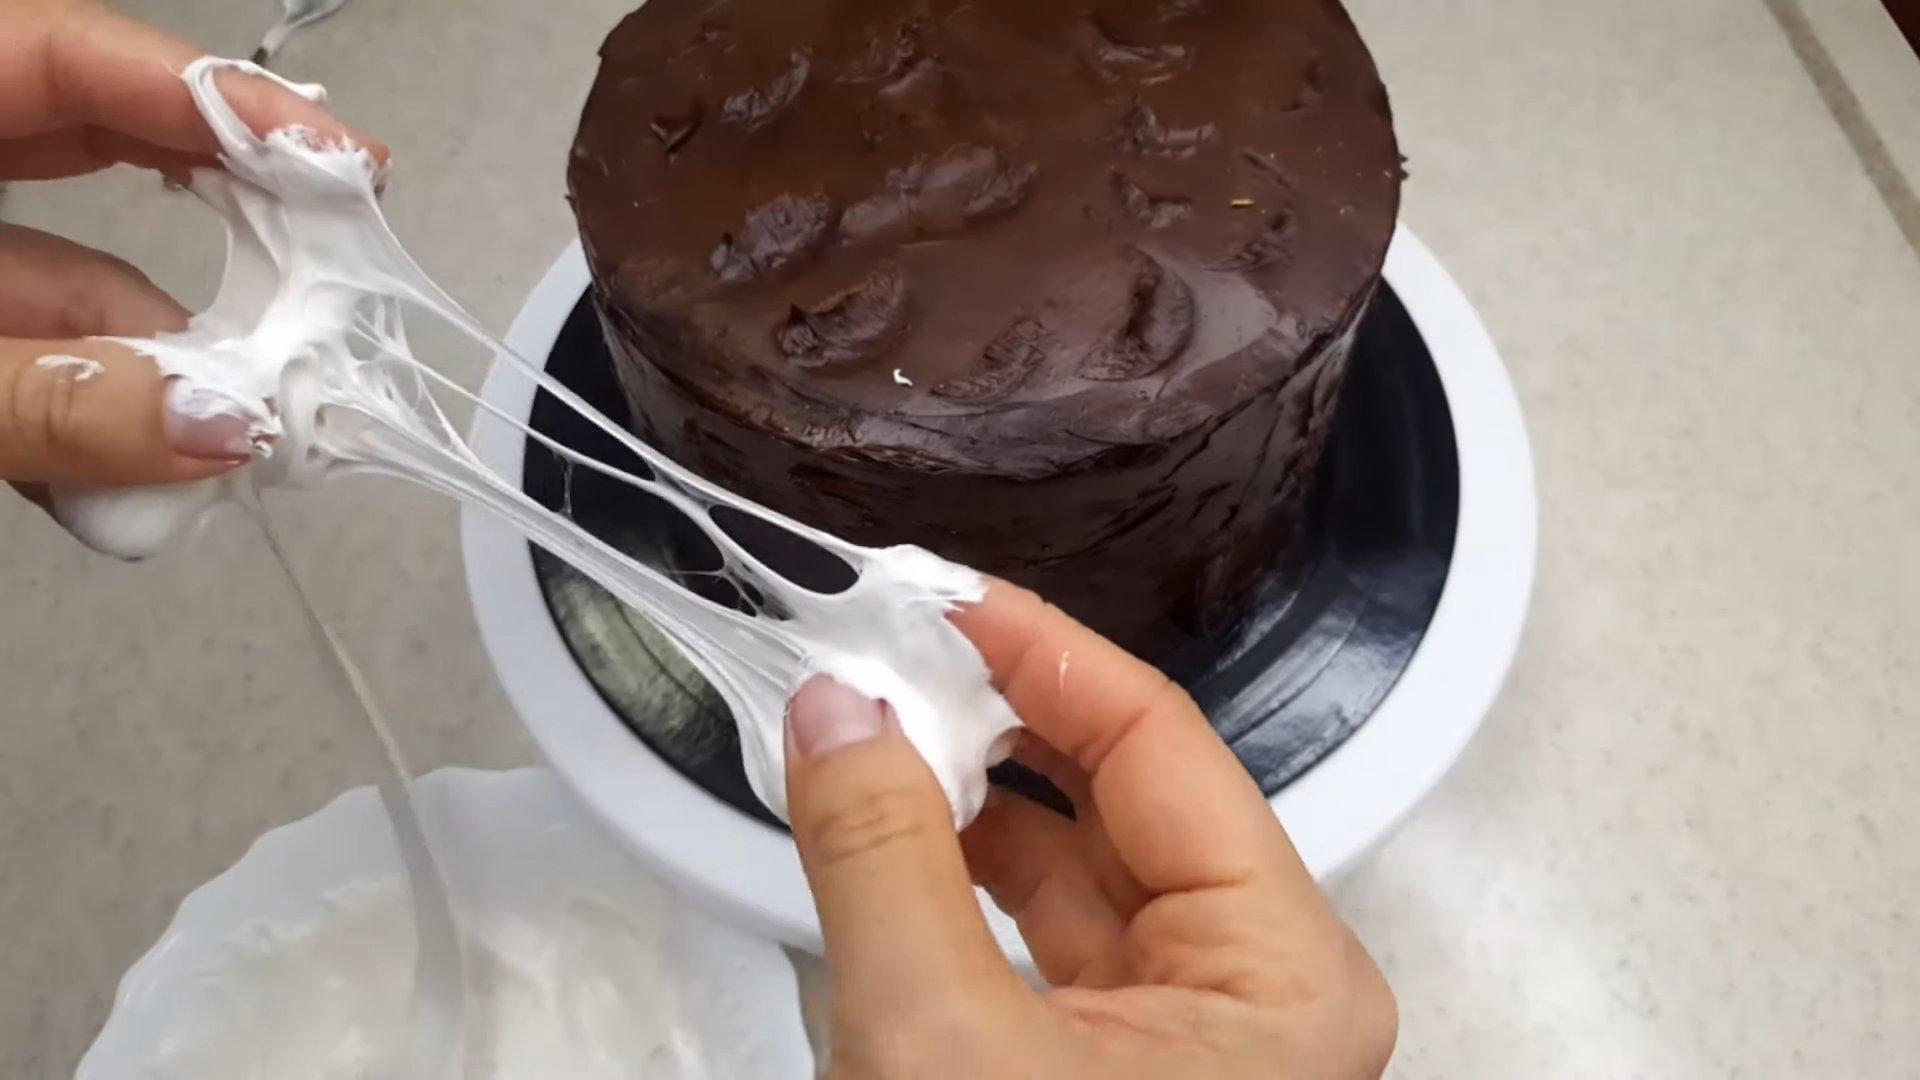
Step 7
We stick our fingers into the resulting mass, stretch the marshmallow and create a “web” out of it on the cake.
Step 8
We make eyes from sugar beads and decorate the cake with them. We draw the pupils with black gel food coloring.
Step 9
The original festive cake "Mummy" for Halloween is ready.
Ghosts for Halloween Cake Decorating
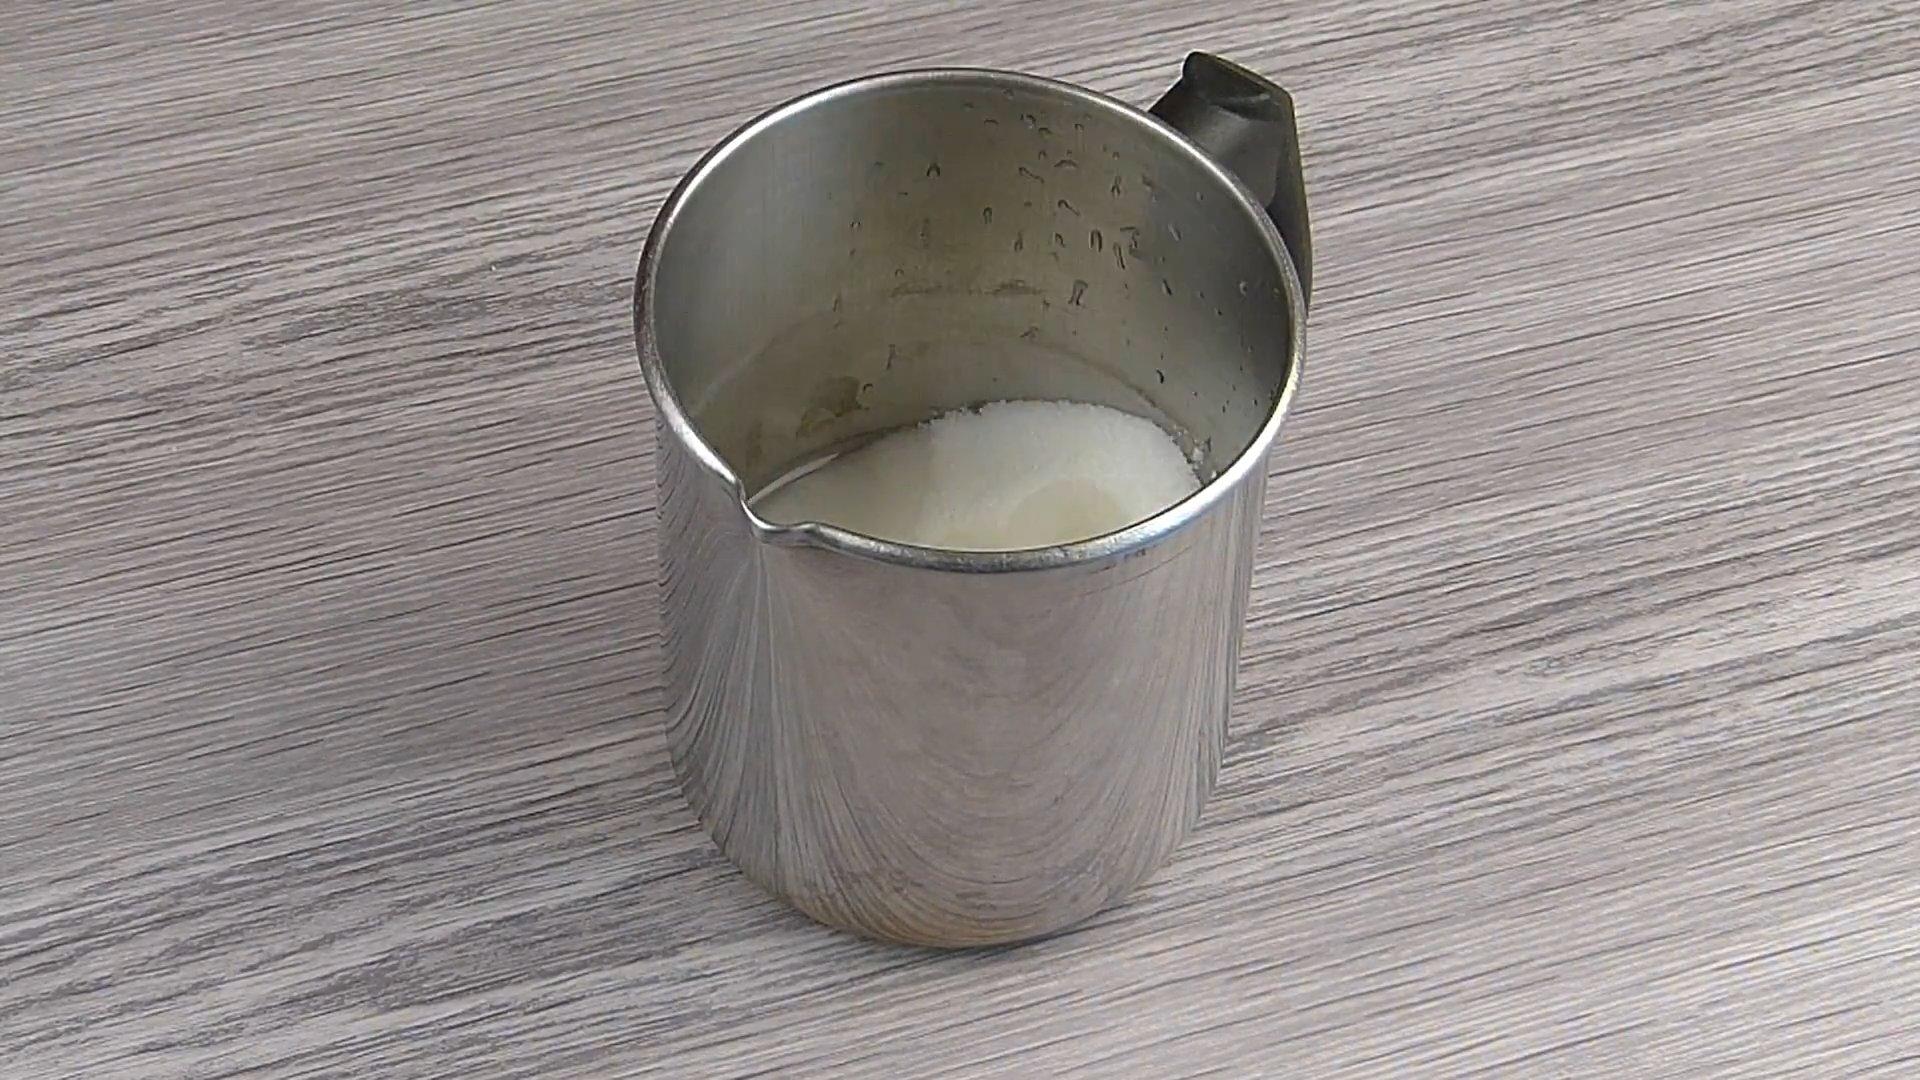
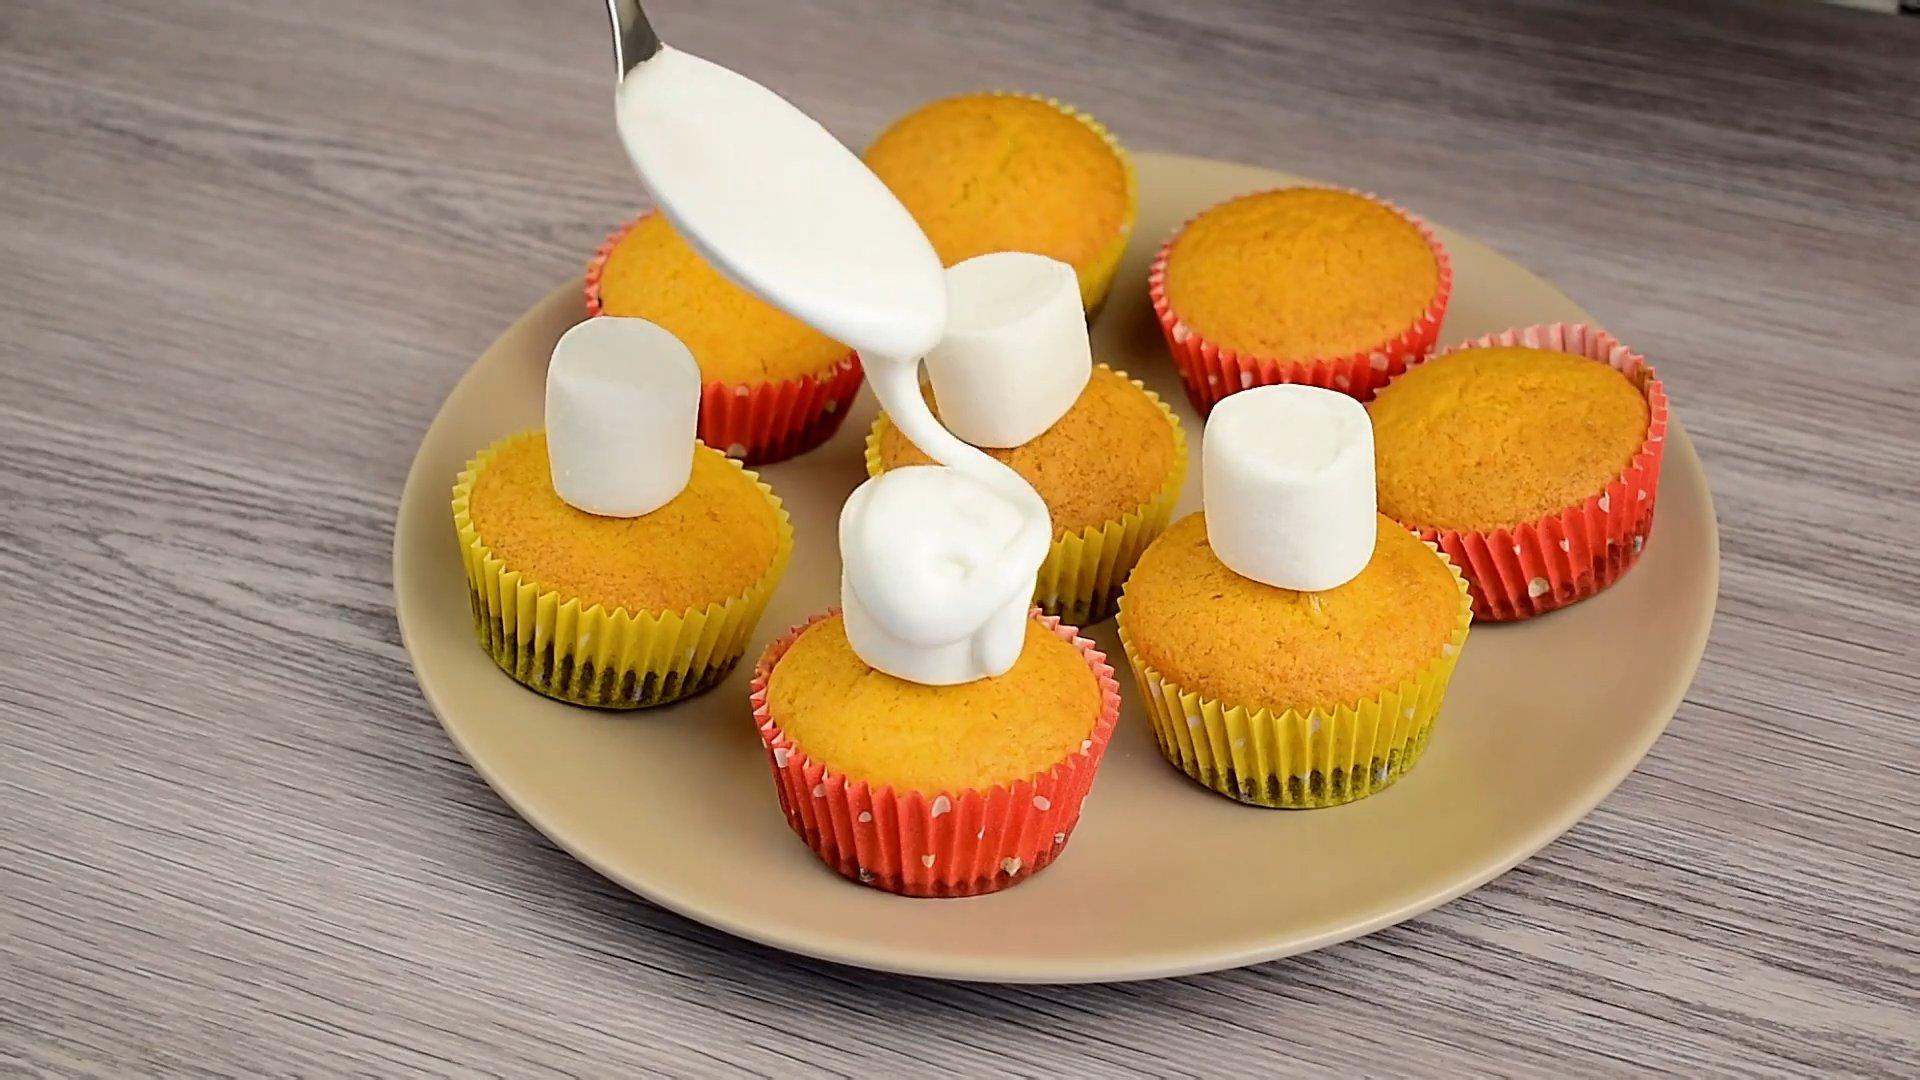
Want to decorate your Halloween cake or cupcakes with cute ghosts? I'm offering you a wonderful recipe for making festive figures using marshmallows and sugar syrup. These ghosts will delight both adults and children.
Ingredients
- Marshmallows - 10-15 pcs
- Sugar - 170 g
- Water - 6 tbsp.
- Gelatin - 1 tsp.
- Lemon juice - 1 tsp.
Cooking time: 30-40 minutes
Servings: 1 (10-15 figures)
Step-by-step recipe
Step 1
Soak gelatin in 2 tablespoons of water and leave to swell.
Step 2
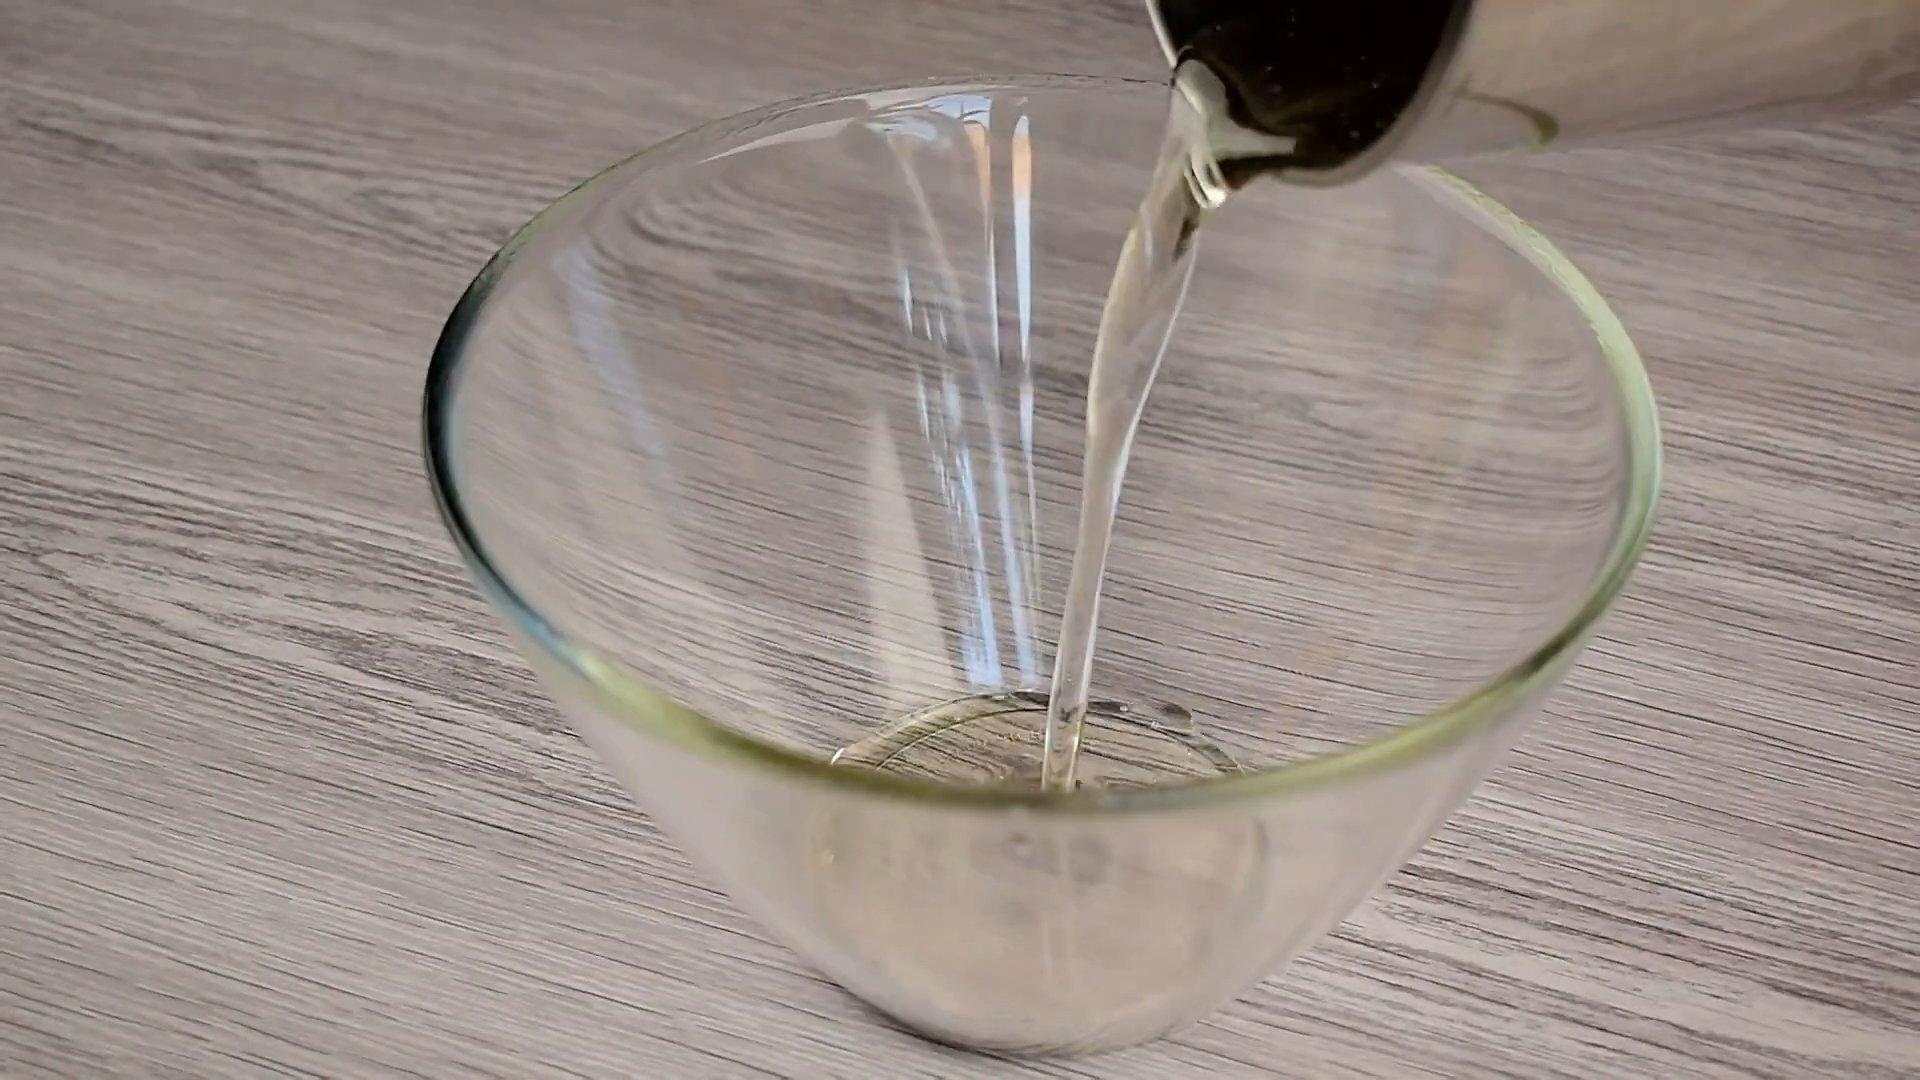
Pour sugar into a saucepan or any convenient container, add the remaining water and place on the fire.
Step 3
When the syrup boils, remove it from the heat and pour it into a deep glass bowl.
Step 4
Add the swollen gelatin to the sugar syrup and stir well.
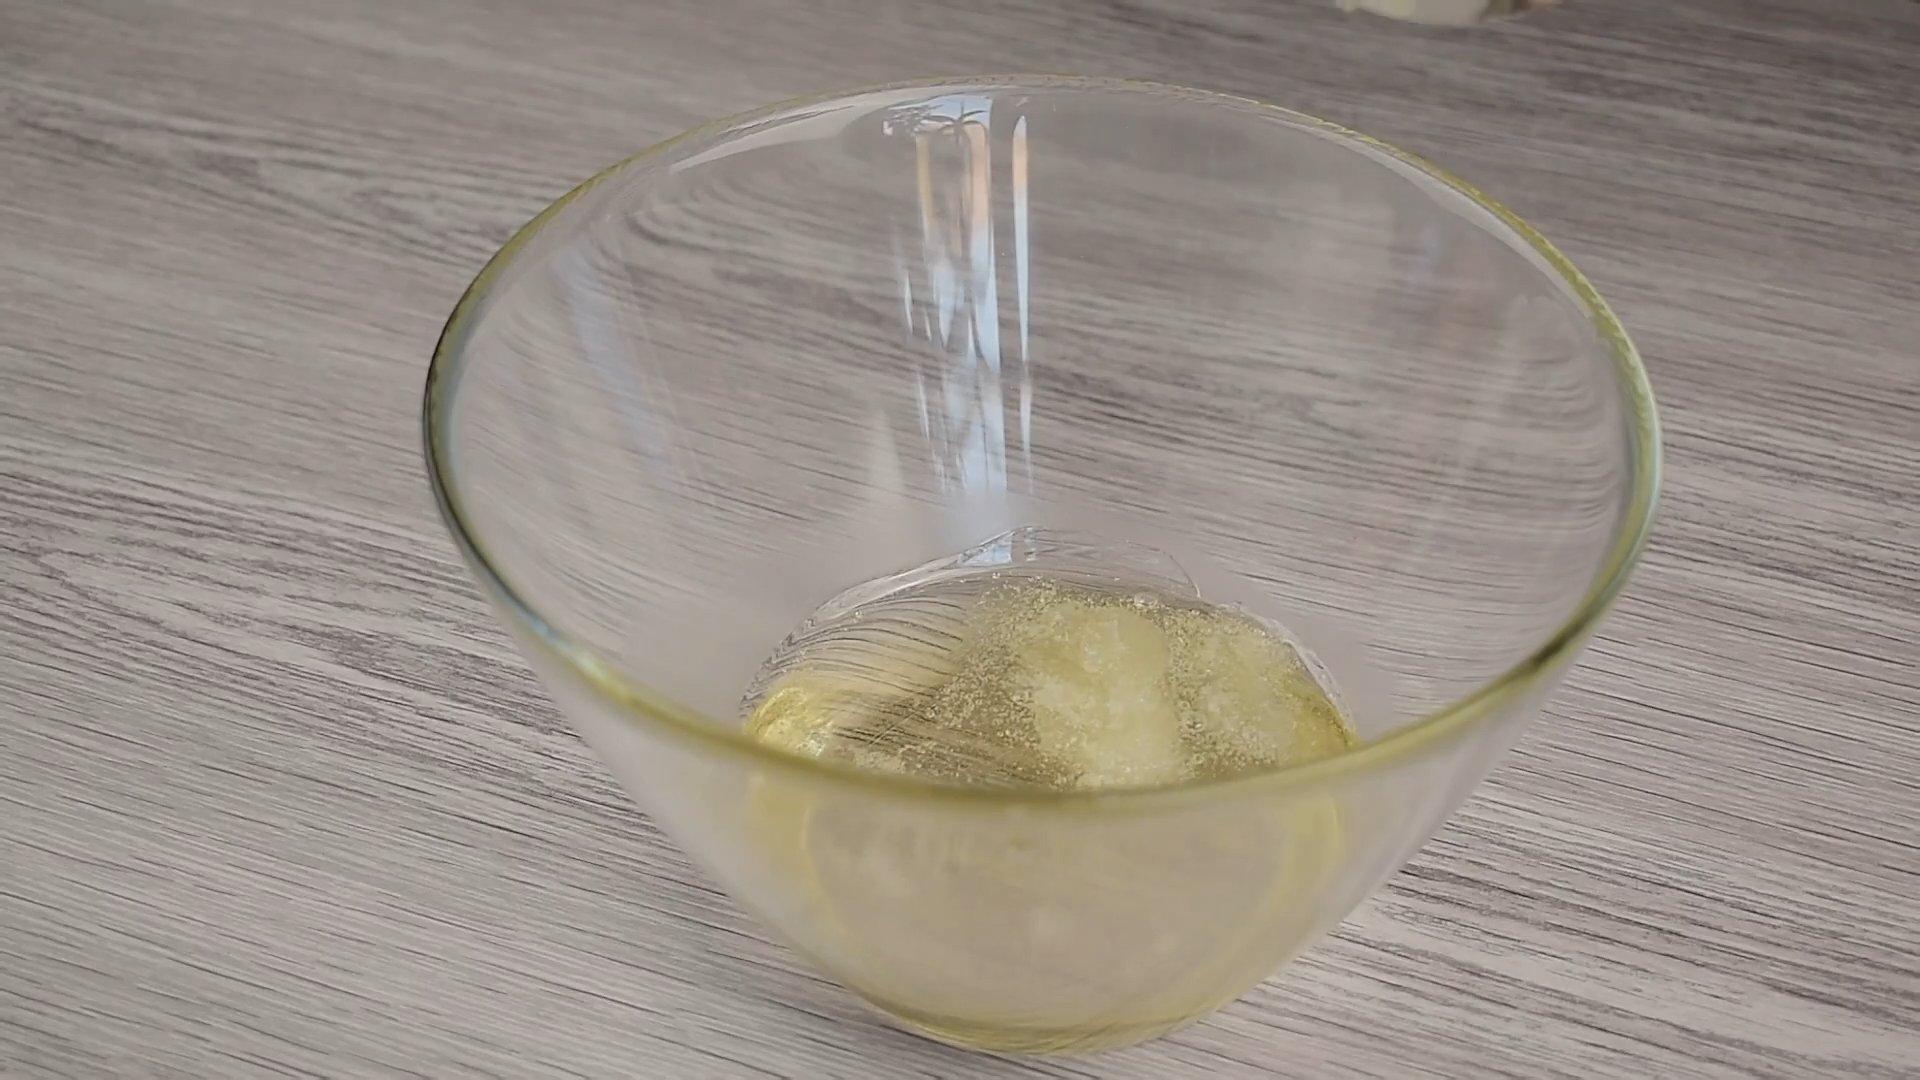
Step 5
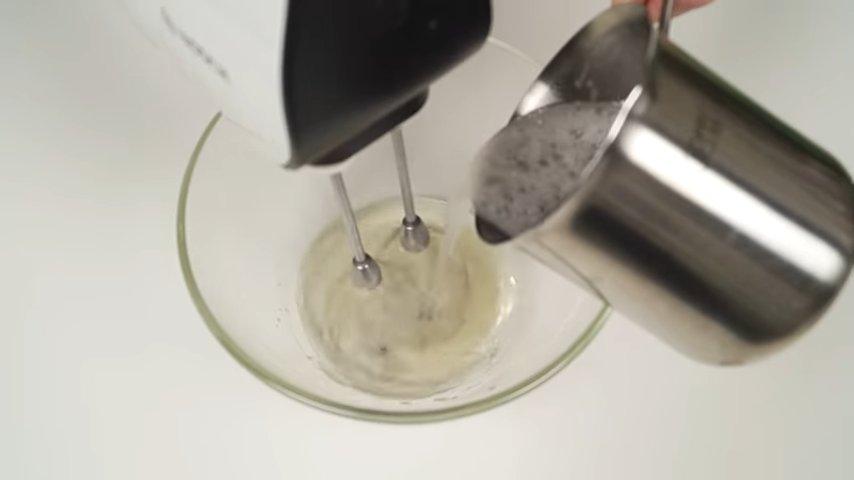
Beat the syrup with a mixer at high speed until you get a thick white mass.
Step 6
Add lemon juice and beat for a few more minutes.
Step 7
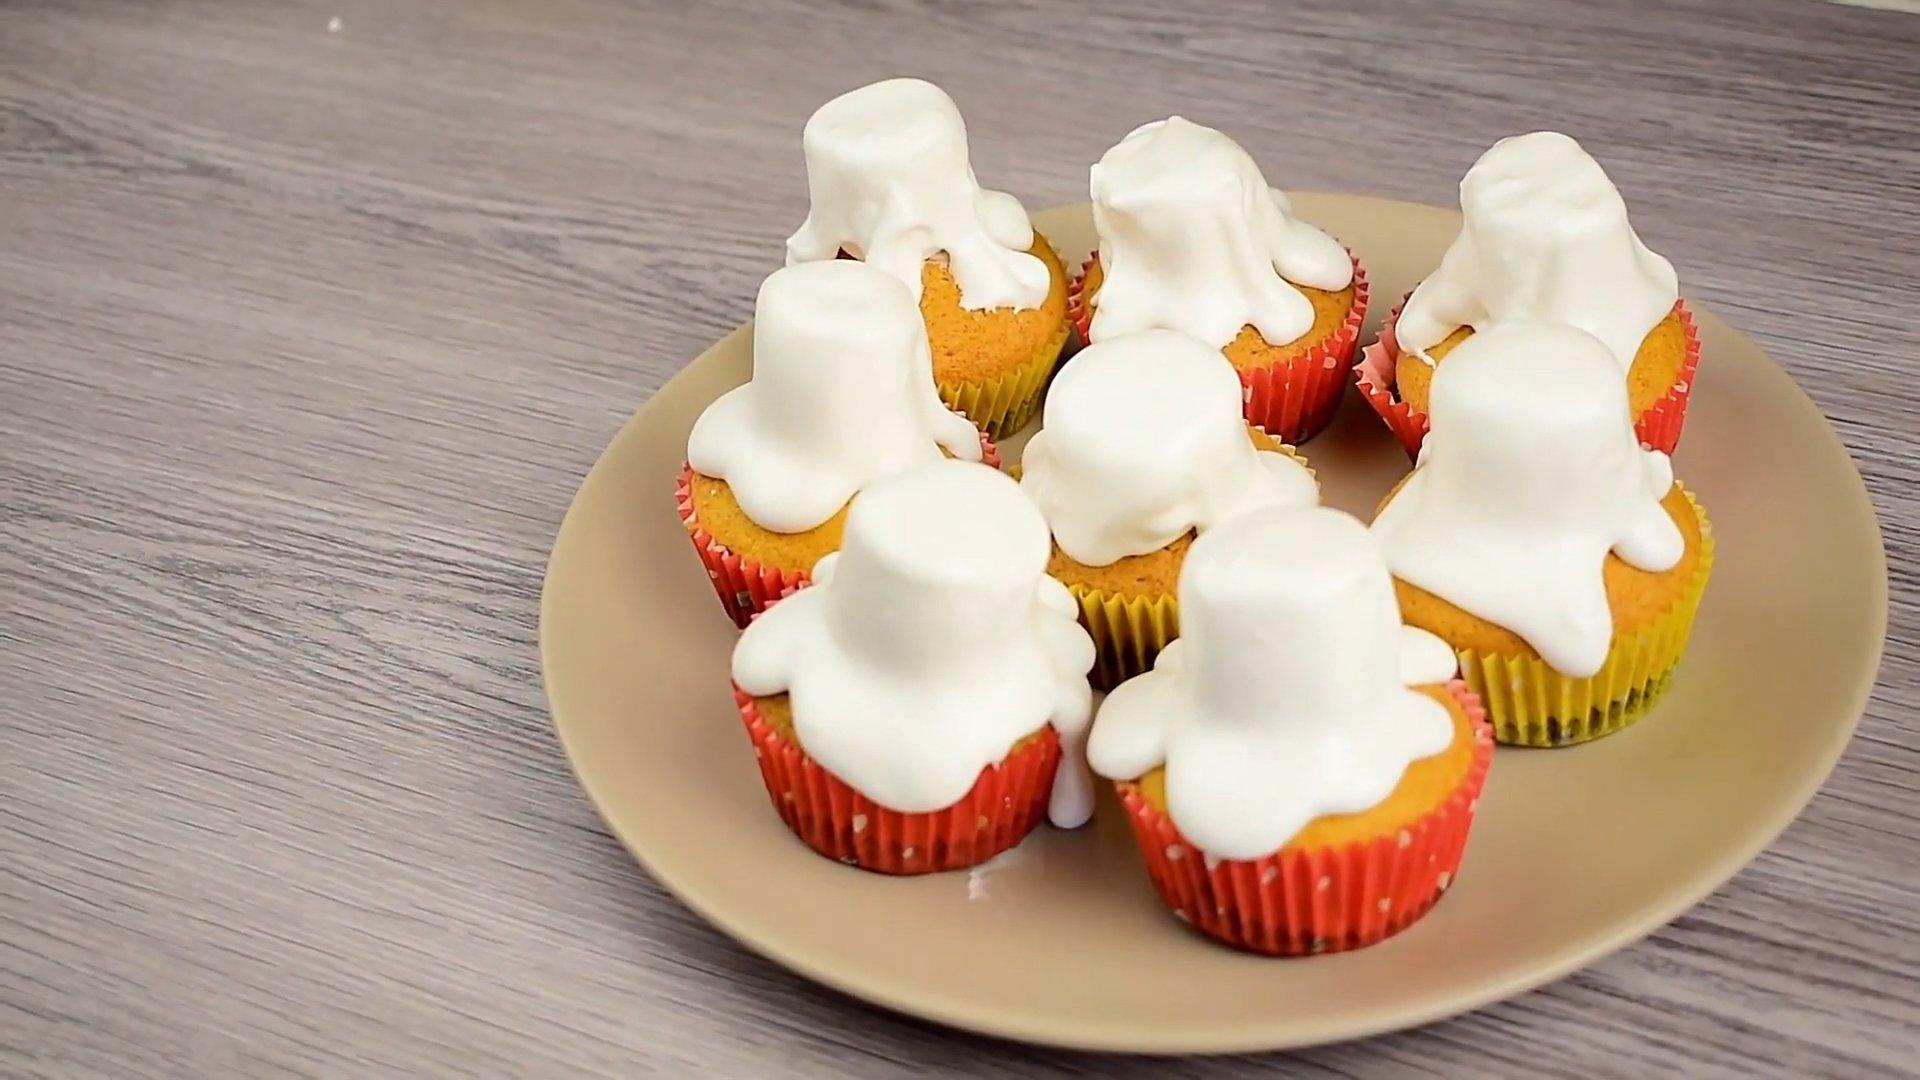
Place the marshmallows on the cake or cupcakes and pour sugar syrup on top.
Step 8
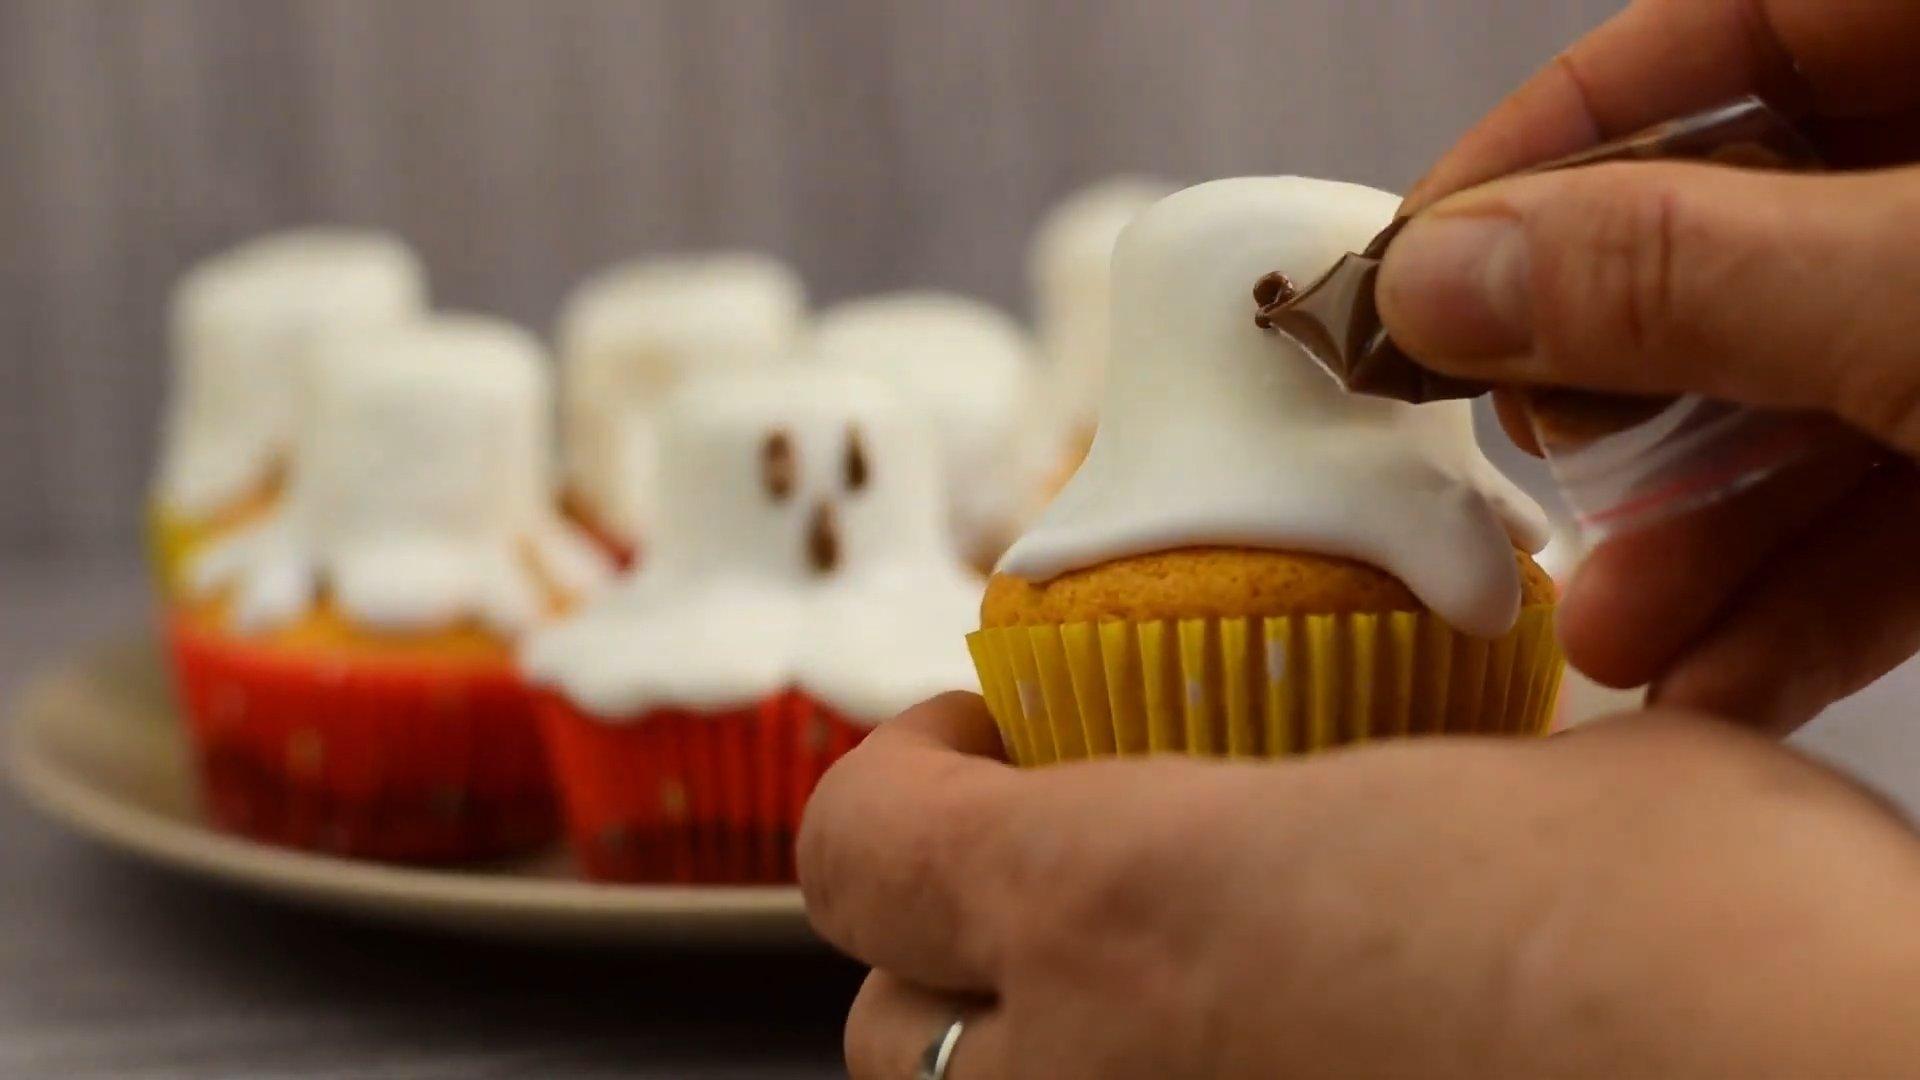
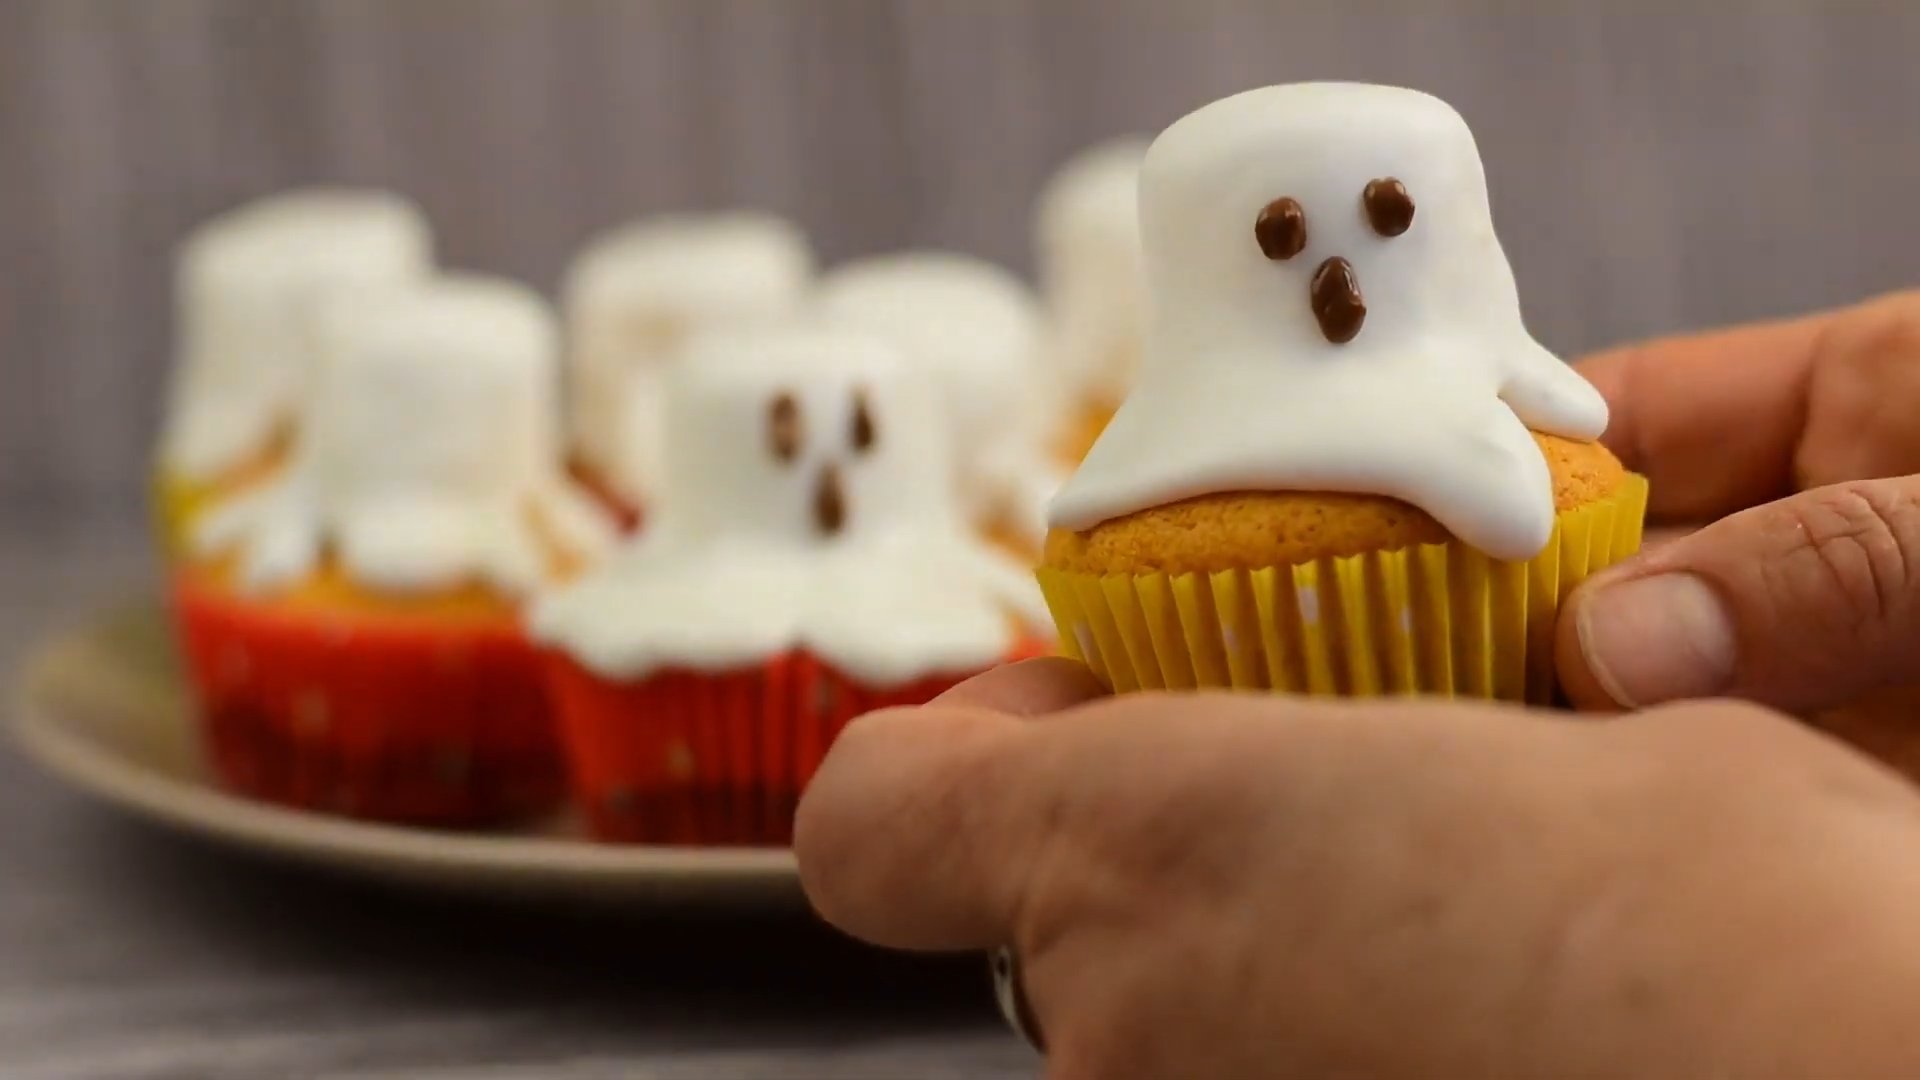
We'll use melted chocolate to paint the ghosts' eyes and mouths. These cute and cuddly ghosts are ready to brighten up your guests' day.
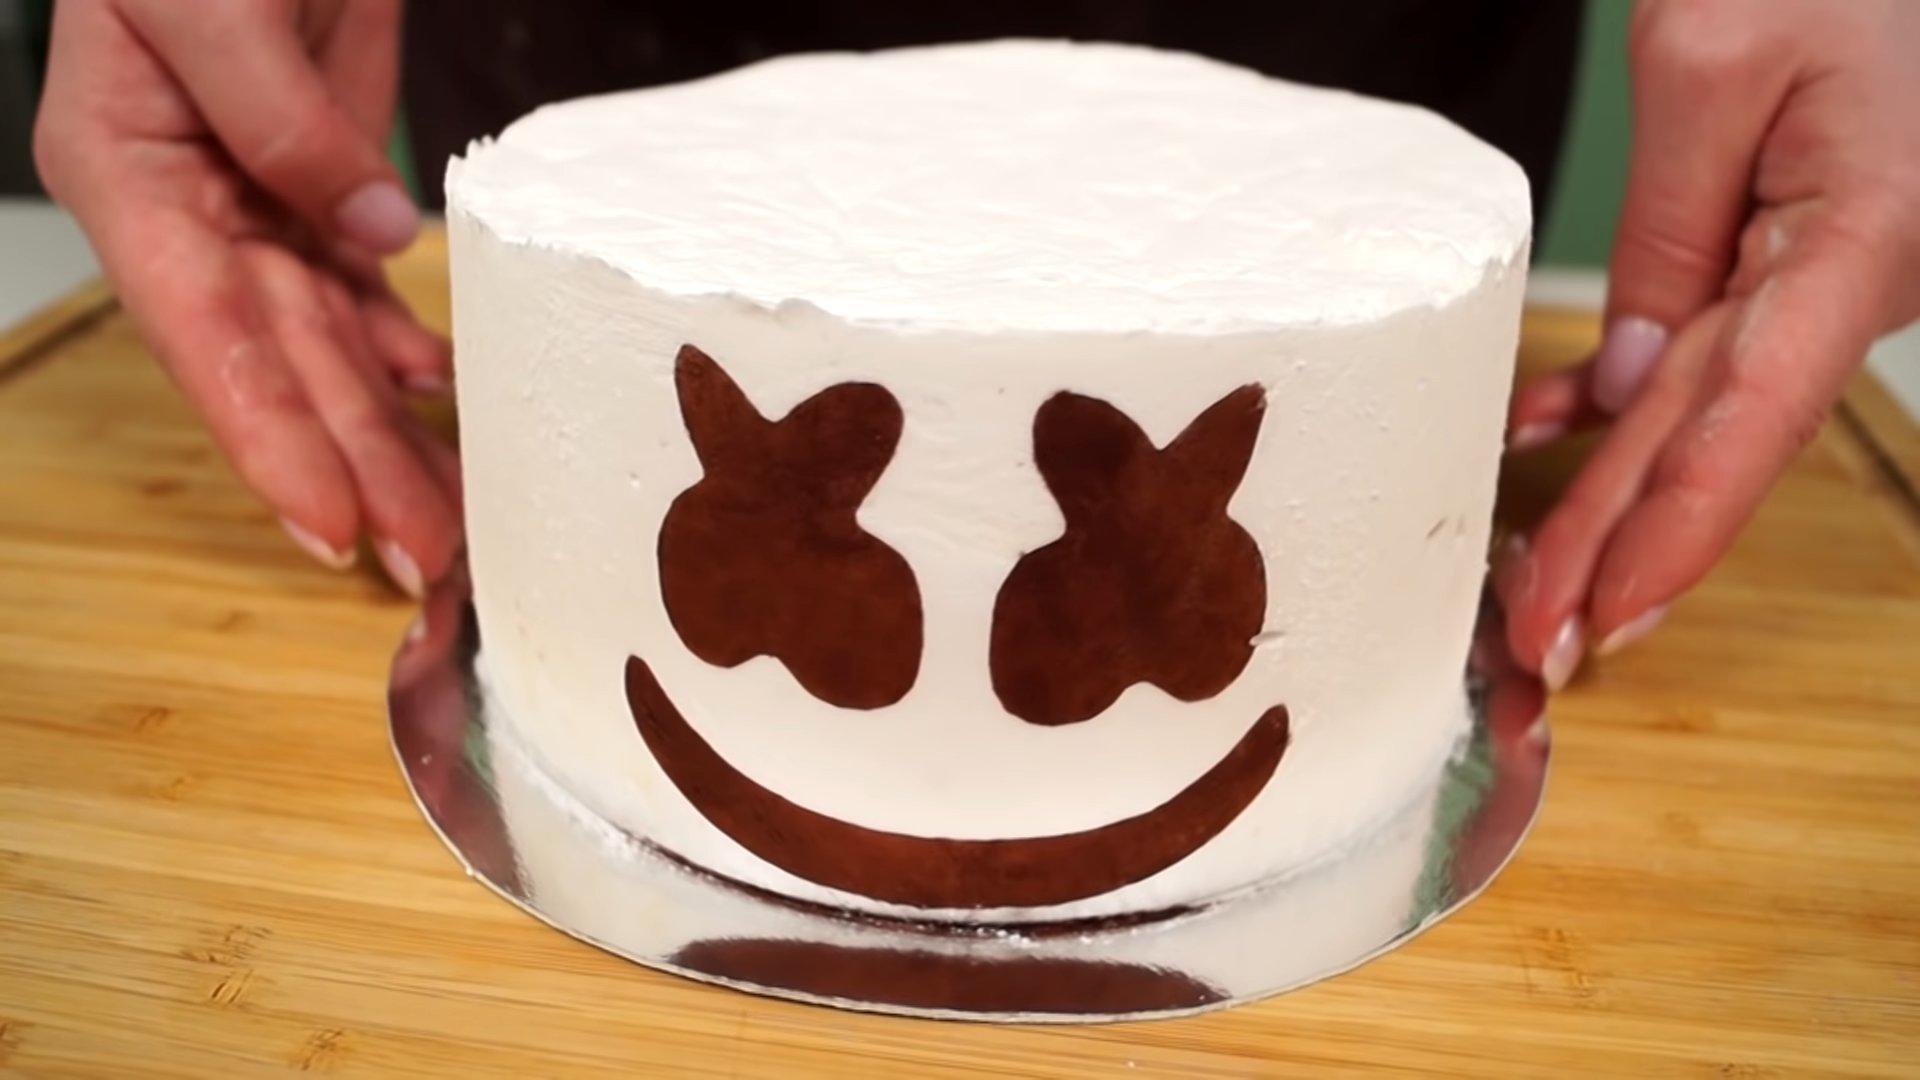
Marshmallow Halloween Mask Cake
I'd like to share a simple recipe for decorating a Halloween-themed marshmallow cake. You can make the cake using your favorite recipe, but I recommend using a chocolate sponge cake with fluffy buttercream frosting. Paired with snow-white marshmallows, this cake will look very stylish.
Ingredients
- Water - 120 ml
- Gelatin - 1 tbsp. l.
- Sugar - 220 g
- Vanilla sugar - 1 tsp.
- Salt - a pinch
- Cocoa powder - 1-2 tbsp. l.
- Powdered sugar - 2 tbsp.
- Corn starch - 2 tbsp.
Cooking time: 1 hour
Servings: 1 (for decorating a cake with a diameter of 14 cm)
Step-by-step recipe
Step 1
Prepare the marshmallows. Pour 60 ml of water over the gelatin and let it swell.
Step 2
Pour the remaining water into a saucepan, add sugar, vanilla and a pinch of salt.
Step 3
Place the saucepan over low heat and cook the syrup, stirring occasionally, until it boils.

Step 4
Place the swollen gelatin in a deep bowl and begin whisking with a mixer. Pour in the sugar syrup in a thin stream.
Step 5
Gradually increasing the speed, beat the resulting mixture until you get a white, fluffy mass.
Step 6
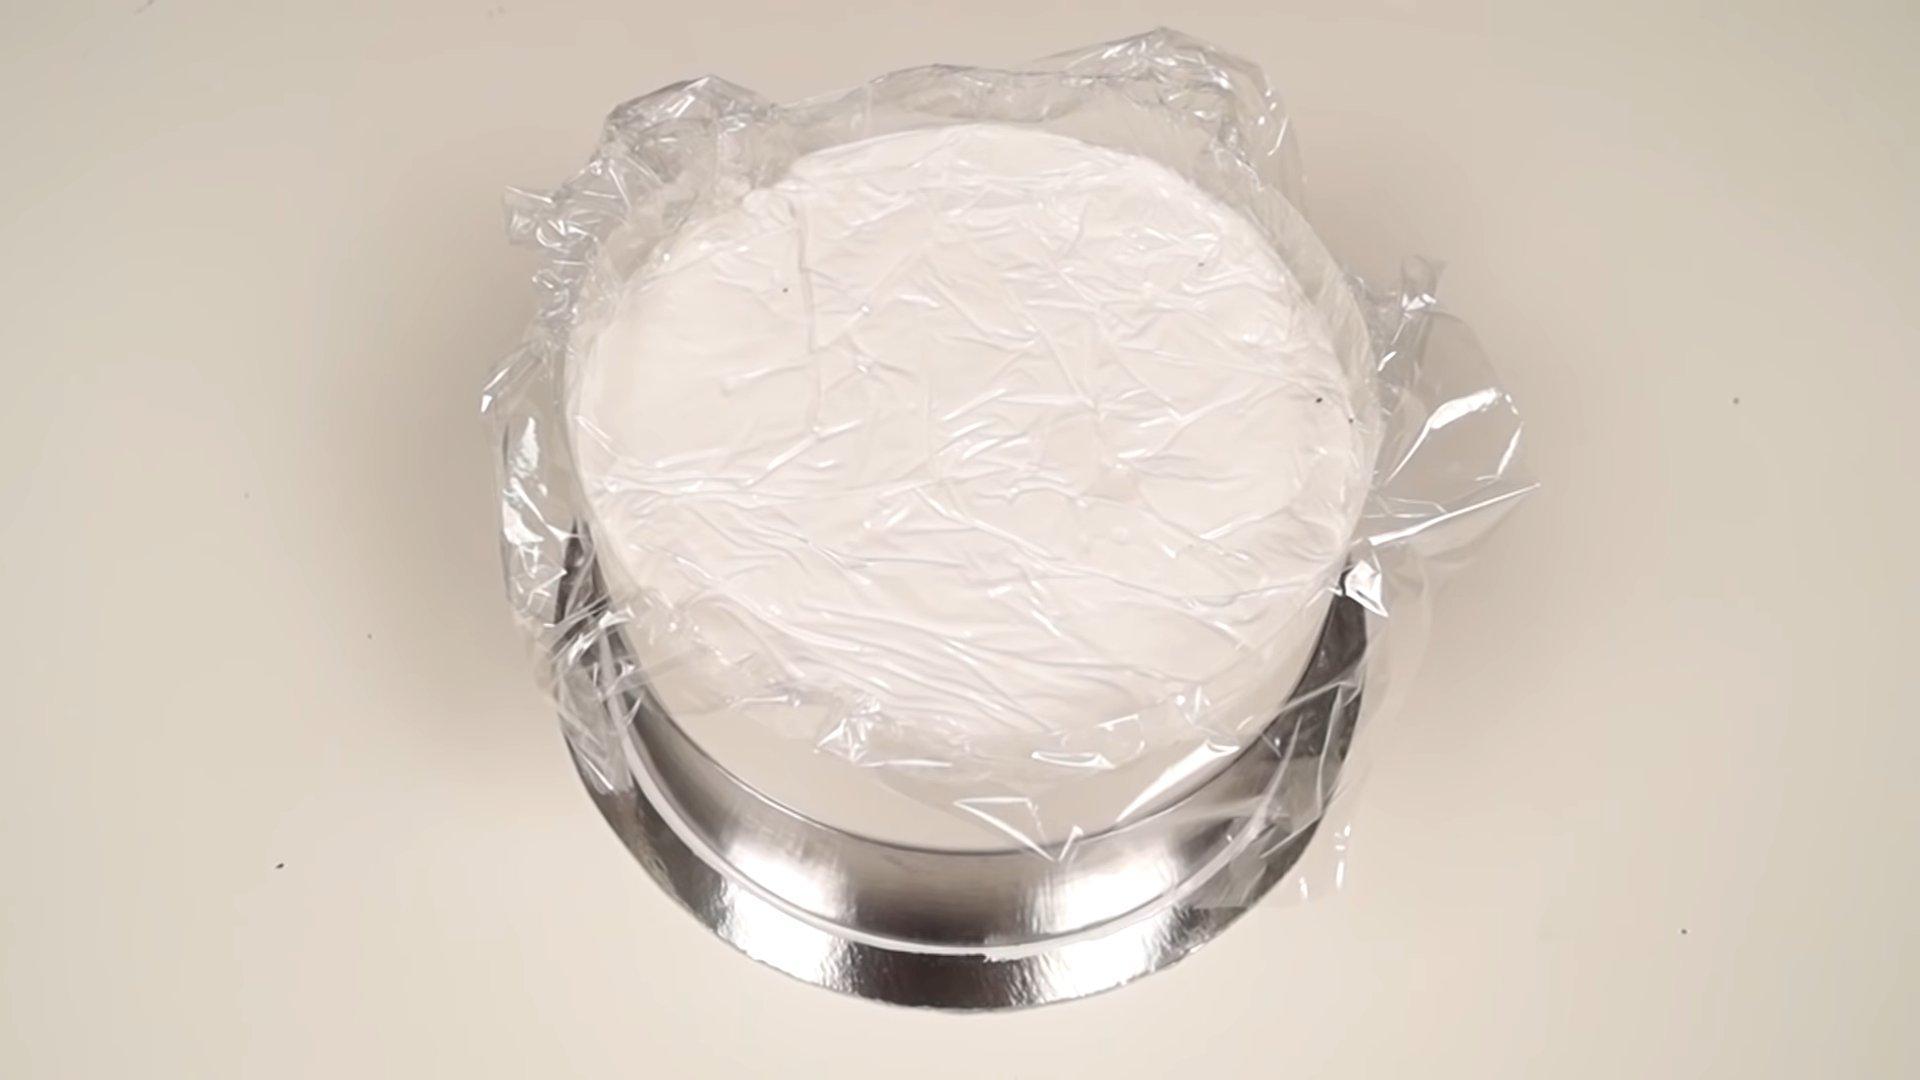
Take a 16 cm diameter pan, line its sides with acetate film, grease it with vegetable oil and transfer the cake into it.
Step 7
Place the marshmallows in a piping bag and fill the space between the cake and the edges of the pan. Then carefully frost the top of the cake.
Step 8
Cover the cake with greased film and place in the refrigerator for several hours until the marshmallows are completely set.
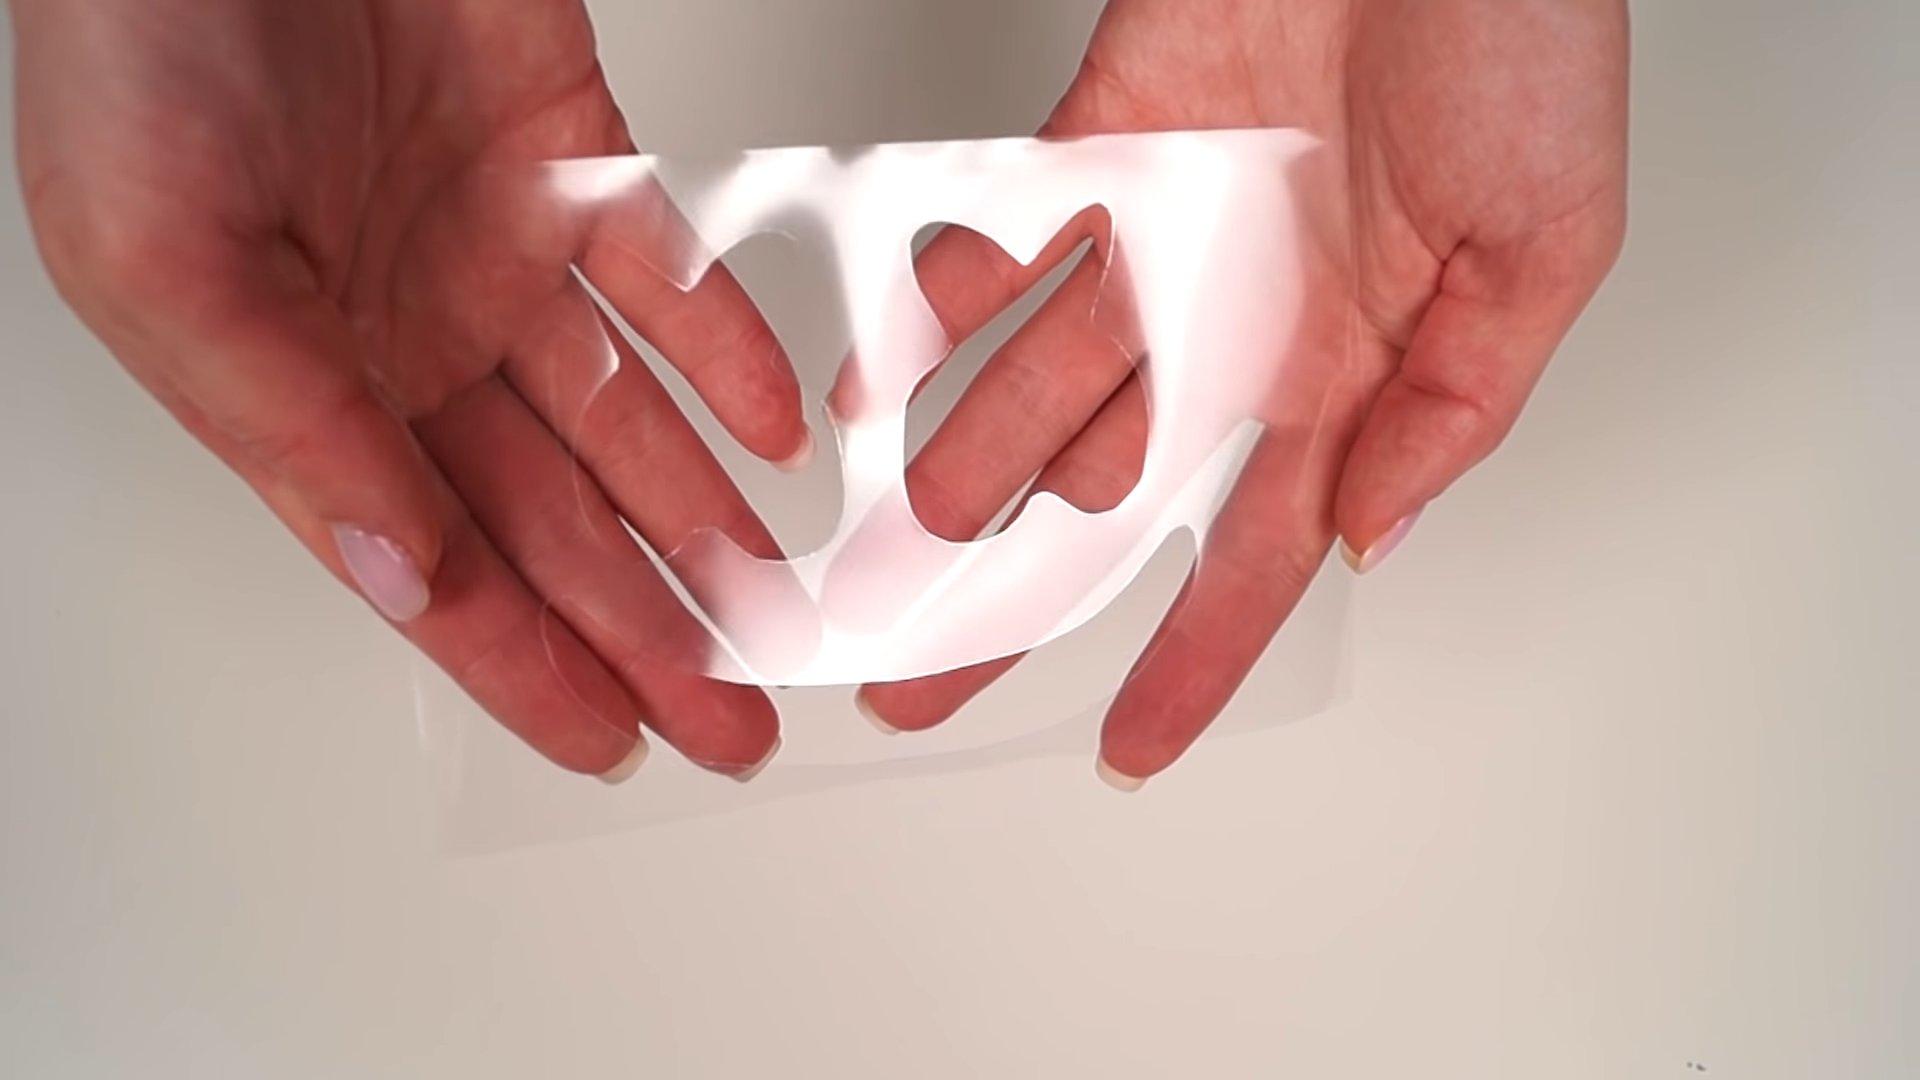
Step 9
We make a stencil out of acetate film. We cut out the eyes and mouth.
Step 10
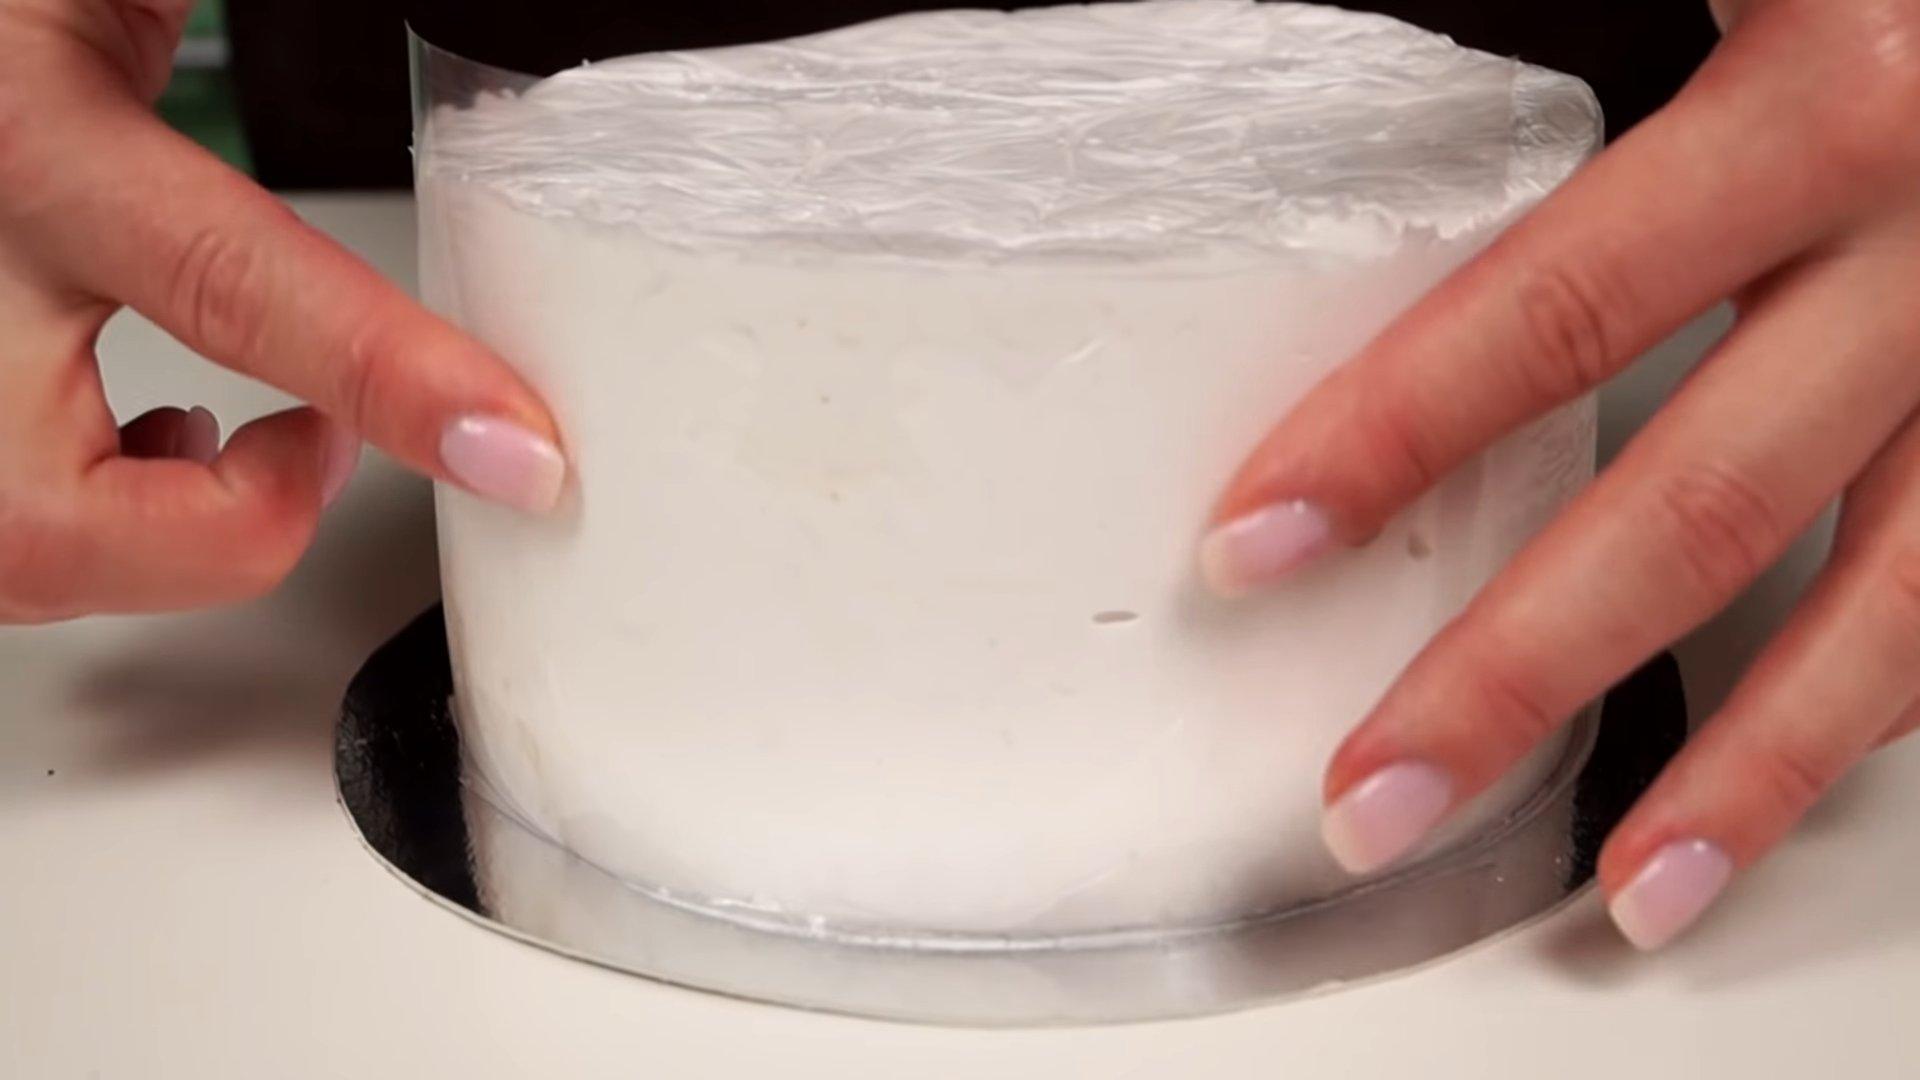
We take the cake out of the refrigerator, remove all the film and the ring from the mold.

Step 11
Place the stencil on the side of the cake. Using a brush, apply cocoa powder to the cut-out areas.

Step 12
Mix powdered sugar with corn starch and lightly dust our cake.
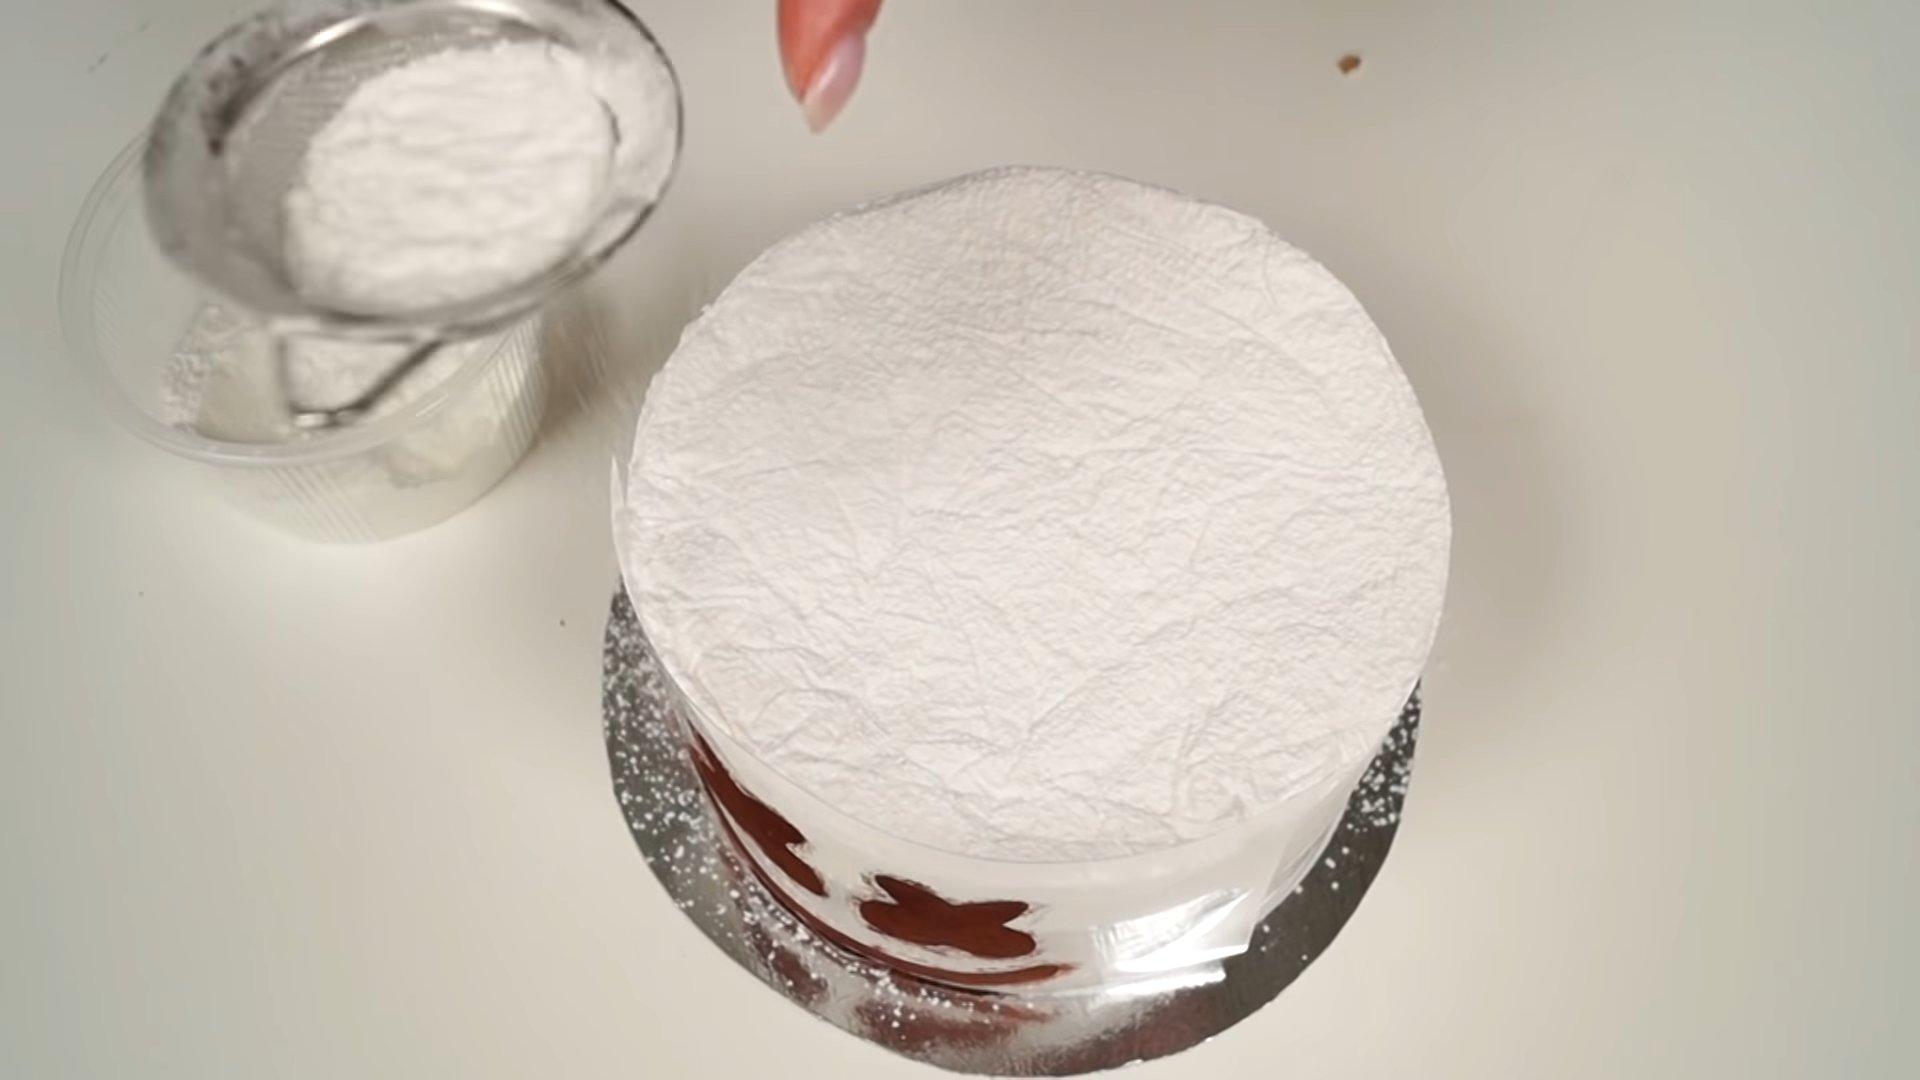
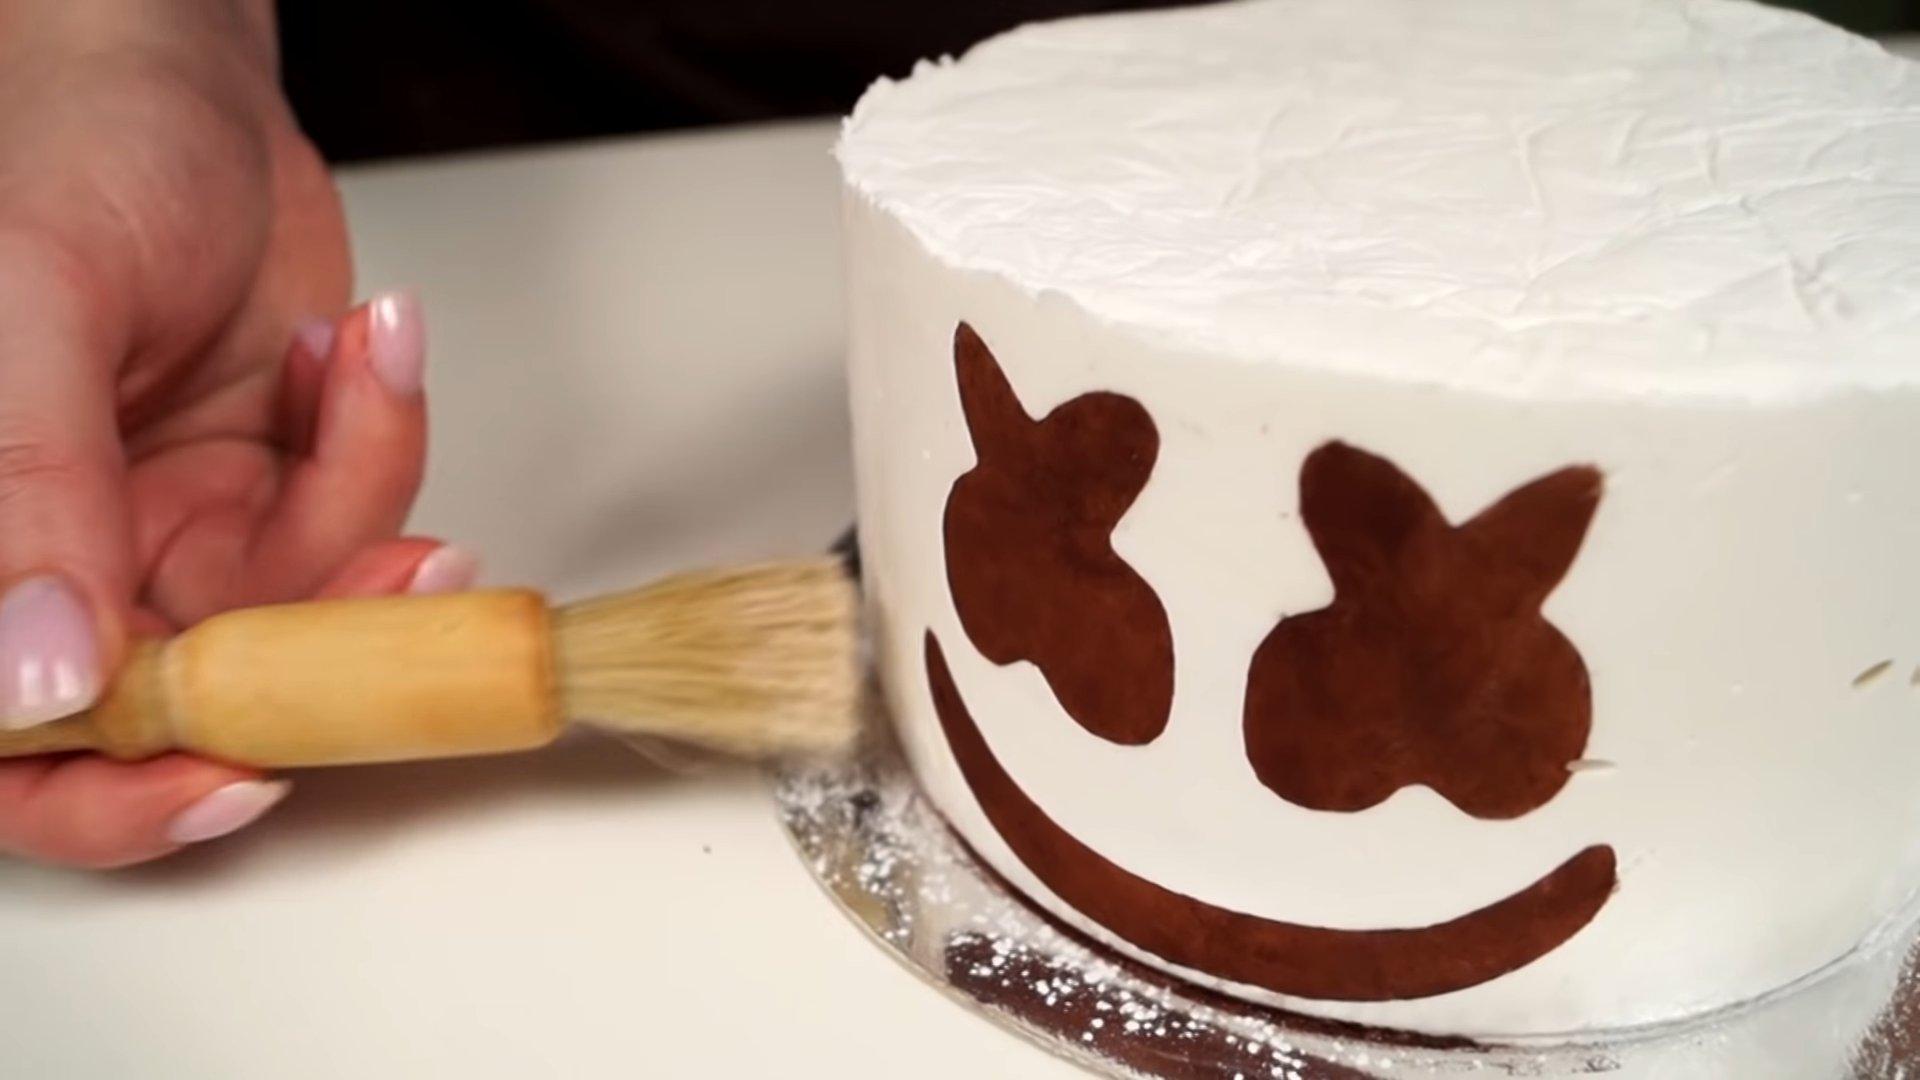
Step 13
A beautiful and very stylish Marshmallow mask cake for Halloween is ready.
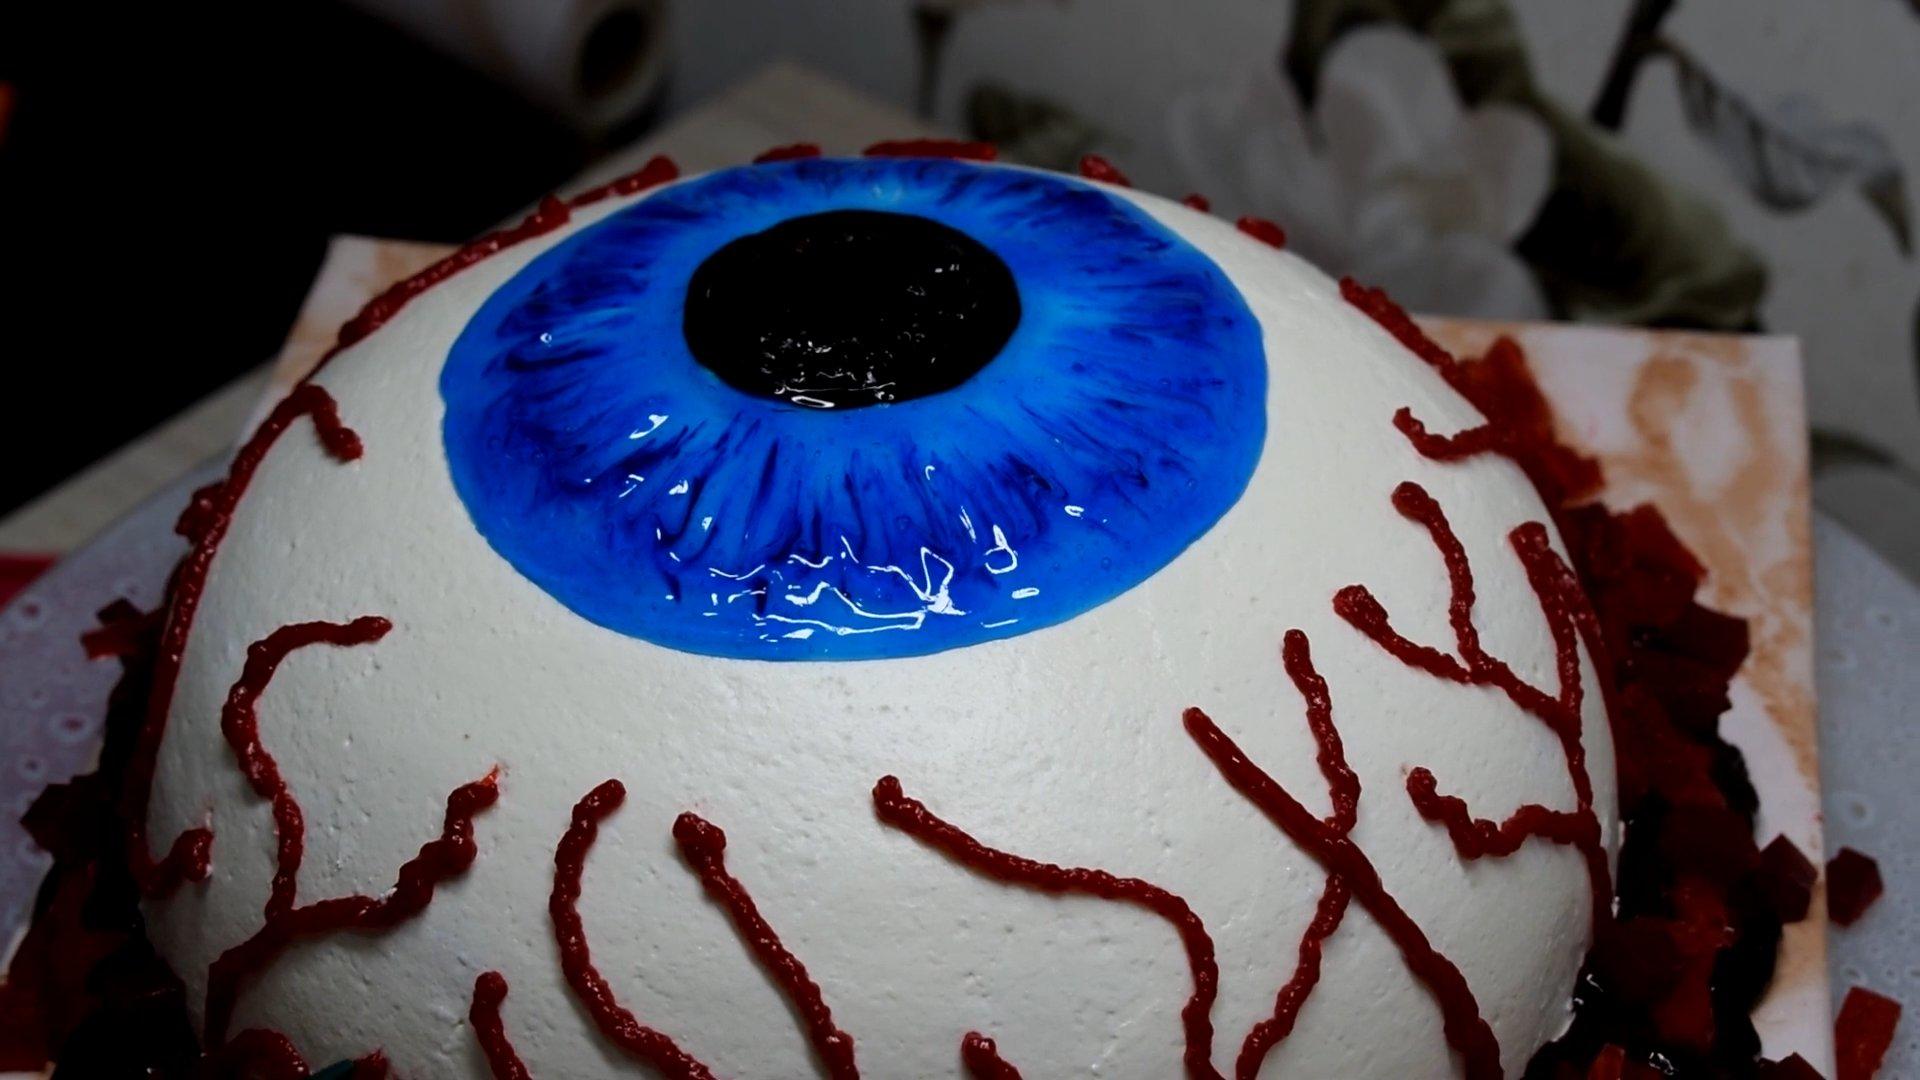
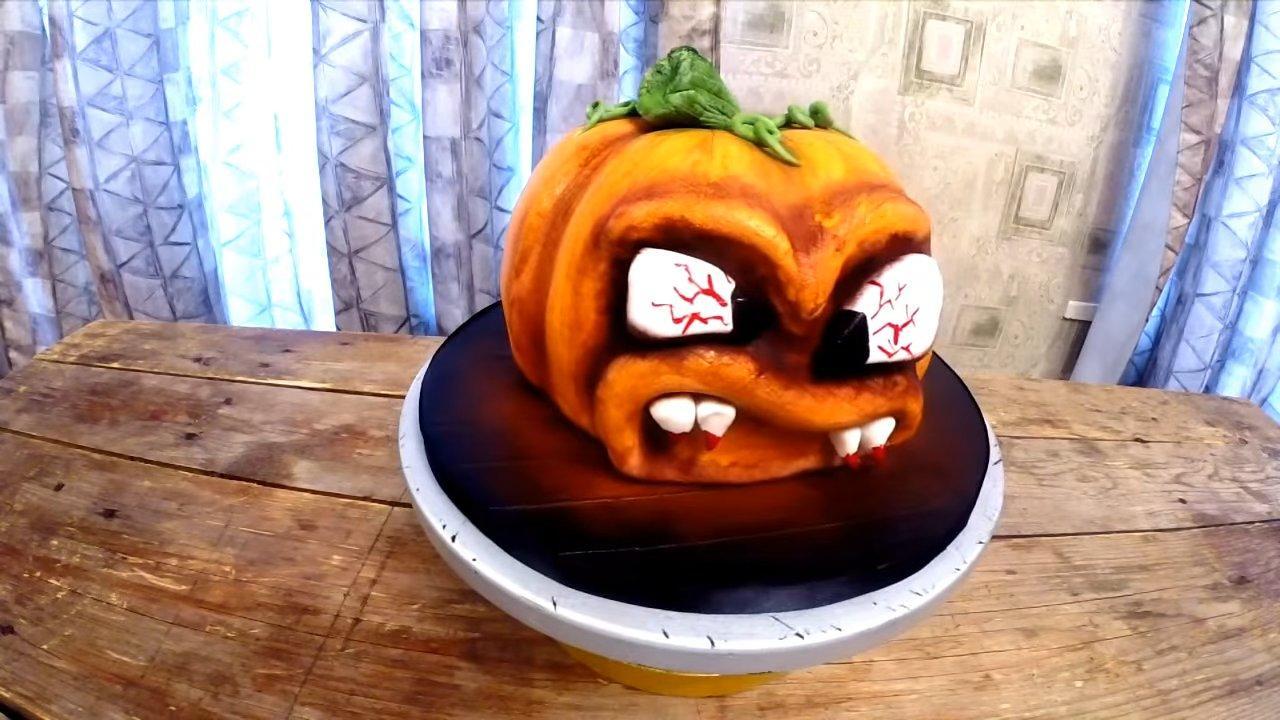
Zombie Cake
What's Halloween without evil, scary, and hungry zombies? After all, they're one of the most popular characters at holiday parties. I suggest you surprise your guests and make a zombie-eye-shaped Halloween cake. This is a rather unique idea that will make your dessert the center of attention at the party.
Ingredients
- Gel food colors - blue, black, red
- Cherry jelly – 300-400 g
Cooking time: 30-40 minutes
Servings: 1
Step-by-step recipe
Step 1
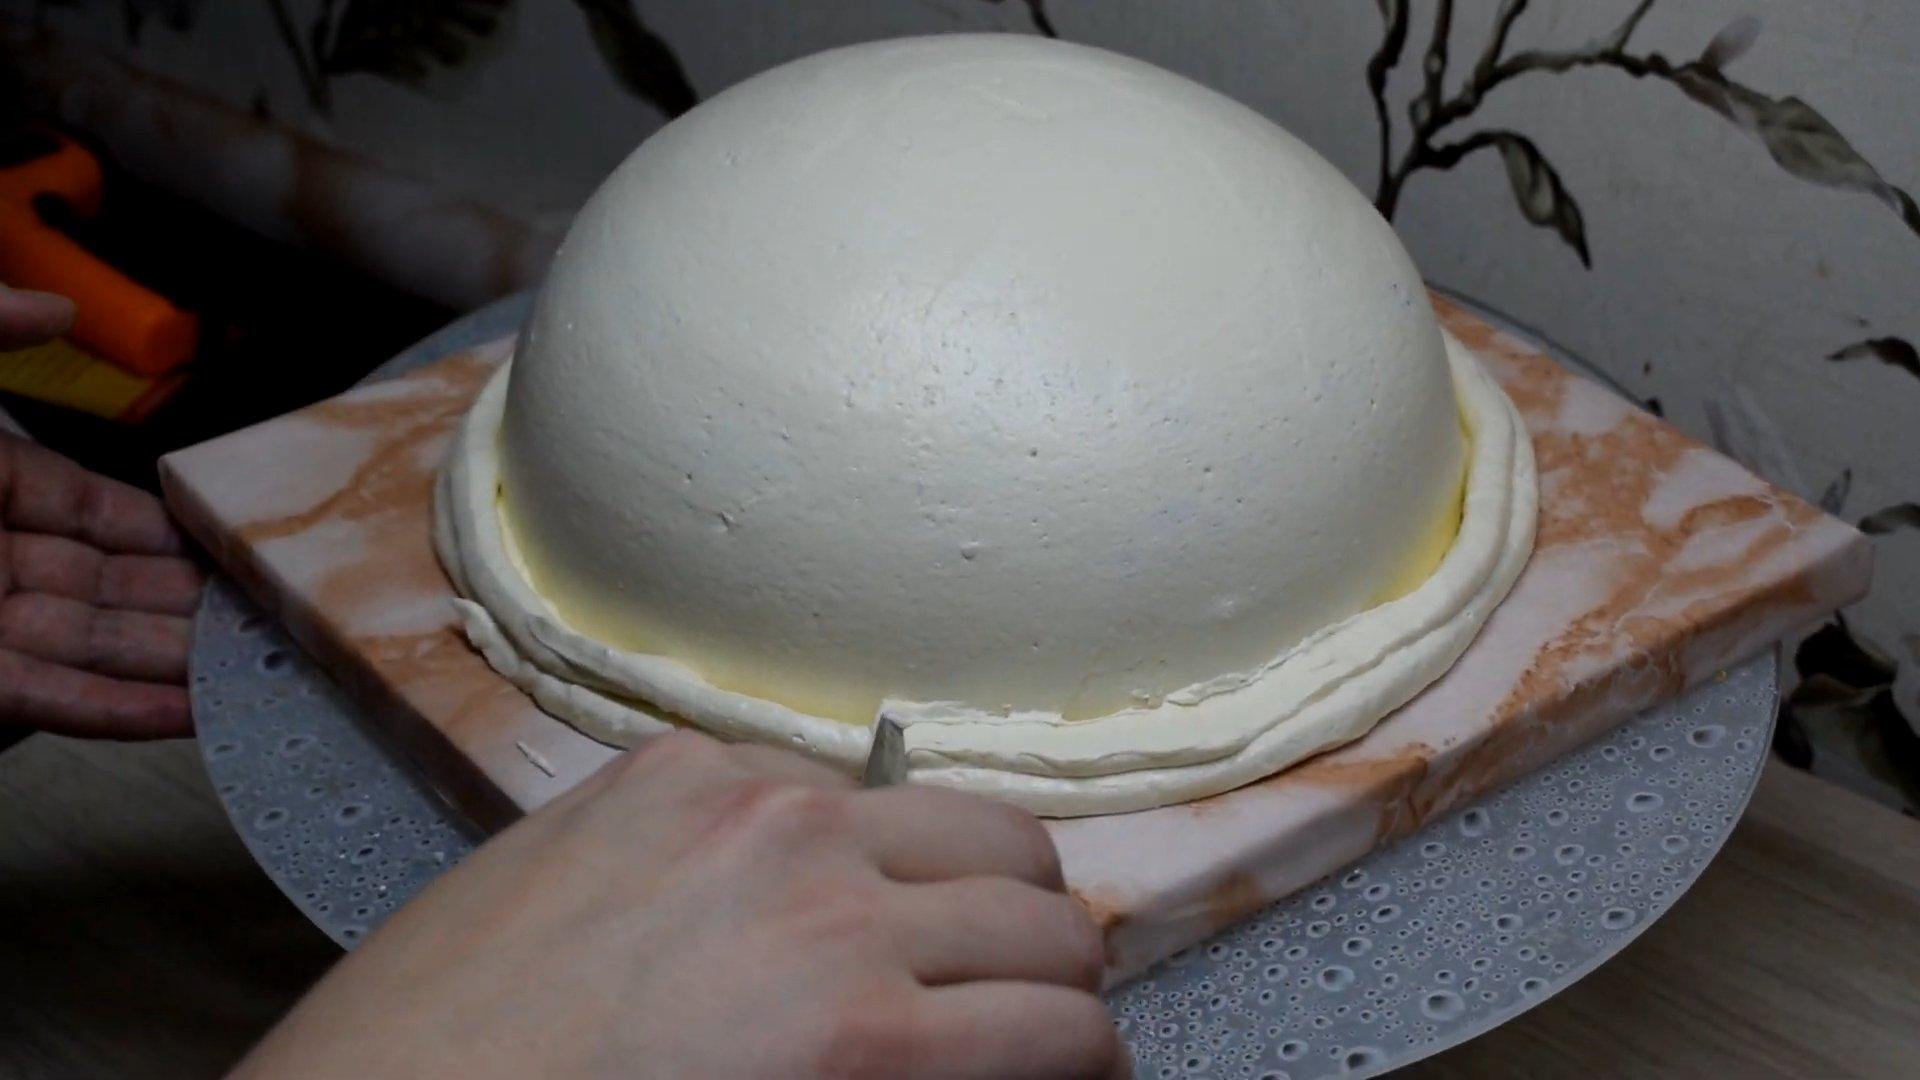
Using a knife, shape the cake into a hemisphere.
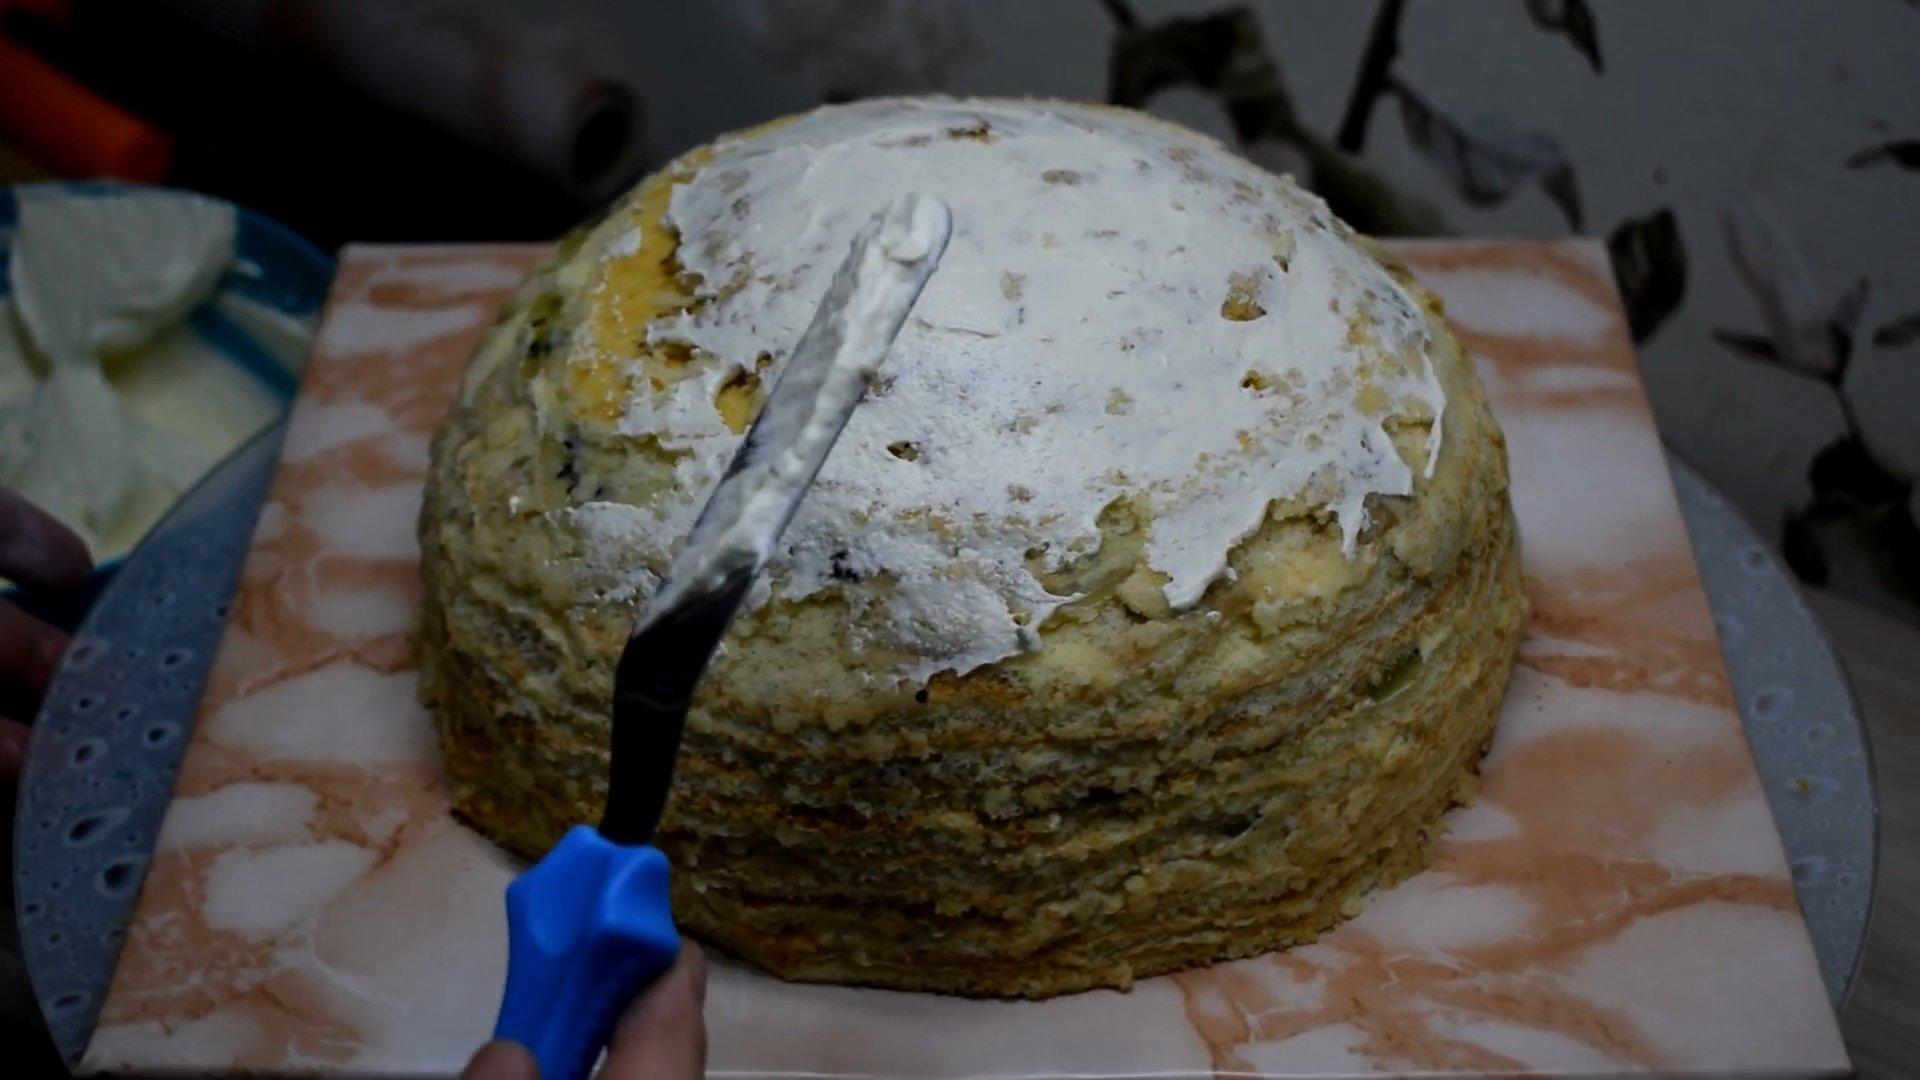
Step 2
Smooth the surface of the cake with ganache and place in the refrigerator for 10 minutes.
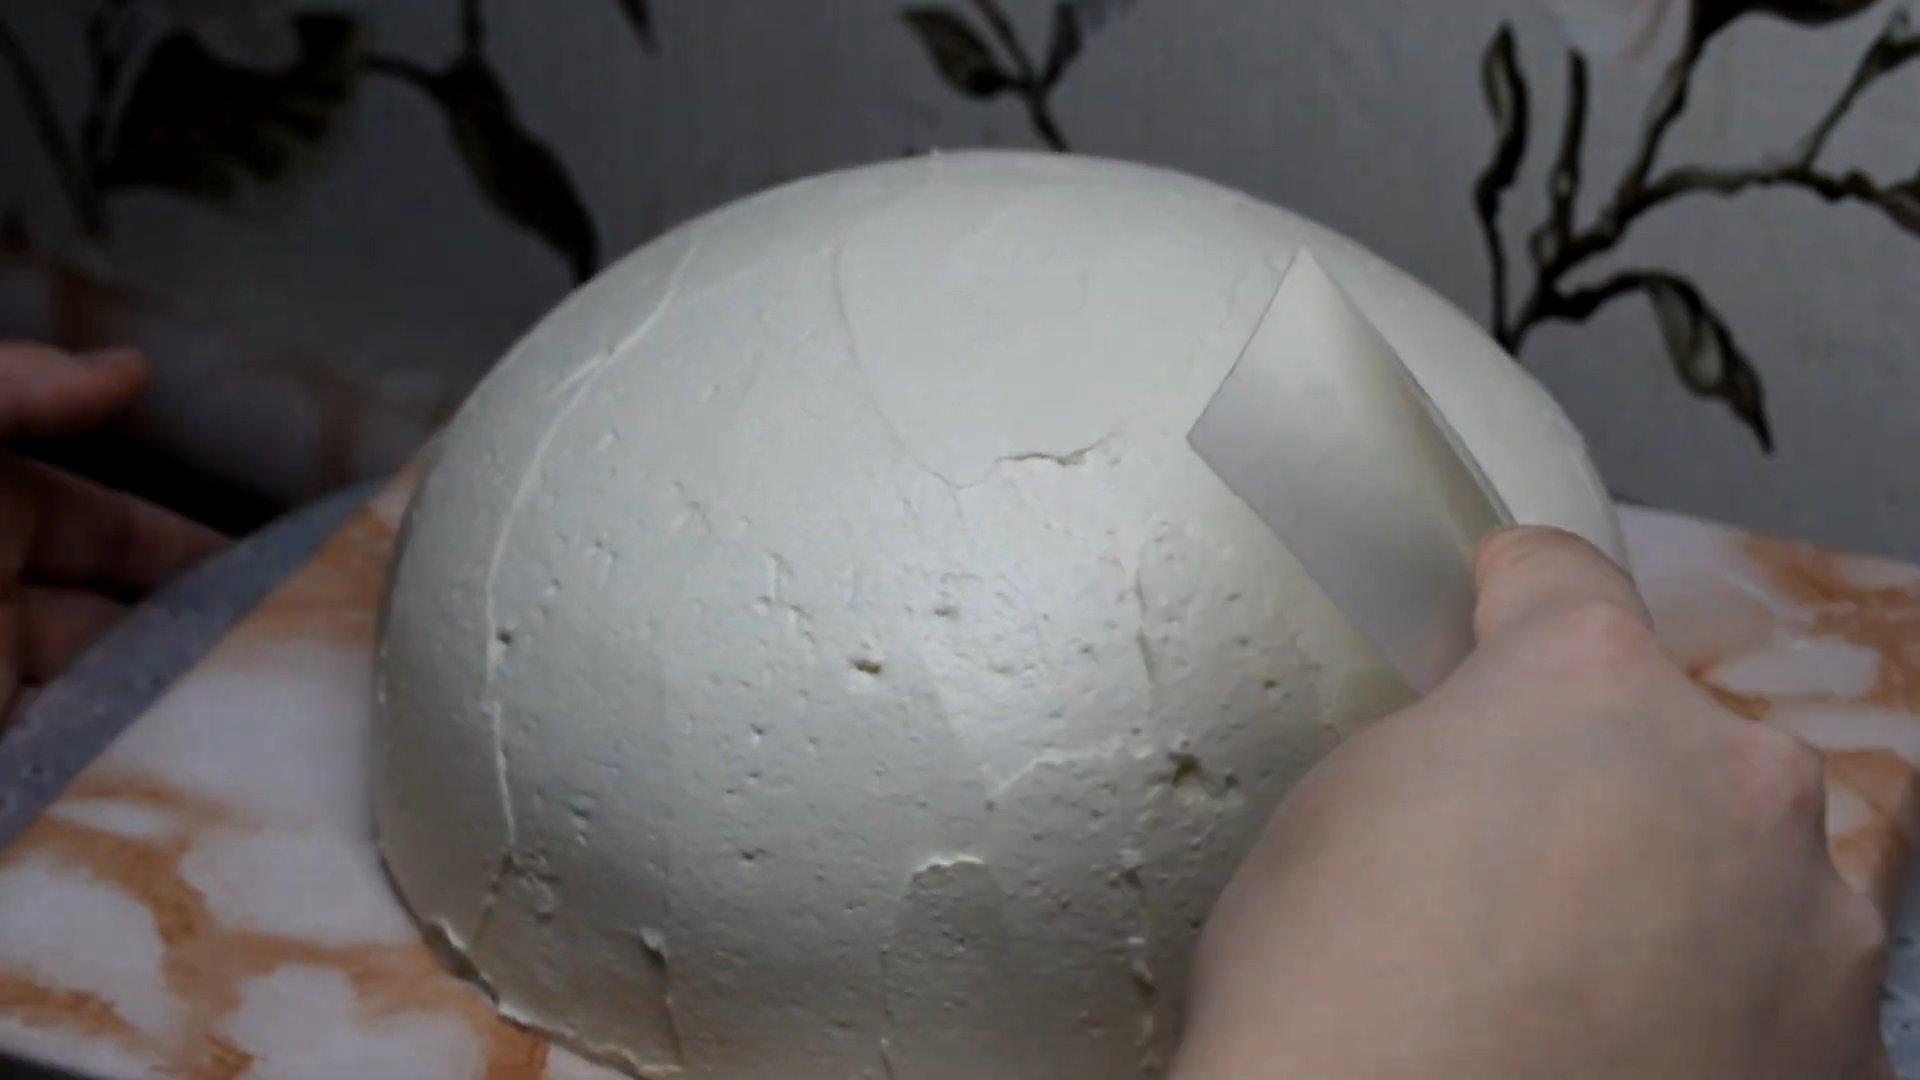
Step 3
We take the cake out of the refrigerator and make a border with ganache.
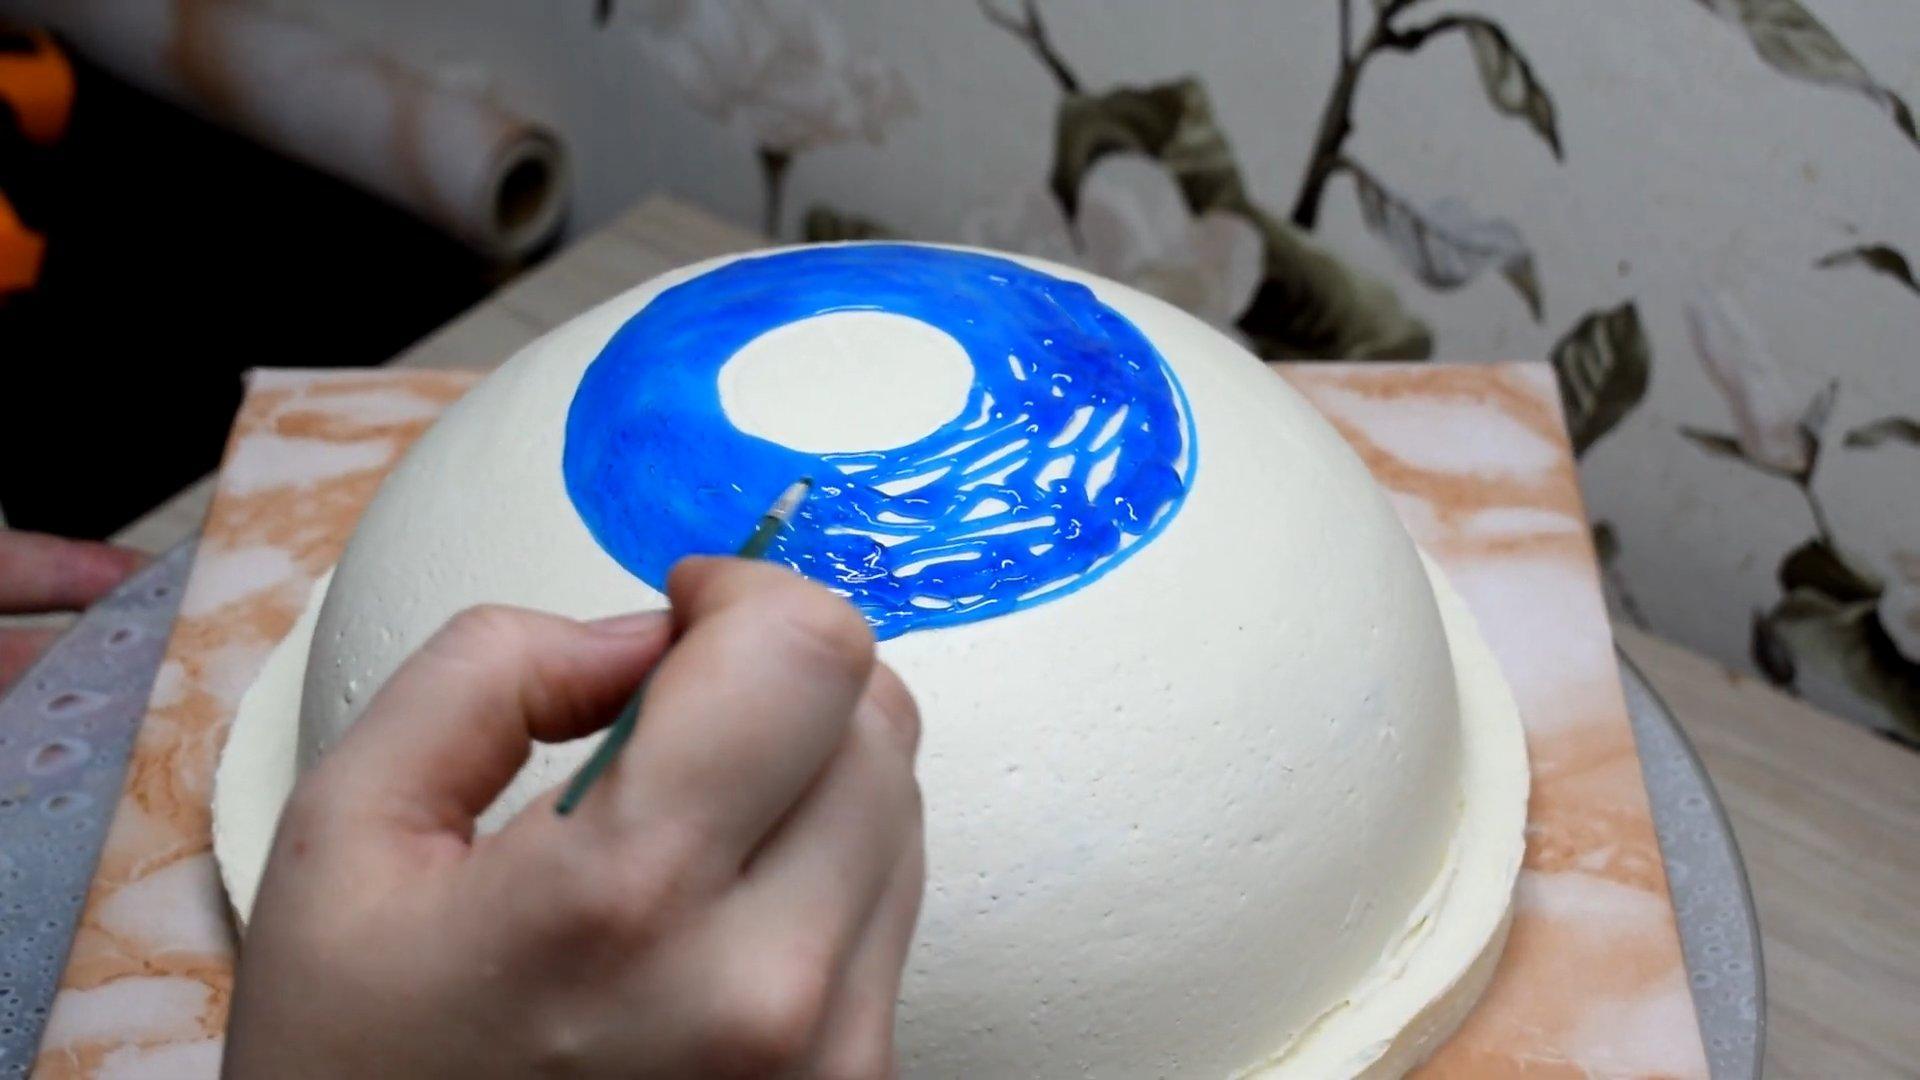
Step 4
Draw the eye with gel food coloring.
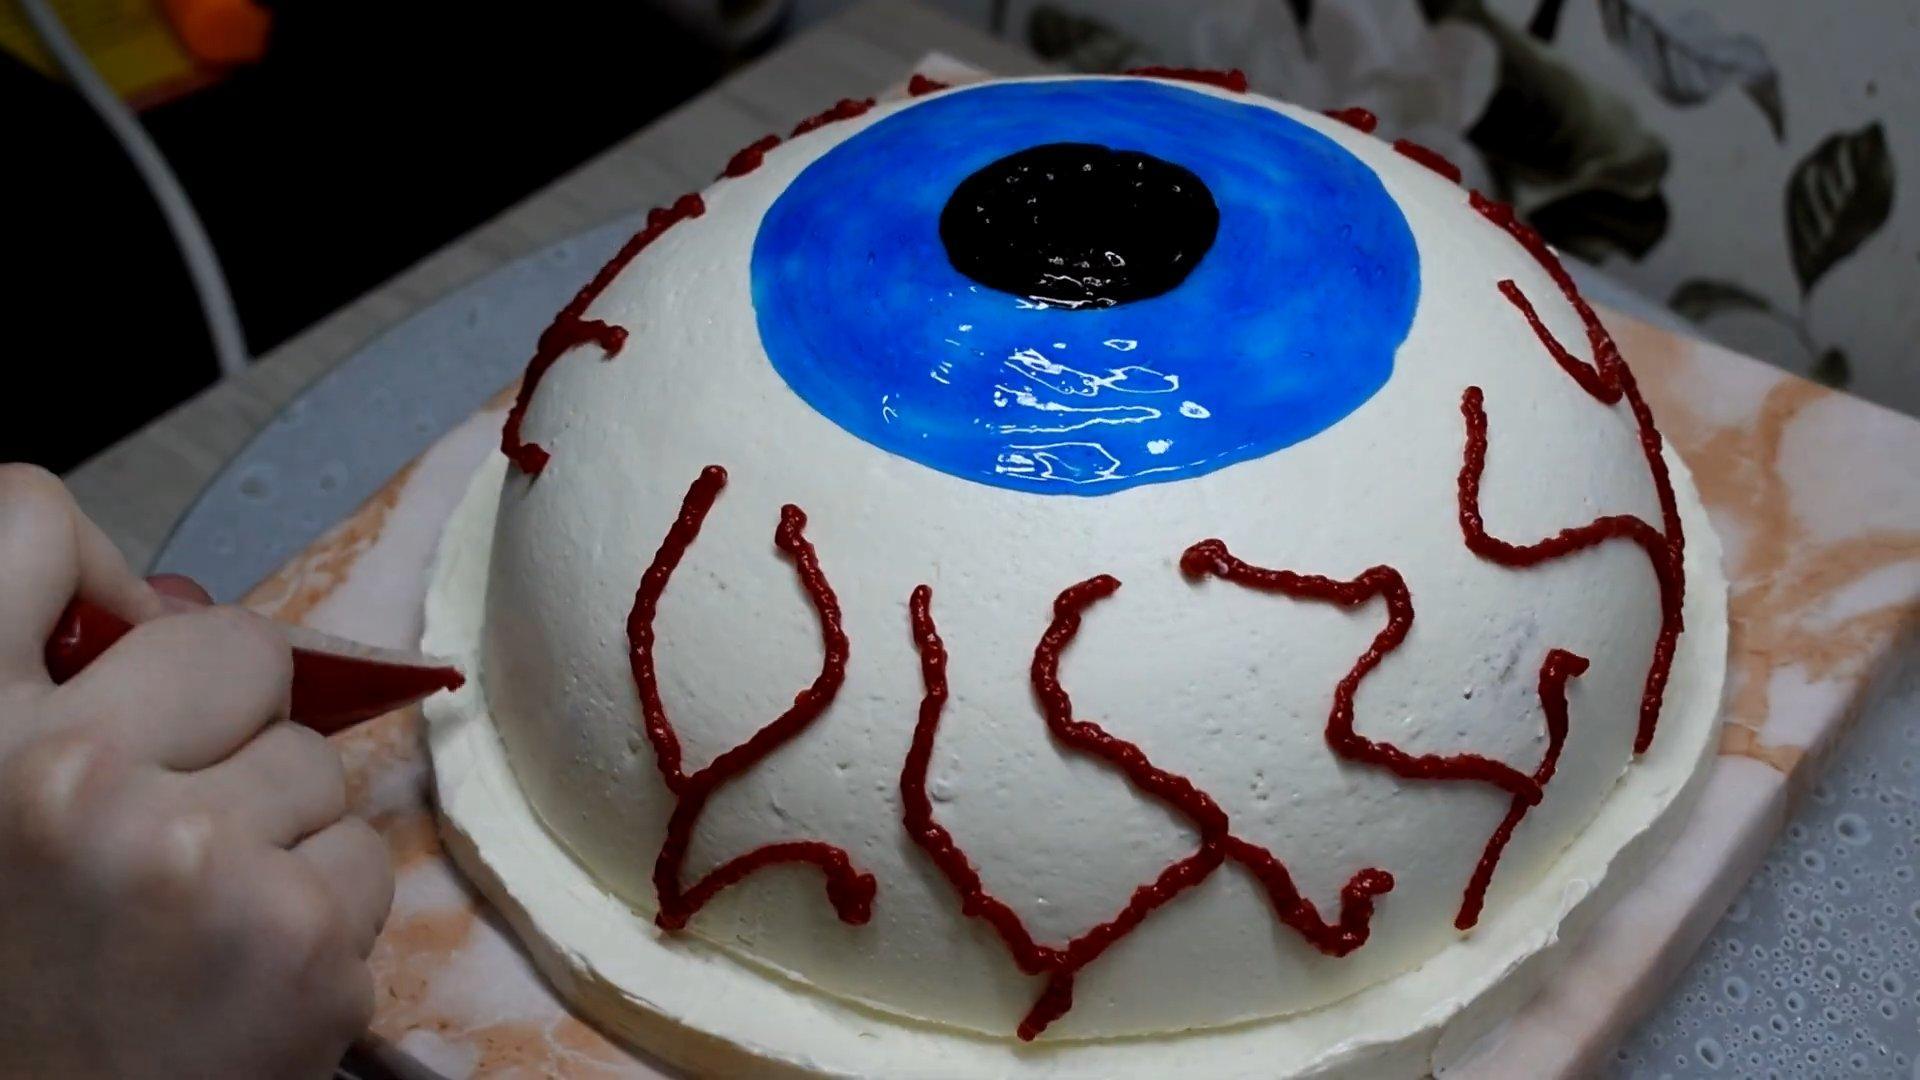
Step 5
Cut the jelly into small cubes and place them on the edge of the ganache.
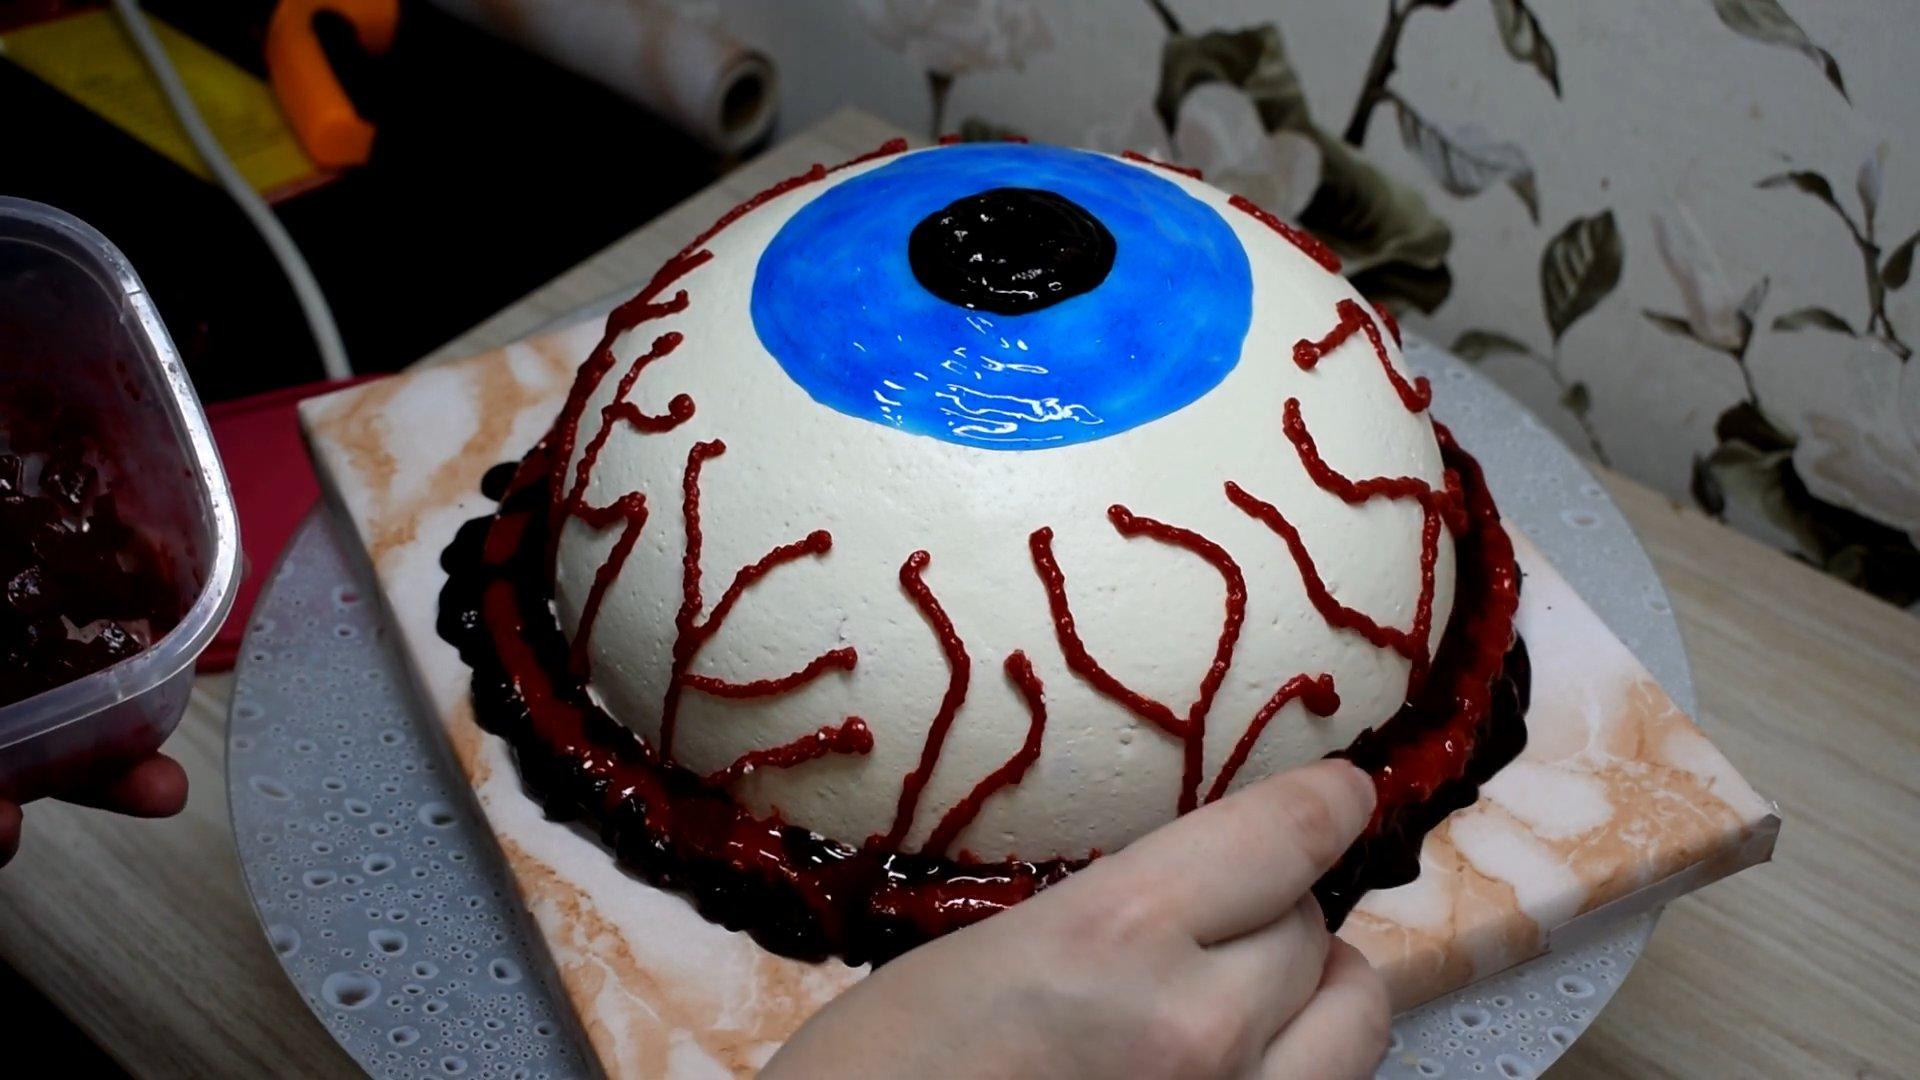
Step 6
The extravagant "Zombie" cake for Halloween is ready.
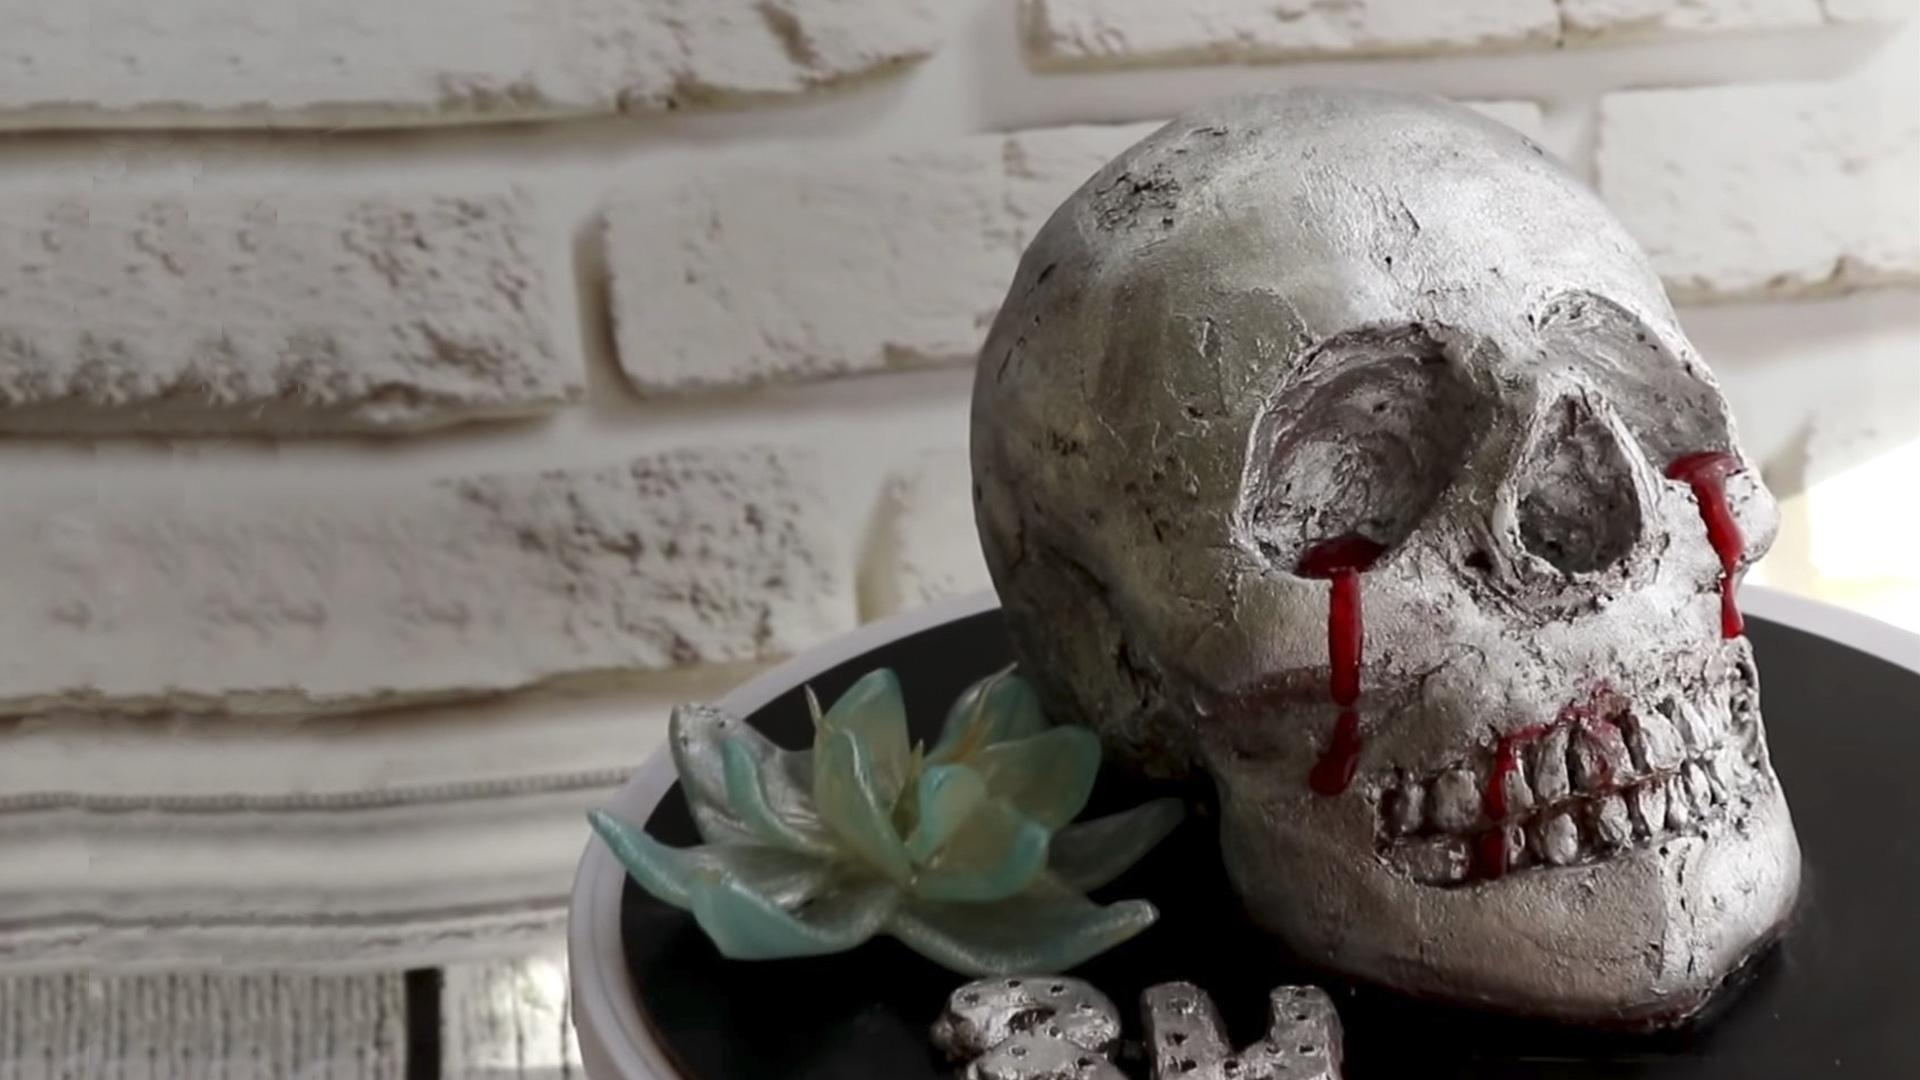
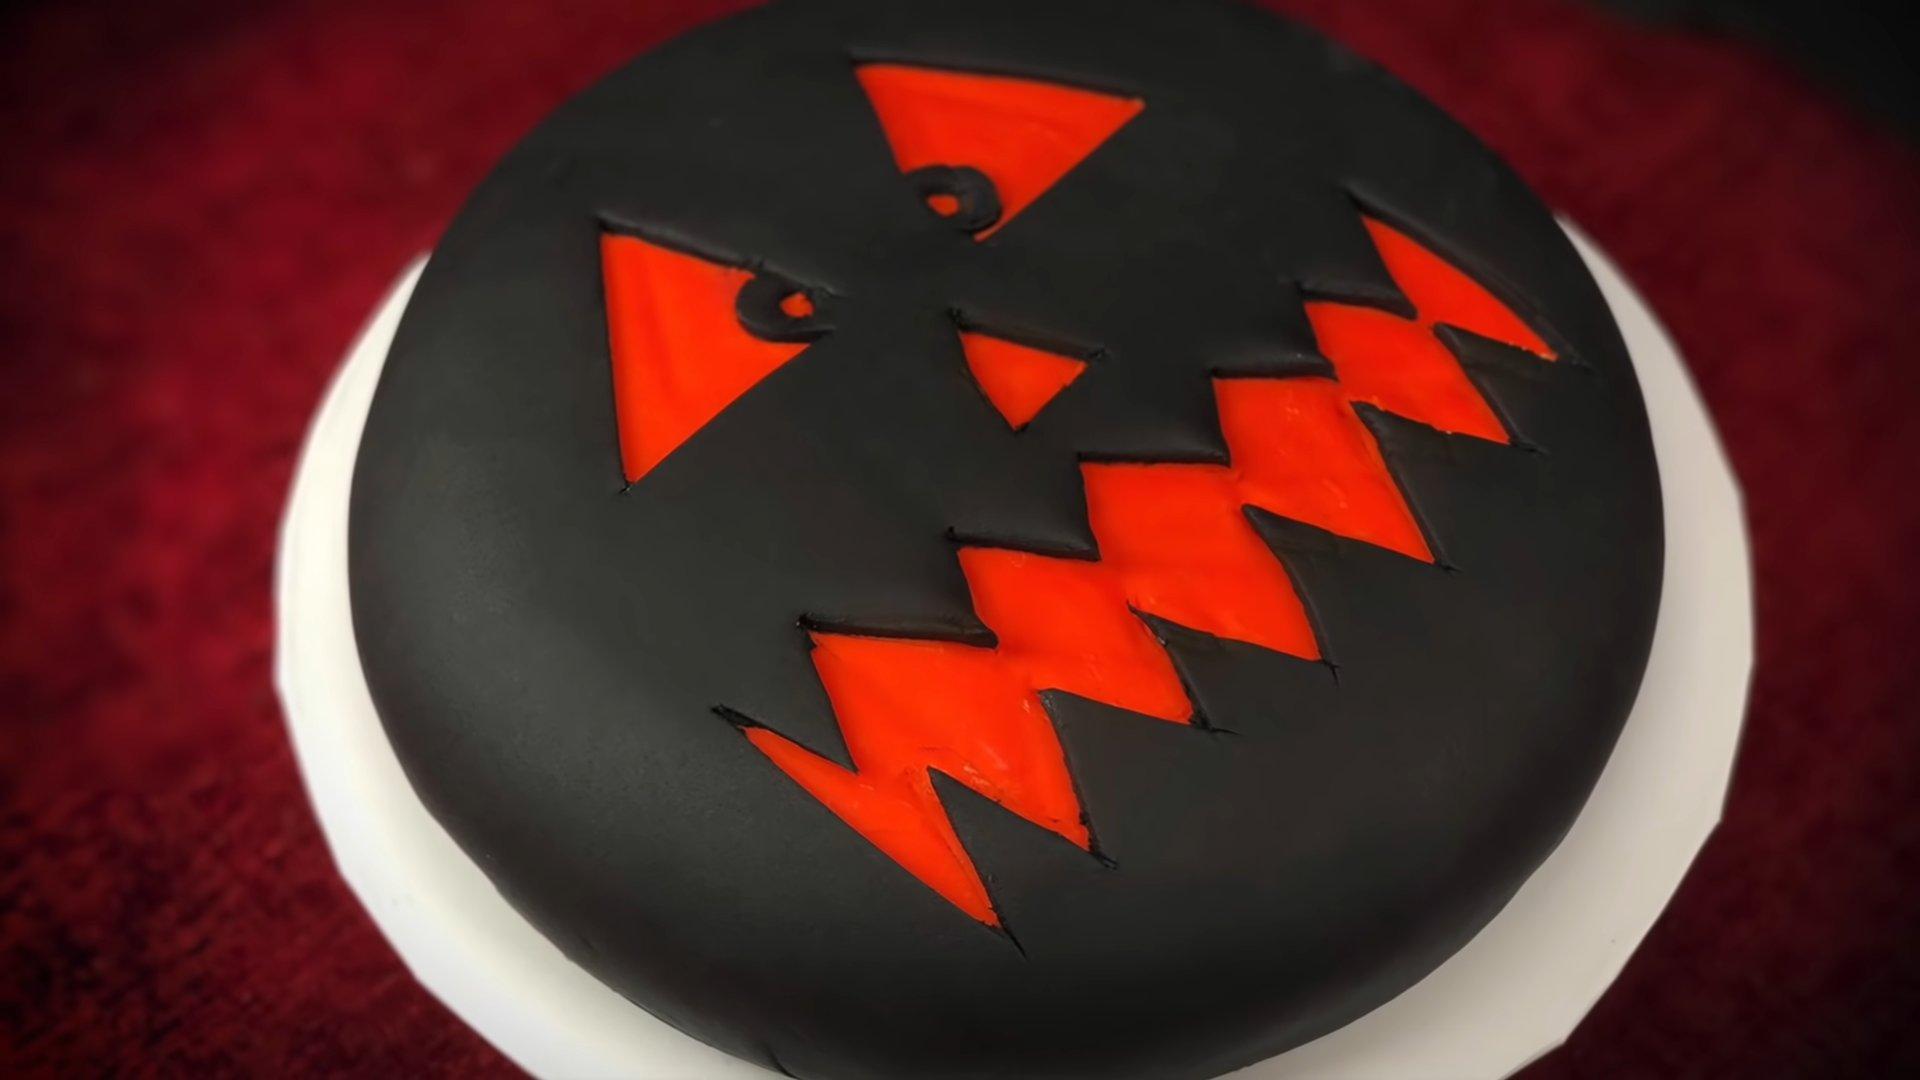
Skull Cake
This is a recipe for a brutal "Skull" cake that will be the highlight of your Halloween table. To create this confectionery masterpiece, you'll need any rectangular sponge cake, stable frosting for leveling, candurin, and a little imagination.
Ingredients
- Chocolate - 200 g
- Butter - 70 g
- Boiled condensed milk - 50 g
- Kandurin - silver
- Gel food coloring - red
Cooking time: 2 hours
Servings: 1
Step-by-step recipe
Step 1
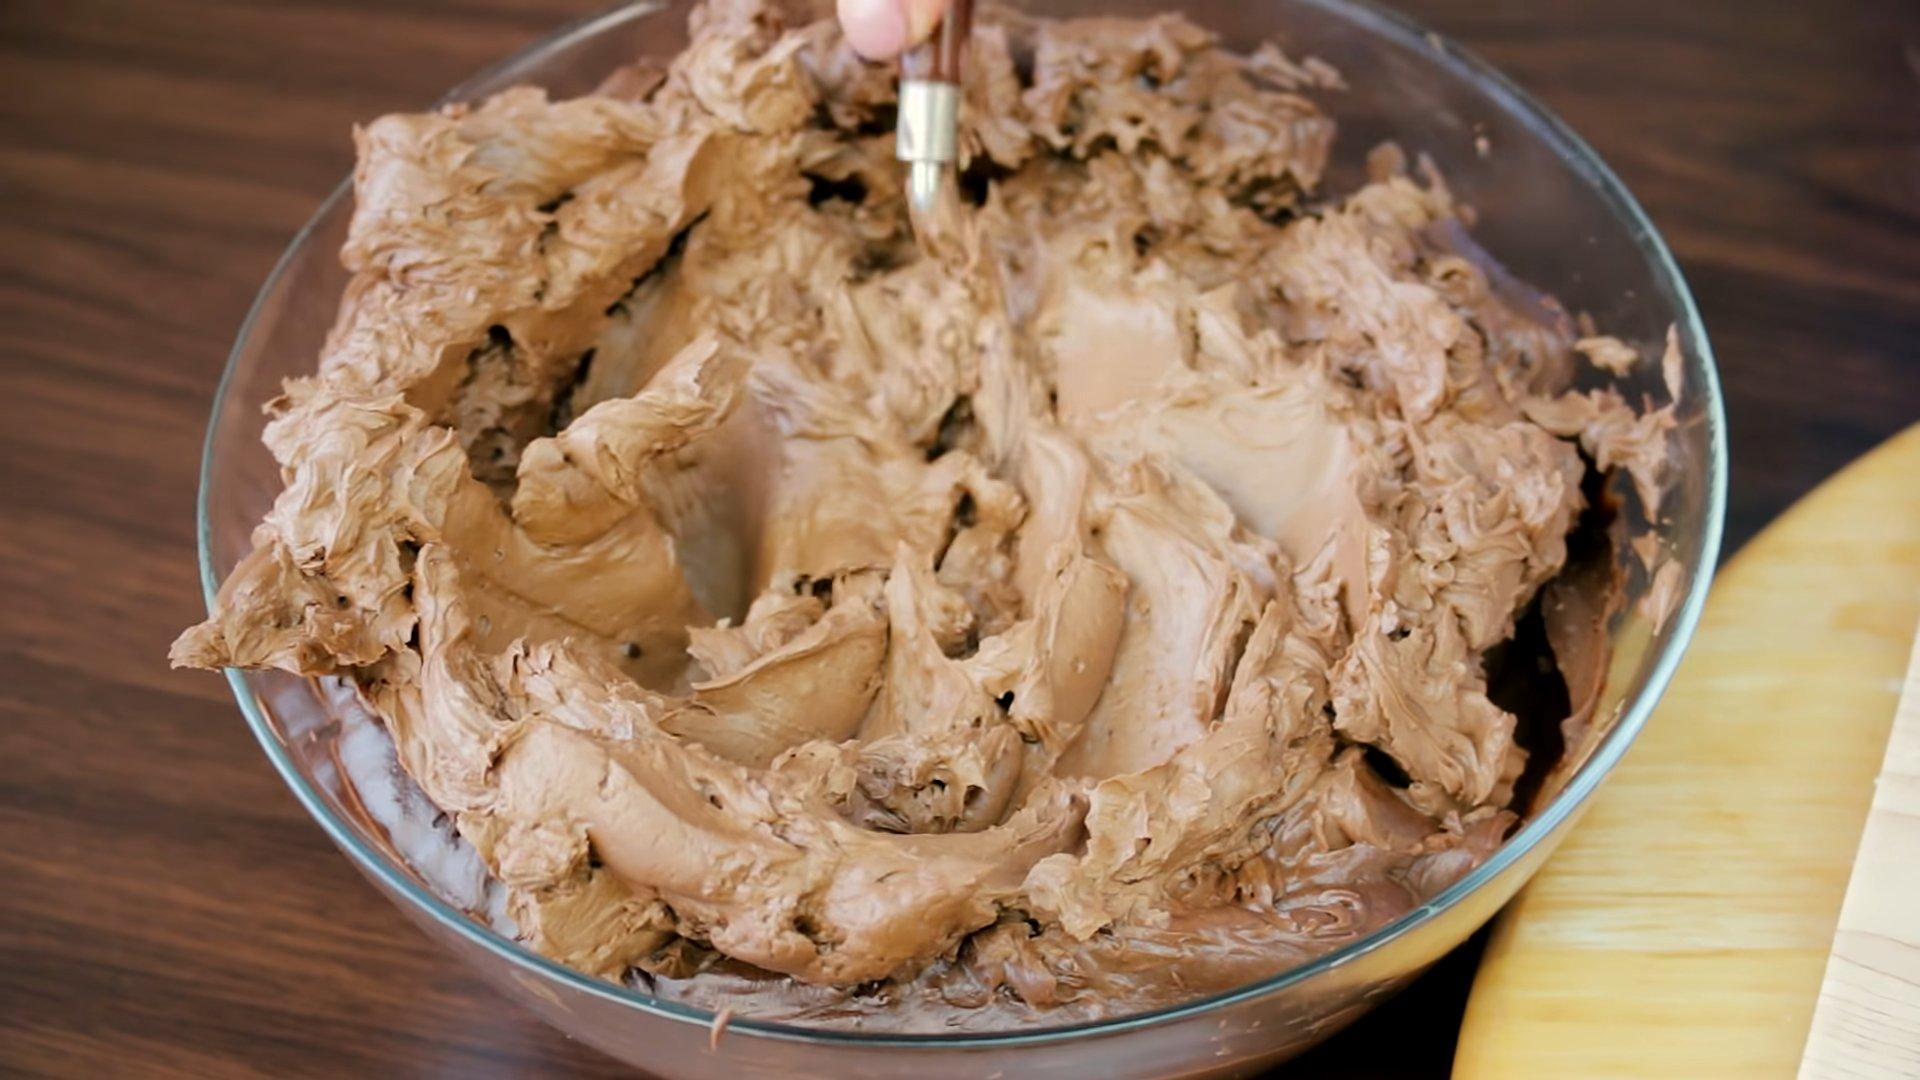
Prepare the frosting to smooth out the cake. Melt the chocolate in a double boiler, add the butter and condensed milk, and beat with a mixer for 3-4 minutes.
Step 2
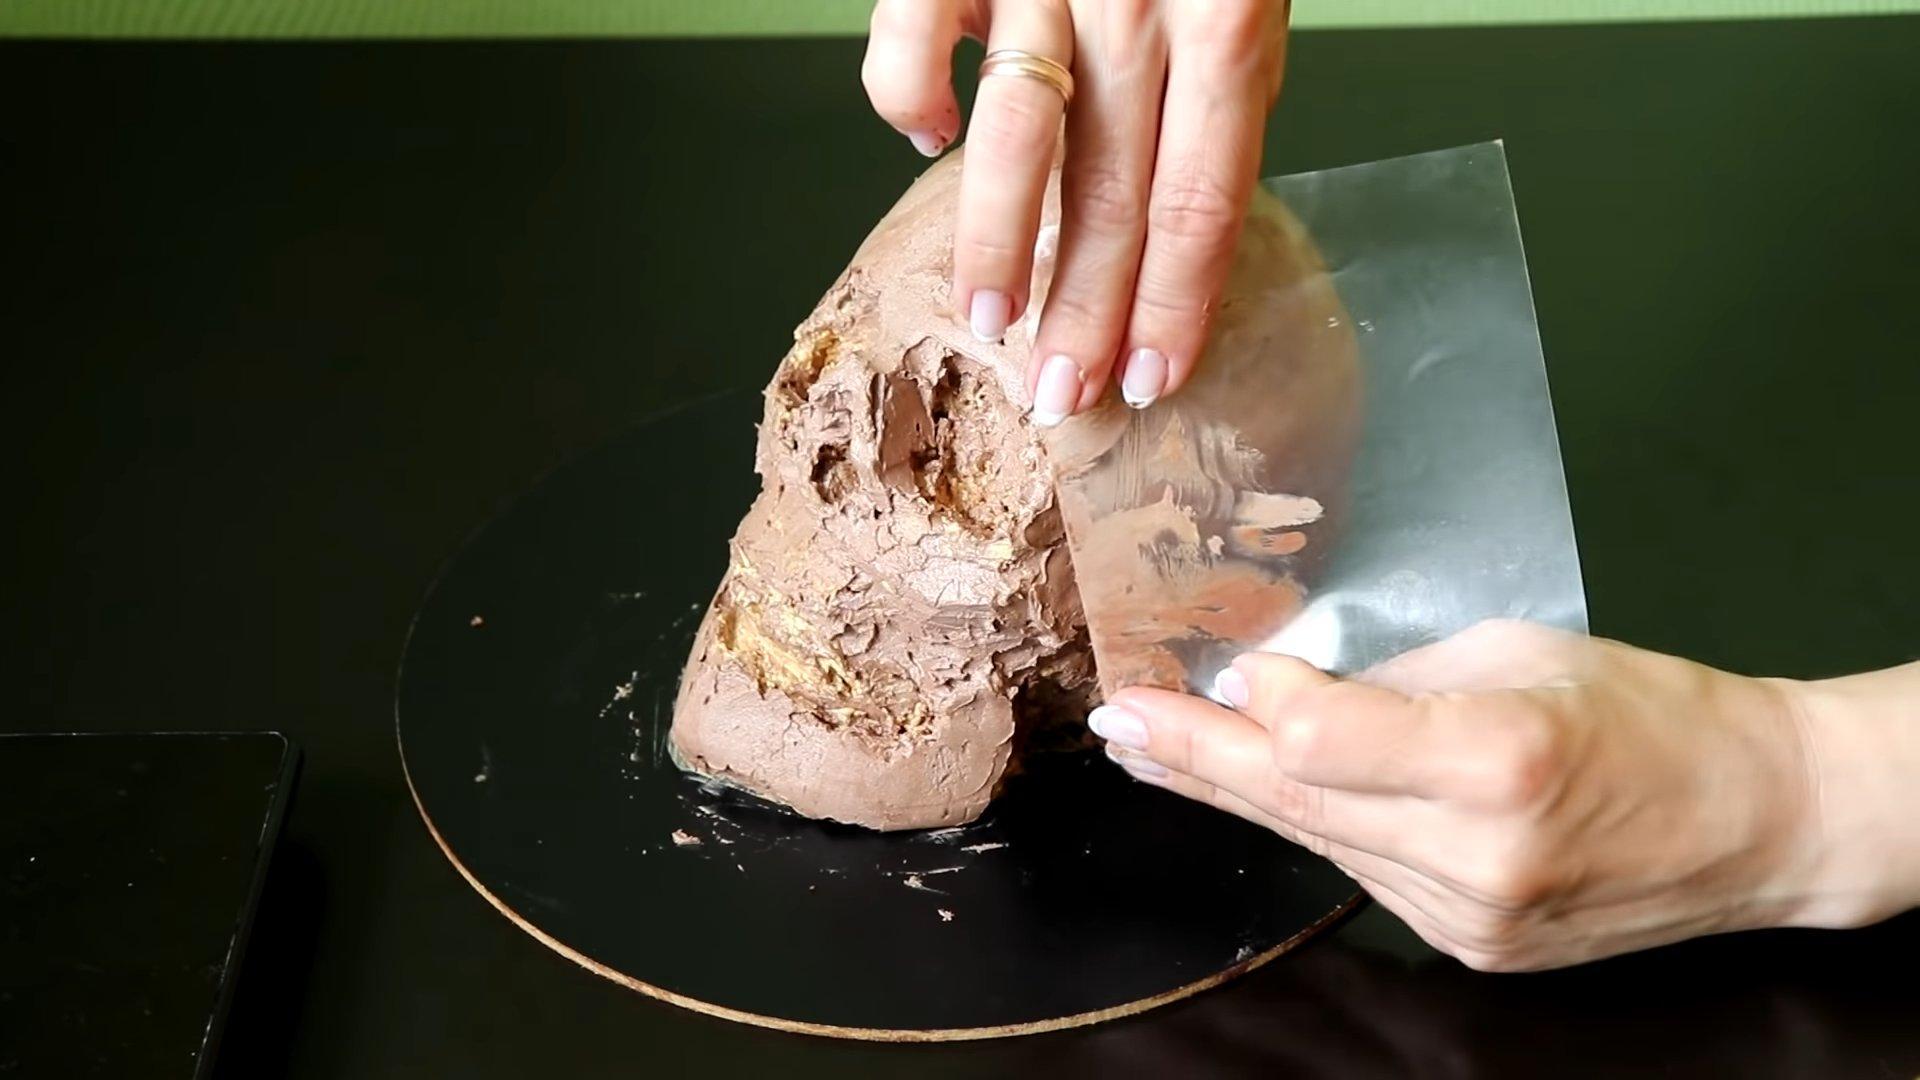
Cut out a skull from the existing cake. Use scraps to add the missing height.

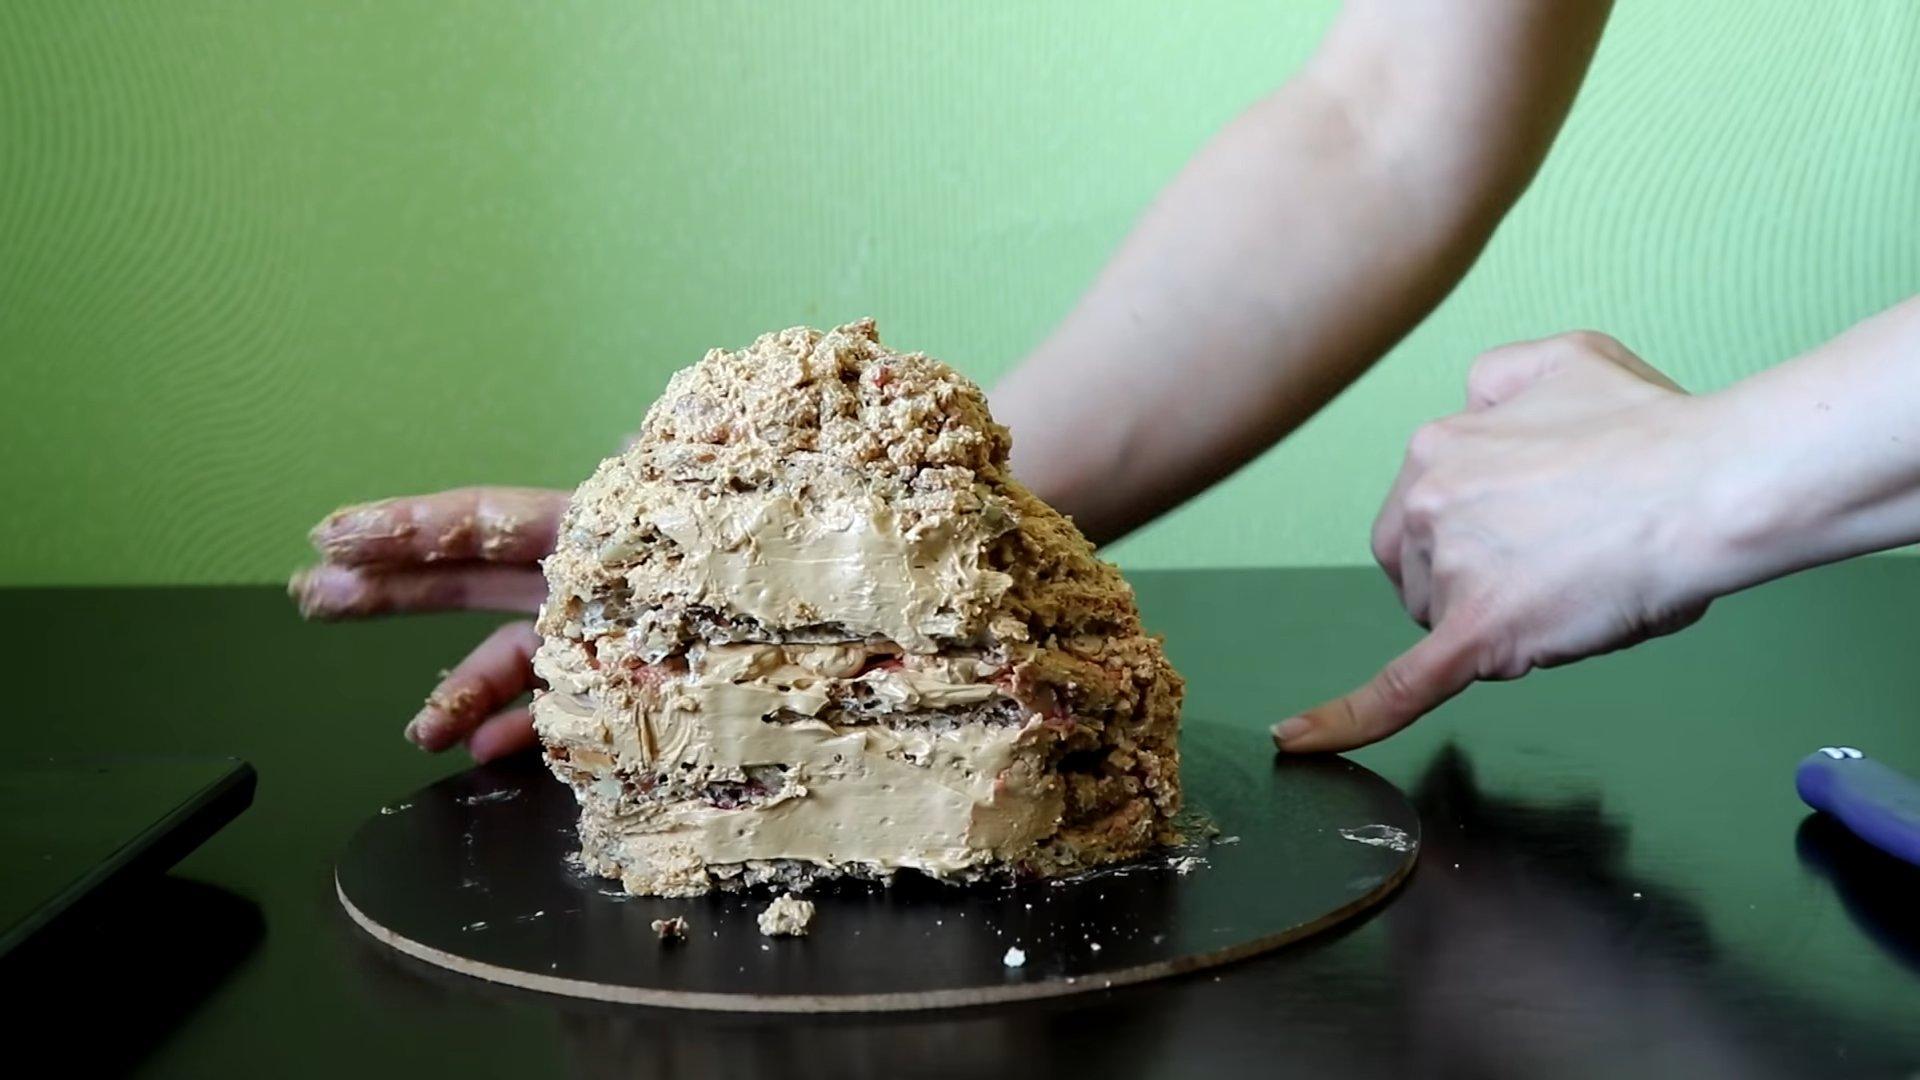
Step 3
We also add the nose and jaw using scraps. Then we carefully work out all the details and proportions.
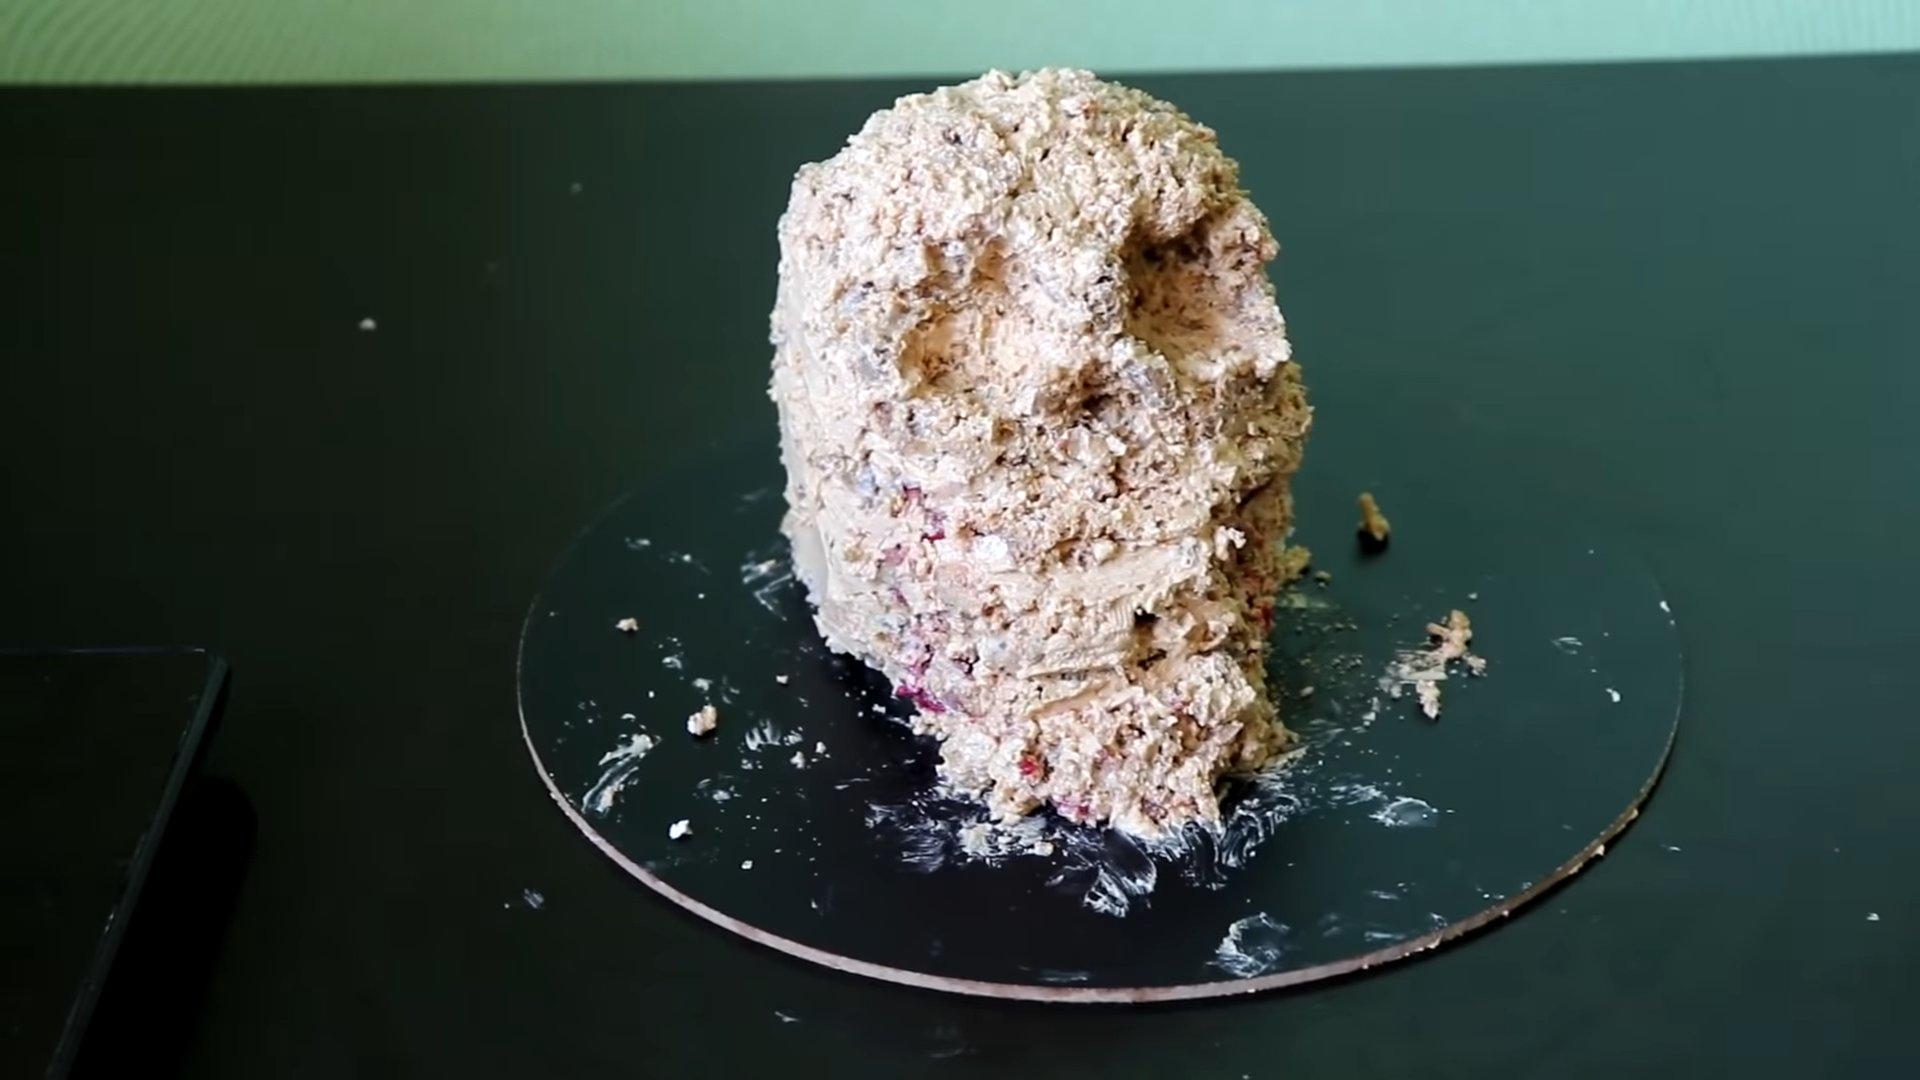
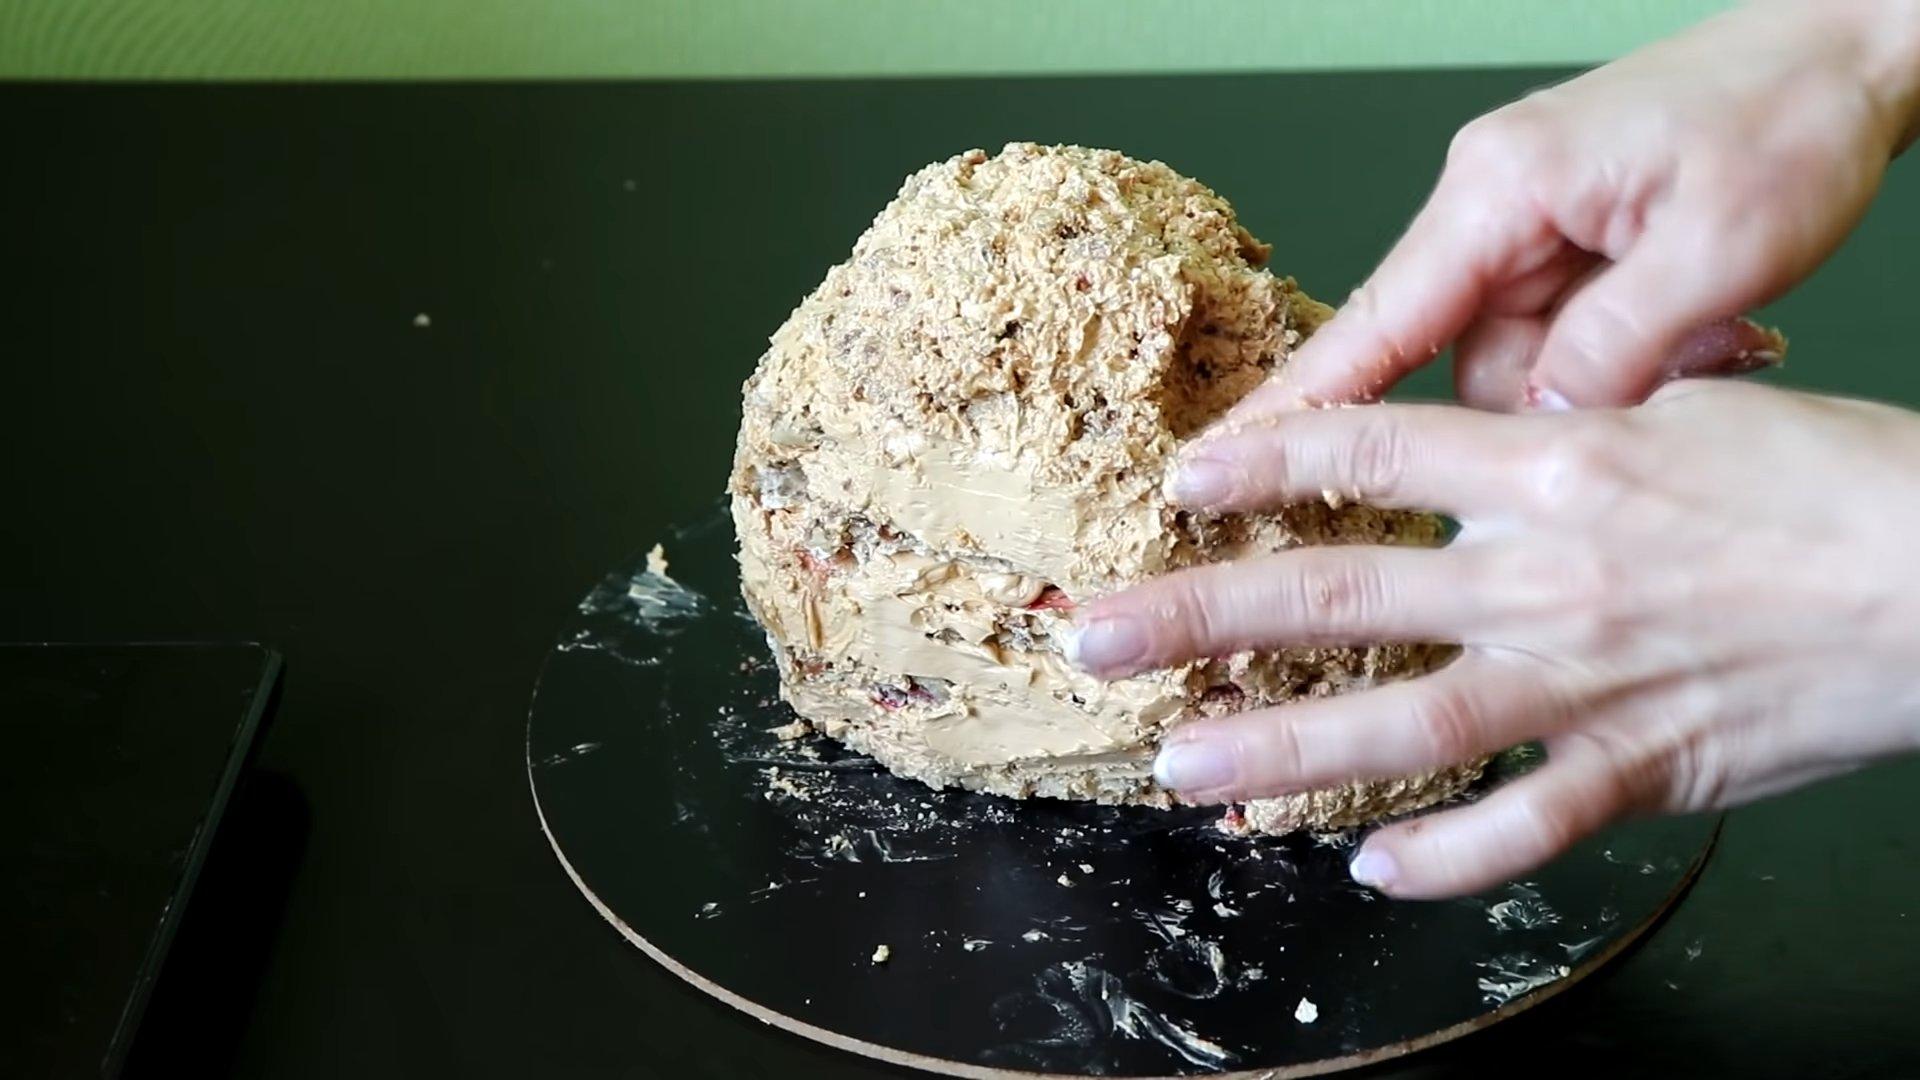
Step 4
Carefully spread the chocolate cream onto the cake, smoothing the surface as much as possible.
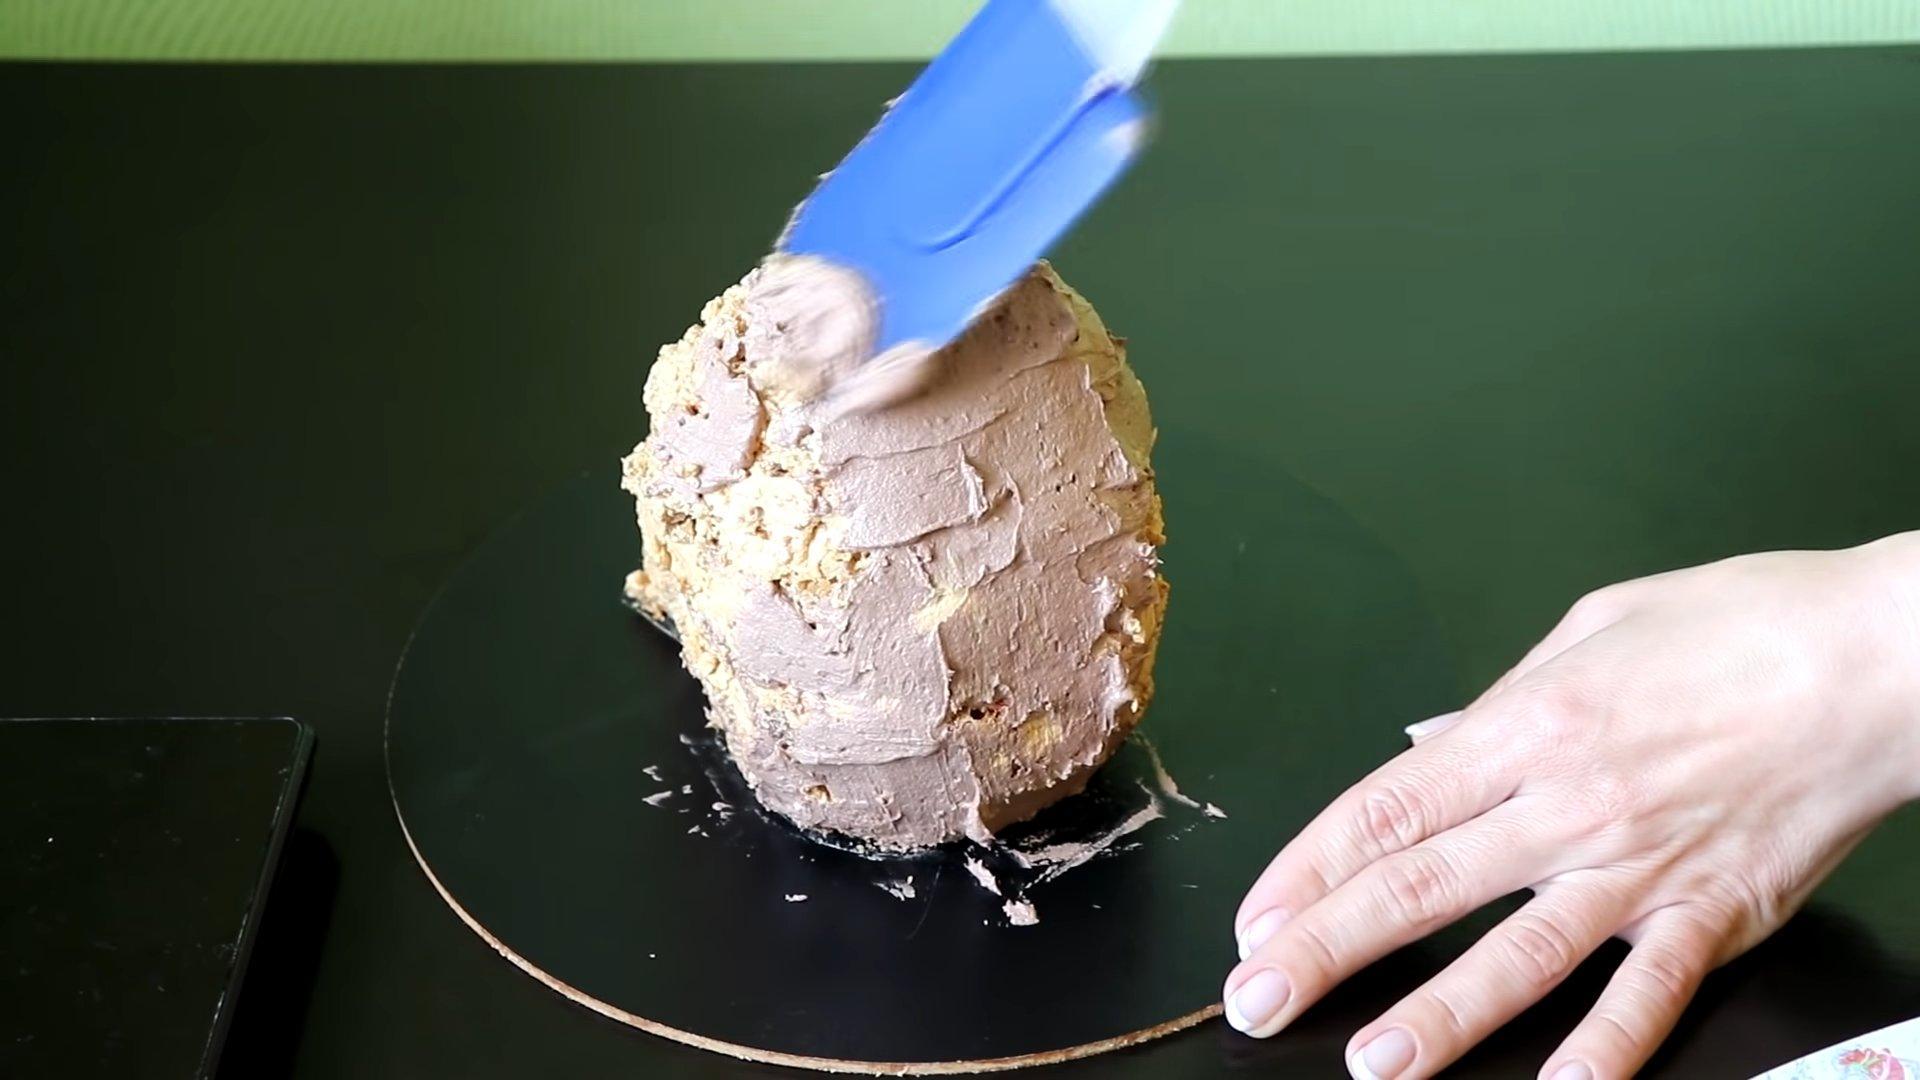
Step 5
Place the cake in the refrigerator for 30 minutes.
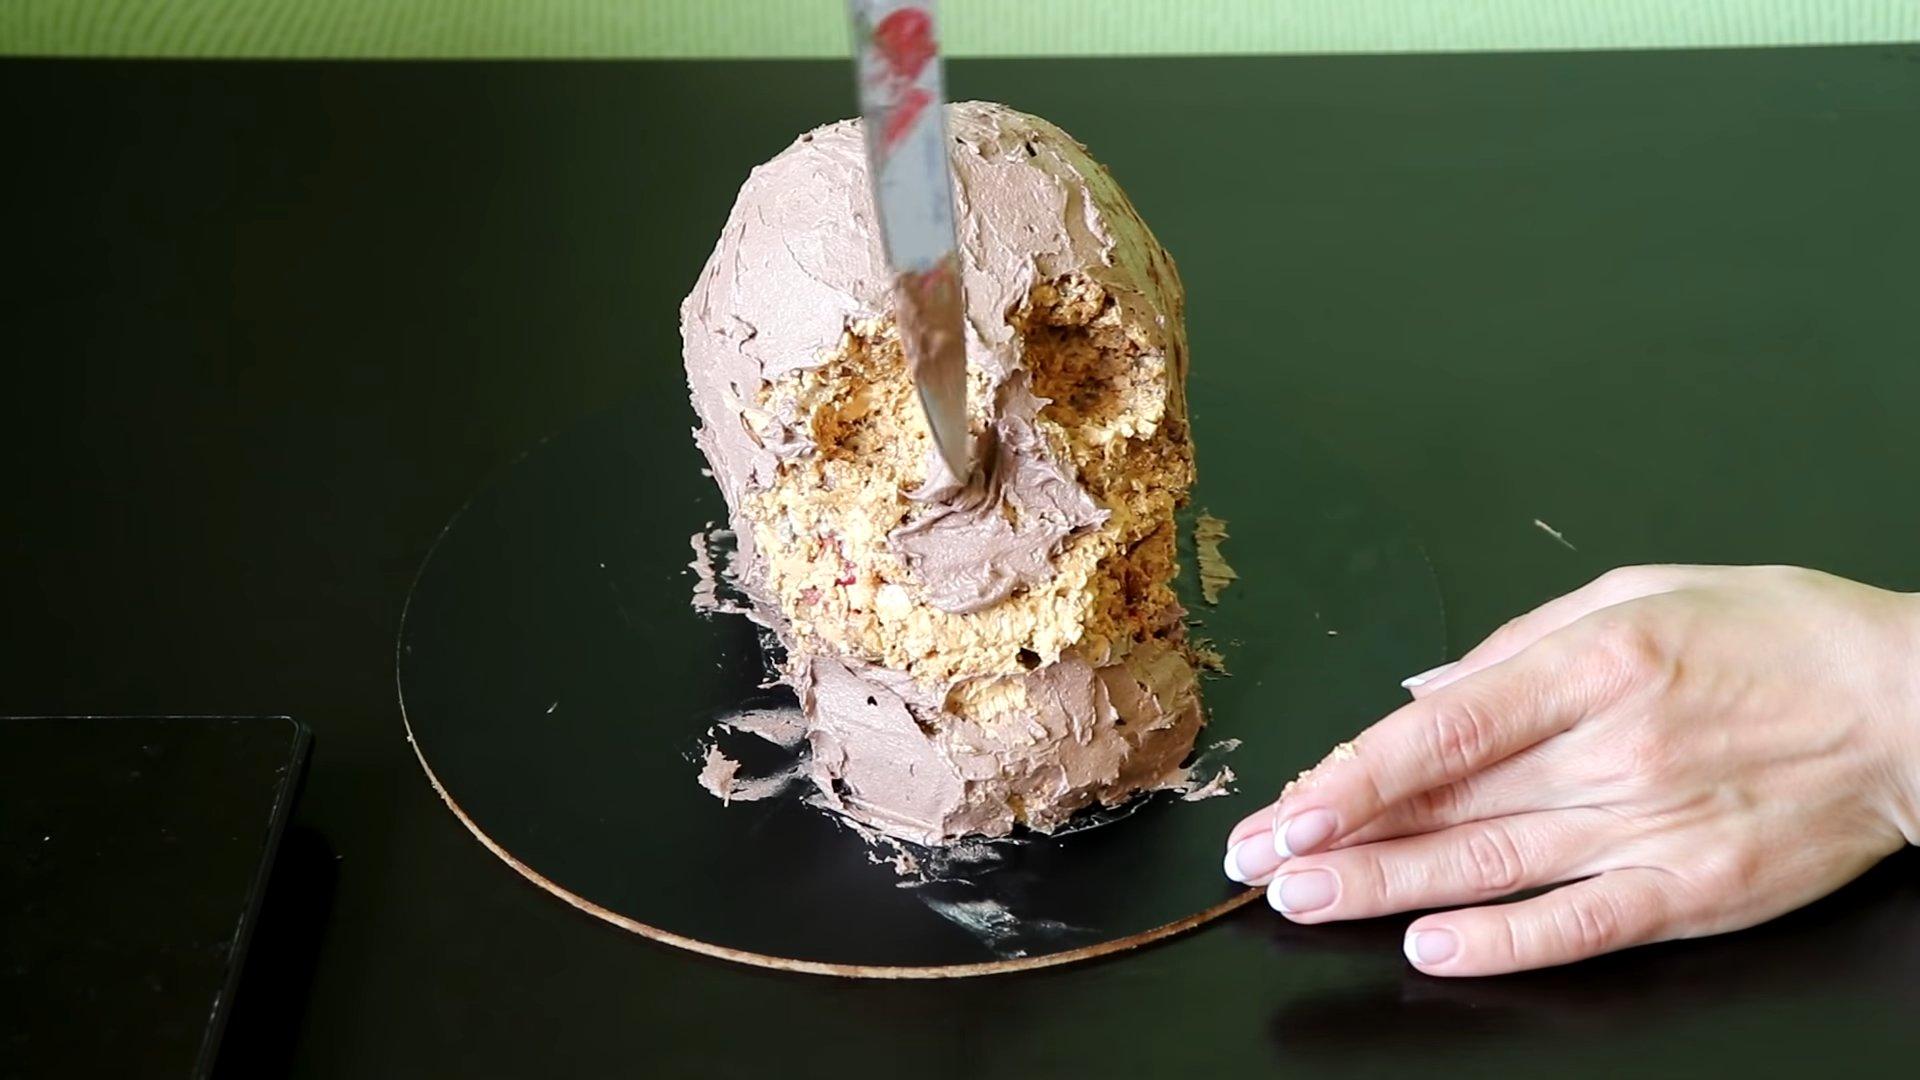
Step 6
We take the cooled cake out of the refrigerator and smooth out any unevenness using acetate film.
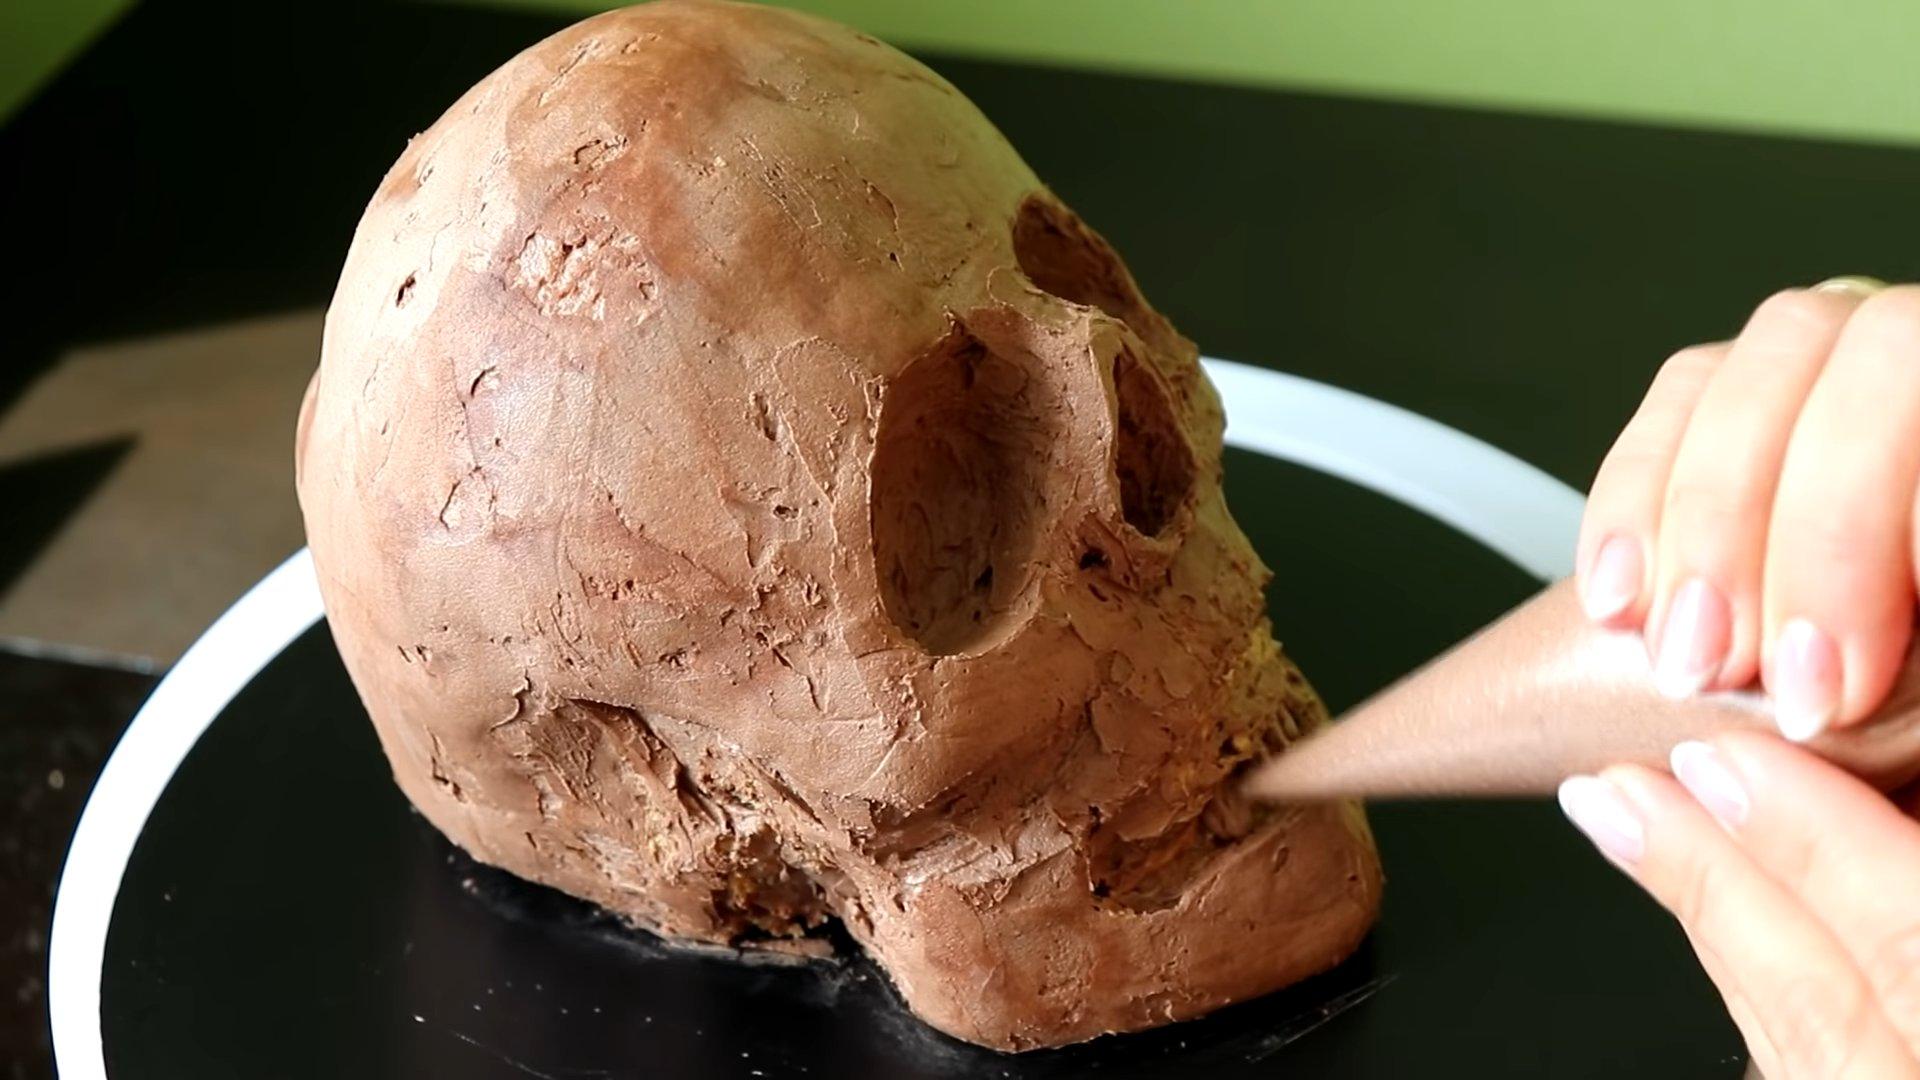
Step 7
Using a pastry bag, create teeth and place the cake in the freezer for 1 hour. Make sure the frosting is completely frozen.

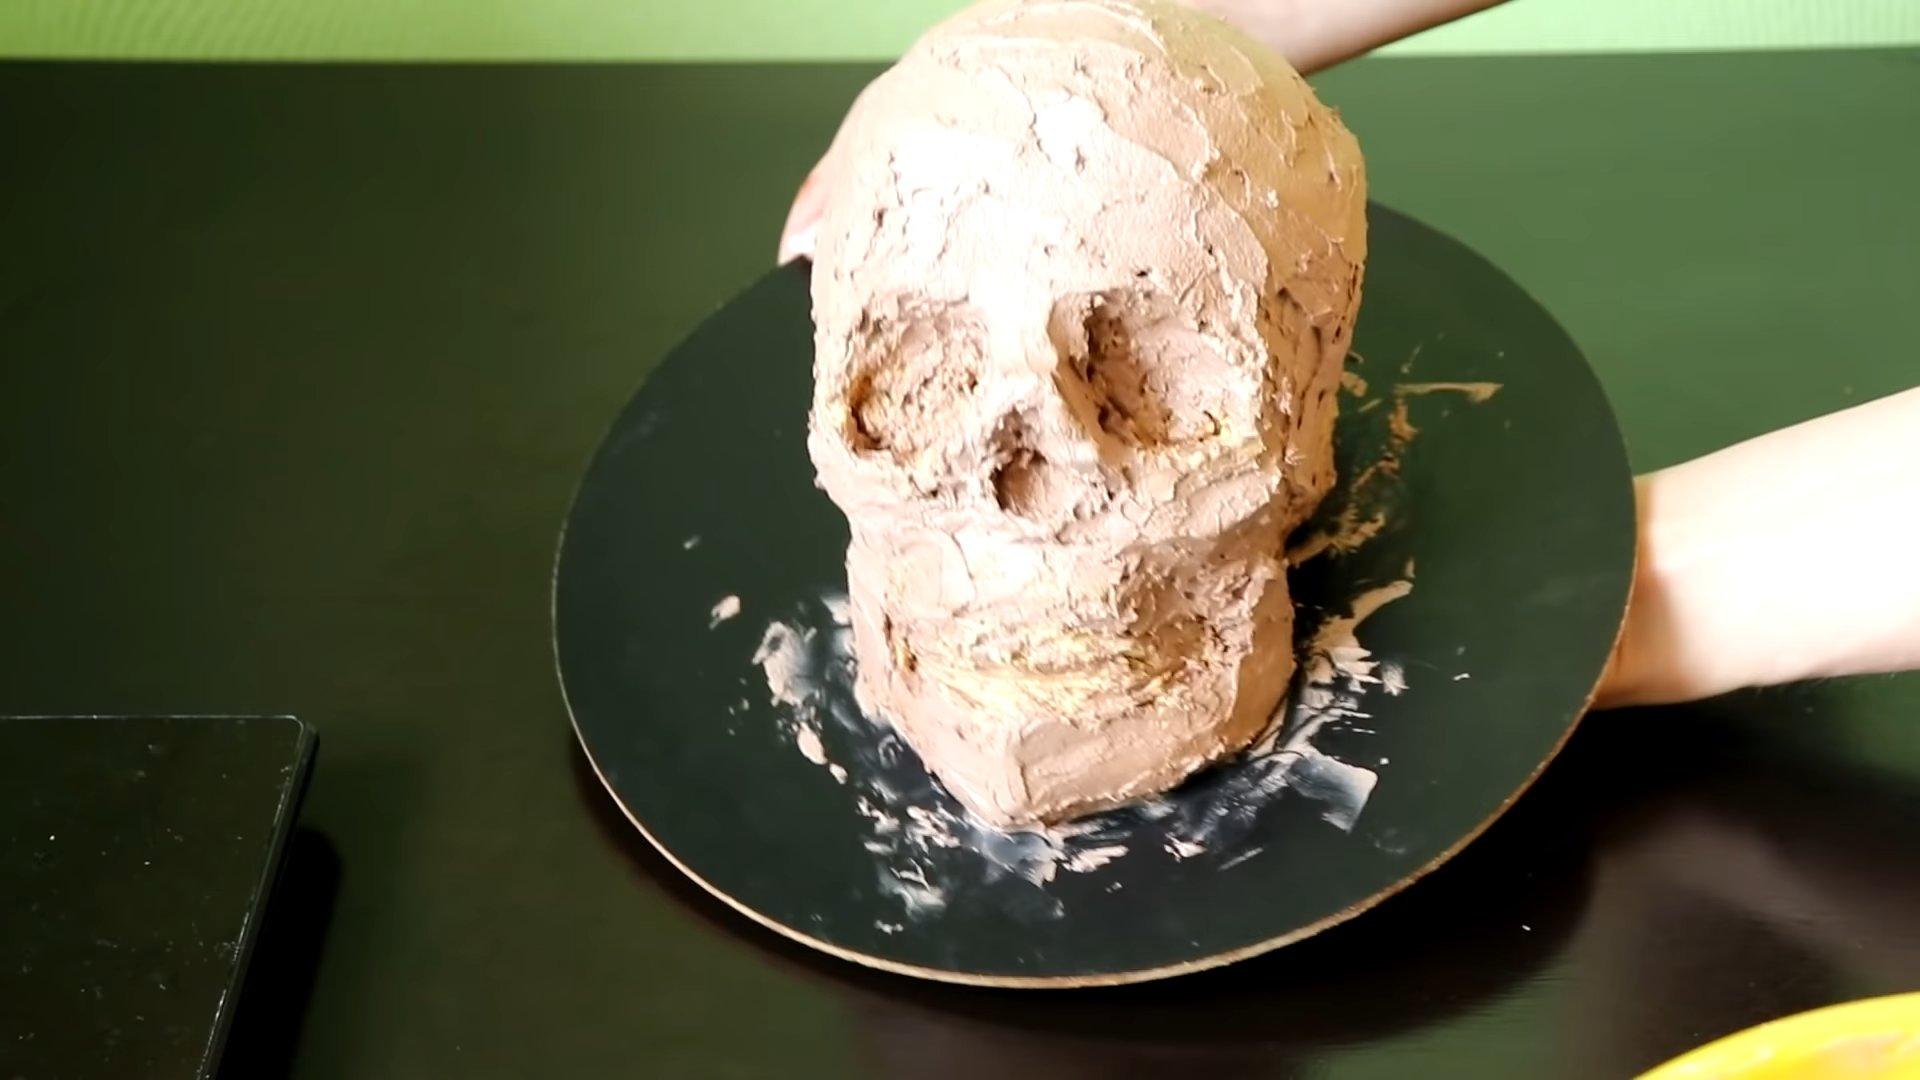
Step 8
Remove the cake from the freezer and drybrush it with silver candurin. Use red gel food coloring to create the blood.
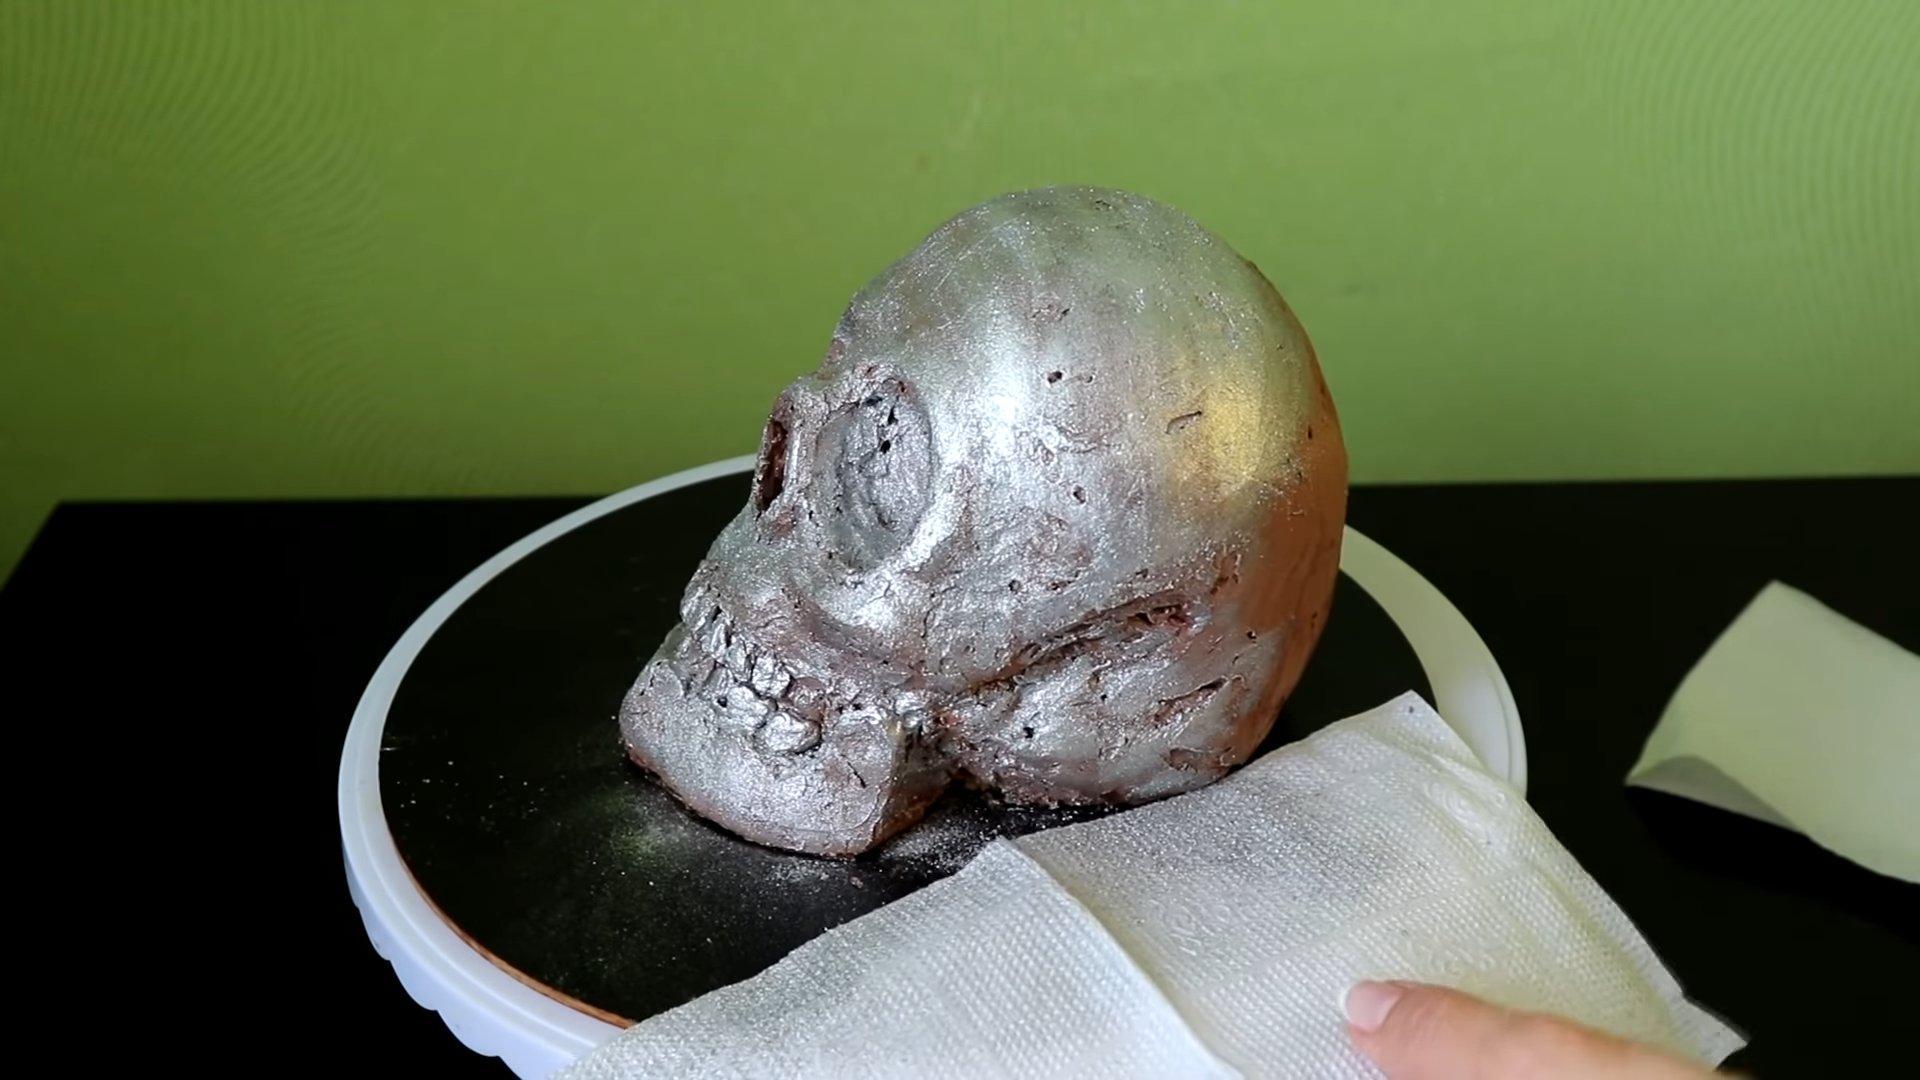
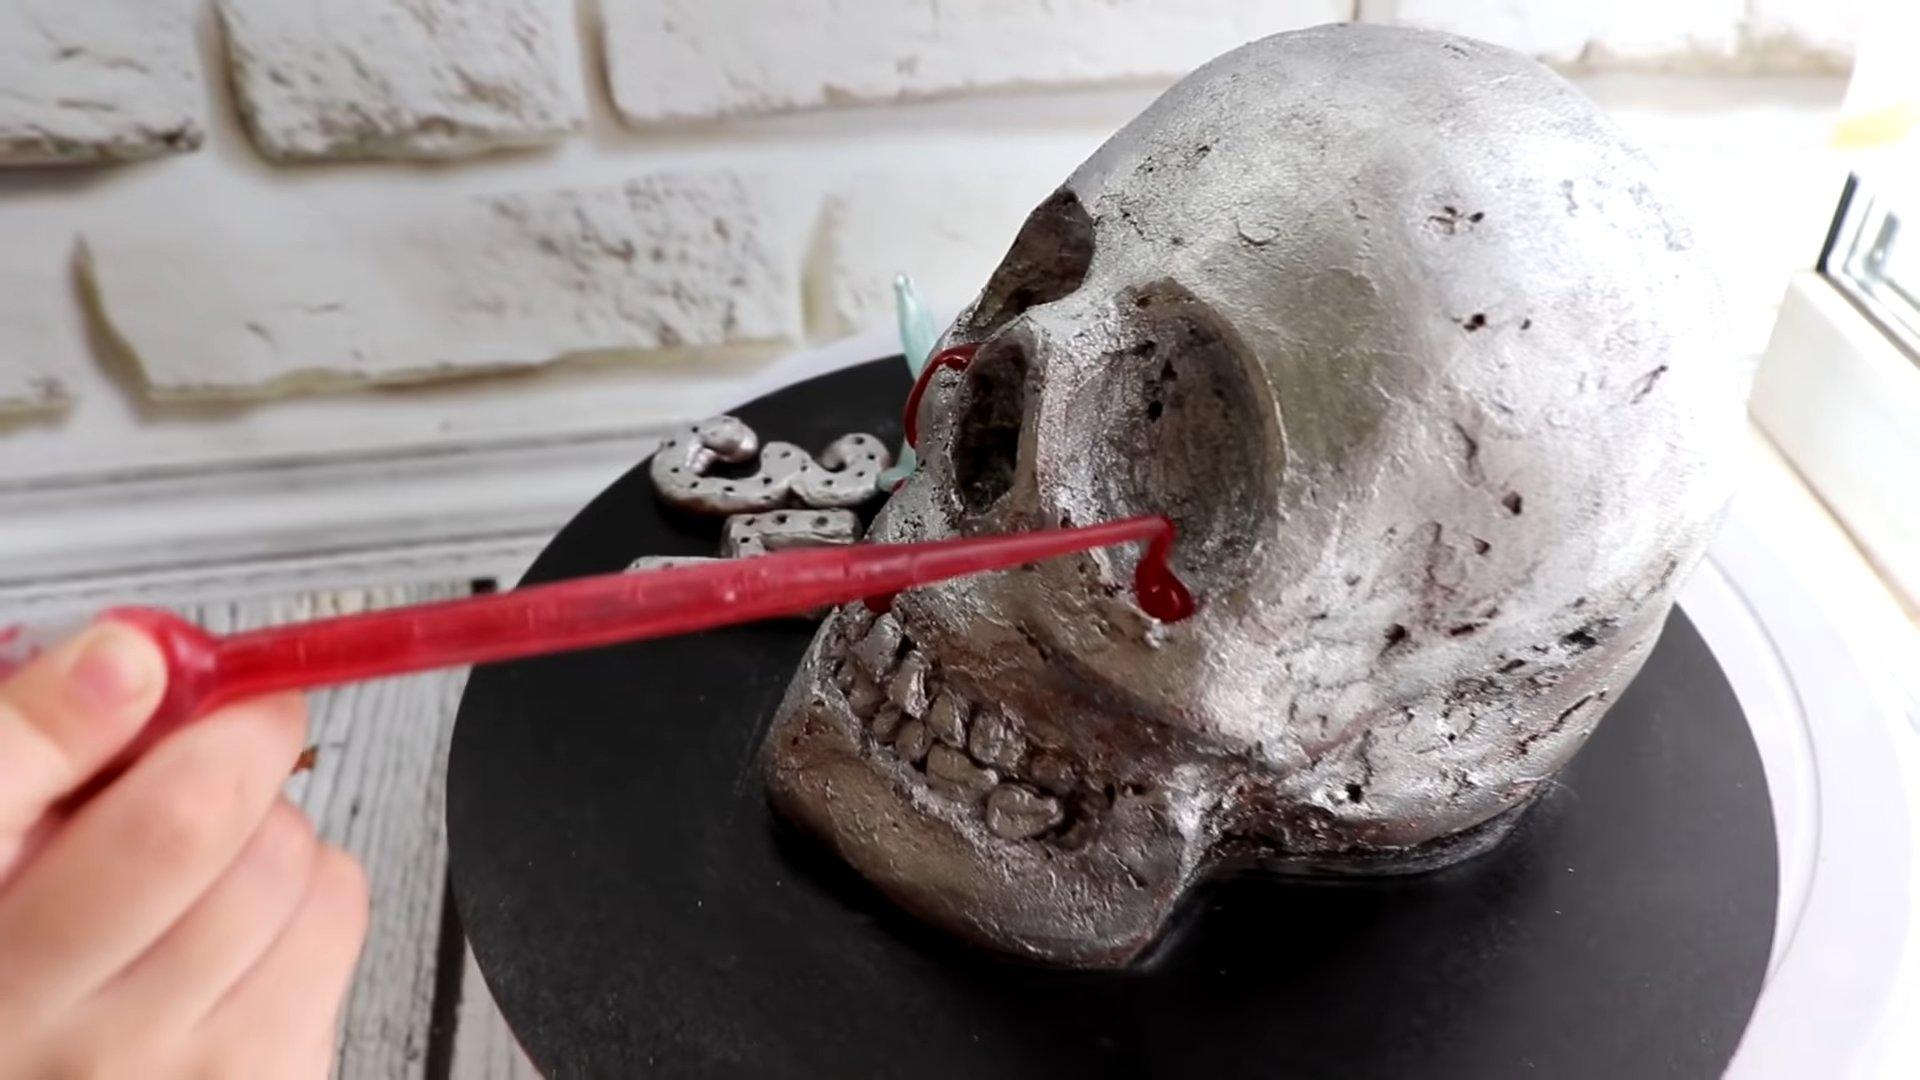
Step 9
The original "Skull" cake is ready for Halloween. Serve it and enjoy the compliments.
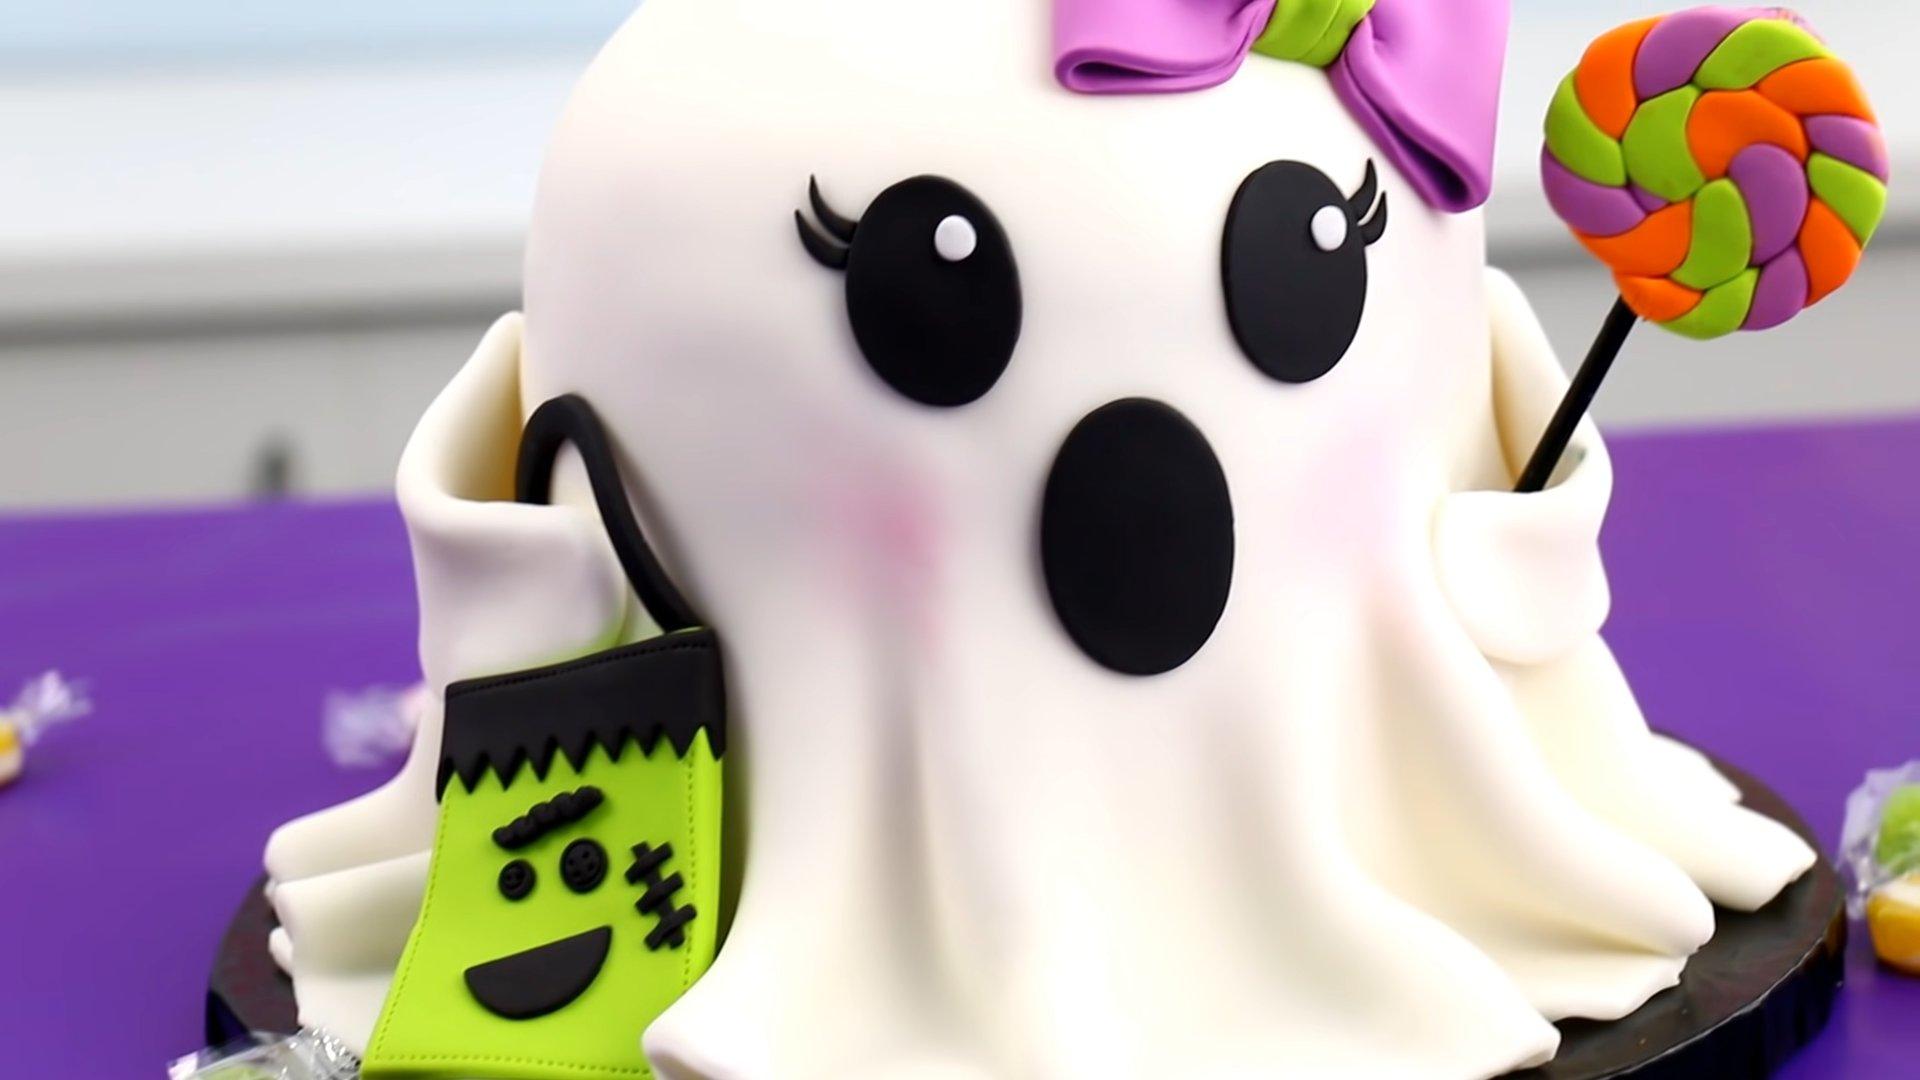
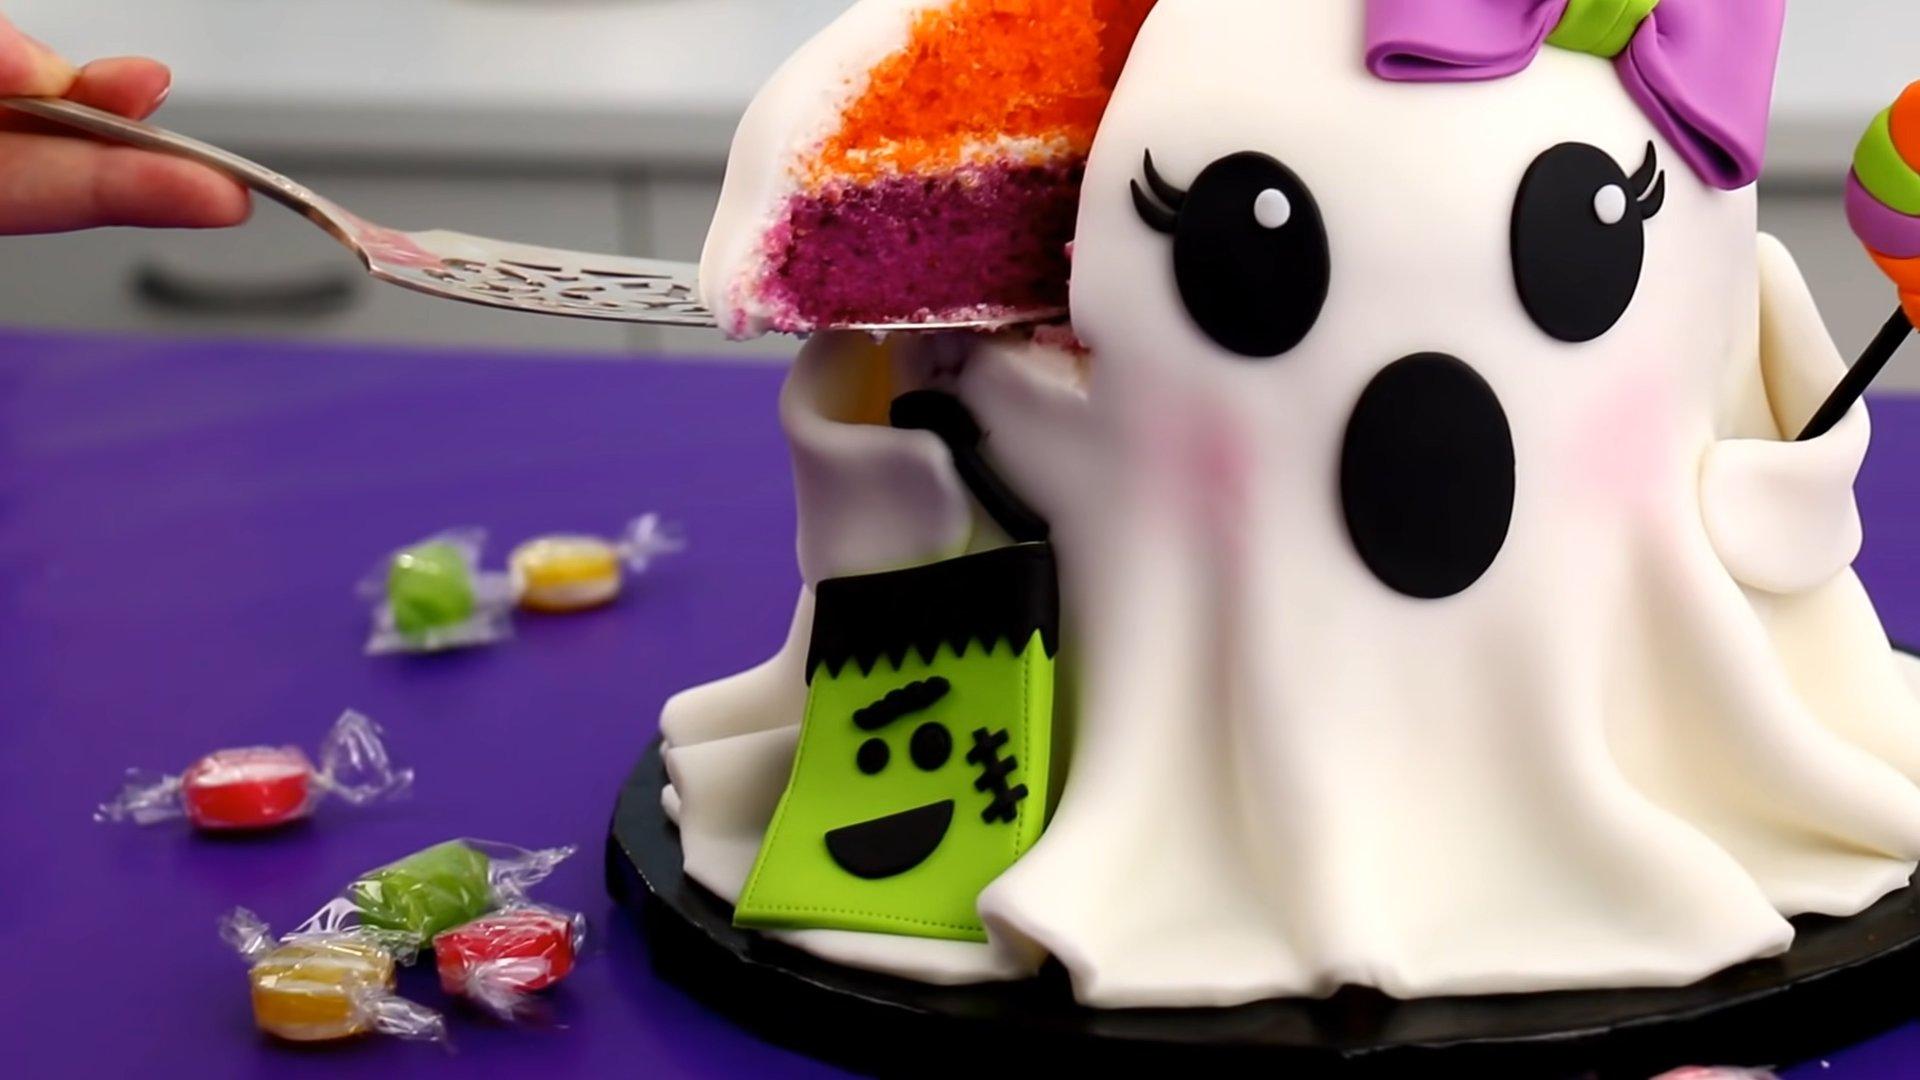
Children's Halloween cake
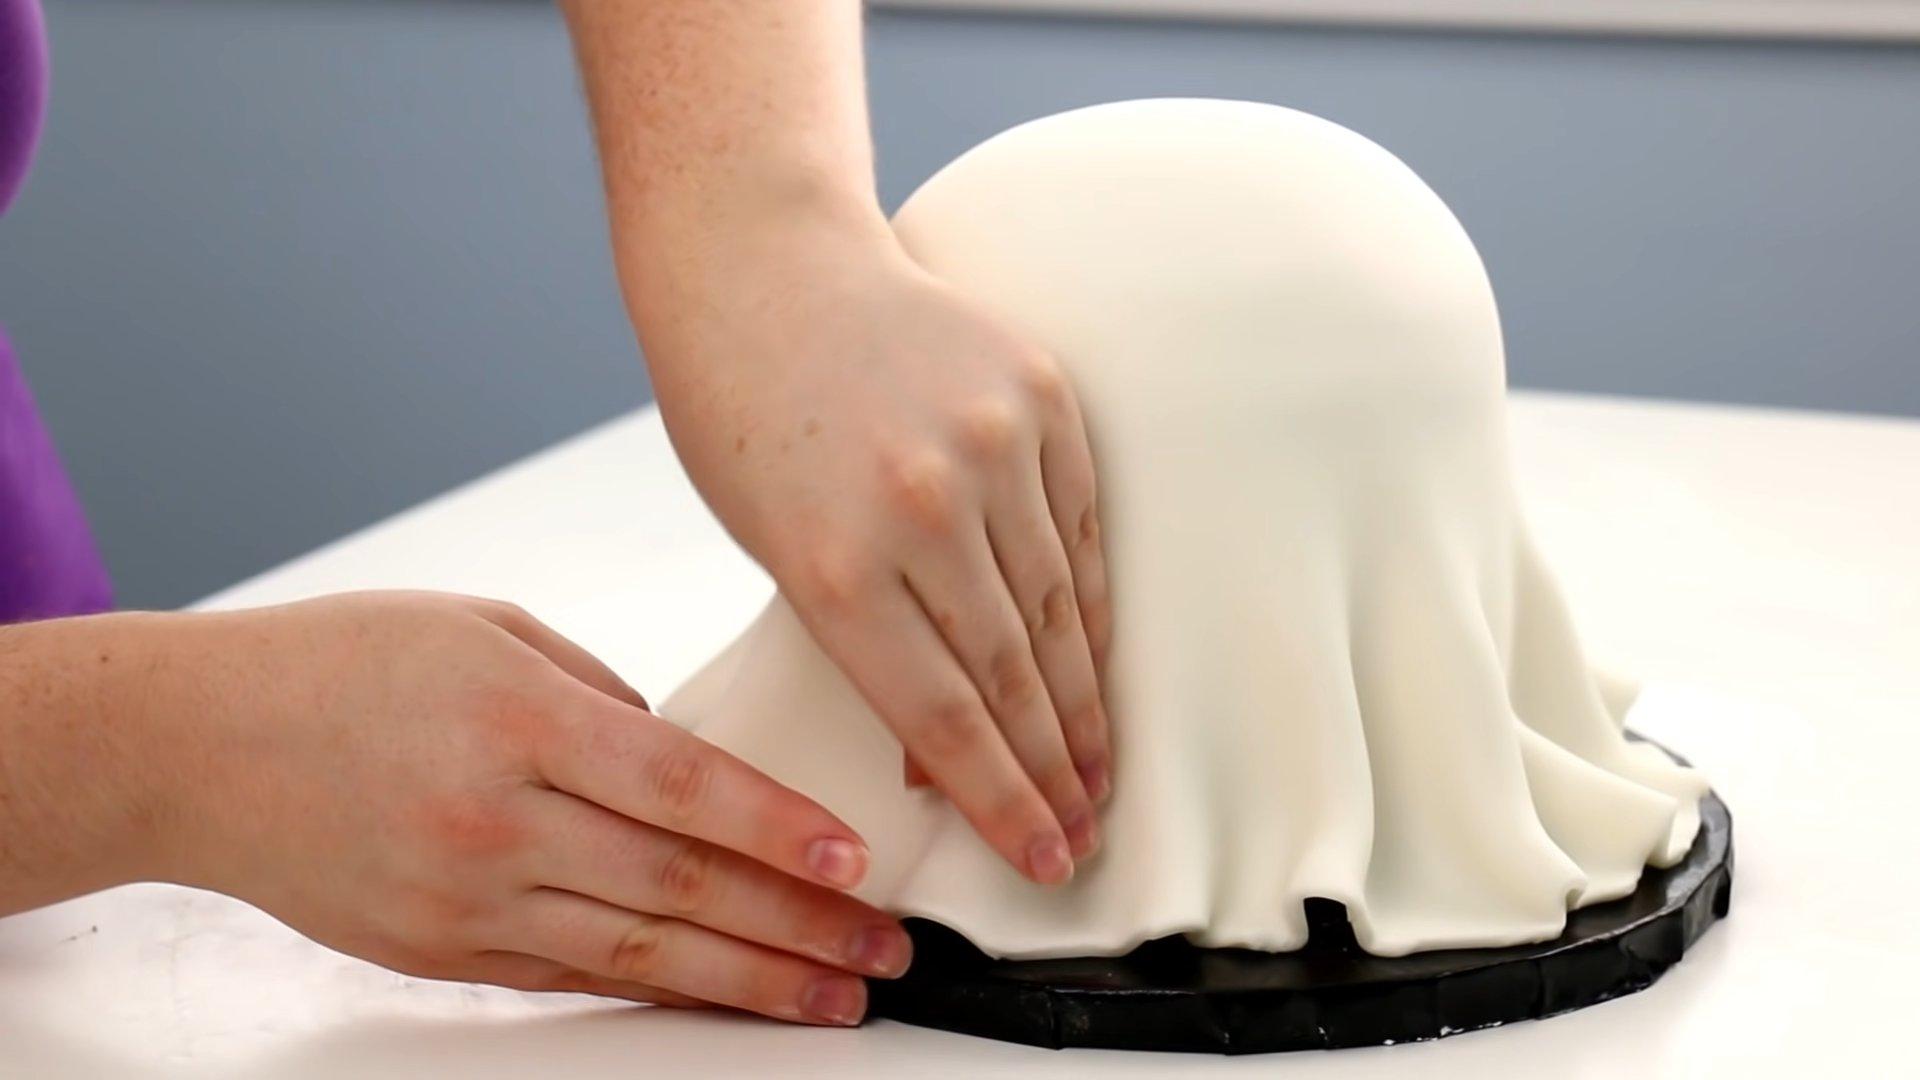
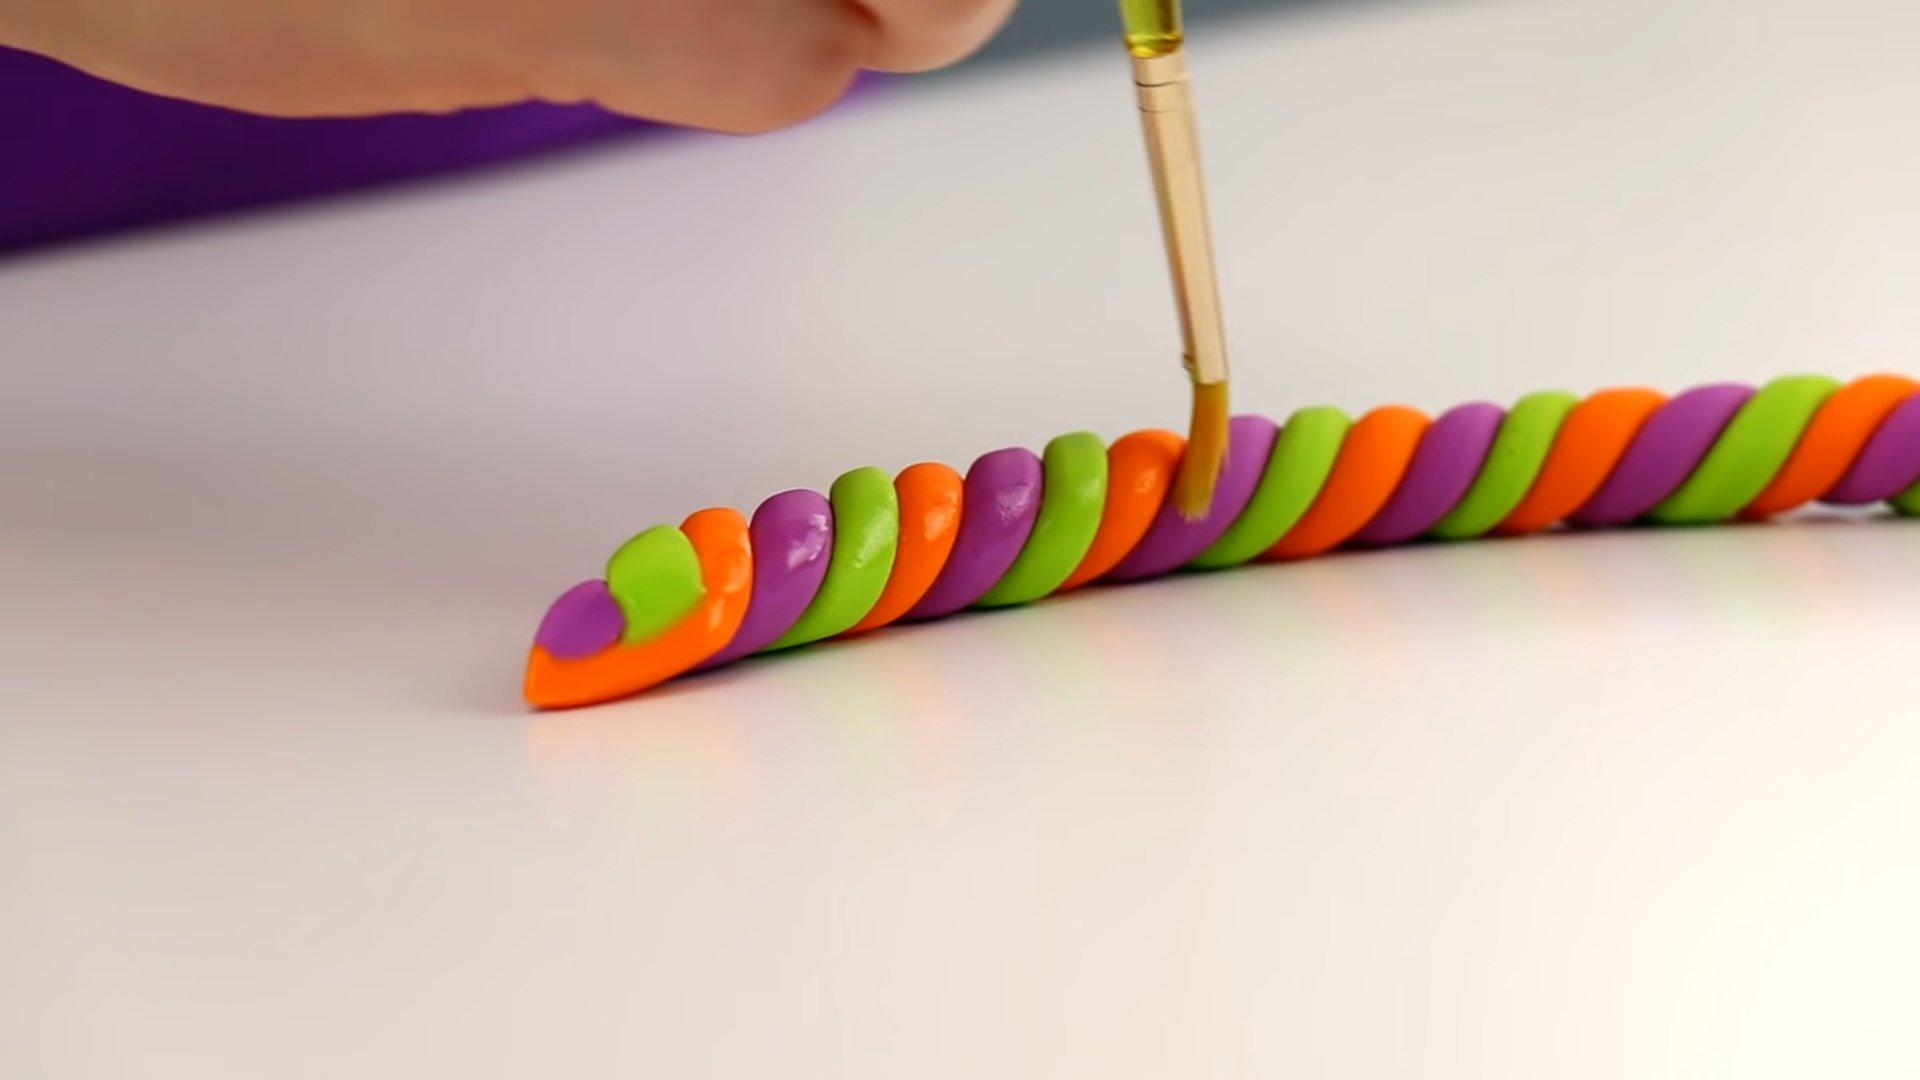
Decorating a children's Halloween cake requires special attention. It should be themed around the holiday, but it shouldn't be too scary, so as not to frighten the little ones. I suggest you make a very colorful and beautiful cake for children in the shape of a cute ghost. For the base, I recommend making multicolored sponge cake layers and frosting them with soft buttercream. The cake should be small in diameter but tall enough.
Ingredients
- Ready-made mastic - white, purple, black, green, orange
- Edible glue
Cooking time: 30-40 minutes
Servings: 1
Step-by-step recipe
Step 1
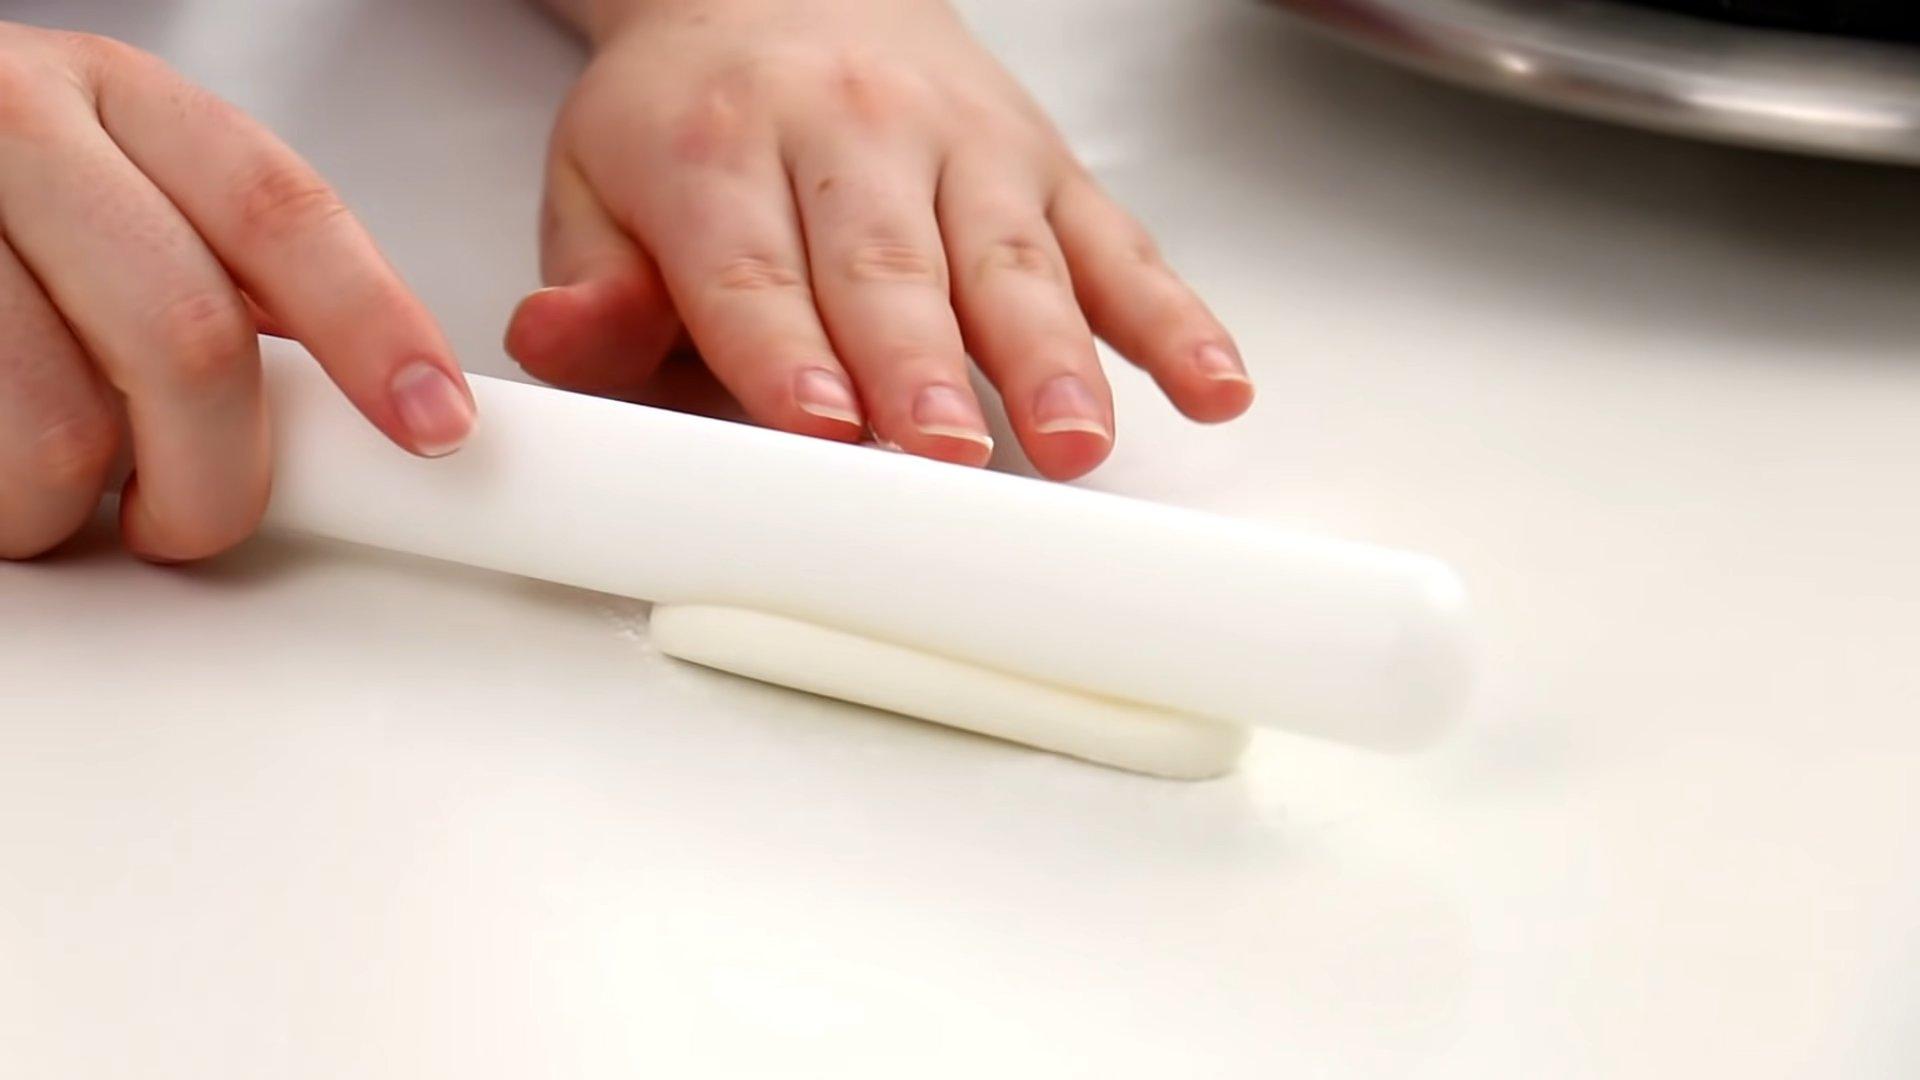
We assemble the cake and give its top the shape of a hemisphere.
Step 2
Level the surface of the cake with any stable cream or ganache.
Step 3
Roll out the white mastic and cover the cake with it.

Step 4
Carefully smooth out the mastic and cut off the excess.
Step 5
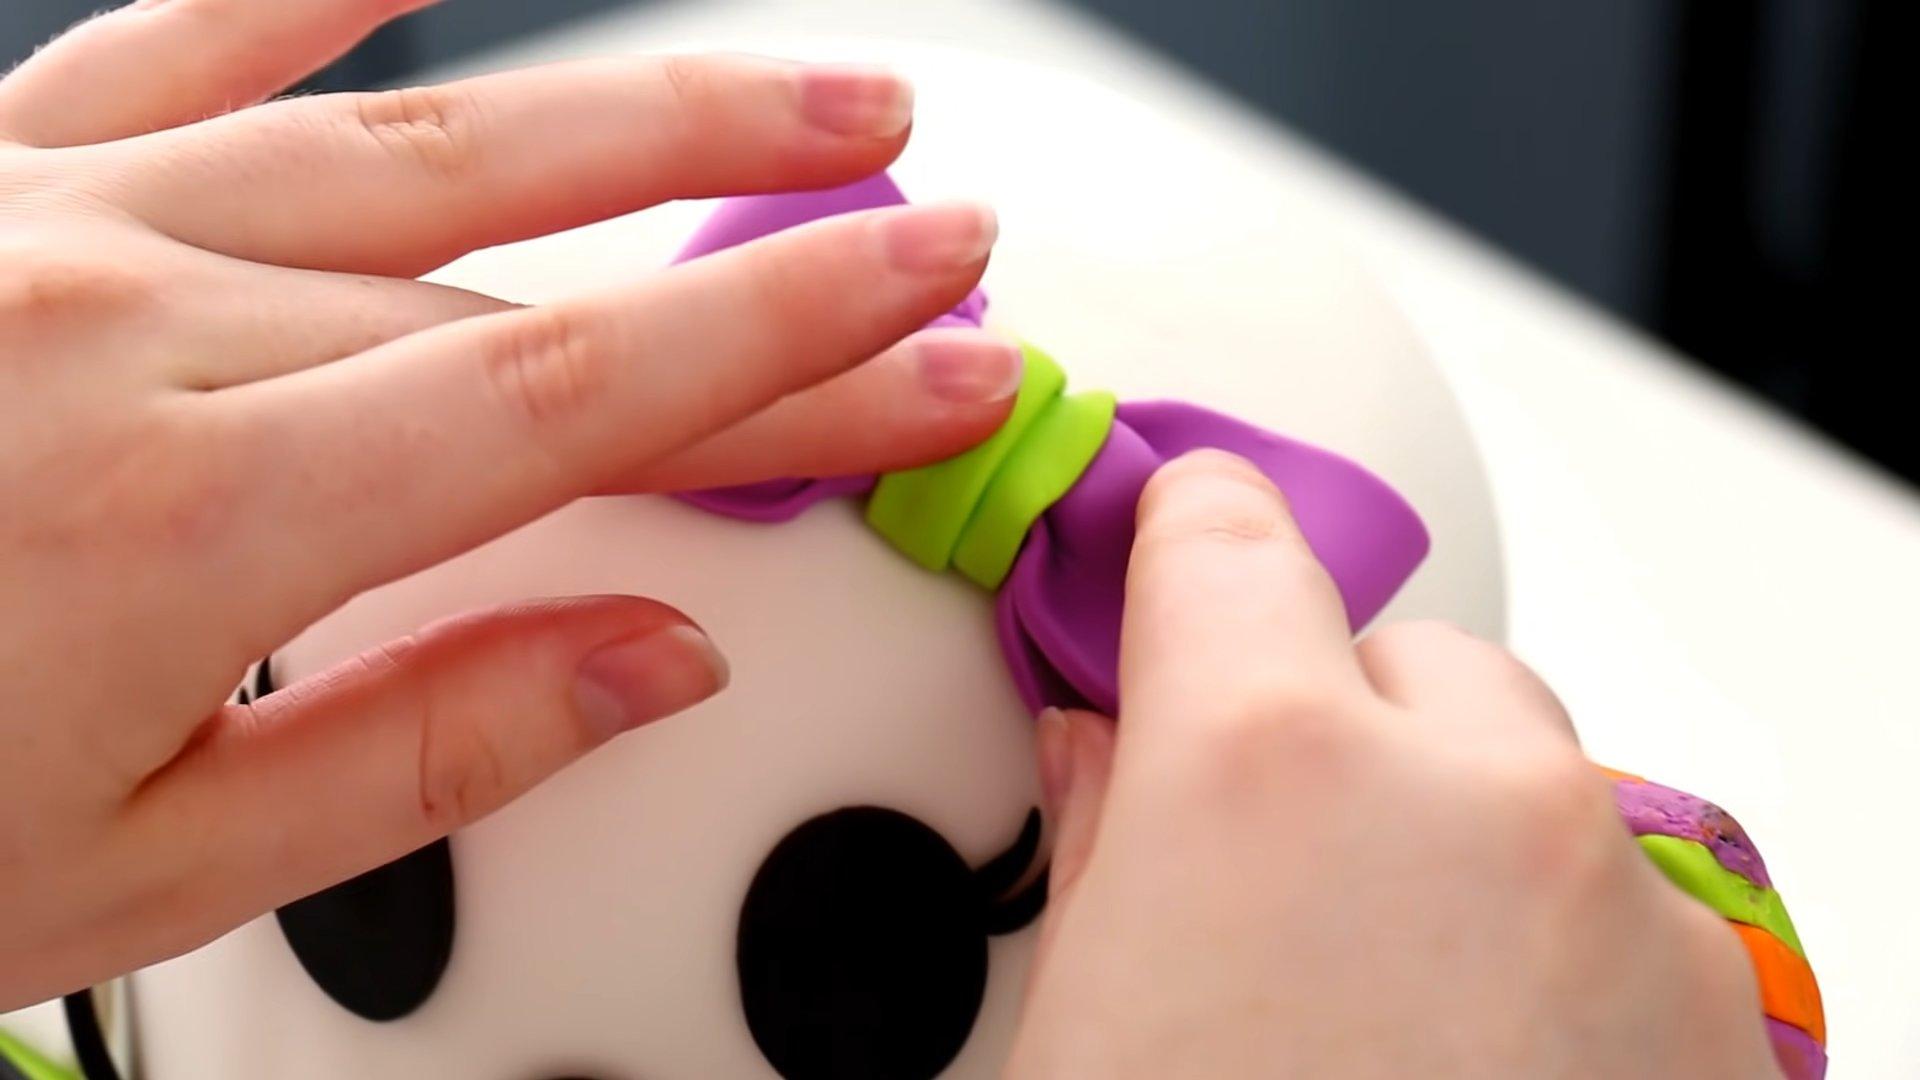
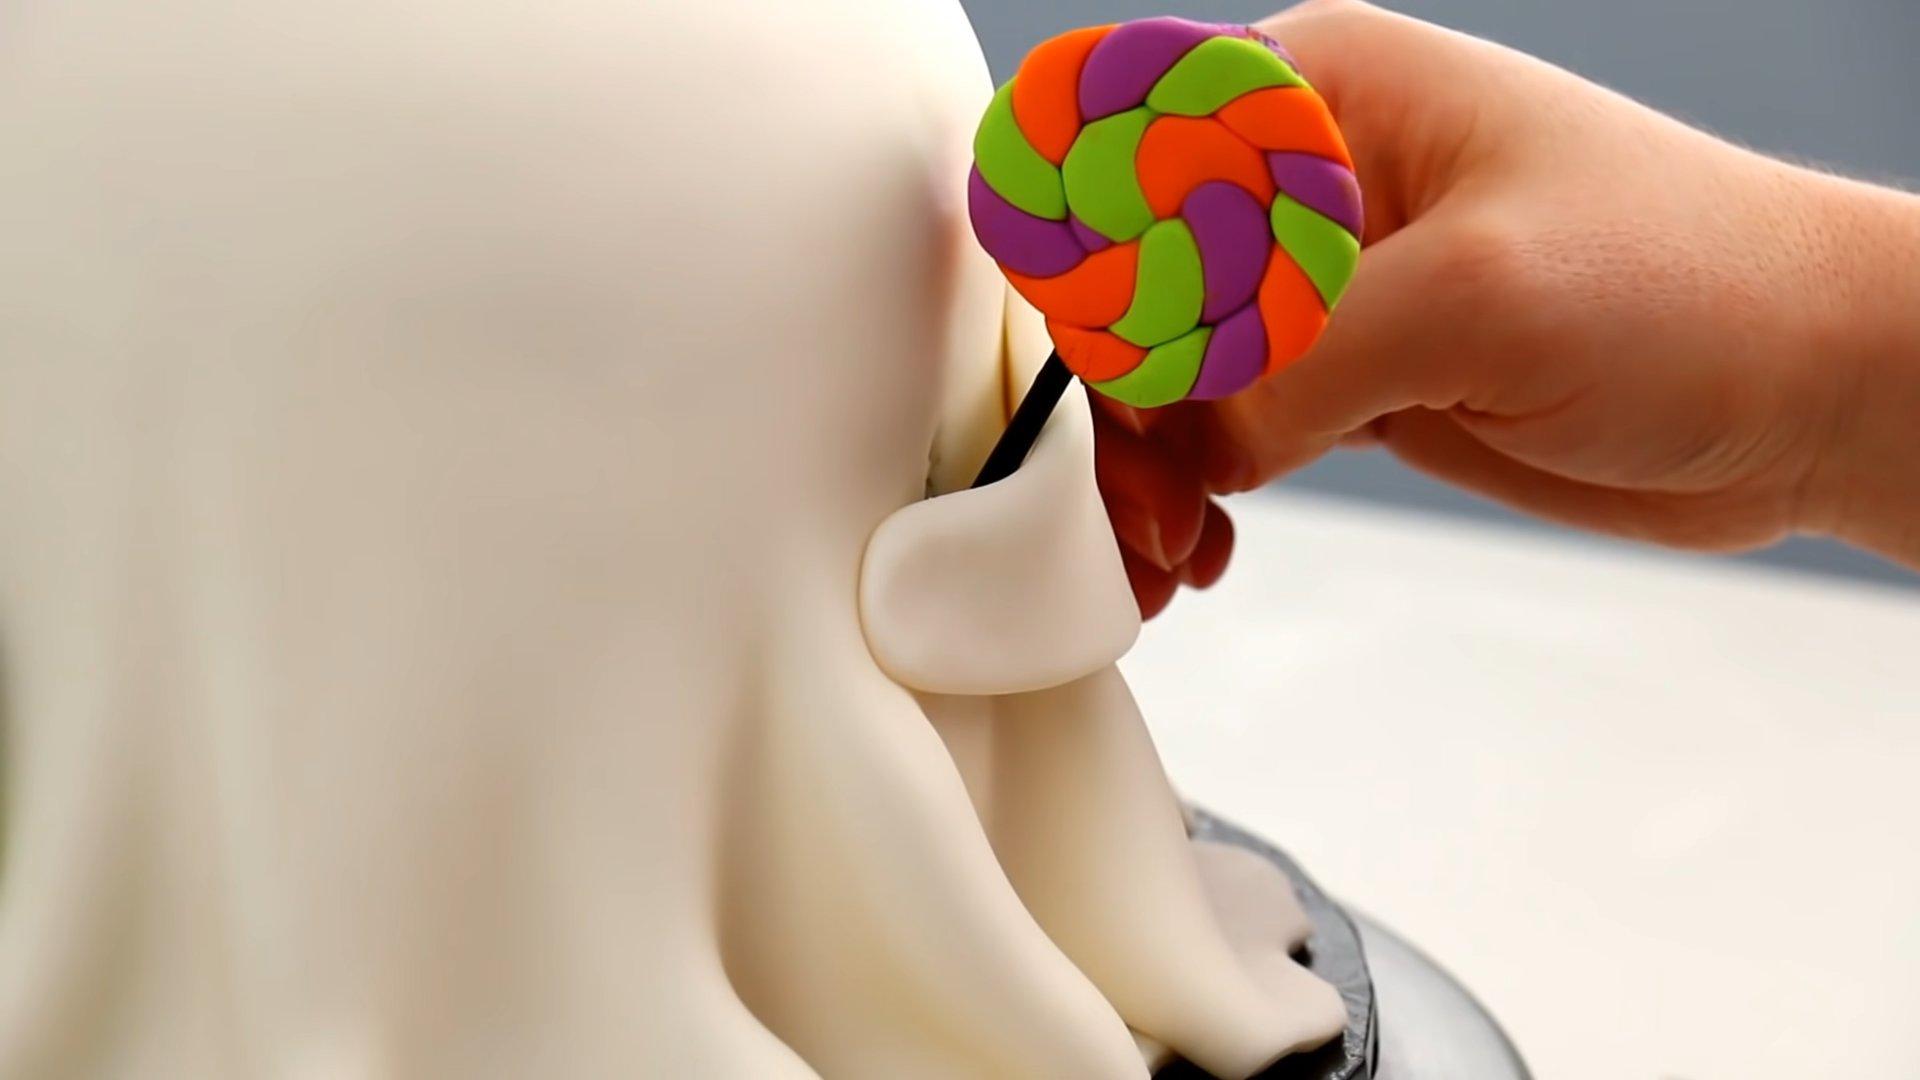
We create accessories from multi-colored mastic: a handbag, a lollipop, a bow.
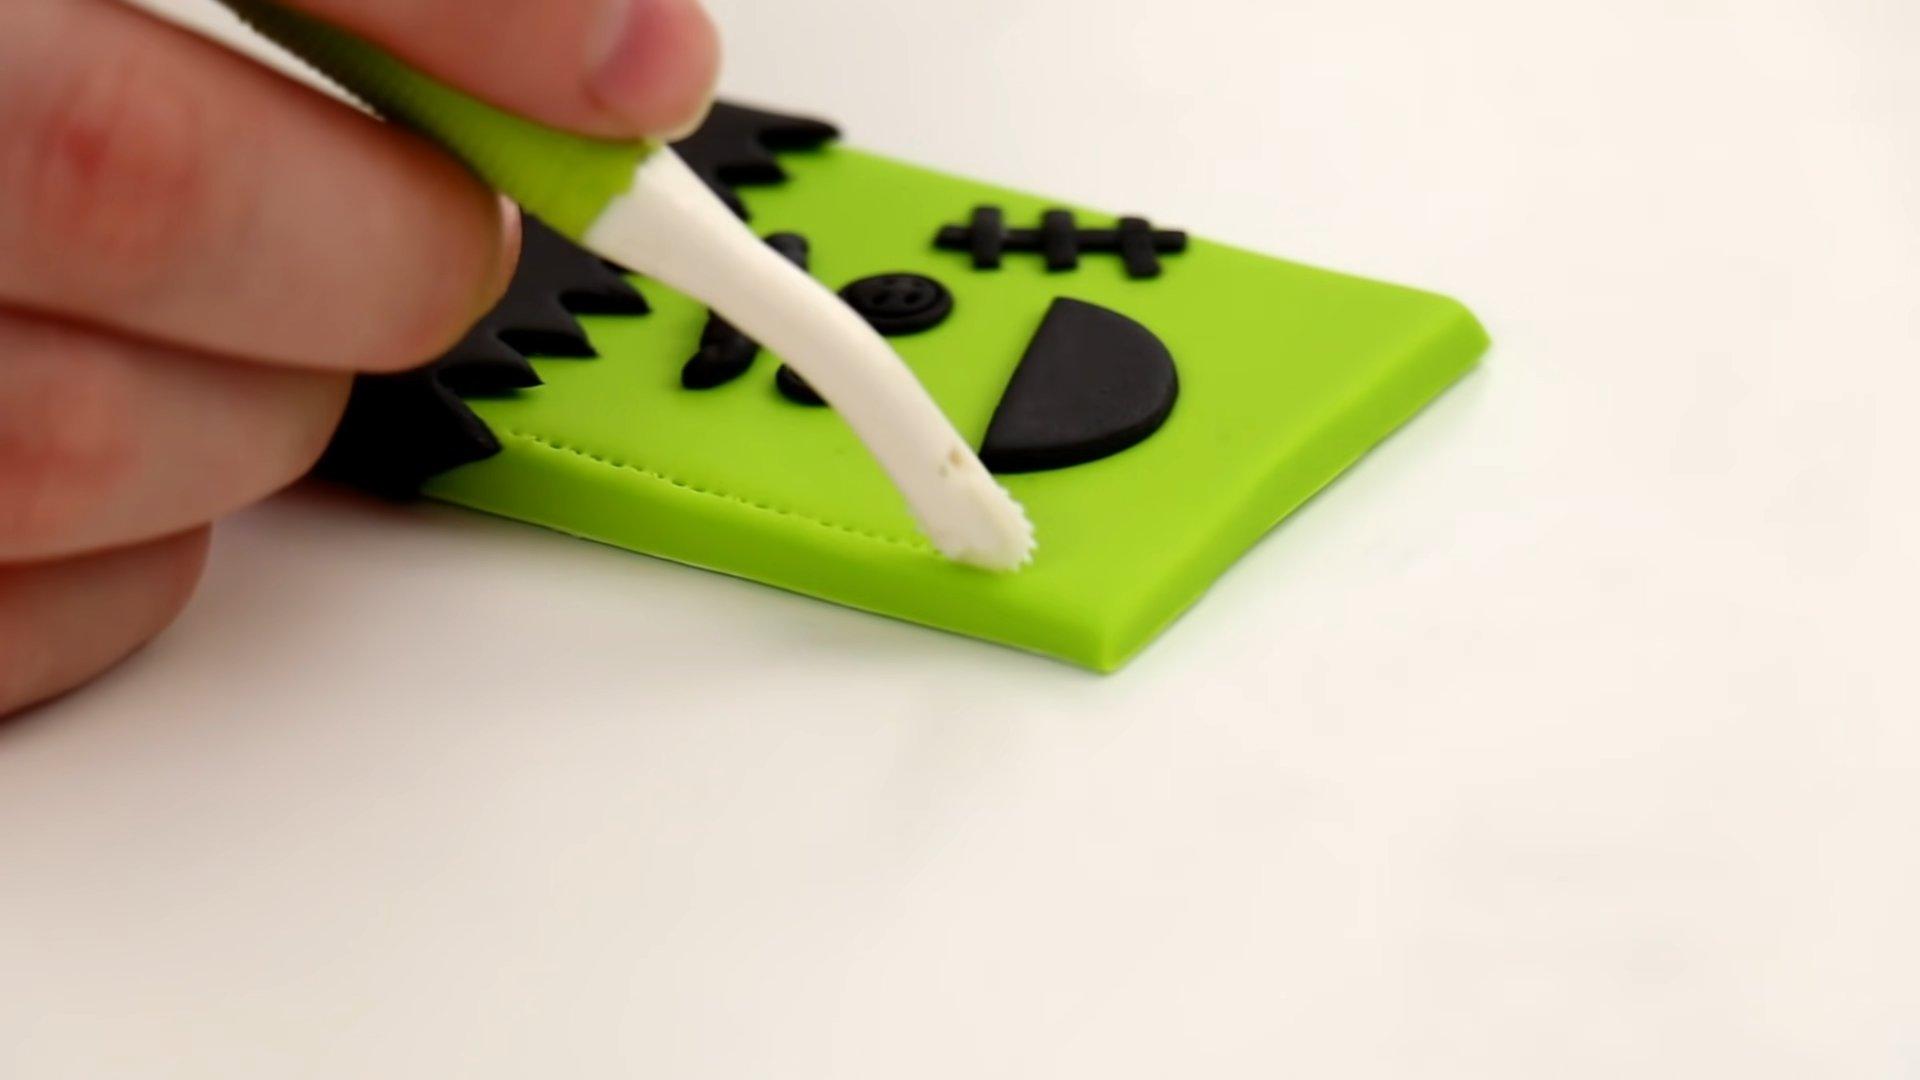
Step 6
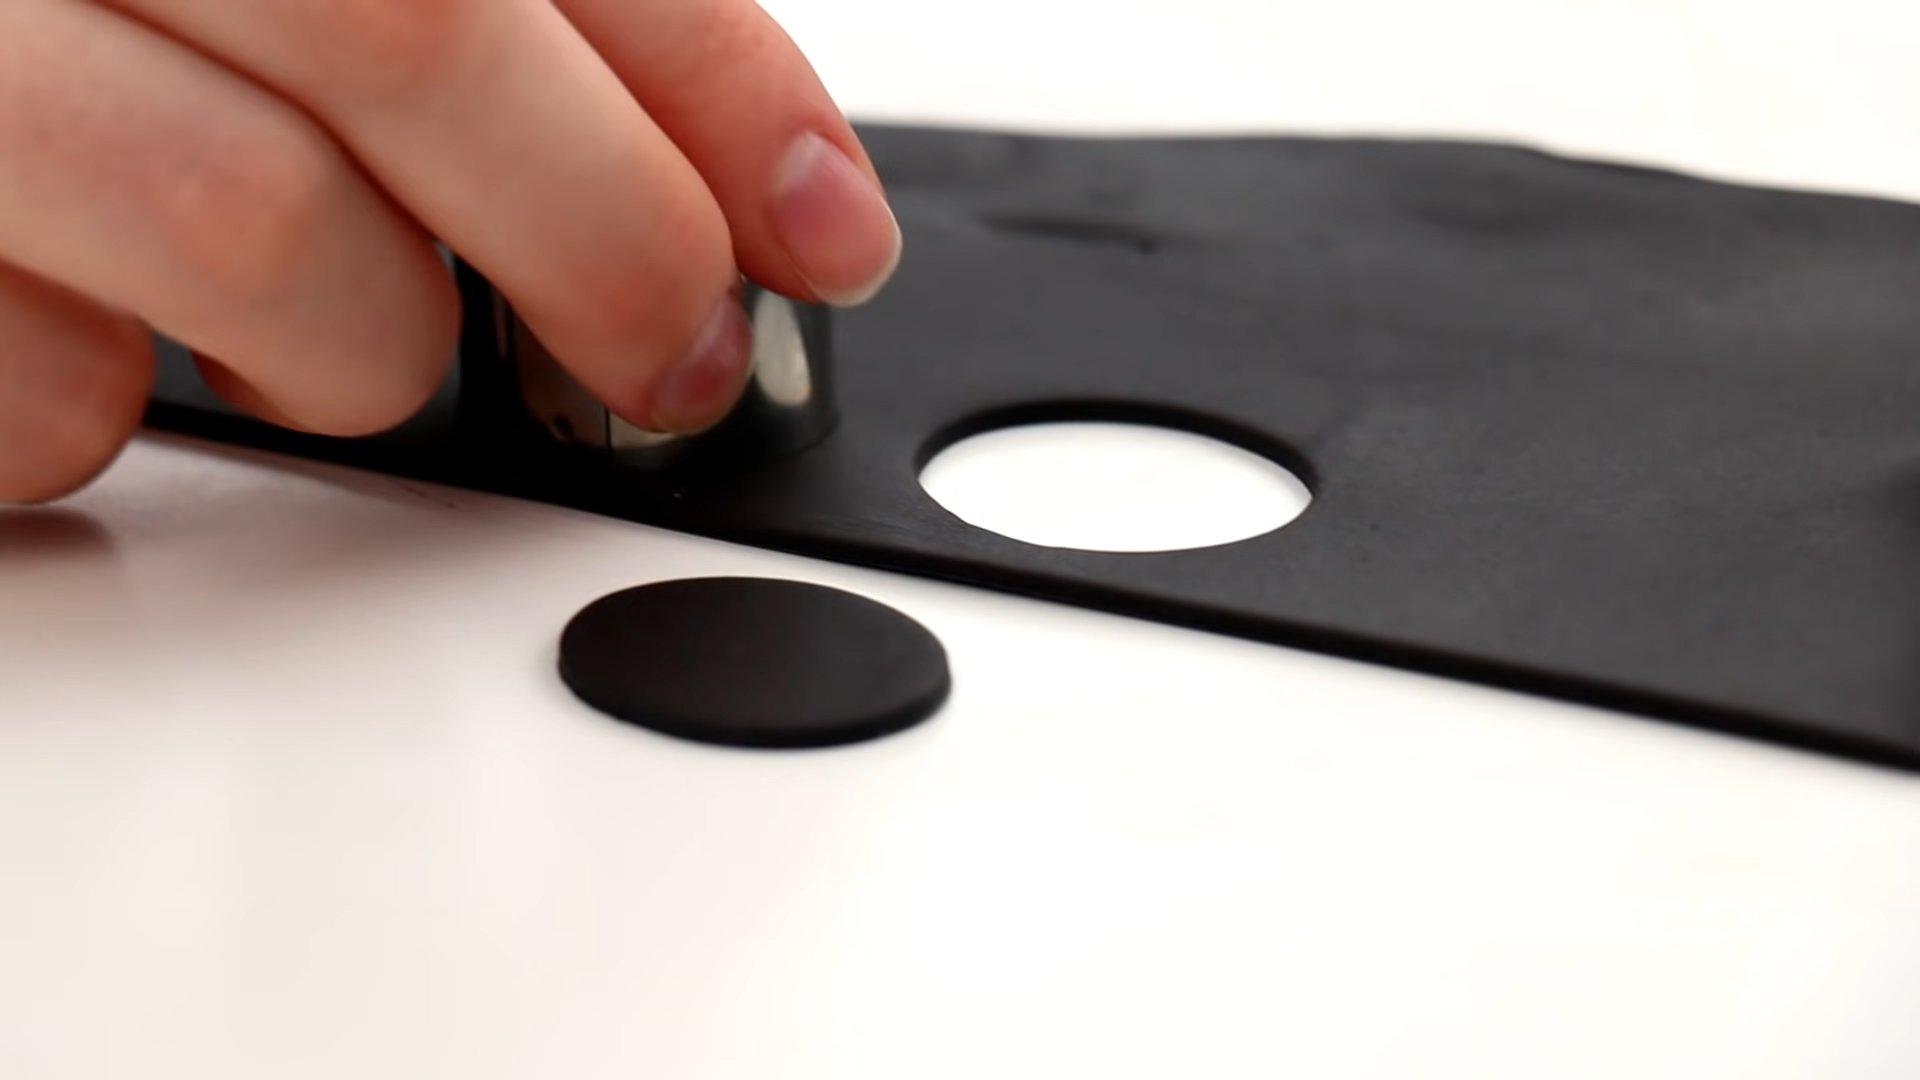
We roll out black mastic and cut out eyes from it, and make the ghost’s hands from white mastic.
Step 7
We attach all the parts using food glue.
Step 8
This bright, sweet, and incredibly beautiful Halloween cake is ready to serve.
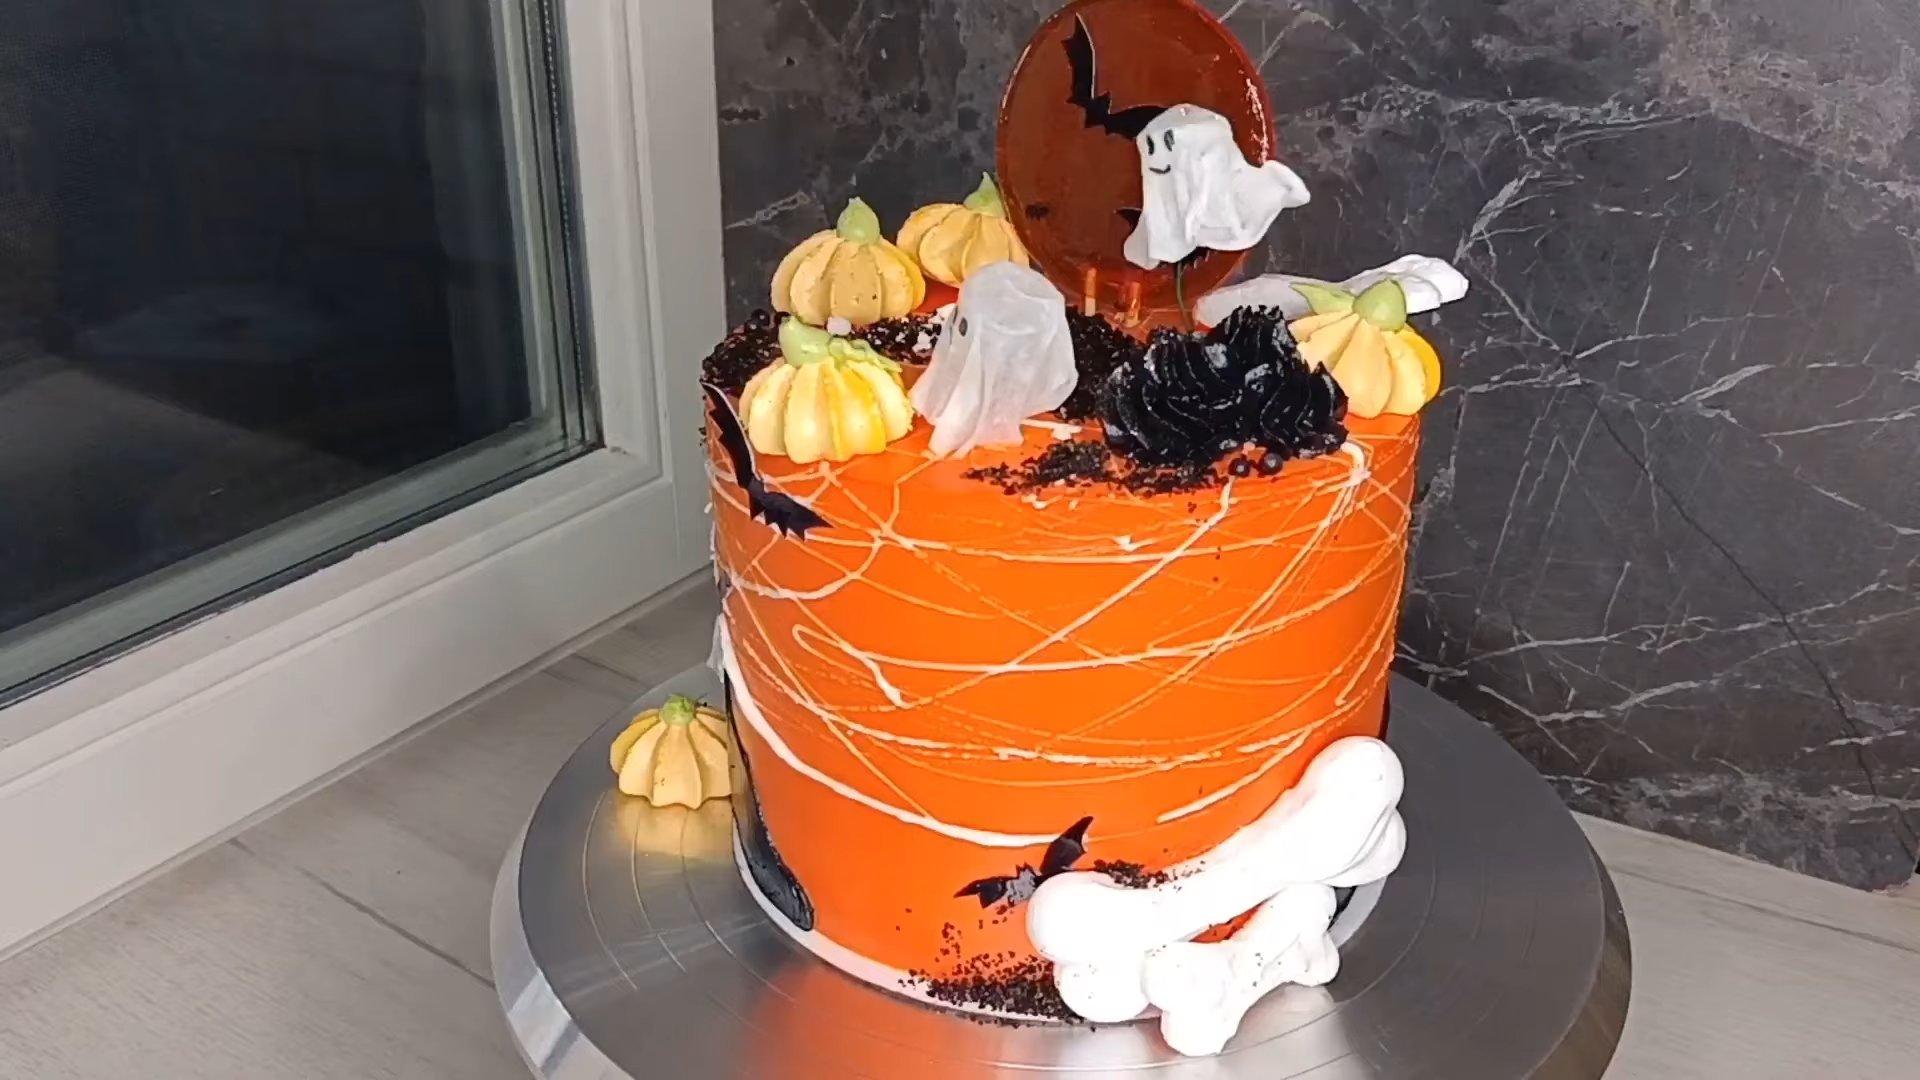
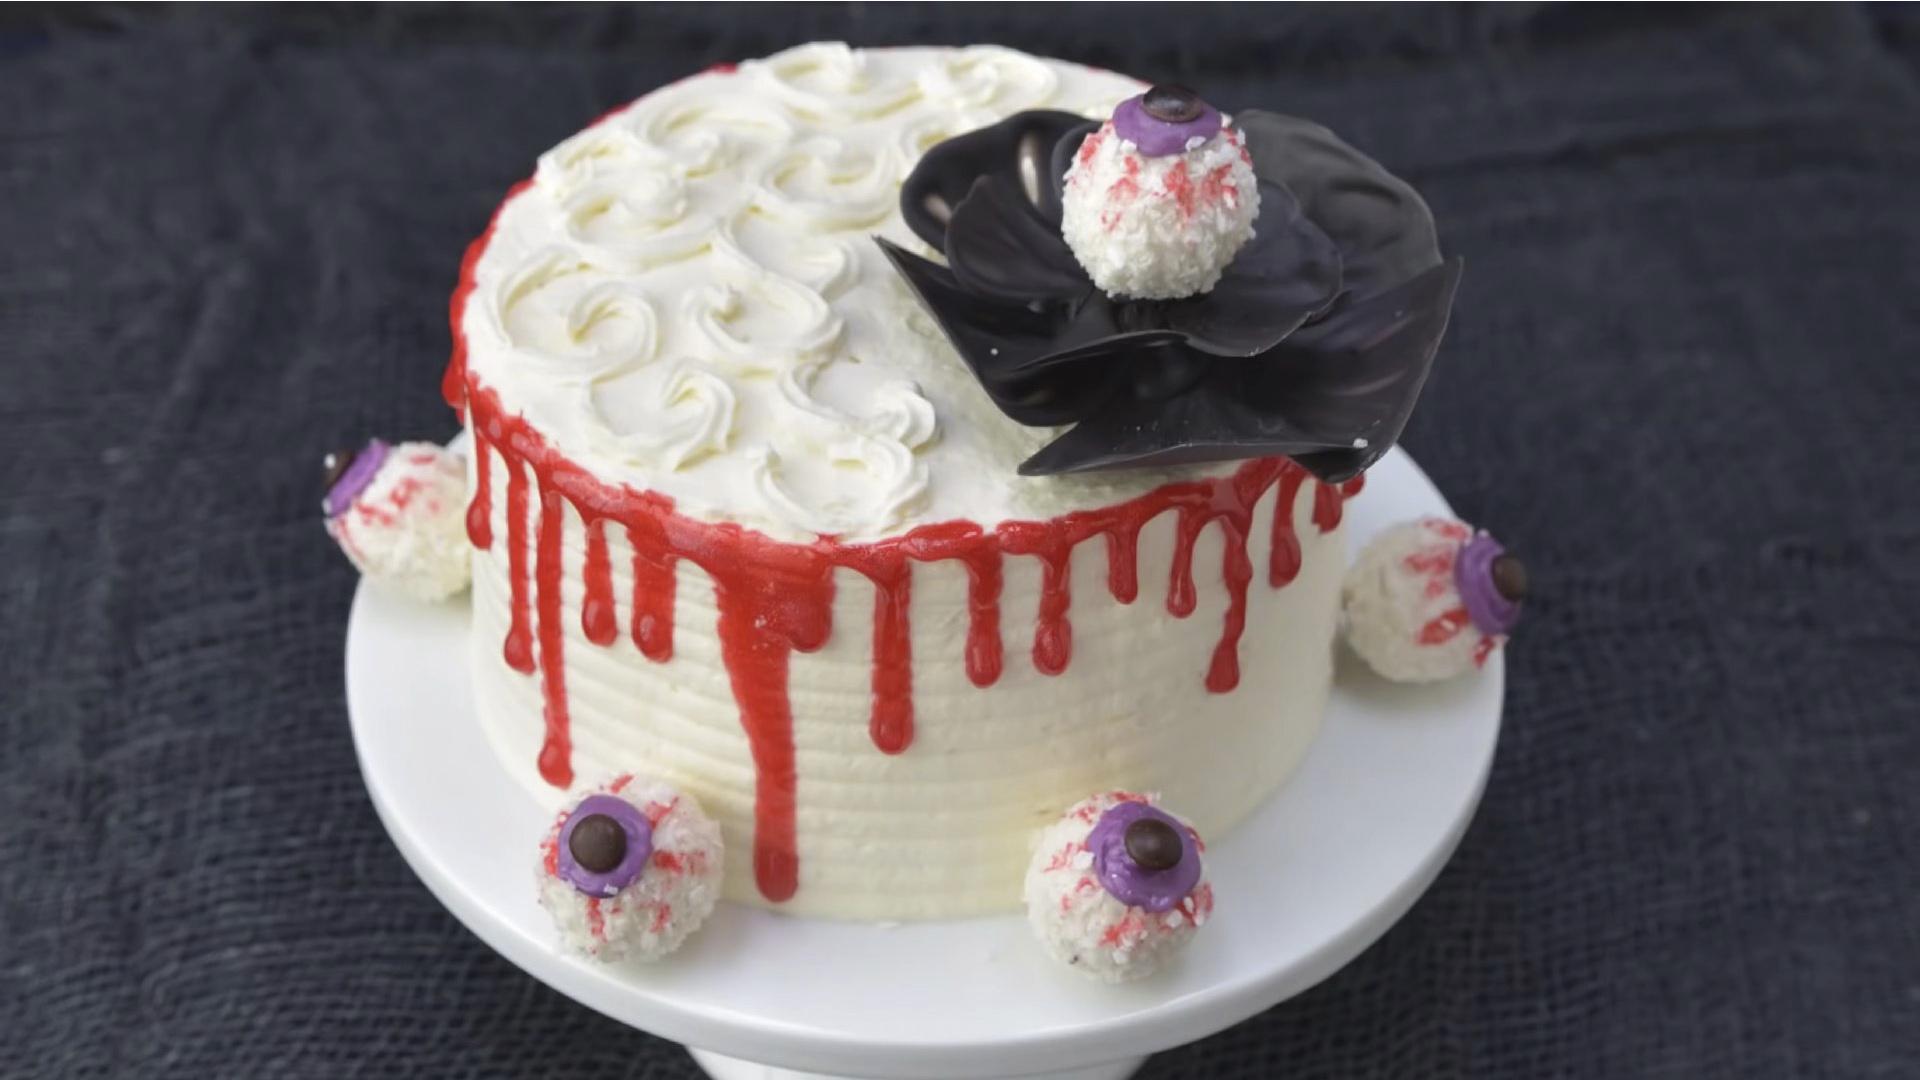
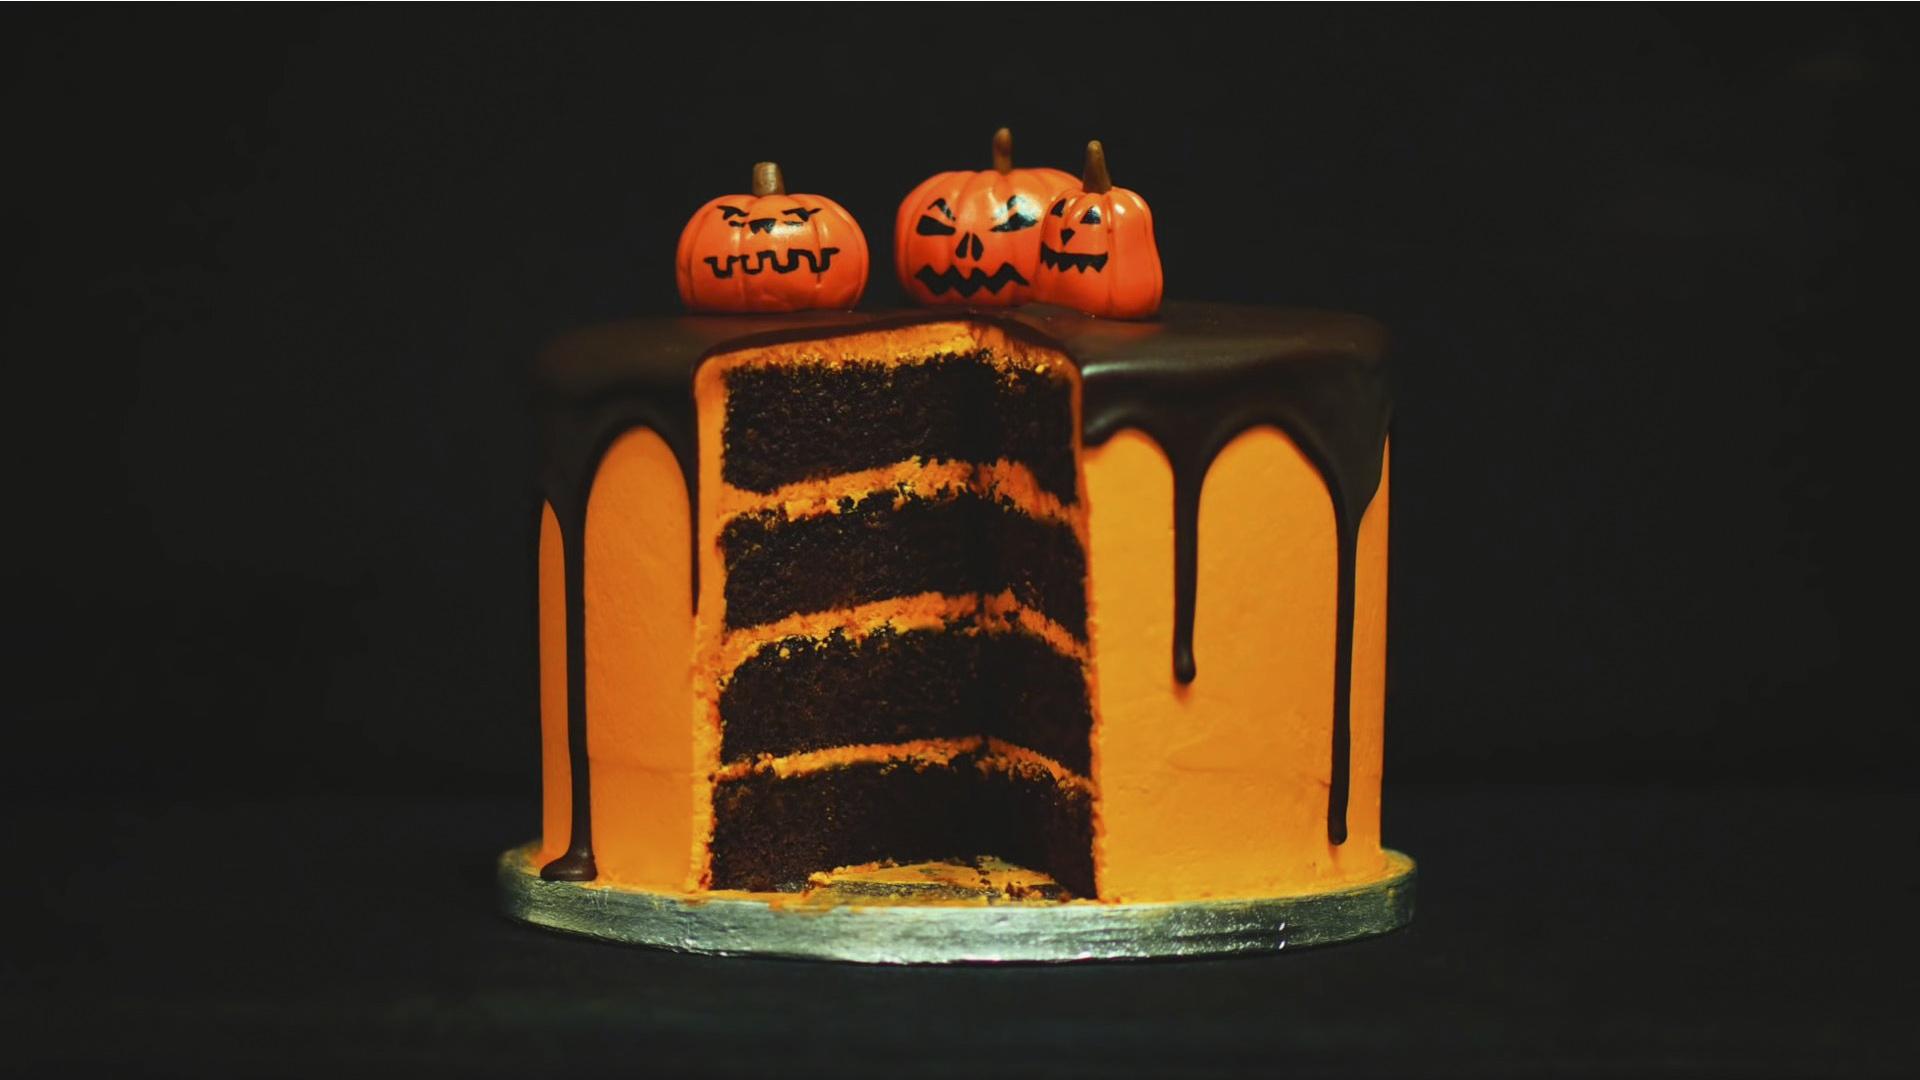
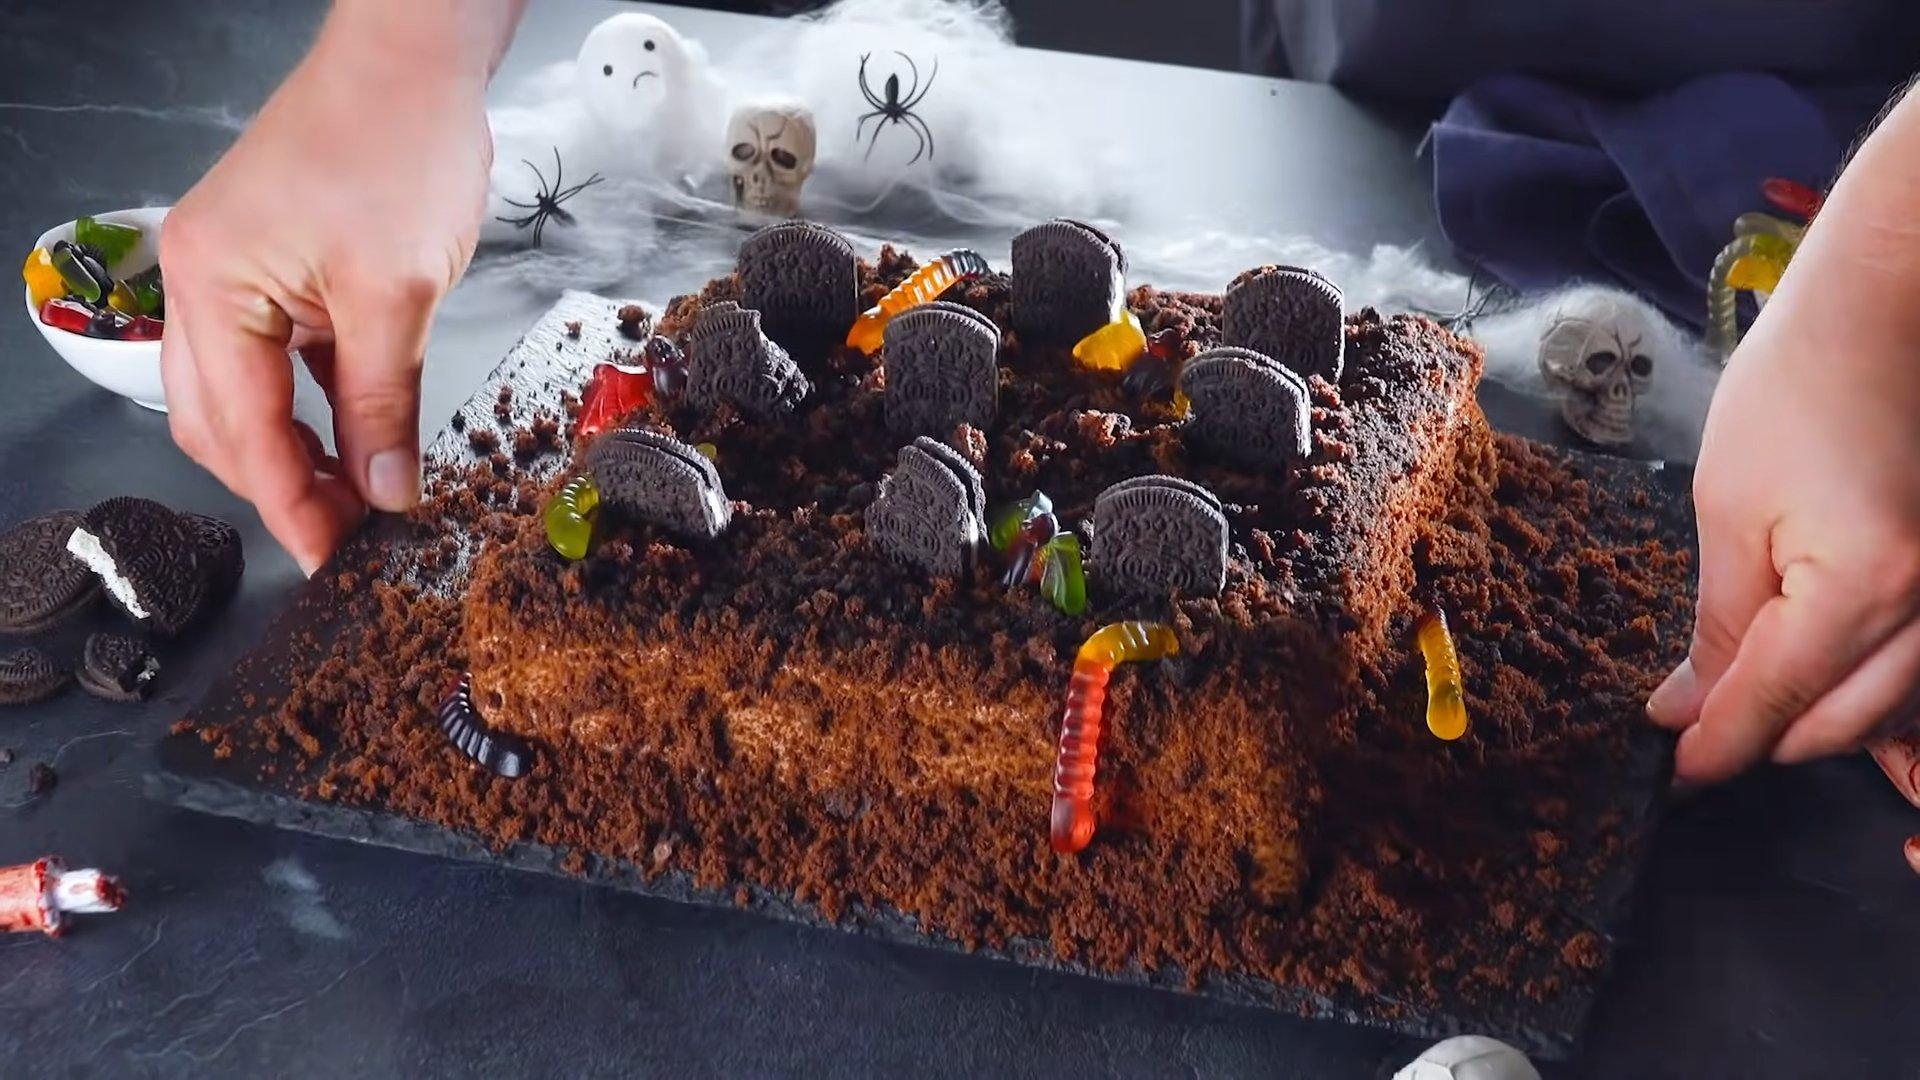
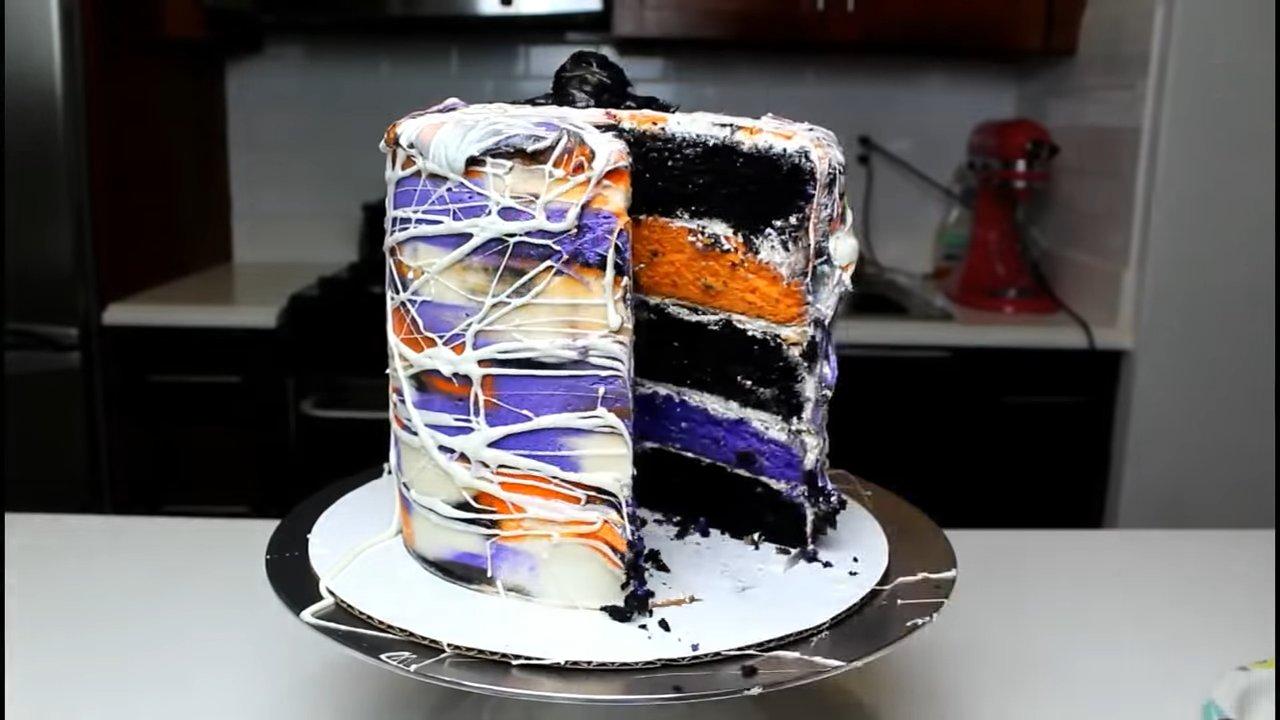
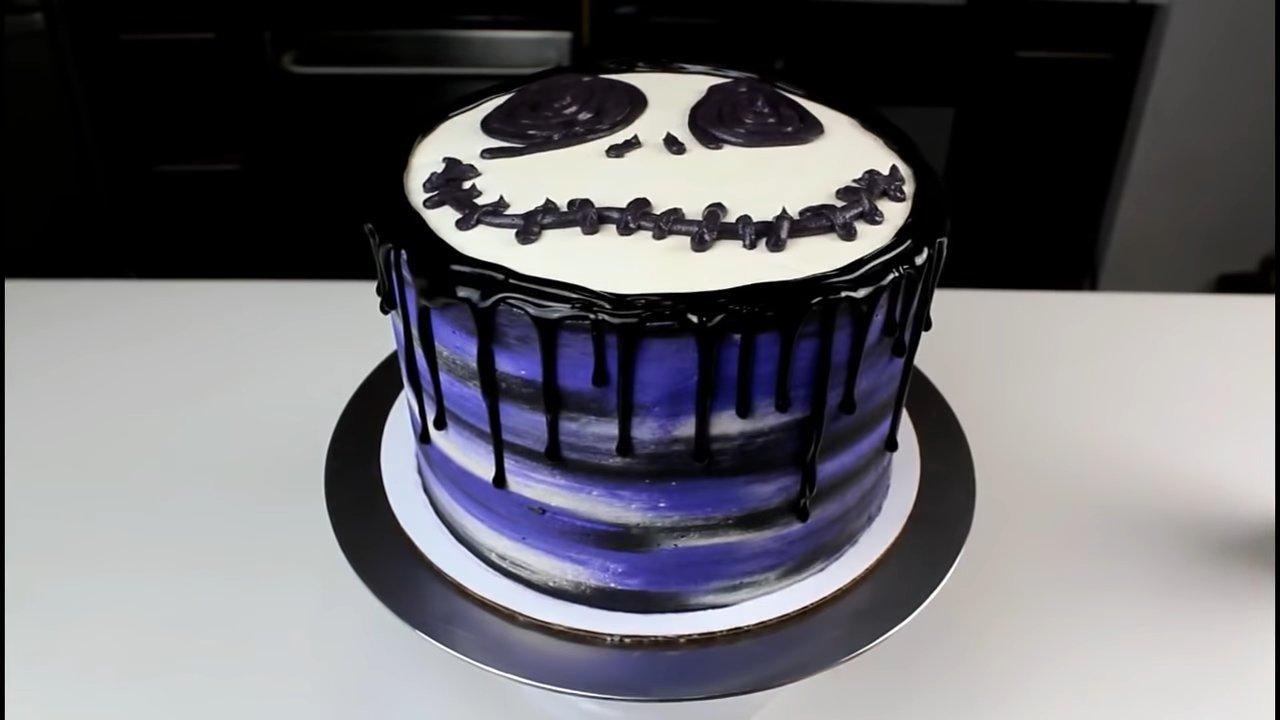
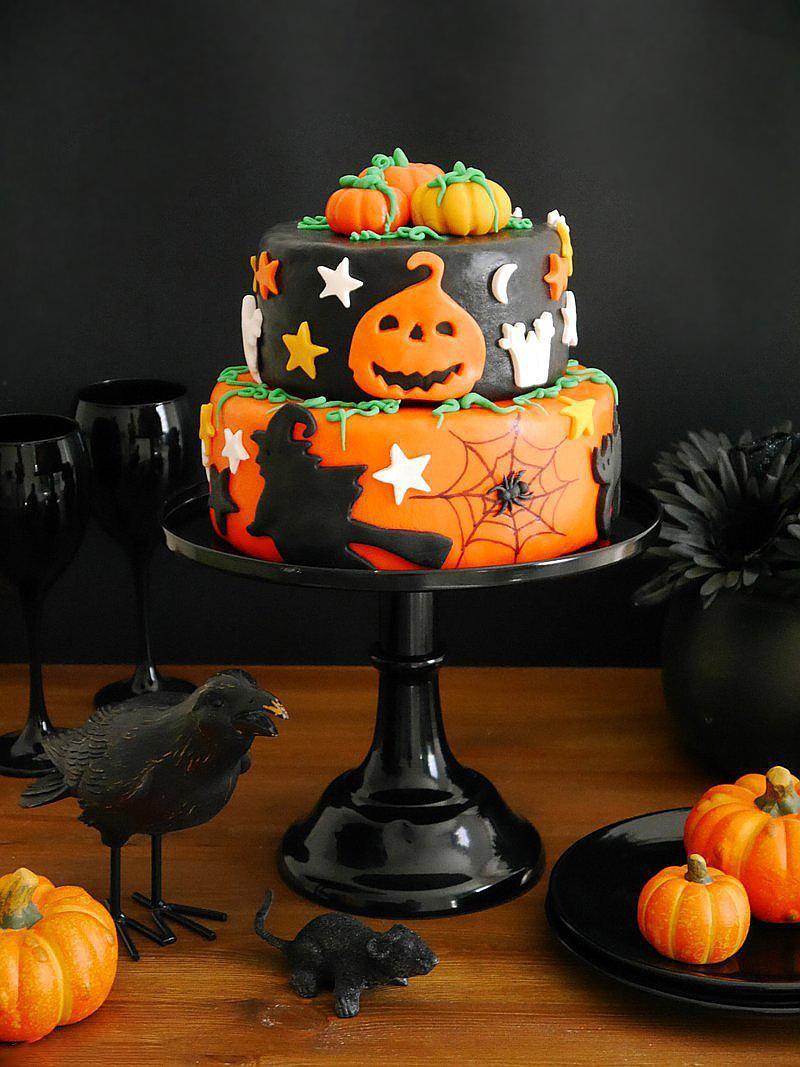
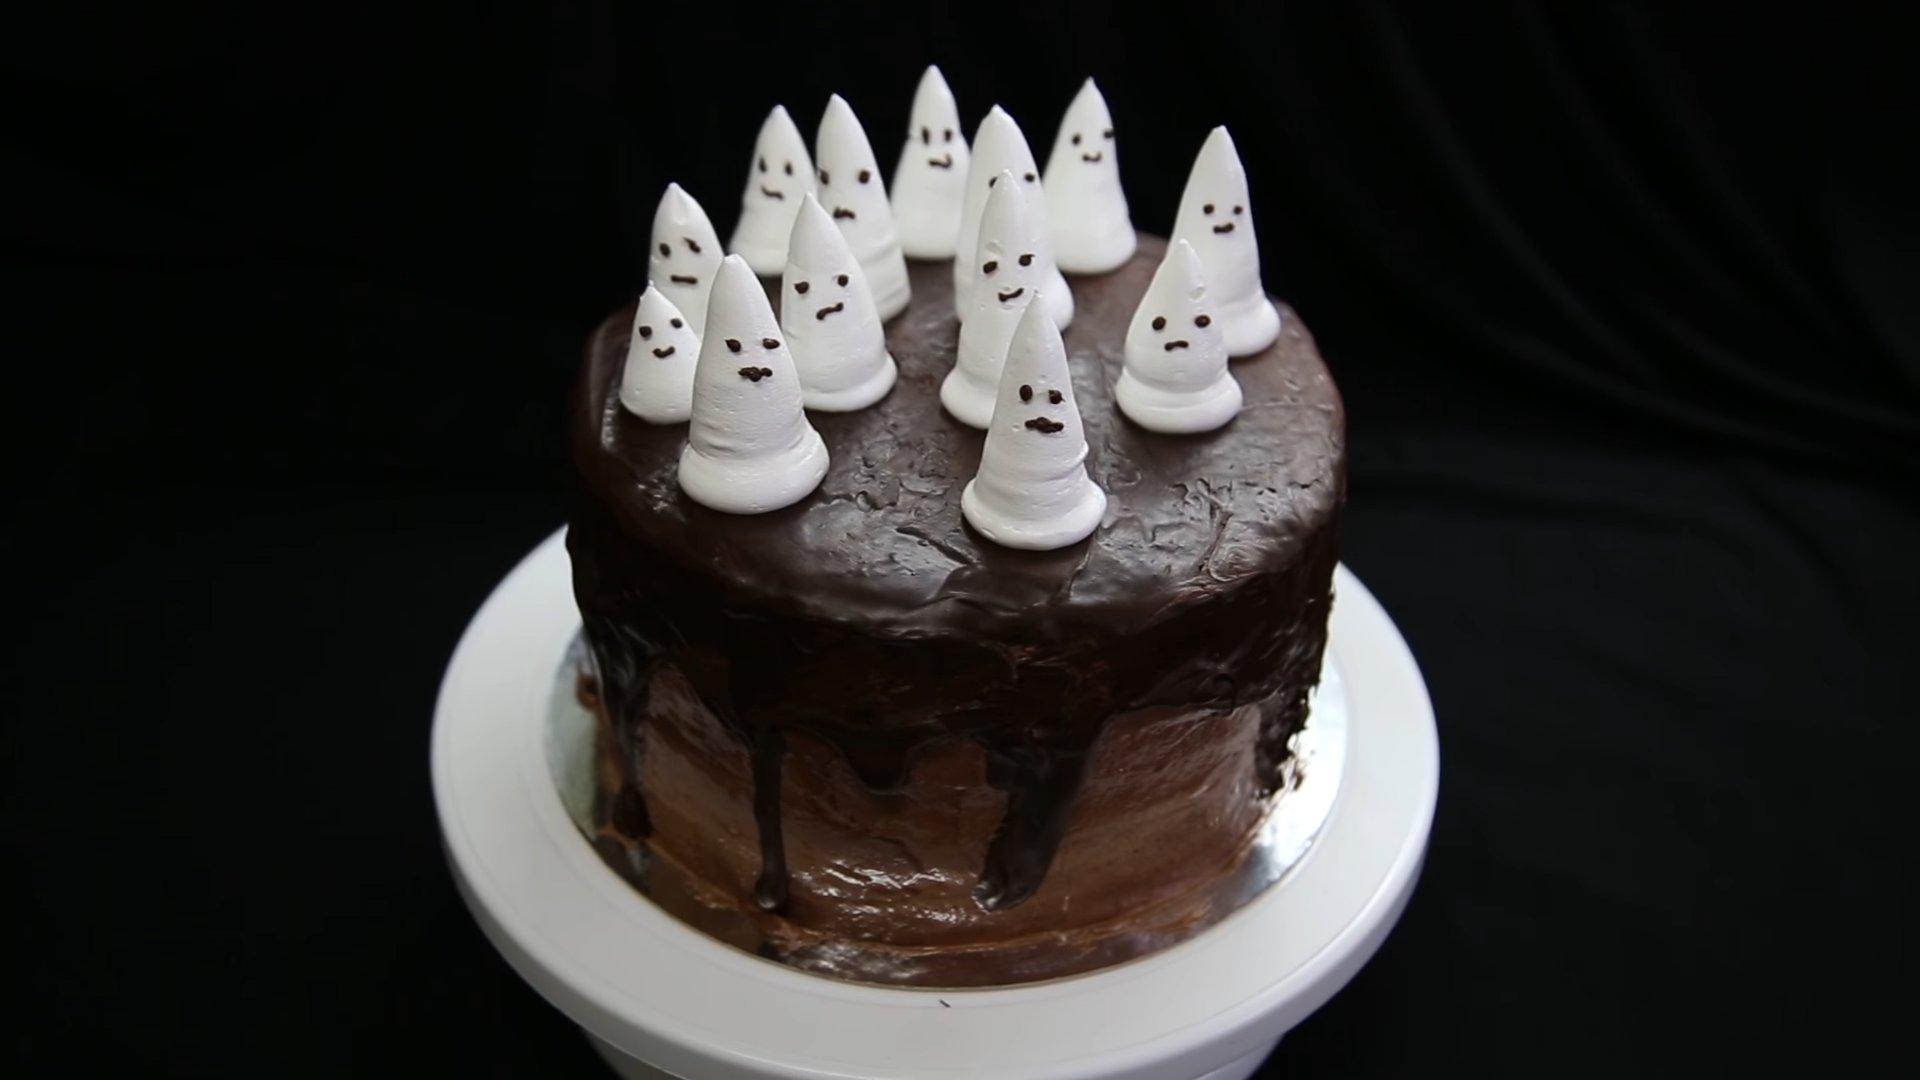
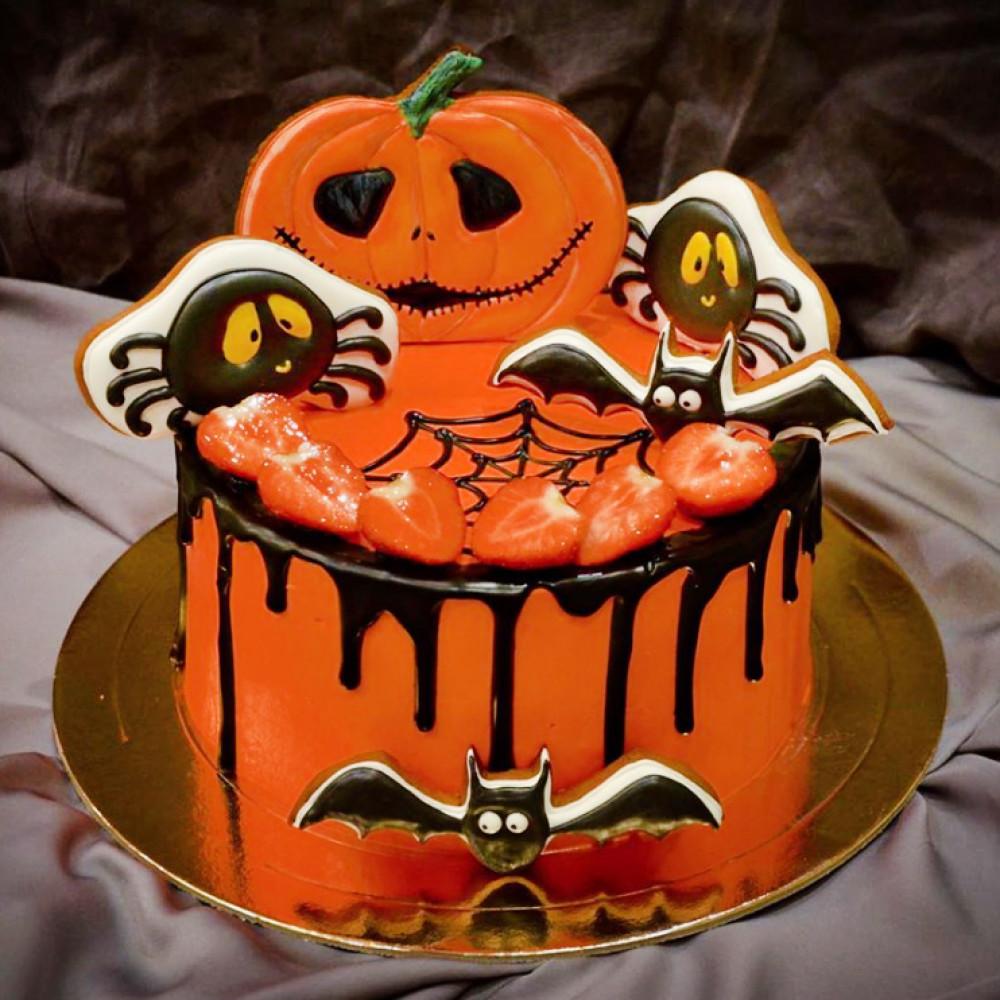
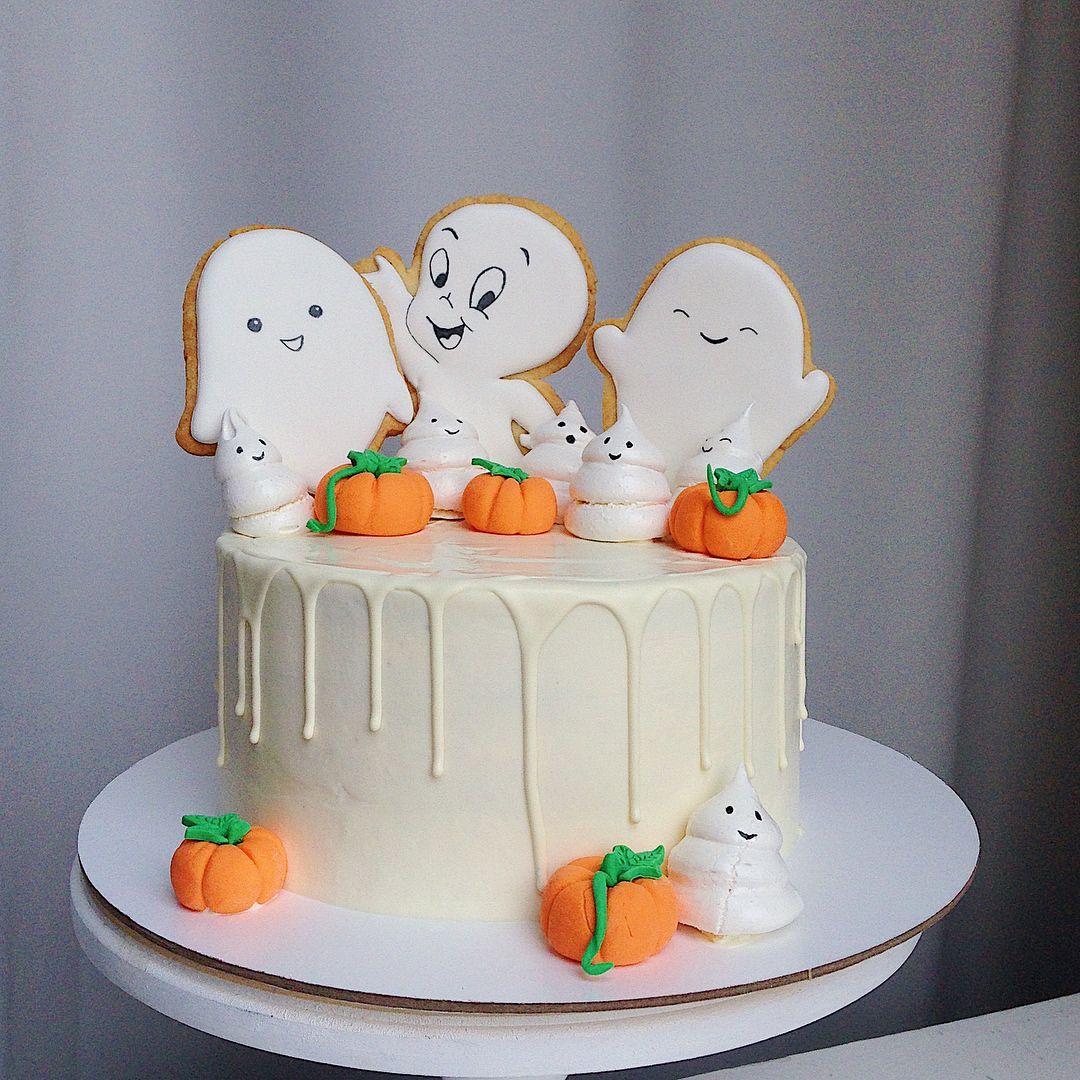
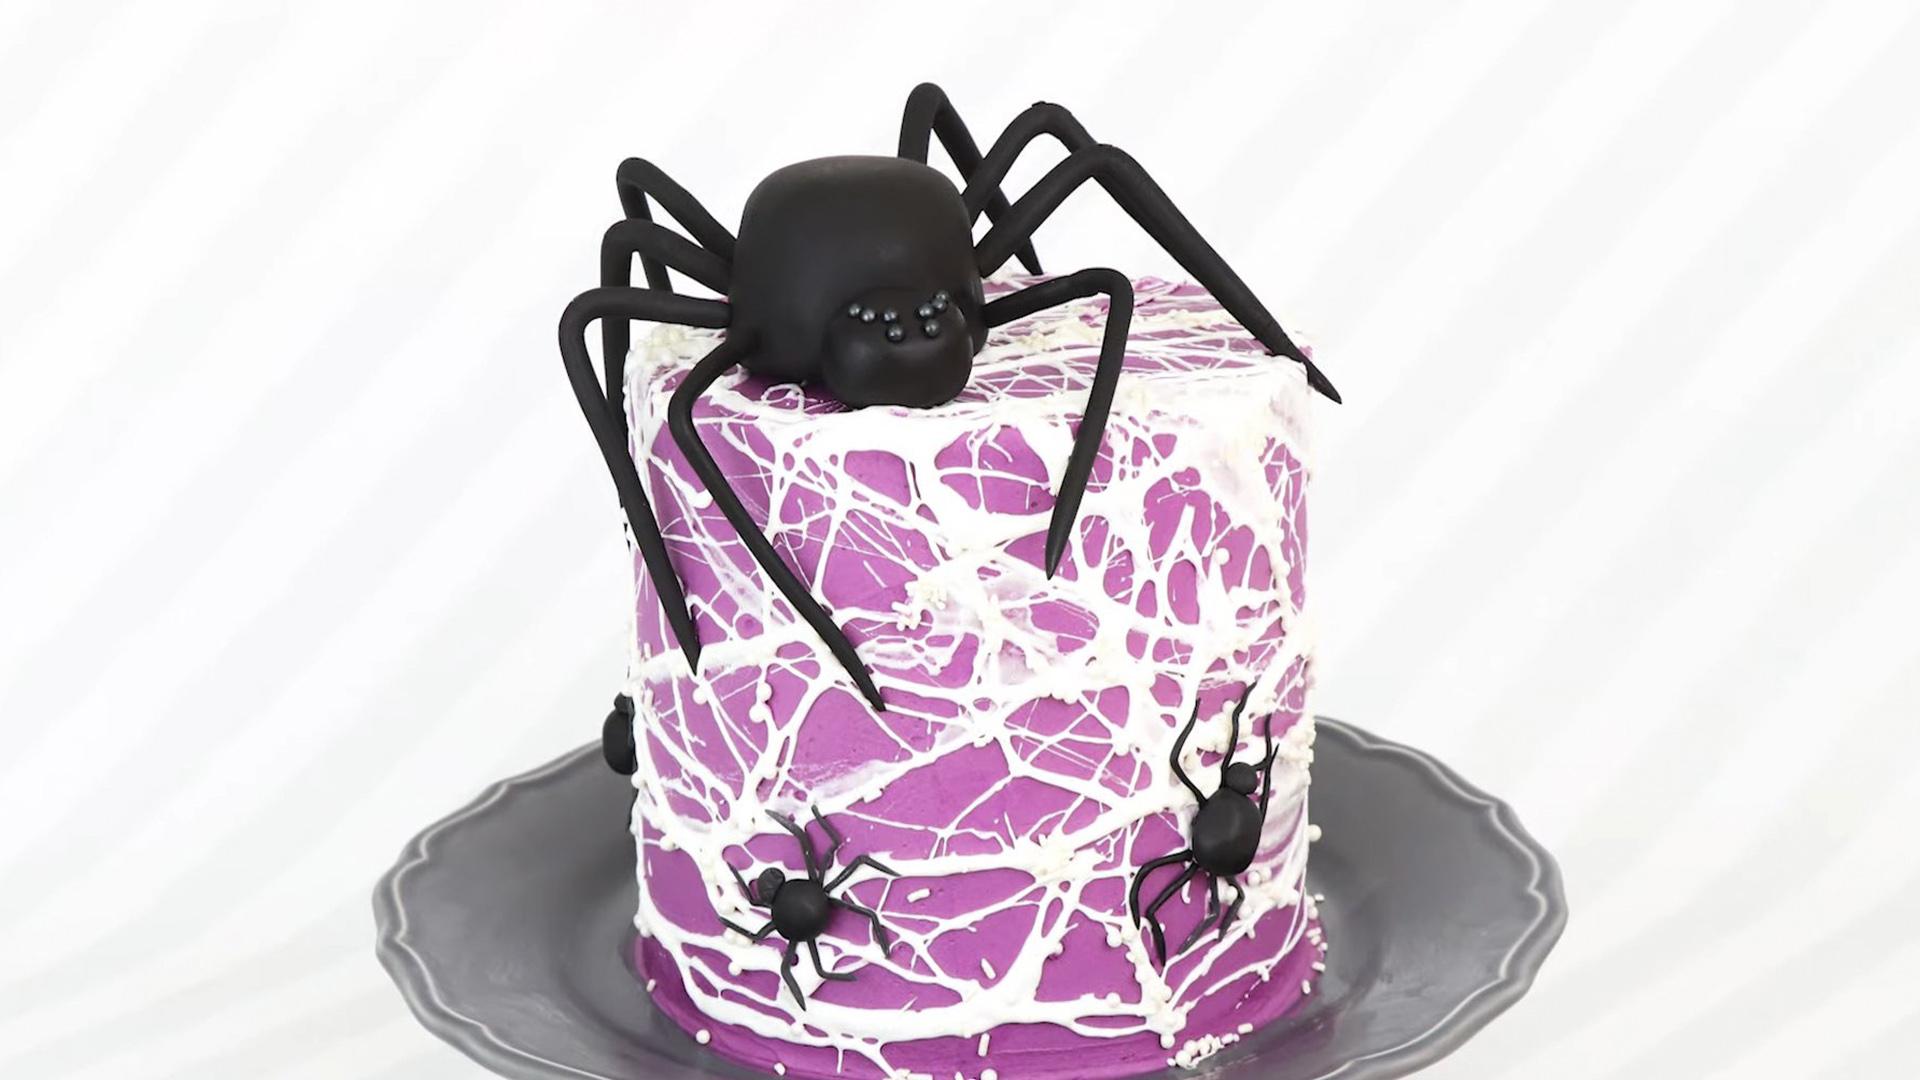
30 Halloween Cake Decorating Ideas
Want to make a unique Halloween cake? Looking for bright and unique ideas to wow everyone? I've compiled the most exciting Halloween cake decorating ideas for you.
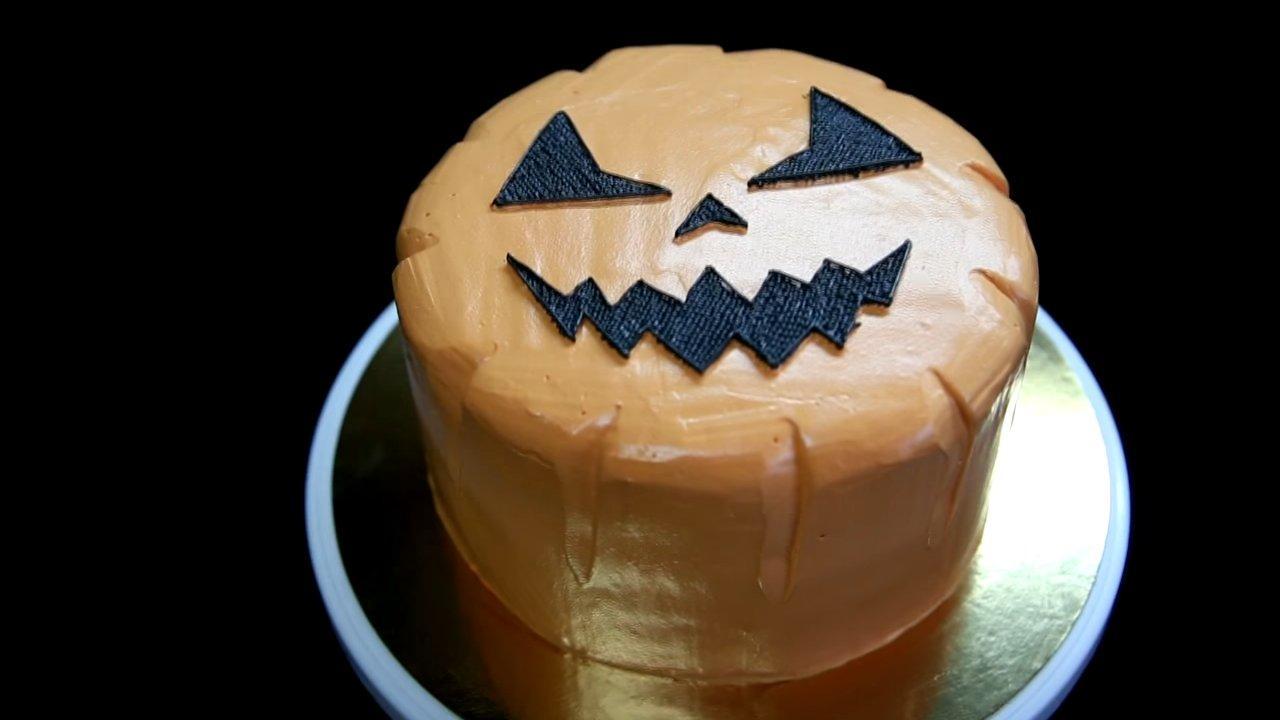
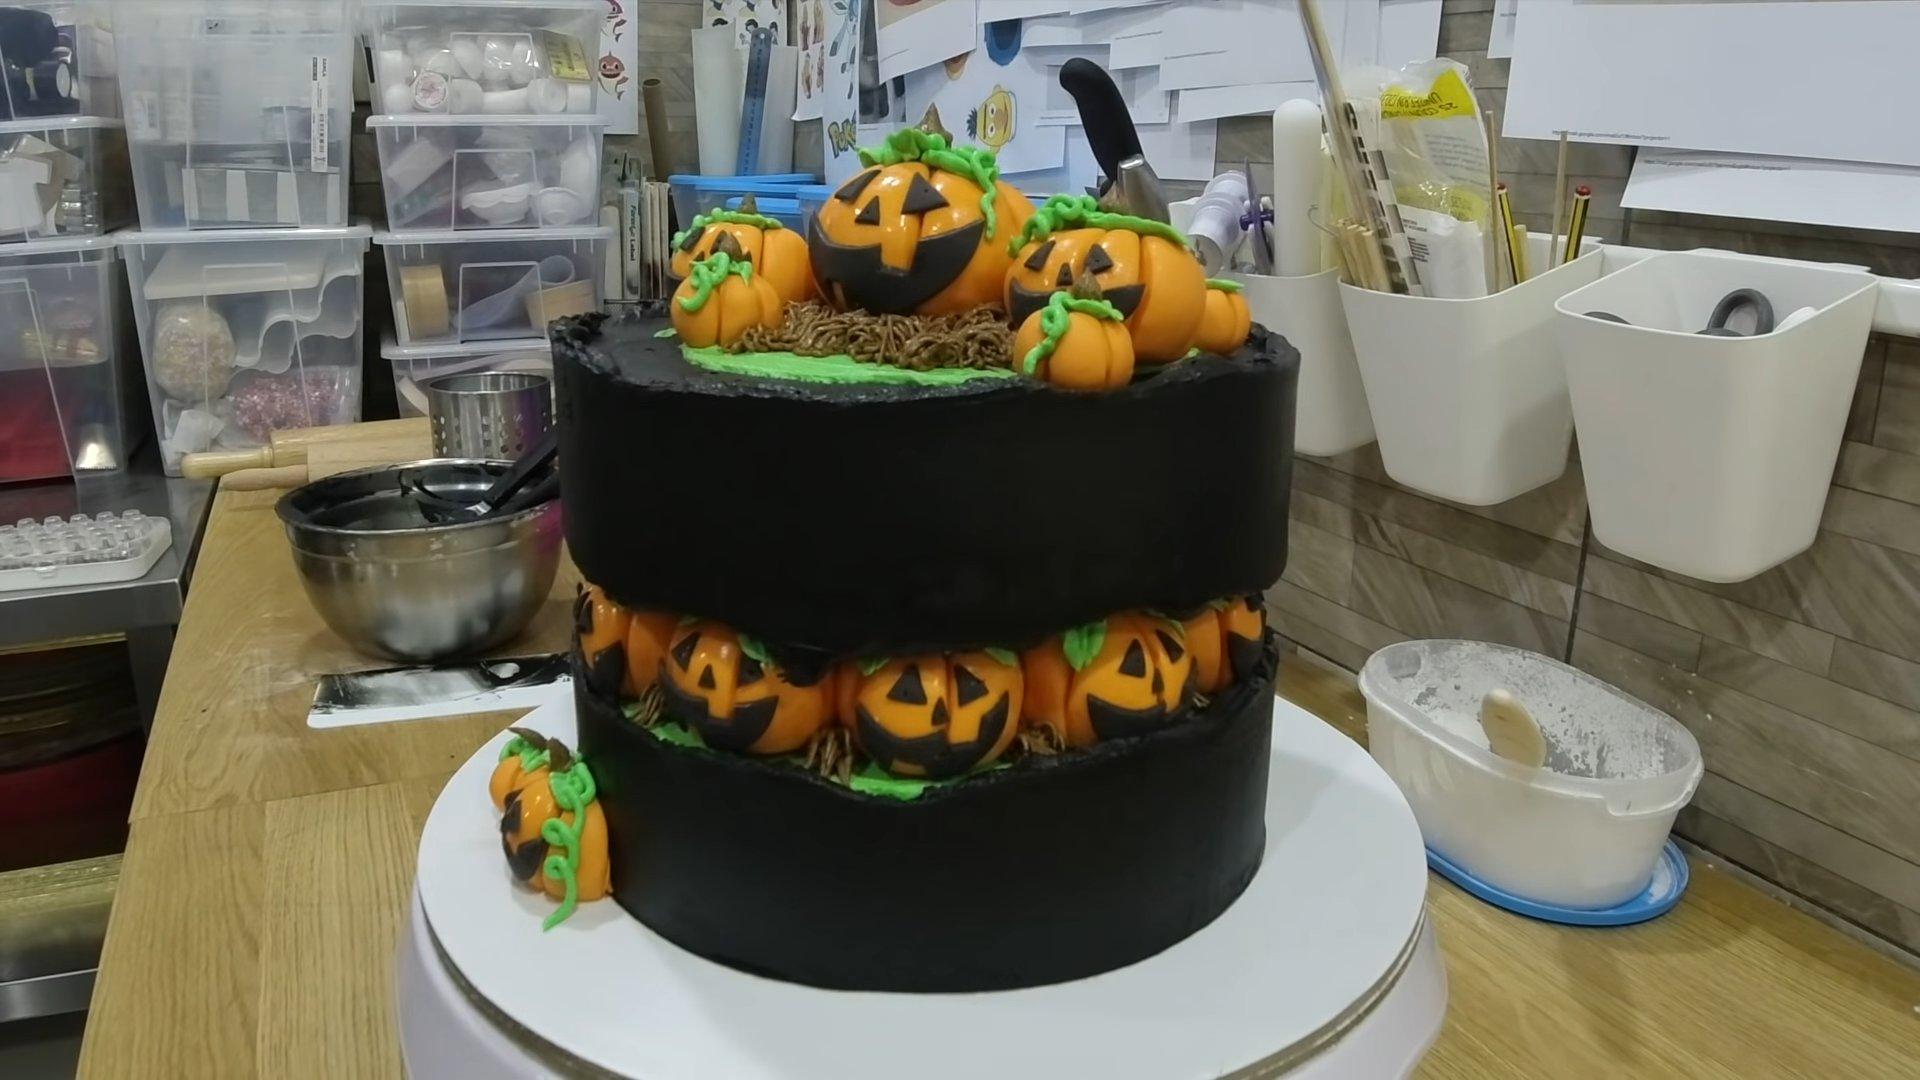
Pumpkin Cake Decorating Options
A bright pumpkin with a wicked grin is the main symbol of Halloween. In the lead-up to the holiday, it's used to decorate homes, yards, cafes, and shops. That's why pumpkin-themed or pumpkin-shaped cakes are incredibly popular. I offer several wonderful options for decorating such cakes.
Decorating a Halloween cake without fondant
Fondant is incredibly popular among confectioners these days. But not everyone knows how or wants to work with it. And not everyone likes its taste. So, I've put together some wonderful ideas for decorating a Halloween cake without fondant.
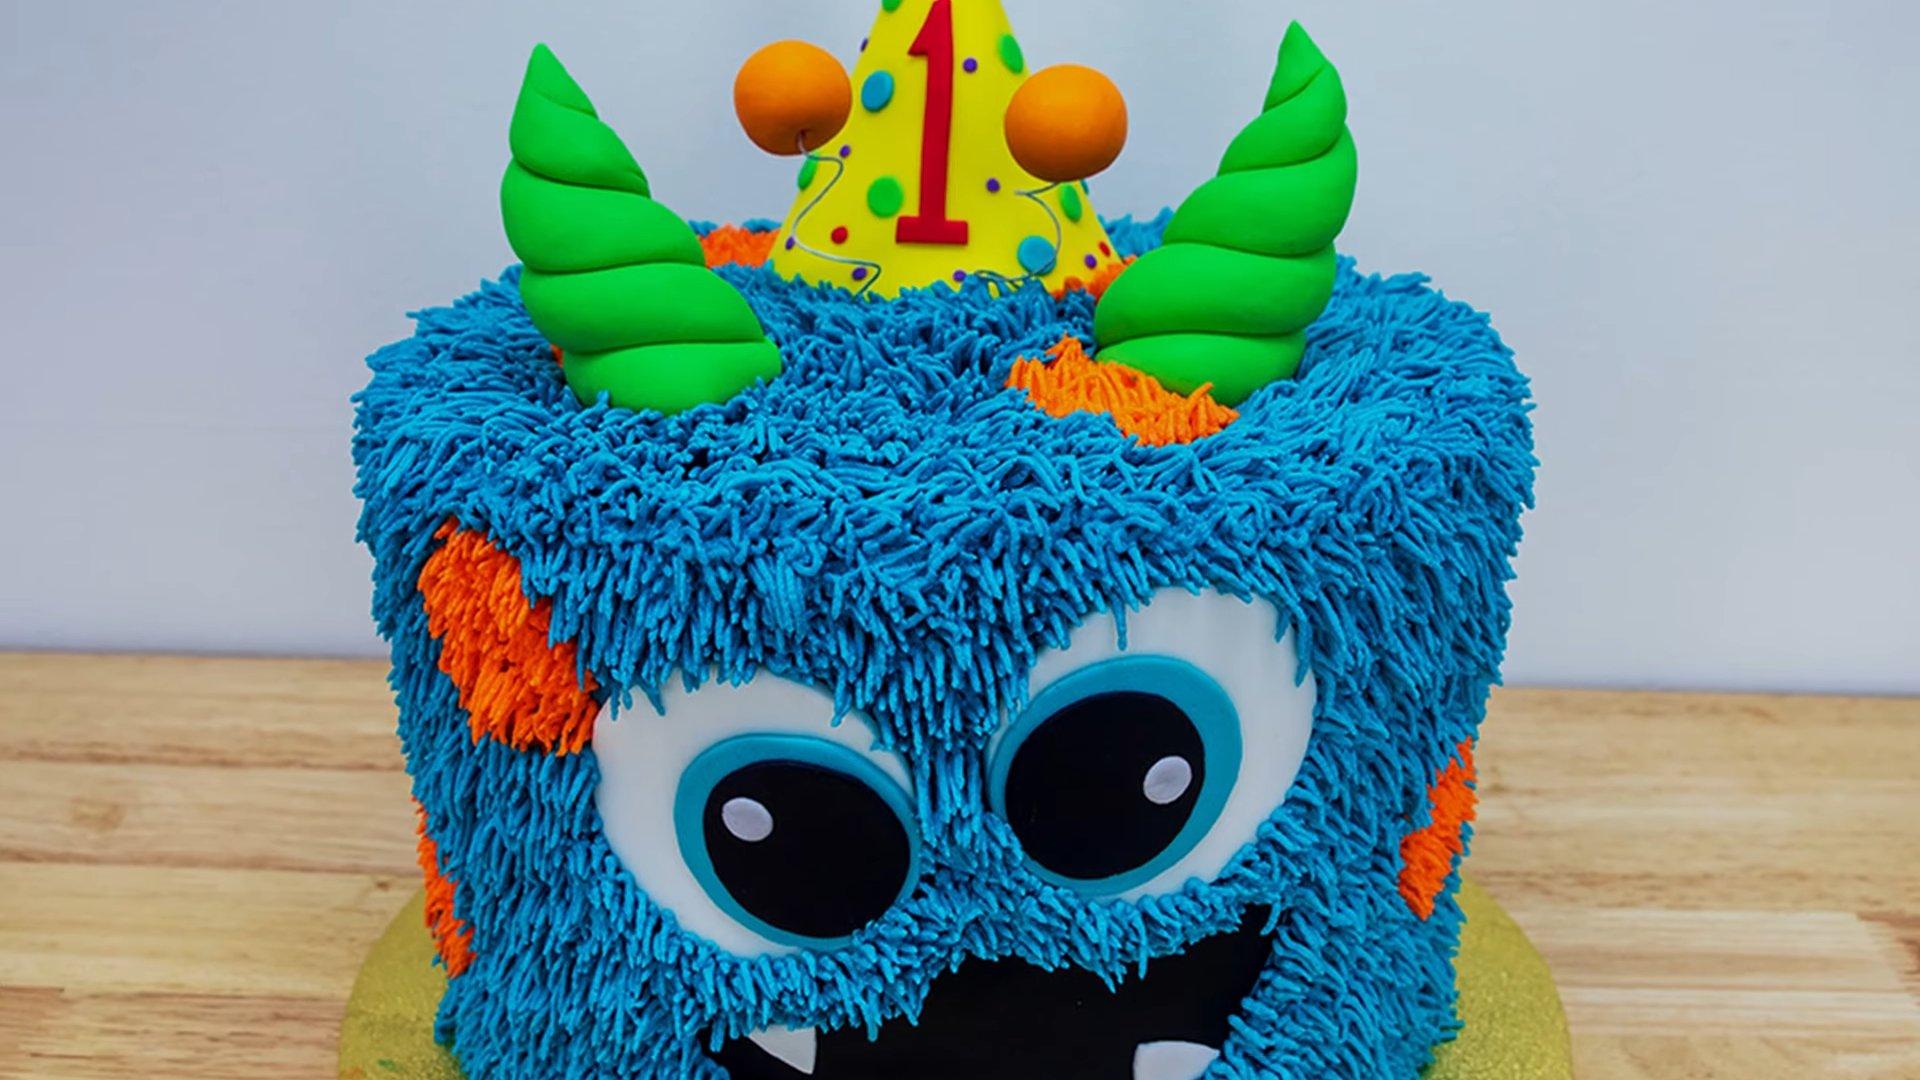
Cute Halloween Cakes for Kids
If there will be children at your Halloween party, it's best to make a separate cake for them. It should be beautiful, cute, and not at all scary, so as not to frighten the little ones. I offer you some wonderful ideas for decorating children's Halloween cakes.
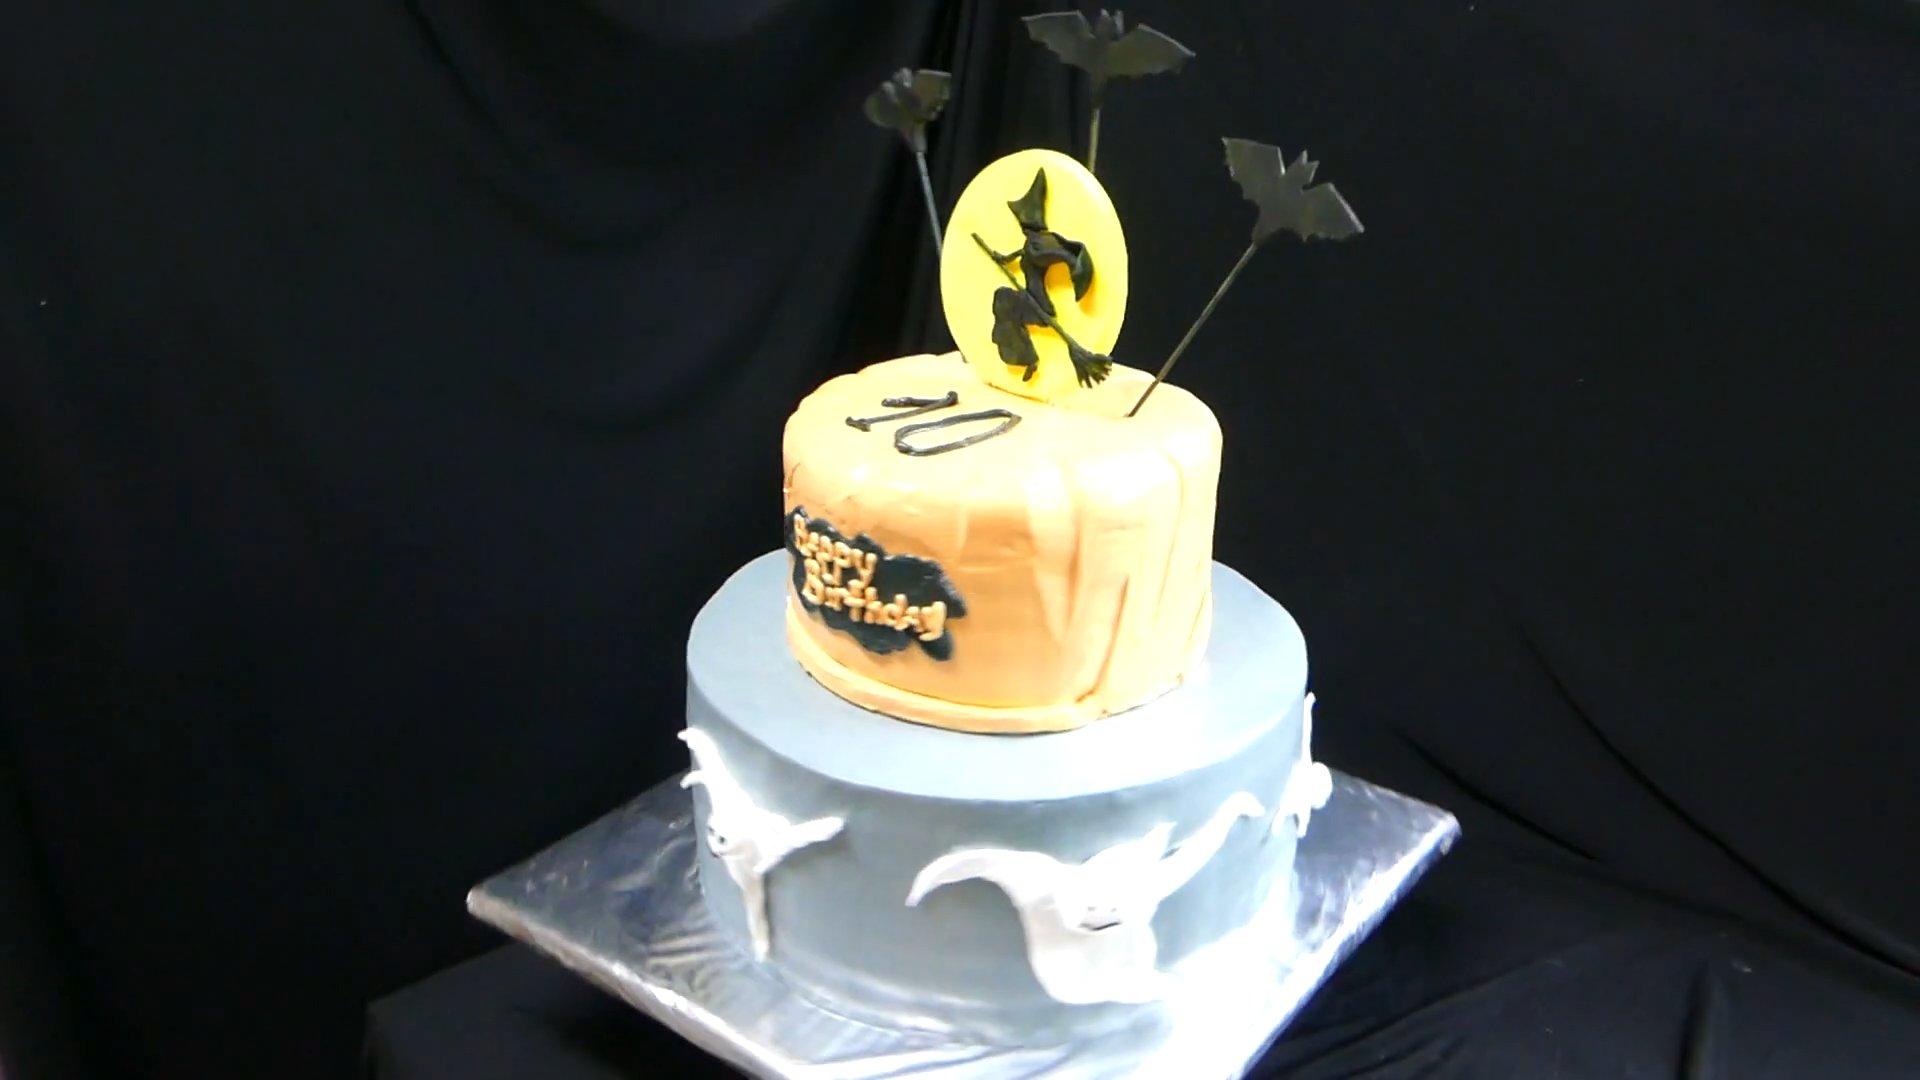

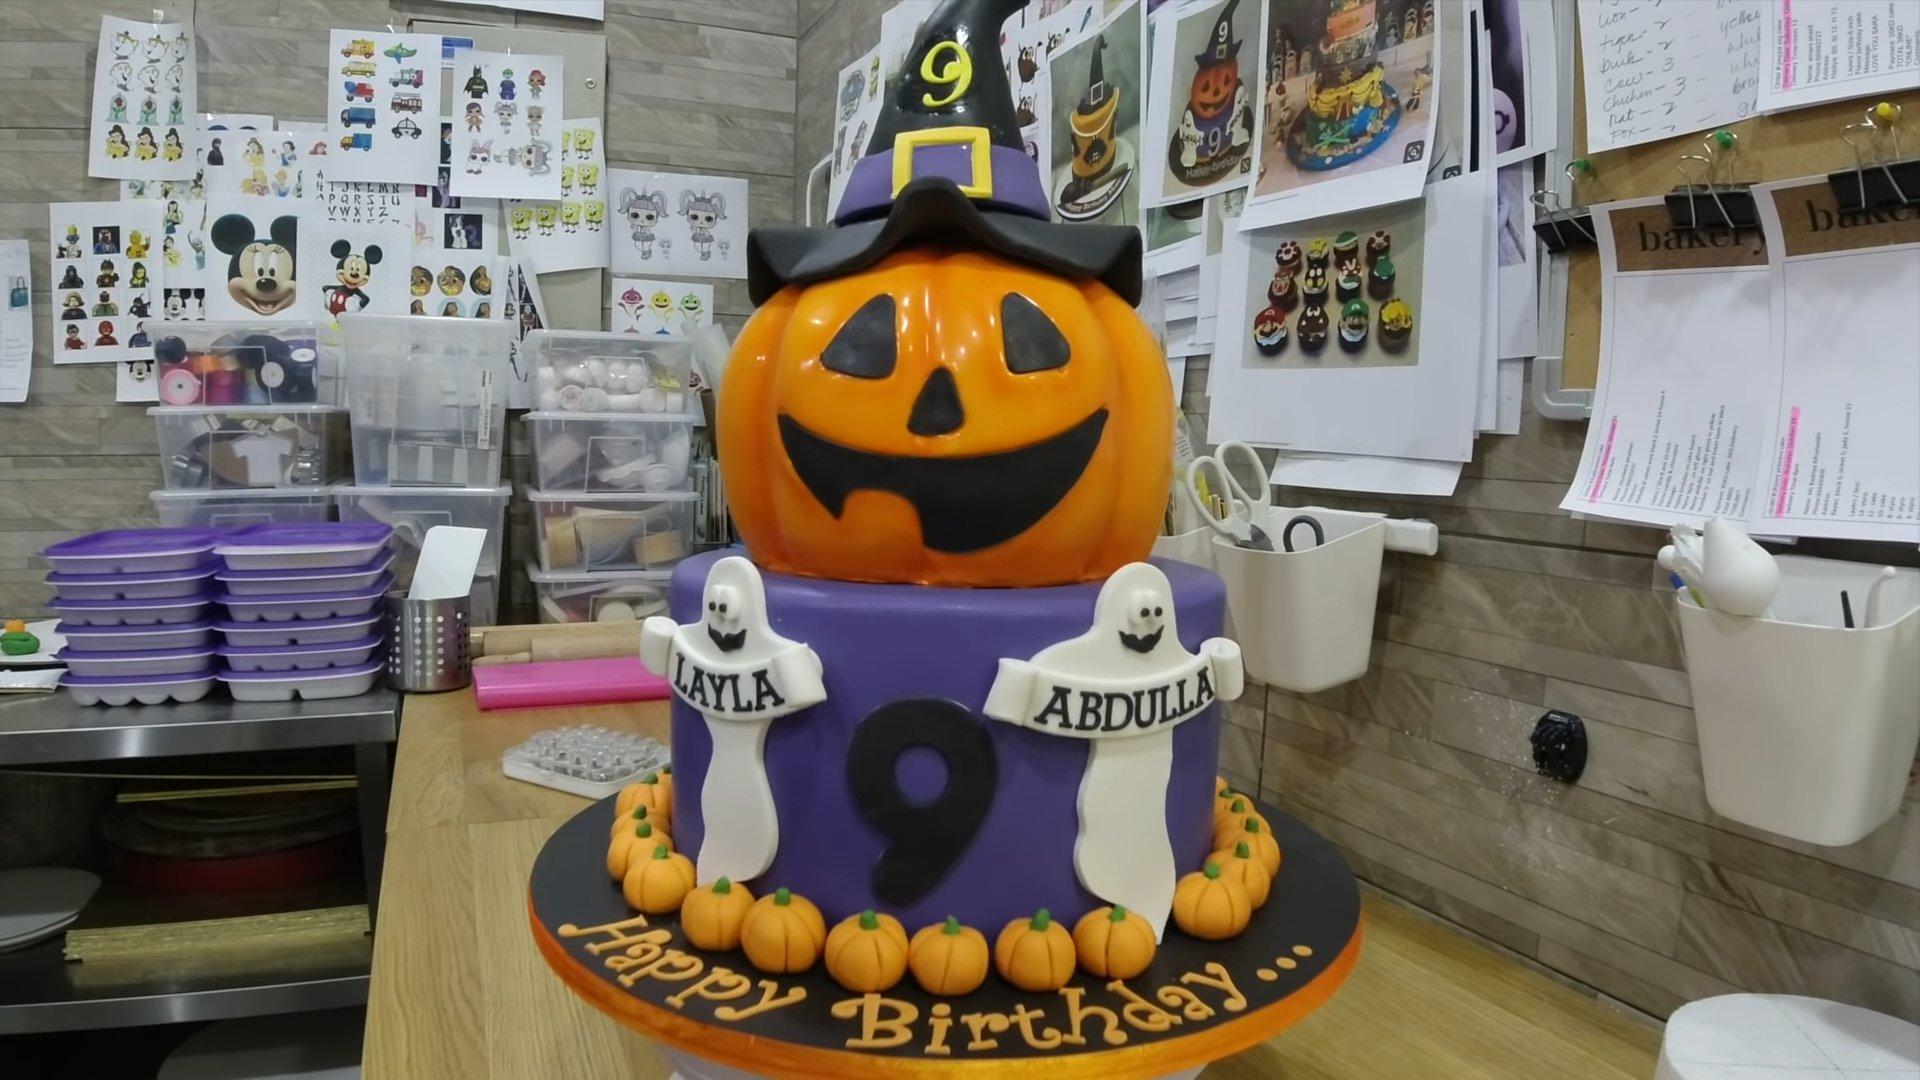
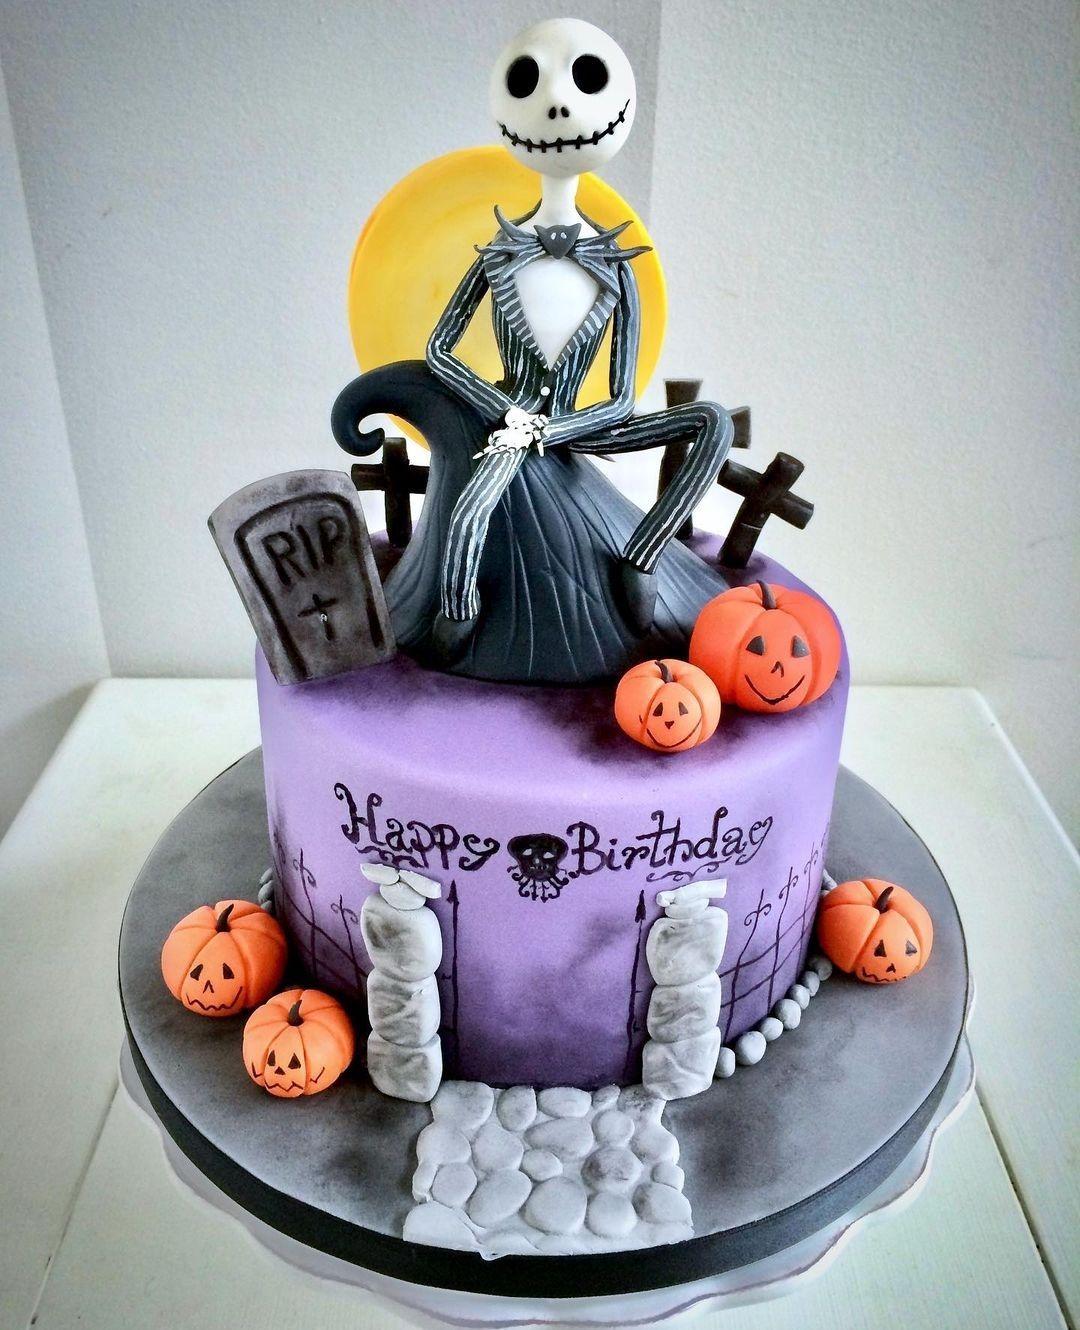
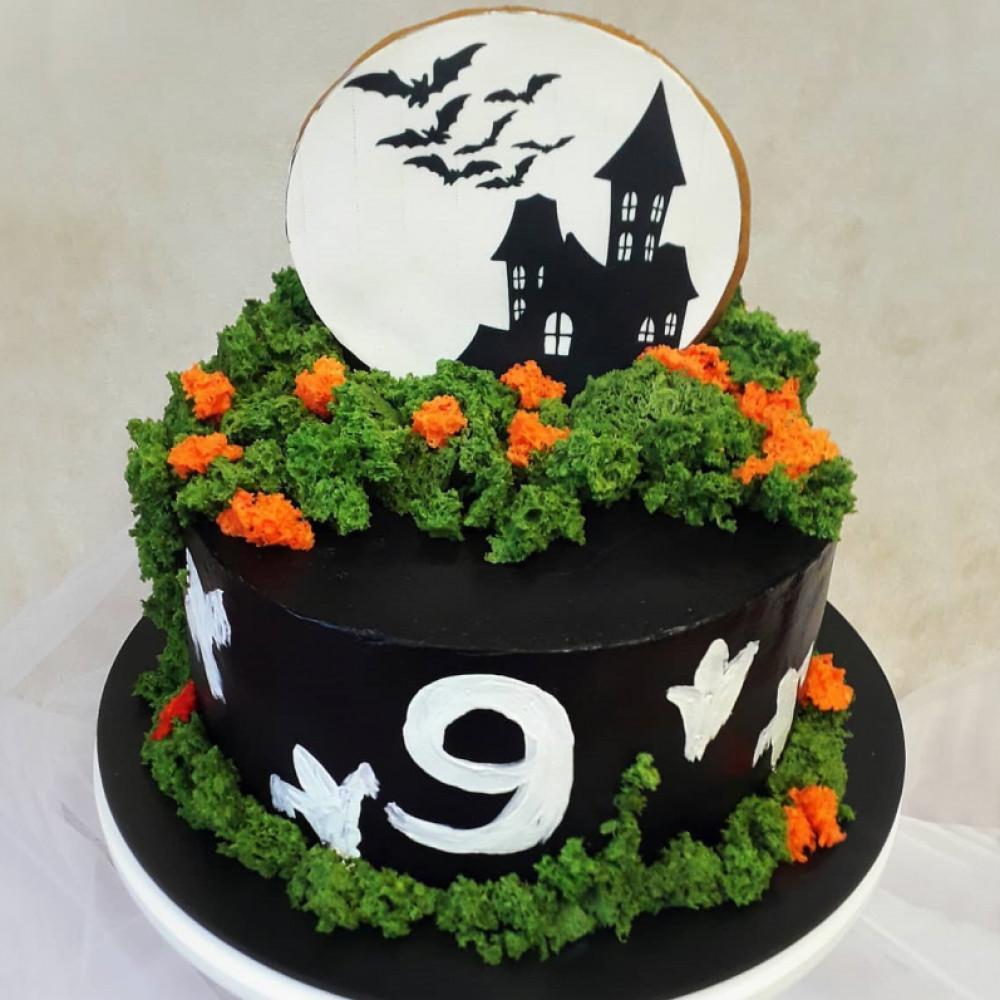
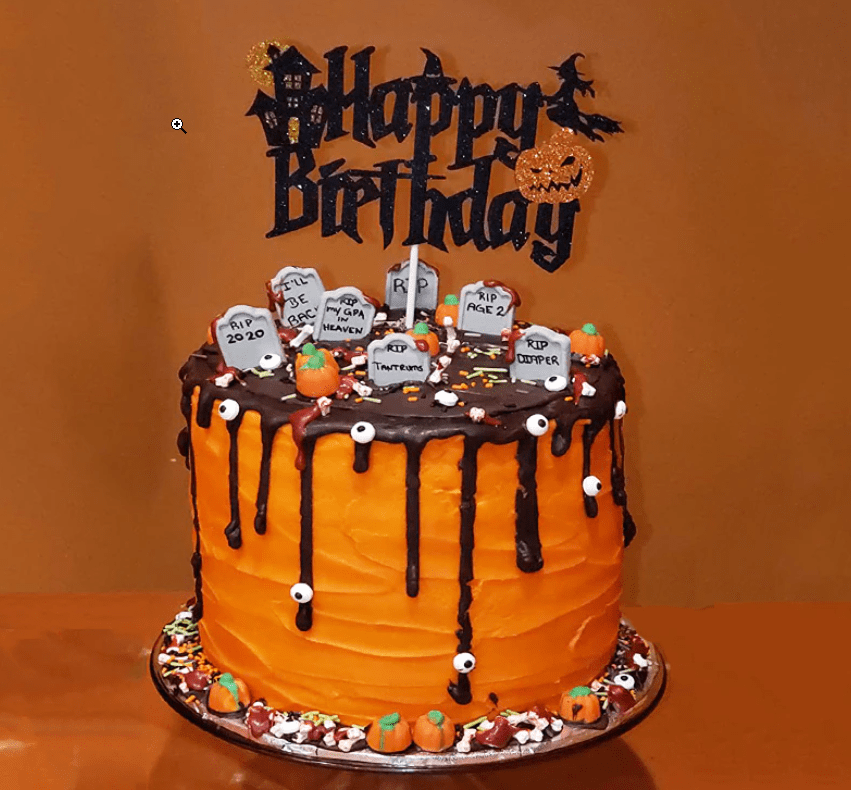
Halloween Themed Birthday Cake
If you or a loved one's birthday falls on Halloween, consider making a Halloween-themed cake for the occasion. This dessert will look very bright and unique. And it'll be a true delight for horror lovers. I've put together some fun Halloween-themed cake decorating ideas for birthdays.
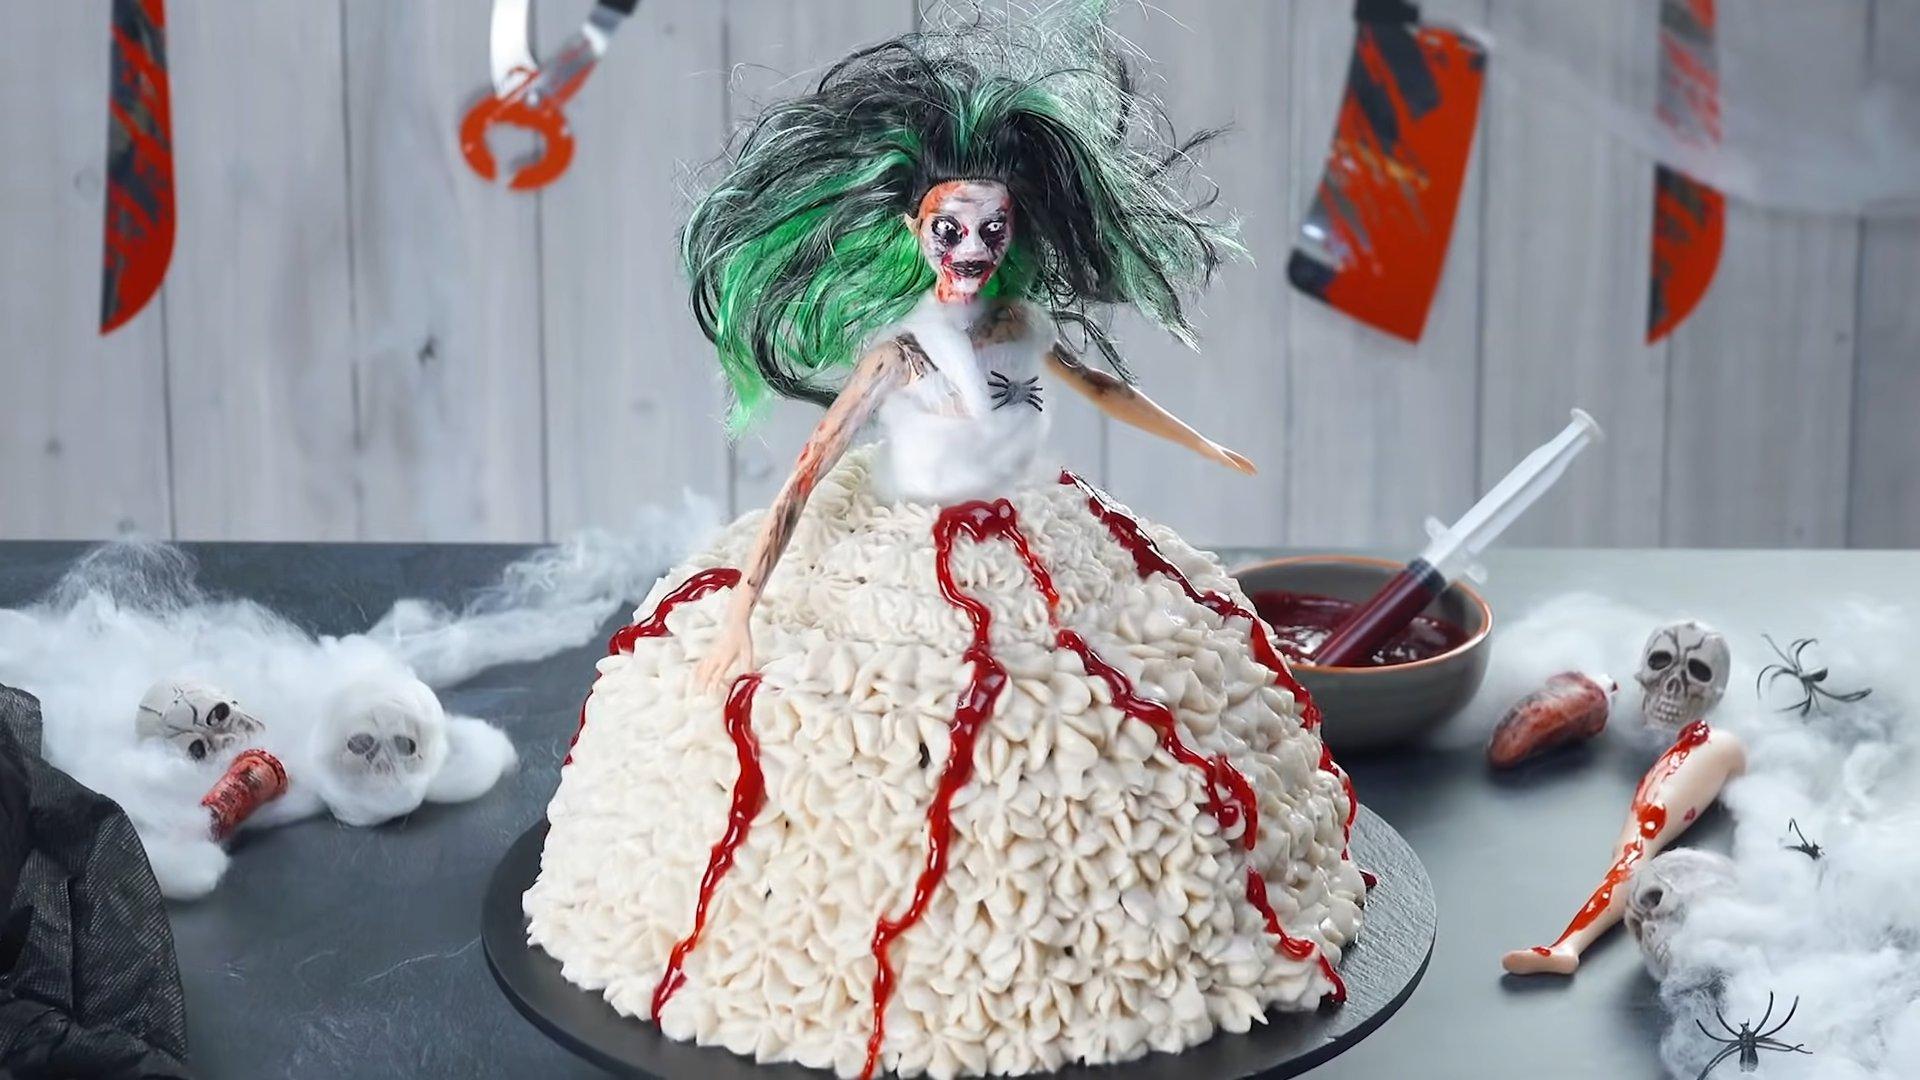
Video: Polina Filimonova's Creepy Halloween Cake
In this video, renowned pastry chef Polina Filimonova shares her fascinating story of creating a spooky Halloween cake. She details all the ideas and mistakes she made during the dessert's design process.
The video also shows the process of decorating a Halloween cake. It briefly shows how the sponge cake was shaped, as well as how the fondant and food coloring were applied. The result is stunning!