Gingerbread Painting for Beginners: 5 Step-by-Step Tutorials + Icing Recipe

Content
- 1 Types of painting on gingerbread
- 2 What do you need to decorate gingerbread cookies?
- 3 General rules for decorating gingerbread
- 4 Classic glaze recipe
- 5 Gingerbread painting for beginners at home
- 6 How to decorate a gingerbread tree
- 7 Painting the "Mitten" gingerbread
- 8 Painting the Snowflake gingerbread
- 9 Video: Masterclass on transferring images onto gingerbread
Decorating gingerbread cookies is a truly captivating and creative process that requires patience, perseverance, and attention to detail. Many homemakers and aspiring pastry chefs dream of mastering this craft. After all, decorating helps transform ordinary baked goods into true masterpieces. It can be done not only professionally but also with family, on the eve of holidays.
In this article, I'll share some useful information about gingerbread painting, as well as wonderful master classes that will help you learn the craft faster. All you'll need is some free time, a few simple supplies, tools, and a good mood.
Types of painting on gingerbread
There are many painting techniques that can give gingerbread a luxurious, unique look. They can be divided into simple and complex.
Simple ones include:
- Contour filling is filling the gingerbread along pre-drawn and slightly or completely dry contours.
- Lineless fill - filling an image without any pre-applied outlines.
- Gradient is a smooth transition between several shades.
- Wet on dry - a design on a dried base layer.
- Wet on wet - a design on a base layer that has not yet dried.
- Marble is a very impressive, textured design.
Complex techniques include:
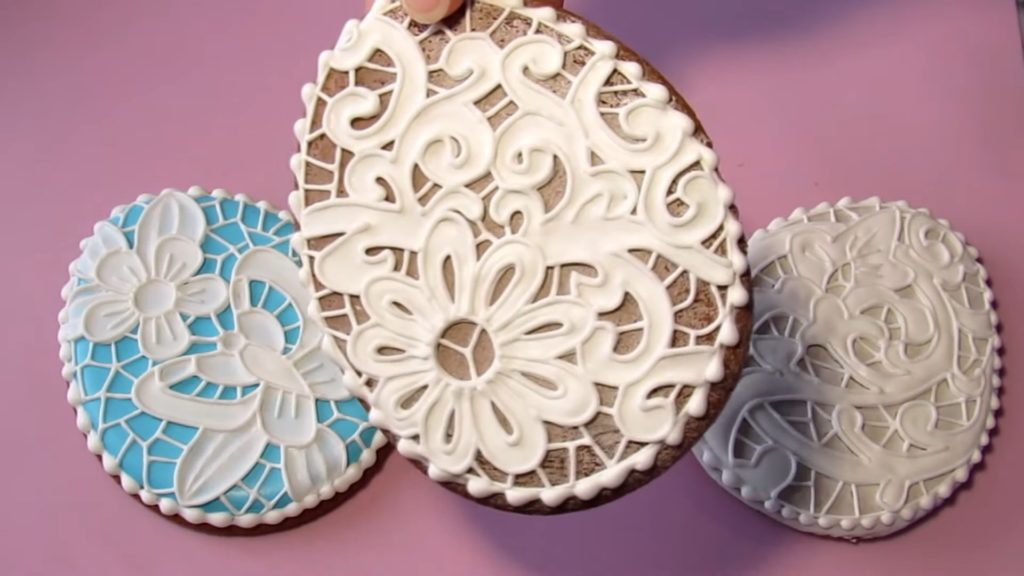
- Openwork is a complex pattern with many curls, nets, and monograms.
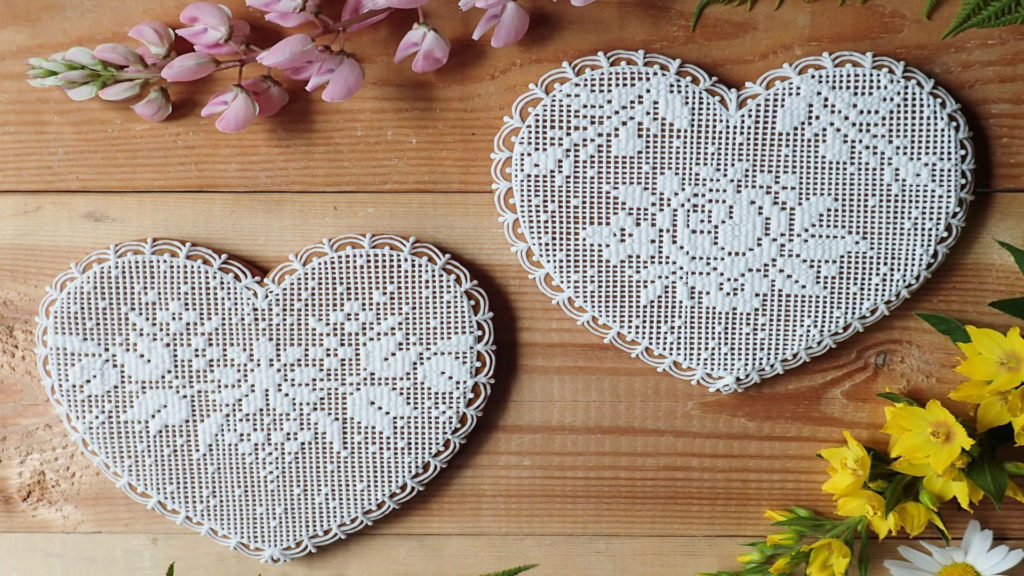
- Richelieu is an exquisite lace embroidery.
- Craquelure is the effect of cracks and aging.

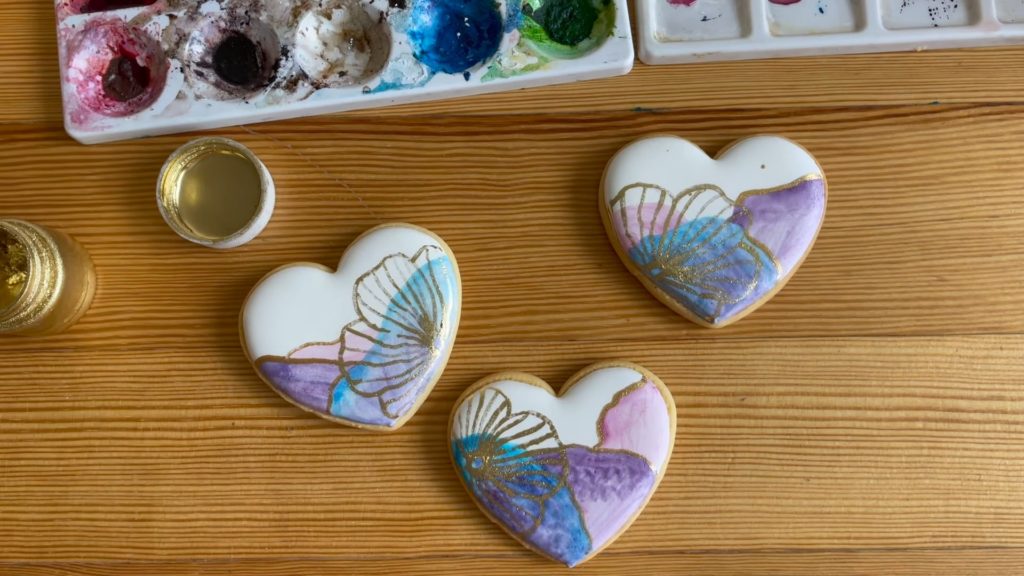
- Watercolor - drawings, writing or patterns made with food coloring on a dried base layer of glaze.
- Piping is a three-dimensional image.
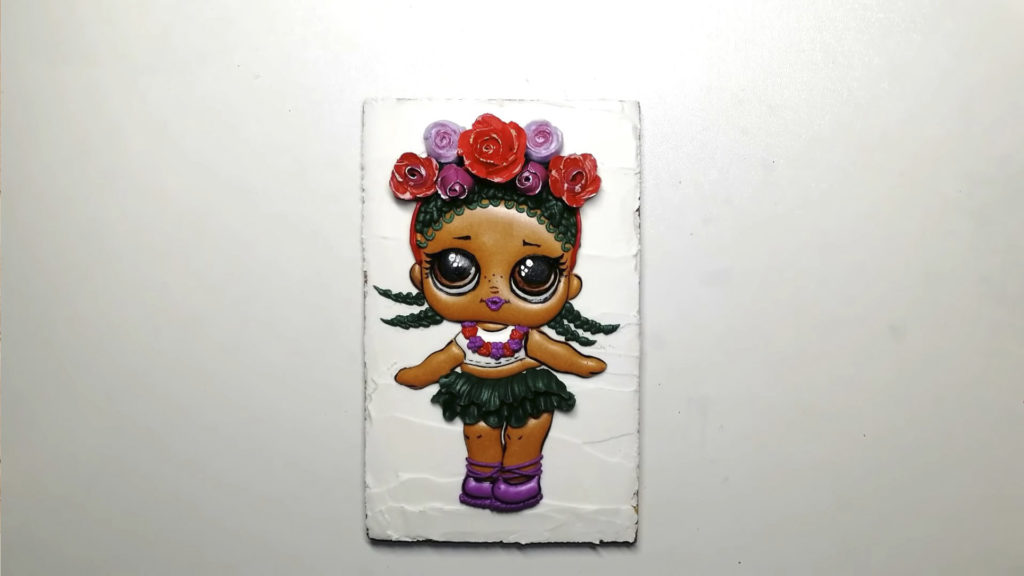
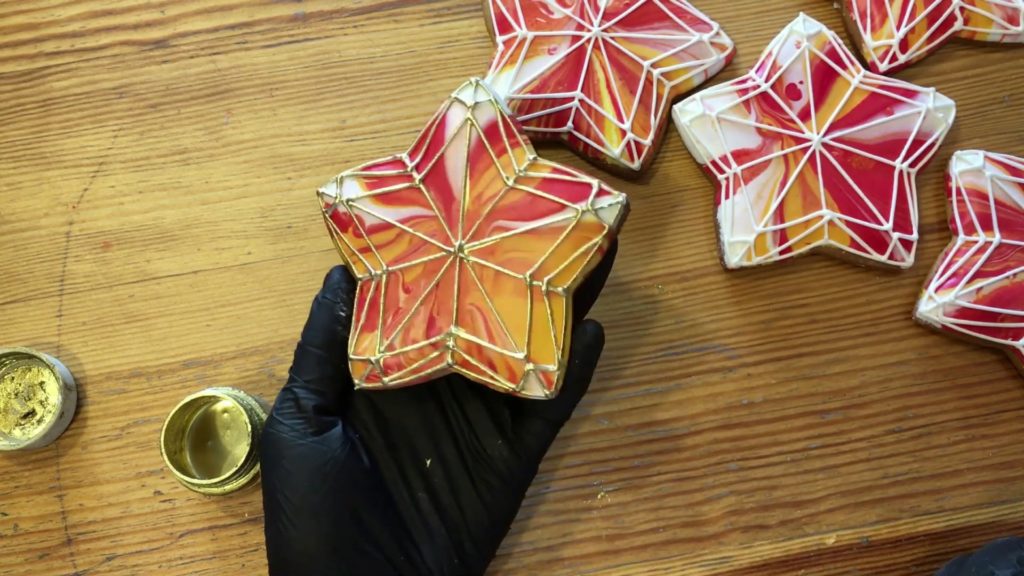
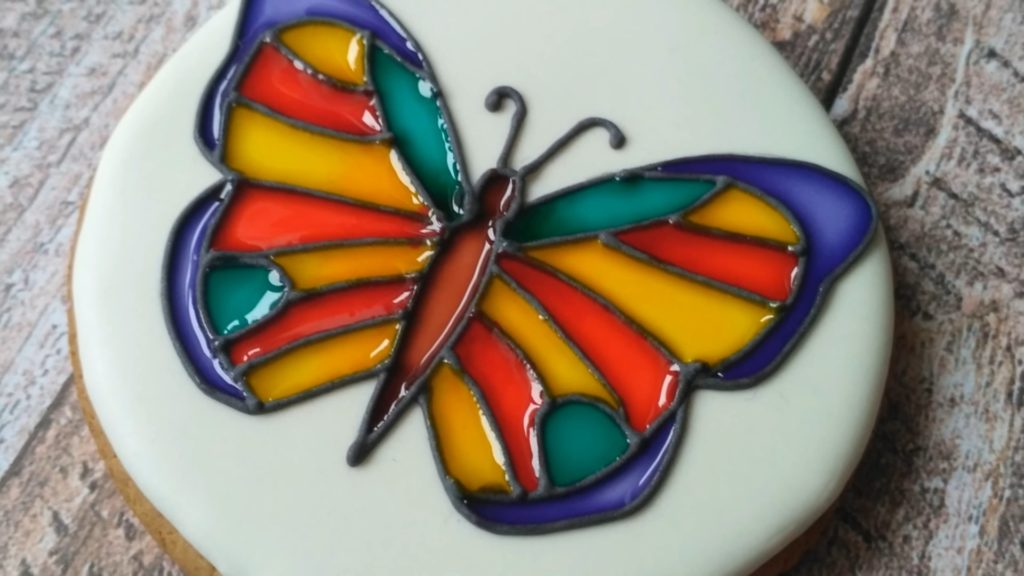
- Stained glass is a process of filling with a special glaze that resembles multi-colored glass.
And this isn't the only list of decoration techniques. Modern confectioners are constantly inventing new techniques, combining them, and achieving interesting effects every time.
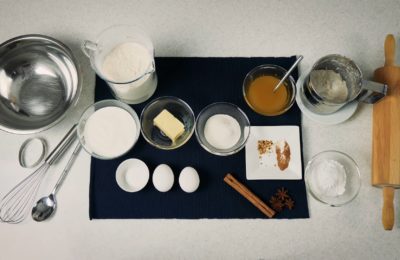
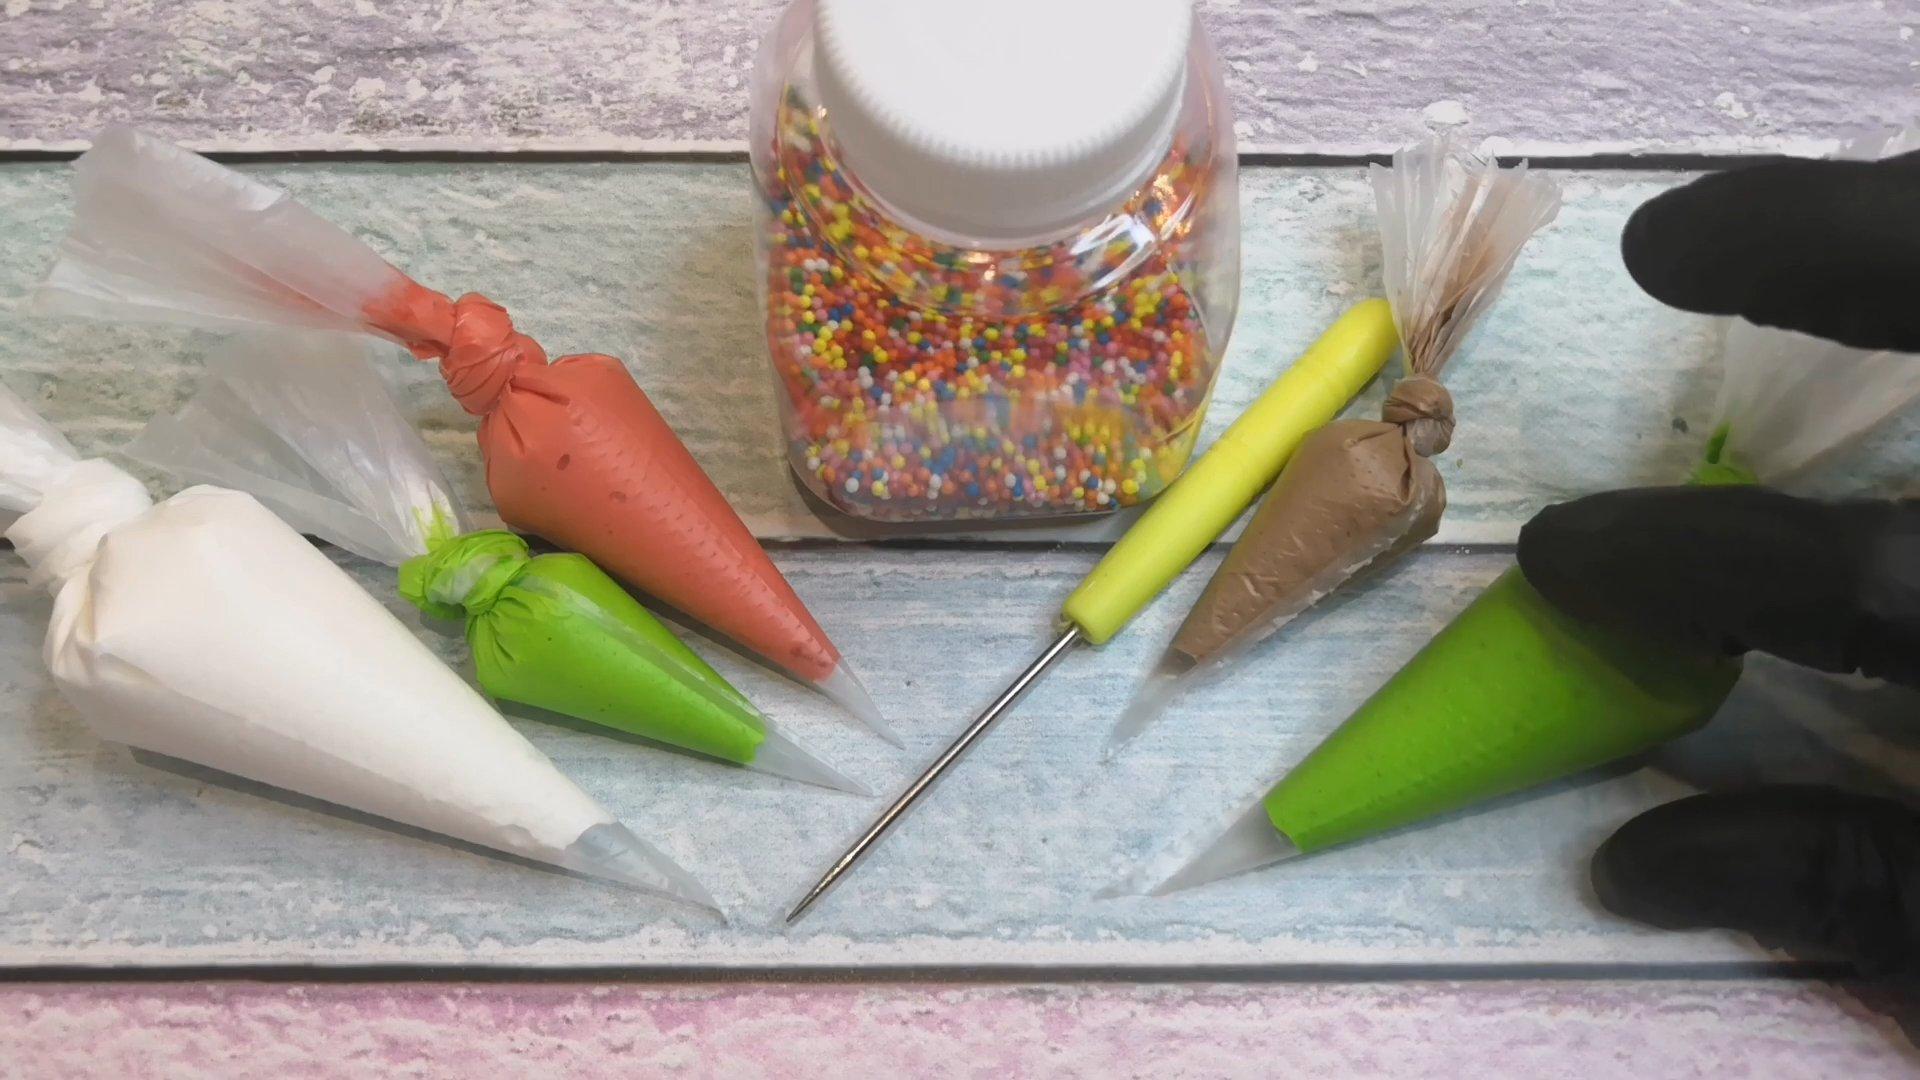
What do you need to decorate gingerbread cookies?
To create beautiful, original, and neat gingerbread cookies, you need to not only master painting techniques. It's also crucial to select high-quality materials and tools. Let's find out what a budding pastry chef needs before decorating gingerbread cookies, cookies, and other confections.
To decorate gingerbread you will definitely need:
- Icing. This is the main material for decorating cookies or gingerbread. It comes in different types and consistencies. Always choose the icing based on the painting technique.
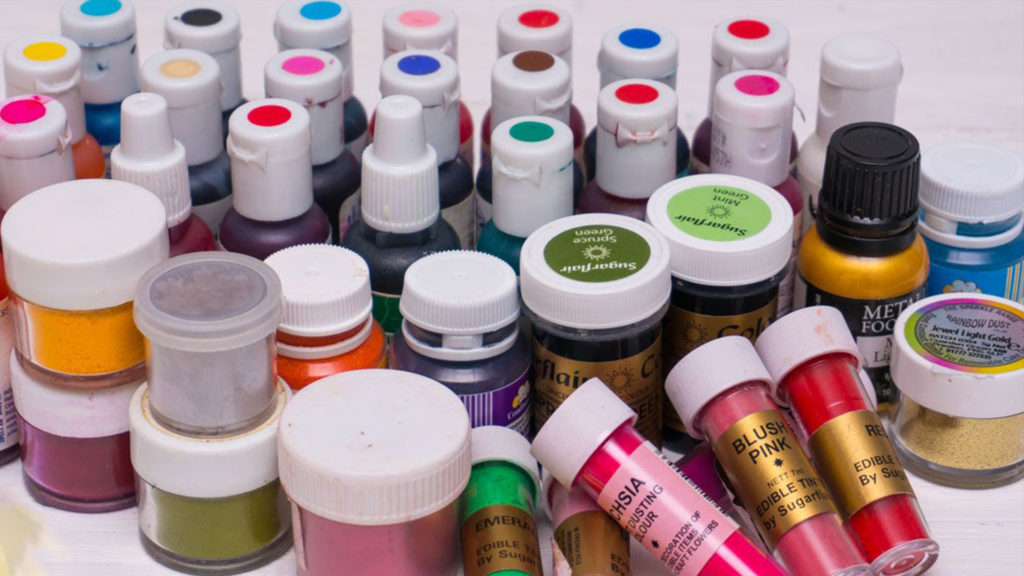
- Food coloring. Classic snow-white icing can always be tinted to any shade. And for this, you can't do without high-quality food coloring: liquid, gel, or powder. Choose the type that's most convenient for you to work with.
- A piping bag (or syringe) with tips. This tool will help you carefully fill gingerbread, draw various patterns, pictures, and add messages. Both reusable and disposable bags are suitable.
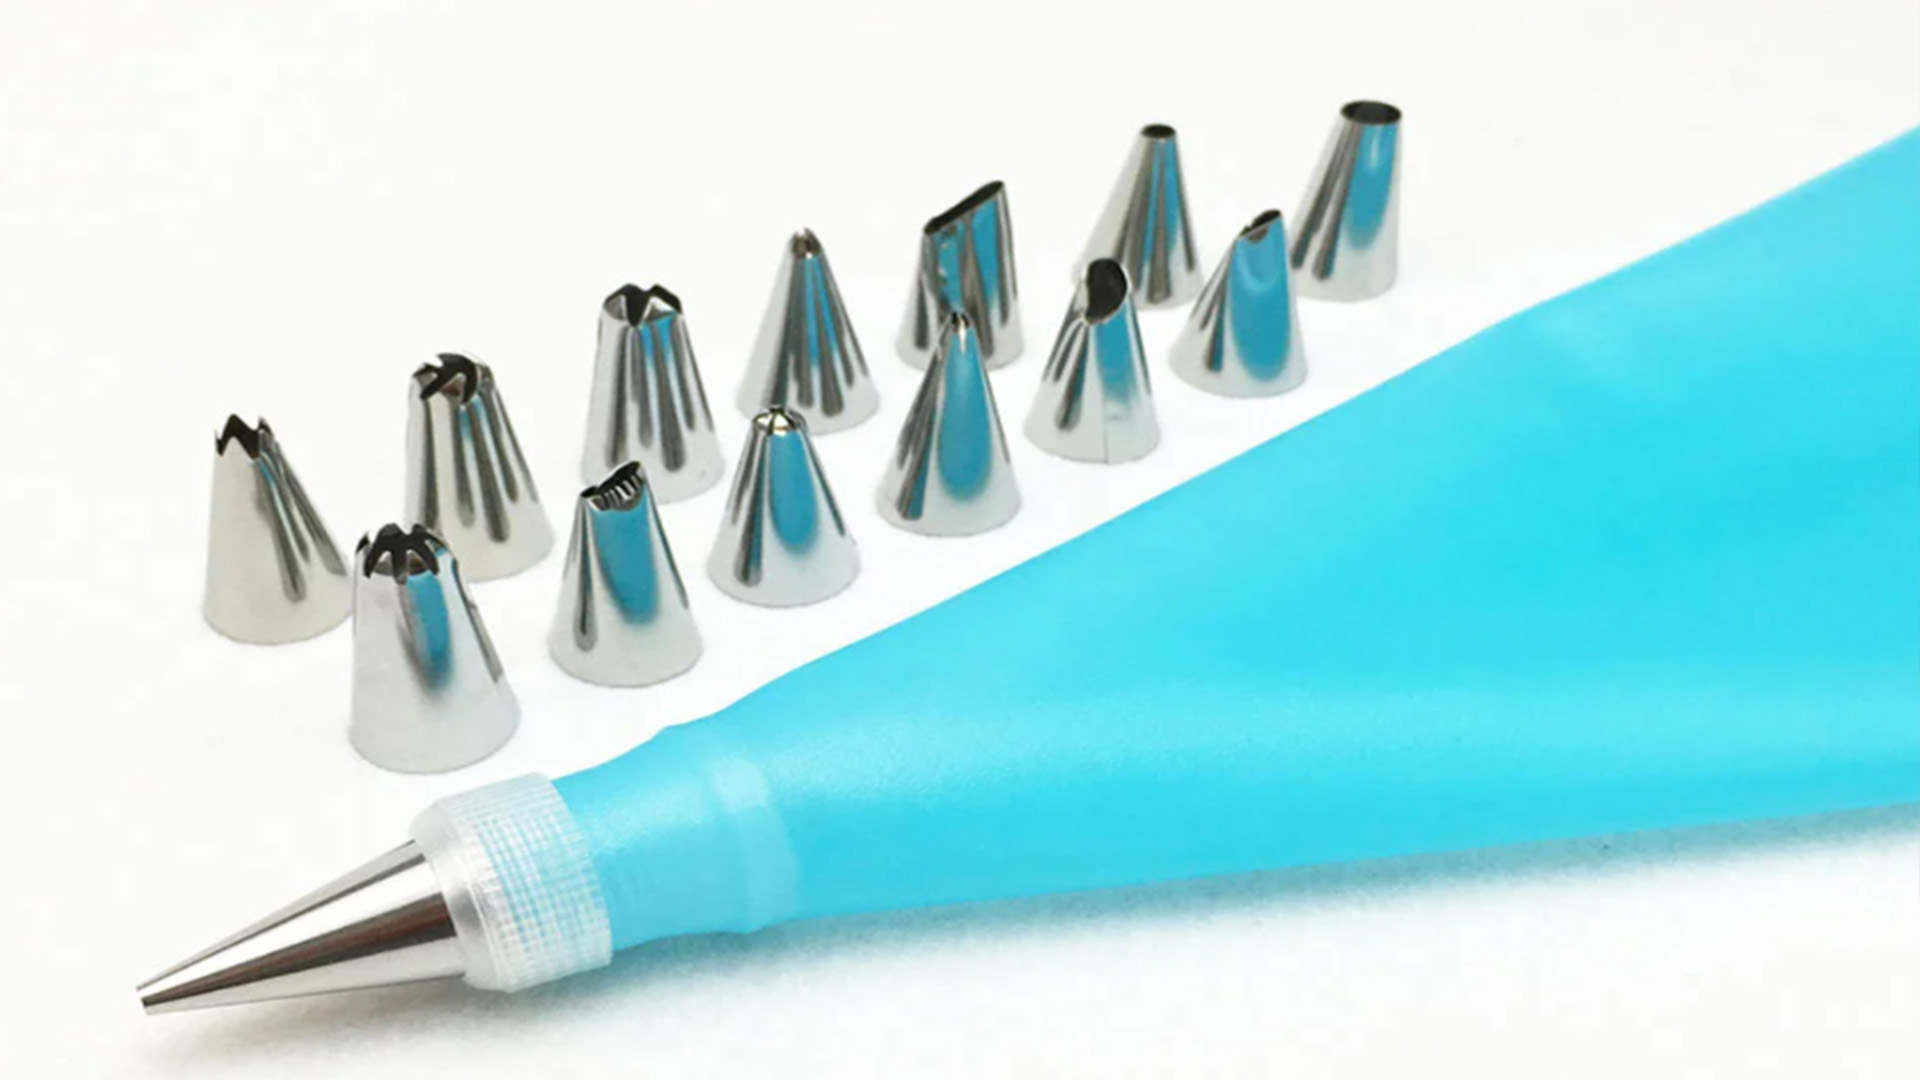

- An awl, needles, and toothpicks are essential for smoothing transitions, removing air bubbles, and creating dots or other simple, fine patterns.

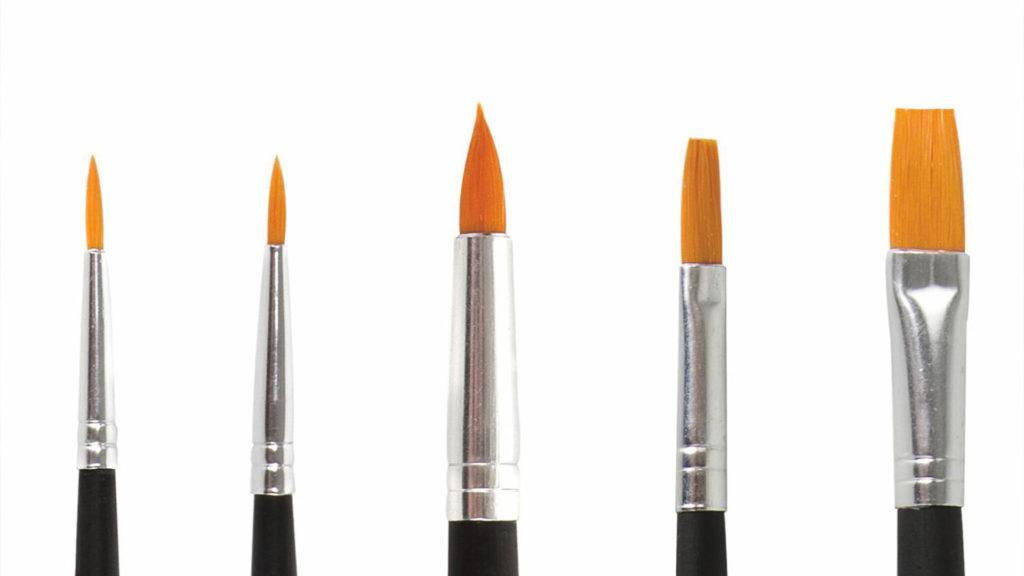
- Brushes of varying thicknesses. They can be used to create patterns and images, write beautiful lettering, draw fine details, and perform precise shading.
And this is far from a complete list of materials and tools used for decorating gingerbread. Their quantity and type directly depend on the painting technique: the more complex the technique, the more tools are needed. Each pastry chef selects their own set of tools and proven materials that are most comfortable to work with.
General rules for decorating gingerbread
Regardless of the technique chosen, there are a few general rules for decorating gingerbread. If you follow them, your treats will always look luxurious. Let's take a look at these rules.
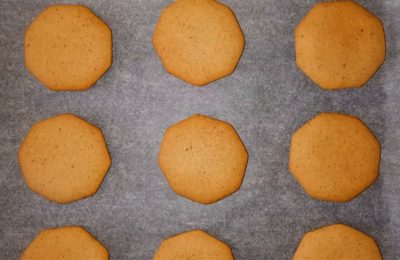
Let the baked goods cool
Gingerbread cookies or gingerbread must cool thoroughly before decorating. Otherwise, the icing won't hold its shape and may curdle or run.
Preparing the right glaze
The icing for decorating gingerbread cookies should have a thick, smooth, creamy consistency. It shouldn't drip off a spoon.
Patterns on paper
Before applying patterns or images to the gingerbread, draw or print them on paper. Keep the template in front of you while you work to avoid mistakes and ensure you can draw all the details.
Watch master classes
If you're new to this craft, check out a few gingerbread decorating workshops. They'll help you gain an understanding of the decorating process, essential knowledge, tips, and inspiration.
Dry the coating thoroughly
After icing, allow the gingerbread cookies to dry completely. At room temperature, the icing will set within 5-12 hours. To speed up this process, bake the gingerbread cookies in a preheated oven at 50 degrees Celsius (122 degrees Fahrenheit) for 15-30 minutes using the convection setting.
Don't neglect tools
There are many confectionery tools that can be used when decorating gingerbread cookies. They make the entire decorating process easier, helping you quickly and accurately create patterns and fills using any technique.
Let's be patient
Decorating gingerbread cookies is a labor-intensive process that requires patience and precision. Not everyone gets perfect designs on the first try. But don't be discouraged if something goes wrong. Analyze your mistakes, refine your techniques, try again, and you're sure to succeed.
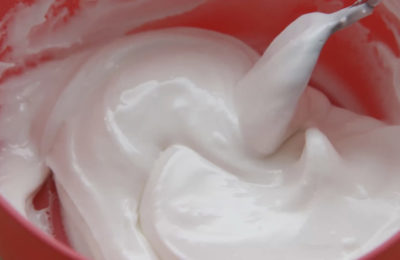
Classic glaze recipe
- Proteins: 0 g
- Fats: 0 g
- Carbohydrates: 0 g
- Total time:
-
Complexity:
It will work even if you're making it for the first time. Not just this dish, but your first time ever.
- Number of servings: 1
Ingredients
-
Egg white1 pcs
-
Powdered sugar200 G
-
Starch0.5 tsp
-
Lemon juice0.5 tsp
Preparation

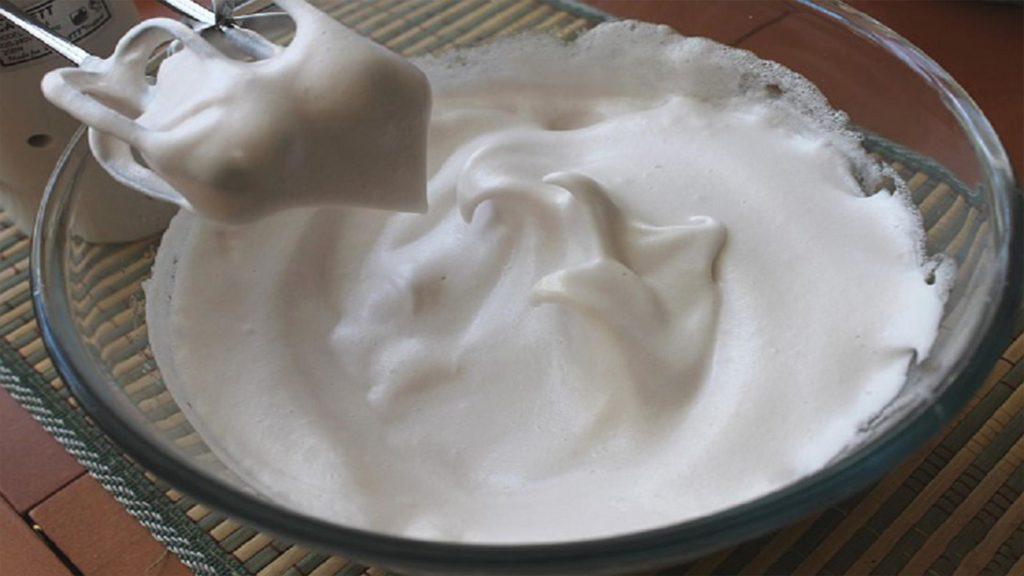
We prepare all the necessary ingredients.

Pour the protein into a deep container.

Sift the powdered sugar and add to the egg whites.

Add half a teaspoon of starch.

Lightly mix the ingredients with a whisk.

Beat the resulting mixture at low mixer speed for 2-3 minutes.

Add lemon juice and continue whisking the mixture for another 3-4 minutes.

The finished glaze should be snow-white, uniform, and shiny.

If desired, color the icing with any food coloring.

We transfer the finished glaze into a pastry bag and can decorate the gingerbread cookies.
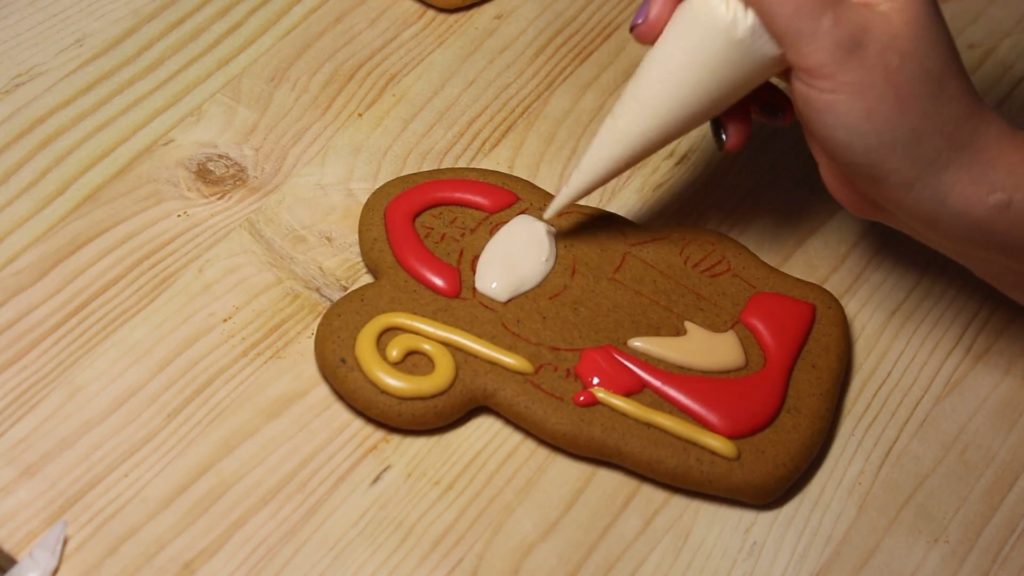
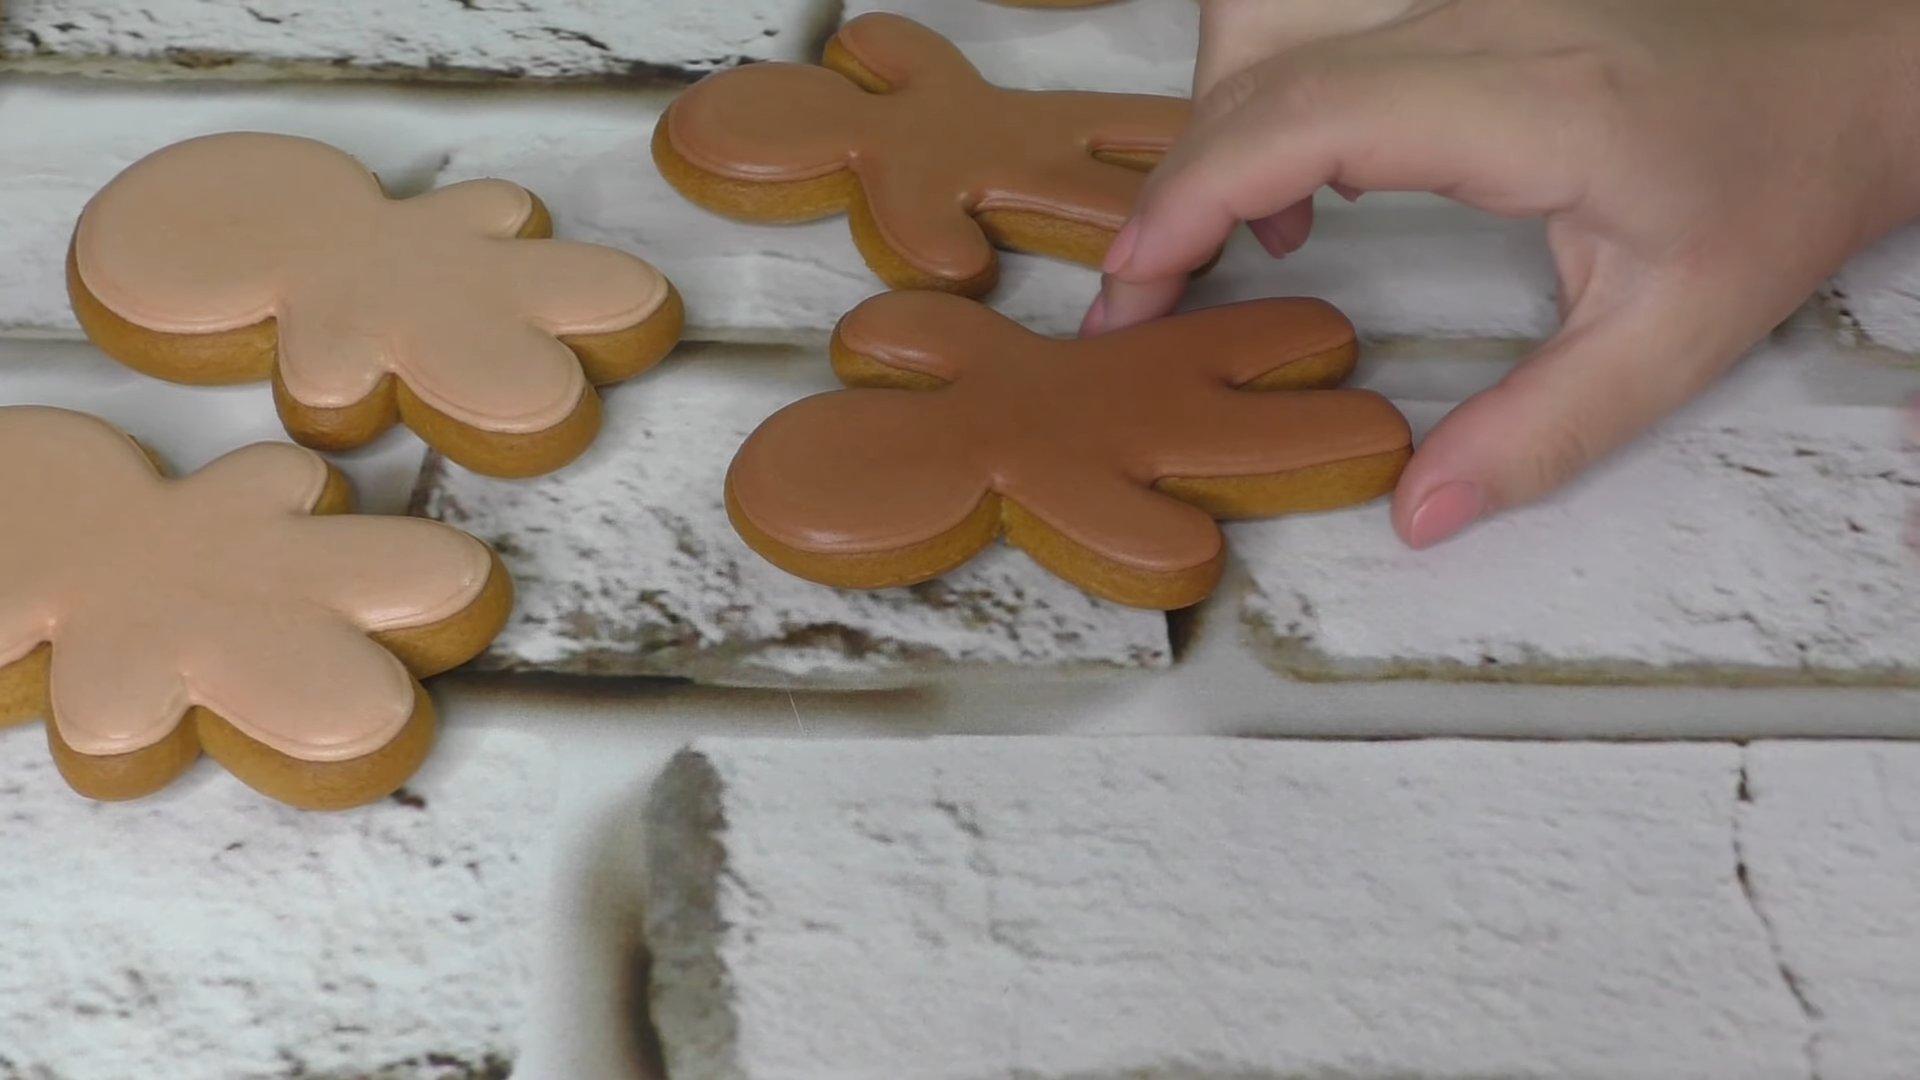
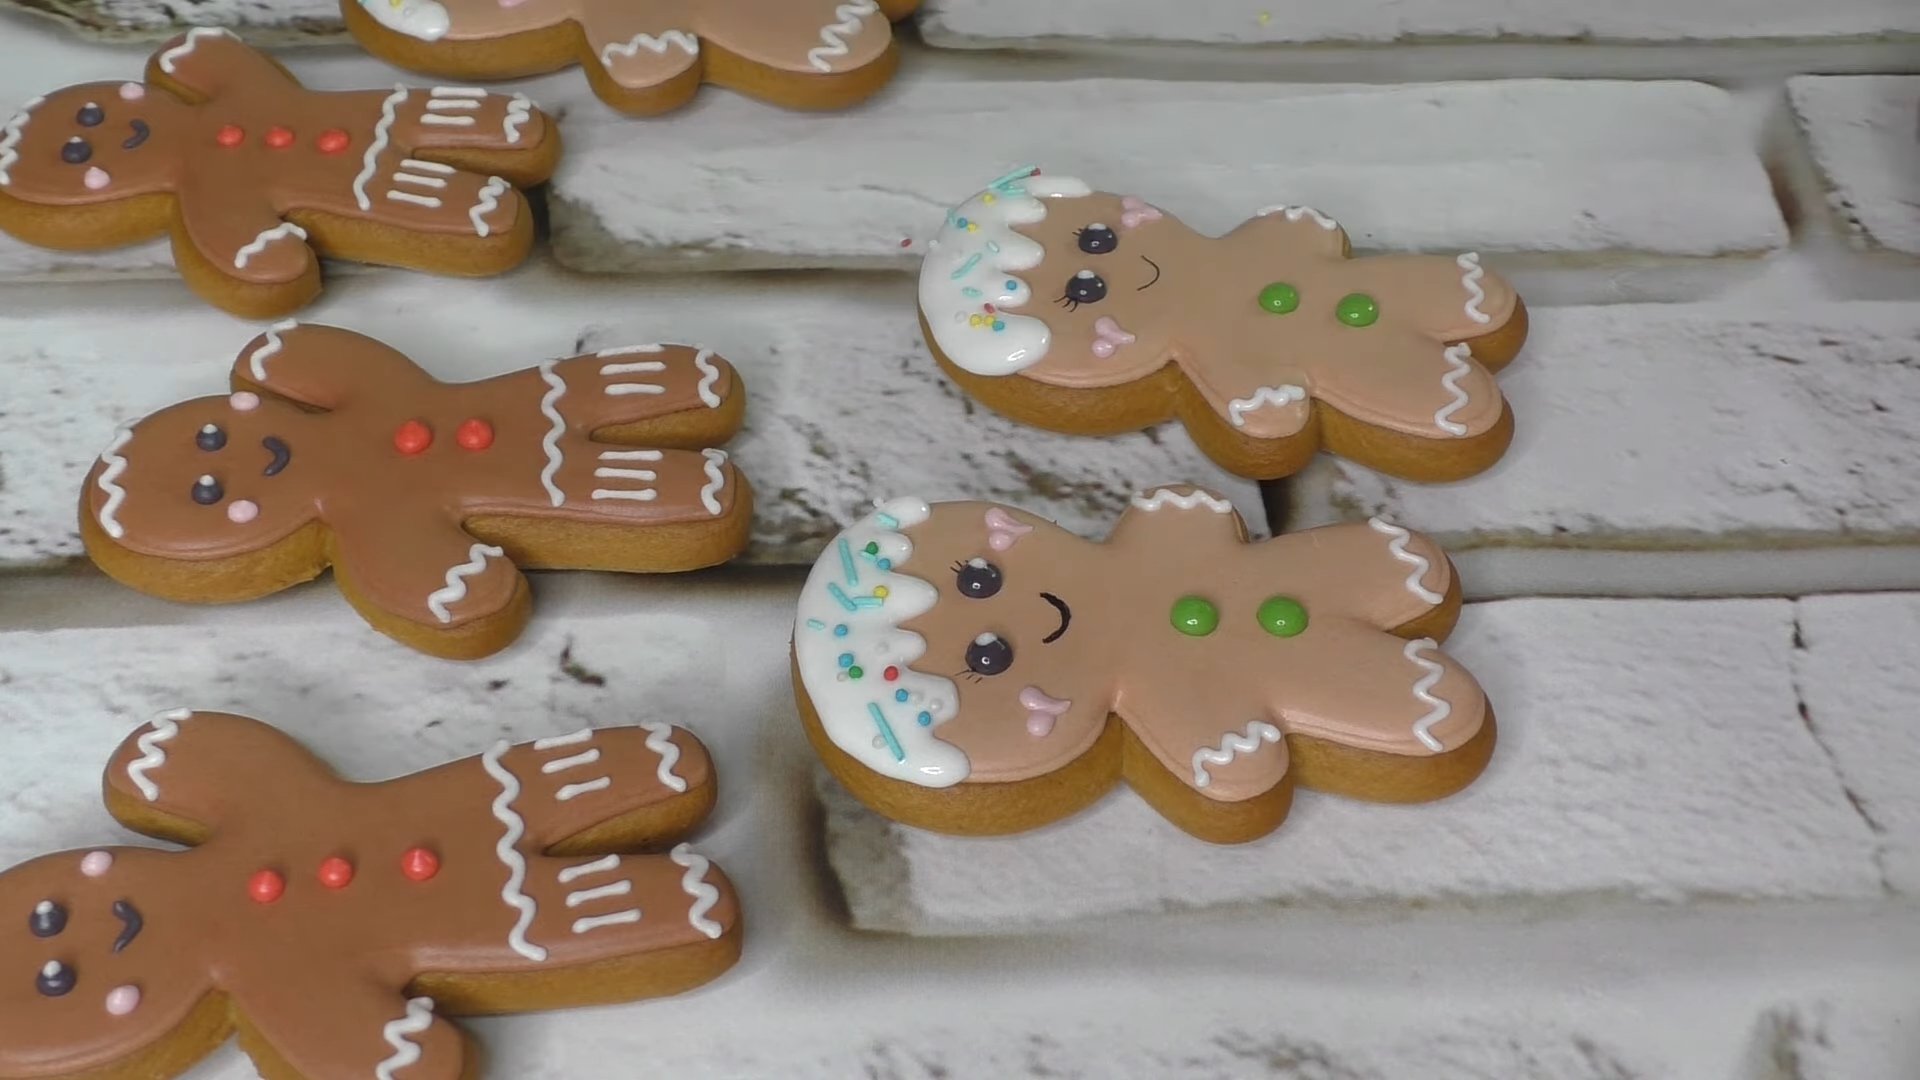
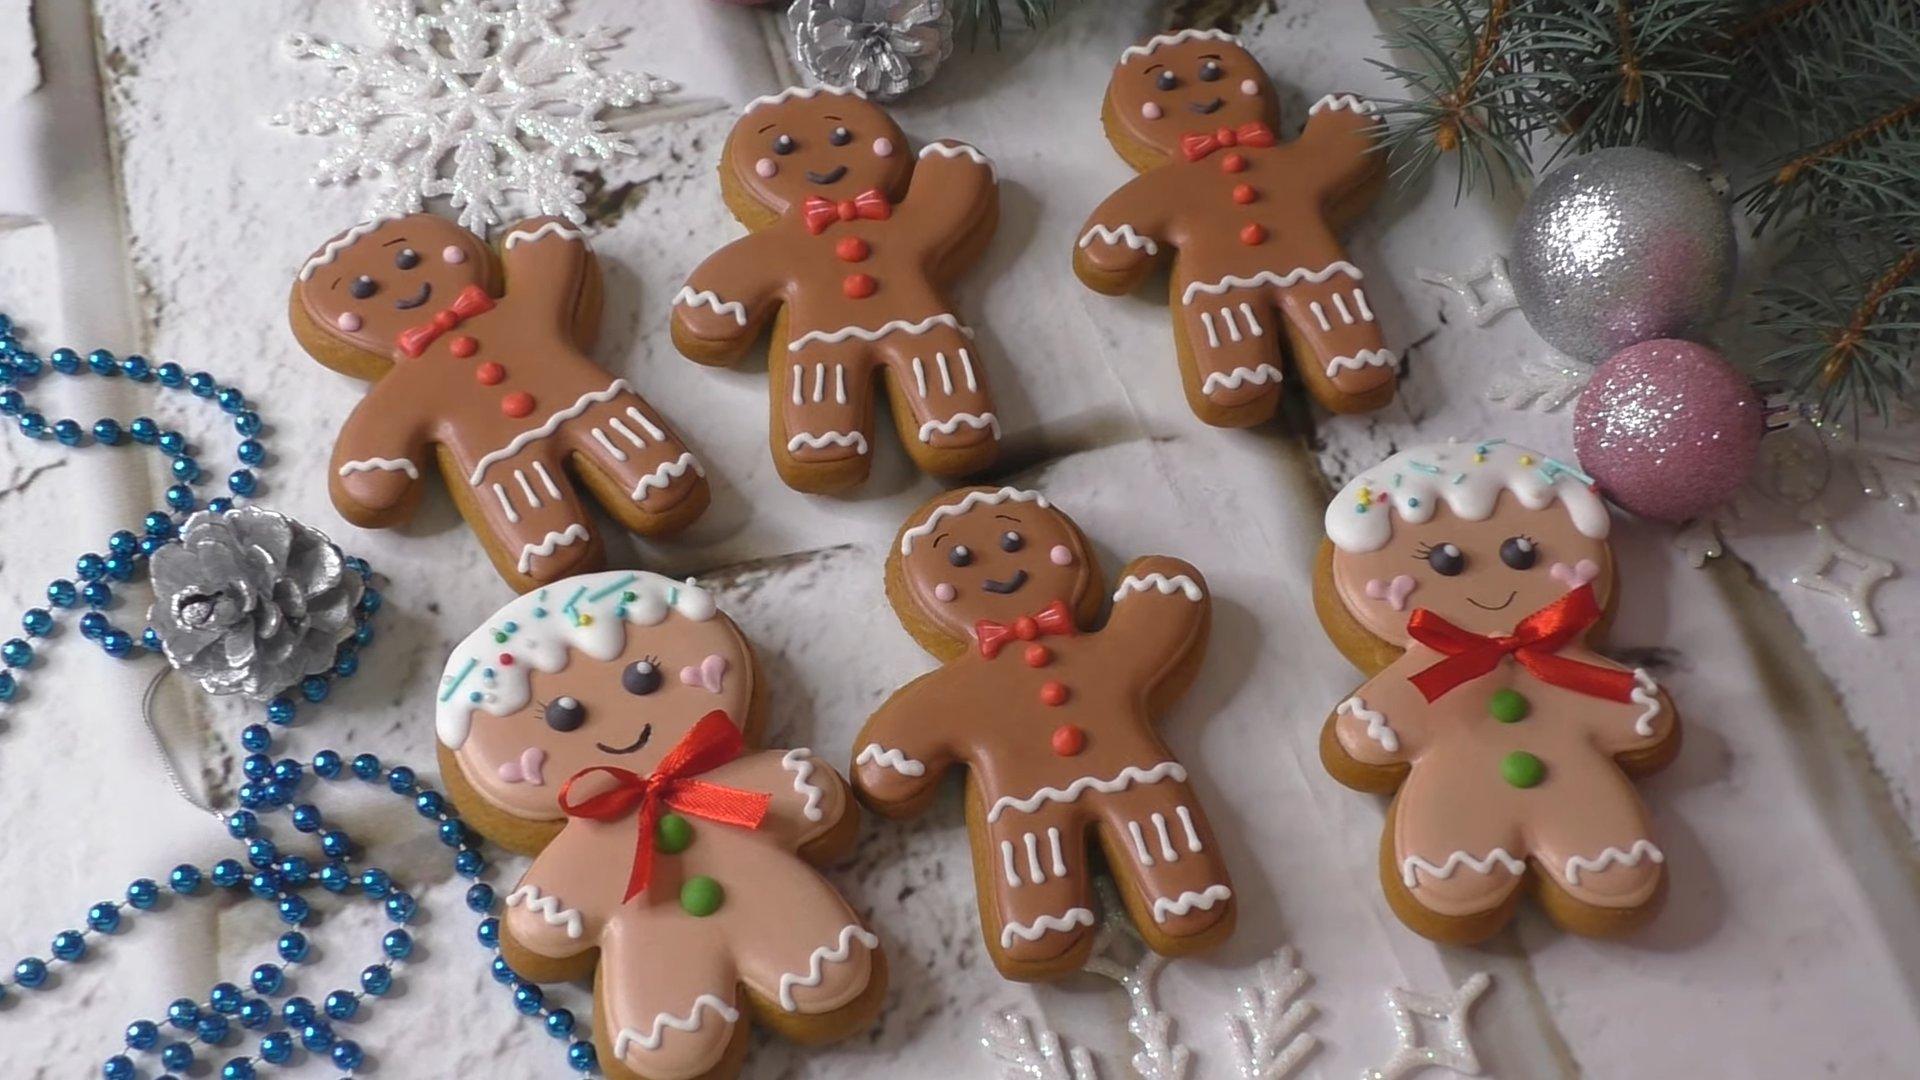
Gingerbread painting for beginners at home
This is a wonderful master class on decorating gingerbread cookies at home. It's perfect for beginner confectioners. You'll learn how to properly create outline fills, paint with glaze and food coloring, and decorate with sugar sprinkles and other decorative elements. This principle can be used to decorate gingerbread cookies of any size and shape.
Materials, tools
- Contour glaze
- Glaze for pouring
- Food colorings - dark and light brown, green, black, red, pink
- Sugar sprinkles
- Satin bows
- Pastry bags
- Tassels
Cooking time: 2 hours 40 minutes
Servings: 1
Step-by-step recipe
Step 1
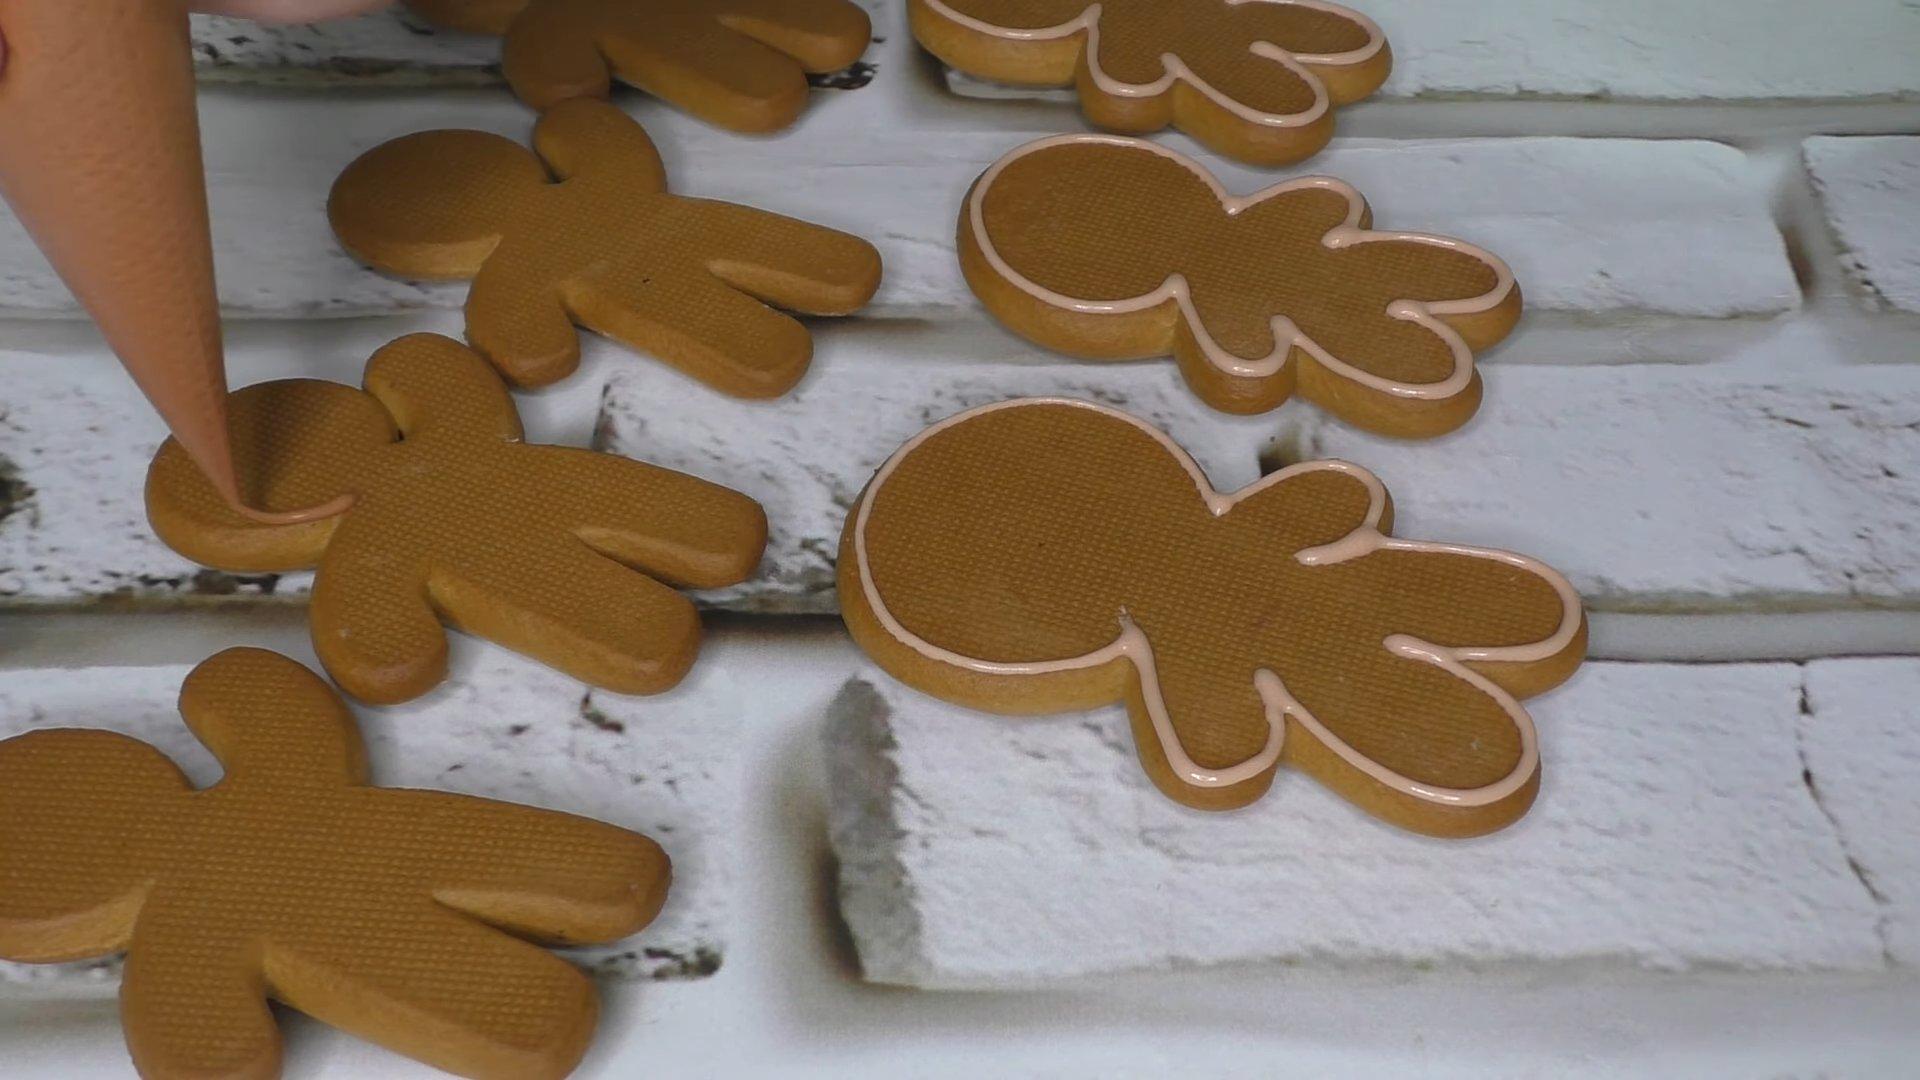
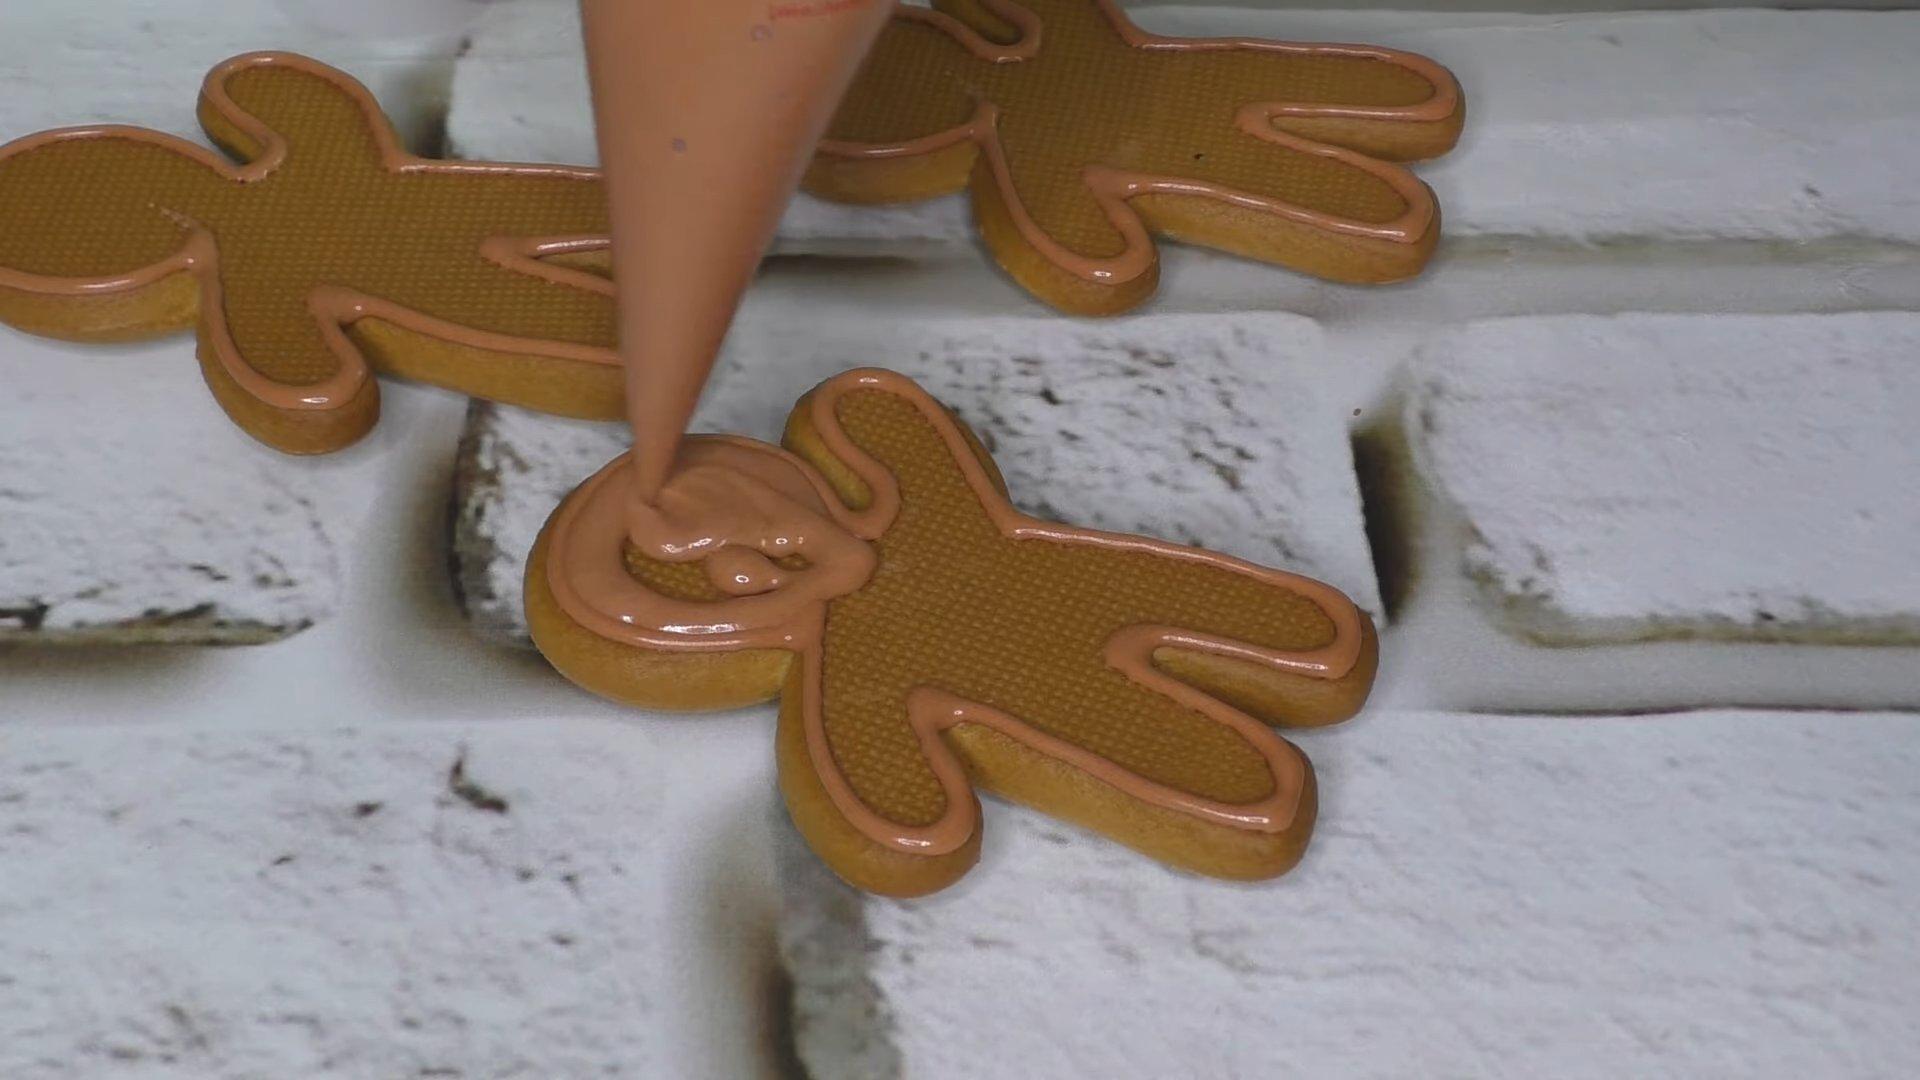
Once the gingerbread cookies have cooled completely, apply the outlines using thick icing. Let the icing set for 20-25 minutes.
Step 2
Once the outlines have set, we make a base fill with a more liquid glaze.

Step 3
Leave the gingerbread for 1-2 hours to allow the glaze to dry thoroughly.
Step 4
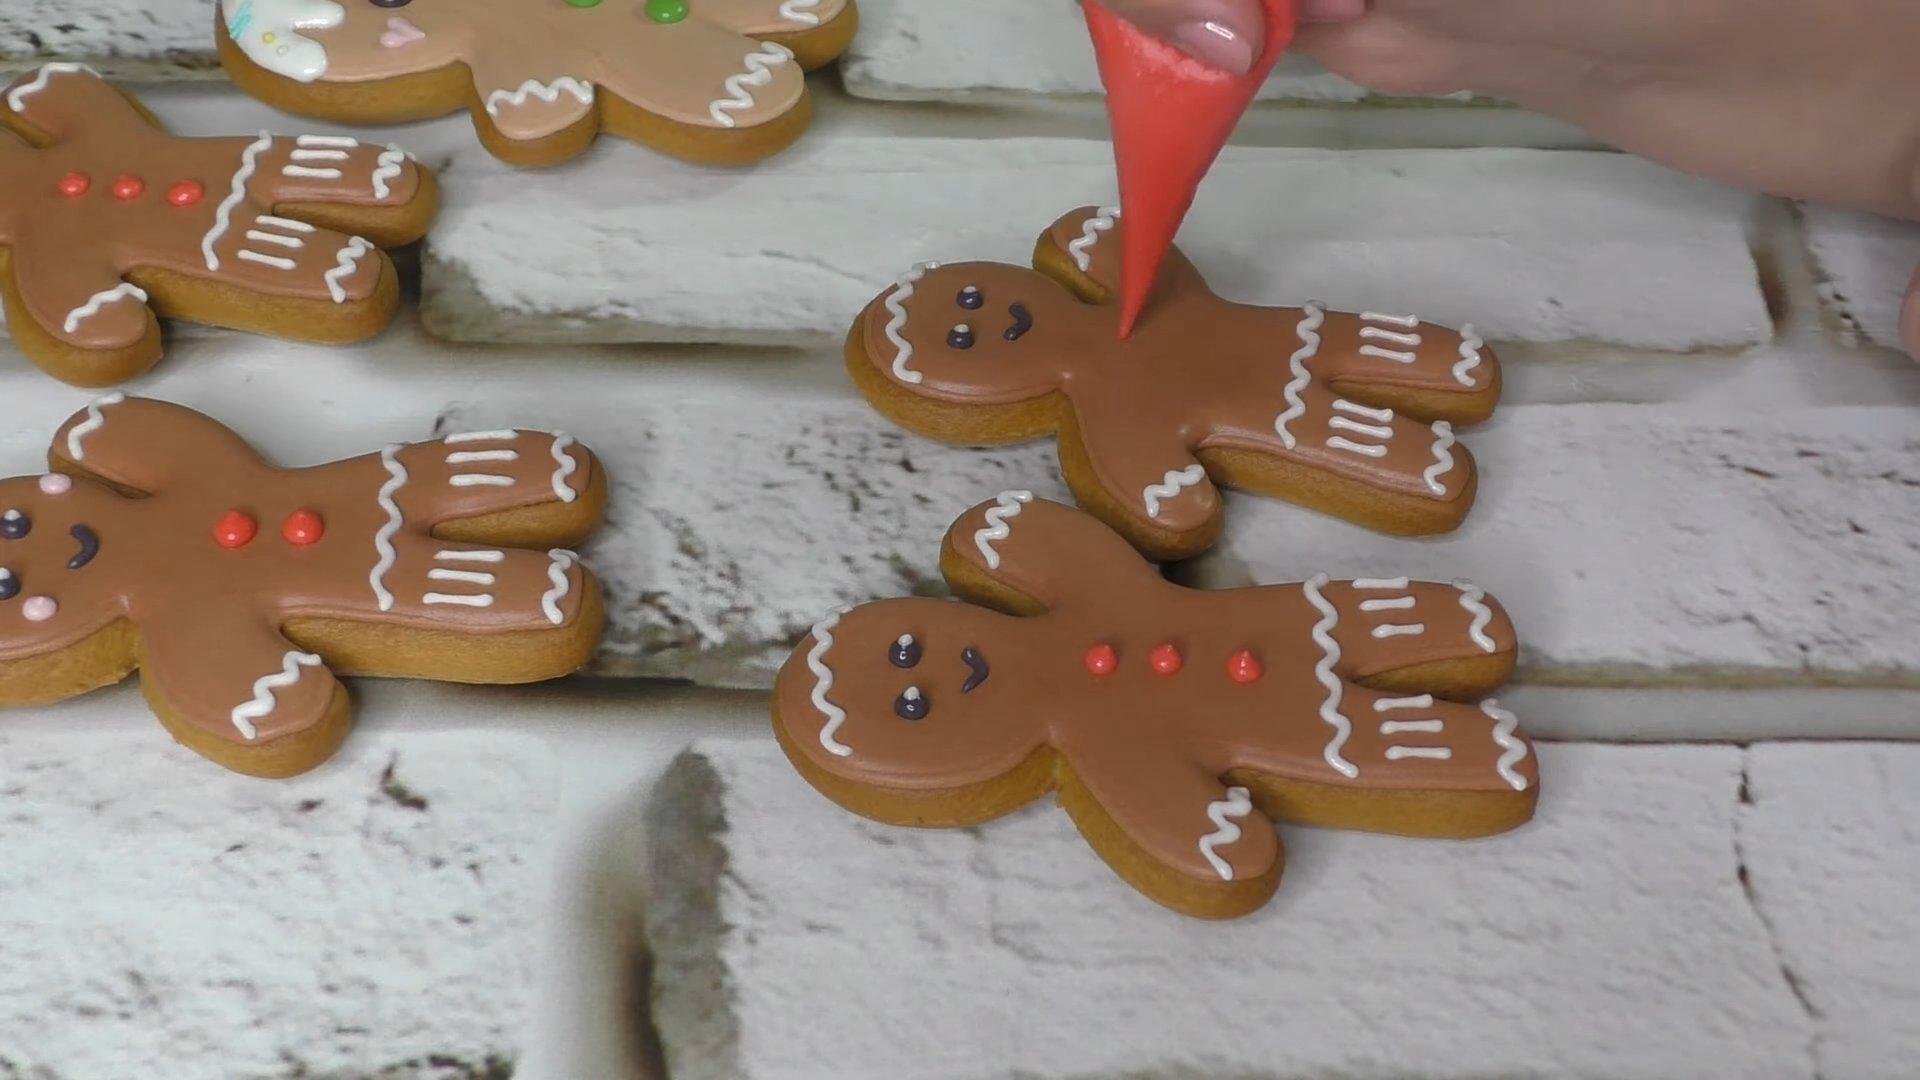
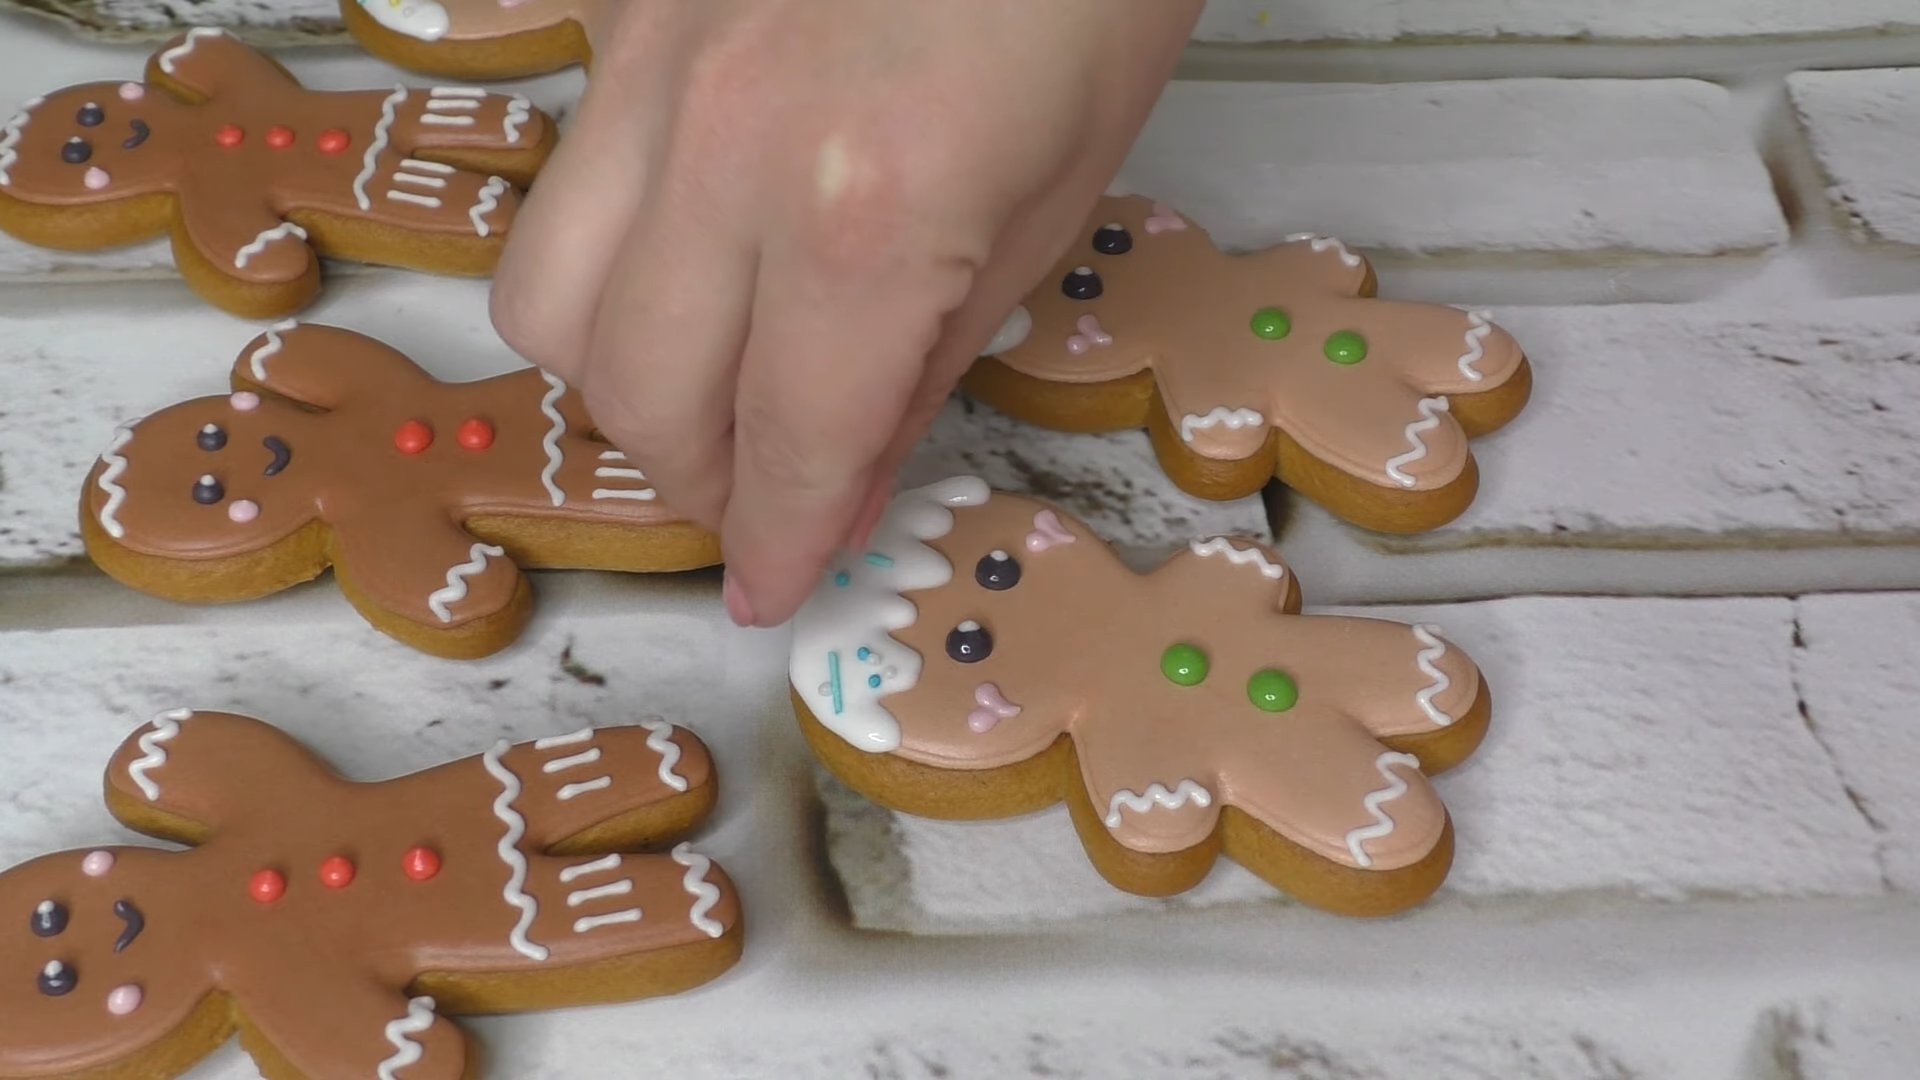
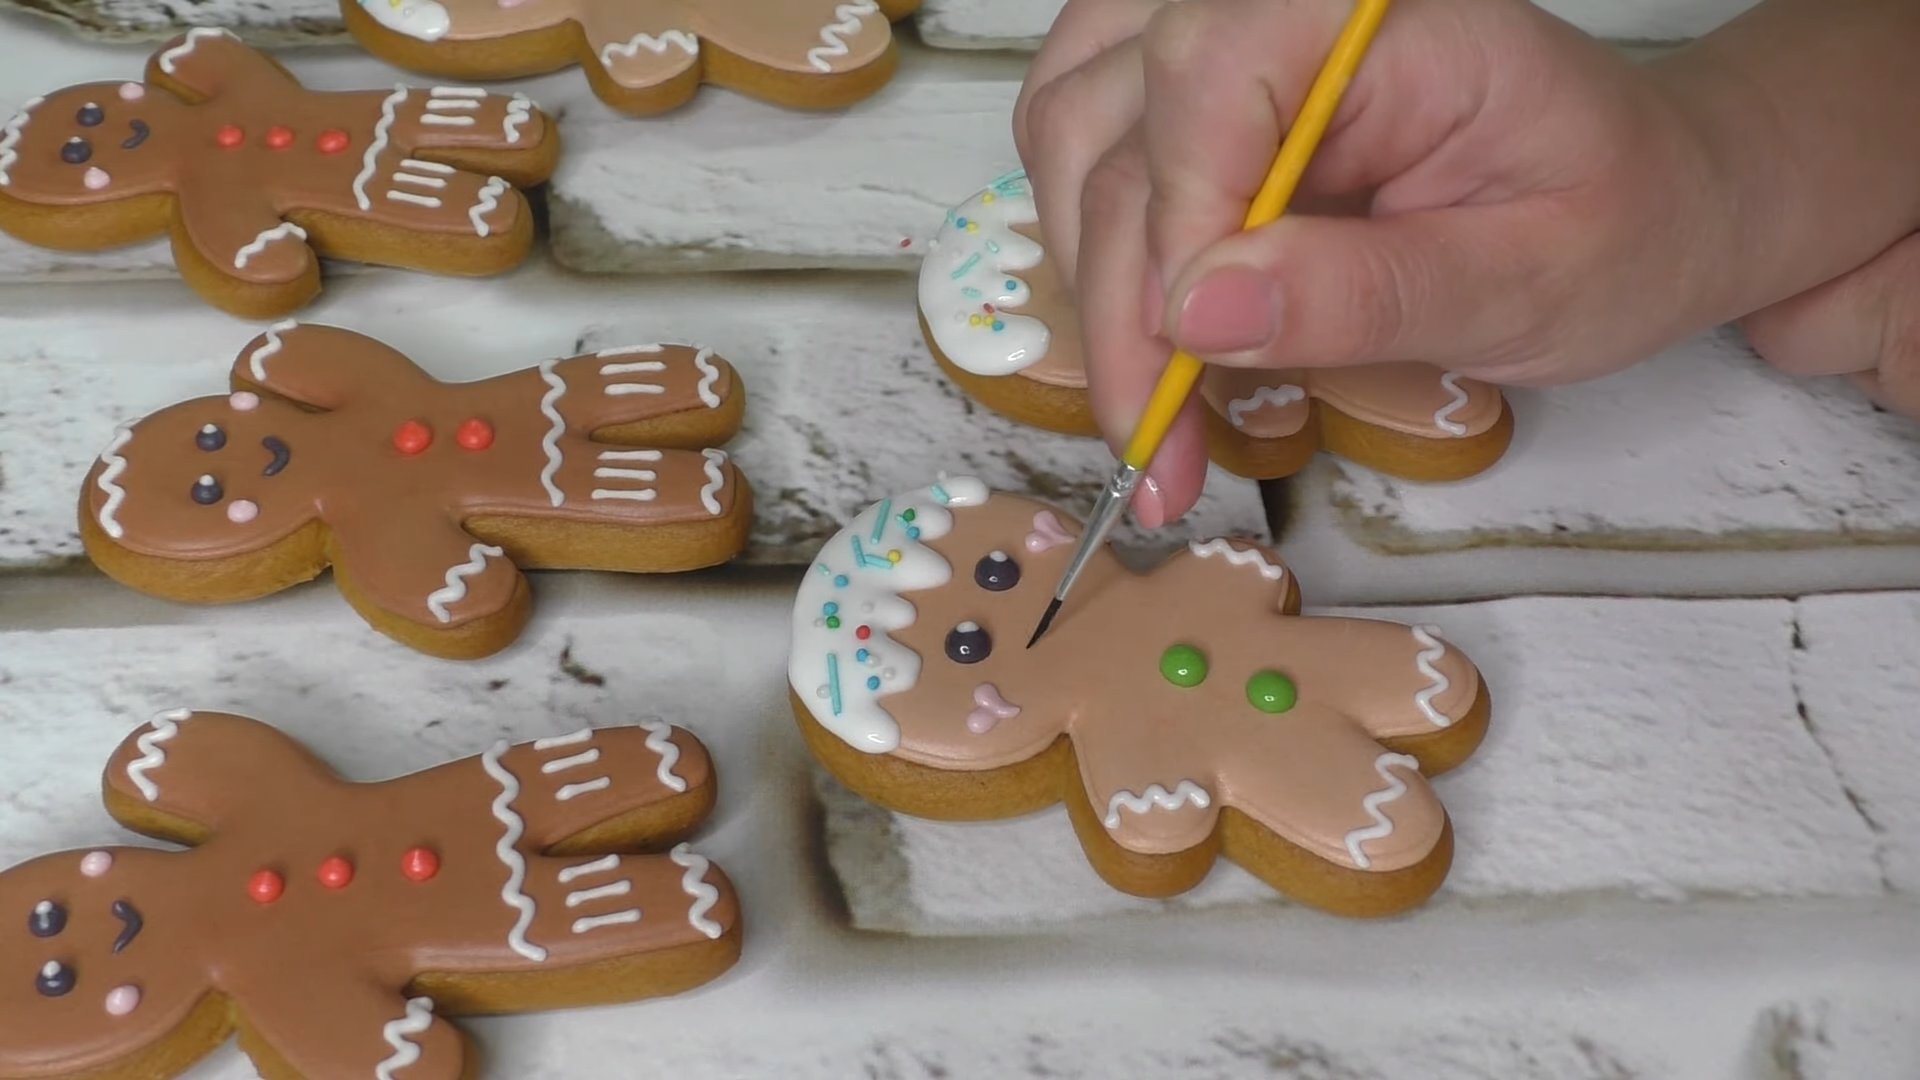
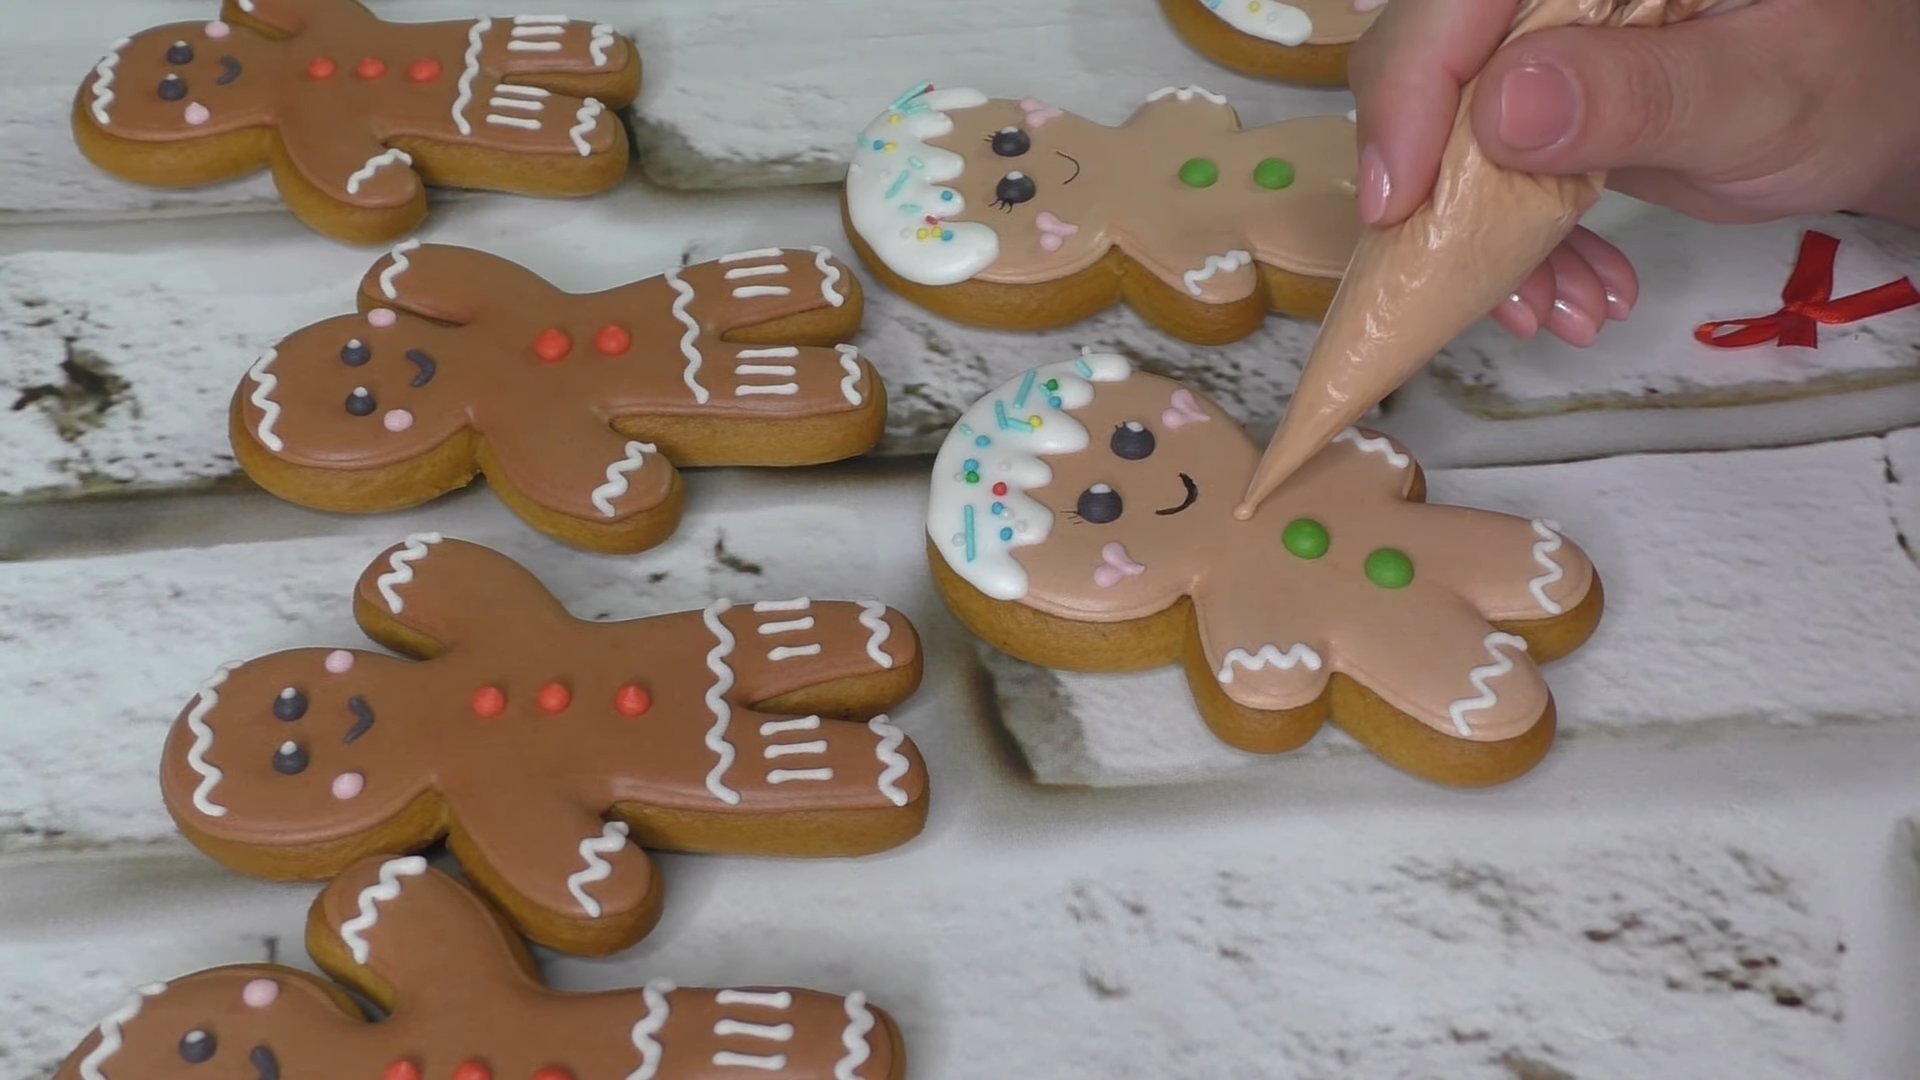
Decorate the gingerbread cookies with colored icing to your taste.

Step 5
Sprinkle the sugar 5-10 minutes after applying the glaze so that it doesn’t sink or dissolve.
Step 6
We can paint the mouth and eyelashes of the “people” with black food coloring, using a thin brush.
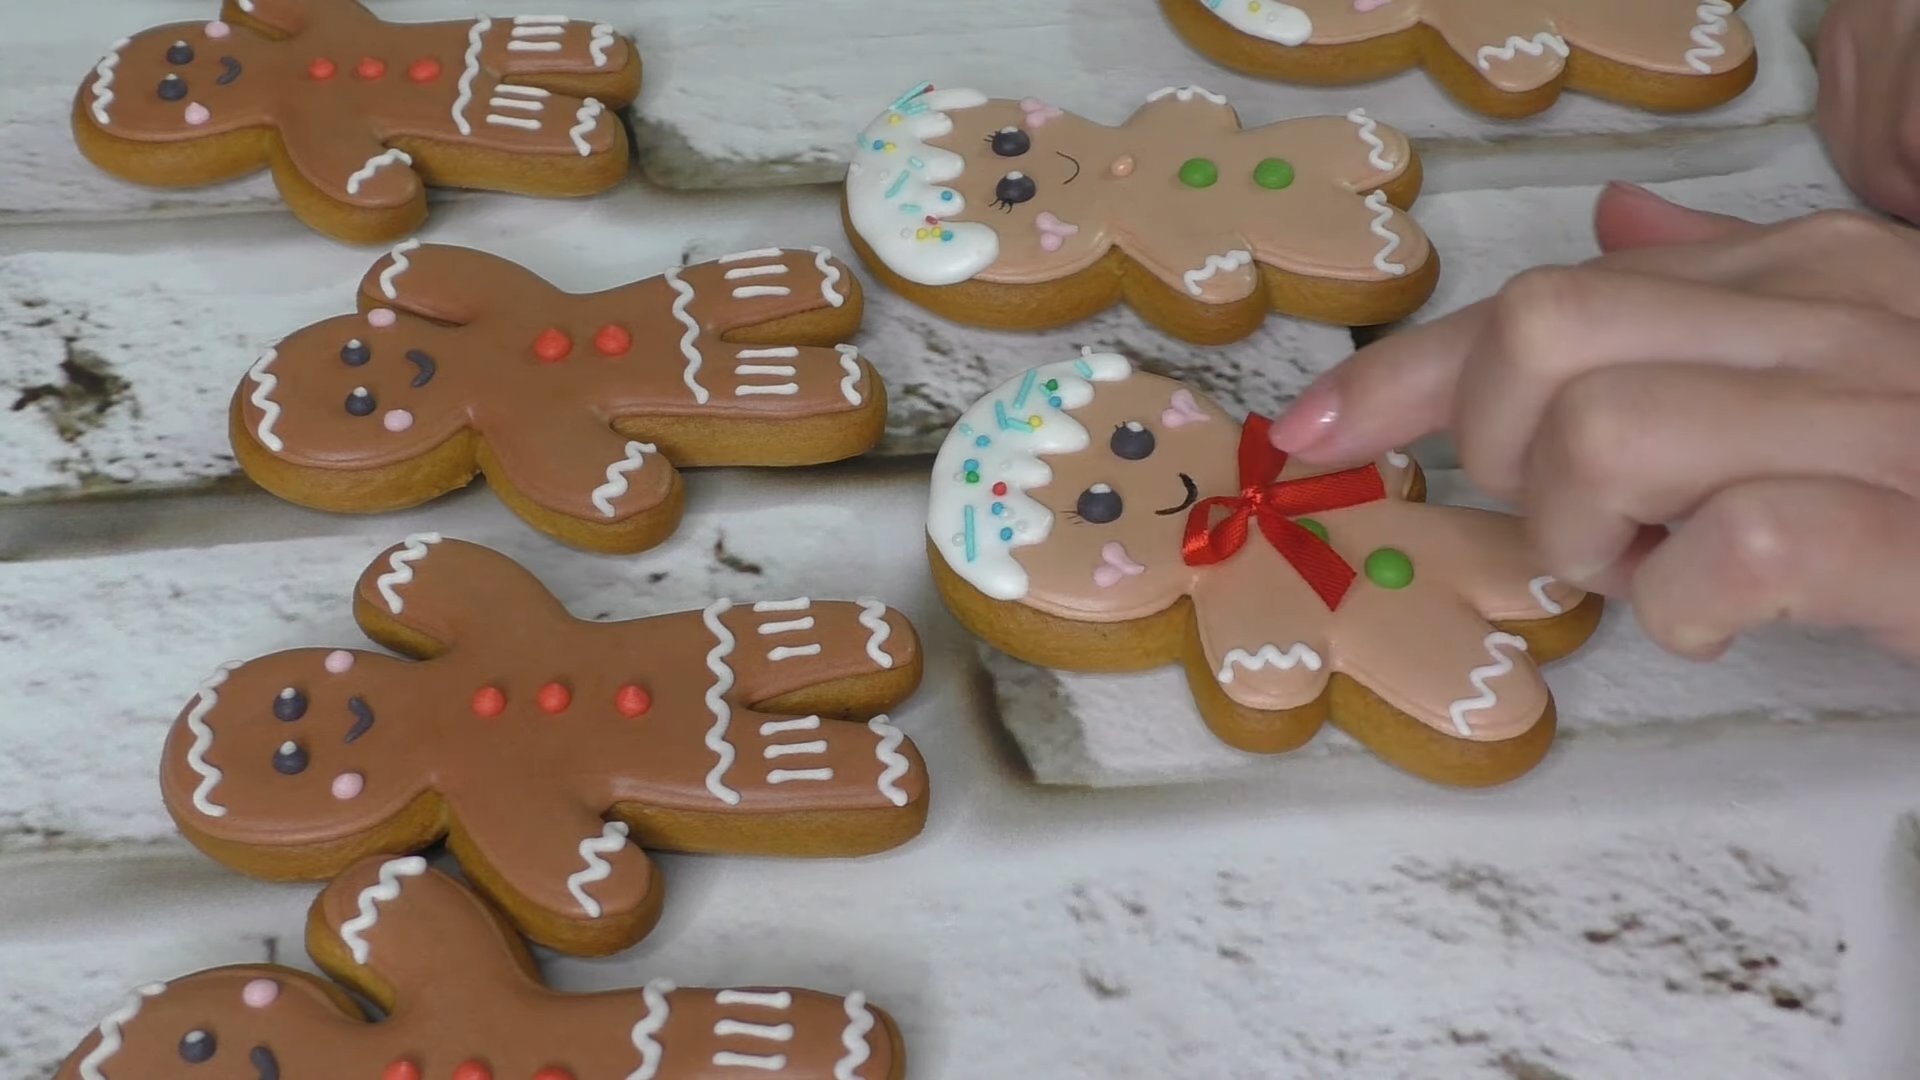
Step 7
We glue the satin bow with thick icing (the same as for the outlines).
Step 8
Leave the finished products to dry for at least 5-6 hours, or better yet, overnight.
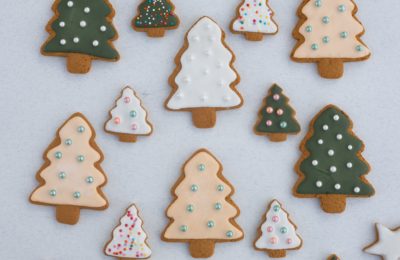
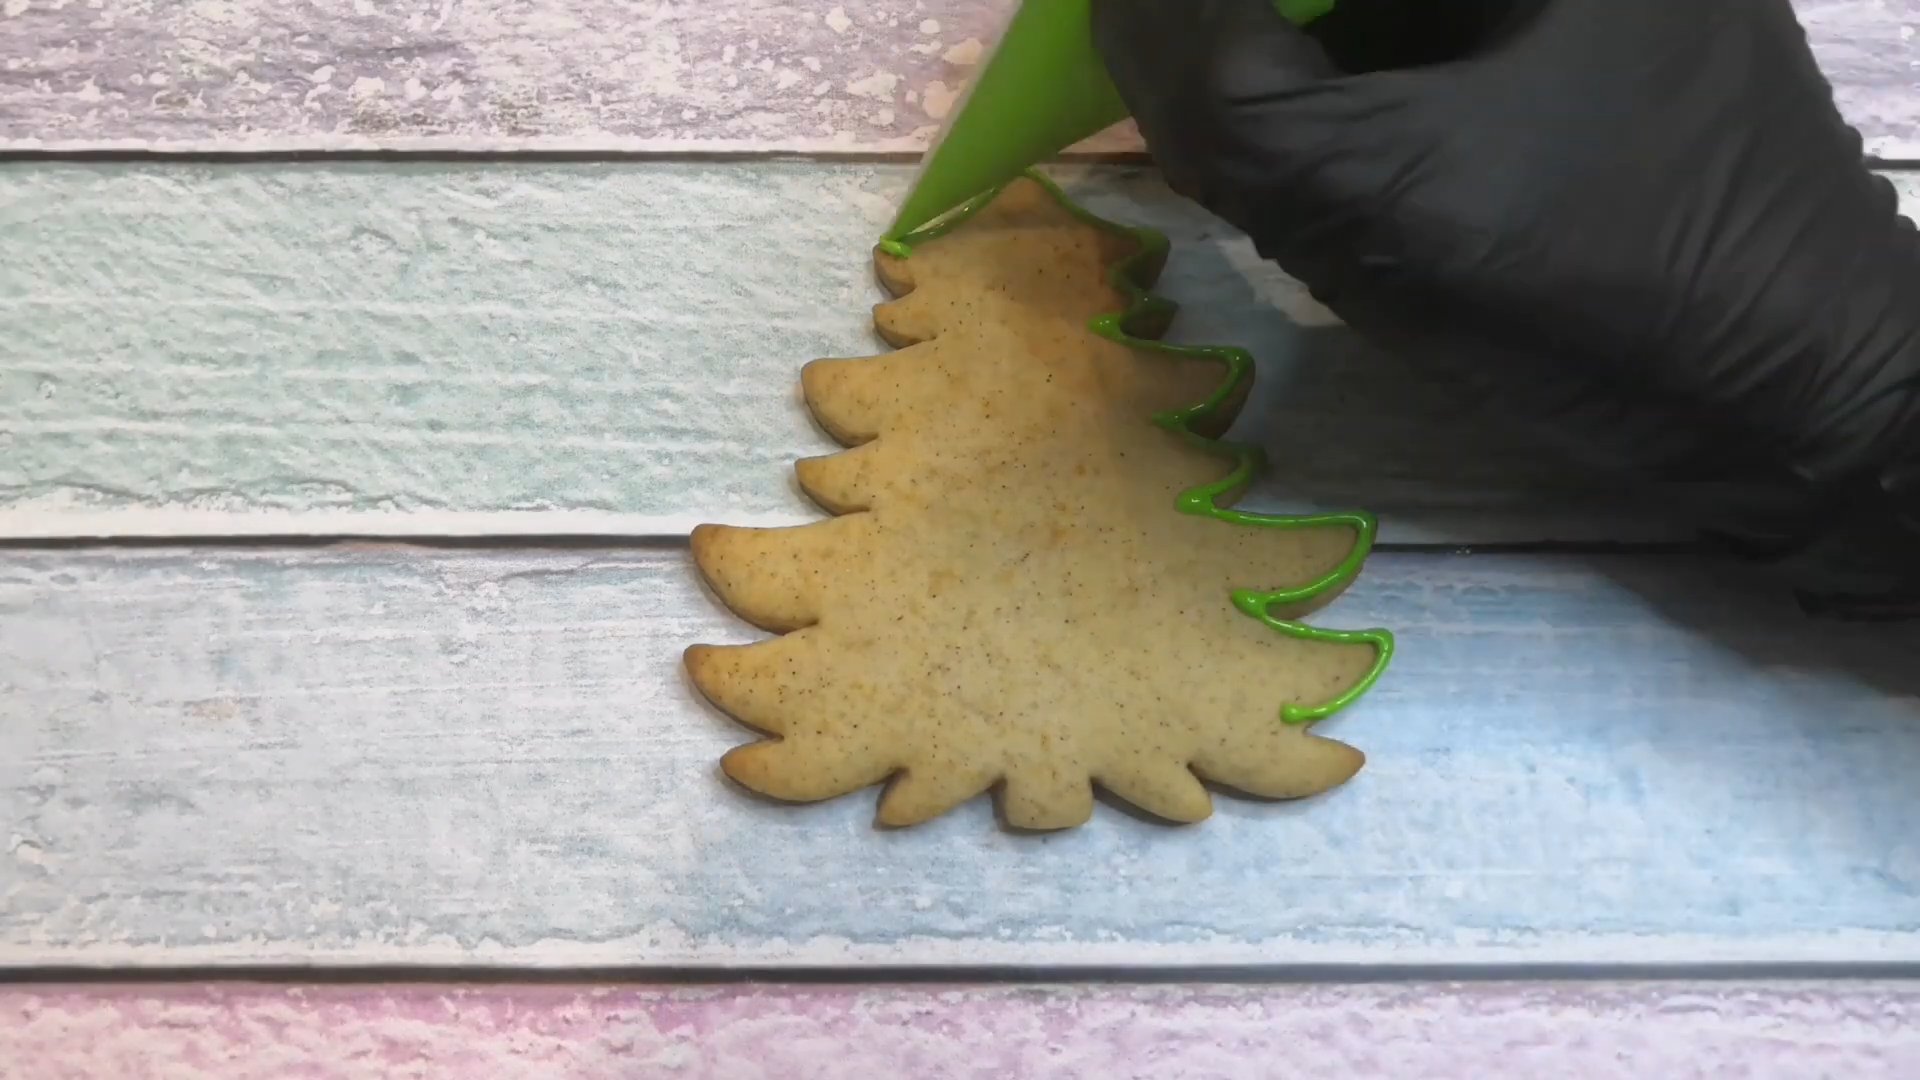
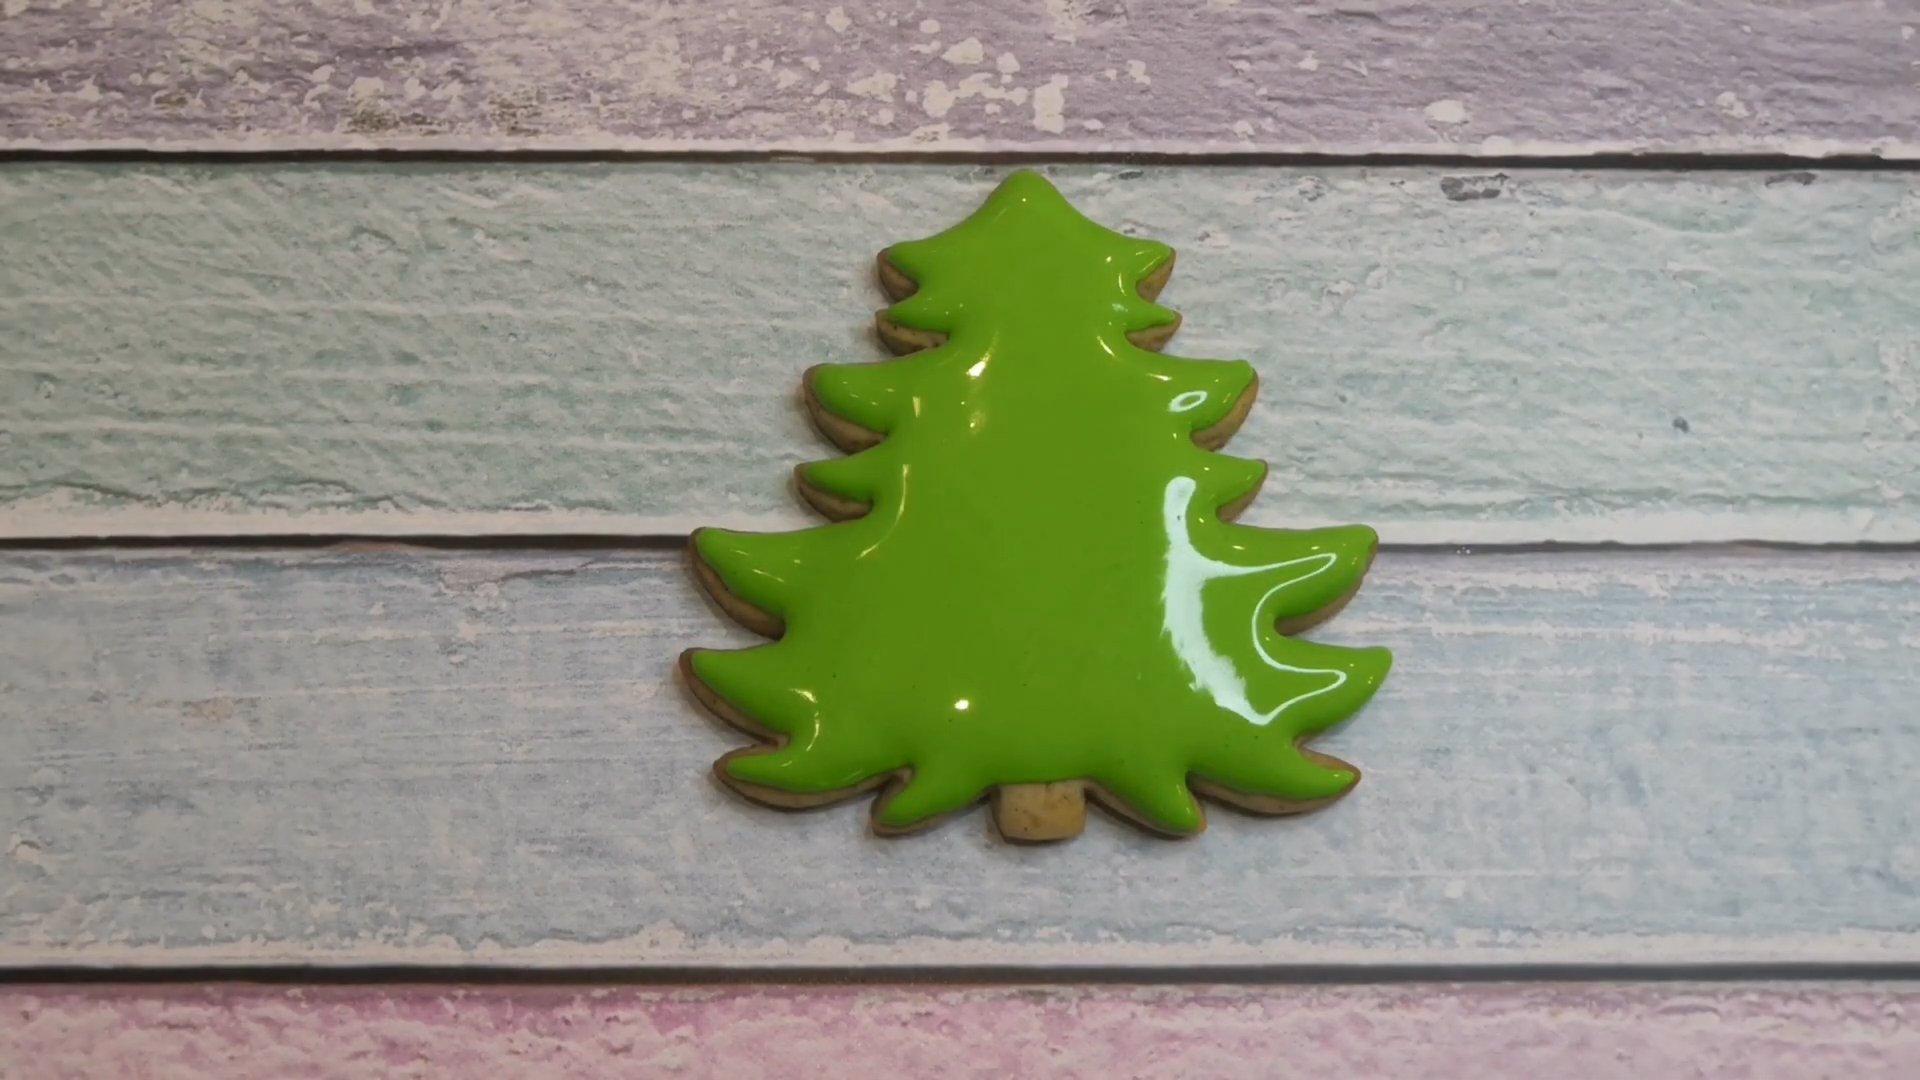
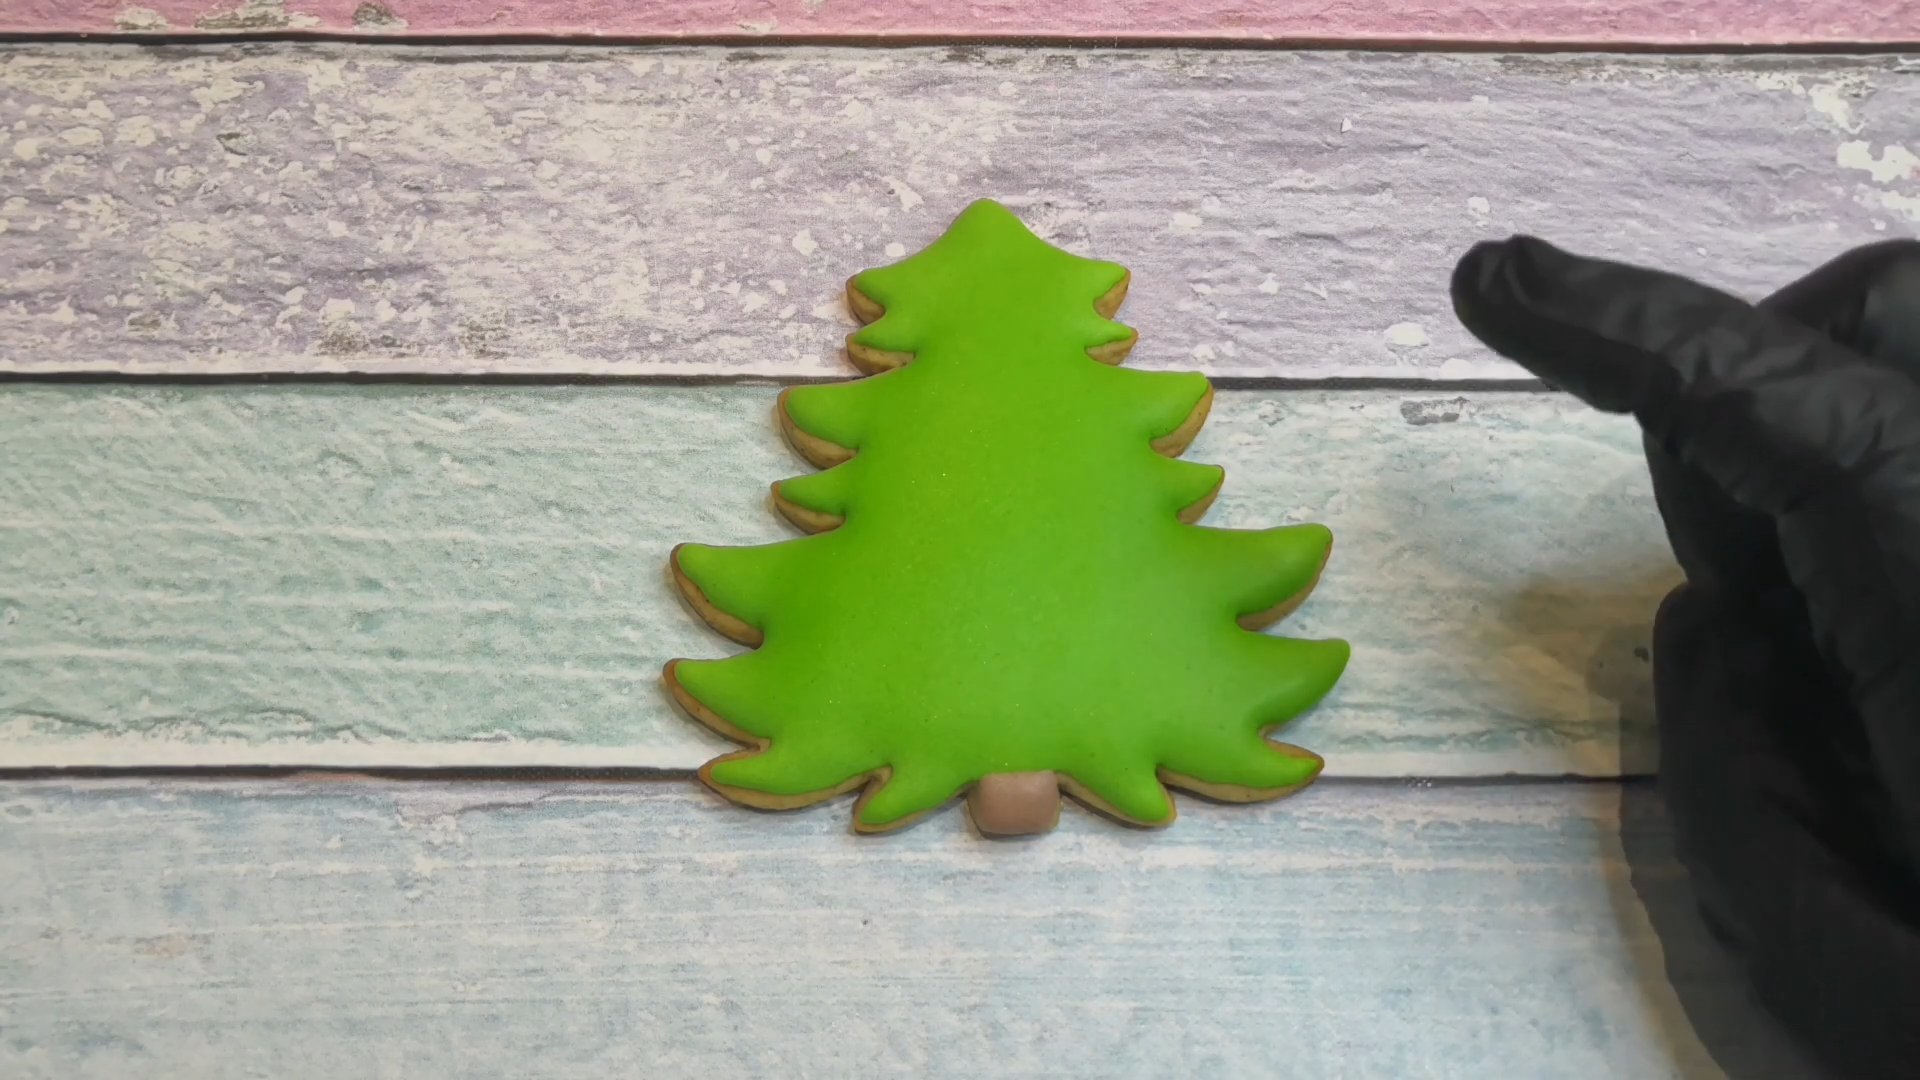
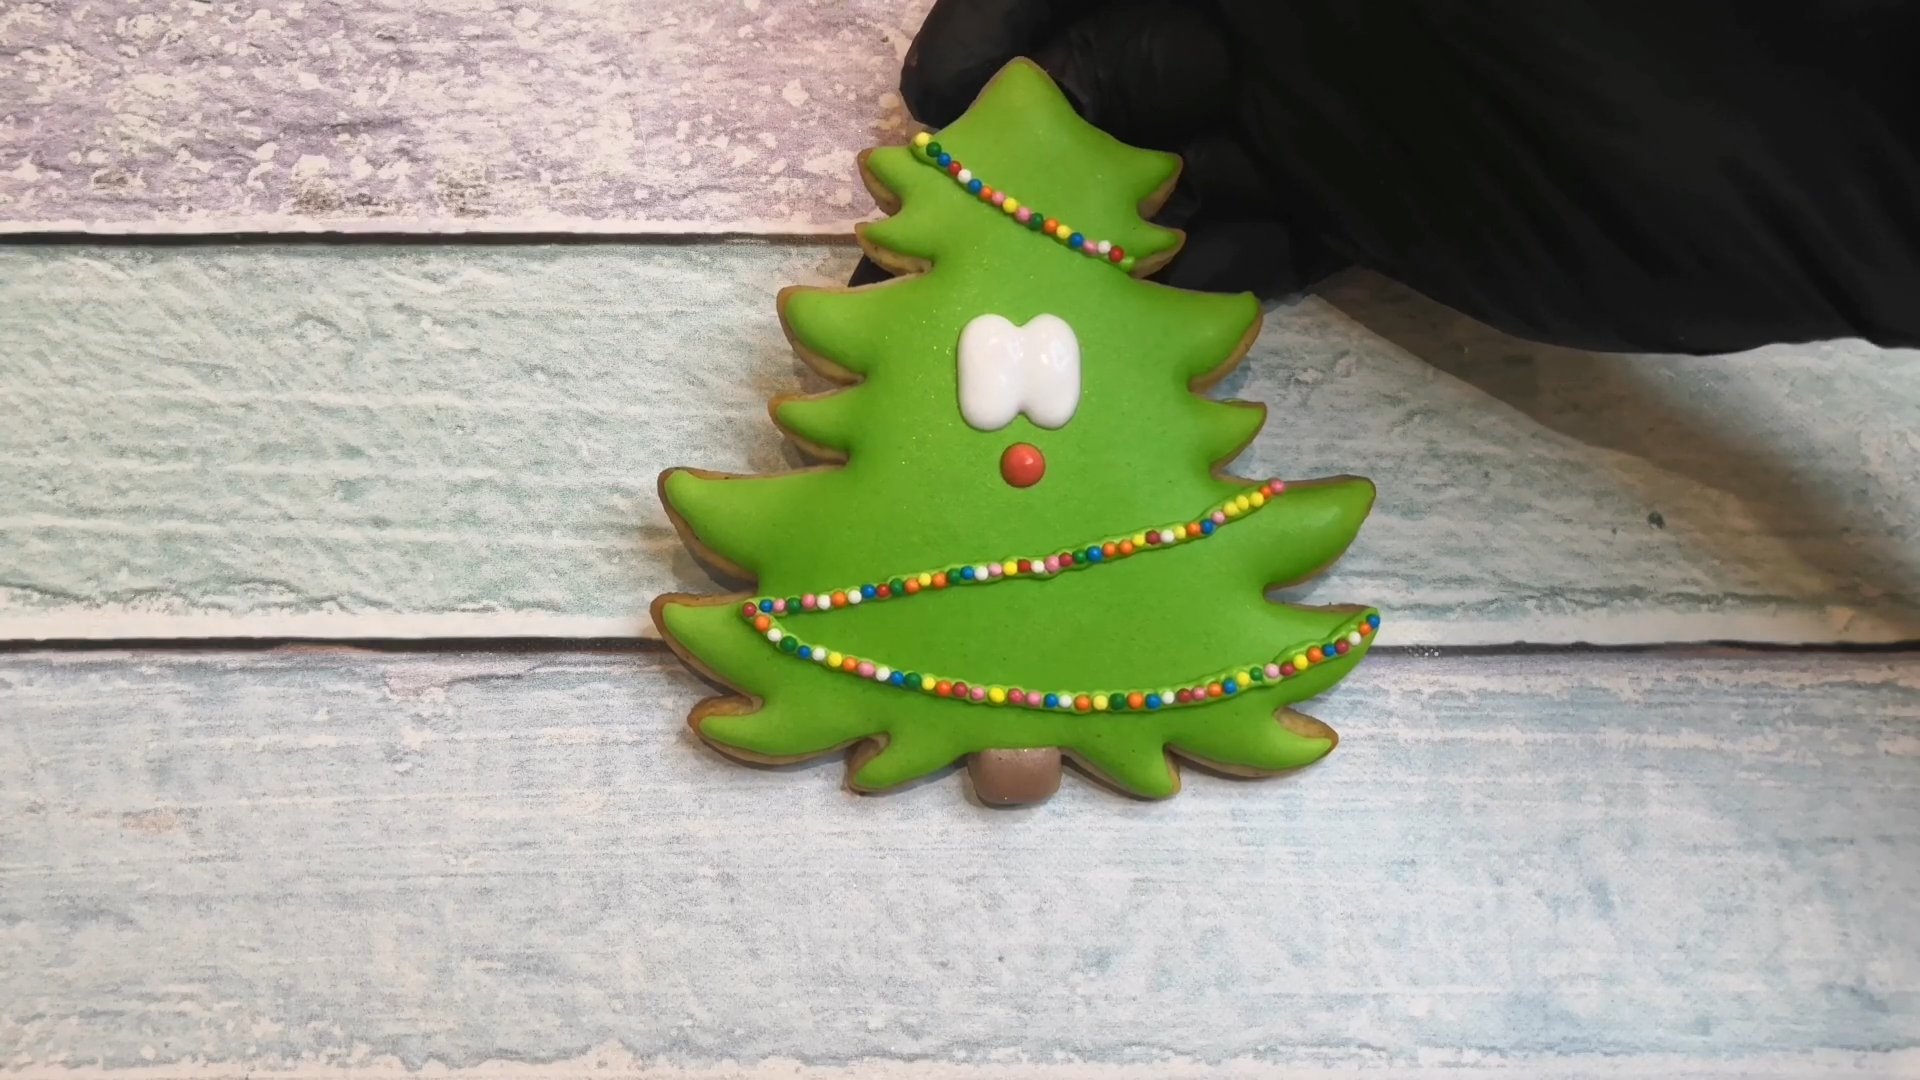
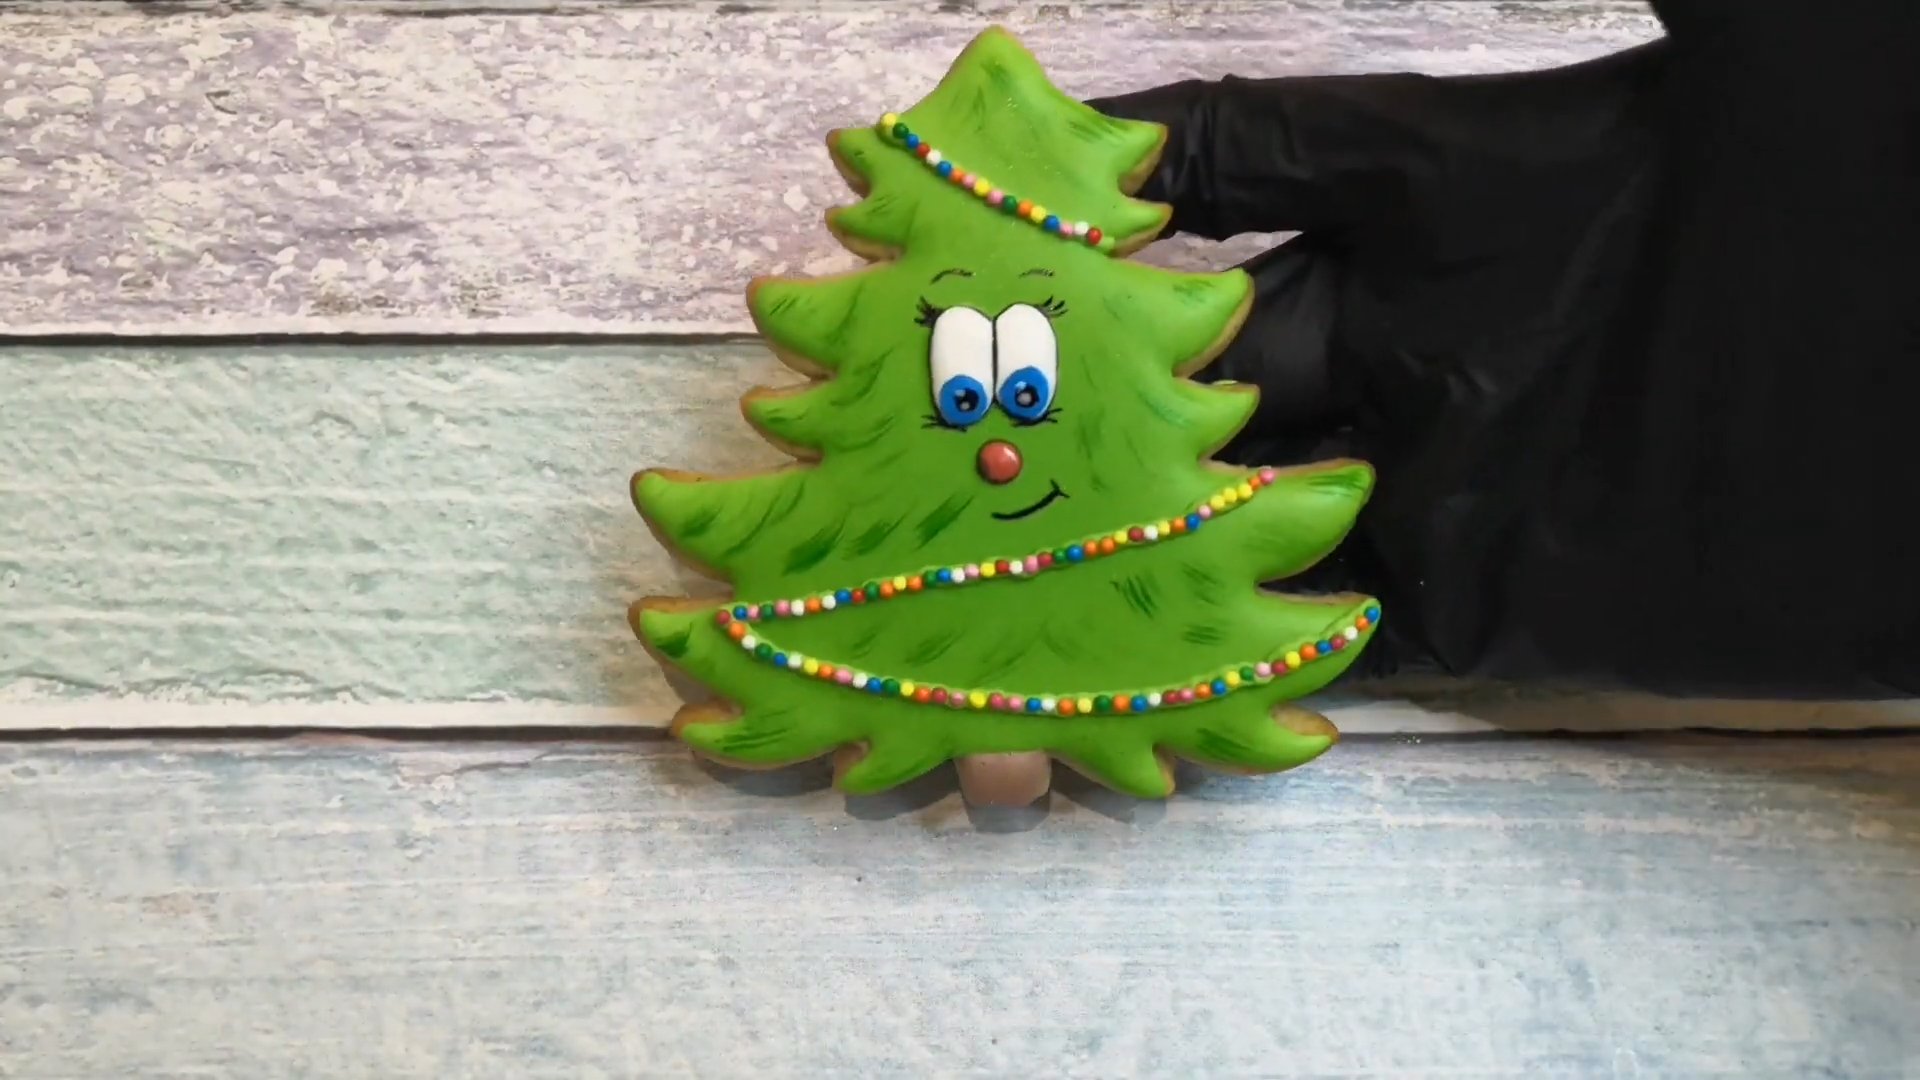
How to decorate a gingerbread tree
I present to you a gorgeous master class on decorating a gingerbread "Christmas Tree." Even a novice pastry chef can handle this simple decoration. The "Christmas Tree" is bright, sweet, and charming. It makes a wonderful gift for a loved one or a perfect addition to your holiday table.
Materials, tools
- Protein-sugar glaze
- Food colorings - green, brown, red, black
- Sugar sprinkles
- Pastry bags
- Pastry awl or toothpicks
Cooking time: 2 hours 30 minutes
Servings: 1
Step-by-step recipe
Step 1
We prepare the necessary tools and materials.
Step 2
Carefully draw the outline of the Christmas tree.
Step 3
Fill the entire product with green glaze.

Step 4
Leave the gingerbread for 10-20 minutes so that the glaze dries slightly.
Step 5
Using brown icing, draw the trunk of the tree.
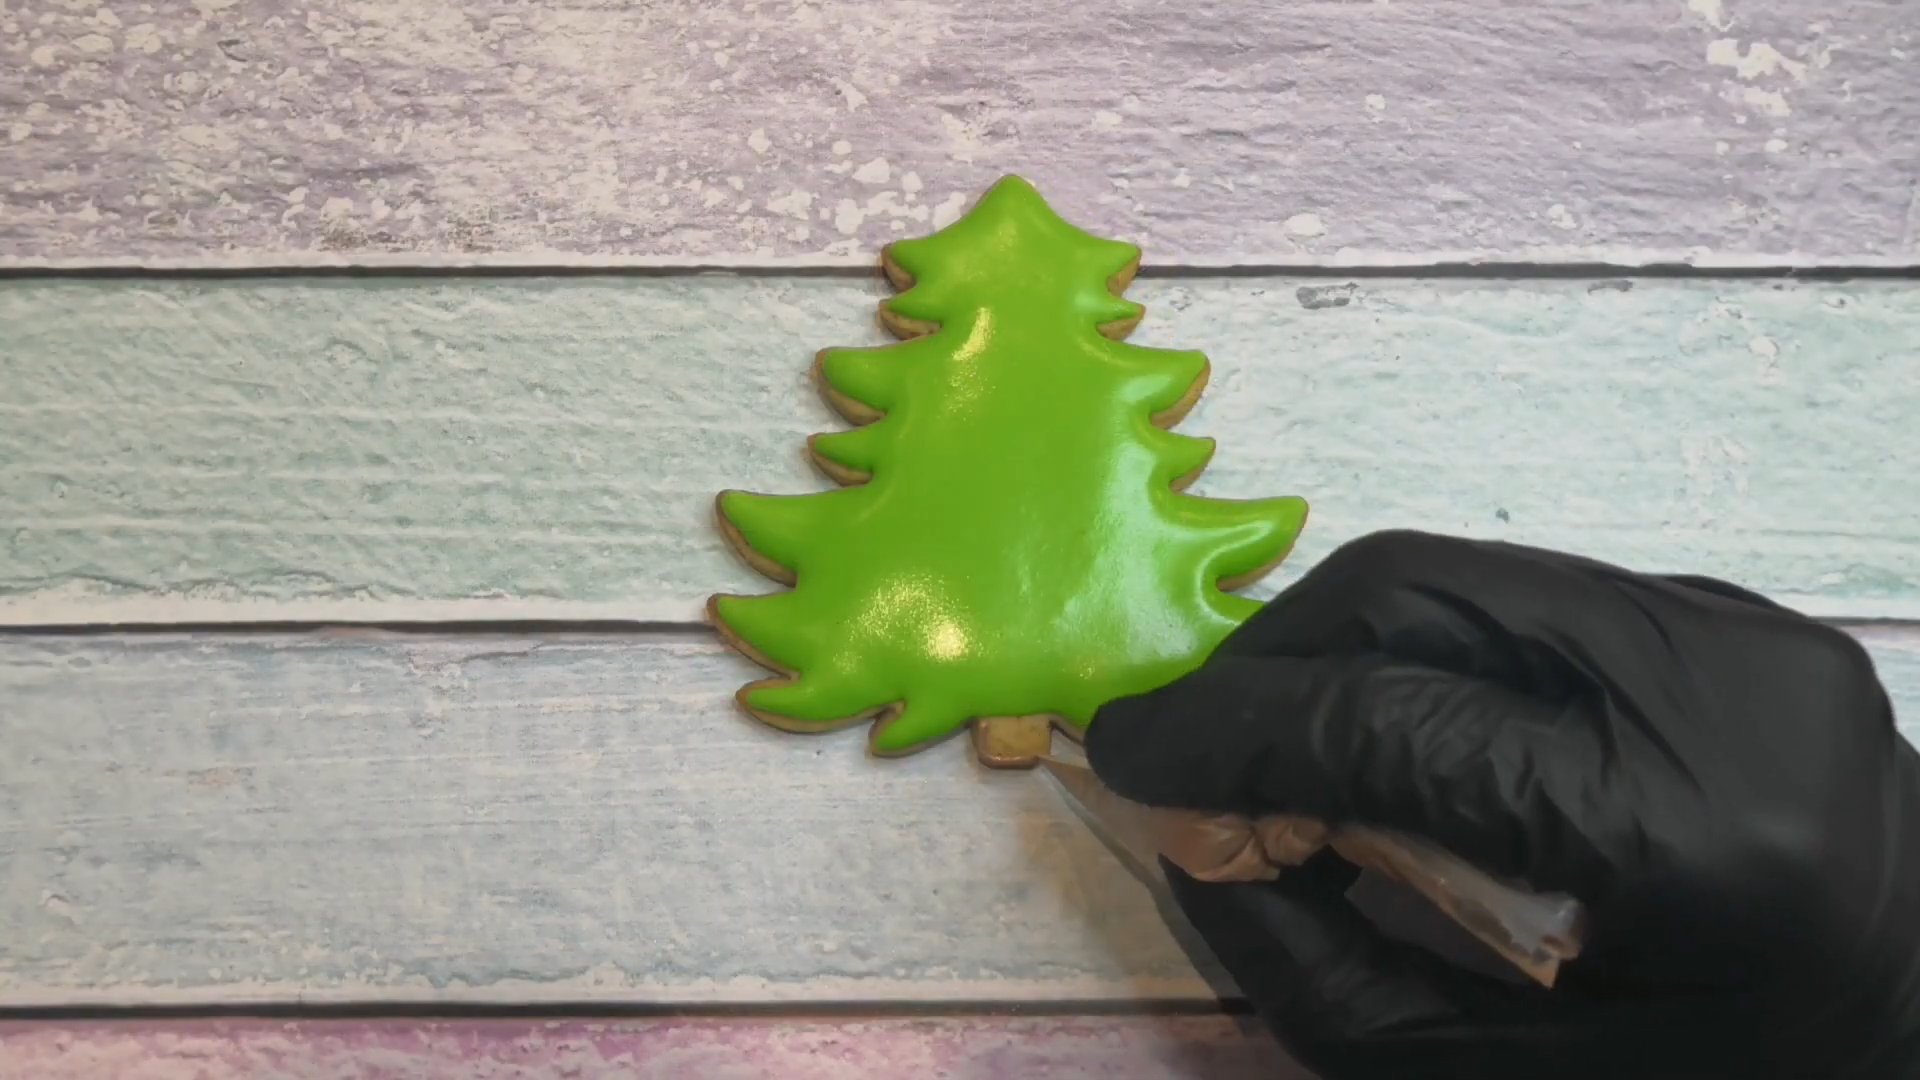
Step 6
Leave the product for 1-2 hours to allow the glaze to set well.
Step 7
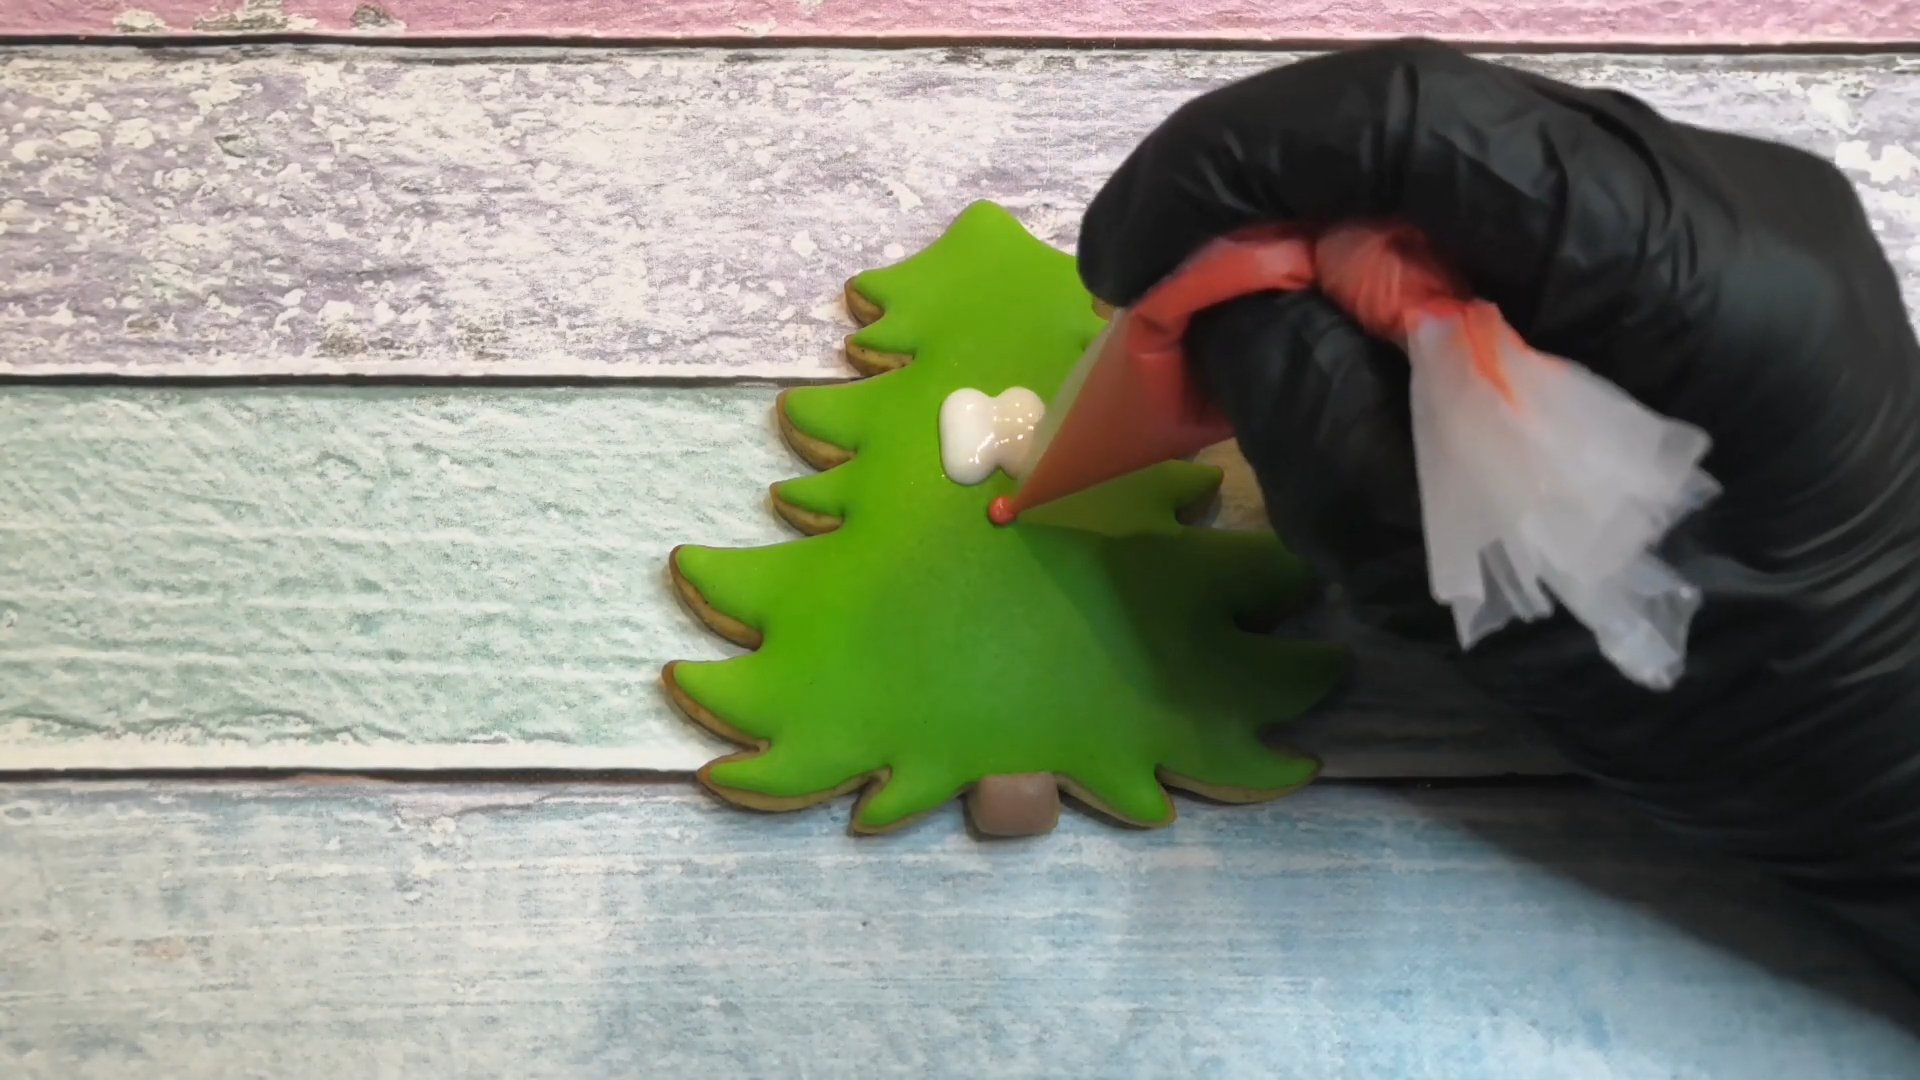
Using white and red icing, draw the nose and eyes of the Christmas tree.
Step 8
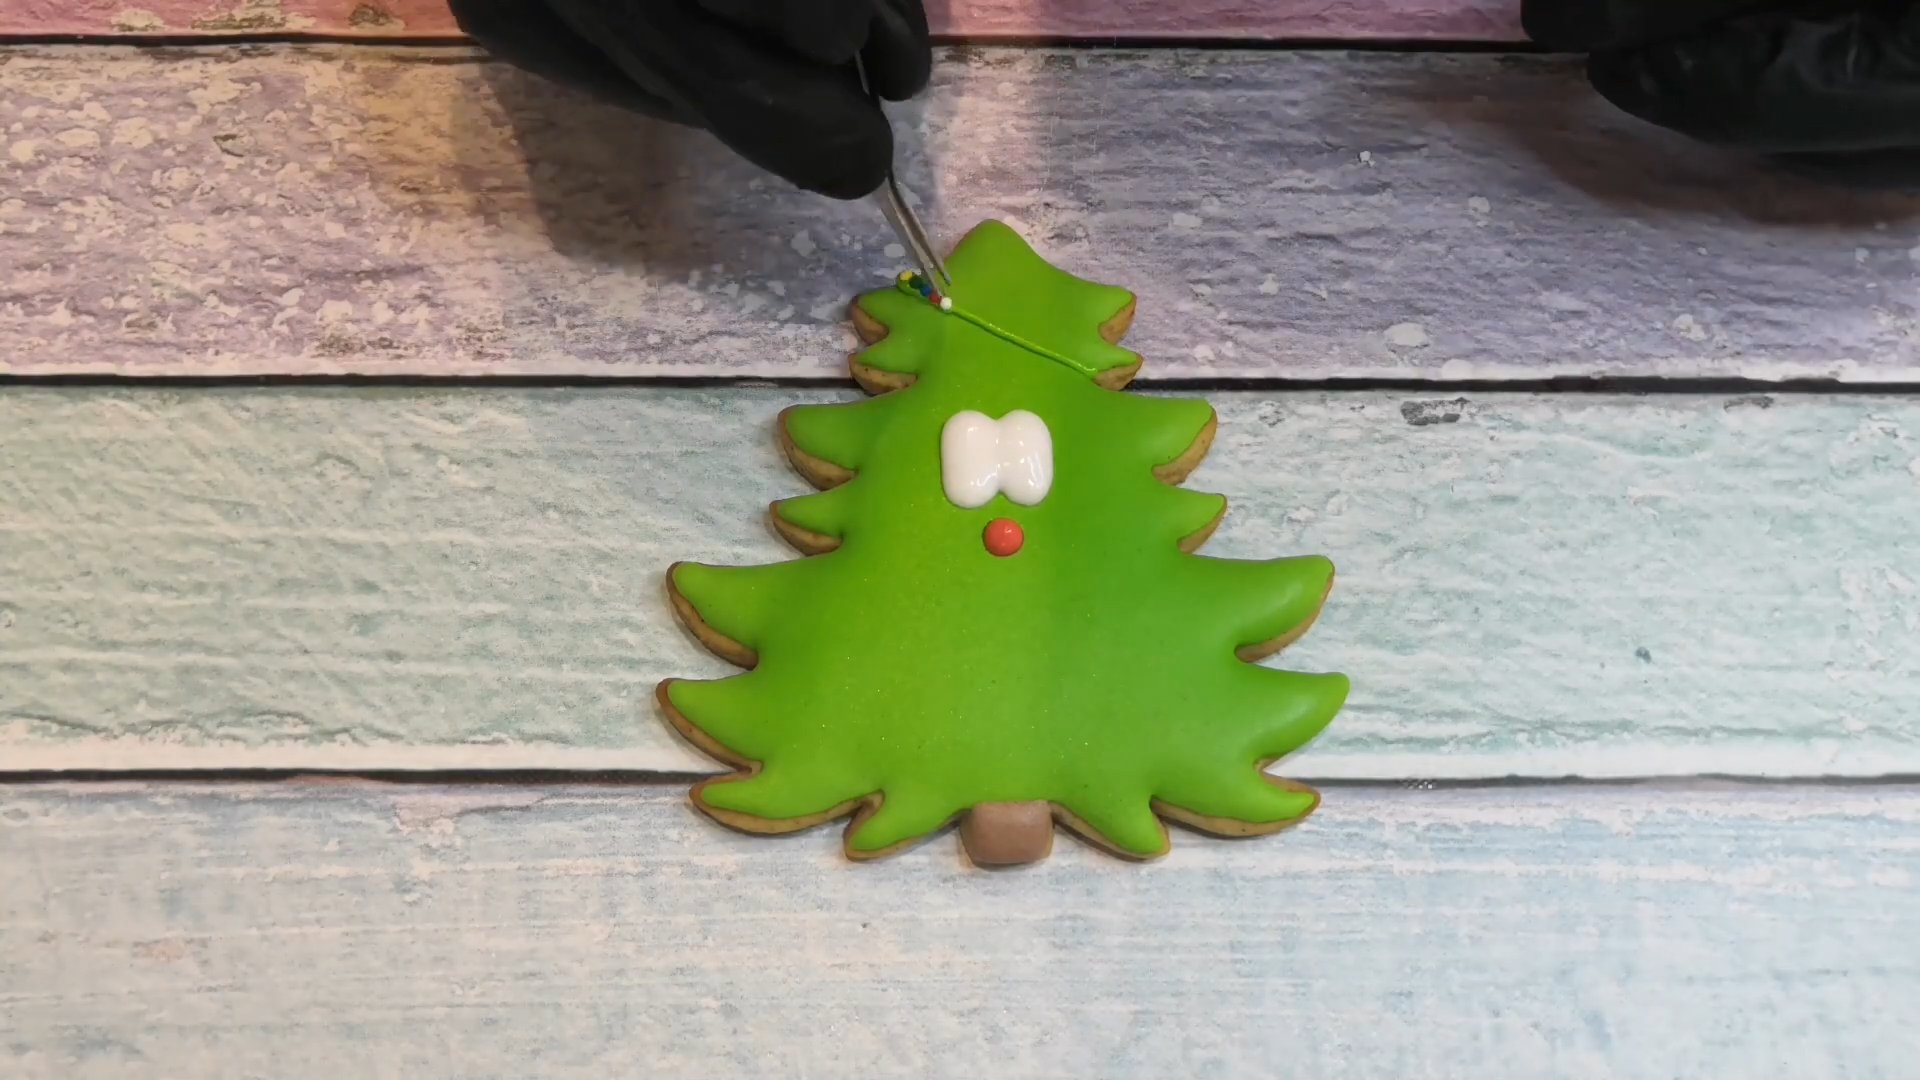
Let's form a garland. Apply thin lines of green icing to the tree to imitate the garland's wires.
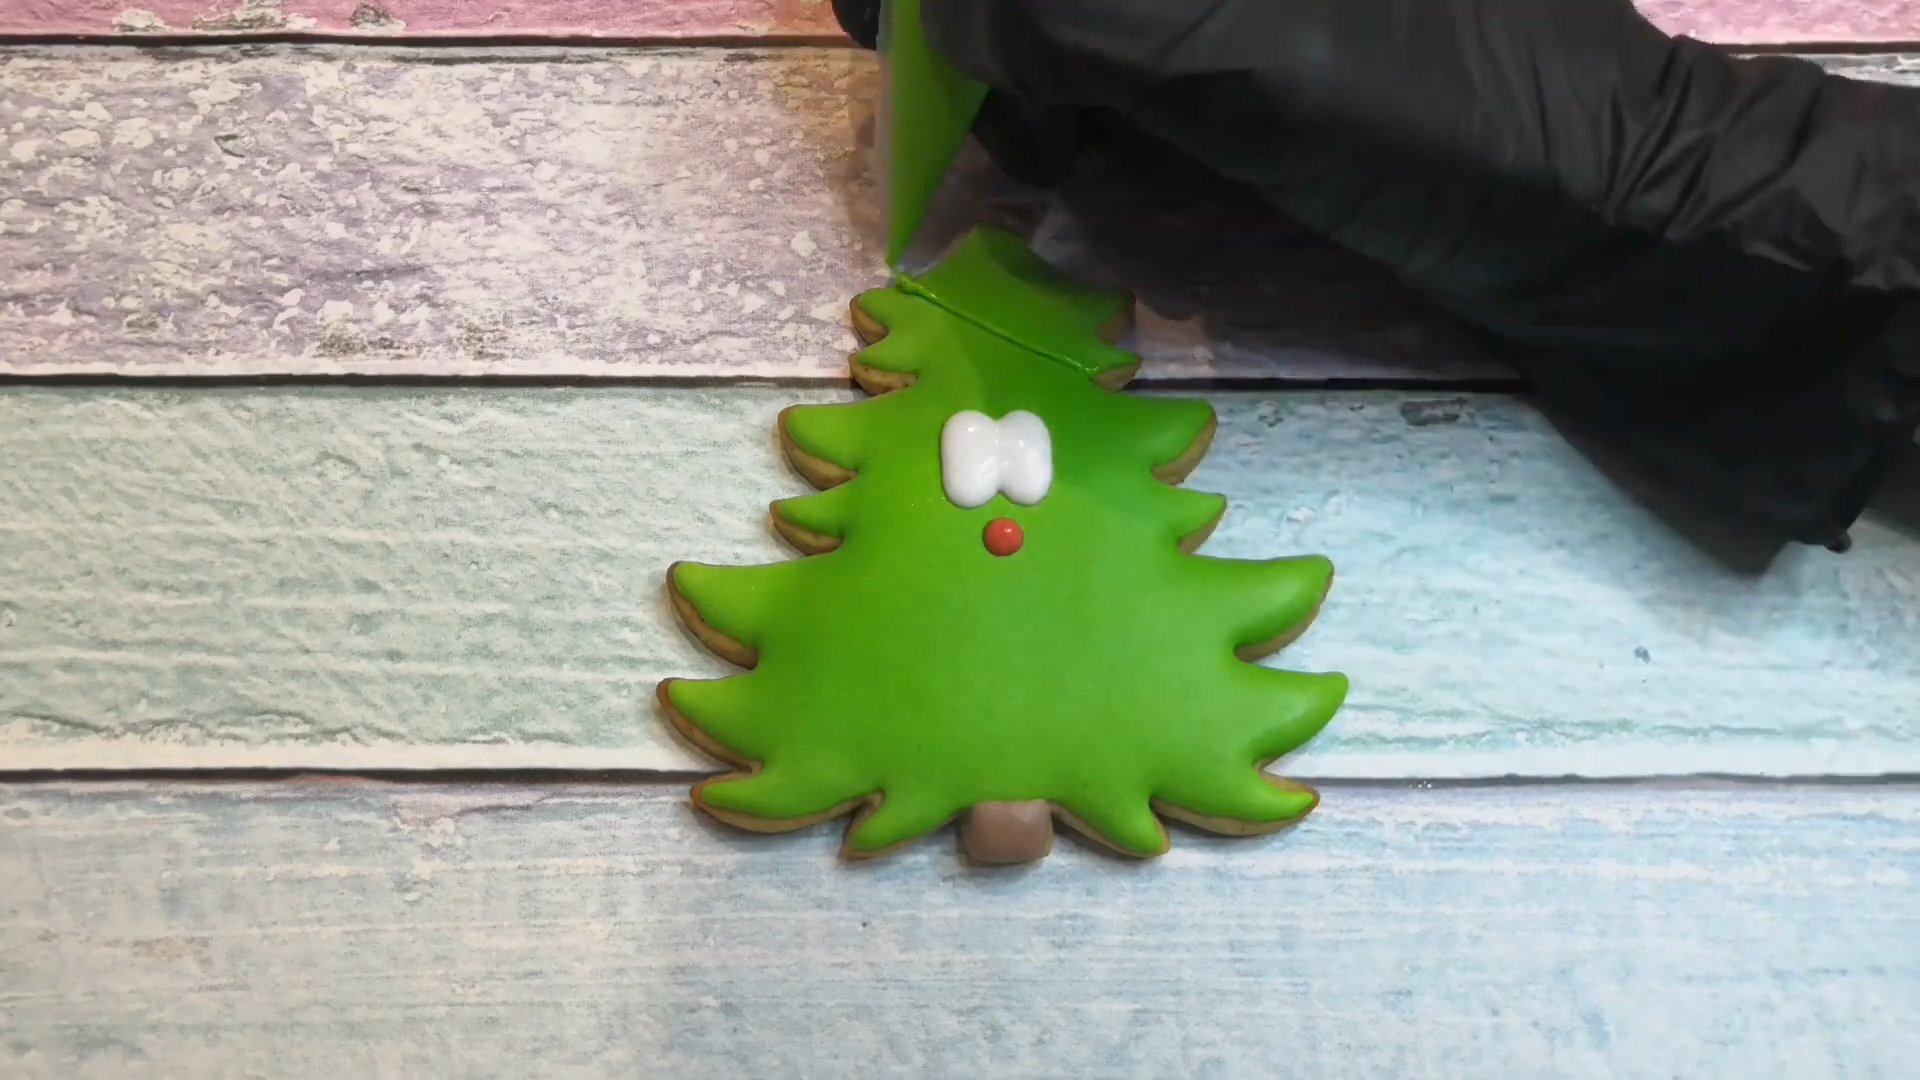
Step 9
We make the lights from multi-colored sugar sprinkles, securing them to the icing.
Step 10
Leave the gingerbread for 12 hours so that the glaze on it dries completely.
Step 11
The next day, we use food coloring to paint the tree's eyes and draw needles.
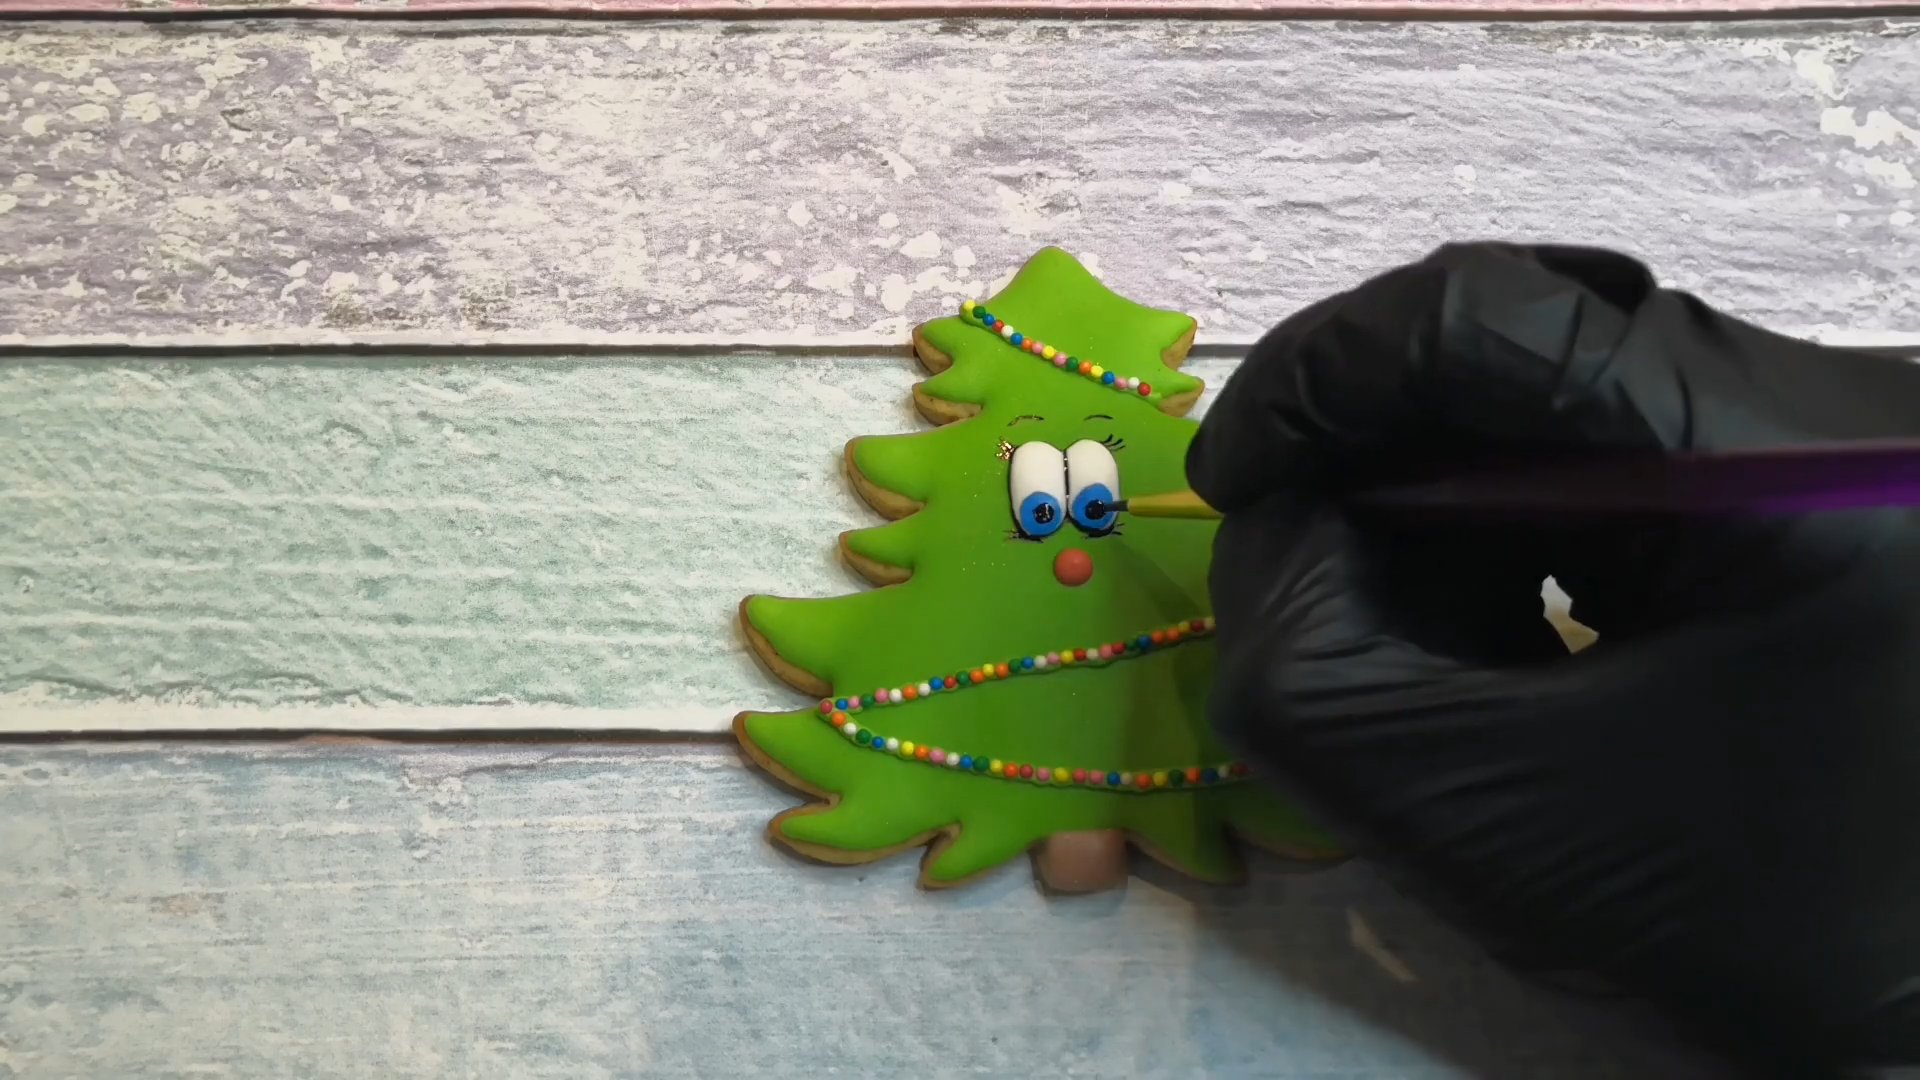
Step 12
The bright and elegant gingerbread "Christmas tree" is ready.
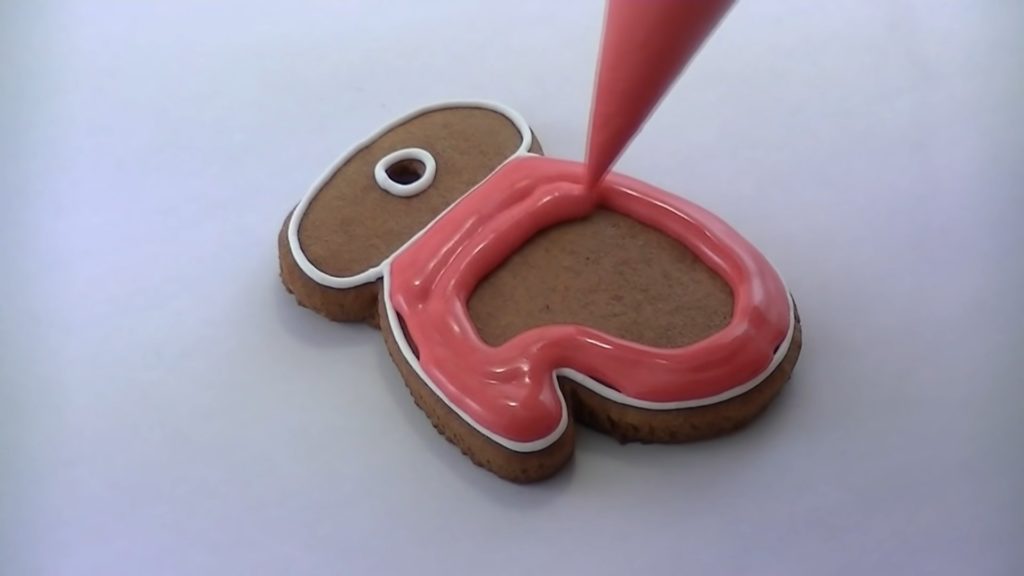
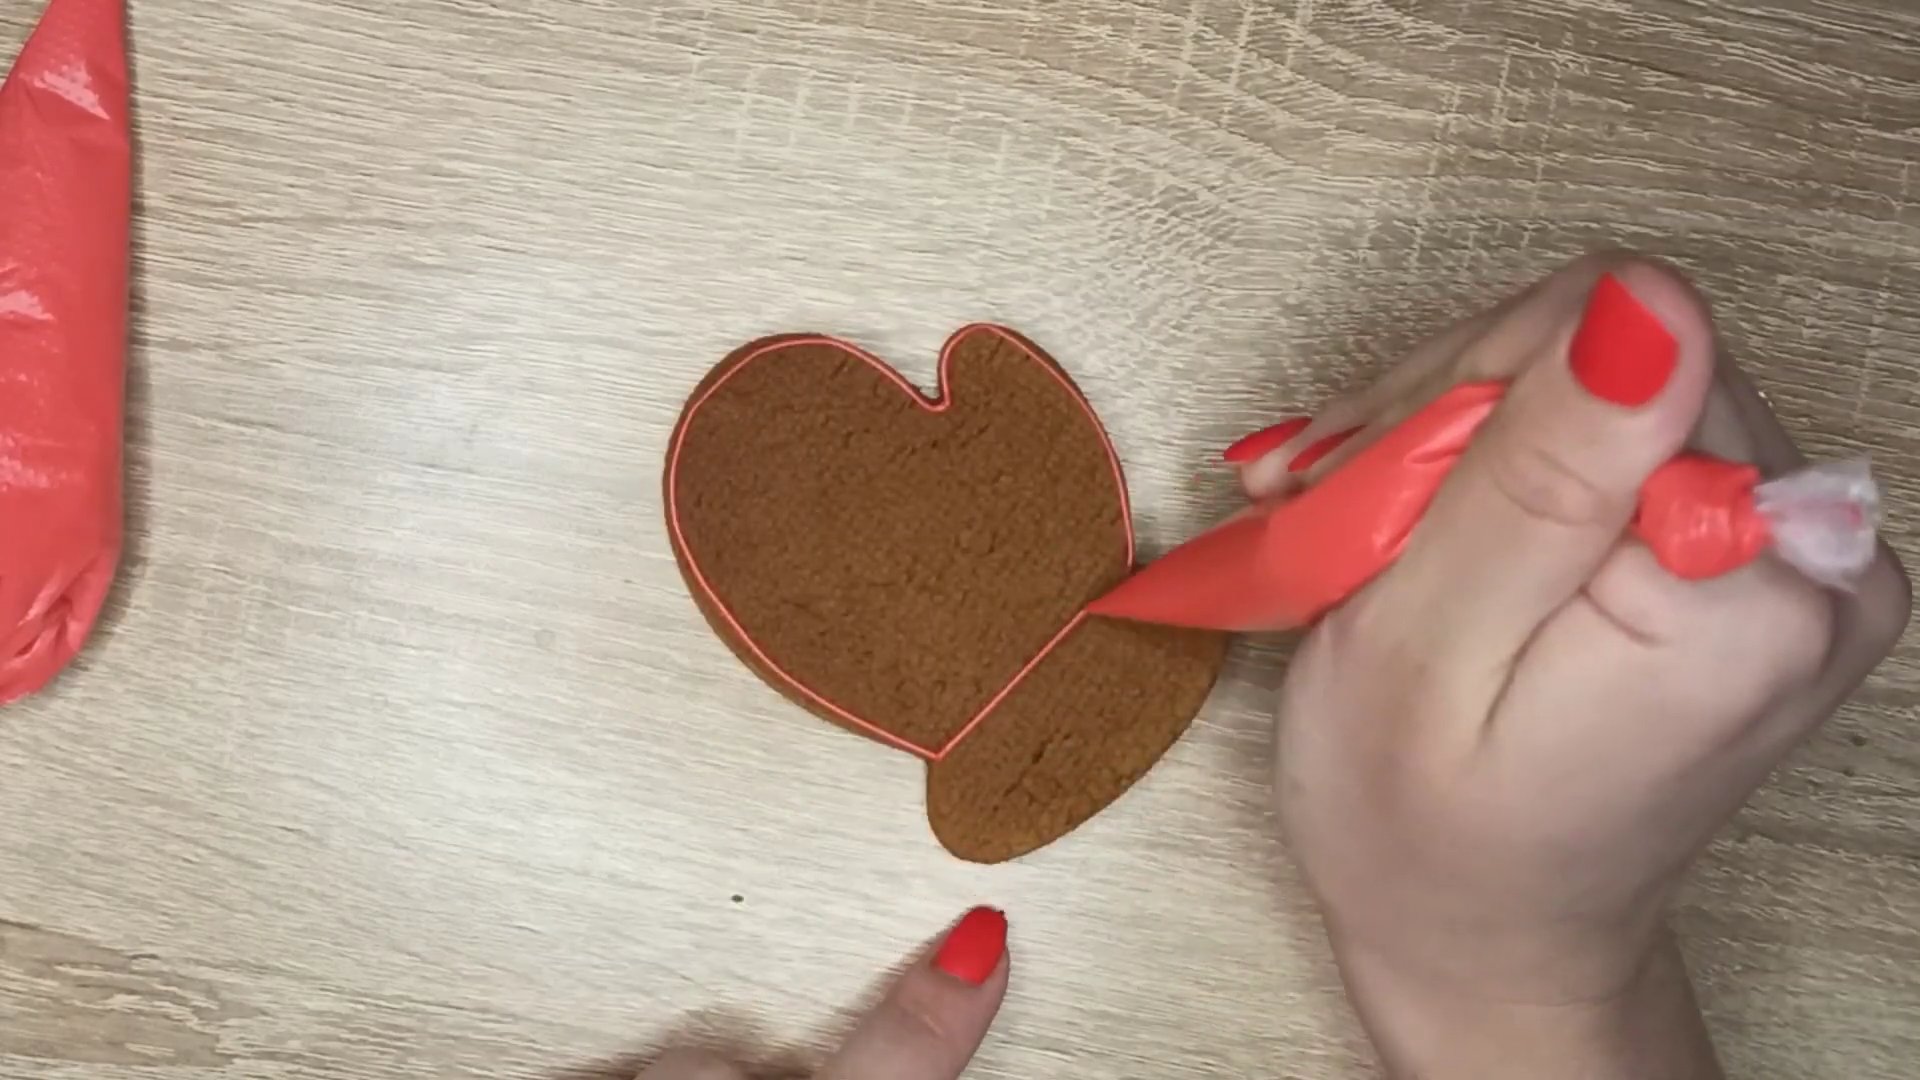
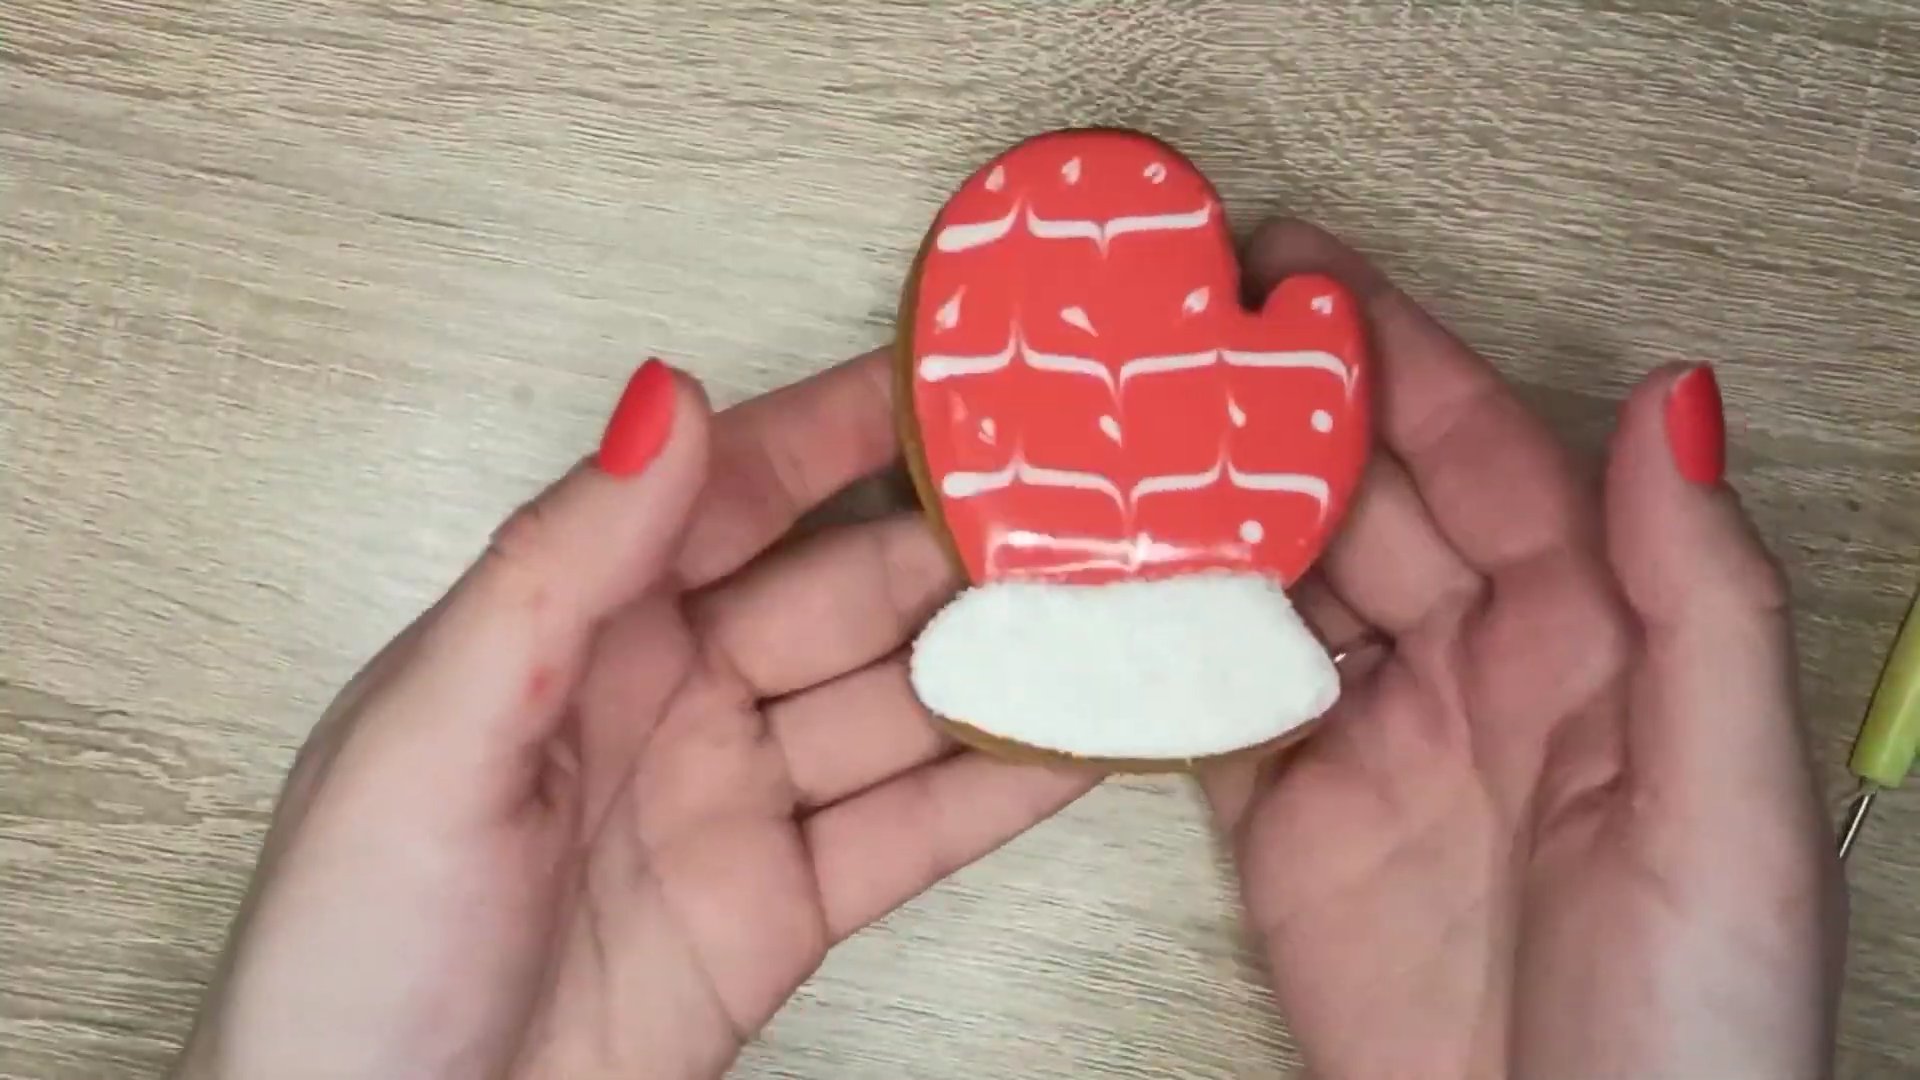
Painting the "Mitten" gingerbread
This master class is dedicated to decorating the "Mitten" gingerbread cookie. This treat will make a wonderful decoration for your Christmas tree or New Year's arrangements. Two painting techniques are used for decoration: contour filling and wet-on-wet. You can choose the color of the mitten to suit your taste.
Materials, tools
- Protein-sugar glaze
- Food coloring - red
- Sugar
- Pastry bags
- Pastry awl or toothpick
Cooking time: 20-30 minutes
Servings: 1
Step-by-step recipe
Step 1
Using colored glaze, draw the outline of the top of the mitten.
Step 2
Fill the top of the gingerbread according to the outline.
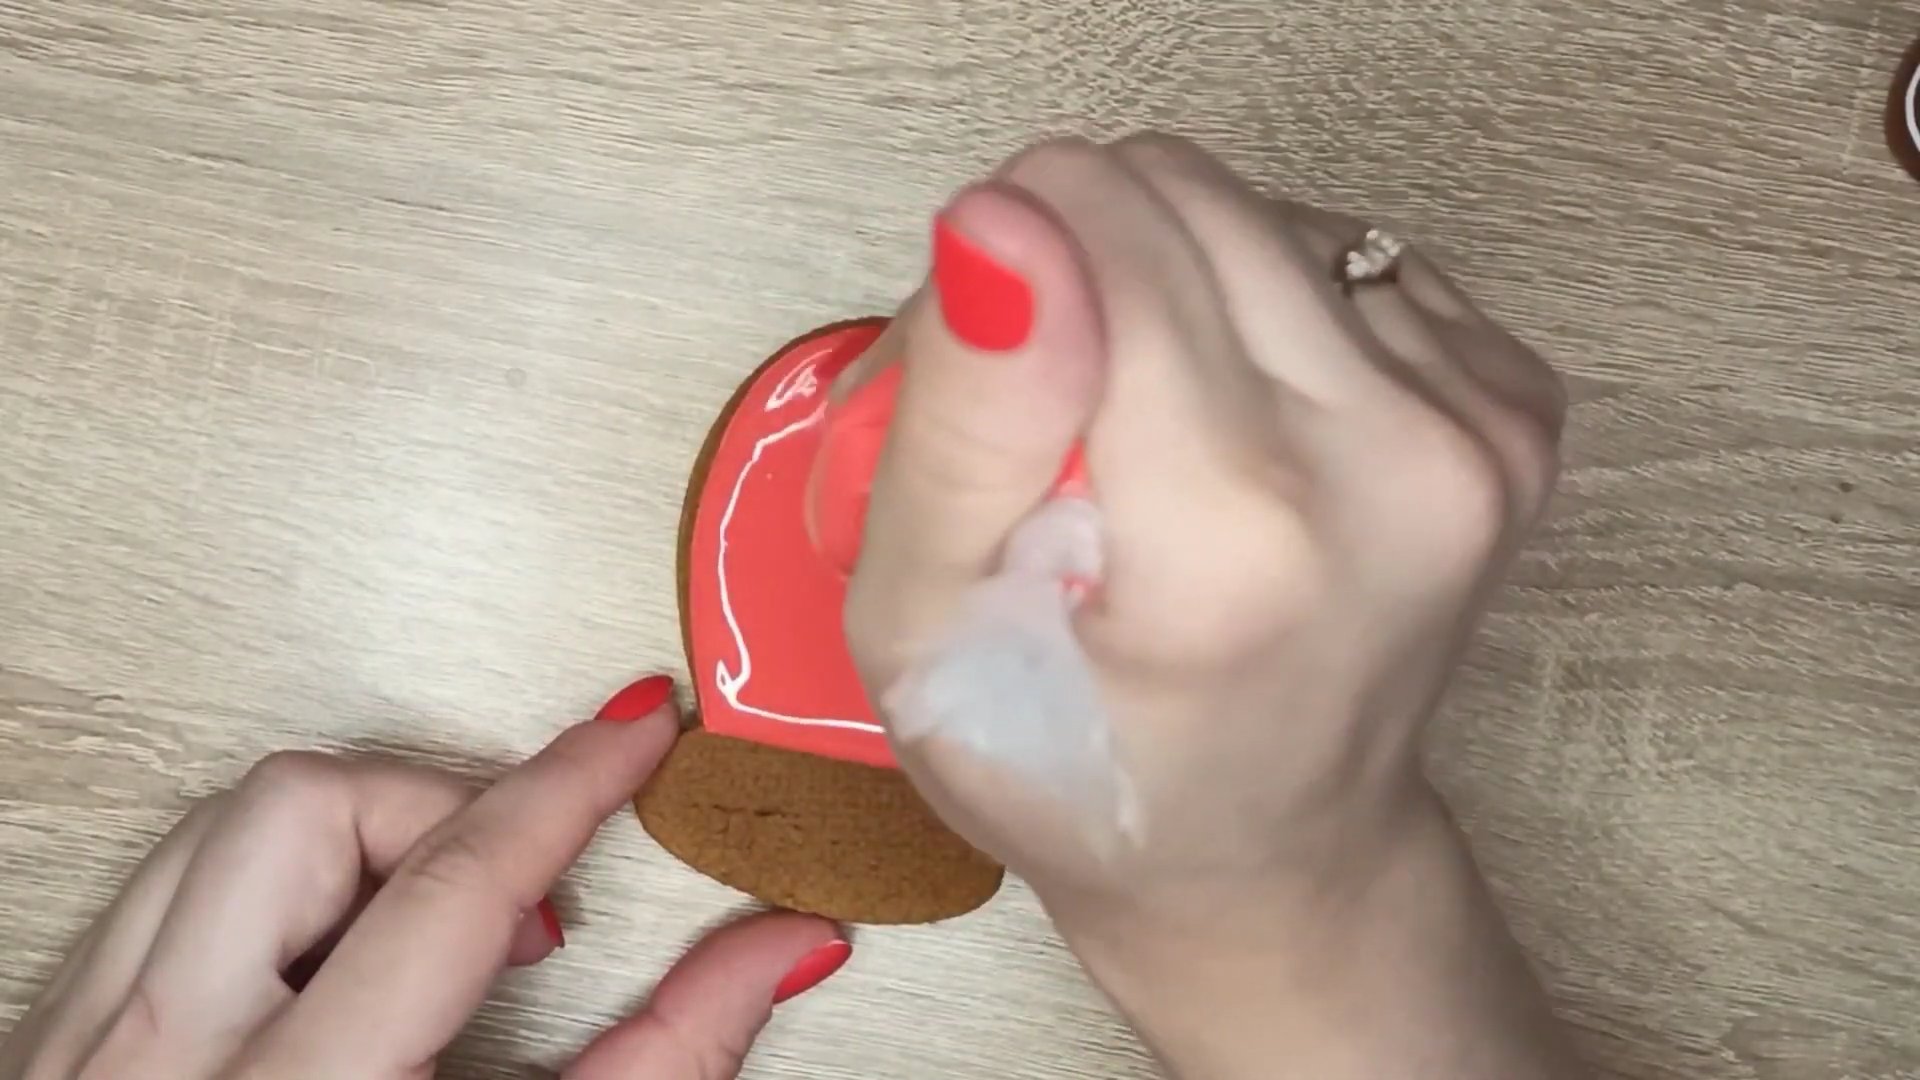
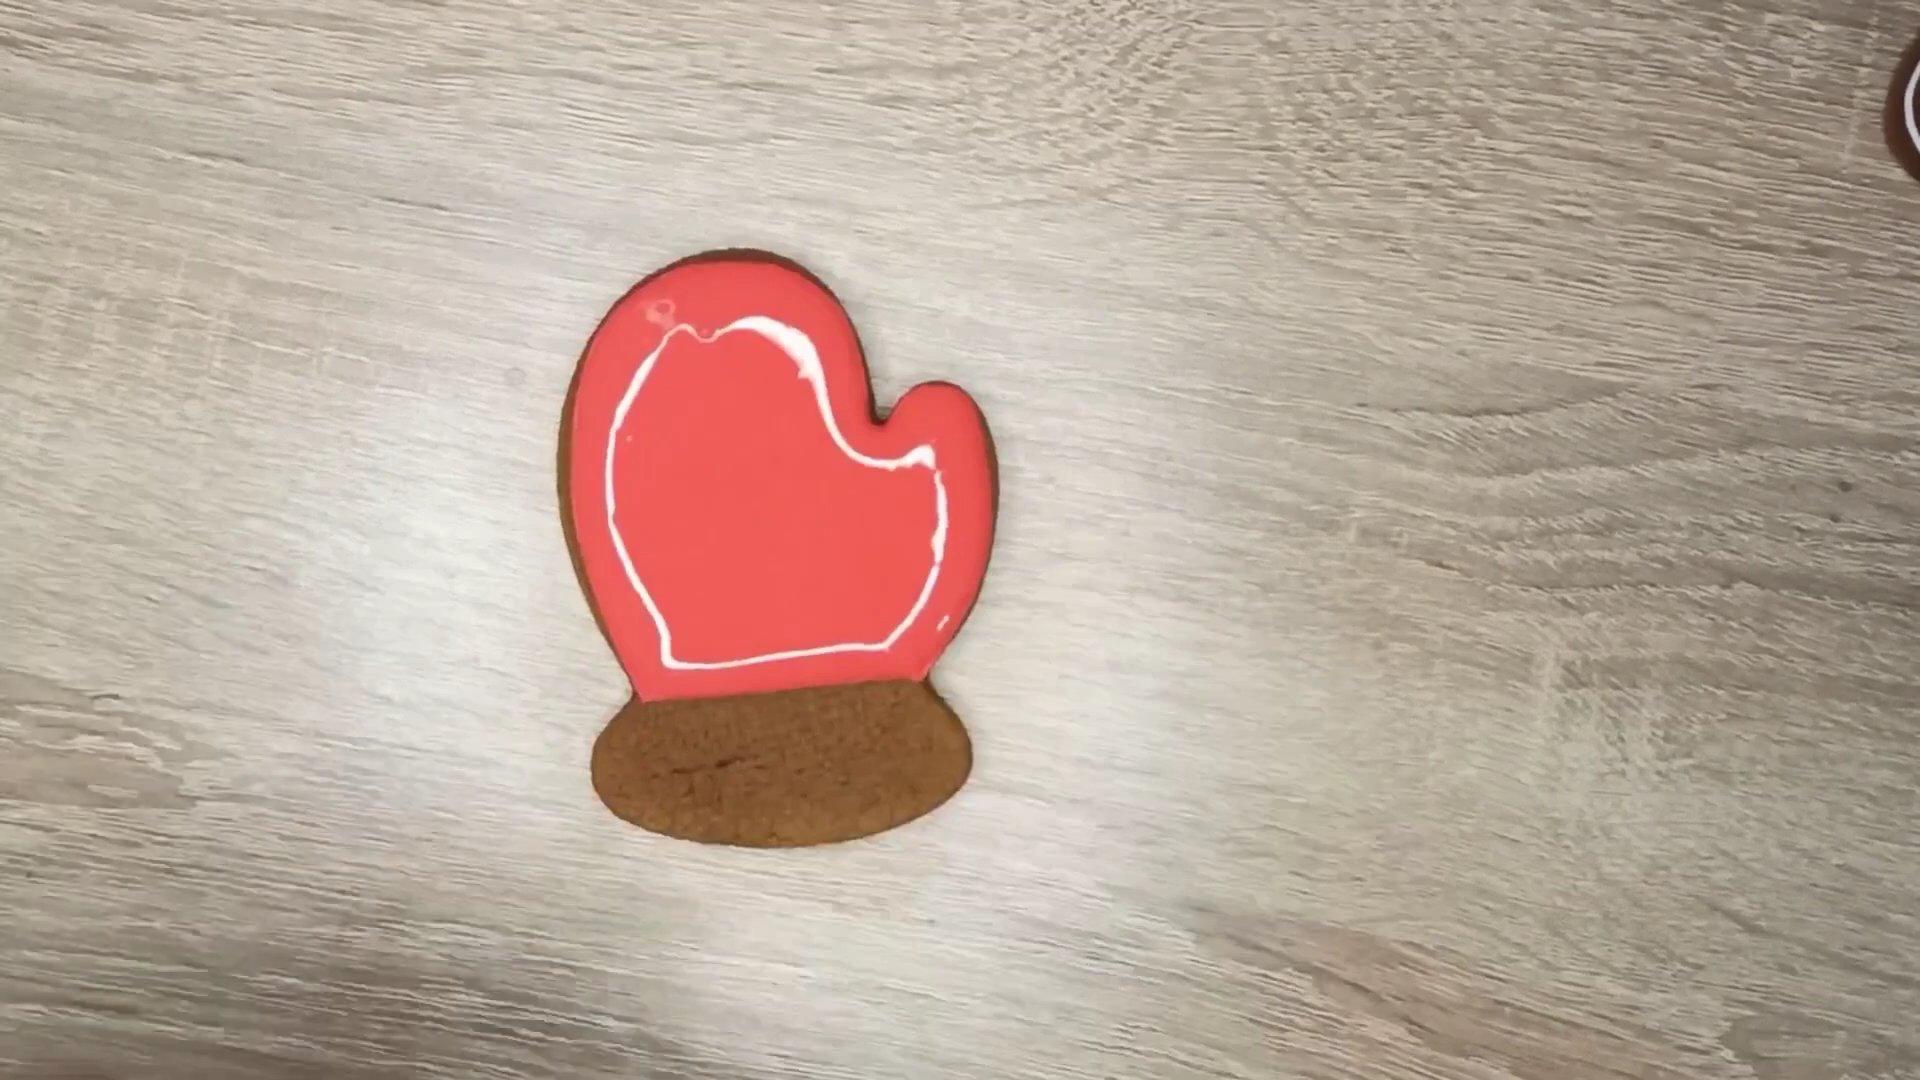
Step 3
Using white icing, draw thin lines on the mitten.
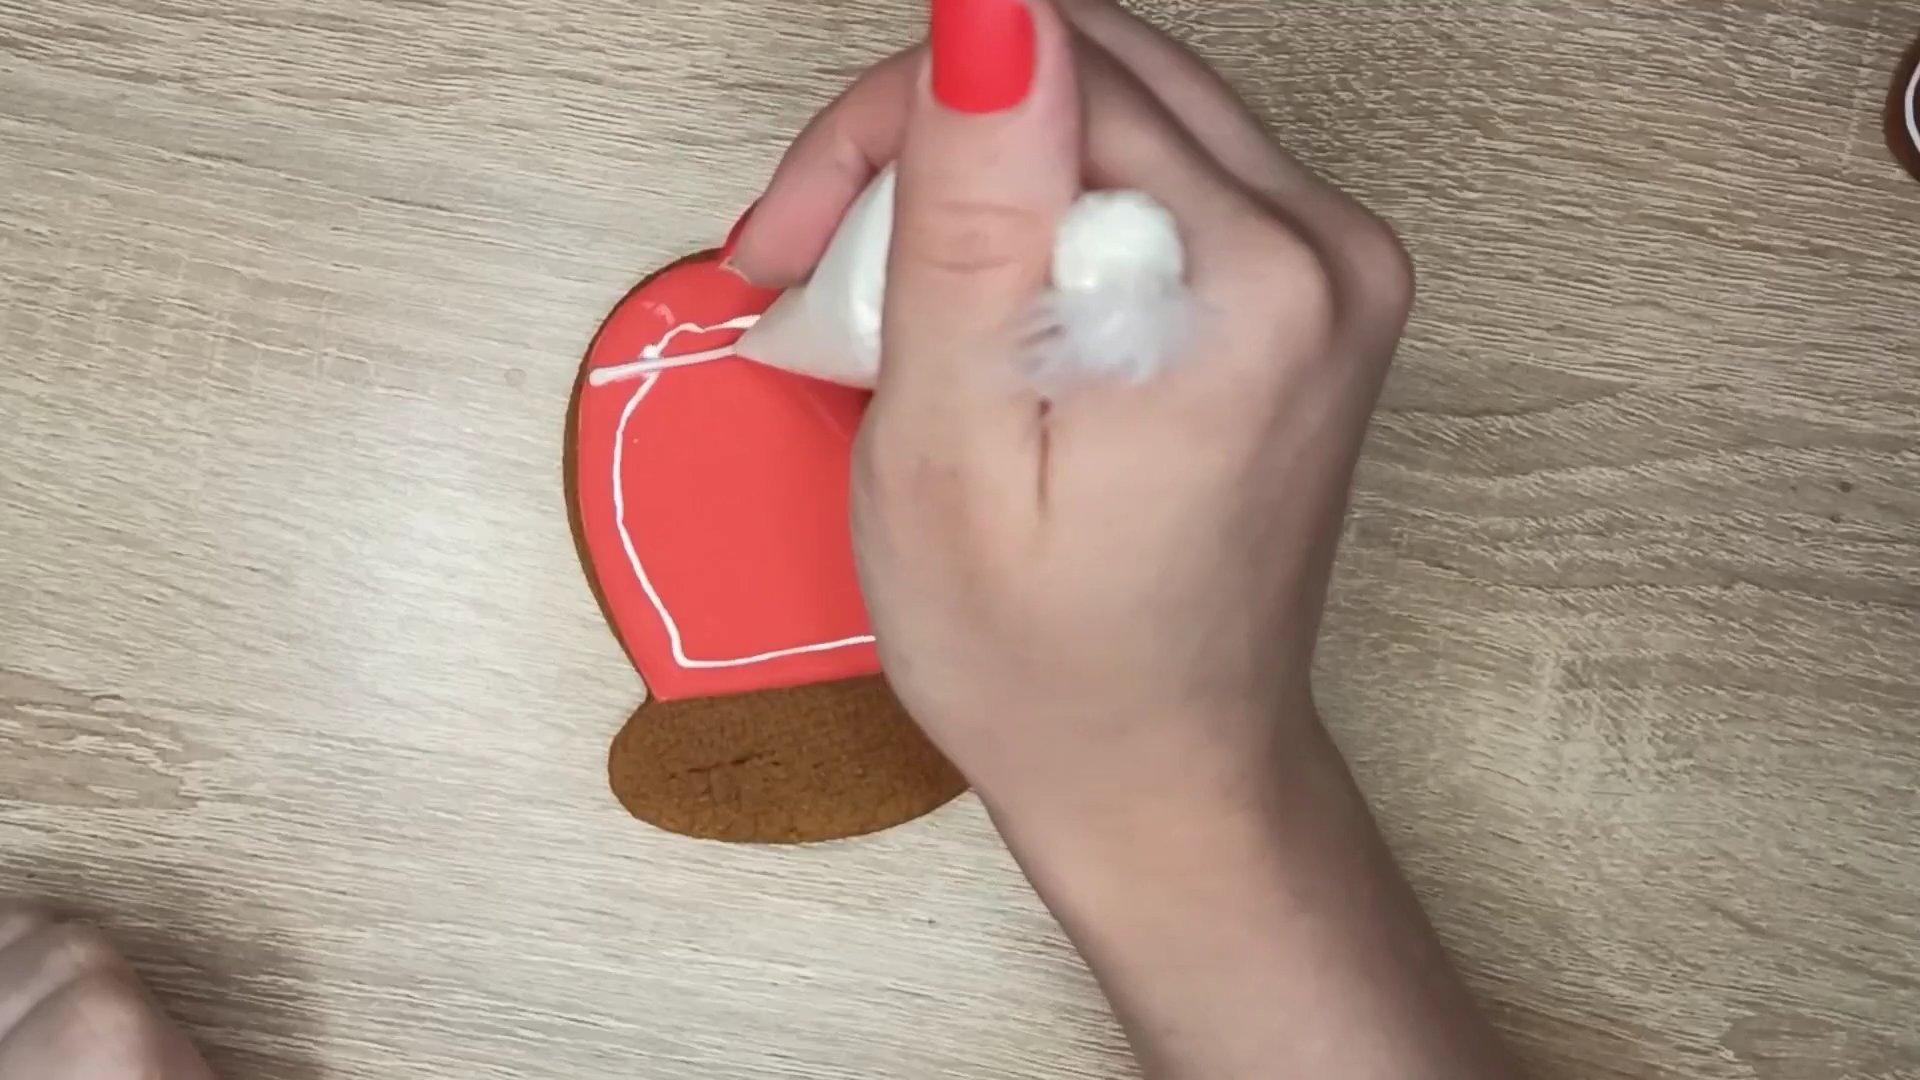
Step 4
We draw along the white lines with an awl or a toothpick, creating different patterns.
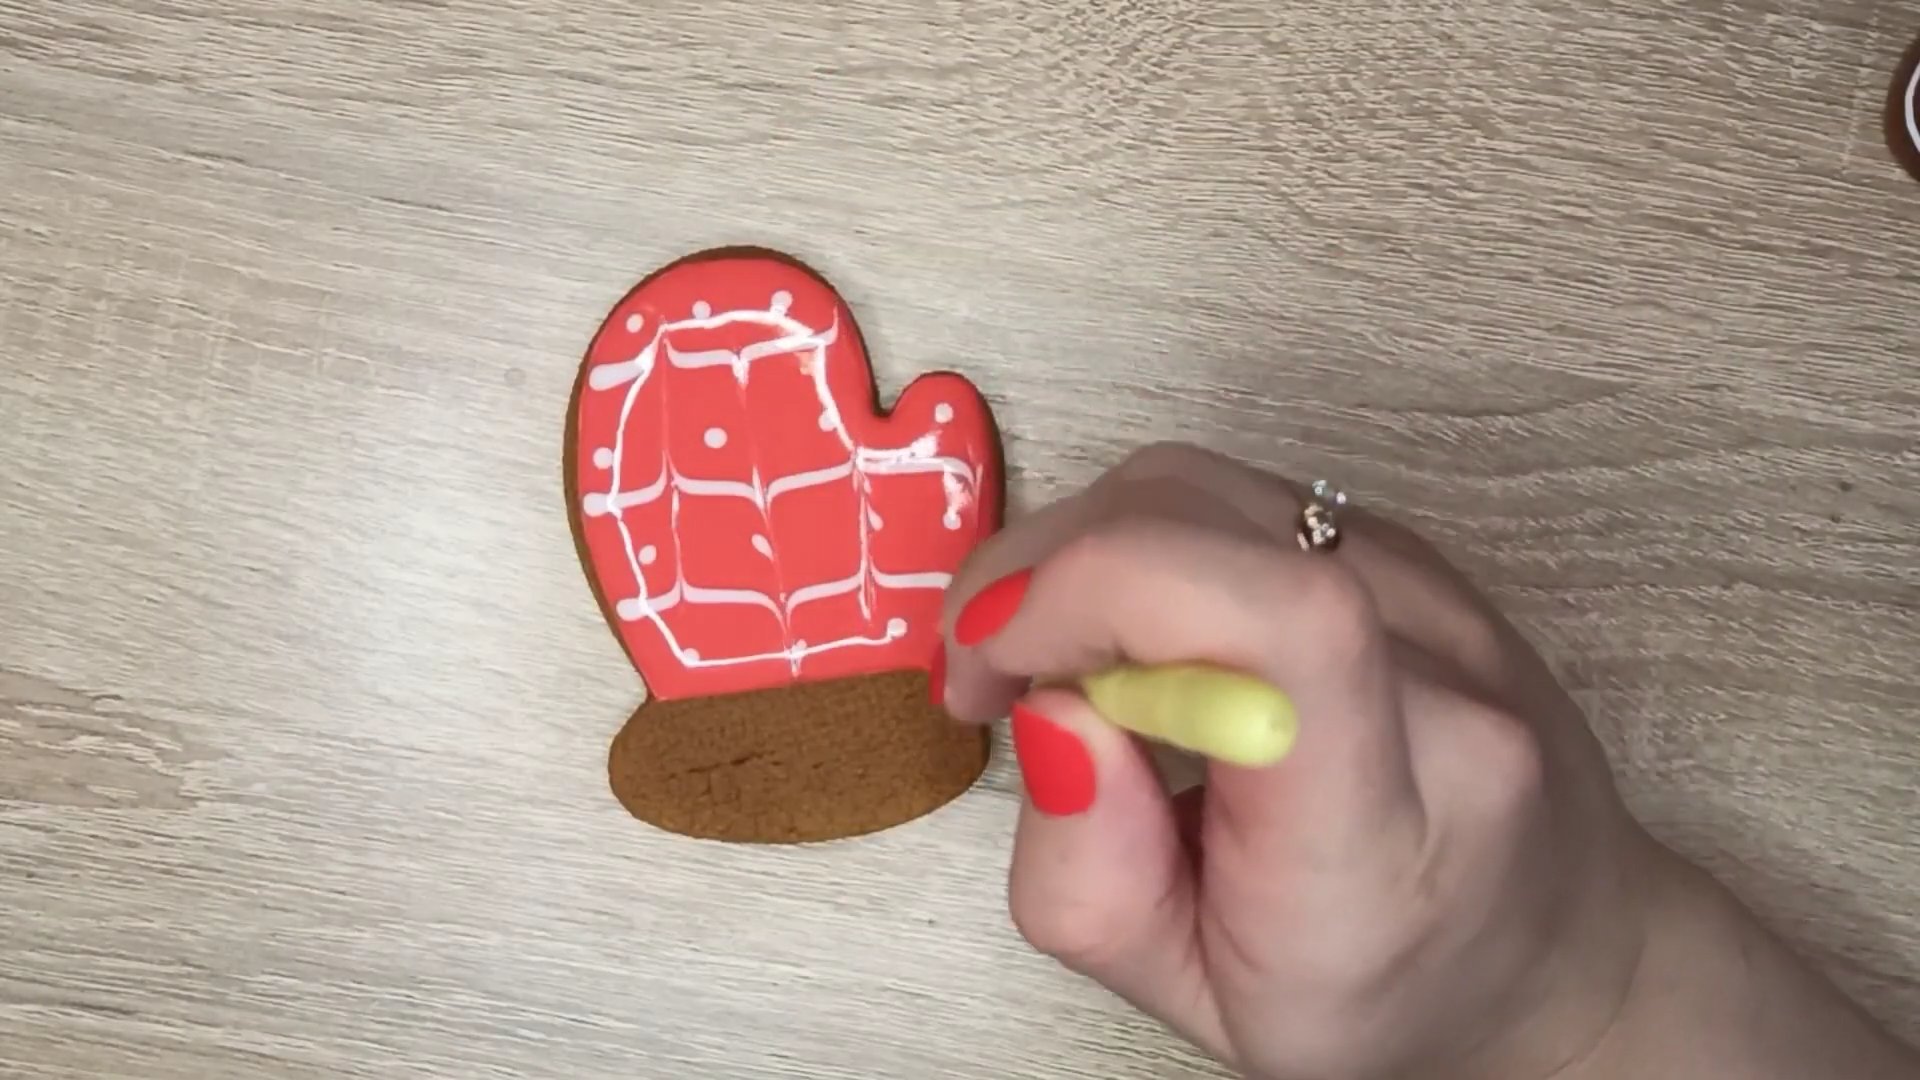
Step 5
Using white icing, draw the outline of the bottom of the mitten and fill it in.
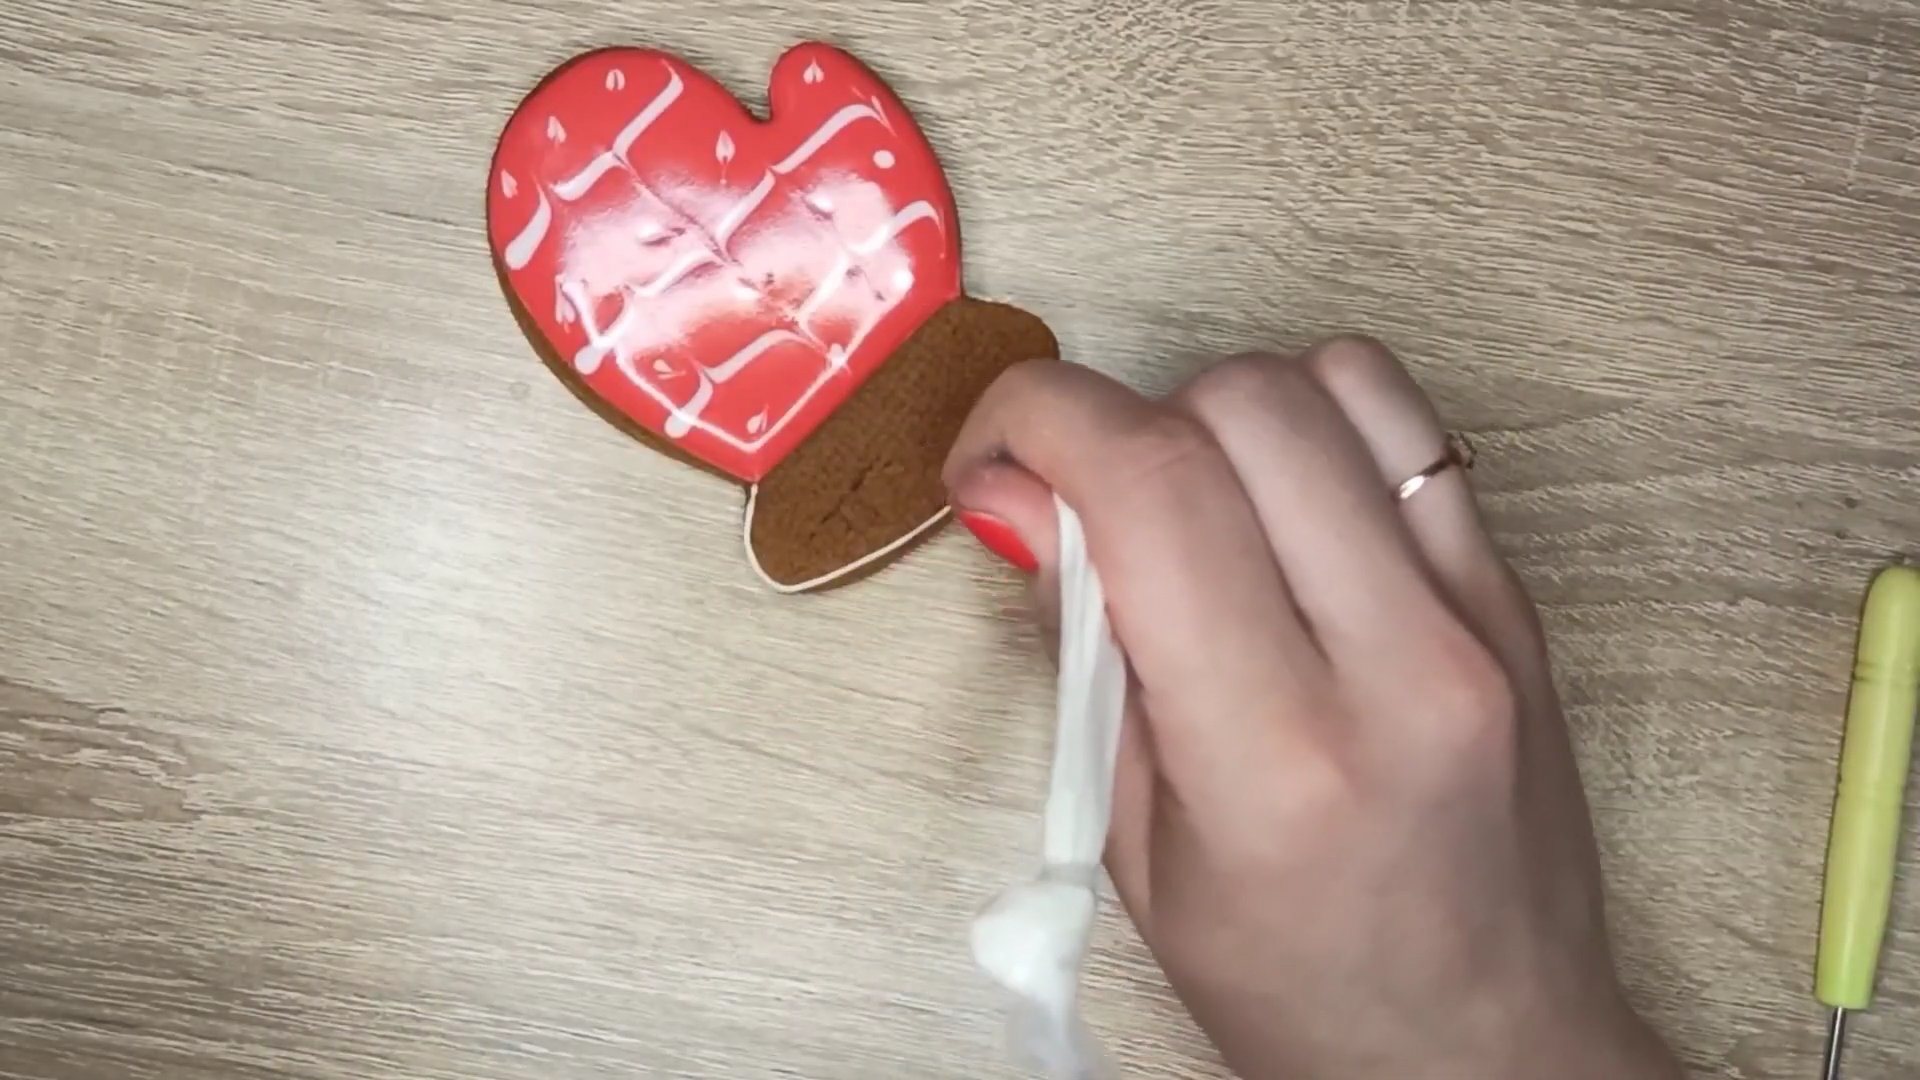
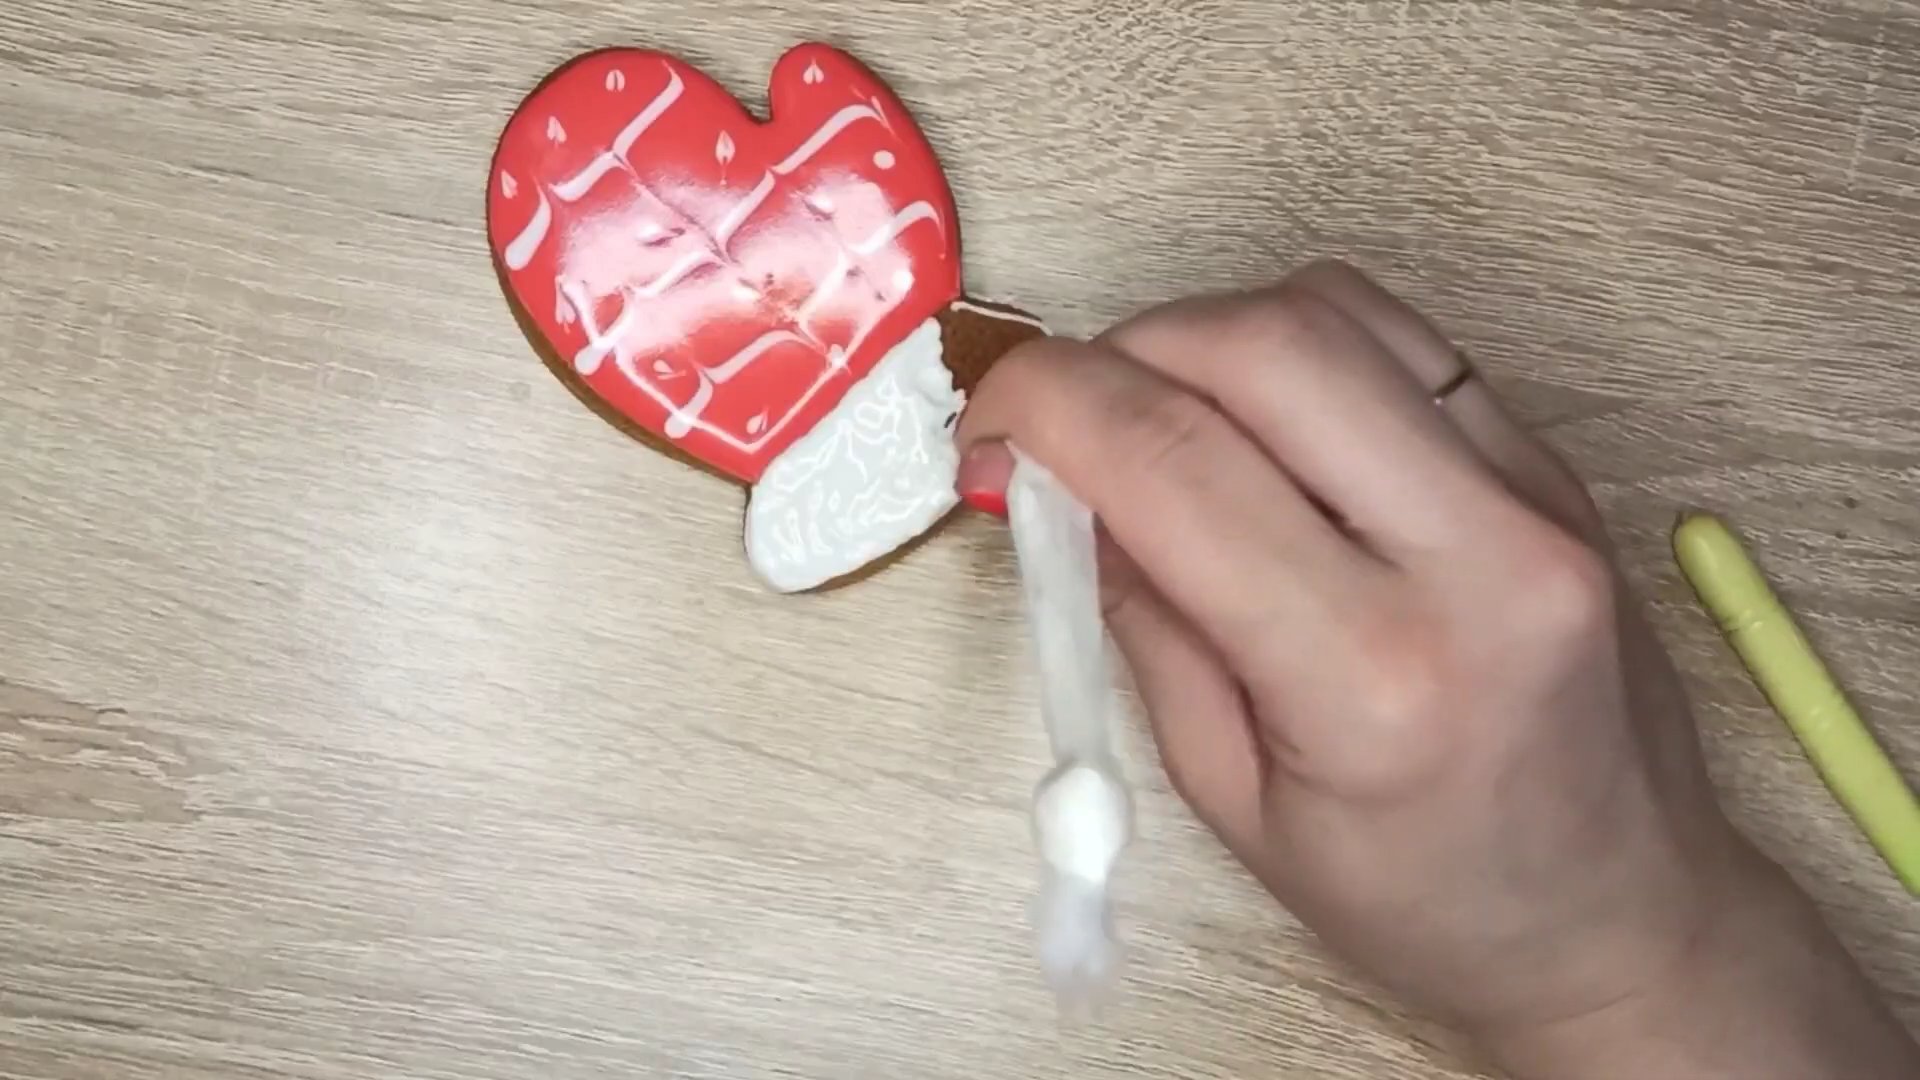
Step 6
Sprinkle white icing with sugar to imitate fur on the mitten.

Step 7
We leave the finished product to dry overnight.
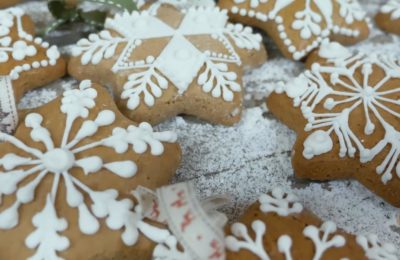
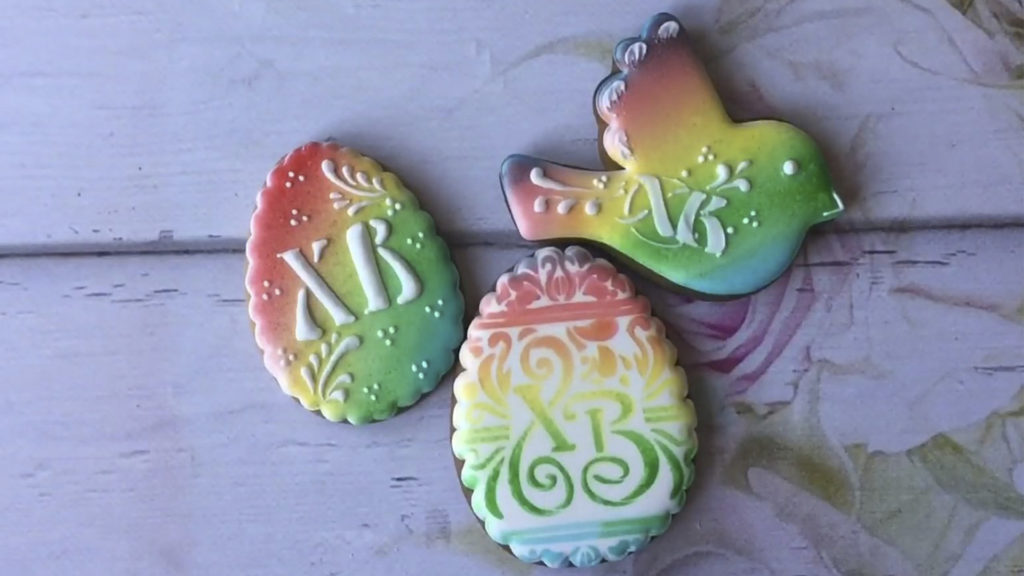
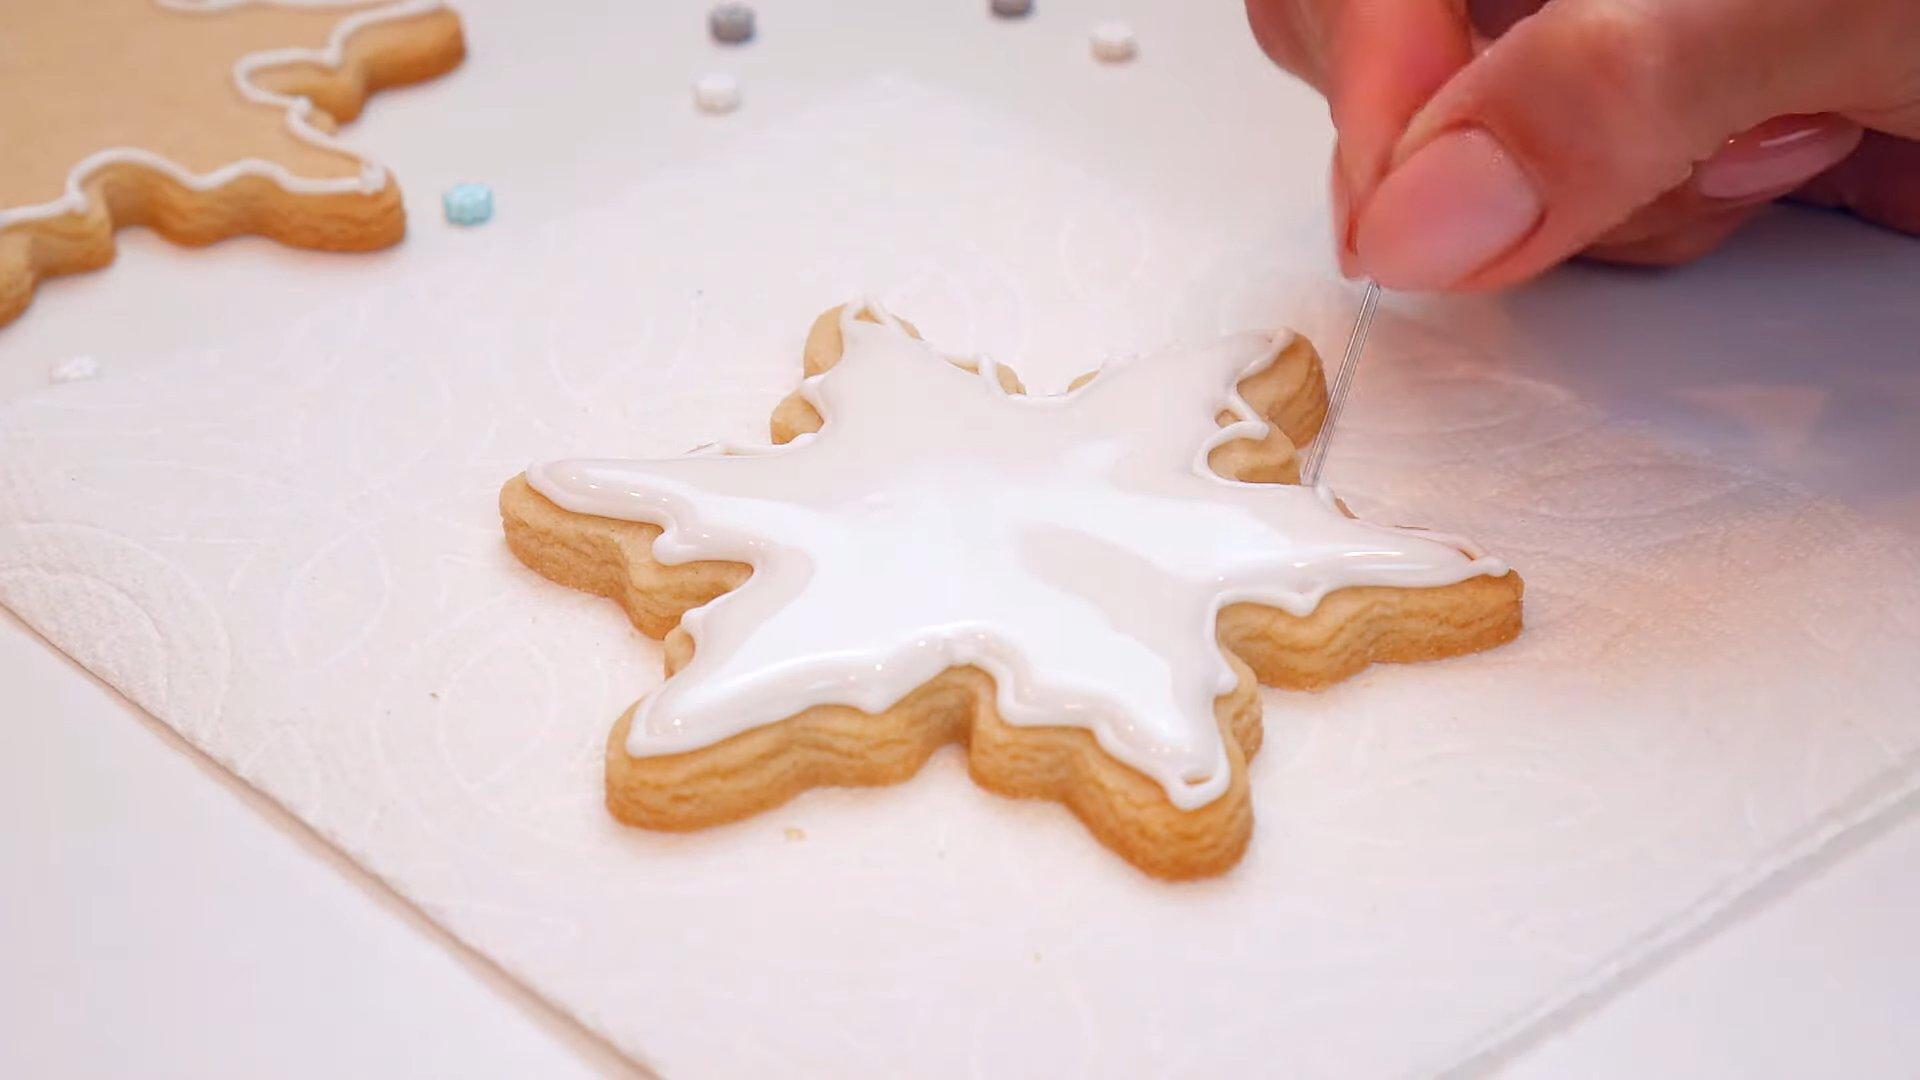
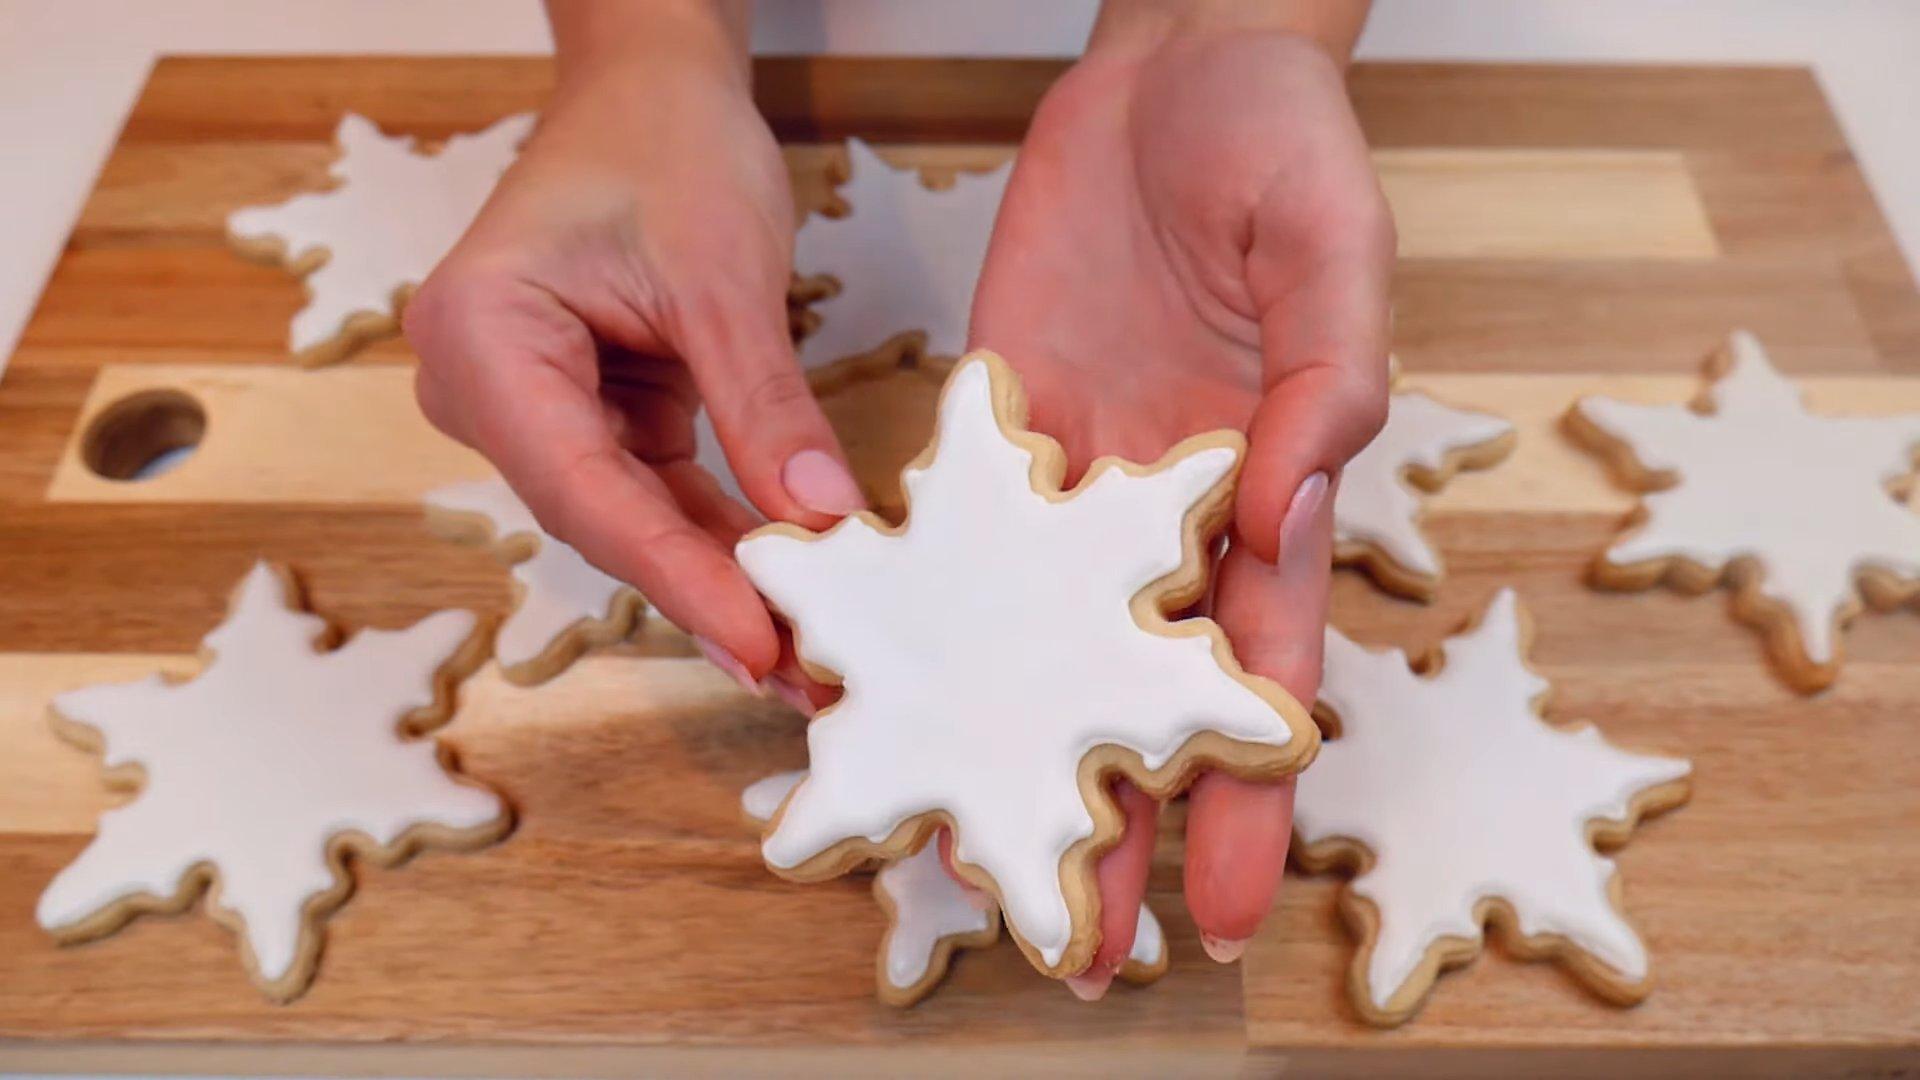
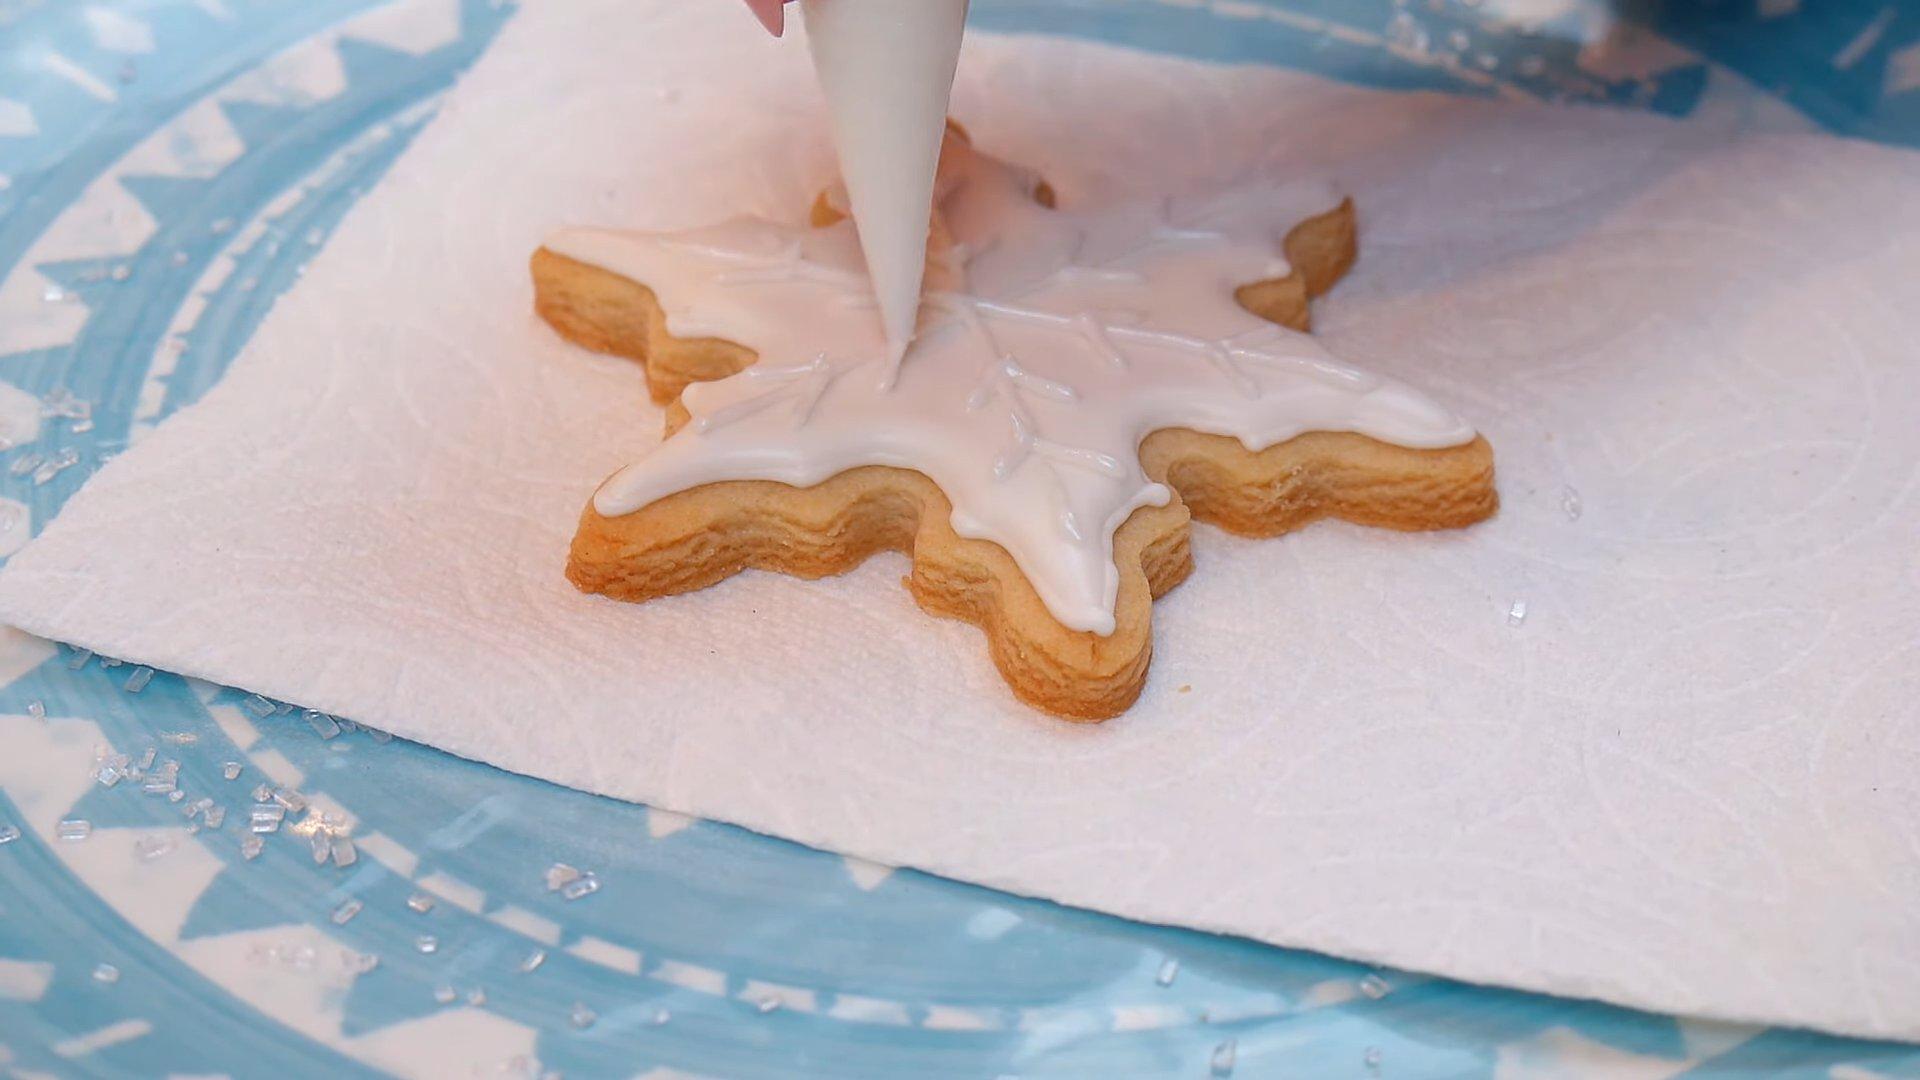
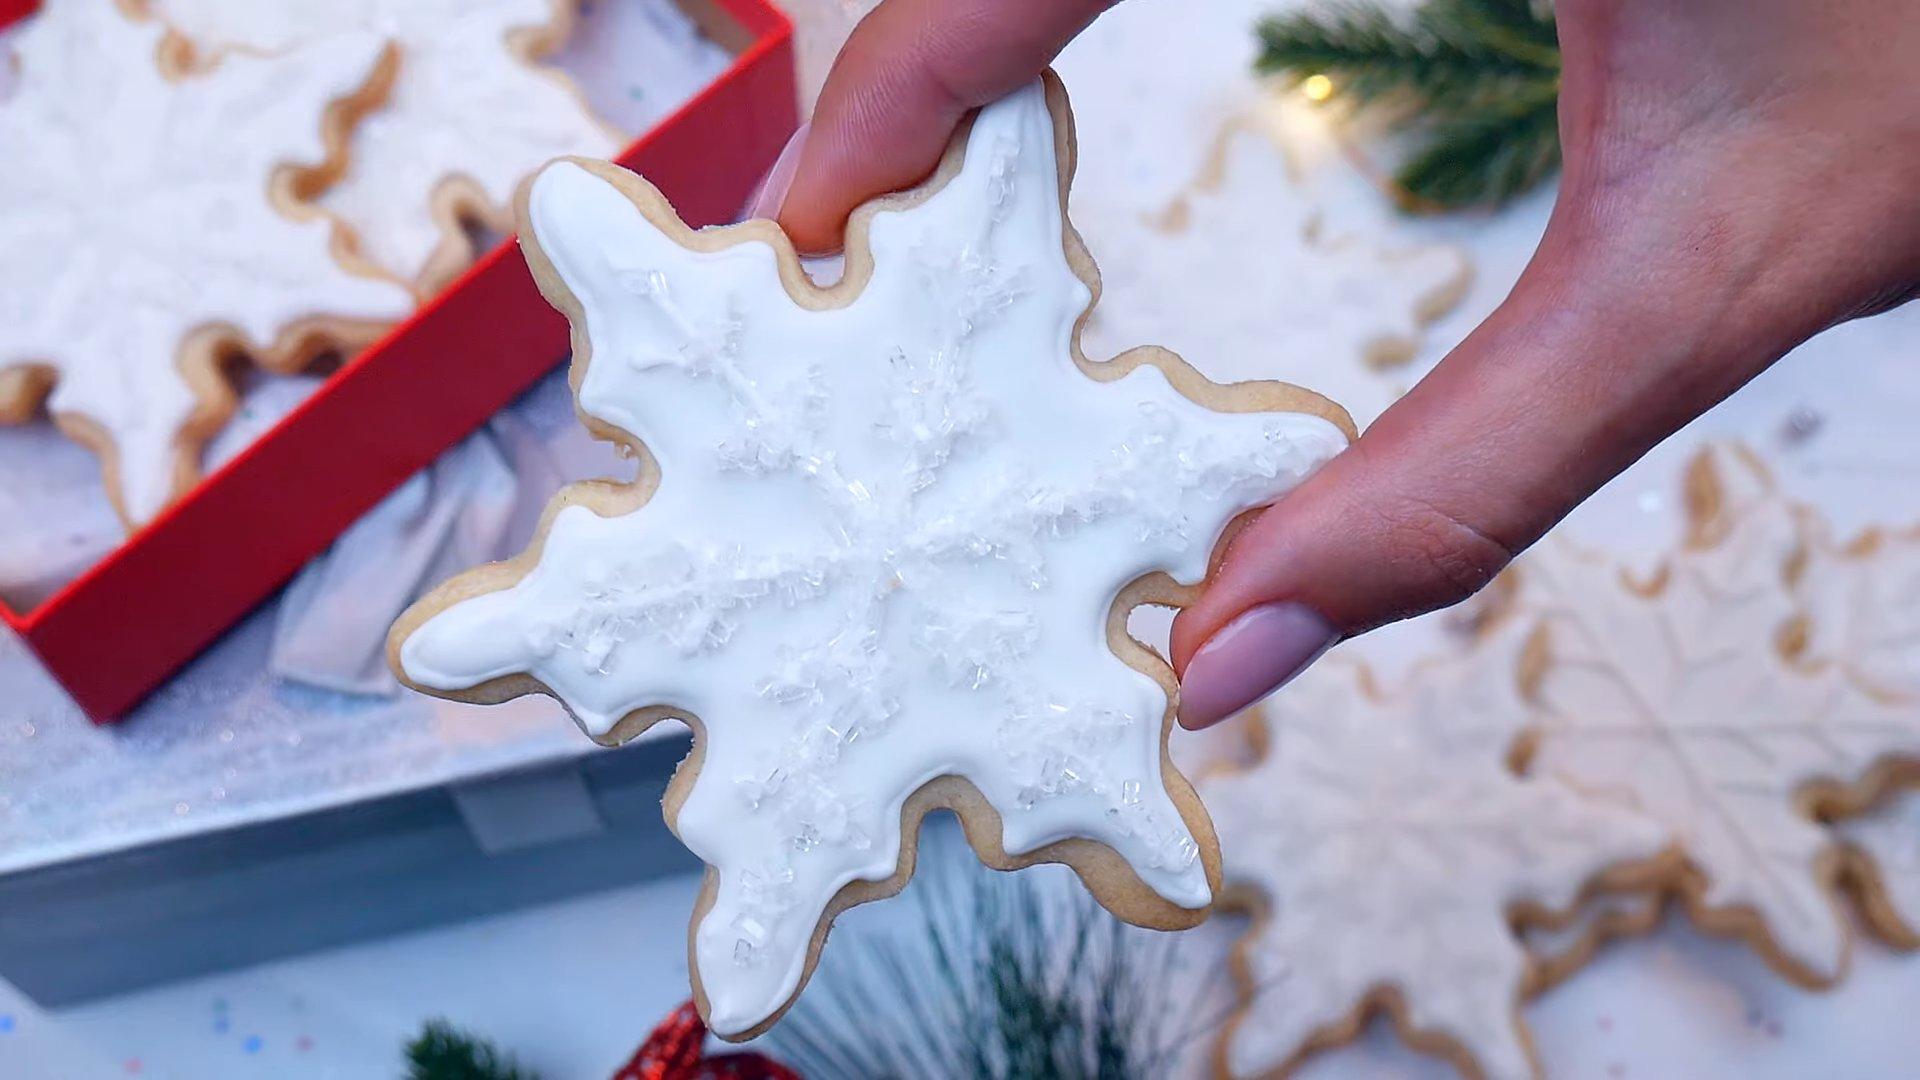
Painting the Snowflake gingerbread
Baked snowflake-shaped gingerbread cookies and don't know how to decorate them? Then you'll definitely love this master class. It shows an original way to decorate a snowflake gingerbread cookie. Creating this decoration requires minimal time, materials, and effort.
Materials, tools
- Protein-sugar glaze (basic)
- Water - 1-2 tsp.
- Pastry bags
- A needle or a toothpick
- Sugar
Cooking time: 25-35 minutes
Servings: 1
Step-by-step recipe
Step 1
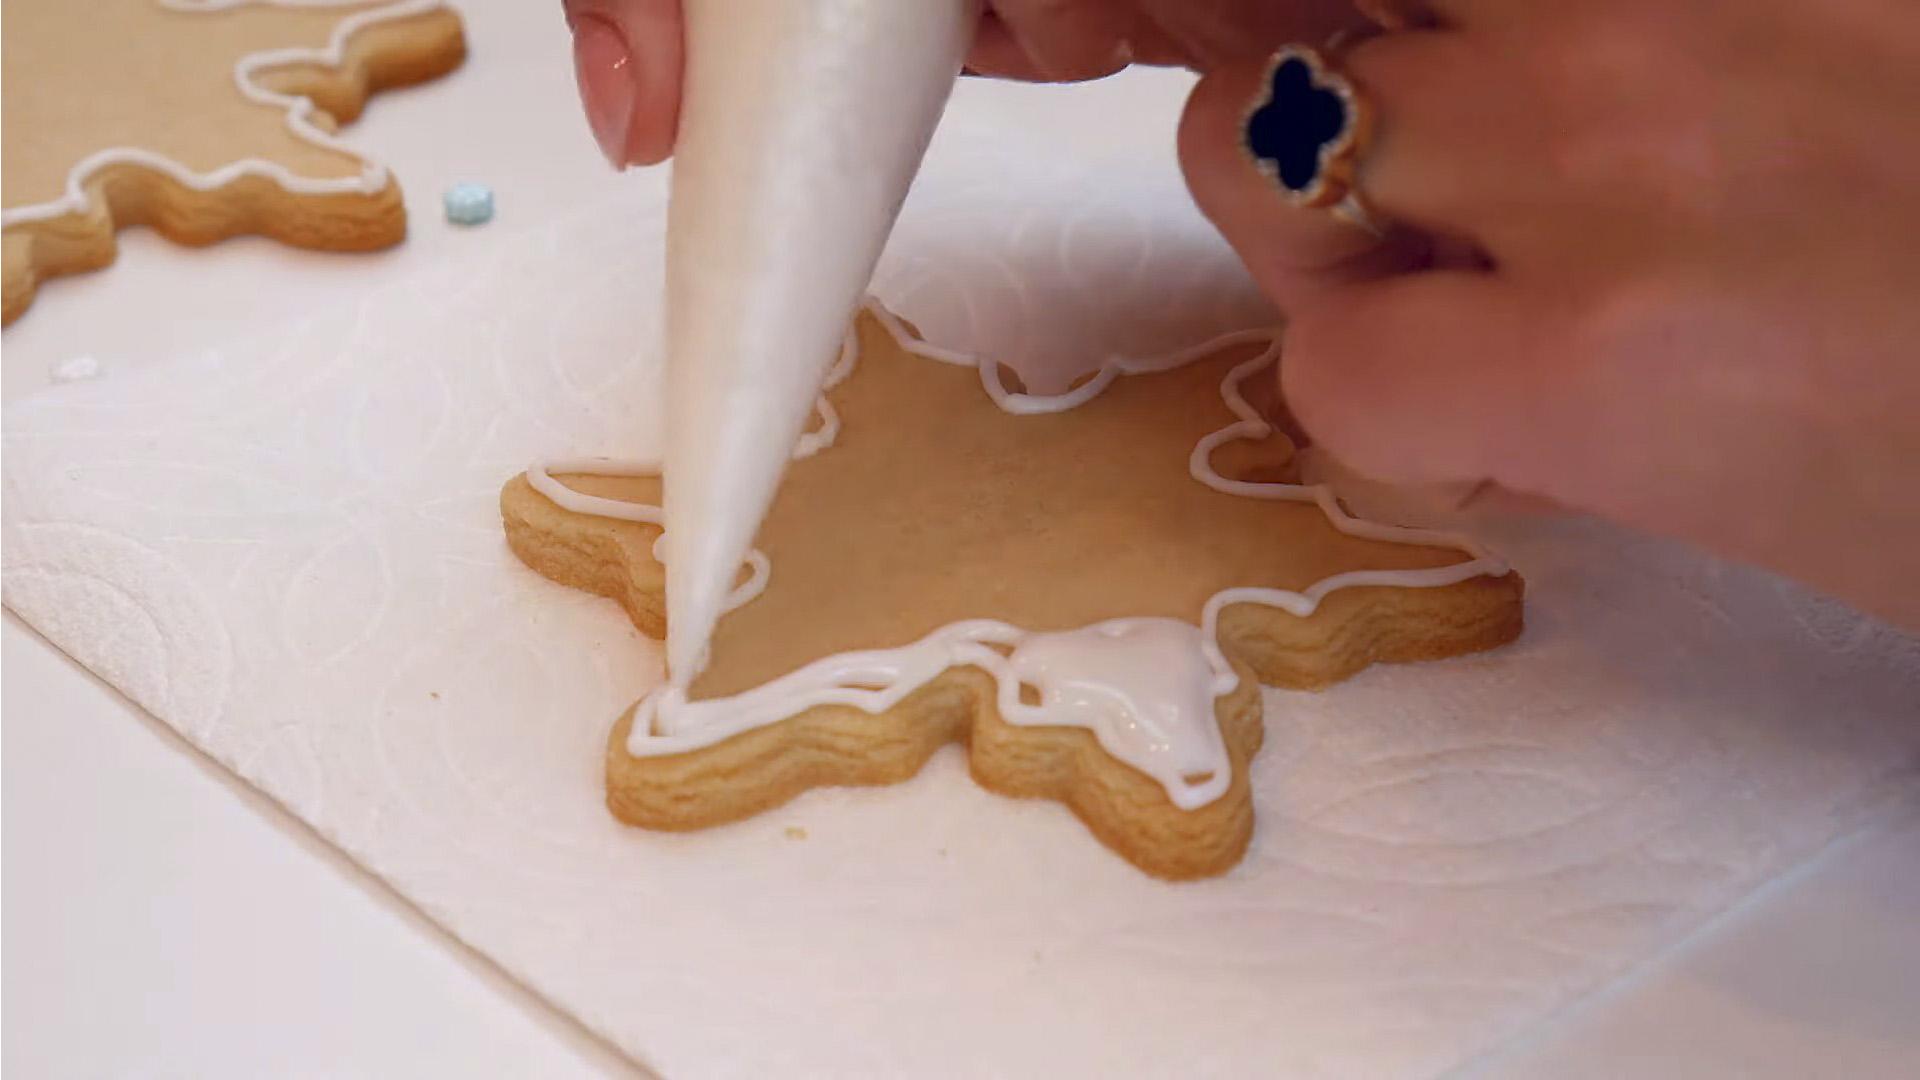
Place the thick glaze into a pastry bag and use it to draw the outline of a snowflake.
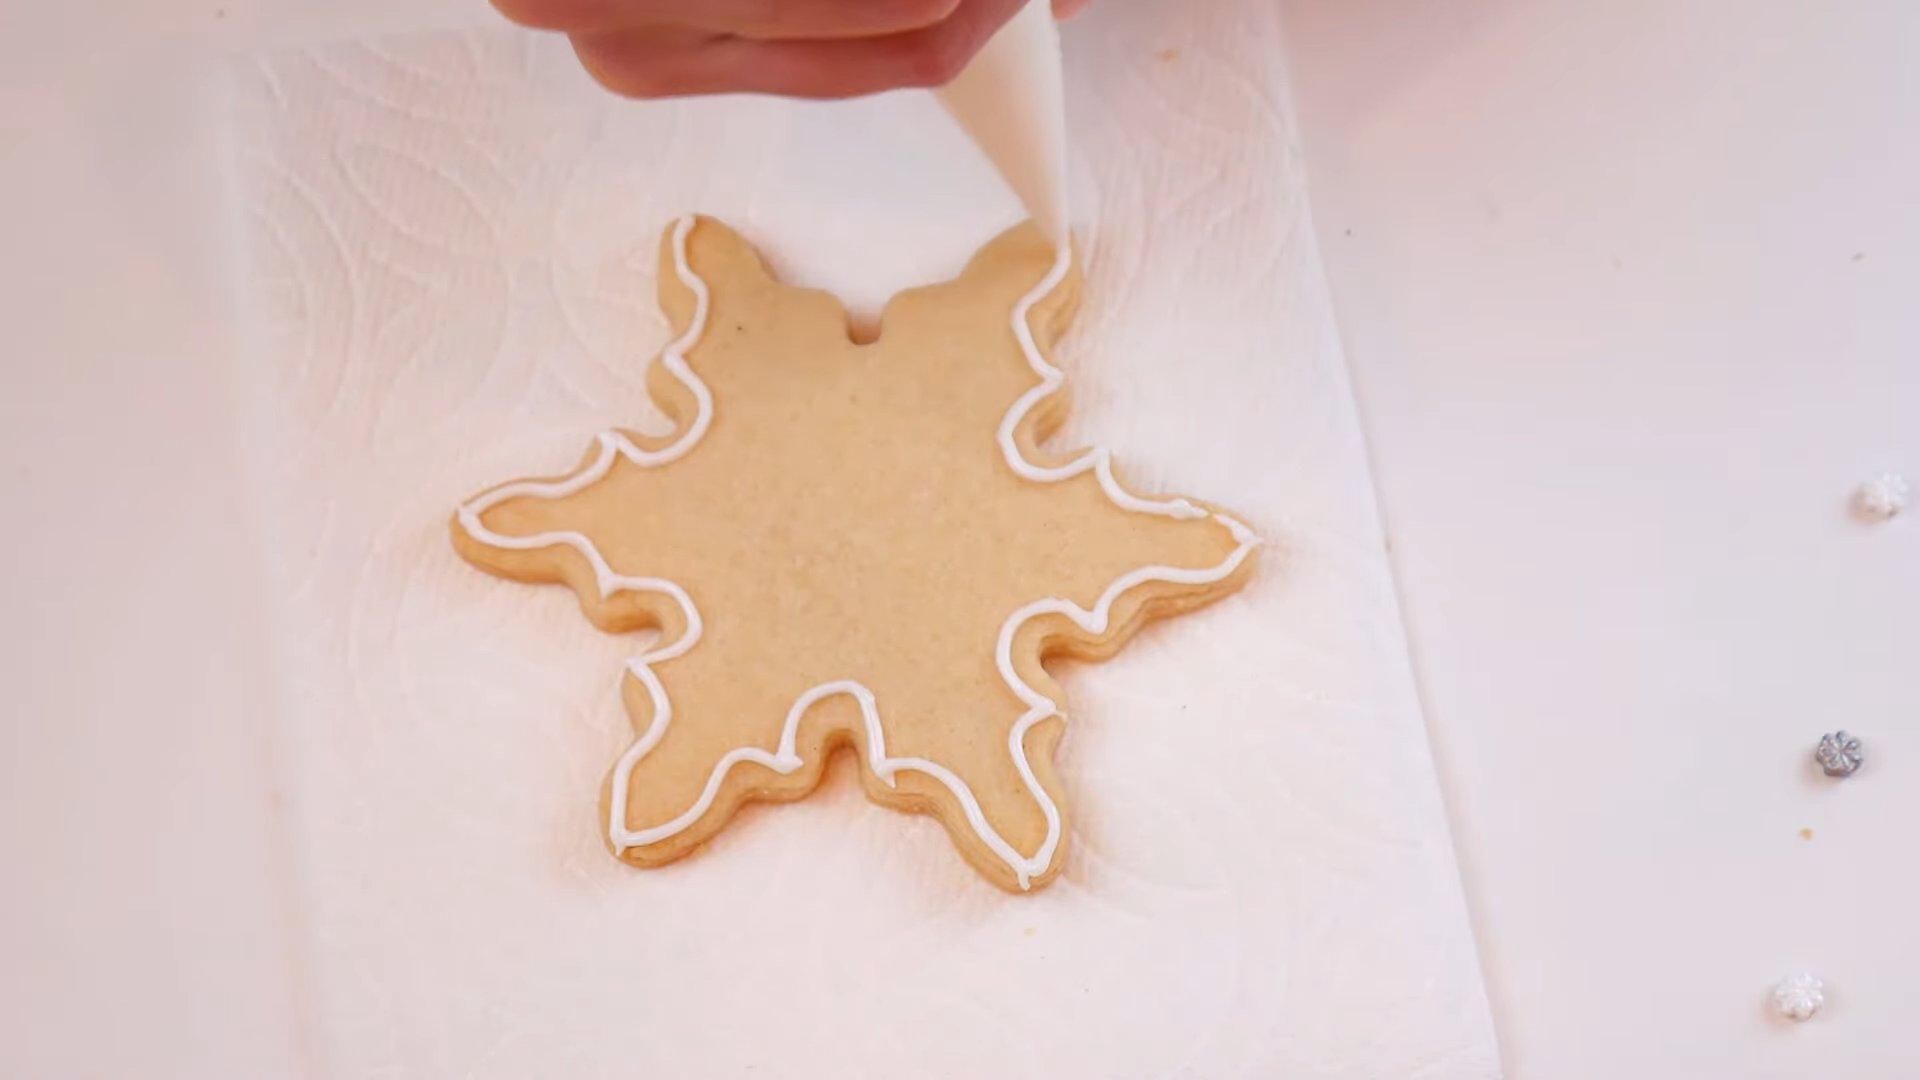
Step 2
Prepare the icing for pouring. Add a little water to the base icing and stir well. The mixture should become less dense, but not runny.
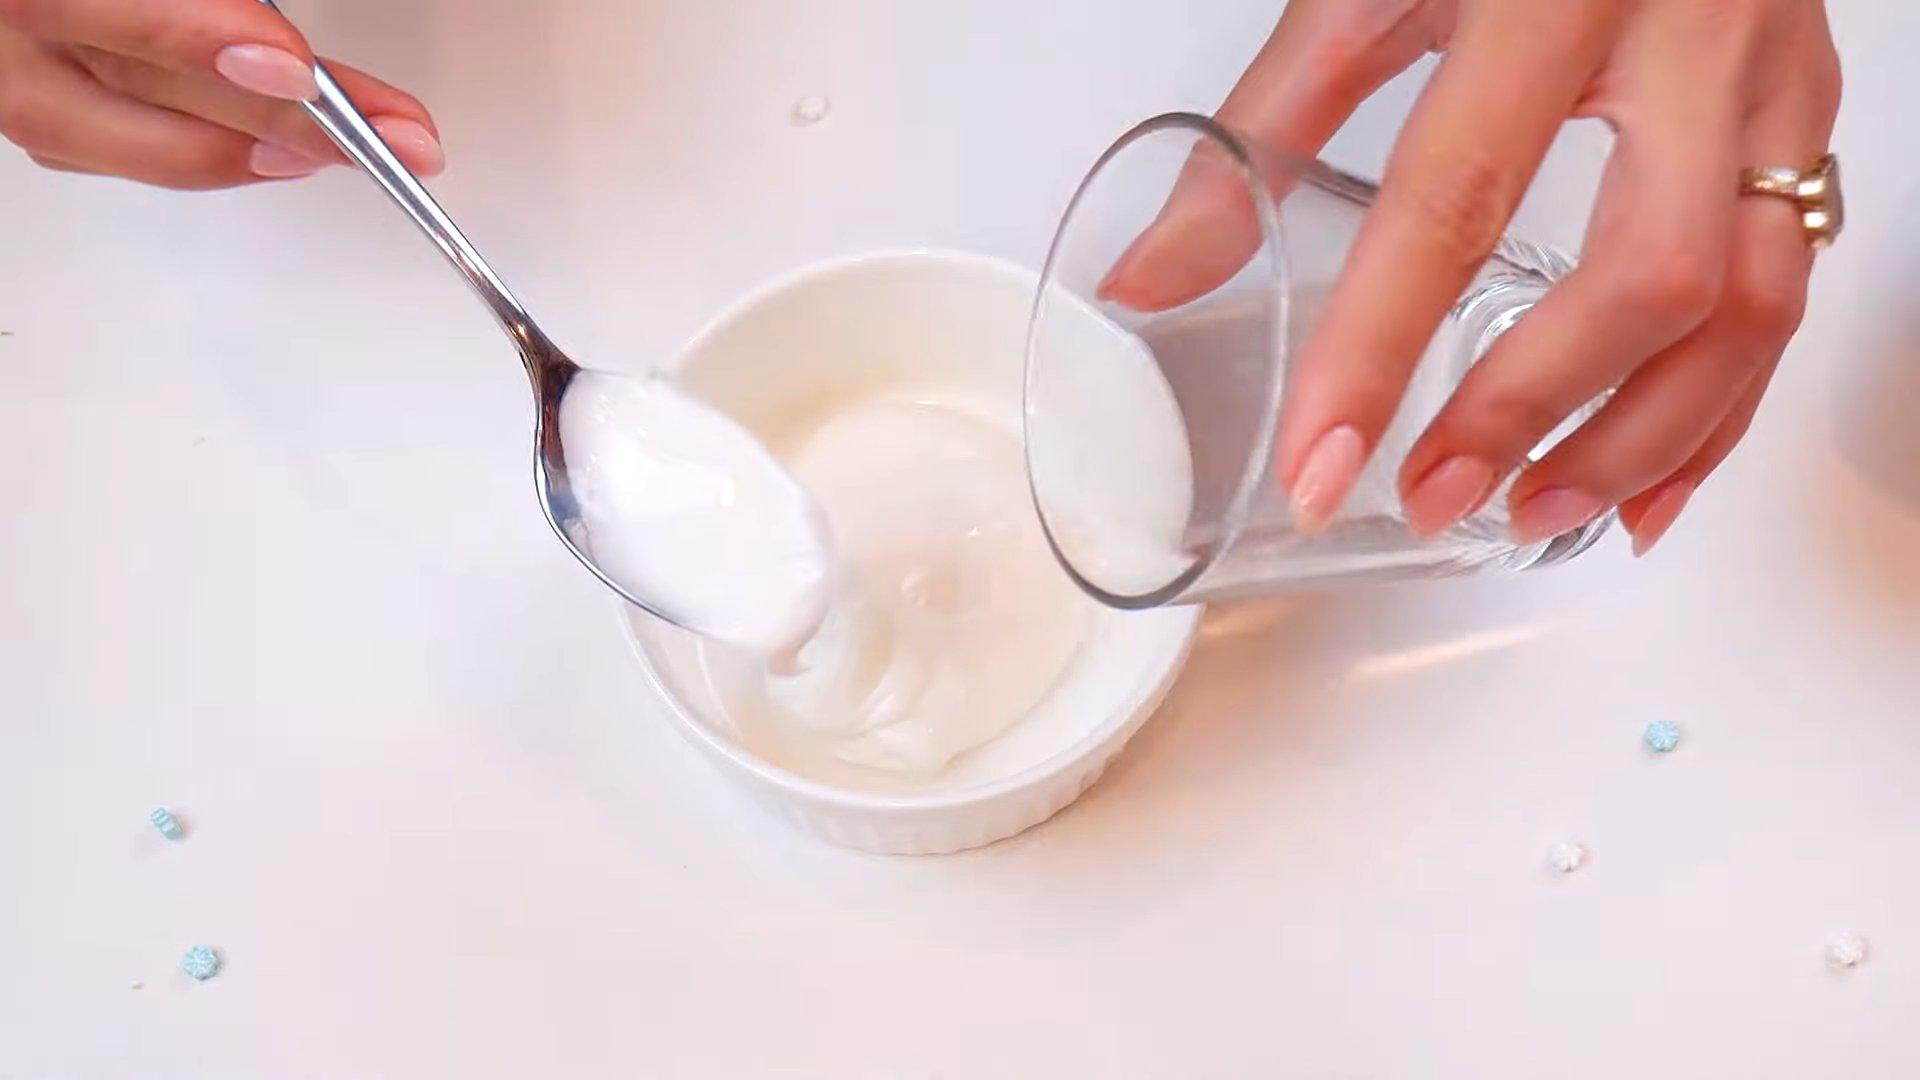
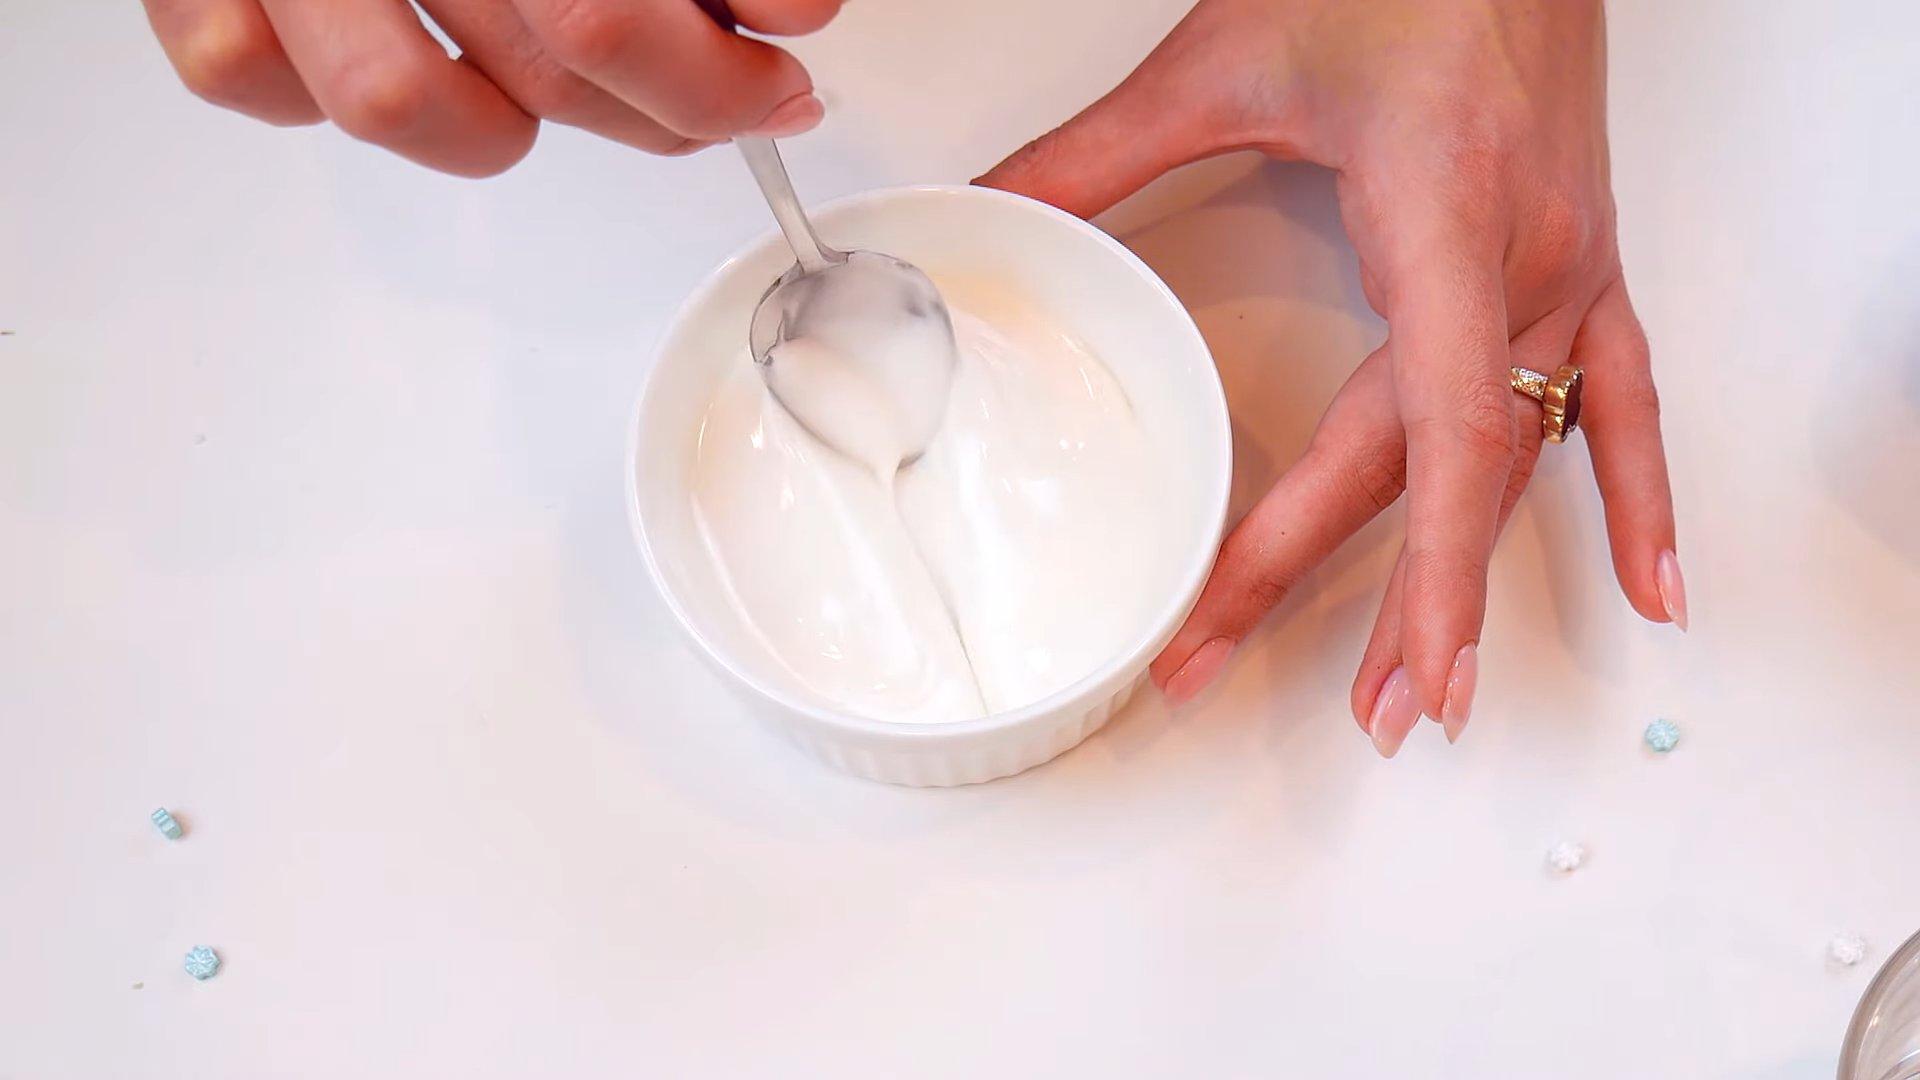
Step 3
Fill the gingerbread with icing.
Step 4
We remove all unevenness and air bubbles using a needle or a toothpick.
Step 5
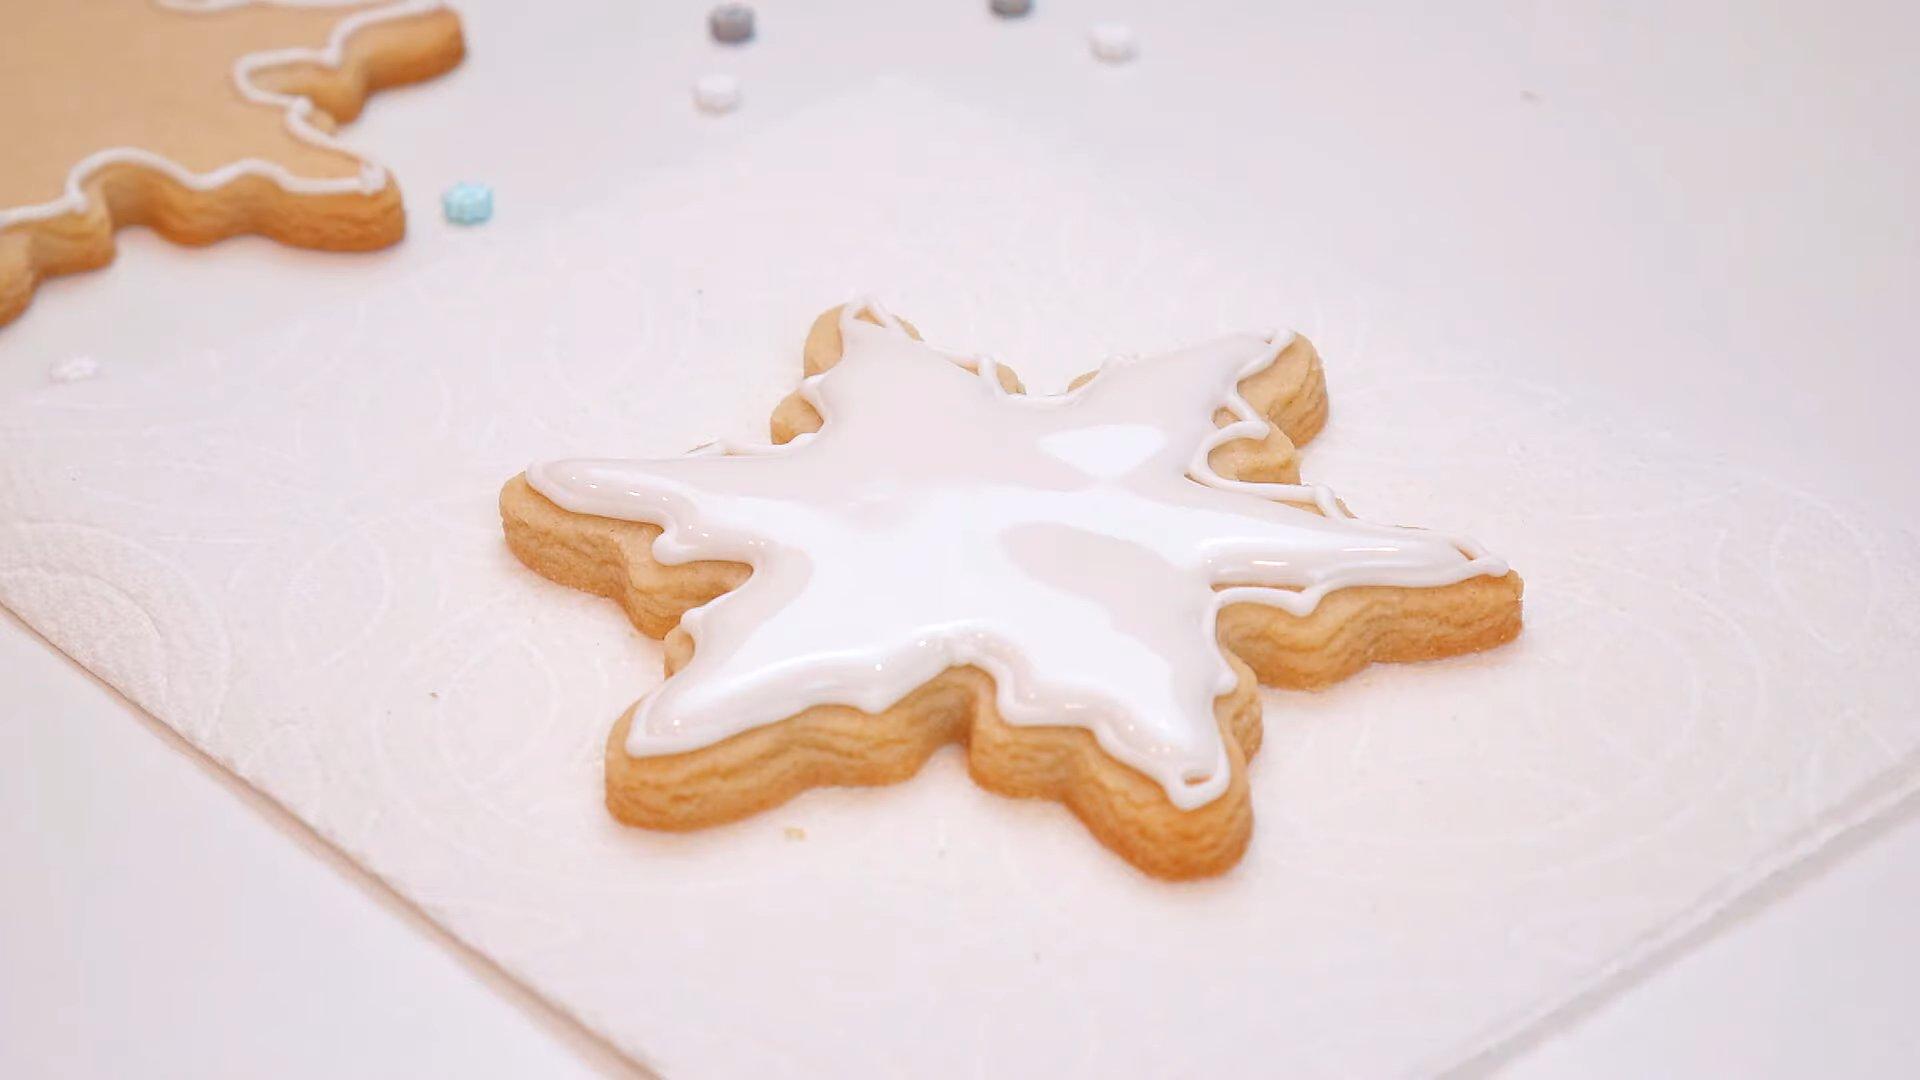
Let the gingerbread dry for about 12 hours. It should become completely paveable.
Step 6
Using the base glaze, draw patterns on the snowflakes.
Step 7
If desired, sprinkle the patterns with sugar.
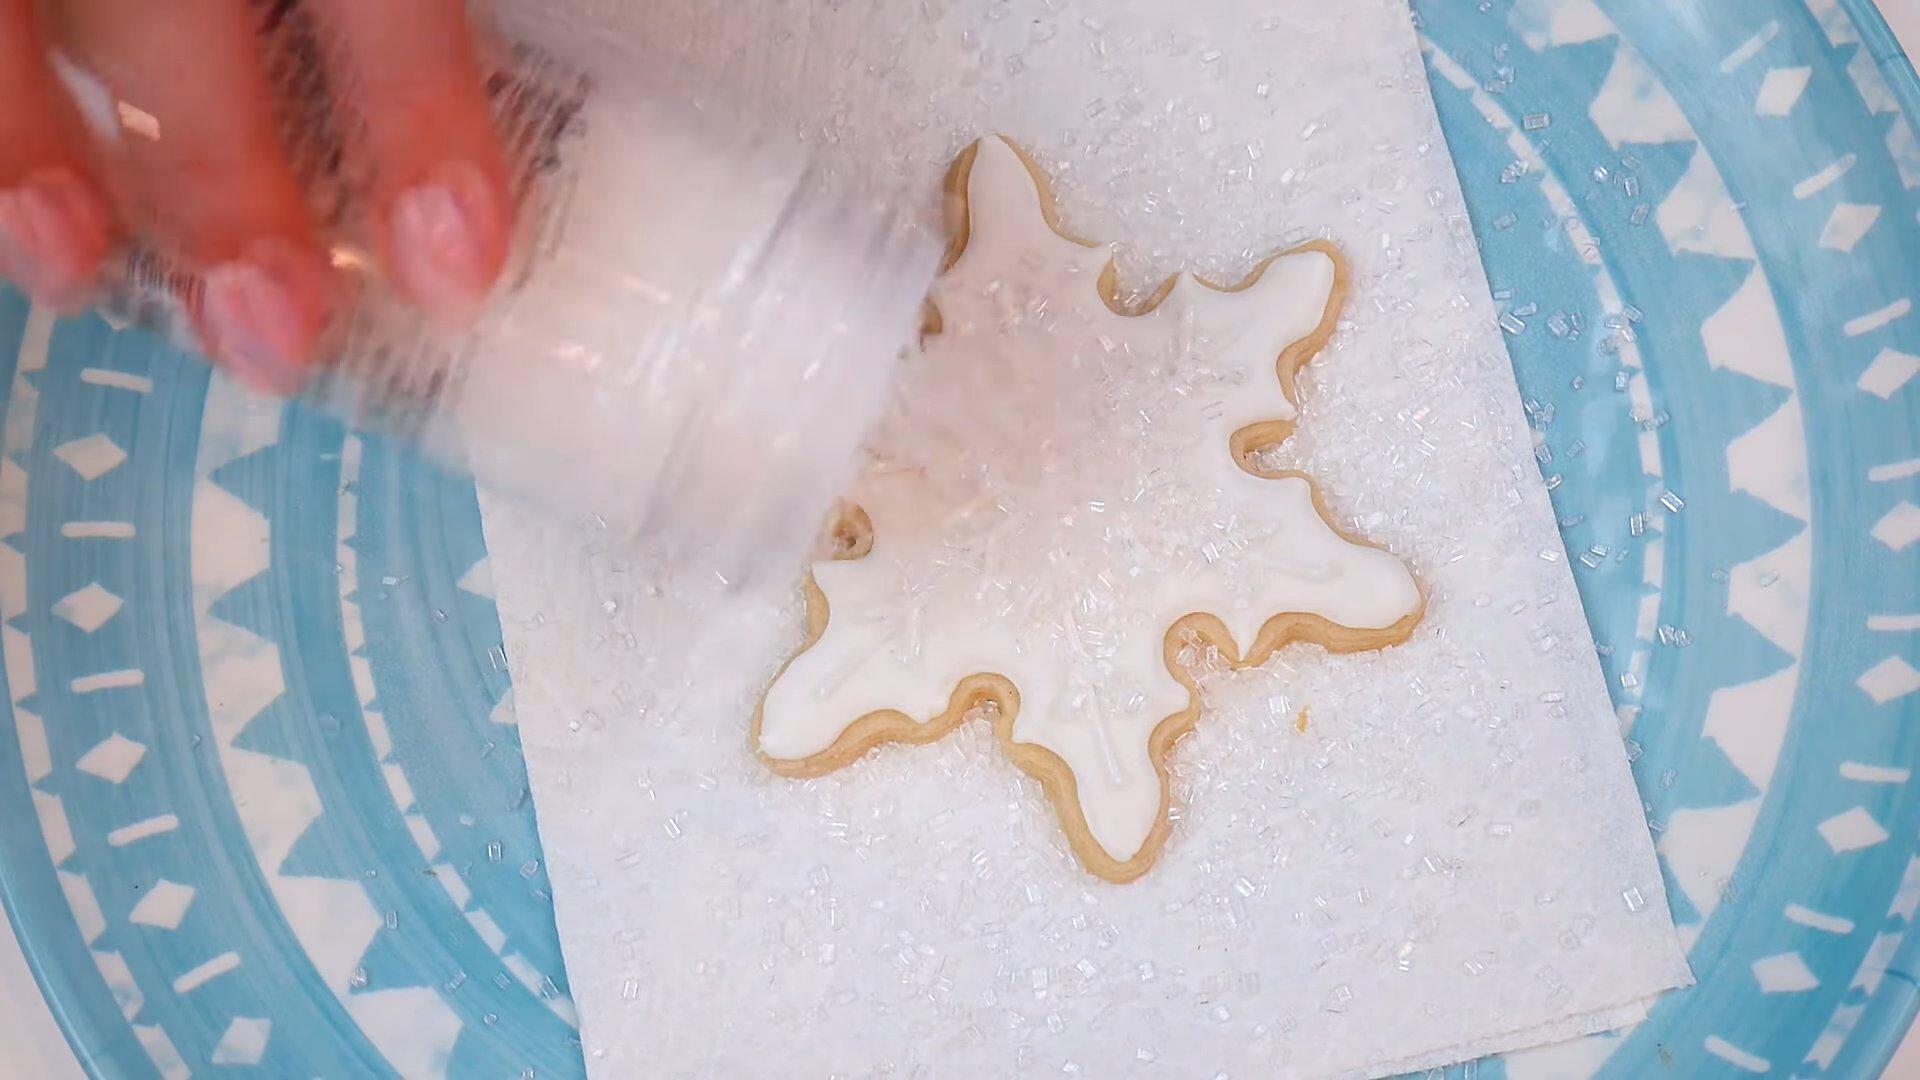
Step 8
Delicate, beautiful and simply charming gingerbread snowflakes are ready.
Video: Masterclass on transferring images onto gingerbread
Want to beautifully decorate gingerbread cookies but lack artistic skills? Then you definitely need to watch this video. It shows several simple techniques for transferring images onto gingerbread. Each one is unique in its own way and will help you achieve stunning results.
The pastry chef demonstrates how to use stencils, transfer printed images and patterns, and a simple piping technique. After watching this video, you'll be able to easily decorate gingerbread cookies at home.