
Cake Pops: A Simple Step-by-Step Recipe
Cake pops Cake pops are desserts with unique shapes and designs, the name of which translates from English as "cake on a stick." By saving the simple step-by-step recipe for cake pops presented on this page, you can easily prepare this unusual holiday treat at home, surprising your guests with this ultra-fashionable dessert.

- Proteins: 5.8 g
- Fats: 15.5 g
- Carbohydrates: 38.8 g
- Total time:
- Time in the kitchen:
-
Complexity:
It's easy and straightforward to prepare, but it does require some experience. Not everyone can do it right the first time.
- Number of servings: 20
The Atlanta-based American confectioner Angie Dudley invented the treat known as cake pops. Initially, this unusual lollipop-shaped treat received little attention, but in 2008, it rapidly gained popularity thanks to the interest of many bloggers in the dessert's unusual shape and content.
Like the mega-popular cupcakes, beautifully decorated cake pops (or as they're sometimes called, popcakes) can be the highlight of any celebration for children and adults. These sweet treats are especially popular at events with a large number of guests, as the dessert is individually portioned and compact.
Homemade cake pops can be very diverse in flavor. The center of such a cake can be made of:
- classic vanilla sponge cake;
- chocolate biscuit;
- colored sponge cake, like for red velvet cake;
- green biscuit, as for decorative moss;
- crushed cookies;
- dough with fruit additives;
- dough with nuts, coconut flakes and other fillings.
These days, you can't find this delicacy in every bakery, as the preparation process is labor-intensive. Ordering a popcake will cost you around 150 rubles per cake, while a custom-designed one (for a special occasion) can cost as much as 300 rubles or more per cake. Therefore, it's worth learning how to make your own pop-ups to delight your loved ones and surprise your guests with unusual treats.
In this simple recipe, we'll show you step-by-step how to make classic cake pops, which are made with airy chocolate sponge cake and condensed milk.
-
Flour250 G
-
Sugar300 G
-
Cocoa50 G
-
Egg C12 pcs
-
Milk270 ml
-
Butter60 G
-
Salt1 tsp
-
Soda1.5 tsp
-
Apple cider vinegar1 tbsp
-
Vegetable oil60 G
-
Condensed milk3 tbsp
-
White chocolate100 G
-
Wooden skewersfor filing

To make a soft, airy dough, first sift 250 grams of flour and 50 grams of cocoa through a sieve, thoroughly breaking up all the lumps.

Add 1 teaspoon of salt, 1.5 teaspoons of soda, 300 grams of sugar to the flour and mix thoroughly with a whisk.

Beat 2 room temperature eggs (yolks + whites) into the dry ingredients and mix well again with a whisk.

Add 60 grams of vegetable oil and 60 grams of softened butter to the mixture. Mix thoroughly until smooth.

Add 270 ml of milk and mix until the dough becomes smooth.

Add 1 tablespoon of apple cider vinegar to the dough and beat the mixture with a mixer.

Pour the dough into pre-prepared molds (ours have a diameter of 20 cm) and place in the oven.

Finished sponge cakes can be cooled directly in the pans. Natural cooling typically takes about 2 hours.

Step 2 – Prepare the pop-cake filling
If the sponge cake has dried out slightly during storage, trim off the top layer and bottom of the cake. A fresh, unburned cake can be used in its entirety.

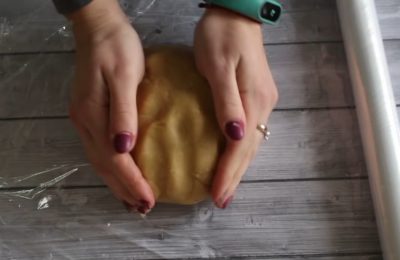
Break the cakes into pieces and crush into crumbs using a blender or chopper.

Add a few spoons of condensed milk to the crumbs and mix the mixture thoroughly until smooth.


Prepare the balls that you will later use to make popcakes and place them in the refrigerator for about 30 minutes.

Step 3 – Decorating the cakes
While the cookies are cooling, you can prepare the chocolate glaze for decorating them. To do this, melt 100 grams of white chocolate or confectioners' glaze in the microwave using short bursts.

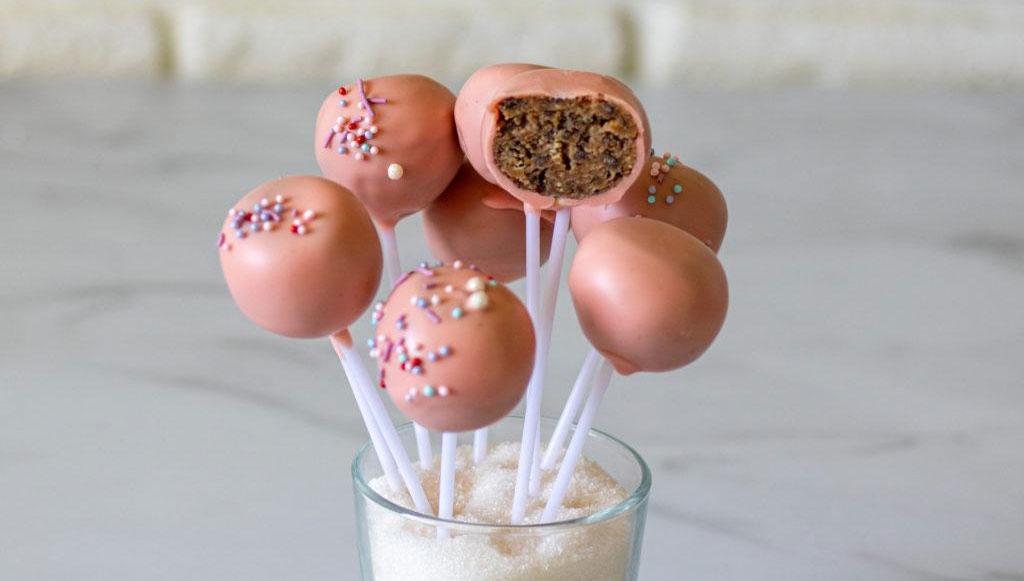
Dip a wooden skewer or plastic stick into the chocolate and insert it into the ball, about halfway down, as shown in the photo. Since the balls are well chilled, the glaze will set immediately, securing the ball to the stick.

Repeat the procedure with each piece and put the balls back in the refrigerator for 15-20 minutes.

Remove the cooled cakes from the refrigerator and dip them one by one into the chocolate. After allowing the excess chocolate to drip off, arrange the cakes in a convenient position for drying. We use Styrofoam for this, as it easily accommodates any skewers.

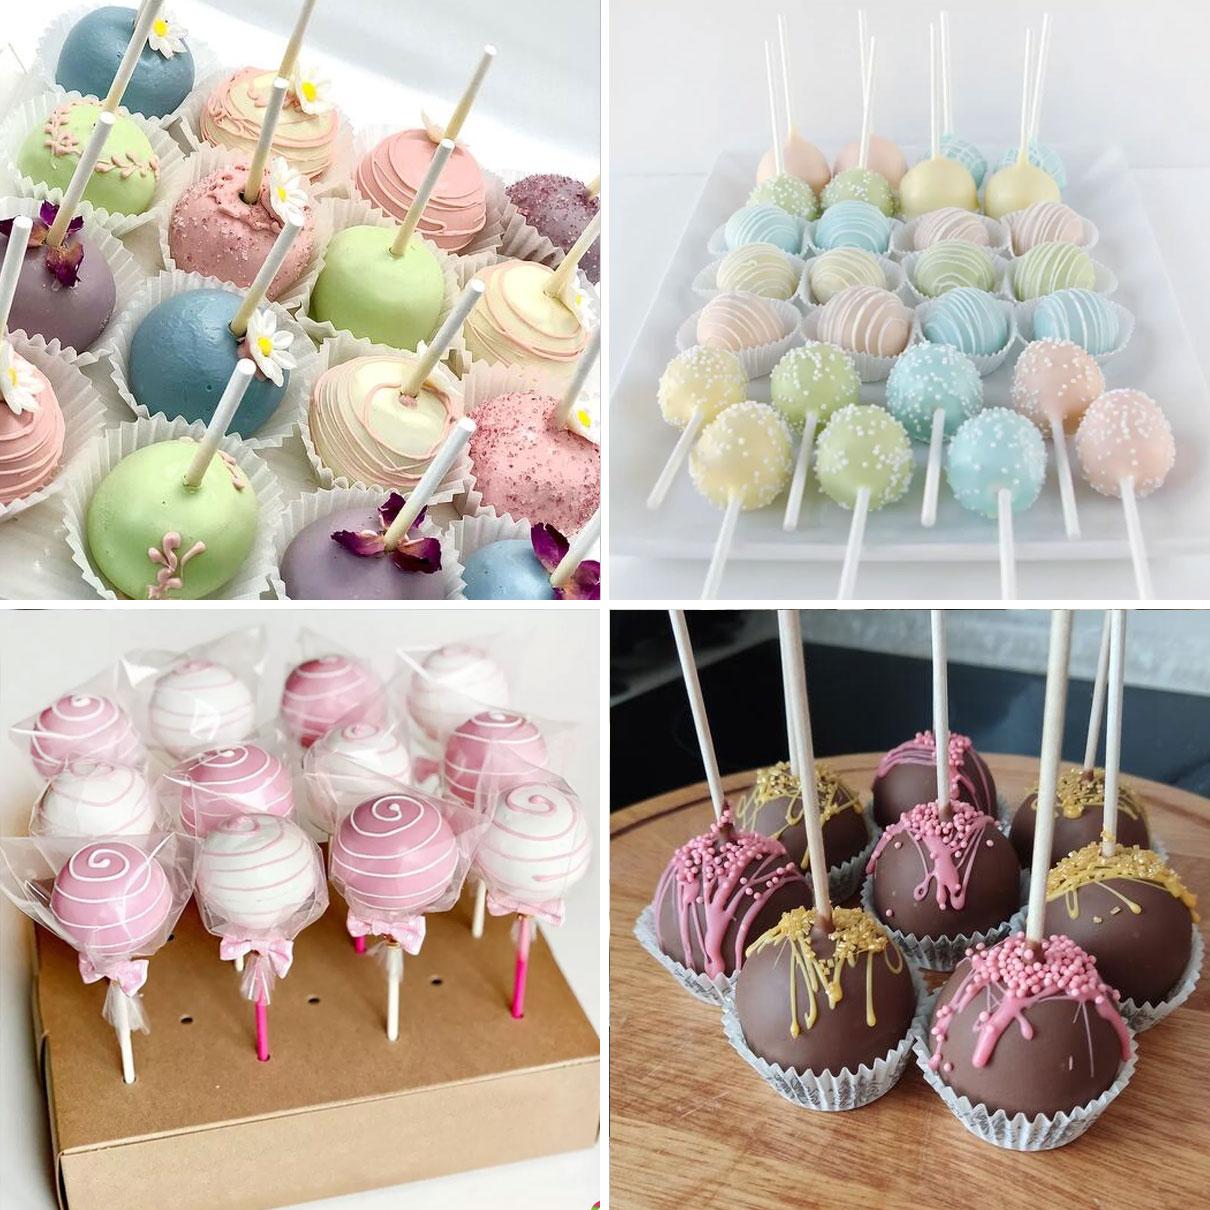
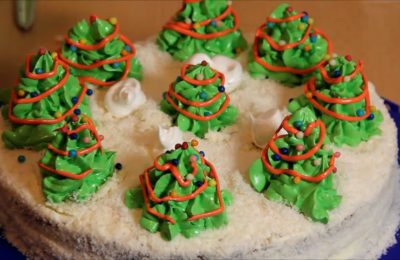
The final step is decorating the cake pops. You can create any design you like in the photo. We simply smeared chocolate drips onto the cooled surface and added a few sprinkles.
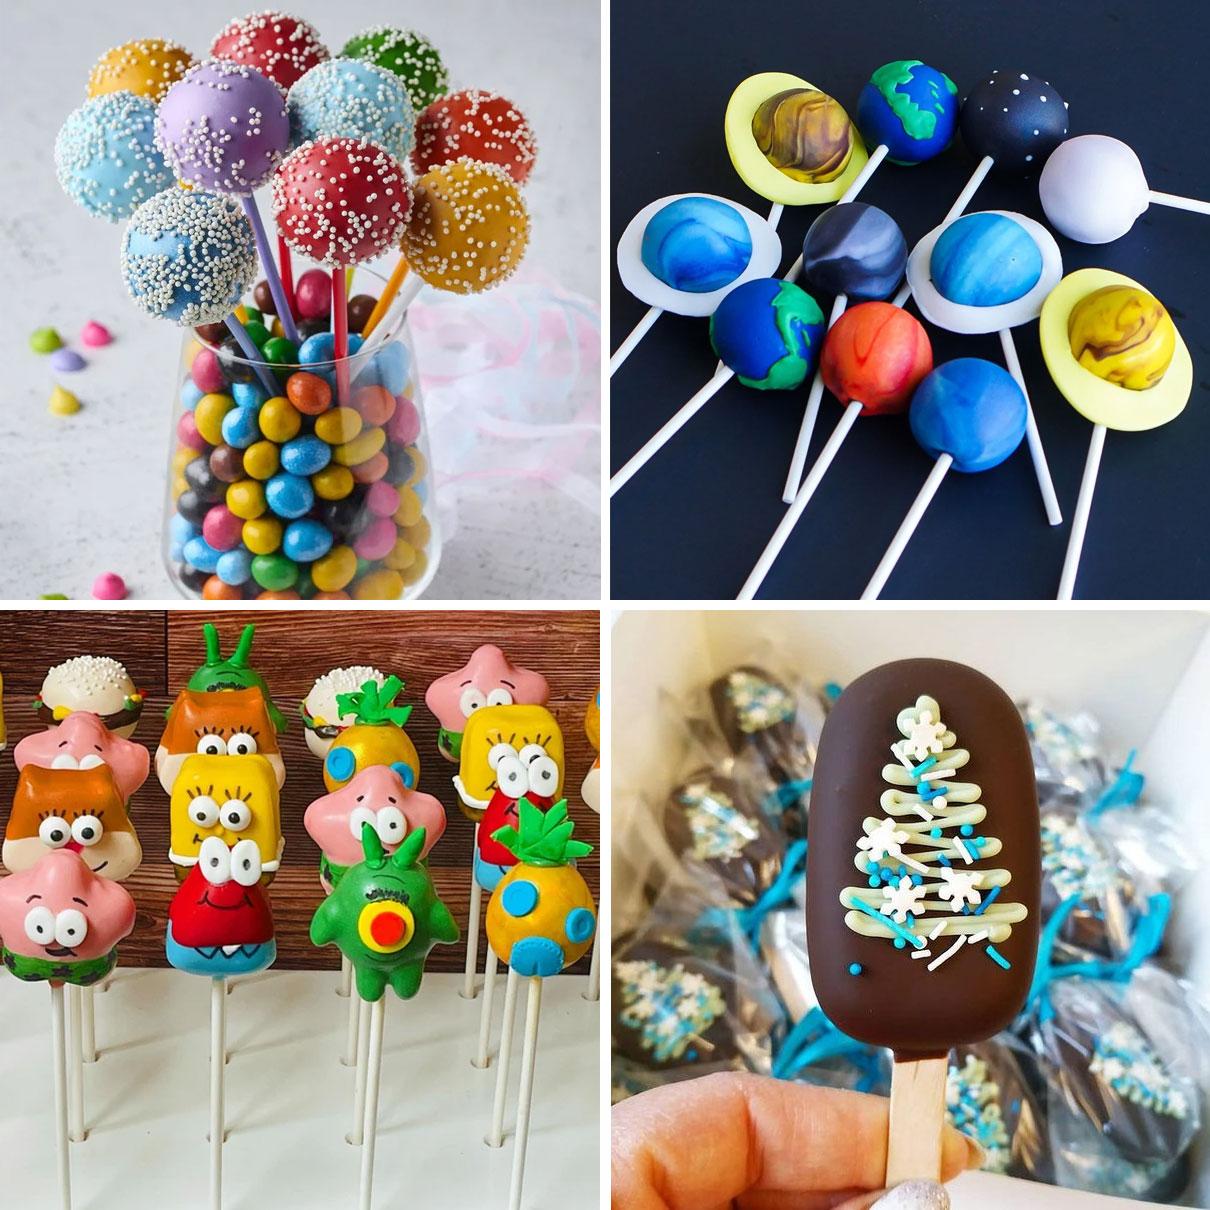
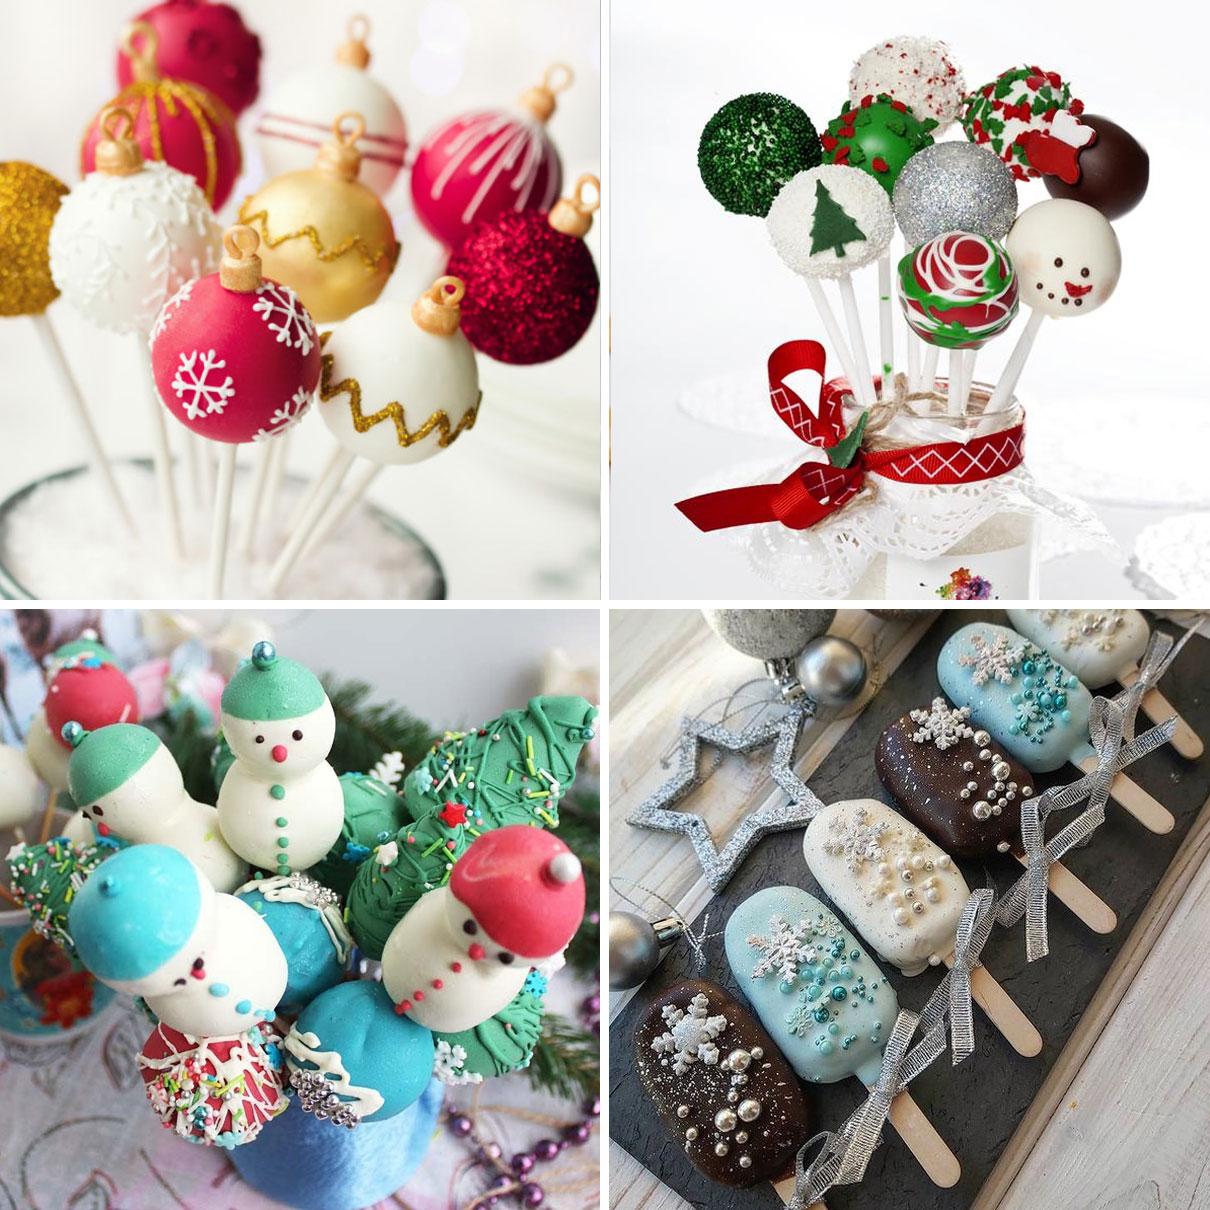
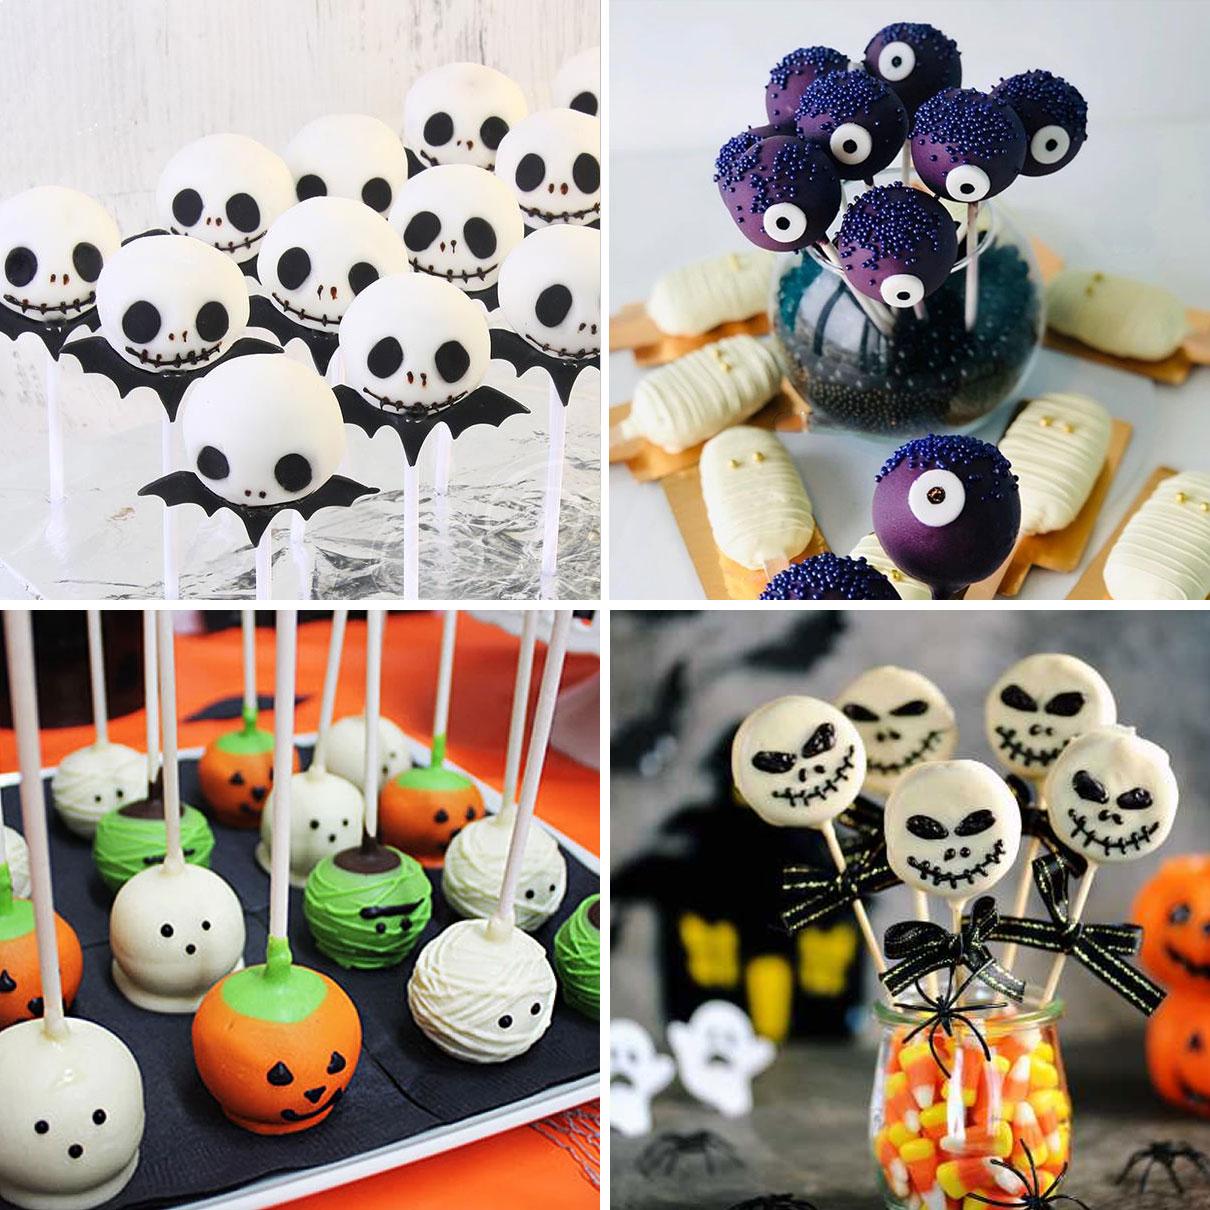
You can see the unique cake pops in these photos. You can find many more ideas online for decorating these cakes for Halloween, New Year's, children's parties, anniversaries, and weddings.
We also offer you another original cake pop recipe using sponge cake and cream cheese. Watch the master class from Yulia Small:
An alternative is to make cake pops using a mold, using a classic sponge cake recipe. Watch this video to learn how to use a special silicone mold for baking sponge balls:
- 50 min
- 222 kcal
- 269
- 25 min
- 336 kcal
- 488
- 1 hour 15 minutes
- 6.3 kcal
- 738
- 50 min
- 227 kcal
- 726

- 1 hour 30 minutes
- 336 kcal
- 358
- 20 min
- 191.3 kcal
- 346

- 50 min
- 0 kcal
- 267

- 40 min
- 120 kcal
- 562