
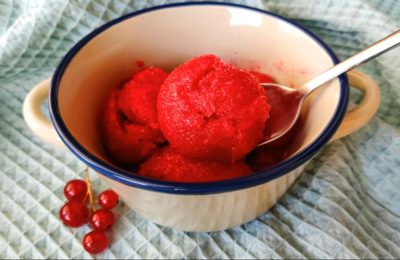
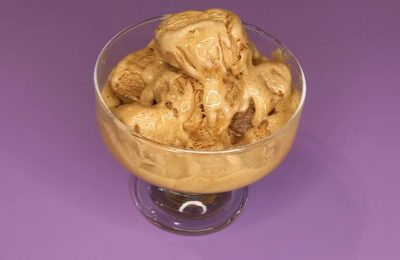
Creamy ice cream according to GOST standards, just like in the USSR
Soviet "Plombir" ice cream was one of the most beloved street treats among Soviet children and adults. Regardless of the season, this milk-based delicacy was always popular. Today, I suggest making authentic Soviet ice cream at home, just like you did in childhood.

- Proteins: 4.6 g
- Fats: 7.5 g
- Carbohydrates: 24.3 g
- Total time:
- Time in the kitchen:
-
Complexity:
A simple recipe.
-
Number of servings:
1 600 grams of ice cream
Ice cream was highly prized in the USSR. It was one of the most affordable foods for the average person, and therefore a favorite. It's hard to say exactly what it was that won the hearts of millions of Soviets: its low price, its naturalness, or its taste. Whatever the case, Soviet ice cream production was at a very high level.
In 1945, a specialized ice cream laboratory was established in Moscow at the Refrigeration Research Institute. Ice cream parlors were located on the main streets of resort towns and regional centers. Their selection was limited, but the delicious treat at an affordable price always attracted many eager customers.
-
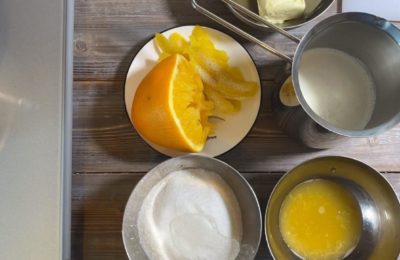
Cream 33%500 ml
-
Milk160 ml
-
Sugar150 G
-
Egg yolk2 pcs
-
Vanillin1 pinch

Pour milk into a saucepan, add vanilla and about 100 g of sugar.

Place the saucepan and contents on the stove. Bring the mixture to a simmer, but do not boil. Remove from the heat and let cool slightly.

Separate the yolks from the whites. Add the remaining sugar to the yolks and lightly whisk everything together.

Pour the hot milk into the yolk mixture in a thin stream. Whisk the yolks vigorously to prevent them from curdling.

Pour the mixture into a saucepan. Place on the stove. Stirring thoroughly, bring the mixture to a slight thickening.

We check for readiness as follows: draw a line on the back of a spoon - if a clear mark remains, the mixture is ready.

Strain the mixture through a fine sieve to remove lumps. Let cool completely to room temperature.

Remove the chilled cream from the refrigerator. Before you begin, you can pour it directly into a whipping bowl. You can also place the whisk paddles in the refrigerator. Whip the cream until it forms stiff peaks.

Add the cooled yolk cream to the whites in portions, mixing well after each addition.

Place the bowl of ice cream in the freezer for 2–3 hours, stirring every 40 minutes.

When the mixture reaches the consistency of soft ice cream, pour it into molds. Place the molds in the freezer for a few hours until the ice cream hardens completely.

The ice cream just like from childhood is ready! Enjoy!
Design and submission
If we prepare ice cream like in the USSR, then we should serve it like they did in Soviet cafeterias.
The servings were small—only 50 to 100 grams. It was served in tall-stemmed glass bowls. The ice cream was stored in containers on the counter, but even the average barmaid knew how to make it. do from the cold mass the perfect ice cream ball.
Enjoying a creamy ice cream was a true joy for any Soviet citizen, and if you could ask for a topping at a café, you were overjoyed. Chocolate topping, liquid caramel, fruit, and nuts were the most common options. Most importantly, all the ingredients were completely natural, meaning they were safe for the body.
How to thicken egg mixture without ruining it
According to the rules, the egg mixture must be heated to a temperature of approximately 80 degrees Celsius (Steps 5, 6) so that the yolks undergo the sterilization stage.
It is not recommended to heat above 82 ͒C, so that the yolk does not bake and the cream does not turn into omelet grains.
Adviсe
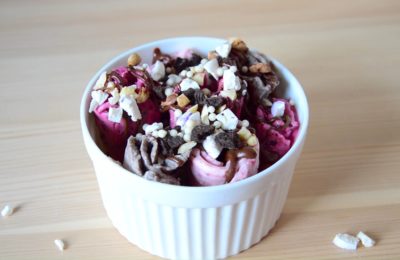
- Creamy ice cream can serve as the base for any fruit or berry ice cream. Add jam or berry sauce at the end to create "Plombir" flavors like cherry, strawberry, banana, and more.
- To make chocolate ice cream, add 125ml of coffee to the egg mixture.
- Want to enhance the creaminess of your ice cream? Add whole condensed milk to the mixture just before freezing.
- You can add a shot of alcohol (rum, brandy, whiskey, or even vodka) to the ice cream. This will give the dessert a new, more adult flavor. The alcohol will soften the ice cream's texture, so you can skip the 40-minute stirring step for the first three hours.
- 4 hours 20 minutes
- 81.8 kcal
- 1576
- 3 hours
- 258.1 kcal
- 8834
- 2 hours 10 minutes
- 336.9 kcal
- 2957
- 5 min
- 150.4 kcal
- 415
- 6 hours 20 minutes
- 196 kcal
- 2538
- 3 hours
- 141.4 kcal
- 5227
- 40 min
- 362 kcal
- 599
- 2 hours 30 minutes
- 341 kcal
- 3579