
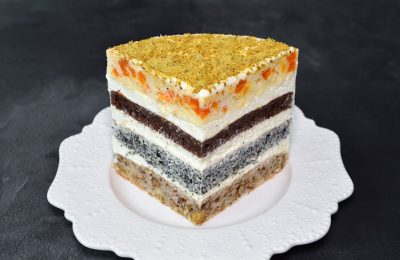
Ladyfingers Cake: A Classic Step-by-Step Recipe
Ladyfingers Cake – a delicate and beautiful dessert straight out of childhood. Using this classic step-by-step recipe with airy profiteroles and light sour cream, you can easily prepare this holiday treat at home.

- Proteins: 3.6 g
- Fats: 12.3 g
- Carbohydrates: 29.9 g
- Total time:
- Time in the kitchen:
-
Complexity:
It's easy and straightforward to prepare, but it does require some experience. Not everyone can do it right the first time.
- Number of servings: 10
According to legend, the "Ladyfingers" cake was invented over 900 years ago (approximately between 1051 and 1081) by the court pastry chef of the King of France. He was inspired by the graceful hands of Bertha of Savoy. However, the original French recipe used strips of Savoy sponge cake (similar to the popular Savoiardi biscuit).
The recipe came to Russia in the 18th century. Empress Elizabeth was so impressed by the dessert served at the court of Louis XV that she bought the court chef who prepared the cake and brought it back with her so she could enjoy exquisite French sweets at home.
Today we'll make that classic Soviet-era "Ladyfingers" cake, the recipe for which was written down in every cookbook. Making the dessert at home is quite simple (without the need for expensive professional equipment). The ingredients listed will make a large cake weighing approximately 1.9 kg and measuring 24 cm in diameter.
-
Egg C17 pcs
-
Flour225 G
-
Water375 ml
-
Butter150 G
-
Salt1 pinch
-
Sour cream 20%1500 G
-
Powdered sugar350 G
-
Vanilla sugar10 G
-
Dark chocolate30 G
-
Butter14 G
-
Nuts50 G
-
Fruits and berries for filling and decorationas desired

Place 1,500 grams of regular 20% fat sour cream in cheesecloth and hang it in the refrigerator (or simply place it in a colander) to drain the excess liquid overnight. 1,500 grams of regular sour cream yields, on average, 1,100 grams of thick, weighed sour cream, which is used in many recipes.

Step 1 – prepare the choux pastry sticks.
Pour 375 ml of water (1.5 cups with a capacity of 250 ml) into a saucepan, add 15 grams of softened butter and a pinch of salt.
Place on fire and bring to a boil.

Add 225 grams of sifted flour to boiling water with butter and begin to vigorously knead the dough, continuing to heat over low heat.

Continue to cook the dough, kneading it with a spatula, until it begins to form a homogeneous elastic lump.

Transfer the base to a bowl and let it cool until warm enough to continue working with the choux pastry.

Add 7 eggs (yolk + white) to the dough gradually, mixing each one thoroughly before adding the next one.

As a result, you should get a soft, elastic, homogeneous choux pastry.

Grease a baking sheet with butter (or margarine). You can use parchment paper or a silicone baking mat.

Place the dough in a pastry bag and pipe strips of dough onto a baking sheet.
The remaining dough must be stored in a pastry bag or covered with plastic wrap.

As a result, you should get golden brown sticks like in the photo.
Repeat steps 9-10 until you have used all the dough.

Step 2 – prepare the sour cream.
Place 1100 grams of weighed sour cream into a mixing bowl and sift 350 grams of powdered sugar through a sieve, thoroughly kneading all small lumps.

First, mix the mixture with a spatula (to prevent the powder from rising into the air), and then beat with a mixer until you get a smooth, soft cream.

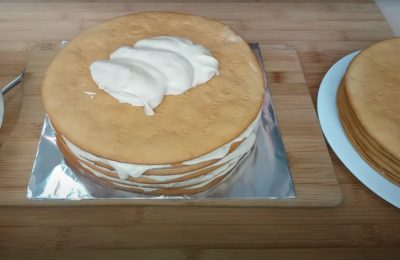
Place a 24cm diameter culinary ring on a dish, line the inside with parchment paper or insulate with acetate film, and spread the first layer of cream.

Roll each stick in cream and place it in a layer in the mold, trying to press the pieces together as tightly as possible.

Sprinkle the layer of sticks in the cream with chopped nuts.
If desired, you can use any kind of nuts here: peanuts, hazelnuts, almonds or others.
You can also add chocolate chips, coconut flakes, or berries at this stage.

We spread the layer of sticks with cream, trying to fill all the gaps.

Repeat steps 14-16 twice more, creating three layers of choux pastry sticks. Cover the top layer well with cream (no nuts), cover with cling film, and refrigerate for at least 2 hours to set.

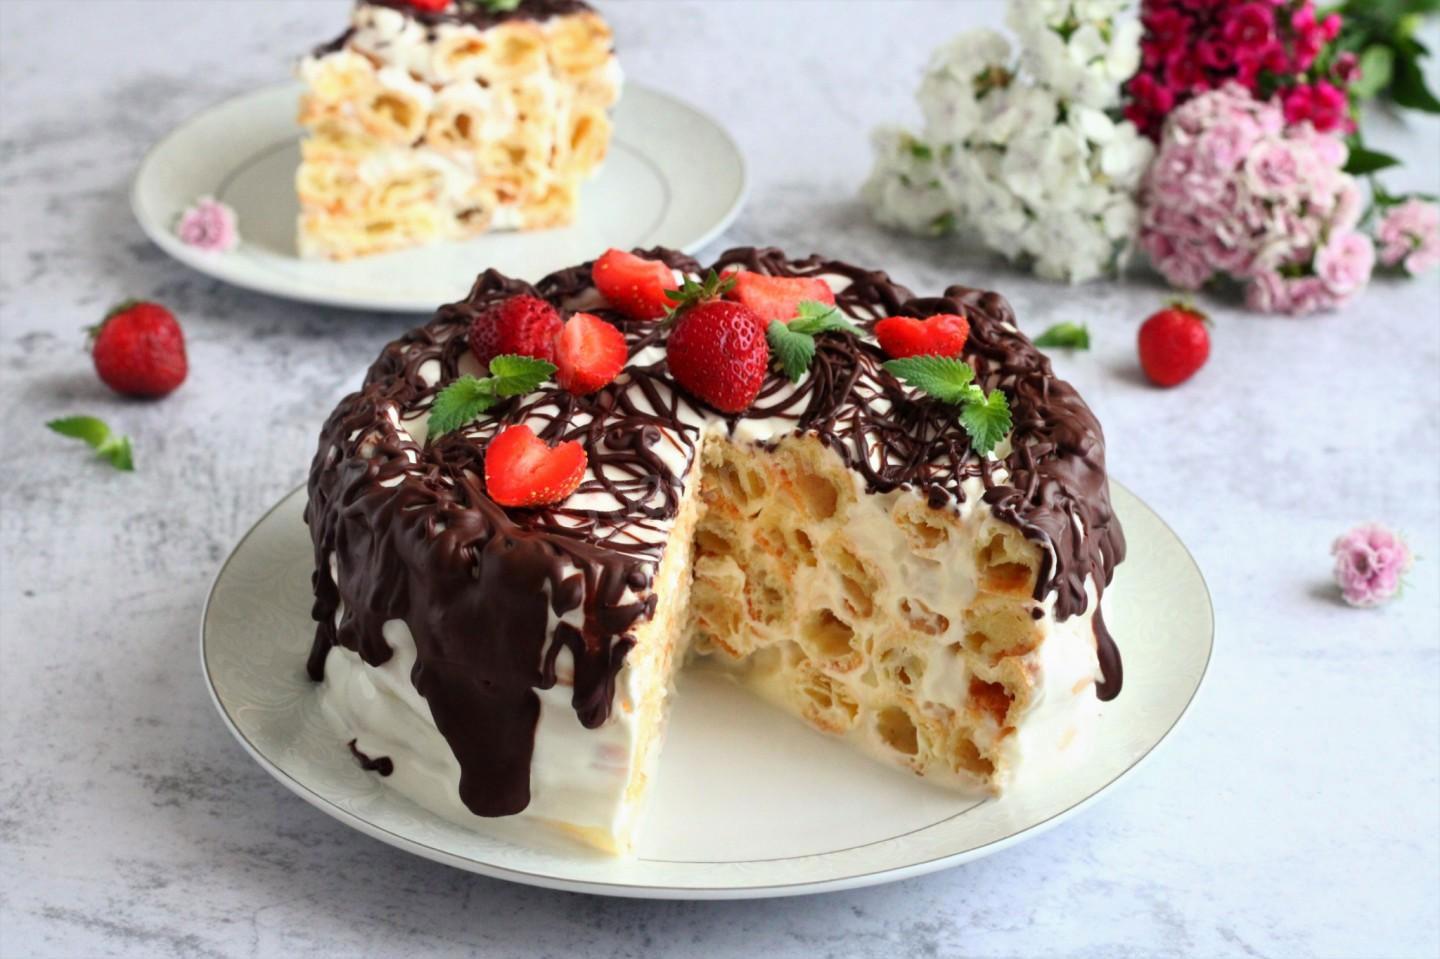
We remove the soaked cake from the mold and begin decorating.
We level the sides and top of the cake with the remaining cream.

For decoration, prepare the chocolate glaze by melting 30 grams of dark chocolate and 15 grams of softened butter in the microwave in short bursts. Mix the melted ingredients until smooth.

Transfer the prepared icing to a pastry bag and decorate the cake with a chocolate lattice, as shown in the photo. Of course, this is the simplest decoration option, but you can come up with your own design and share your results in the comments, along with a photo of your cake.

We also decorate the sides of the cake with chocolate strokes, slightly tilting the cake as we apply the pattern.

We finish decorating with chopped nuts.
We suggest trying Marina Khlebnikova's slightly more complex version of the classic "Ladyfingers" cake, made with a yogurt- and cream-based filling (with added gelatin). This video also provides a detailed description of the choux pastry process:
Try to cook also:
- 5 min
- 208.6 kcal
- 903
- 5 hours
- 288.3 kcal
- 187
- 5 min
- 317.4 kcal
- 606
- 8 hours
- 396.8 kcal
- 6265
- 1 hour
- 268.8 kcal
- 853
- 20 min
- 176 kcal
- 5494

- 1 hour
- 130.4 kcal
- 24116

- 20 min
- 78.6 kcal
- 1383