
Esterhazy Cake: A Classic Step-by-Step Recipe
Esterhazy – an incredibly delicious cake that combines the exquisite nutty flavor and the softness of mousseline cream with a hint of cognac. Today, we'll tell you how to make this dessert at home, offering a classic step-by-step recipe with photos and detailed descriptions of each step.

- Proteins: 6.6 g
- Fats: 26.6 g
- Carbohydrates: 32.9 g
- Total time:
- Time in the kitchen:
-
Complexity:
For experienced cooks. Special equipment may be required.
- Number of servings: 8
The Esterházy cake is believed to have been invented around 1847 by a member of the Hungarian family of the same name. Legend has it that Prince Pál Antal Esterházy himself is the creator of this unusual treat, but there is no reliable evidence to support this claim. Regardless, the recipe is a family heirloom, and since the Hungarian lands were part of Austria at the time, the Austrians also consider the cake their own.
To bake Esterházy cake at home using the classic Hungarian recipe, we recommend preparing:
- baking tray;
- siliconized paper or parchment;
- mixer (hand or planetary);
- whisk for whipping and mixing;
- a saucepan with a thick bottom for brewing the cream;
- spatula for mixing dough.
-
Almond flour220 G
-
Sugar220 G
-
Egg whites6 pcs
-
Cornstarch20 G
-
Vanilla sugar8 G
-
Salt1 pinch
-
Egg yolks5 pcs
-
Milk from 3.2%400 ml
-
Sugar125 G
-
Vanilla sugar8 G
-
Cornstarch35 G
-
Butter200 G
-
Cognac1 tbsp
-
Apricot jam50 G
-
Cream 30%35 G
-
White chocolate100 G
-
Dark chocolate25 G
-
Almond petals50 G

Carefully separate the yolks from the whites, making sure not to get any yolk in the whites (otherwise, the whites won't whip properly). The whites will be used for the cake layers, and the yolks for the cream.

Stage No. 1 - prepare the custard base for the muslin cream.
Mix the yolks until smooth.

In a separate container, mix 100 ml of milk, 125 grams of sugar, 8 g of vanilla sugar and 35 grams of starch.

Mix the starch mixture thoroughly with a whisk or mixer to ensure there are no lumps.

Combine the starch mixture and yolks, stirring until the mixture reaches a uniform consistency.

Pour 300 ml of milk into a heavy-bottomed saucepan. Add the egg-starch mixture to the milk and stir thoroughly until smooth.

Make the cream. Place the saucepan with the mixture over low heat and bring to a boil, stirring constantly and vigorously.

Once it boils and thickens, remove the saucepan from the stove and transfer the custard base to another container.

Covering with a lid is not recommended, as contact with air will cause a crust to form on the cream, which can cause problems in the subsequent stages of preparation.

While the cream is cooling, take 200 grams of butter out of the refrigerator, divide it into small pieces, as in the photo, and leave it to warm up.
While the custard base is cooling and the butter is heating, we move on to preparing the cake layers.

Step 2 – prepare the cake layers.
Experienced cooks recommend using the weight of egg whites in the recipe rather than the number of eggs in the recipe when making cake layers. This way, your cake layers will always turn out perfect.

Add a pinch of salt and 8 grams of vanilla sugar to the whites and beat with a hand mixer at high speed until a fluffy white foam appears.
While continuing to beat, gradually add 220 grams of sugar into the protein mixture.

When the protein has acquired the desired volume and elasticity, add 20 grams of corn starch to the mixture.

After adding the starch, beat the mixture for at least another 8 minutes until a fluffy, white, glossy mass forms, as shown in the photo.

At this stage, add 220 grams of crushed almonds to the dough.
If you don't have almonds, you can make the cake with any other nut—Esterházy cakes are made with walnuts, peanuts, hazelnuts, pistachios, or cashews. You can also add several types of nuts. The best flavor is achieved with a combination of 120 grams of almonds and 100 grams of hazelnuts.
Although the classic recipe is for an almond Esterházy cake, the walnut version remains very popular in Hungary.

You can add nuts in 2-3 stages, thoroughly mixing the mixture with a spatula each time until smooth.

On parchment paper (or baking paper), draw circles with a diameter of 20 cm (the number depends on the size of your oven). Use a baking pan of the corresponding diameter as a template.

Spread the dough onto the parchment paper so that it covers the drawn circles to a depth of 5-7 mm. The resulting dough should make 6 layers.
While the first layers are baking, you can prepare the next batch for baking.

While the cakes are still hot, remove them from the parchment paper, trim off any excess edges, and let them cool. If you don't trim the cakes while they're still hot, they'll become dry and brittle after cooling, resulting in uneven edges.

When stacking the cakes on top of each other, be sure to line them with parchment paper.

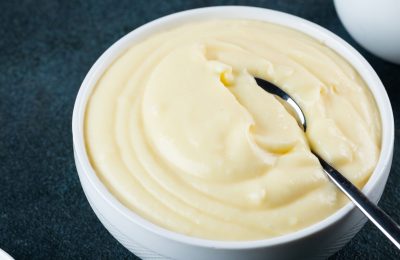
Step 3 – finishing preparing the mousseline cream.
Beat the softened butter with a mixer for 3 minutes.

Add the custard base, cooled to room temperature, to the whipped butter and beat with a mixer until smooth.
You can’t whip this cream for too long, so as not to destroy the structure of the cream.

Add a tablespoon of quality cognac to the cream and mix the mixture again with a mixer.

Step 4 – Assembling the Classic Cake Esterhazy.
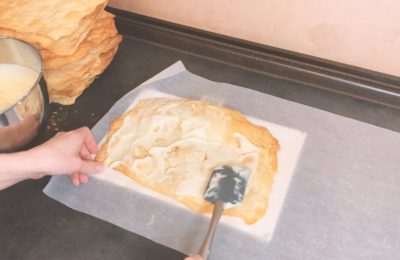
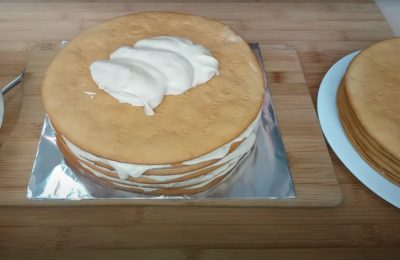
Lightly coat the base on which we'll assemble our cake with cream. This ensures the bottom layer is well-soaked and doesn't remain dry.

The cake comes together very quickly and easily. Simply generously spread each of the six layers with frosting. Make sure to also spread the frosting on the top layer, otherwise it won't soak up the frosting and will be dry.

After frosting the layers, refrigerate the cake for at least 2-5 hours. Ideally, let it sit overnight.

After the cake has been in the refrigerator overnight and has completely soaked, spread the top layer with apricot jam.

Step #5 – Making a classic decoration
Combine 100g of melted white chocolate and 35ml of cream. Mix thoroughly. You'll get a smooth, milky-colored glaze.

Cover the entire surface of the cake with white chocolate glaze.
It's okay if there are some minor uneven spots. Just let the cake sit for a couple of minutes, and the icing will even out on its own.

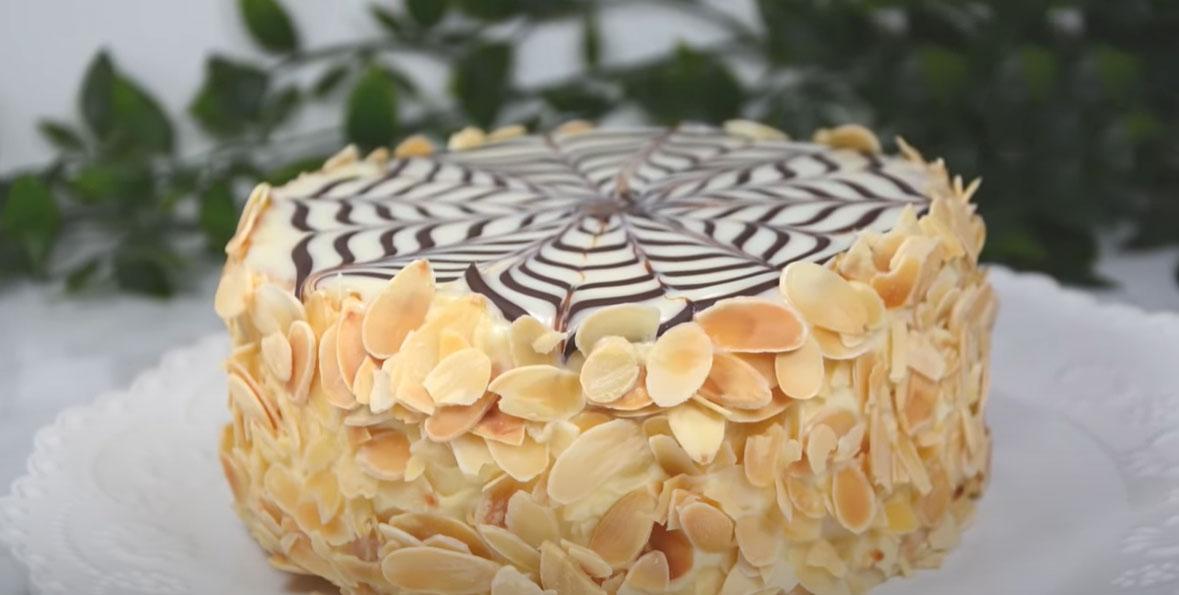
Place the melted dark chocolate in a pastry bag and draw a thin chocolate spiral on the surface of the cake, as shown in the photo.

Using a wooden skewer, draw four crosswise lines, moving from the center of the cake to its edge.

We divide each fragment in half again using the same line, moving from the center to the edge. This makes 8 pieces.

Now we complete the design by drawing a line in each of the eight pieces, but in the opposite direction - from the edge of the cake to the center.
We have created a classic design that makes the Hungarian Esterházy cake recognizable throughout the world.

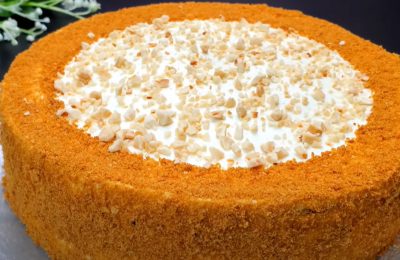
All that's left to do is decorate the sides with toasted almond flakes. You can toast them in the oven or microwave.
As with the cakes, you can use any nuts for decoration, but they must be of a fairly large size.

Once the sides are sprinkled with almond flakes, the cake takes on its traditional appearance and is ready to be served.
If you know you have a celebration coming up and don't have enough time to make a cake from scratch, prepare the layers ahead of time. Walnut layers can be stored for up to 3 days. Chill the layers first, then place them between parchment paper and cover with plastic wrap.
Of course, at first glance, the Esterházy cake is far from simple, as the classic recipe requires a fair amount of time and skill. But thanks to our step-by-step recipe with detailed photos, you can easily prepare this treat in your own kitchen.
Also watch a step-by-step video recipe for making Esterhazy cake with almonds, peanuts, pistachios, or walnuts:
- 15 min
- 241 kcal
- 1906
- 4 hours 10 minutes
- 276.5 kcal
- 4092
- 2 hours
- 198 kcal
- 730
- 5 min
- 317.4 kcal
- 606

- 5 hours
- 288.3 kcal
- 186
- 2 hours 30 minutes
- 224.4 kcal
- 3402
- 20 min
- 542 kcal
- 291
- 30 min
- 370.9 kcal
- 472