
Milk Girl Cake: A Classic Step-by-Step Recipe
Milk Girl Cake – a beautiful and incredibly delicious dessert worthy of any holiday menu. Today, we'll tell you how to make this treat at home, using a classic step-by-step recipe, and we'll also highlight some of the secrets.

- Proteins: 6.4 g
- Fats: 11.8 g
- Carbohydrates: 64.2 g
- Total time:
- Time in the kitchen:
-
Complexity:
It's easy and straightforward to prepare, but it does require some experience. Not everyone can do it right the first time.
- Number of servings: 8
Because of this fact, many believe that the "Molochnaya Devochka" cake was invented in Germany in the early 2000s. However, chefs were already trying to bake the first condensed milk-based cakes in many countries around the world in the early 20th century, and the recipe for German condensed milk cakes is very different from the dessert that was incredibly popular in the USSR. Therefore, it's safe to say that the classic "Molochnaya Devochka" cake recipe, published in "Rabotnitsa" and "Krestyanka," and kept by our mothers and grandmothers in their cookbooks, was invented in the USSR.
The dessert is multi-layered, just like Napoleon, Honey Cake or EsterhazyIt's based on 7-8 thin layers of cake, but the cream can vary:
- classic – the most delicate creamy “Diplomat”, which tastes like ice cream;
- curd (based on cheese and condensed milk);
- delicate cream cheese;
- sour cream;
- yogurt, etc.
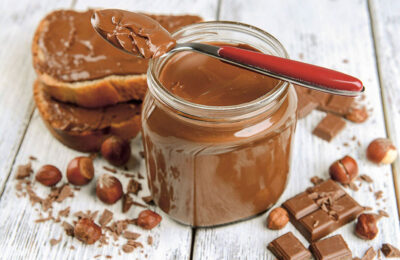
An additional chocolate, caramel or fruit filling is also allowed in the form of a thin layer of dark or light chocolate, boiled condensed milk or jam (can be prepared with raspberries, strawberries, cherries, peaches or any other fruits).
We suggest you start by making a classic "Milk Girl" cake at home with delicate "Diplomat" buttercream frosting, without any additives. Then, if you'd like, experiment with flavors, adding various layers to our step-by-step recipe to make the dessert look even more impressive.
-
Condensed milk380 G
-
Egg C12 pcs
-
Butter100 G
-
Flour190 G
-
Baking powder5 G
-
Cream 33%250 G
-
Milk400 G
-
Egg C11 pcs
-
Cornstarch40 G
-
Butter80 G
-
Vanilla sugar8 G
-
Milk chocolate20 G
-
Cranberry3 pcs
-
Rosemary (sprig)3 pcs
-
Almond petals20 G

Stage 1 – prepare the custard base for the cream.
Break 1 large egg into a cooking container.

Add 8 grams of vanilla sugar and 160 grams of regular sugar to the egg. Beat with a whisk or mixer, as for a sponge cake, until a stable, light foam forms.

In a separate bowl, dissolve 40 grams of corn starch in 100 ml of milk.

Add the starch mixture to the egg mixture. Whisk until smooth.

Pour 300 ml of milk into a saucepan with a thick bottom and heat until hot, but not boiling.

Stir the starch mixture again and slowly pour it into the hot milk, stirring vigorously to avoid the formation of lumps.

Brew the cream. Continue stirring vigorously over low heat until it reaches the desired consistency.

Add 80 grams of butter to the hot custard base and mix with a hand whisk until smooth.

Transfer the prepared custard base to a bowl and cover with cling film (if the top layer of the cream is exposed to air, a thick film will quickly form on its surface). Let the mixture cool, then refrigerate until completely chilled.

Step 2 – prepare the dough for the cake layers.
Break 2 large eggs (yolk + white) into a bowl and beat with a whisk for 2 minutes until smooth.

Add 380 grams of condensed milk at room temperature (1 standard can). Mix the eggs with the condensed milk until smooth.

Add 100 grams of melted butter to the mixture and mix until smooth.

Sift 190 grams of flour + 5 grams of baking powder through a sieve and knead the dough.

Please note that the batter shouldn't be too thick. The ideal consistency is like pancake batter.

Step 3 – bake the cakes.
For convenience, draw a circle of the desired diameter on parchment paper. Ideally, your baking sheet should fit two circles diagonally across, so you can bake the cookies faster.

Lay out the parchment paper on a flat surface and spread the dough in a thin layer where the circles for the cakes are marked.

Transfer the parchment to a baking sheet and bake. 7-8 minutes in an oven preheated to 200℃.

Let the finished cakes cool for 1-2 minutes and remove them from the parchment paper. The cakes will peel off very easily, as the dough contains butter.

While still warm, cut the cakes to the desired size.

Repeat steps 15-19 the required number of times, resulting in 7-8 finished cakes (depending on the diameter).
By the way, some YouTube bloggers recommend baking these cookies in a frying pan, but baking them in the oven still turns out better.

Step 4 – finishing preparing the cream.
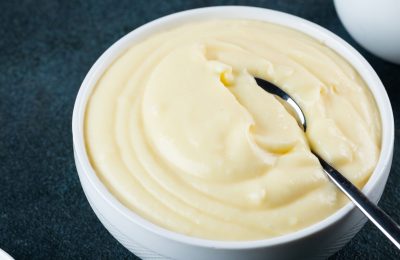
Place the well-cooled custard base into a bowl and mash well with a spatula.

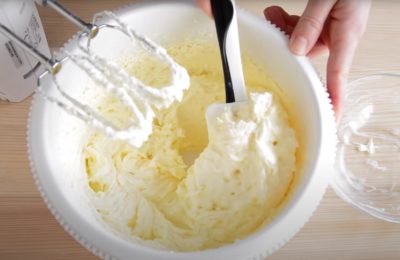
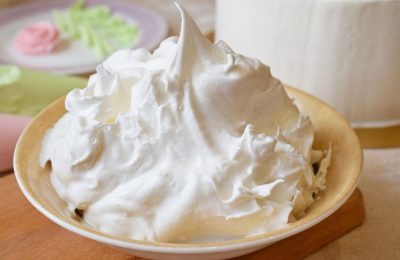
Separately, whip cream with a fat content of at least 33% until a fluffy white foam forms.

Add whipped cream to the custard base in 4 stages, stirring each time until smooth.

Beat the finished cream with a mixer for an additional 2 minutes to obtain a fluffier and more delicate texture.

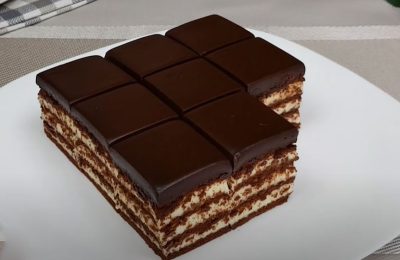
Step 5 – Assembling the Milk Girl cake.
We secure the first cake layer on the plate with a small amount of cream and grease it.

We repeat the procedure for each of the available cakes.

Spread the frosting over the sides and top of the cake. Refrigerate the dessert to soak for at least 2 hours, or even better, overnight.

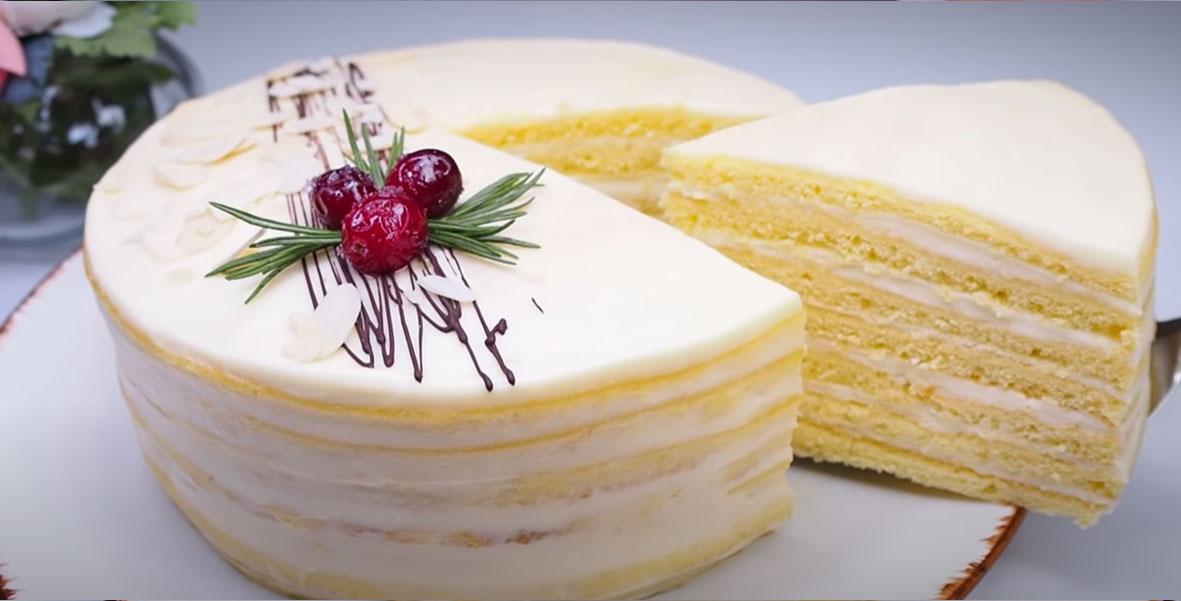
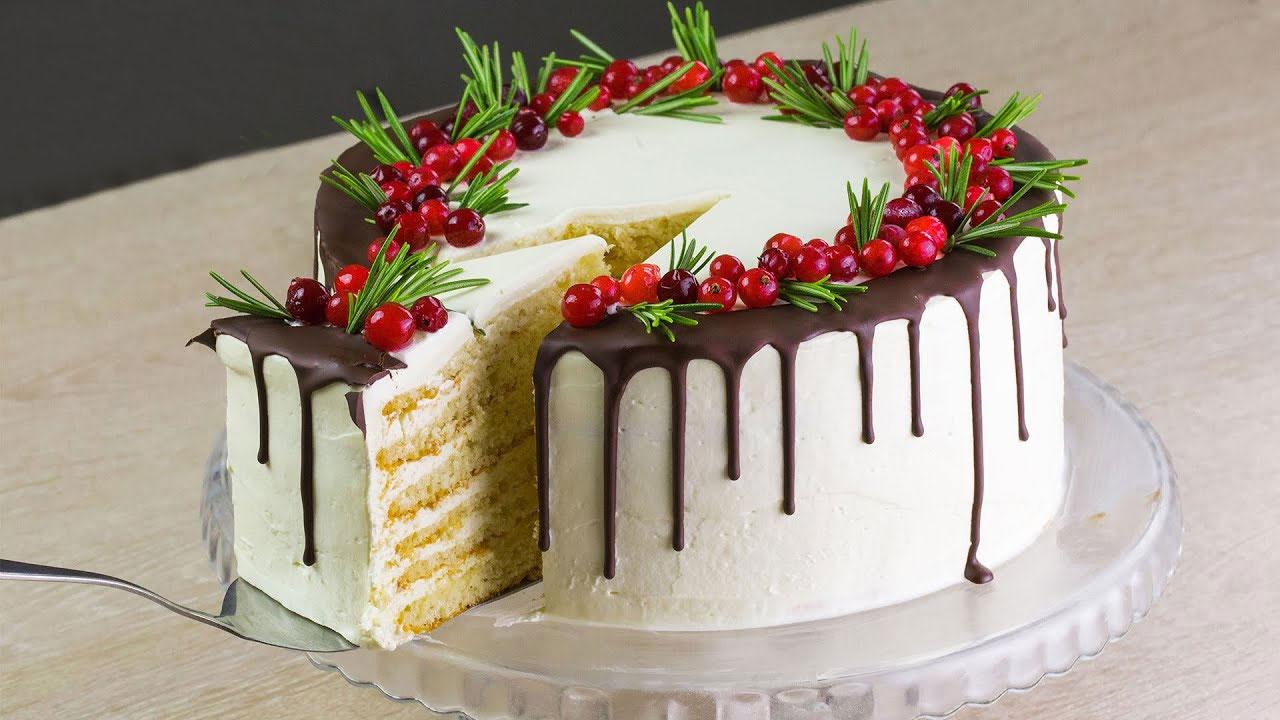
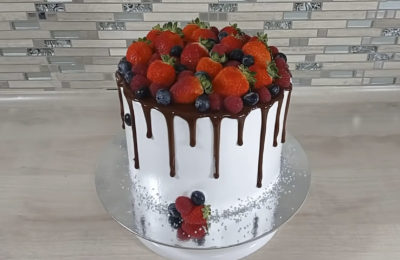
Before serving, decorate the cake with melted milk chocolate, adding candied cranberries (you can substitute cherries or other berries), and rosemary sprigs. Sprinkle the cake with flaked almonds.
The chocolate crown and fresh fruit on the white base of the cake look very beautiful.
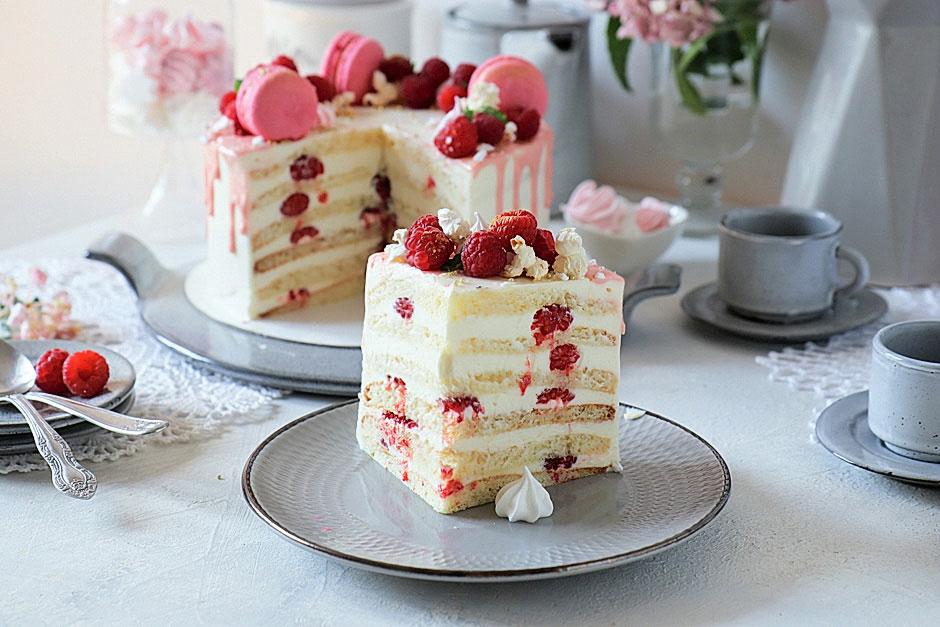
We also suggest trying making a delicate "Milk Girl" cake with a fruity twist, following the step-by-step recipe in one of the videos below.
Option #1 – with blueberries and cream cheese:
Option #2 – with raspberries and Mascarpone cheese cream:
- 1 hour
- 268.8 kcal
- 853
- 20 min
- 539 kcal
- 306

- 25 min
- 303.6 kcal
- 319
- 20 min
- 181.9 kcal
- 861
- 5 hours 30 minutes
- 334.0 kcal
- 20262
- 20 min
- 542 kcal
- 291
- 15 min
- 241 kcal
- 1906
- 20 min
- 208.0 kcal
- 9350