
Pancho Cake - A Simple, Step-by-Step Classic Recipe
Sancho Pancho cake is a timeless classic, familiar to many from childhood. Today, we offer you a simple step-by-step recipe that will teach you how to make a classic Pancho cake at home.

- Proteins: 5.6 g
- Fats: 13.1 g
- Carbohydrates: 33.5 g
- Total time:
- Time in the kitchen:
-
Complexity:
It's easy and straightforward to prepare, but it does require some experience. Not everyone can do it right the first time.
- Number of servings: 8
The original and delicious cake with the interesting name "Pancho" became very popular during the Soviet era thanks to a well-known confectionery factory. However, confectioners made no secret of the fact that they learned how to make the classic Sancho Pancho cake from an old recipe book.
It's hard to find a ready-made classic version of this dessert in stores these days, so anyone who wants to surprise guests with this beautiful and delicious cake will have to learn how to make it themselves at home. The good news is that the preparation process itself is quite simple (significantly easier than bento cake), and by following our step-by-step instructions with detailed descriptions of each step and high-quality photos, you can easily repeat it and add another truly delicious cake to your collection of interesting sweets.
During the cooking process we will need:
- deep bowl for kneading dough;
- mixer;
- silicone spatula;
- baking pan (a regular baking sheet or a special silicone pan);
- baking parchment;
- a spherical bowl for forming the cake;
- cling film.
-
Wheat flour200 G
-
Sugar200 G
-
Milk120 G
-
Vegetable oil80 G
-
Egg C16 pcs
-
Cocoa40 G
-
Baking powder10 G
-
Salt1 pinch
-
Cream 33%400 G
-
Sour cream 20%300 G
-
Powdered sugar130 G
-
Pineapple300 G
-
Cherries (fresh or frozen, pitted)100 G
-
Walnut100 G
-
Cream 33%30 G
-
Dark chocolate30 G

Step 1. Prepare the chocolate sponge cake.
Break 6 eggs into a mixing bowl and beat lightly until smooth.

Add a pinch of salt and 200 grams of sugar.
Beat with a mixer until you get a dense porous mass, as in the photo.

In a separate container, combine all dry ingredients: 20 grams of flour, 40 grams of cocoa and baking powder.

Into the mass of whipped egg whites in two steps Add the dry ingredients mixture. The first time, add only half of the flour and cocoa.

Mix the mixture thoroughly until a homogeneous dough is formed.

Pour in 120 ml of milk and gently mix it into the dough.

Add the second half of the dry ingredient mixture and mix until a homogeneous dough is formed.

Separate 3 tablespoons of the prepared biscuit dough and mix with a small amount of vegetable oil until smooth.

Add the resulting mixture to the rest of the dough and carefully mix it into the overall mass.

The dough should be elastic and fluffy, as in the photo.

Line a baking tray with baking paper and carefully pour in the dough.

Using a spatula, spread the dough over the entire surface.
Keep in mind that your stovetop may require a slightly shorter or longer baking time. You can check the cake's doneness after 15 minutes of baking by inserting a wooden skewer (or toothpick) into the cake. If the cake is baked through, the skewer will come out clean; if it's still wet, it will stick to the wood.

Remove the finished sponge cake from the oven and let it cool in the oven for another 5 minutes. After this, remove the cake and let it cool completely on a wire rack.

Step 2: Prepare the sour cream.
For this we need only three ingredients – sour cream, cream and powdered sugar.

Whip the chilled cream with powdered sugar until a soft, elastic texture is formed.

Add sour cream and mix the mixture thoroughly with a spatula.
At this stage, it is better not to use a mixer so as not to over-beat the sour cream mixture.

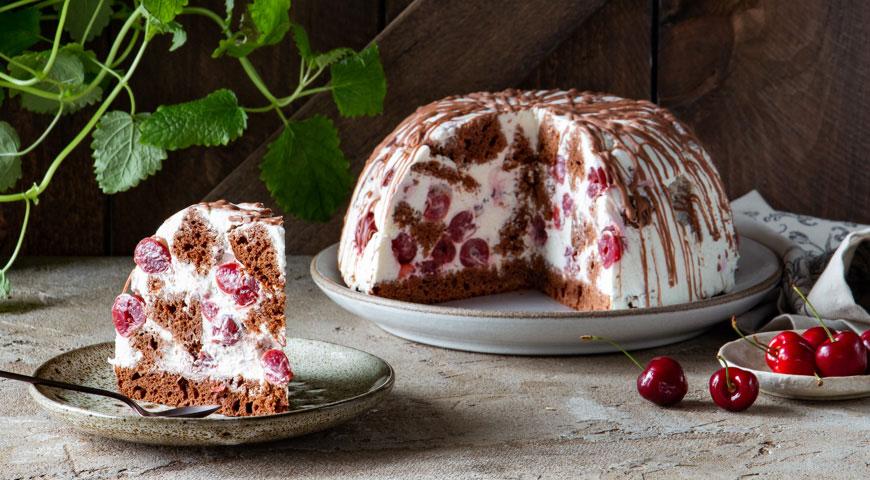
Step 3: Assembling the classic spherical Pancho cake
While Pancho cake can be made in a standard round or rectangular shape, the classic recipe calls for a spherical dessert, like half a ball. For this, it's best to use a plastic or glass bowl of appropriate capacity.

Cut out the base layer from the sponge cake, taking into account the diameter of your future cake (use the diameter of the container in which you will assemble the cake as a guide).
For now, we'll set the base aside, as the recipe calls for assembling the Pancho cake from top to bottom, meaning we'll be laying the base layer last.

Cut the remaining biscuit into small cubes, as shown in the photo.

At this stage, you need to prepare the filling:
- roast and grind the nuts;
- remove the pits from the cherries (if using frozen ones, defrost them and remove excess moisture);
- cut the pineapple into pieces of the desired size.

1 layer
Place the biscuit cubes coated with cream on the bottom of the forming bowl.

2nd layer
Sprinkle the biscuit layer generously with nuts and lay out a layer of pineapples.

3rd layer
Place another layer of sponge cake cubes with cream, following the same procedure as in step 21. Lightly press the cubes with a spoon to ensure the cream penetrates between the pineapples and nuts.

4th layer
Sprinkle with nuts and add cherries and pineapple cubes.

Layer 5 and subsequent layers
Similar to steps 21-24, alternate layers of cream cubes and fruit filling.

We are finishing the assembly
Once all the layers are laid, cover everything with the round biscuit base that we prepared in step #18.

Cover the bowl with the cake with cling film and place it in the refrigerator to soak for 4-6 hours (or even better, overnight).

Stage 4: Finishing
Shortly before removing the soaked cake, prepare the frosting. Our homemade Pancho cake recipe calls for a heavy cream frosting. To make it, simply whip the cream with powdered sugar.

We take the well-soaked cake out of the refrigerator, remove the cling film that covered it, turn it over onto a plate and remove the forming bowl.

We apply our butter cream and smooth it out using a spatula, rotating it on the plate with the cake.

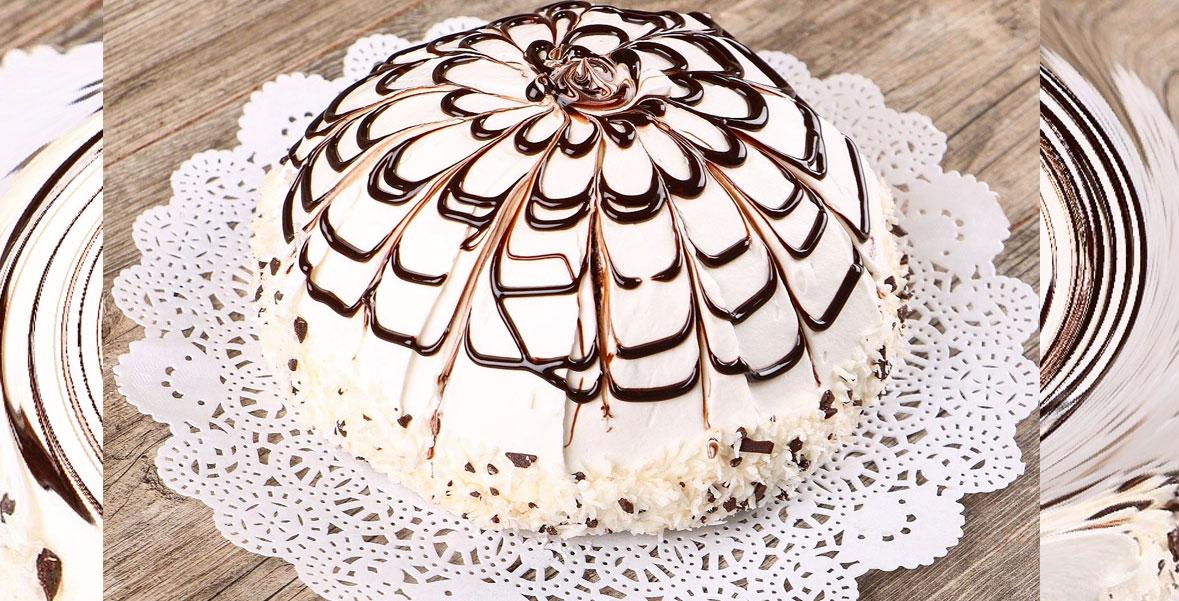
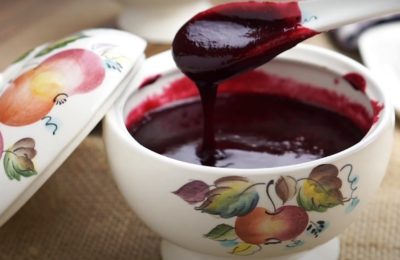
Let's make the chocolate ganache and decorate our cake with beautiful lace patterns, as shown in the photo.
You can decorate your cake differently. You can find a wide variety of pictures online showing how to beautifully decorate a Pancho cake at home.

The final touch is to sprinkle the base of the cake with crushed nuts.
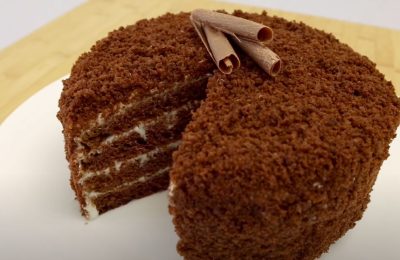
The highlight of Pancho cake is not only the combination of chocolate kozha with delicate sour cream, pineapple, and cherries, but also the unique presentation of this dessert. The classic recipe calls for a hemisphere with a smooth white coating and a variety of lacy patterns made of dark chocolate, as pictured.
We also suggest trying making a quick Sancho Pancho cake at home, using the simplest no-bake recipe (instead of chocolate sponge cake, the recipe uses 600 grams of gingerbread). For step-by-step instructions and detailed explanations, watch this video:
- 4 hours 20 minutes
- 398.6 kcal
- 5339
- 7 min
- 72 kcal
- 8885

- 10 min
- 405.3 kcal
- 20752
- 4 hours 30 minutes
- 340.5 kcal
- 44617

- 20 min
- 240 kcal
- 7662
- 5 min
- 0 kcal
- 3783
- 4 hours 20 minutes
- 210 kcal
- 375
- 20 min
- 350.7 kcal
- 361