
Vertical Roll Cake: A Simple Step-by-Step Recipe
A vertical roll cake is an incredibly original dessert that will be a worthy addition to your holiday table, impressing your guests with its striking appearance, delicate texture, and vibrant flavor. Making this unusual treat at home is easy; just follow the simple step-by-step recipe with detailed photos.

- Proteins: 6.7 g
- Fats: 22.6 g
- Carbohydrates: 35.8 g
- Total time:
- Time in the kitchen:
-
Complexity:
It's easy and straightforward to prepare, but it does require some experience. Not everyone can do it right the first time.
- Number of servings: 10
Essentially, a vertical cake can be made using many popular recipes. Spiral variations of the honey cake are most common, as are a wide variety of combinations of soft sponge cake layers with sour cream-based cream and fruit filling (cherry, raspberry, currant, or any bright, contrasting jam). The greater the contrast between the layers and the filling, the more beautiful the cross-sectional effect created by the multicolored layers will be.
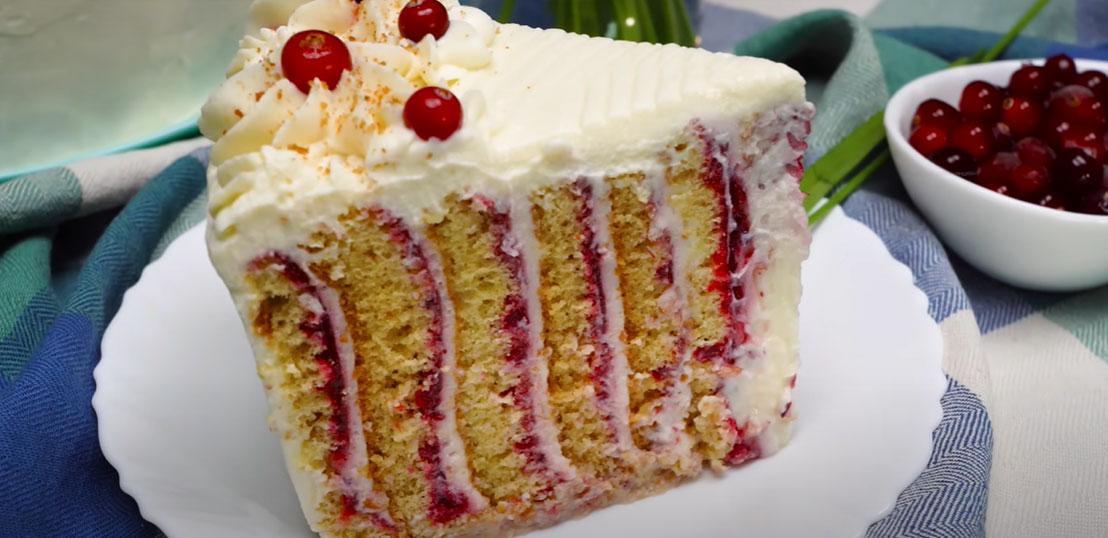
We'll demonstrate the principle of assembling a vertical (spiral, roll) cake using the example of preparing a delicious and very beautiful fruit dessert with a honey sponge cake and sour cream.
-
Egg C15 pcs
-
Sugar120 G
-
Butter80 G
-
Flour210 G
-
Soda0.5 tsp
-
Salt1 pinch
-
Sour cream400 G
-
Cream cheese400 G
-
Powdered sugar3 tbsp
-
Vanilla sugar10 G
-
Cranberry300 G
-
Sugar140 G
-
Cornstarch20 G
-
Water30 G

Step 1 – making a thin sponge cake.
In a saucepan, combine 100 grams of liquid honey, 80 grams of soft butter and a pinch of salt.

Heat the mixture and stir until the butter is completely melted.

Add 0.5 teaspoon of soda.
Mix everything until smooth and remove the pan from the heat so that the honey base cools slightly before adding the next ingredients.

In a separate bowl, beat 5 eggs (yolks and whites together) and 120 grams of sugar until a fluffy, light foam forms.

Add 60 grams of flour (approximately half of the required volume) to the egg mixture and mix with a hand whisk until smooth.

Add all the previously prepared and cooled honey mixture into the biscuit dough and mix until smooth.

Sift the second portion of flour and knead it with a spatula or hand whisk to form an elastic biscuit dough.

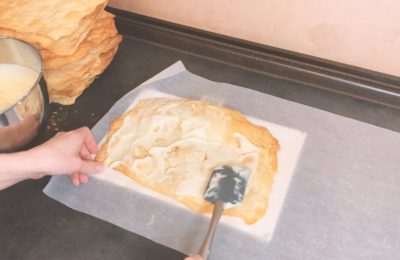
Pour the batter onto a parchment-lined baking sheet. We'll make one large, thin sponge cake, but if your baking pan is smaller, you can divide the batter into 2-3 portions and bake them alternately.

Cooking time may vary depending on the thickness of the sponge cake layer.

Remove the finished biscuit from the parchment and cut into two equal parts.
The width of your cake may vary, but keep in mind that it should match the desired height of your future cake. We'll make the width twice the height of the cake, which makes it easier to work with at this stage. We'll cut each cake in half later.

We also cut each cake horizontally.
If you initially baked thin sponge cakes in several layers, you don't have to cut them horizontally, but ours turned out quite plump. Furthermore, a cut sponge cake will soak better than a thin, uncut one.

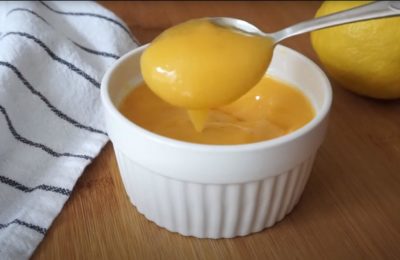
Step 2 – prepare the berry layer.
Our recipe uses 300g of cranberries, but you can use any fresh or frozen berries.

Place 300 grams of berries and 140 grams of sugar in a saucepan. Heat gradually until the mixture boils and the sugar dissolves completely. Boiling for a short time is not necessary; 1 minute is enough.

Remove the saucepan from the heat and puree the berries in a blender until smooth. If you want to remove any remaining skin, pass the mixture through a sieve.

In a separate container, combine 20 grams of cornstarch and 30 grams of water, stirring thoroughly to avoid lumps.

Add starch to the berry mixture, stirring until smooth.

Place the saucepan over the heat and bring to a boil, stirring vigorously. Let the berry puree simmer for 30 seconds and remove from the heat.

Let the berry mixture cool for about 15-20 minutes and spread it on the cake layers (it’s okay if the mixture is still quite warm when you spread it).
While we're working on the cream, the cakes with the berry filling will have completely cooled and soaked.

Step 3 – making the cream.
Combine 400 grams of cream cheese and 400 grams of sour cream. Beat with a hand mixer until smooth.

Add 3 tablespoons of powdered sugar and 10 grams of vanilla sugar. Beat for another 1-2 minutes until smooth.
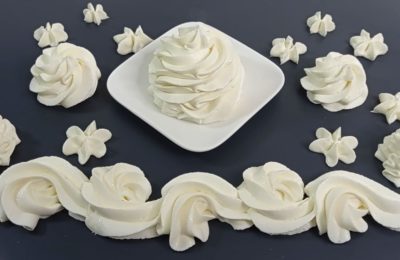
Curd-sour cream frosting is the simplest frosting you can imagine for a sponge cake. It's perfect for frosting cakes with regular layers, for rolling sponge cake rolls, and for smoothing the top and sides of a cake.

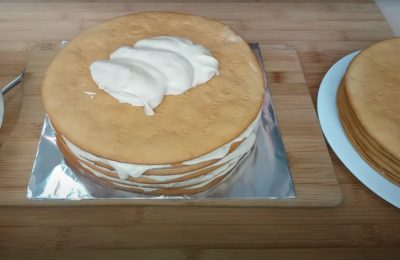
Step 4 – Assembling the roll cake.
At this stage, all the cakes need to be cut so that the width of the biscuit strips is equal to the desired height of the cake (if you haven’t done this yet in step 10).

Place the curd cream on top of the berry layer and distribute it evenly over the entire surface.

Choose any of the ready-made cream-covered biscuit strips and roll it into a roll.

We join the edge with the second strip and continue rolling it into a roll.

Place the roll on a serving plate or other cake base.

Take the next strip of biscuit and attach it to the main roll (as in the photo), pressing lightly for a tighter fit.

We continue to lay out the biscuit strips in a circle until all the layers are used.

We secure the cake with a culinary ring of a suitable diameter.

Cover the cake with cling film and put it in the refrigerator for 3-4 hours (ideally, if you can let it sit overnight).

Stage 5 – final decoration.
Once the cake is well soaked, remove the film and the fixing ring.

Level the top and sides of the cake with the remaining curd cream.

We create a beautiful relief on the surface.

Using a piping bag and a special tip, pipe the cream into pretty flowers. Place a berry in the center of each flower.

Sprinkle the flowers with biscuit crumbs.
If you don't have any biscuit pieces left, you can use the following as a topping:
- coconut flakes;
- crushed nuts;
- wafer crumbs, etc.
You can make a classic honey cake in a similar way. For a detailed recipe for a vertical honey cake, watch this video:
We've already cooked with you Strawberry Fraisier cakeIf you'd like, you can also make a rolled (spiral) version by following the recommendations in this video:
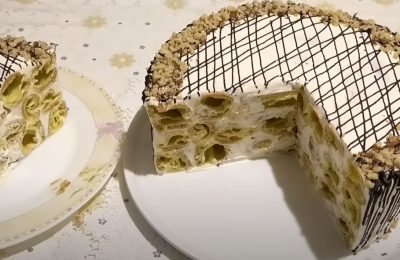
For those looking for a recipe with a twist, we offer an unusual pistachio roll cake:
Fruity variations with currants or raspberries are no less interesting, and pastry bloggers describe the preparation in detail in their step-by-step master classes:

- 3 hours
- 333.7 kcal
- 349
- 20 min
- 248.3 kcal
- 443

- 3 min
- 141 kcal
- 3662
- 1 hour
- 209.4 kcal
- 744
- 2 hours
- 198 kcal
- 730
- 5 min
- 317.4 kcal
- 606
- 20 min
- 222.3 kcal
- 360
- 3 hours
- 246.0 kcal
- 1200