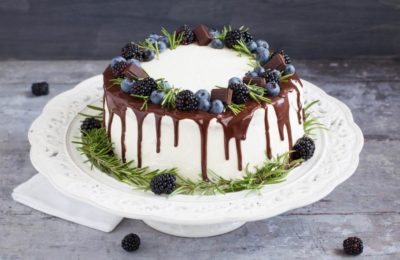
Kyiv cake is the hallmark of the Ukrainian capital.

The legendary Kyiv cake is the hallmark of the Ukrainian capital. Almost every visitor to Kyiv considers it their duty to bring home a sweet souvenir to go with their tea. Tens of thousands of delicious cakes fly off the shelves of pastry shops every day.
Preparing Kyiv cheese at home according to GOST standards is a challenging, but entirely doable, task. The recipe is certainly intricate, but it doesn't require any unusual ingredients or culinary skills.
Some facts and legends
Legend has it that back in 1965, the Kiev cake (the name came later) was the result of a mistake by workers in the sponge cake department at the Karl Marx Confectionery Factory. By pure chance, several workers forgot to refrigerate an entire batch of whipped egg whites intended for cakes. During this time, the egg whites dried out and supposedly turned into meringue. To cover it up, the shop foreman, Konstantin Petrenko, coated the cake layers with buttercream, sprinkled them with nuts, and decorated them with ornaments. This is believed to be how the Kiev cake was created.
Another version claims that the recipe was specially developed, practically in secrecy, by Anna Kurylo and Galina Fastovets-Kalinovska. However, they were the ones who received the cake's patent, and the Ukrainian capital has acquired a new symbol. It is now produced according to GOST standards. Furthermore, the Kyiv cake is decorated with a unique pattern, which is applied to each piece to prevent counterfeiting.
DIY Kyiv cake
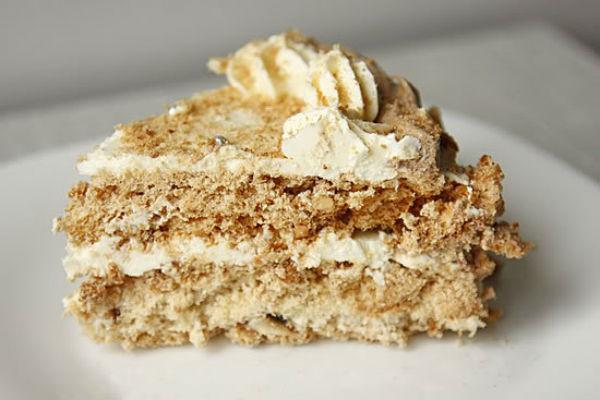
Sweet cream paired with crisp meringue and a scattering of nuts… What could be better for morning or evening tea? This dessert will be a hit with the whole family, young and old. And there's no need to travel to Kyiv and stand in a long line for a sweet souvenir. Simply stock up on the right ingredients, choose a suitable recipe, and prepare this wonderful dessert in the comfort of your own home.
Ingredients for the cake according to GOST:
- chicken eggs - 13 pcs
- granulated sugar (for the base) - 500 g
- wheat flour - 100 g
- cashew nuts - 450 g
- vanilla
- sugar (for cream) - 200 g
- butter - 400 g
- milk - 350 ml
- cocoa powder - 30 g
- cognac - 20 ml
- powdered sugar - 100 g
So, let's start making the cake layers. To do this, roast the cashews in the oven for a few minutes until golden brown. Meanwhile, as the recipe says, prepare the egg whites, preferably from home-made eggs. Refrigerate the yolks and pass the whites through a sieve twice. Then, begin whisking the whites on low speed, increase the speed, and add the vanilla.
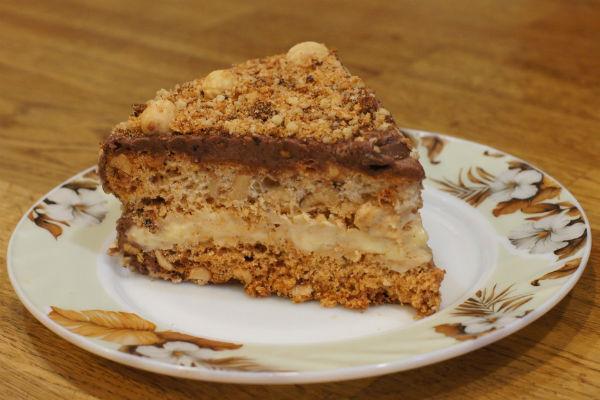
When the whites form stiff peaks, fold in the dry ingredients and crushed nuts, stirring gently with a silicone spatula. Then, take equal-sized springform pans and line the bottoms with parchment paper. Divide the mixture in half and pour into the pans. Bake the cake layers in the oven for 1.5 hours at 120 degrees Celsius.
Here's a trick: first preheat the oven to 150 degrees Celsius (300 degrees Fahrenheit), add the cake layers, and only after 15 minutes reduce the temperature to 120 degrees Celsius (250 degrees Fahrenheit). When it's time to take the meringue out, open the oven door and keep it there for a bit longer.
While the base is baking, you can make the cake frosting. To do this, according to the GOST standard, mix the yolks with 300 g of sugar, then pour in the milk and bring the mixture to a boil over low heat until thickened. Reduce the heat to low and simmer for another 10 minutes. Then, according to our recipe, remove from heat and place in ice water.
While the cream is cooling, beat the butter with a mixer and fold in the cooled cream, one at a time. Then add the vanilla and cognac. Divide the mixture into two parts: 600 ml and 300 ml. Use the larger portion for spreading, and the smaller portion for decorating. Add cocoa powder to the smaller portion.
Remove the cake layers from the oven. Tip: To ensure crisp meringue, the recipe recommends leaving the cake layers in the open air for 6 hours.
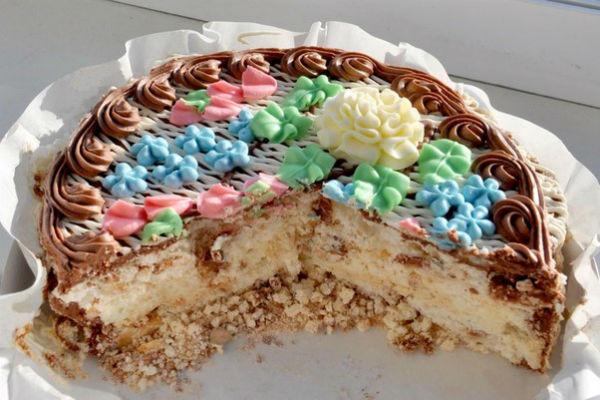
Assembly: Spread the first cake layer with a thickness of frosting equal to its height. Place the second cake layer on top, smooth side up. Use a spatula to spread the chocolate frosting over the sides and top of the cake.
Decorate the cake with flowers made from butter whipped with powdered sugar and, of course, write "Kyivsky" on it with a pastry bag to match the GOST standard. Once it's set, you can delight your family with this delicious dessert!