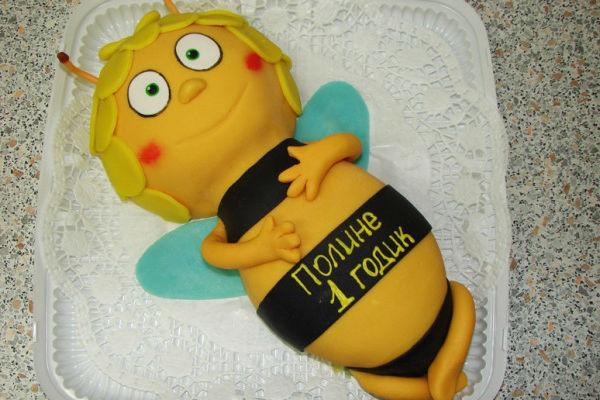
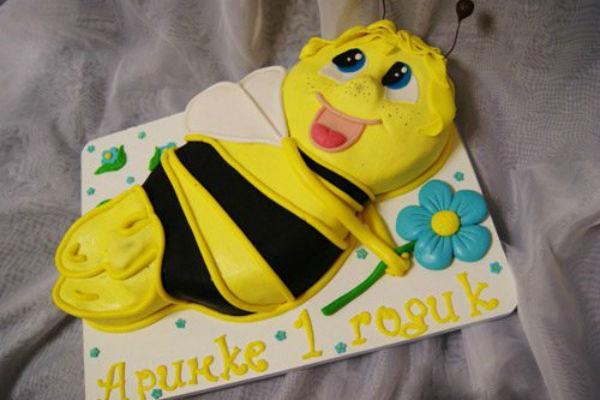
"Maya the Bee" is a dessert from a favorite cartoon.

Looking at the photo, the "Maya the Bee" cake seems like a true masterpiece of confectionery. Making such a cake yourself requires patience, time, and perseverance. But you'll agree, if it's your child's birthday, the happy smile on their face upon seeing such a surprise will be a worthy reward for your efforts.
Selecting ingredients
Ingredients:
- One and a half cups of flour;
- A couple of pinches of salt;
- 1 egg;
- 50 g sugar;
- 120 g butter;
- 250 g apricot jam;
- 4 egg yolks;
- 1 egg white;
- 7 g gelatin;
- 1 glass of milk;
- 150 g cream 33% fat;
- 120 g honey;
- Multicolored mastic.
Cooking process
Prepare the dough: sift the flour into a bowl, add a pinch of salt and sugar, and mix. Then add the refrigerated butter. Chop the mixture with a knife until it forms a crumbly mixture. Add the egg and knead the dough. Shape it into an oval or disc shape, then freeze for 10 minutes. Then remove it, roll it out, place it in a parchment-lined pan, and bake for about five minutes at 220 degrees Celsius (425 degrees Fahrenheit). Then reduce the temperature by 30 degrees Celsius (98 degrees Fahrenheit) and bake for another 20 minutes. Let the finished "Maya the Bee" cake crust cool.
The base is ready, but our cake isn't quite ready yet. Let's continue with the filling. Puree the apricot jam in a blender. Set aside 1/3 for the filling. Place the rest in a saucepan and heat over high heat. Bring to a boil, then strain. Reserve the liquid, and spoon the remaining slurry onto the freshly baked "Maya the Bee" cake base.
Now we'll move on to what will make our cake tender and delicious—the filling. Place the honey, egg yolks, a pinch of salt, and gelatin in a saucepan. Mix well. Bring the milk to a boil in another saucepan. Add a few spoonfuls of milk to the egg mixture, stirring constantly. Then slowly pour in all the milk. Continue stirring and place the mixture on the heat. Heat everything, but don't let it boil. Stir continuously throughout the entire process. We want to ensure there aren't a single lump. Then strain the mixture and leave it there until it cools.
While the mixture is cooling, beat the cream with a mixer, then the egg whites. We do this in separate bowls. Whip the cream until fluffy, and the egg whites until stiff, elastic peaks form. Then, using a top-to-bottom motion, gently fold the cooled mixture, first the egg whites, then the cream. Then add the 1/3 of the apricot puree we poured out. Gently mix everything again. The "Maya the Bee" cake is almost finished. Pour this mixture onto the base we baked in the oven.
Now let's make a honeycomb pattern so the cake looks as beautiful as the photo. For this, we'll need a bubble wrap bag (the kind used to protect items during shipping to prevent damage). Cut a circle from the bag the size of the cake and wash it thoroughly. Place it on top of the "Maya the Bee" cake and press it down lightly. Freeze for three hours. Then take it out, carefully remove the film, and pour the strained apricot syrup over the cake. Let it sit for a couple of hours.
Next, we mold a bee out of fondant, as shown in the photo. It's not for nothing that the cake is called "Maya the Bee." Here, you can let your imagination run wild and create any bee you want, deviating from the standard bee in the photo—it's your own personalized "Maya the Bee" cake. That's it—a beautiful cake for your beloved child's birthday is ready!