How to make chocolate cake balls

Content
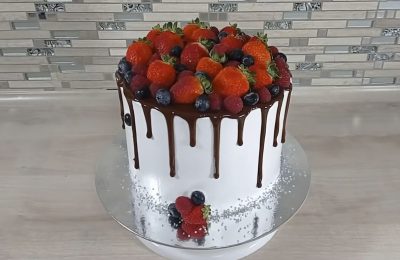
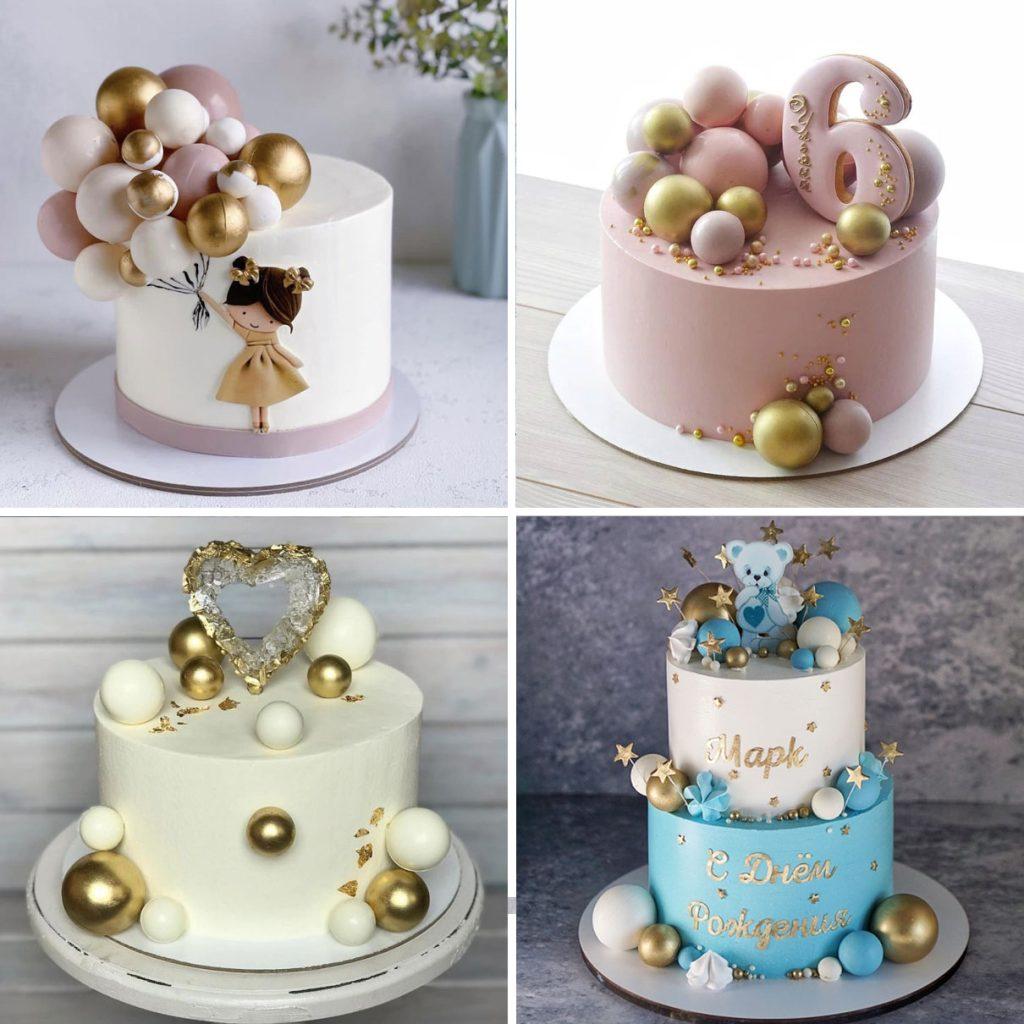
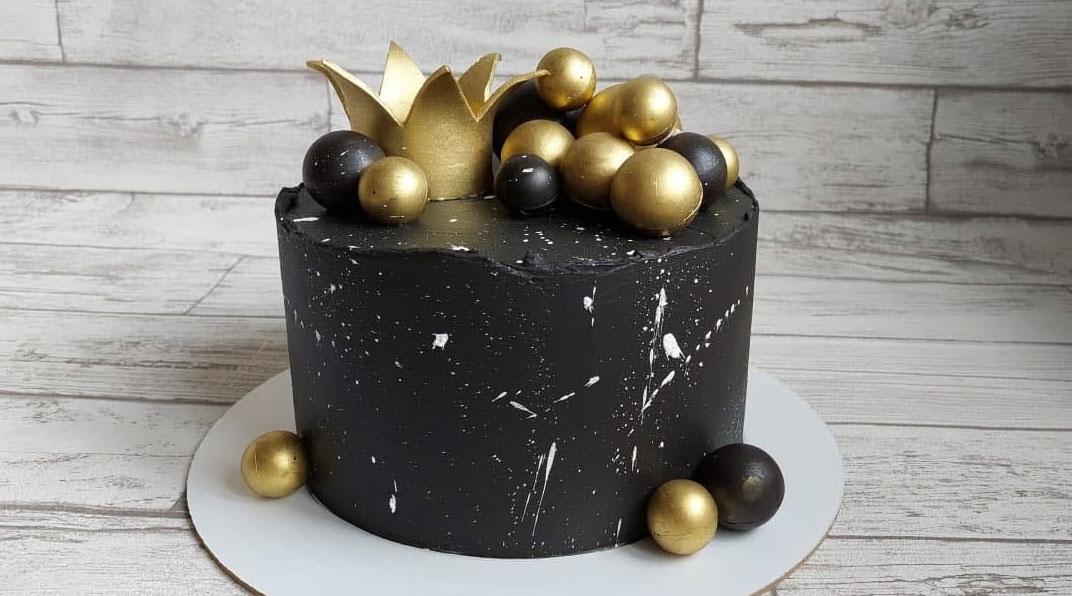
If you've already mastered making 3D chocolate figures for cake decorations and are looking for something new and unusual, we suggest learning how to make luxurious chocolate cake balls yourself. This decoration will make a truly special birthday cake for girls or boys, and can also serve as a stunning addition to a New Year's dessert.
Preparatory stage (choosing dishes and chocolate)
The edible chocolate sphere can be made in any shade or even coated with shiny candurin, which will make the balls look as close to real Christmas decorations as possible.
To create such an unusual cake design you will need:
- high-quality chocolate (you can make balls from white, dark or milk chocolate, as well as confectionery callets);
- convenient utensils for tempering chocolate;
- a special shape that will allow the mass to form a hemisphere when it hardens.
Chocolate balls are made in a round mold, so you can't do without this essential element. Today, the market offers a wide variety of molds for creating decorative balls of varying diameters.
Plastic molds
 Advantages:
- affordable price;
- easy to care for and clean;
- ease of storage.
Flaws:
- fragility (plastic is quite fragile);
- the surface is not perfectly smooth, which makes it difficult to extract the figure;
- slight roughness, which makes the balls matte (not shiny).
Silicone molds
 Advantages:
- affordable price (mid-price category);
- easy to care for and clean;
- relatively good surface.
Flaws:
- soft walls (on the one hand, this simplifies the removal process, on the other hand, the risk of damaging the balls when removing them from the silicone mold increases significantly);
- not a perfectly smooth surface (although better than plastic);
- matte surface (not important if you plan to cover the glaze with velor or paint with candurin).
Polycarbonate forms
 Advantages:
- ideal surface smoothness, which allows you to achieve a luxurious gloss;
- easy to care for and clean;
- maximum durability.
Flaws:
- The high price won't please those who want to try making chocolate cake balls for the first time.
Technology of making chocolate balls
To understand how to make chocolate cake balls at home, we offer a detailed look at the main stages of producing this exclusive decoration.
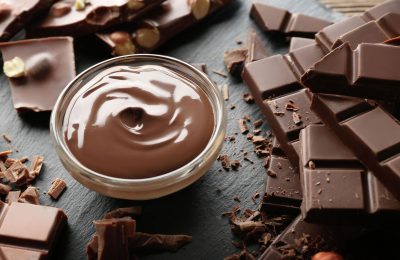
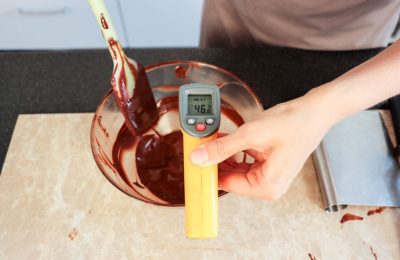
Step 1 – Tempering the Chocolate
Tempering is the process of changing the crystal lattice of the chocolate mass, during which the product acquires a number of properties that are important for every confectioner, such as:
- increasing the melting temperature (tempered chocolate does not melt in your hands);
- luxurious shine (a glossy surface is characteristic of tempered chocolate);
- strength (the chocolate becomes less crumbly, so the crafts made from it are stronger).
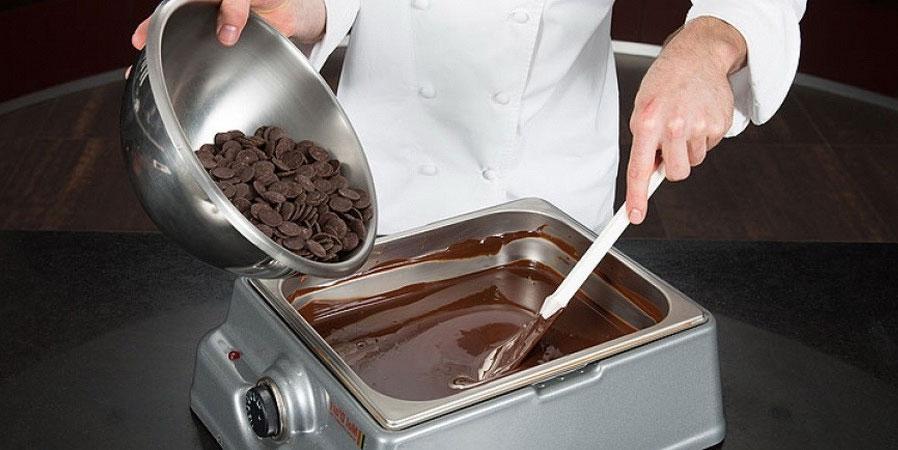
Tempering involves heating chocolate to its melting point and then cooling it. The temperature required for recrystallization varies for dark, milk, and white chocolate.
| Chocolate | Melting | Crystallization | Filling the hemispheres |
| Dark | 47-50℃ | 27℃ | 30-32℃ |
| Lactic | 44-45℃ | 25-26℃ | 28-30℃ |
| White | 44-45℃ | 25-26℃ | 28-30℃ |
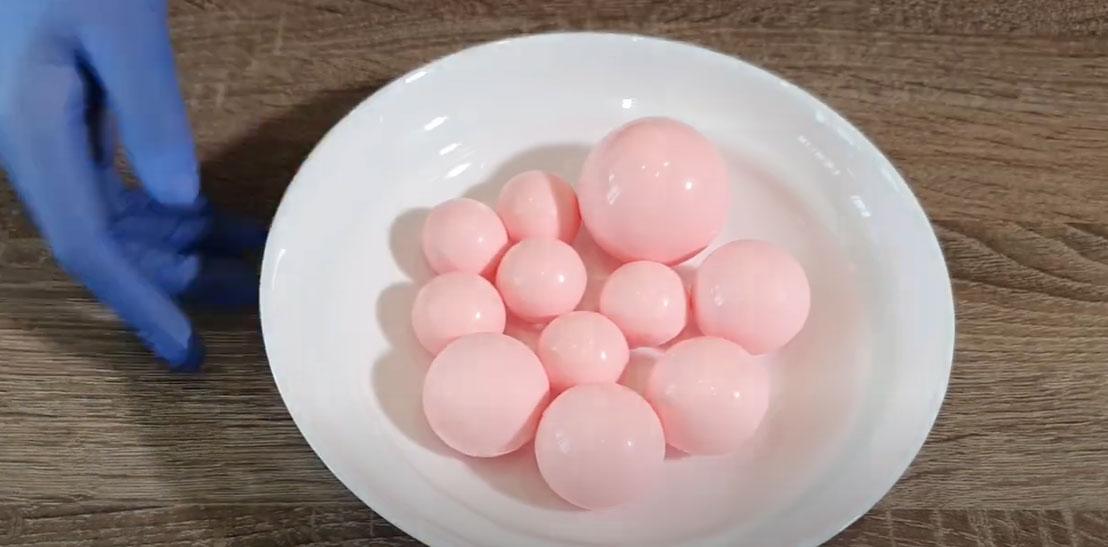
Stage 2 – formation of hemispheres
There are two possible options:
- Complete filling of the ball volume chocolate (used for small diameter spheres).
- Manufacturing of hollow hemispheres (more suitable for larger chocolate balls).
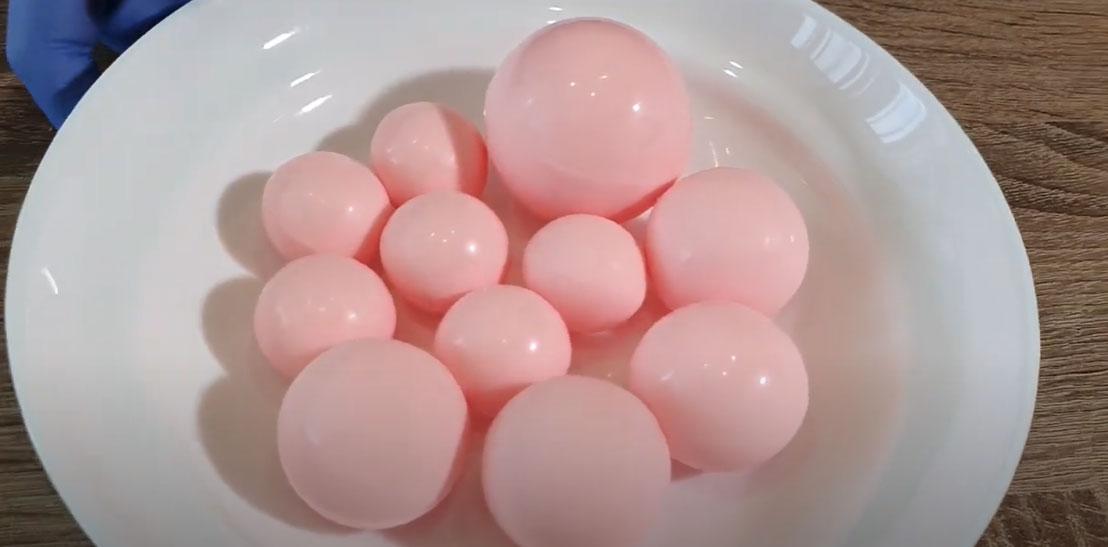
Working with hollow balls is more difficult, but this type of decoration is more in demand today, so it is worth learning how to make these types of balls.
Step-by-step cooking instructions with photos:
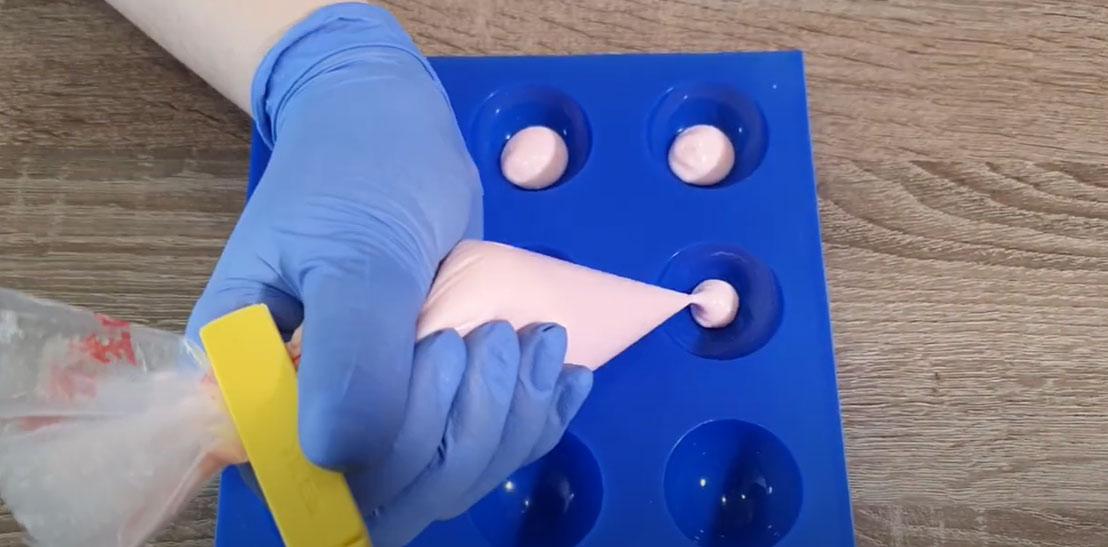
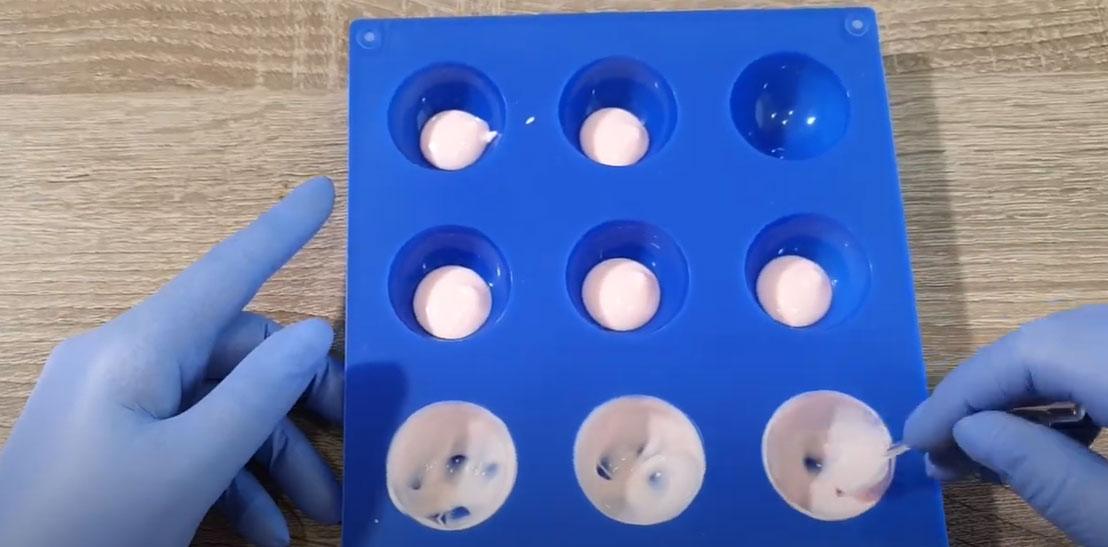
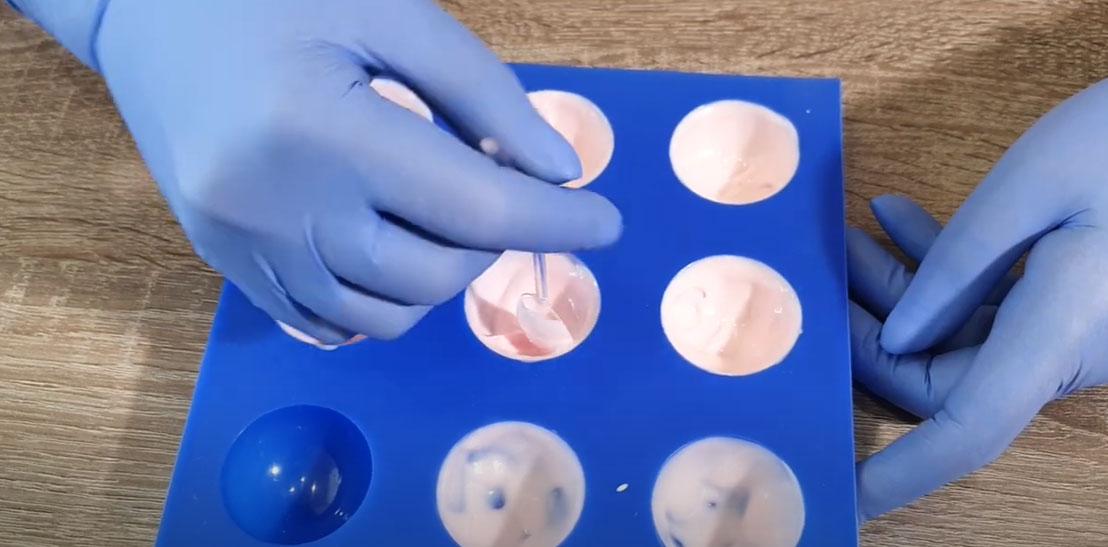
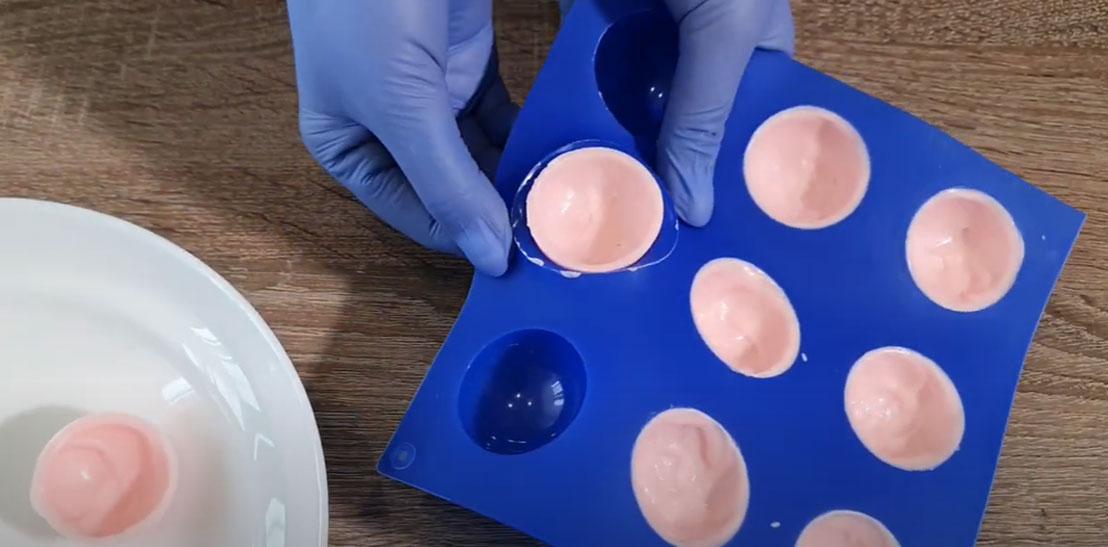
- Pour the melted chocolate into the mold (the mold must be well cooled).

- Spread the chocolate mixture over the inside of the hemispheres, tilting the pan or using a spoon. This will be our first chocolate layer.
- Let the mixture set in the refrigerator (usually 3-5 minutes) and apply a second layer of chocolate.
- We spread the chocolate with a spoon, but you can simply pour the excess chocolate glaze back into the bowl by quickly turning the mold upside down. This will make the balls thinner.
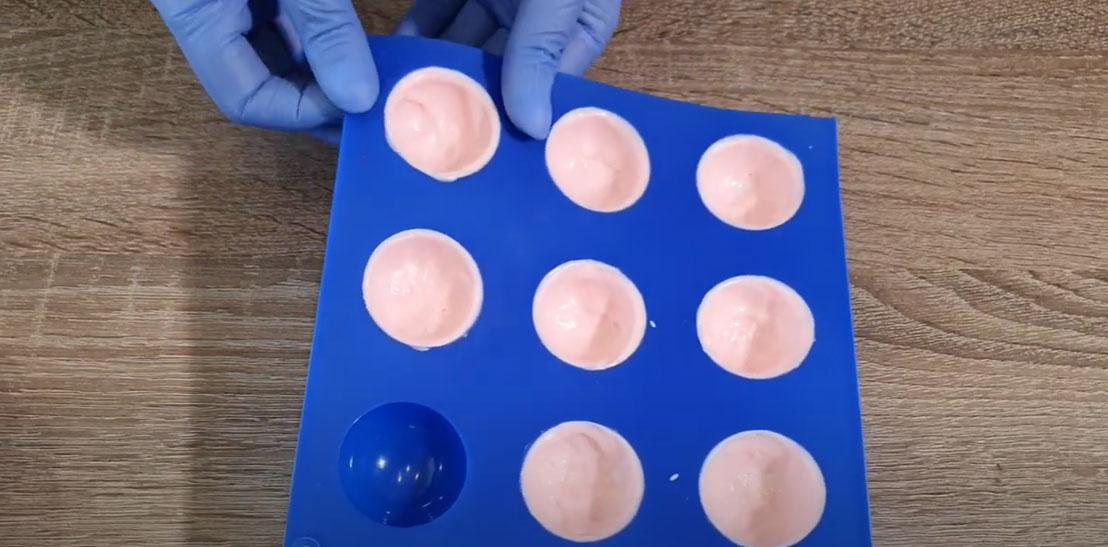
- Allow the hemispheres to stabilize at room temperature (this process takes 12 to 24 hours).
- Carefully remove the chocolate hemispheres from the mold.
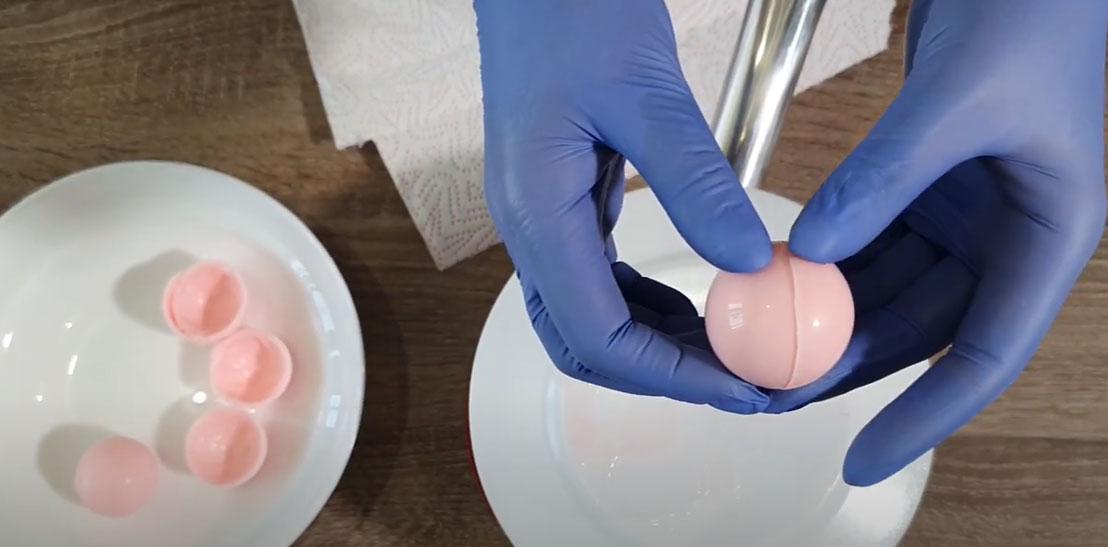
Step 3 – Assembling the balls
How to make chocolate balls from halves? Simply glue the pieces together. Attaching the halves isn't difficult, but it does require some skill. Your movements should be quick and precise.
The algorithm is quite simple:
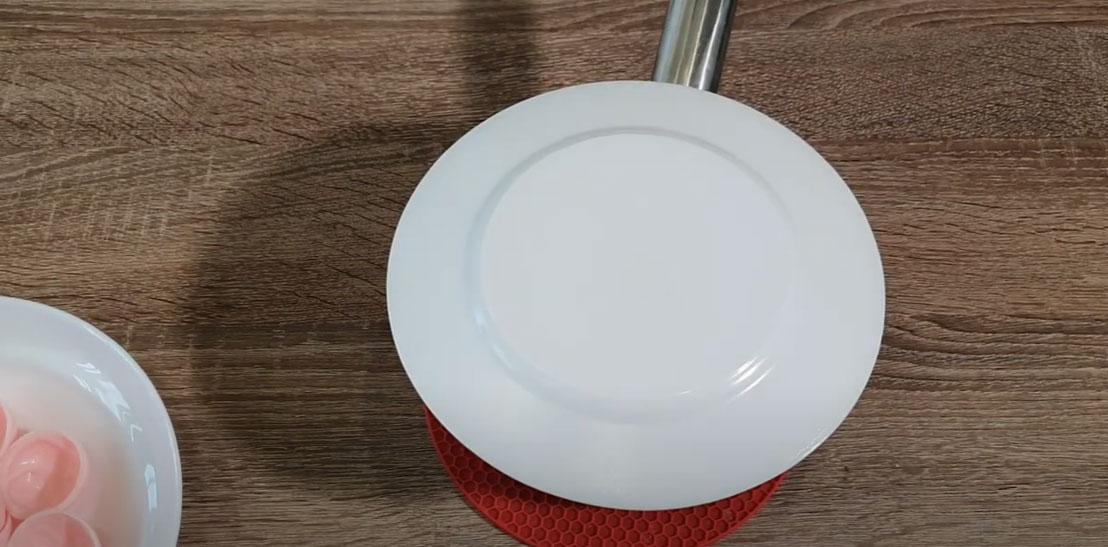
- Heat a plate (a frying pan or a saucepan will do).
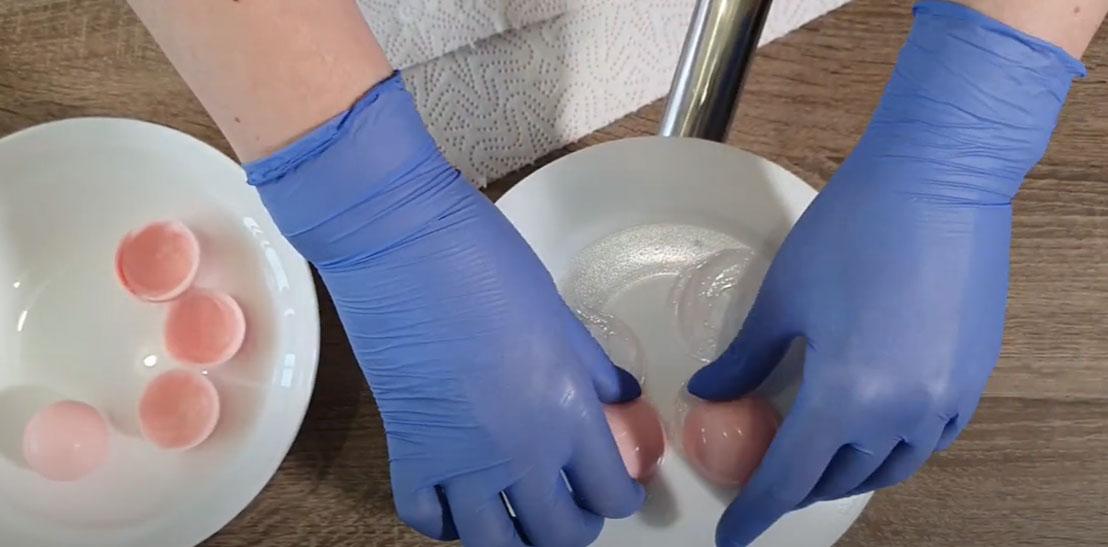
- Place the two halves of the ball on the heated surface so that the joint line is straightened.
- Quickly remove from the heated surface and glue.
- Hold the figure for 2-3 minutes until the chocolate sets, and then carefully remove any excess drops or streaks that may form in the seam area.
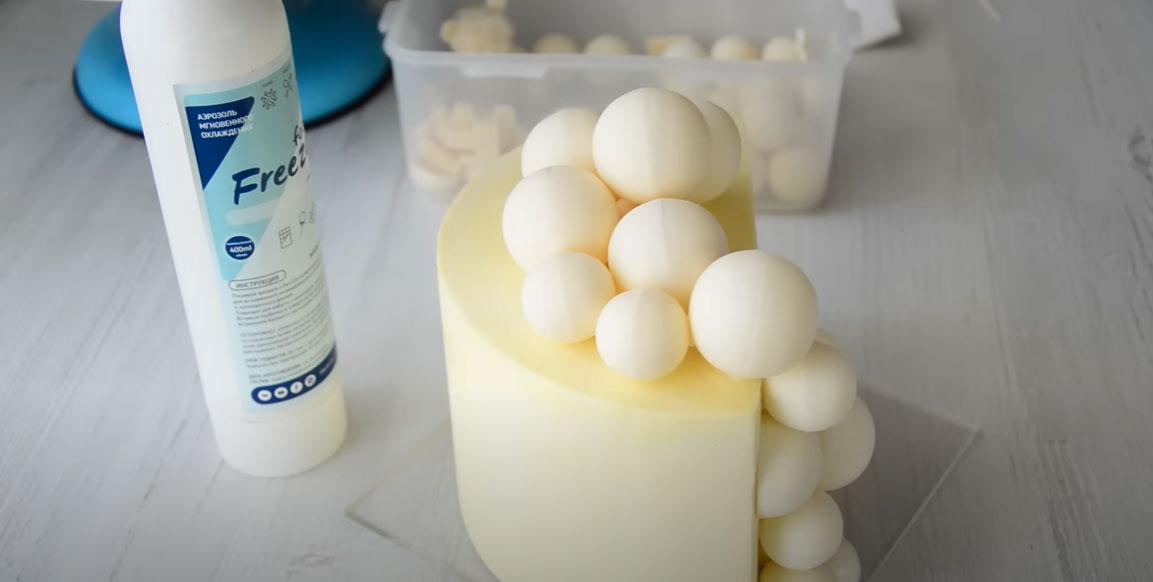
Stage 4 – decorating the balls
For more information on how to make chocolate cake balls, watch this video:
Step 5 – Decorating the Cake
- If the cake is covered with thick cream, then no additional fastening for the balls will be required; they will hold well enough on such a surface.
- If the cake is covered with mastic, then during the process of installing the decor it is necessary to additionally drip a little melted chocolate at the points where the balls and mastic are attached.
Possible problems
Transparent balls
Transparent balls can be made from gelatin or isomalt.
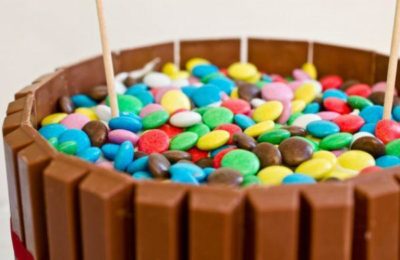
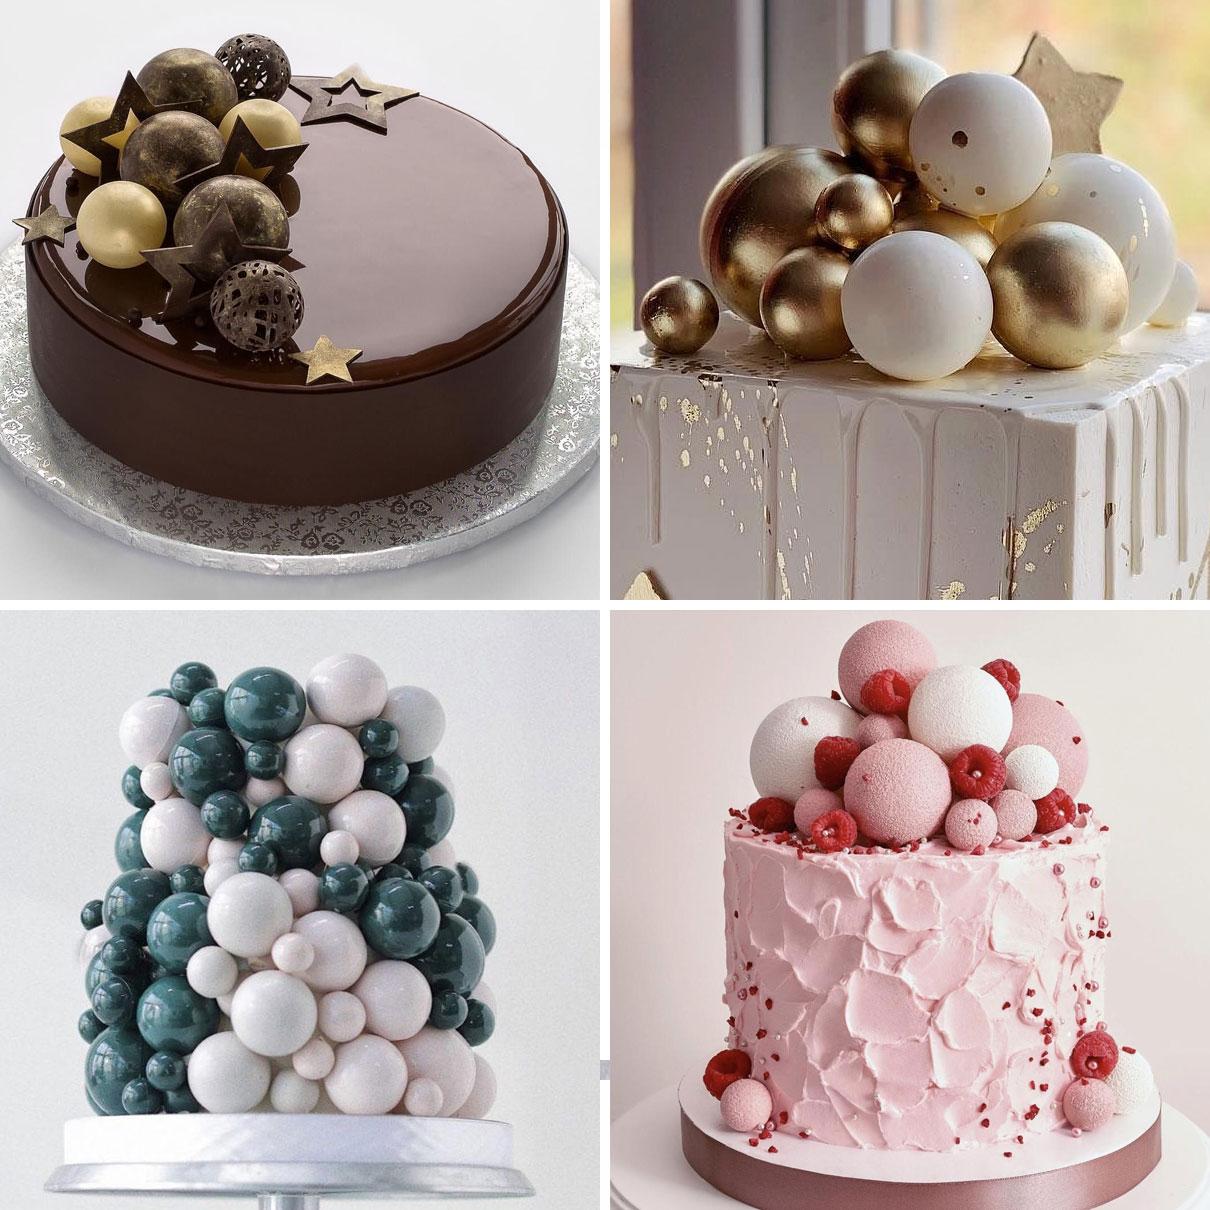
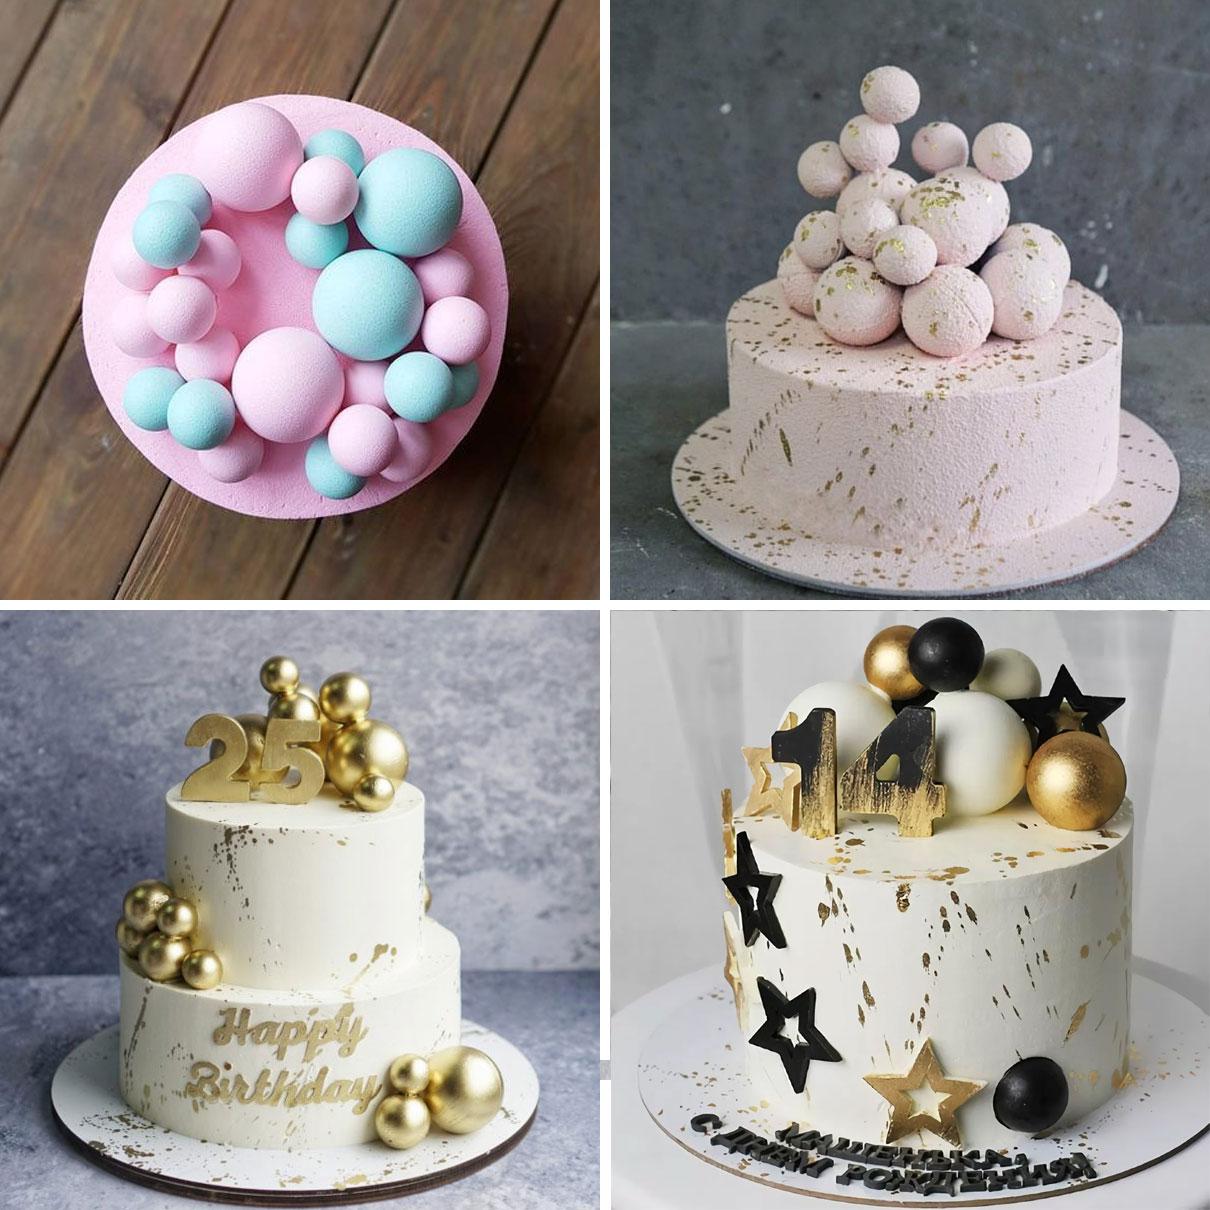
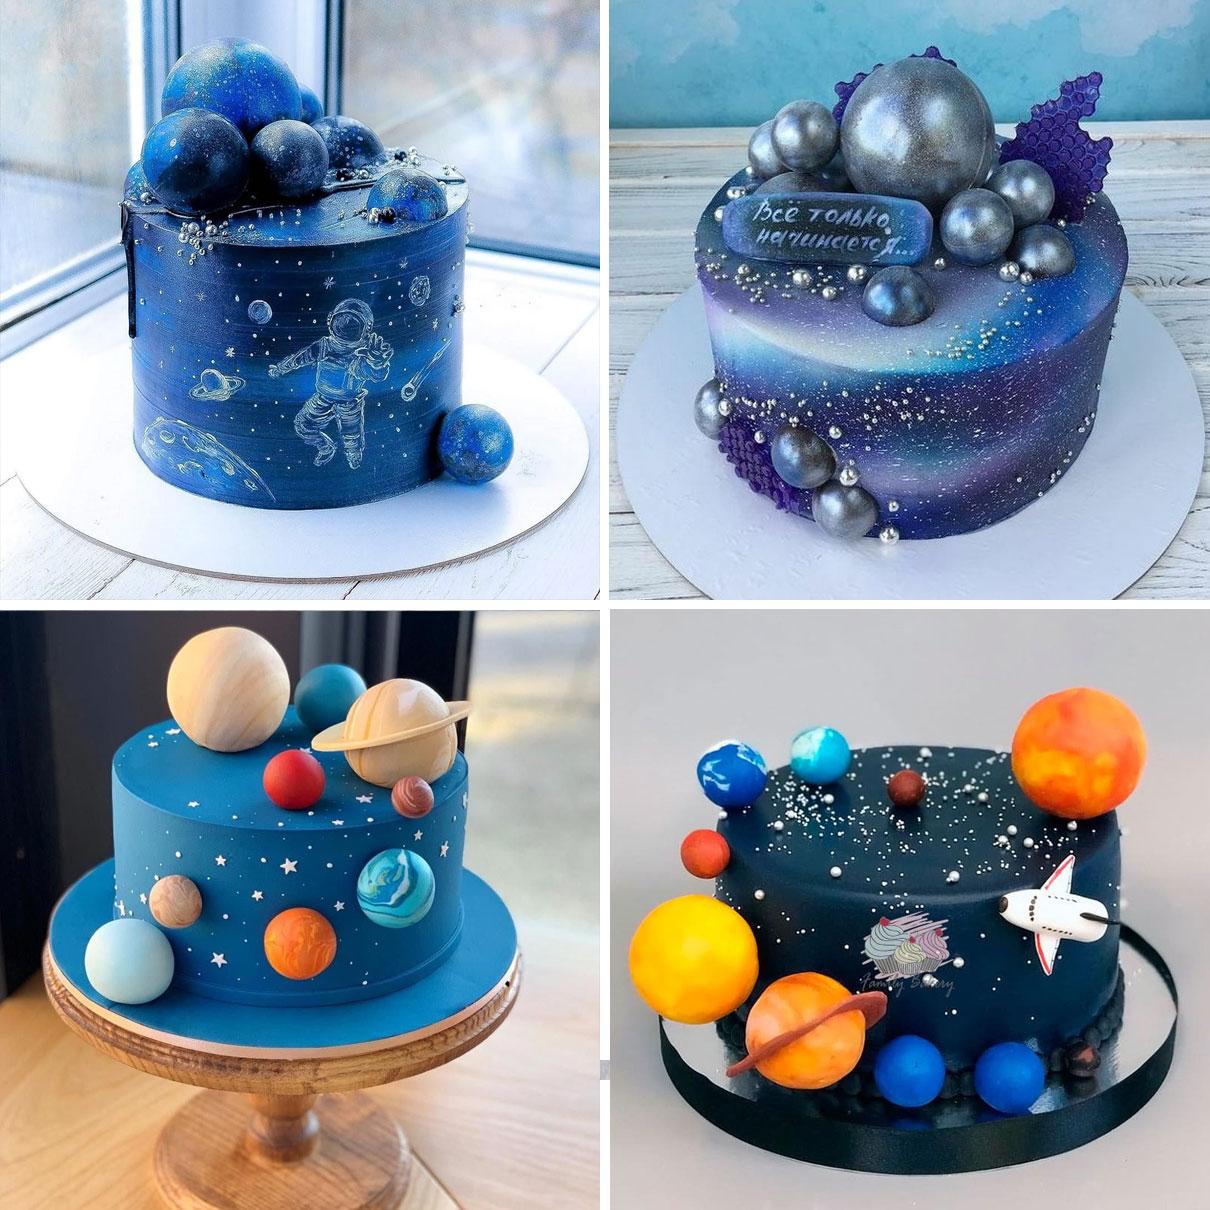
Design ideas
Now you know how to make colored or gold (glittery) cake balls from tempered chocolate. See the photos to see what a homemade holiday cake decorated with these homemade spheres can look like. Perhaps you'll love one of these wonderful ideas and successfully replicate them, adding your own touches.
We look forward to your feedback in the comments and photos of balloons you made yourself at home.