How to make chocolate letters and numbers

Content
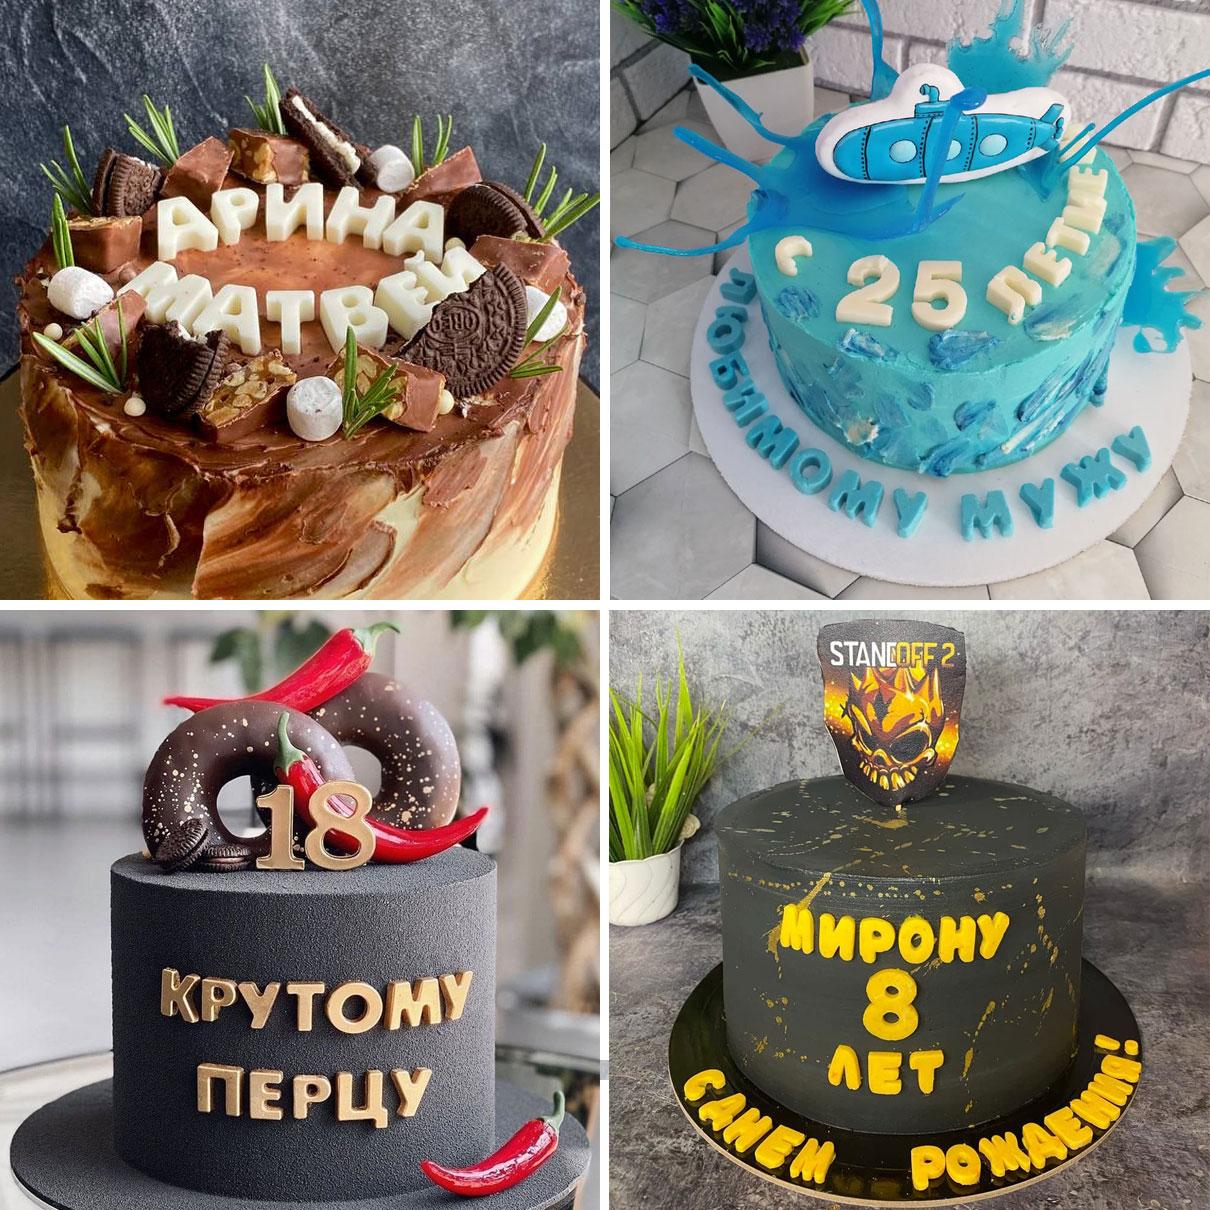
Three-dimensional elements are one of the most popular decorating options for confectionery today. In this article, we'll show you how to create beautiful chocolate letters and numbers for your holiday cake and how to properly attach them.
Volumetric confectionery decor
Chocolate cake letters can come in a wide variety of designs, so it's important to consider the following important points when approving the design:
- What size should edible chocolate numbers or letters be?
- Will it be classic white, milk, dark chocolate or will the mass need to be additionally colored?
- How the chocolate letters and numbers will be attached to the cake.
The volumetric decoration can be attached in different ways:
- just stick it into the cake on a stick, like toppings;
- attach to the top or side, forming an inscription on the corresponding plane;
- place vertically on top of the cake.
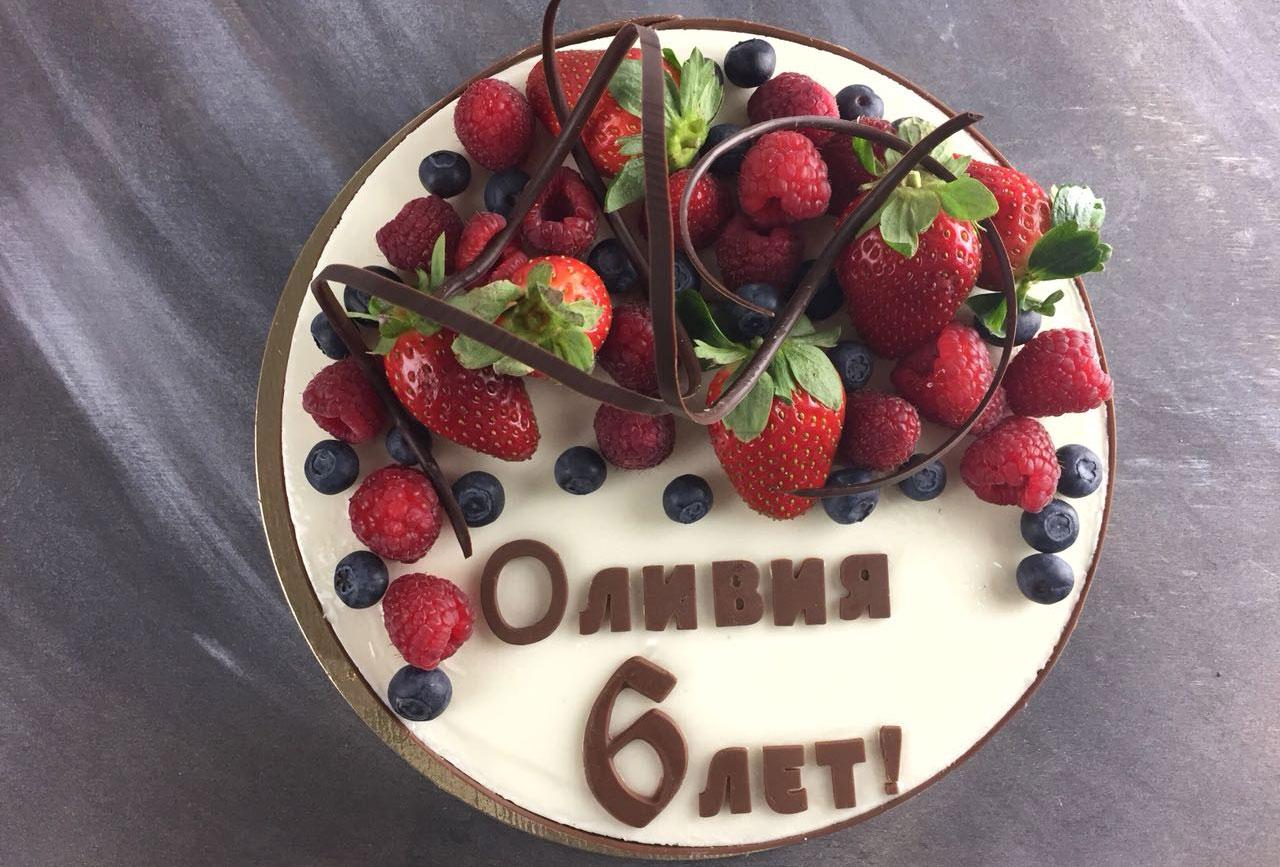
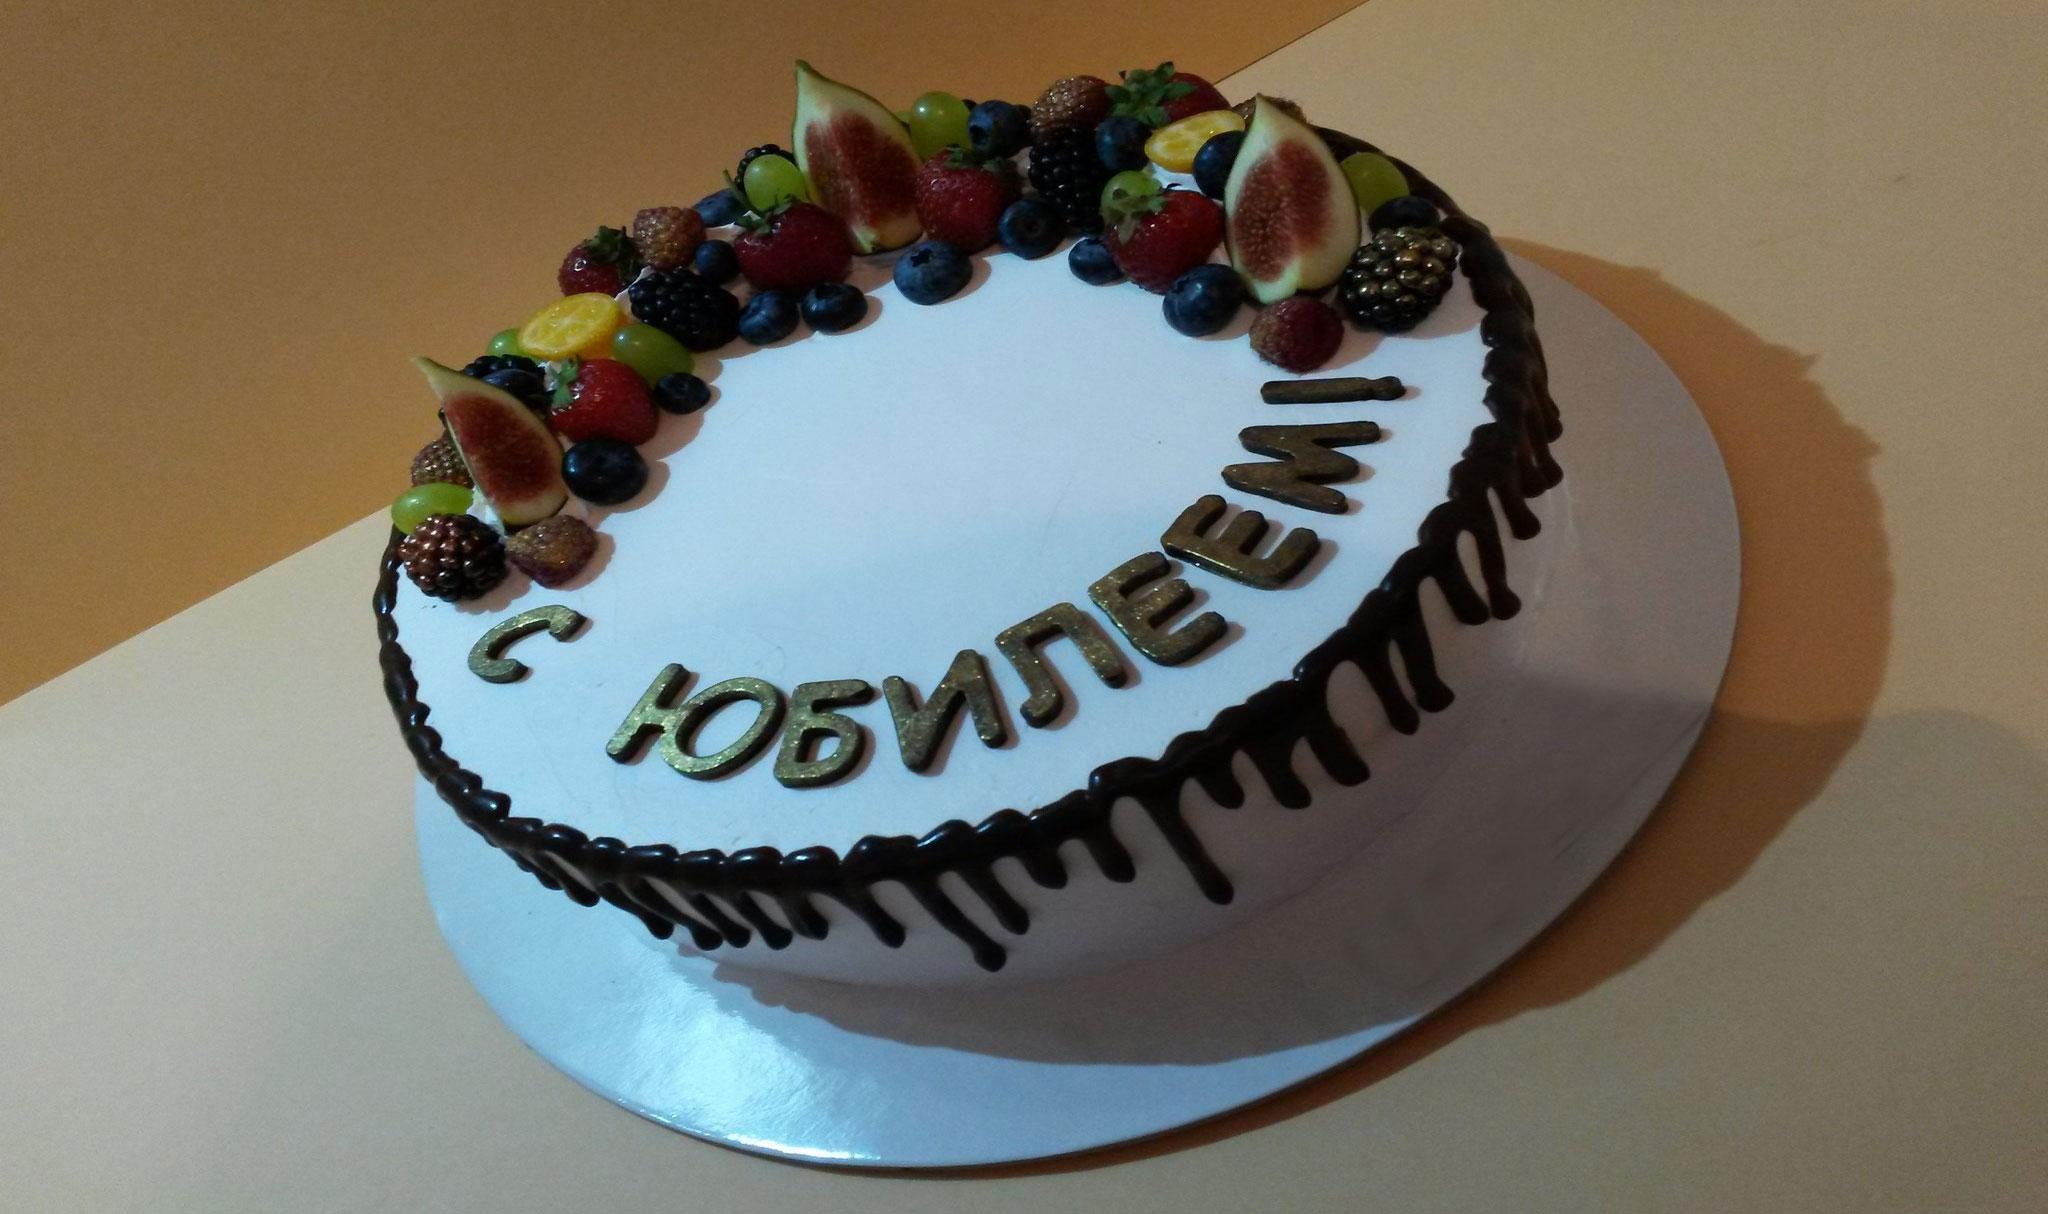
See the photo to see how beautiful edible chocolate figures can look when used as cake decorations.
Now that you understand exactly what you want to create at home, let's talk about how to make your own chocolate decoration in the form of one large number or a whole set of letters.
Simple methods of production
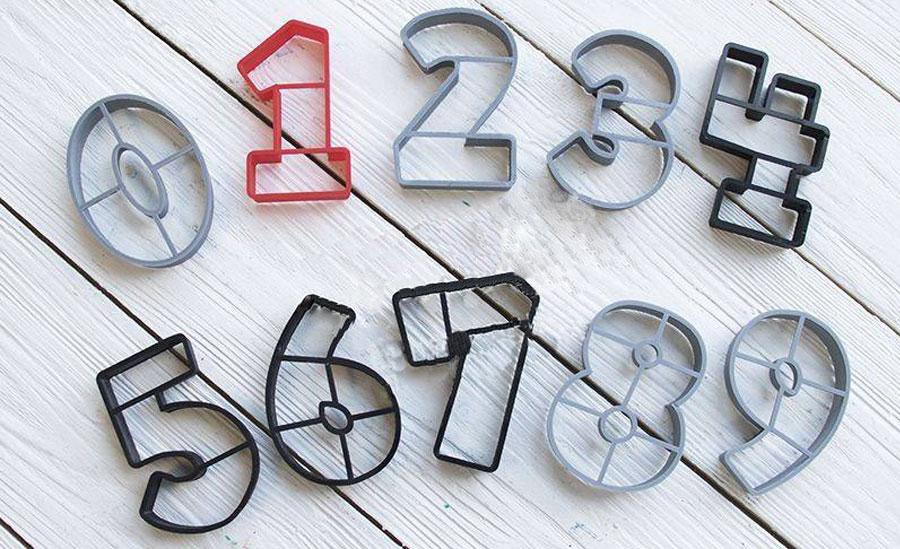
The easiest way to make 3D numbers or letters for a cake is to use ready-made molds. A wide variety of options are readily available today at specialty stores or online. However, it's important to pay special attention to the material the mold is made from.
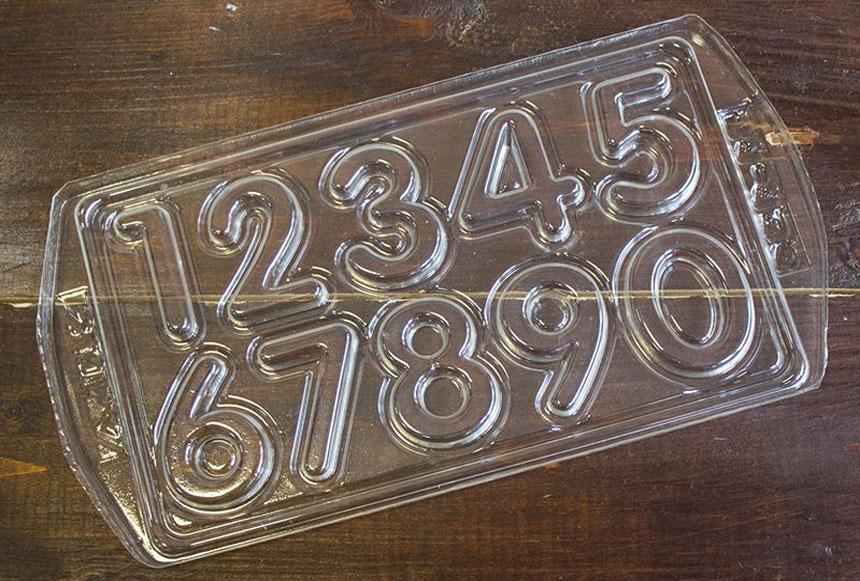
Plastic molds
Even the most inexpensive plastic mold can be used to make letters and numbers for a cake, but it's important to keep in mind that, unlike silicone or polycarbonate, plastic:
- has a surface that is not smooth enough, which makes it more difficult to remove the chocolate figures;
- It scratches and cracks easily, causing the molds to deteriorate quickly.
However, unlike silicone or polycarbonate, a plastic mold is quite inexpensive, allowing you to purchase a wide variety of options for your culinary experiments.
Silicone molds
Many professional confectioners prefer to make letters, numbers, and other decorative elements from chocolate in soft silicone molds, noting the following key advantages of the material:
- optimal surface smoothness;
- easy removal due to the flexibility of the shape itself;
- Durability and ease of storage of silicone molds.
However, a novice pastry chef may find it difficult to properly remove the finished decoration from the soft shell. Many who have tried making small letters themselves report breaking the decoration in the soft molds before they could even remove it. Larger shapes are easier to work with.
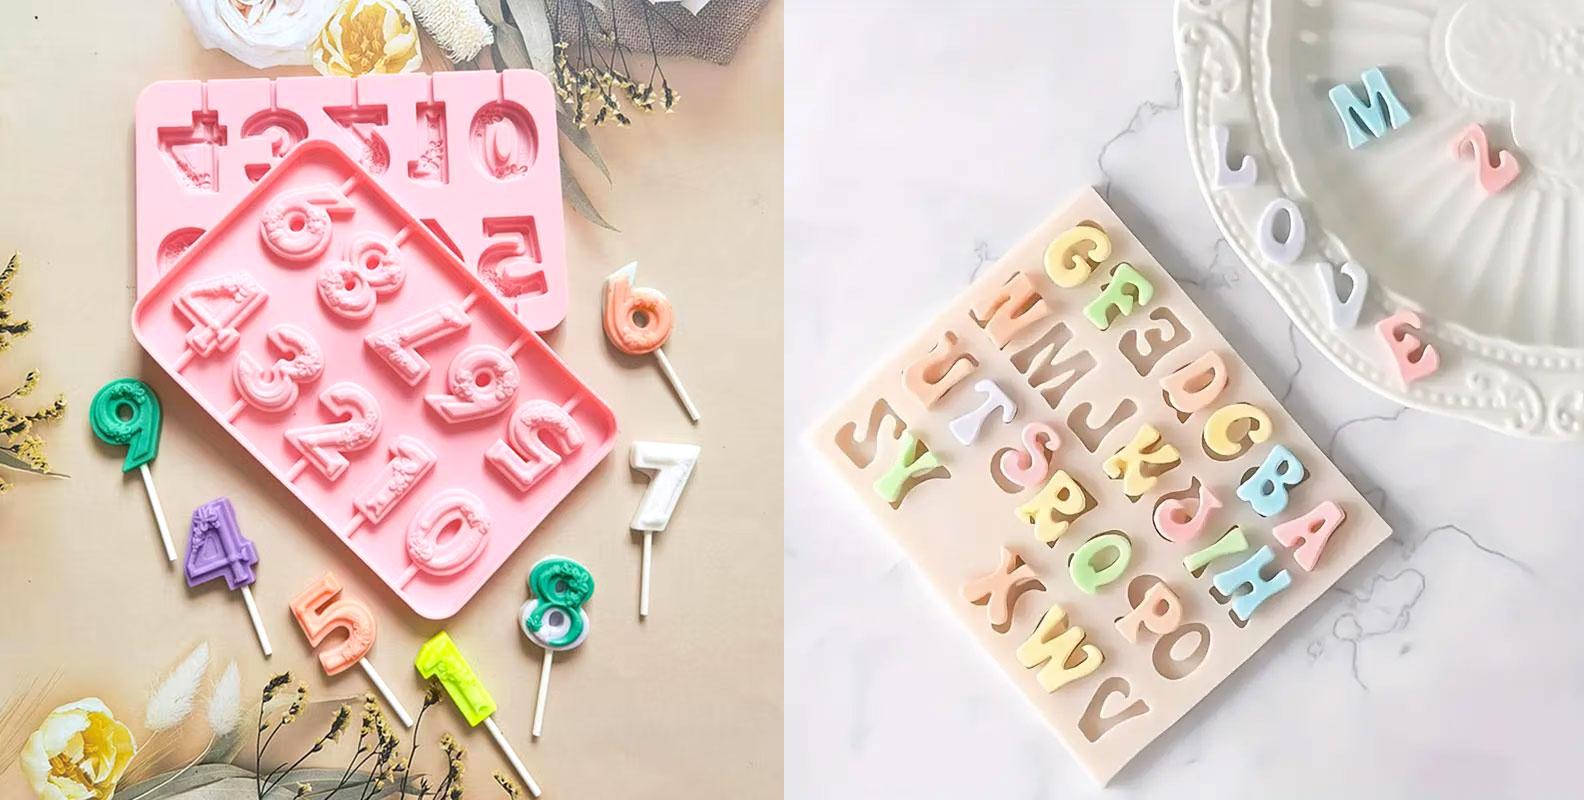
Silicone is definitely not suitable for this type of decoration glaze, as it is more fragile compared to tempered chocolate.
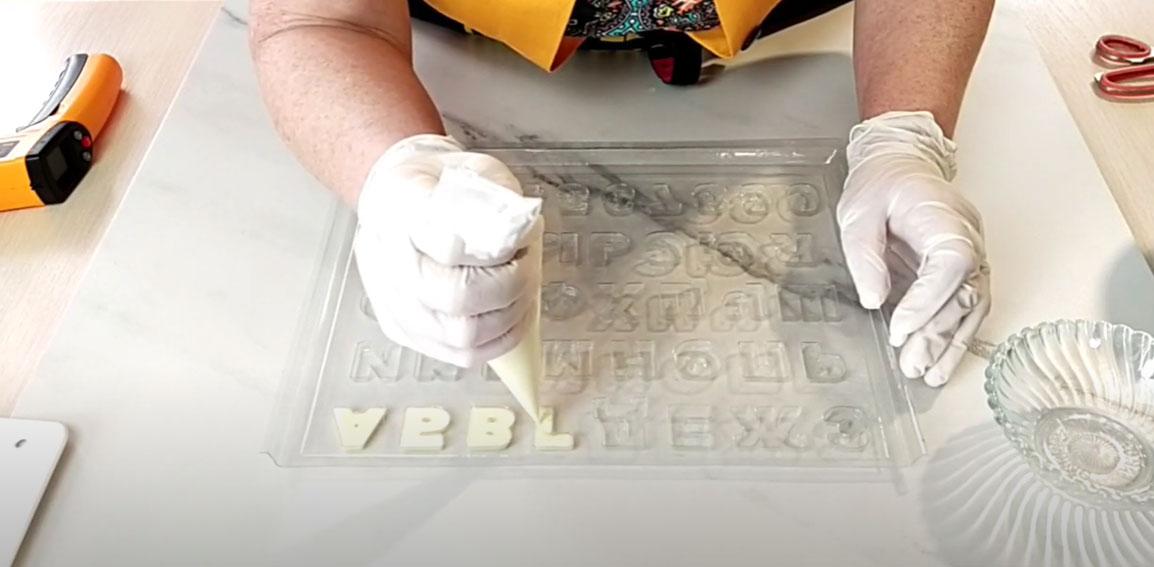
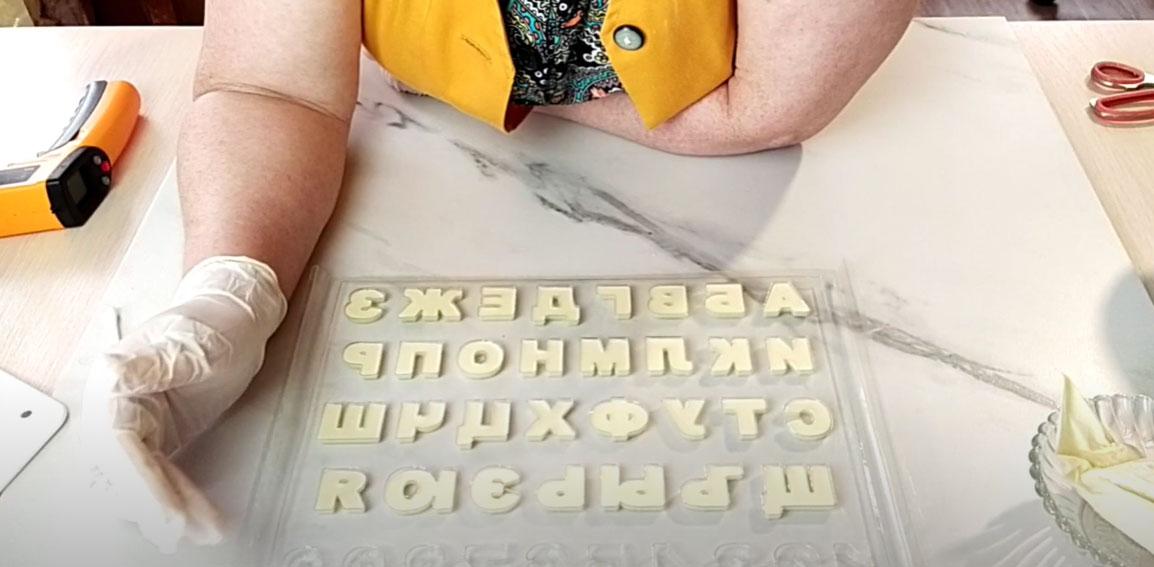
Polycarbonate molds
This is already a professional pastry chef's tool. Polycarbonate molds offer numerous advantages, including:
- the surface is perfectly smooth, making it easy to knock the finished decor out of the mold;
- strength and resistance to any mechanical damage;
- transparent texture, allowing you to assess the completeness of the form filling.
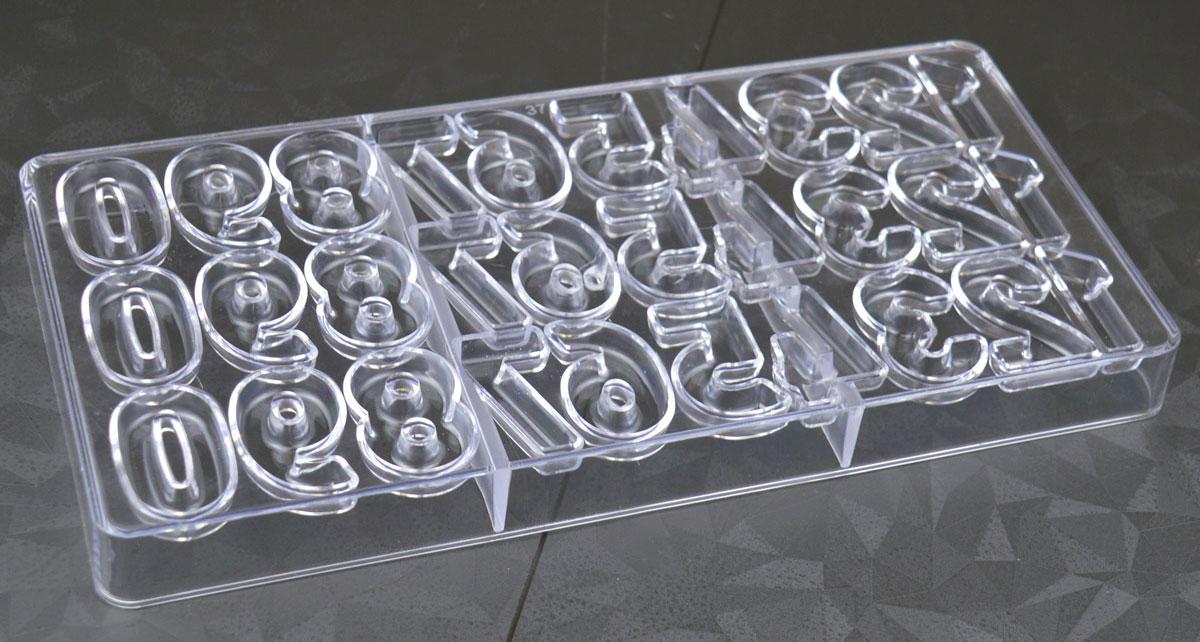
The only drawback of polycarbonate molds is their price. Purchasing a single letter or number made from this expensive material is uneconomical. Therefore, confectioners often purchase entire polycarbonate molds to create smaller pieces.
Handwritten inscriptions
If you don't have a mold but still want to impress someone special with a unique message on a cake, you can create a word out of melted chocolate on silicone-coated paper, a mat, or film. Once the chocolate has hardened, the message can be carefully peeled off and transferred to the cake.

Clearings
But if you want to decorate your cake with a mastic inscription, then be sure to take this handy pastry tool into service.
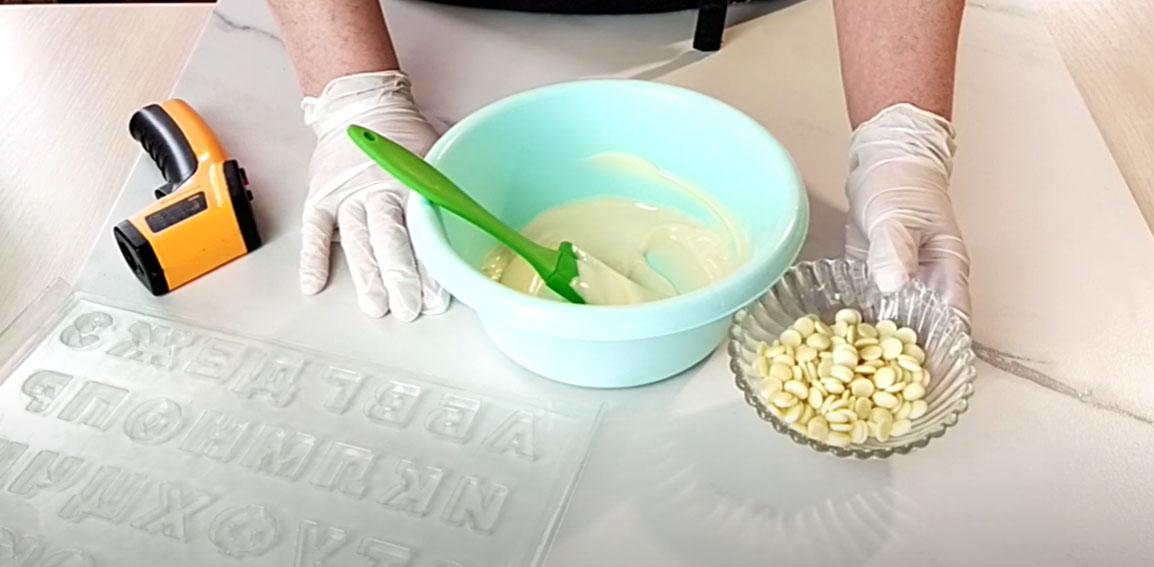
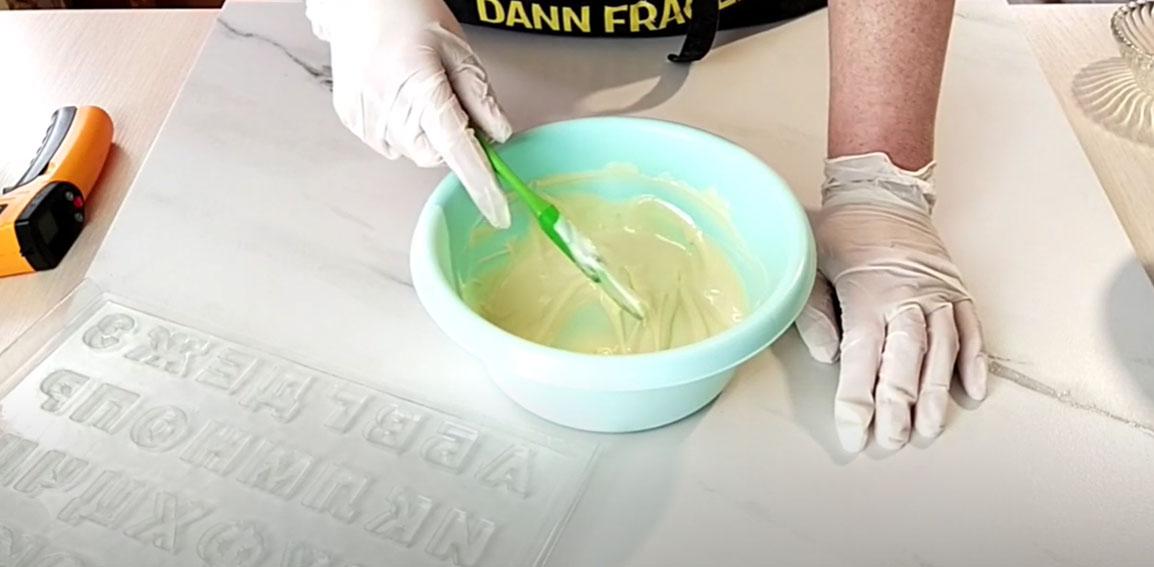
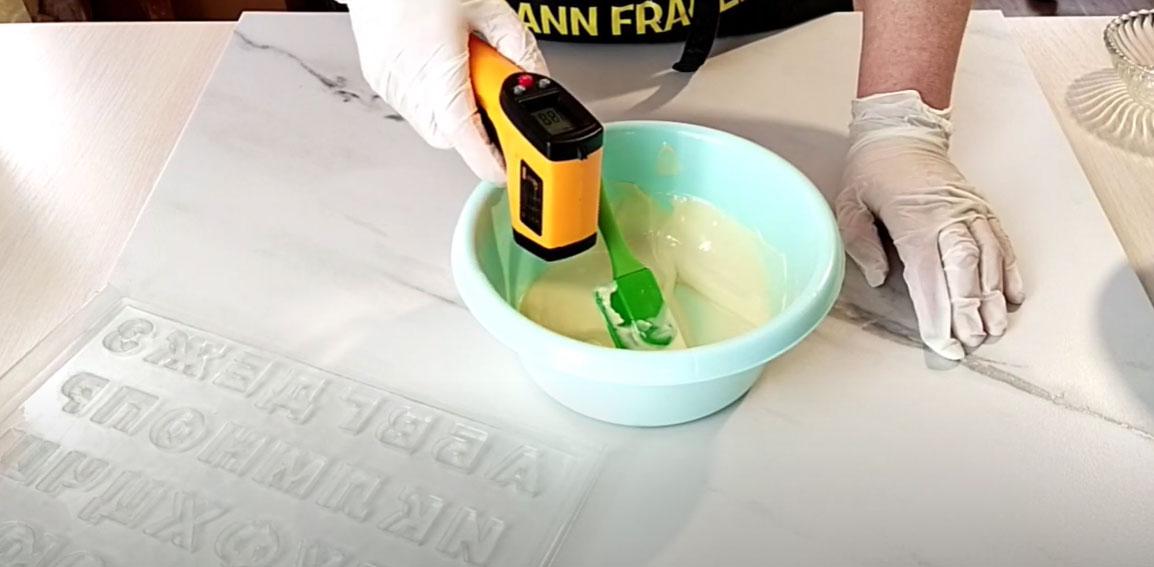
Chocolate recipe for making decorations
The algorithm of actions is quite simple:
- Heat the chocolate (or confectionery culets) to melting temperature (47-50℃).

- We cool the mass, creating the correct structure of the crystal lattice (25-27℃).
- Heat to operating temperature (28-30℃).
- Pour the mixture into the mold.
- Let the chocolate cool completely and stabilize.
- Carefully remove and use to decorate cakes, sweets or pastries.


For more information on how to make chocolate letters in a silicone mold without breaking them during removal, watch this video:
How to attach letters and numbers to a cake
All three-dimensional decorations are attached to the dessert before being given to the client, and in some cases, already at the celebration site before serving.
Option #1 – on a skewer
It is better to make a large volumetric number the central element of the composition, securing it with a wooden or plastic skewer, as shown in the photo.

Please note! For this type of installation, the skewer is inserted into the figure during the pouring process. Do not attempt to pierce the hardened chocolate figure, as this will ruin the piece.
Option No. 2 – fixation with mastic
You can secure the letters to the surface of the fondant using a small amount of melted chocolate. Make sure the cake surface is well chilled.
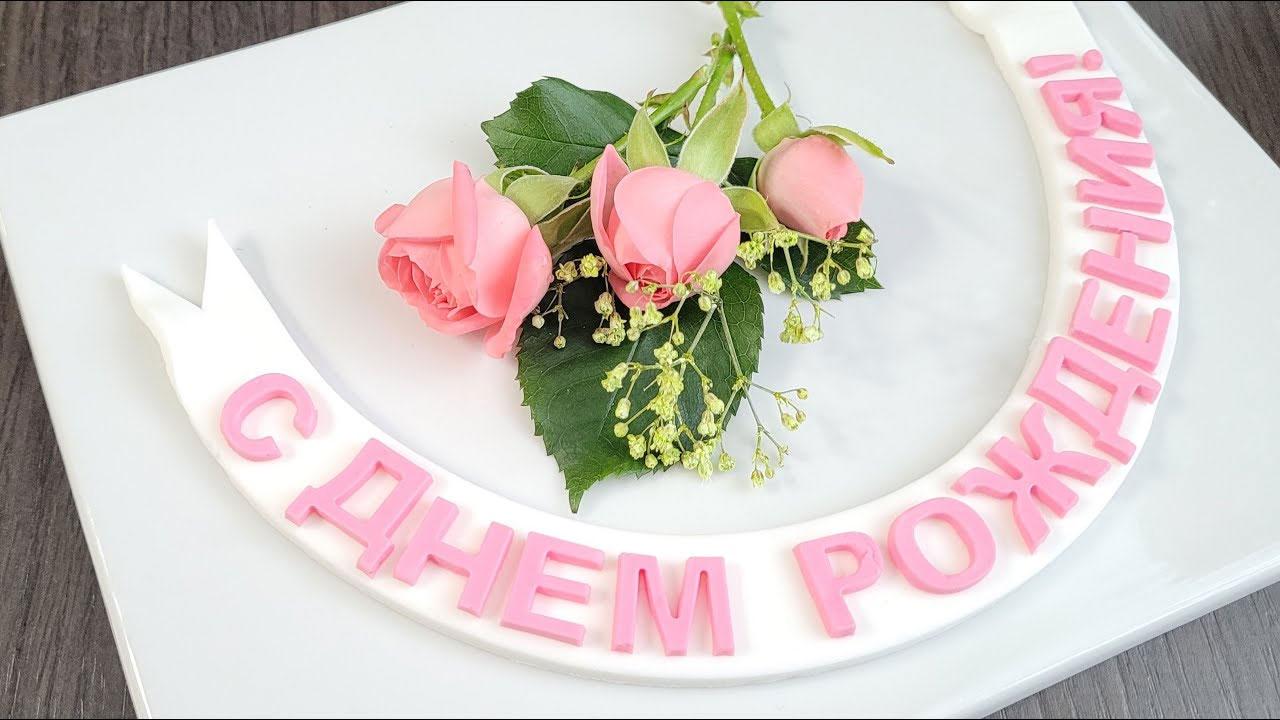
Option No. 3 – for a creamy coating
If the cake is covered with frosting, no additional tricks are required – the letters will adhere perfectly to the top of the cake. Mounting them on the side of the cake with frosting is not recommended, as the heavy letters will simply slide down. In this case, it's better to make an additional plate out of fondant and attach the numbers or letters to it.