Tempering chocolate at home

Content
Tempering chocolate is one of the most complex technological processes, so not all novice confectioners manage to master proper tempering at home on the first try. In this article, we'll explain how to properly work with white, milk, and dark chocolate, what important points to pay special attention to when heating and cooling the mixture, and how to temper chocolate at home without a thermometer or marble board.
Why temper chocolate?
Tempered chocolate has special properties such as:
- correct uniform texture;
- beautiful glossy shine (without sugar or greasy film);
- high melting point (products do not melt in your hands);
- rapid hardening upon cooling with a slight decrease in volume (products are easily removed from the mold);
- no crumbs when broken.

The principle of tempering
The process of chocolate recrystallization consists of three steps:
- Heating to melting temperature.
- Cooling to crystallization temperature.
- Reheating the mass to operating temperature.
The temperature chart differs for dark, milk and white chocolate:
| Type of chocolate | T melting point | T crystallization | T working |
| Black (bitter) | 47-50℃ | 27℃ | 30-32℃ |
| Lactic | 44-45℃ | 25-26℃ | 28-30℃ |
| White | 44-45℃ | 25-26℃ | 28-30℃ |
The three stages and the temperature that must be strictly maintained during the tempering process can be more clearly represented on a graph.

Tempering on an industrial scale has long been carried out using automated lines, but experienced confectioners know methods for making excellent tempered chocolate at home.
What kind of chocolate is tempered?
Before you try tempering white, milk, or dark chocolate at home, you need to choose the right base.

Next, we will look at the basic methods that are used today by both experienced pastry chefs and many housewives.
Method No. 1 - on marble
Step-by-step instructions for tempering marble.
Step 1: Melting the chocolate.
The chocolate callets or bars must be heated to melting point (see table) to break down the existing cocoa butter crystal structure. This can be done in a double boiler or by heating the mixture in short bursts in the microwave.

Step 2. Cooling on marble.
Pour approximately two-thirds of the chocolate mixture onto the stone and cool it with a spatula. Spread the chocolate thinly over the stone, then reassemble it into a single mass, monitoring the temperature with a pyrometer (remote laser thermometer). Repeat the process until the temperature reaches 26.7-27°C, at which point a new, stable crystal lattice forms in the mass.

Step 3. Increase the temperature to operating temperature.
At this stage, we need to add the tempered chocolate, cooled on the marble, to the warm, untempered mixture remaining in the bowl. When mixed, the tempered chocolate will impart its crystal structure, while the untempered chocolate will raise the overall temperature of the mixture. If the mixture isn't warm enough after mixing (the working temperature is indicated in the table), you can warm the chocolate slightly. It's important not to overheat it and damage the crystal structure again.

Method #2 – in the microwave
Most often, when novice housewives search for information on how to temper chocolate at home in small quantities (50-100 grams), they find recommendations for using a regular household microwave.
The main thing is to follow these tips:
- Melt the chocolate in short bursts of 10 seconds.
- Stir the mixture well after each heating.
- Do not heat chocolate above 45℃ (white and milk) and 50℃ (dark).
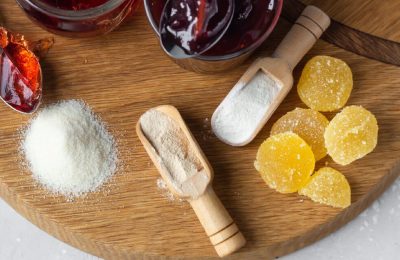
Method #3 – with Mycryo cocoa butter

The method is extremely economical and allows you to temper large quantities of chocolate at once.
Step 1: Melting the chocolate.
Break a bar of white, milk, or dark chocolate into pieces and heat it using a convenient method until it melts and forms a homogeneous mass at a temperature of 45-47°C.

Step 2. Cooling.
Cool the mixture while stirring until it reaches the desired temperature. 34-35℃! You can achieve the desired result naturally (it may take longer). You can speed up the cooling process by placing the bowl in cold water or on a cold surface.

Step 3: Add Mycryo crystals.
When the desired temperature is reached, add Mycryo butter (1% of the total amount of chocolate) and stir the mixture vigorously until it reaches working temperature (see table).

Method #4 – Using Callets
Today, you can buy chocolate callets (also called "buttons," "drops," or "culets") in any specialty store. These callets will not only help you prepare chocolate glaze, but also normalize the chocolate's crystal structure.
Tempering chocolate using the seeding method (using callets) is extremely simple, so this method is best used at home.
Step 1. Measure out the correct proportion.
Divide the total number of callets into two bowls. The first contains 3/4 of the total mass, the second 1/4 of the total mass.

Step 2. Melt the chocolate.
Heat most of the chocolate callets in a double boiler or microwave, stirring constantly and monitoring the temperature, as in the classic tempering method.

Step 3. Grind the callets.
It's best to crush the smaller portion of the callets first. This will help them dissolve much more quickly in the warm mixture and create a stable crystal lattice.

Step 4. Seeding.
Gradually add the crushed seed callets to the warm chocolate. Stir vigorously until the solids are completely dissolved.

Step 5. Cool to operating temperature.
While kneading, cool the mixture to working temperature (according to the table, taking into account the type of chocolate callets - white, milk or dark).
The mass is ready for further use.