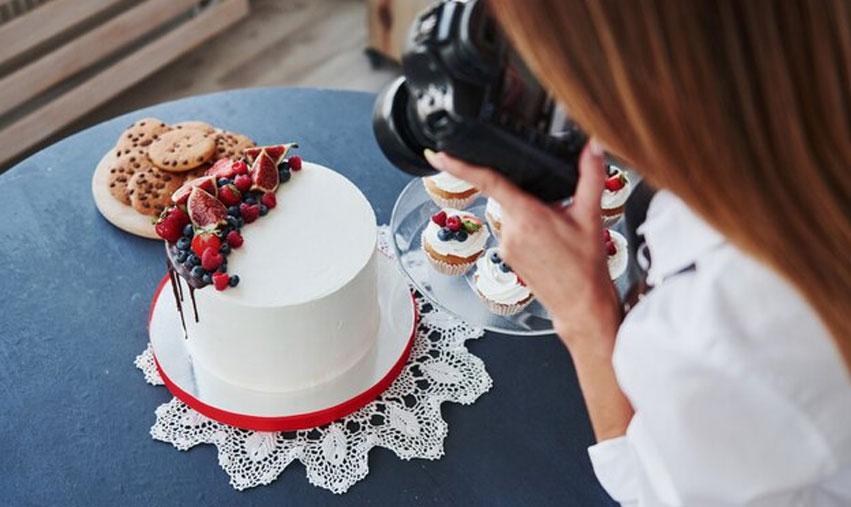
How to take beautiful photographs of cakes

Content
Our website offers a wealth of original recipes and creative ideas for decorating your culinary masterpieces, but today we'd like to discuss how to beautifully frame and properly photograph homemade cakes for Instagram or for creating a personal portfolio for a budding pastry chef.
Necessary equipment
Nowadays, professional photoshoots of confectionery products in a studio and the creation of a personal pastry chef portfolio are quite expensive. Furthermore, it's practically impossible to assemble all the cakes and desserts at once so that the photographer can complete the work in one session. The difficulty of traveling with cakes is needless to mention, so most pastry chefs take photos for their blogs or portfolios themselves, arranging the photoshoot of each cake at a time convenient for them at home.
Learning how to photograph cakes correctly isn't difficult, and to create a picture that's as good as a studio photo, you'll need:
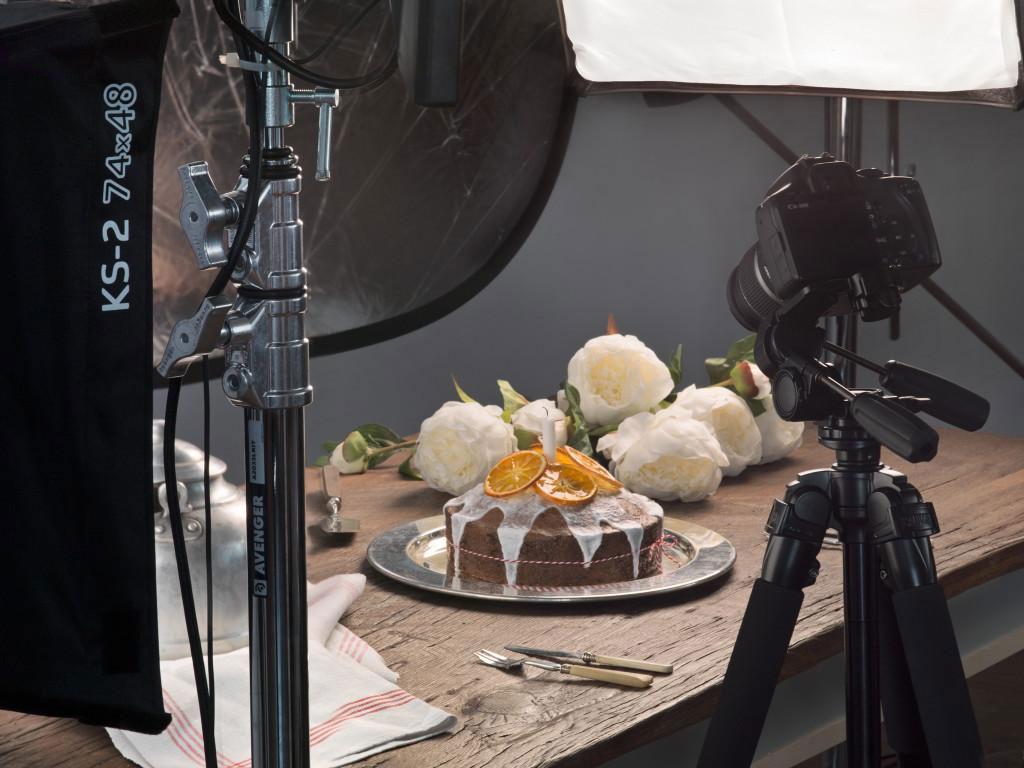
- camera or smartphone (ideally with a tabletop or floor stand);
- the right place for a photo shoot (the background for a photo of a cake should not distract from the design of the dessert);
- thoughtful lighting (natural light is ideal, but a simple kit consisting of a special lamp, diffuser and reflector will also help);
- creative props (toppers with traditional inscriptions or your personal information, as well as other objects that will be present in the frame to create a composition).
Advice from the pros
With just one smartphone, you can take stunning Instagram photos by following these simple tips from a photographer.

Background for shooting
It's best to choose a neutral, not too bright background, in keeping with the color scheme of the cake. The following look good in the frame:
- marble kitchen surfaces;
- fabric tablecloths in neutral tones without bright prints;
- draping the photo zone with plain fabric;
- photo zones decorated with wrapping paper of suitable colors.
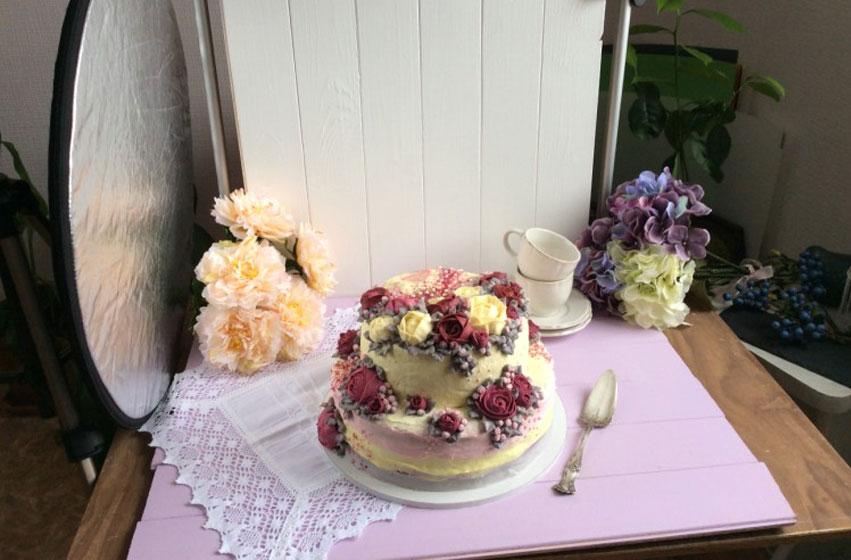
If you want to photograph a cake against a natural backdrop, it's easier to get a good angle in an open space rather than on a windowsill. Bright light from a window can often create an unsightly glow on the back of the cake. A reflector (or a sheet of foil or white paper) can help correct this problem, but that's the next step in your professional development as a food photographer.
Lighting
Everyone who has already learned how to photograph cakes correctly notes that the most difficult thing for them was learning to work with light.
The following options are possible:
- natural light – the simplest, but, unfortunately, not always available option;
- artificial light (can be spot, directional or diffuse, illuminating the subject from one side or from different angles).
When experimenting with light, keep these tips in mind:
- too bright light from the window can be dimmed with a transparent white fabric;
- When photographing opaque desserts, it is best to place the artificial light source on the side;
- It is optimal to illuminate jelly desserts from several points (a light source located behind the jelly layer will create a beautiful glowing effect);
- glossy mirror finishes can glare, so they should be softly illuminated from the sides and photographed without a flash;
- Bright, one-sided light can create shadows; this effect should be avoided by using reflectors.
For more information on how to work with lighting in food photography, watch this video:
Angle of attack
There are some generally accepted rules for photographing desserts:
- An attack angle of 20-30° is considered universal, at which both the sides and the top of the cake are clearly visible;
- A “delicious shot” can be obtained by positioning the camera at an angle of 40-45°;
- multi-tiered ones look best at an angle of 10-15°;
- Cakes whose main highlight is the design of the top can be photographed by simply placing the camera above the object.
Composition
When creating your perfect composition, consider these tips from photographers:
- the cake should be placed in the center of the composition, take up most of the frame and fit completely within it;
- desserts with complex designs do not require any additional elements; the background should be neutral;
- the perfect cleanliness of the photo zone and all objects in the composition is the main rule;
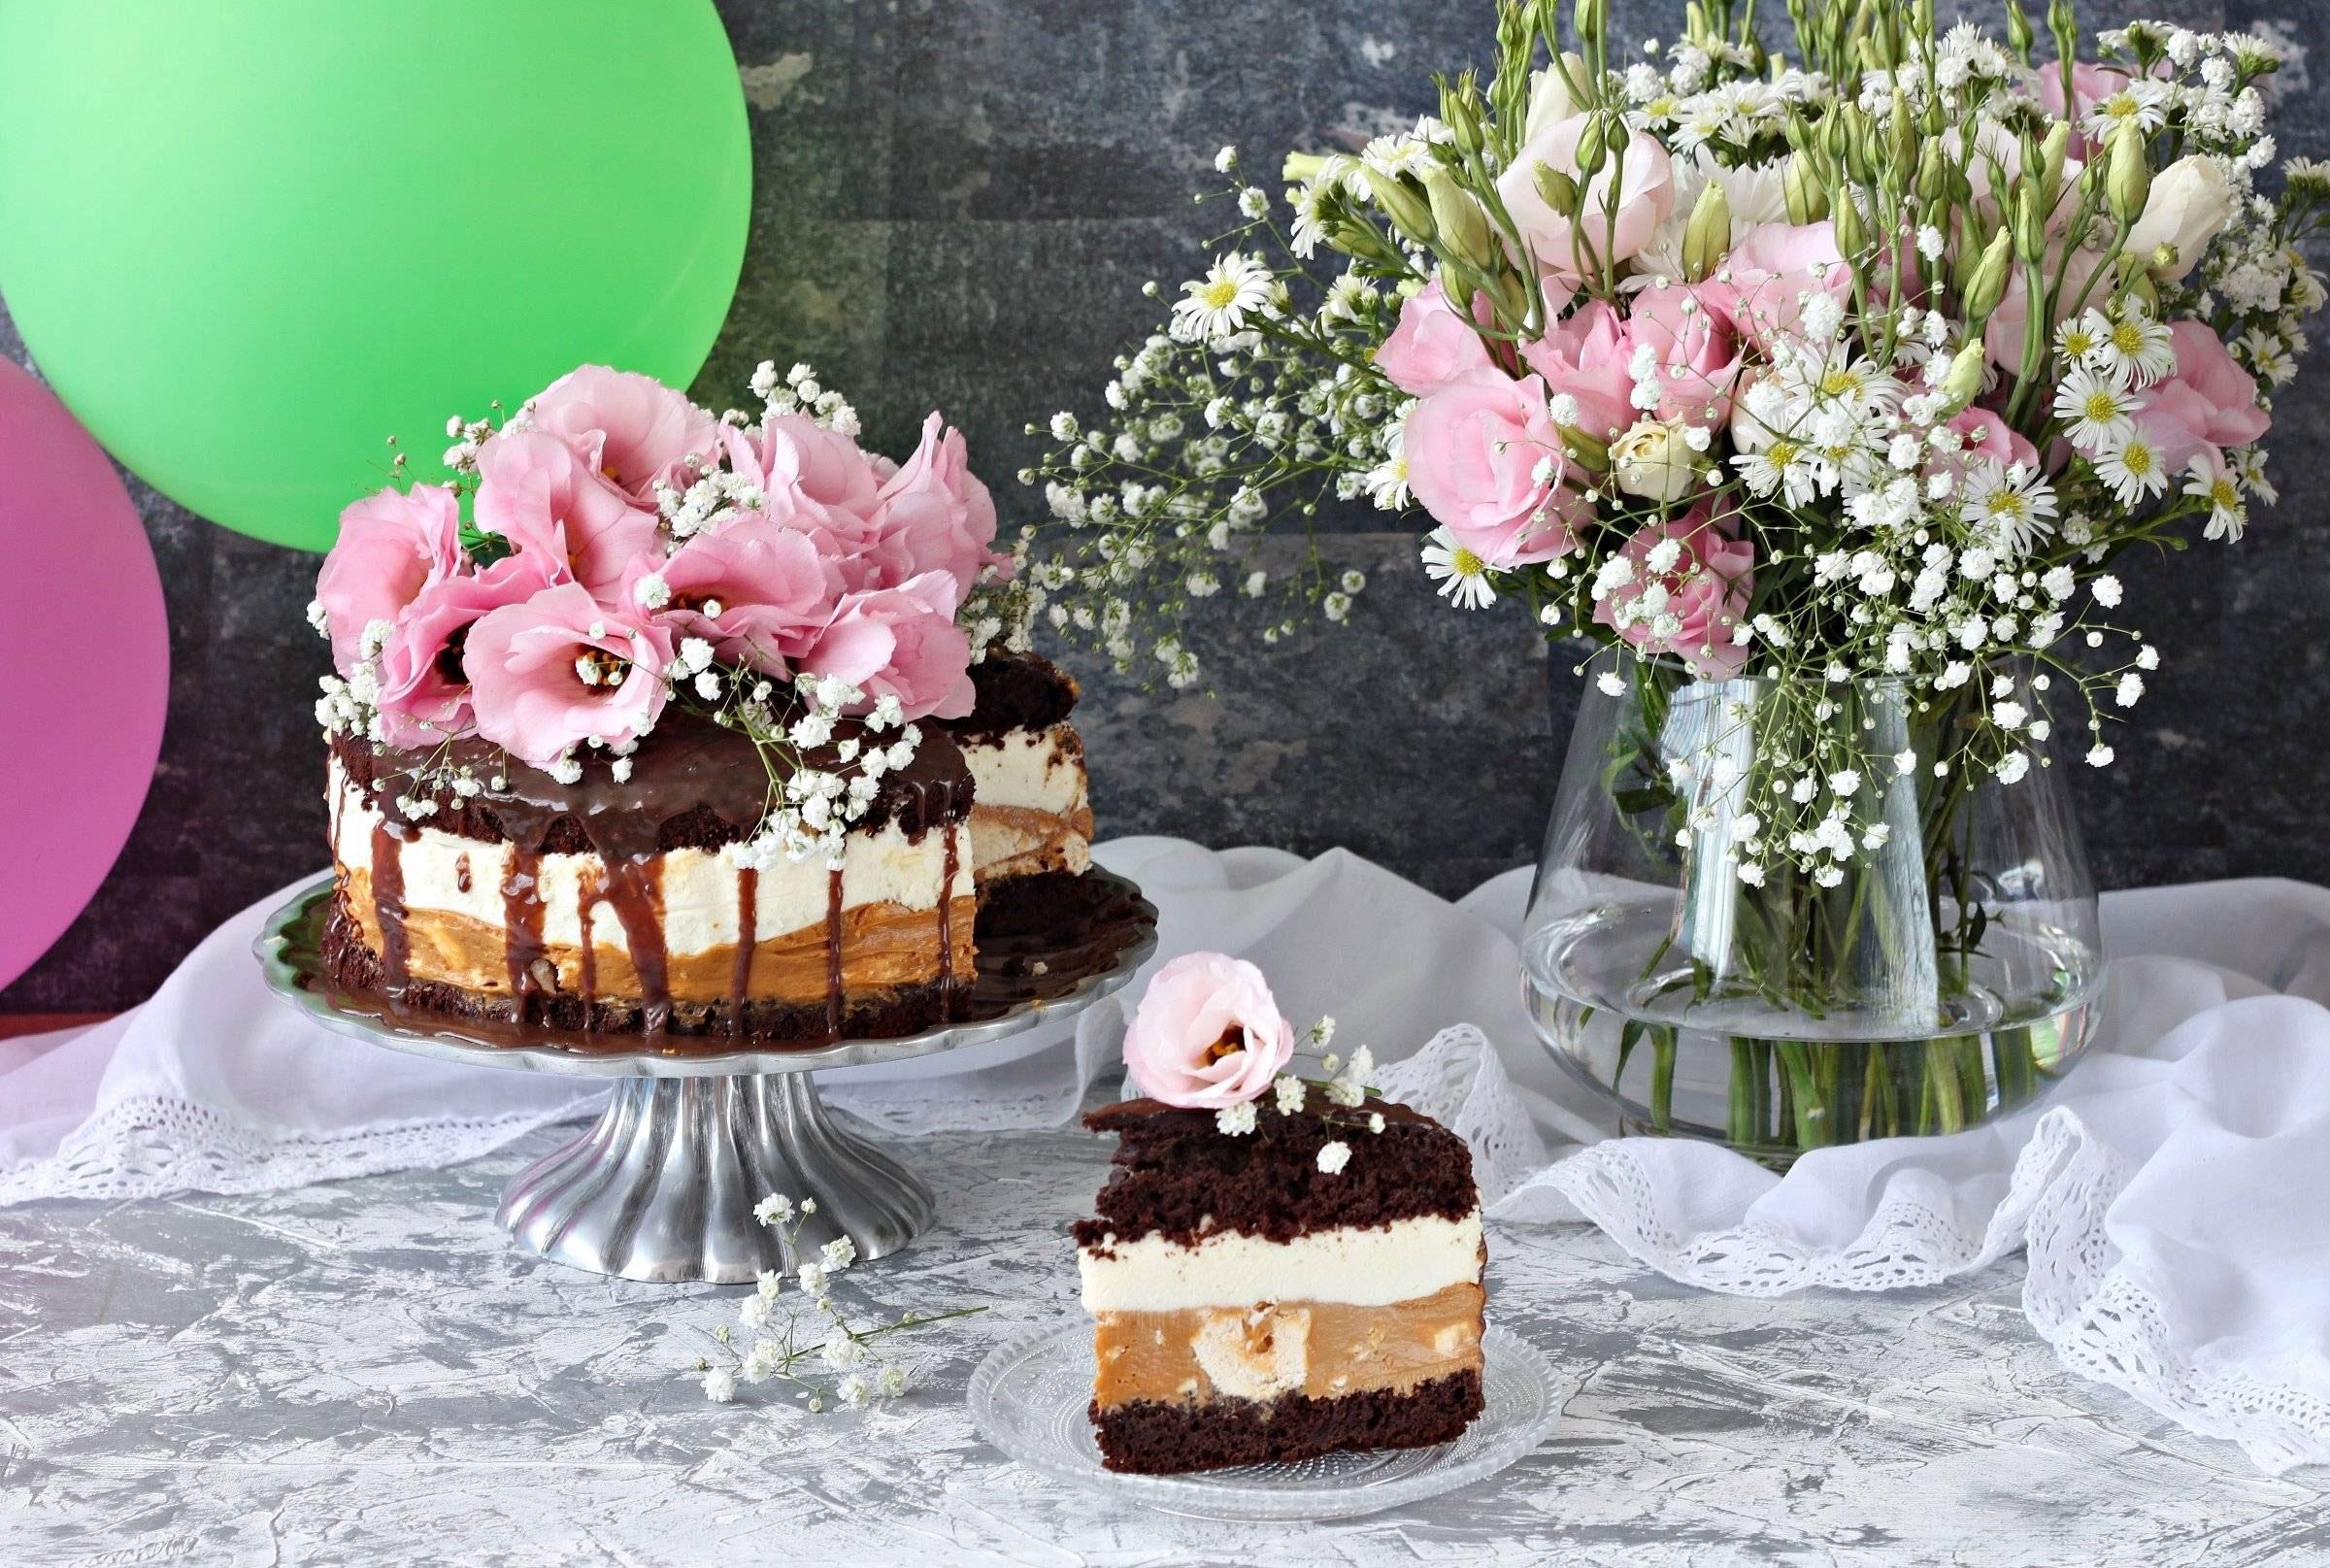
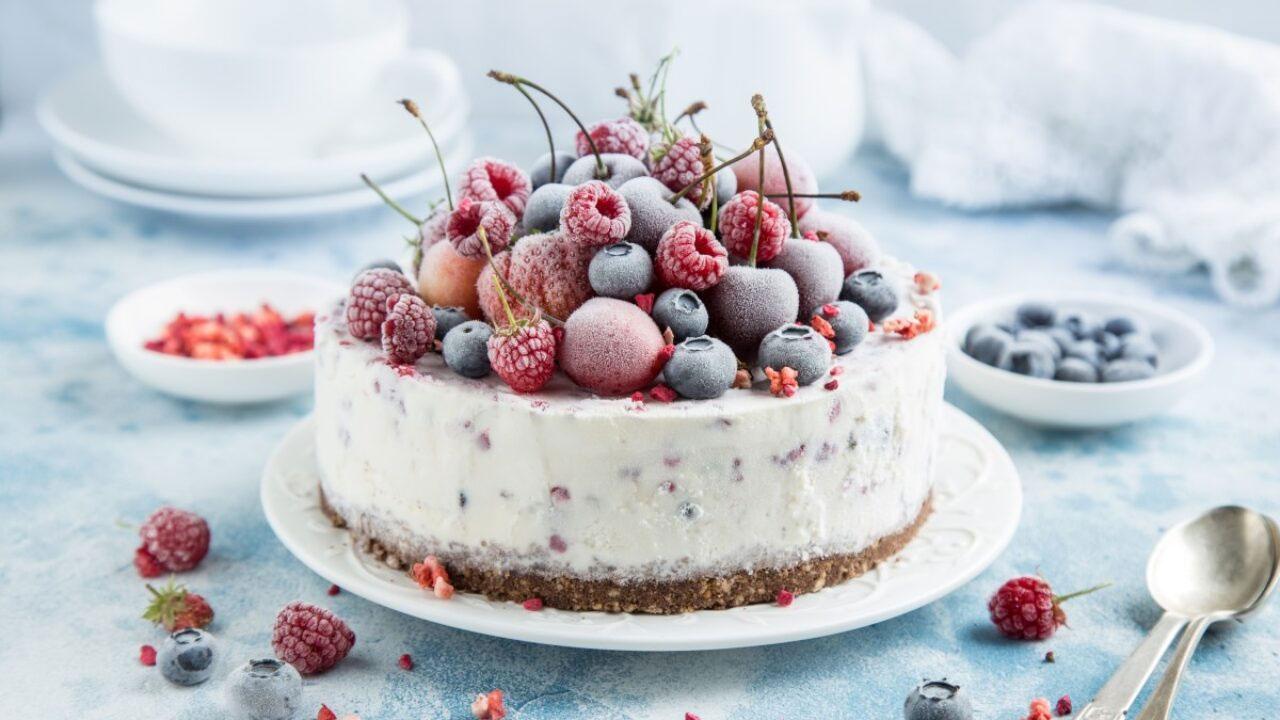
- Cakes, pies, and desserts with a laconic, minimalist design can be complemented with props that match the style (beautiful dishes, an elegant spoon, individual large flowers or mini-bouquets, lace elements, colorful confetti, fruits, and berries);
- If you're photographing your own work for a pastry chef's portfolio on a website or Instagram page, consider adding a topper or a matching sign with your information. This will inspire more trust than text added in a photo editor.
If the main beauty of the dessert is hidden beneath its outer decoration, take a photo of the cake in a cross-section, following these recommendations:
- cut out only one serving piece (usually 1/6 of the cake);
- try to get a perfect cut (to do this, cut the very chilled dessert with a large, preheated knife);
- There should be no crumbs or other traces left after the cut in the frame (they must be carefully removed).
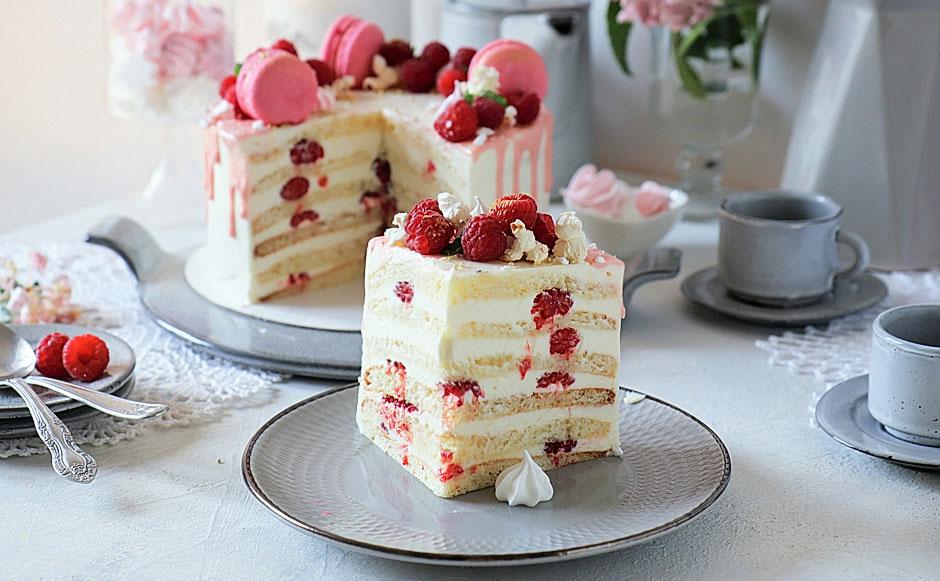
Cut cakes are photographed in three versions:
- the cake itself, without one piece;
- cake and a cut piece next to it on a saucer;
- only the cut portion.

Common mistakes made by beginning food photographers
Among the most common mistakes that experienced photographers notice in the work of food bloggers are:
- incorrect work with light (to learn to photograph without glare and unnecessary shadows, practice is required);
- a complete absence of shadows, which makes the picture unnatural (the other side of the coin, which arises as a result of the overly active use of reflectors);
- white background;
- extra objects in the background;
- incorrect selection of background shades and composition elements;
- bad angles (the art of taking a beautiful photo needs to be learned);
- too close-ups (all the smallest imperfections will be visible);
- untidy cuts (if you are not sure that the cut will be perfect, it is better not to do this);
- shooting without a tripod (a slight shake of the hand can make the shot blurry);
- extra light sources in the room;
- too many props (the dessert itself might get lost in the frame);
- the props are not in the same style.
Ideas for a beautiful photo with a cake
Often, when a girl receives a cake with a spectacular and very original design, she wants to take a beautiful photo and share such an unusual gift with her friends on Instagram or another social network.
For more ideas on how to make creative things at home with the cake you received for your birthday, watch this video: