How to Sift Flour - 6 Ways to Sift Flour Without a Sieve

Content
Recipes often mention the phrase "sifted flour." In the rush and bustle of cooking, many homemakers forget about this step or simply don't pay attention to it.
Why do you need to sift?
- Despite modern processing technologies, manufacturing "bloopers" are still a thing. Even in the highest-quality products, it's easy to find foreign debris, especially when we buy them loose to save money. It's a good thing if a natural thread from a packaging bag, some cereal from a nearby box, or a piece of paper ends up in our pie. But an unnoticed fragment of a plastic bag can irreparably ruin the baked goods.
- Sometimes small stones and broken glass are found in flour – this is a danger for us and our household helpers: a food processor, which is often used for kneading dough, or a bread machine.
By buying packaged goods, we protect ourselves from accidental waste, but we risk buying stale goods that have already become a home for food moths or granary weevils. These pests will also be detected during sifting, saving us both time and money.
To avoid losses from contaminated flour, avoid buying it during sales: manufacturers often reduce prices on low-quality products. Bulk products at the market should only be purchased from trusted sellers. Furthermore, it's not advisable to stockpile large quantities for future use, as the risk of pest infestation increases over time.
When stored for a long time, flour cakes, which deteriorates its baking qualities, and at a humidity of 14–15% and higher, lumps form.
By sifting this product, we restore its original properties. Drying it slightly, especially if repeated several times, makes it looser and more uniform. As a result, the flour mixes better with the other ingredients, the dough becomes more homogeneous, and it "comes to its proper shape" more quickly.
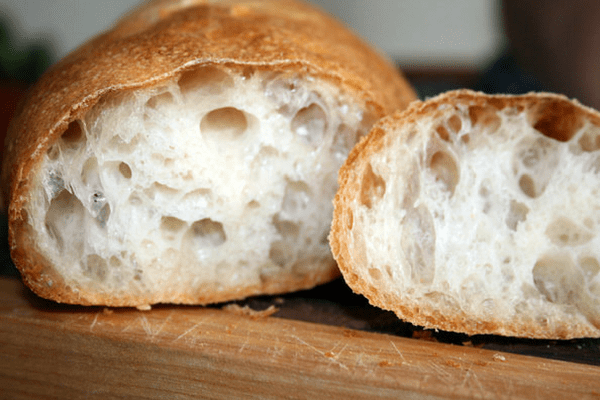
Caked flour has a smaller volume than loose flour. If you don't sift it, you can get the proportions wrong when the recipe calls for measuring ingredients in cups (or glasses) rather than grams. With a multicooker or bread machine, deviations from the specified volume are especially noticeable. We may get a completely different result than we expected. And back to the need to "breathe." During the sifting process, flour is enriched with oxygen, which makes yeast-based, sponge, and puff pastries fluffier. With shortcrust pastry, the effect will be less noticeable, but that doesn't mean it's not there.
All the pros and cons
This step in breadmaking is the most contentious in culinary debates. So, is it necessary to strain flour through a sieve before adding it to the dough? Let's try to find out the truth together.
How does sifting take place?
There are several ways to accomplish this task. The most standard and well-known method is to use a sieve or screen. This device is a mesh of thin metal wire or fishing line stretched along one side of a wide hoop. The hoop is usually made of wood, metal, or plastic.
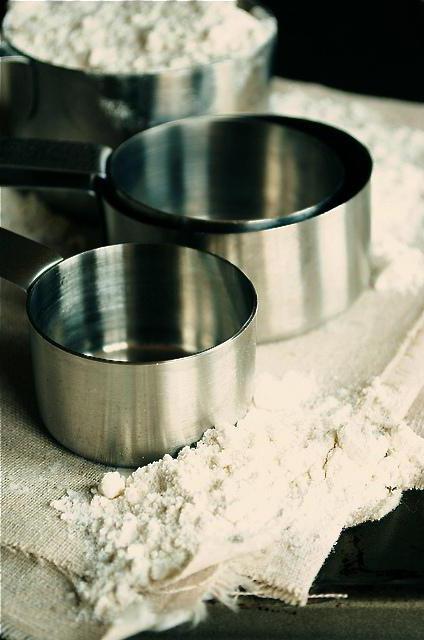
To sift flour, pour it into a mesh sieve. Place a deep bowl underneath to catch the purified flour. Shake the sieve gently.
Where to sow?
We're talking about bowls and pots here, but flour can actually be sifted directly onto the work surface. Of course, it all depends on the intended use. If you're making dough, you'll need to sift the flour separately. When using flour for rolling out dough, you can sift it directly onto the board or table.
It's easy to do. Before sifting, wash and dry the table or board. Then sift the flour through a sieve onto it.
6 ways to sift flour if you don't have a sieve
There are many ways to sift without a sieve. Some require kitchen appliances, others require more basic equipment, and still others require nothing at all. One method is sure to be suitable for specific conditions.
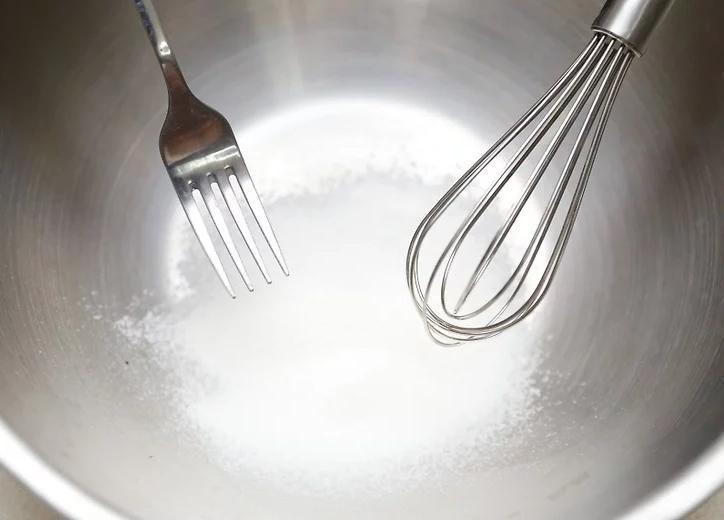
Fork, forward!
No sieve or whisk? No problem, a fork will do the trick. It sounds even funnier than using a whisk, but it's true.
Did you do it? Did it work? Excellent! Now, stir the flour again; it should be light and smooth.
If the lumps are completely unwilling to turn into normal flour, simply stir the fork more quickly.
Oh yeah! When sifting, remember that large amounts of flour will take quite a while.
Colander and cheesecloth
As already noted, you can achieve the desired consistency in flour using a variety of tools. Any object with many small holes is suitable for sifting. A colander is a good choice. A fine-mesh strainer also works well. When discussing how to sift flour without a sieve using any perforated object, don't forget about cheesecloth. You can stretch it over any surface and use a fork to stir and press the flour through it, forcing it into the holes. Kitchen utensils suitable for stretching cheesecloth are readily available.
Whisk and fork
You can sift flour at home without a sieve using a whisk and a fork. Here's how:
- Try to stir very quickly so that the product is better saturated with oxygen and the lumps break up faster.
- It is advisable to stir the flour in one direction.
Blender
Pour the flour into the blender cup, then select the blade attachment, carefully insert it and turn it on for 5-10 seconds, depending on how soft you want the flour to be after sifting.
Small sieve
If you don't have a large sieve for sifting, you'll likely have a very small sieve for other purposes. It's worth noting that large quantities of flour are best sifted using other methods, as a small sieve slows down the process considerably.
But if there's no other option and you need sifted flour, you can use a fine-mesh hand sieve. It's important to prepare the work surface first by lining it with foil or paper.
Since the device is small, there's a good chance a lot of the product will spill out. You can transfer the sifted flour from the paper into a container.
You can speed up the sifting process a little by gently pushing the flour through with a coffee spoon. Alternatively, you can make small holes with a knife.
The simplest method, which doesn't require any additional equipment, is to tap the package with your hands. Take a deep container, such as a basin or a saucepan. Open the package at one end and tap the edges with your palm to gradually release the product into the bowl. Pour enough product into the bowl to knead the dough. Leave the rest in the package, tape the top shut, and store it away.

In the bowl where you poured the flour, fluff it up with tablespoons. Use a gentle up-and-down motion with the spoons, allowing the flour to "fall" from above into the bowl. Continue this motion for 2-3 minutes. The sifted flour will be enriched with oxygen and become lighter.
How to make a sieve with your own hands?
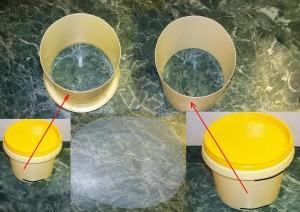
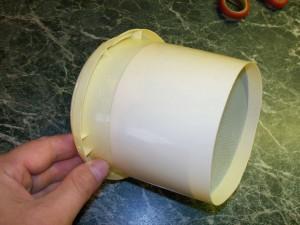
The most readily available materials for making a homemade sieve or strainer are plastic buckets like the kind they sell mayonnaise in, cheesecloth, or mosquito netting. Mayonnaise containers have a wonderful shape that allows the empty containers to be nested inside each other. We'll use this shape in our craft.
To make a sieve with your own hands for sifting flour or something else, you need two plastic buckets.
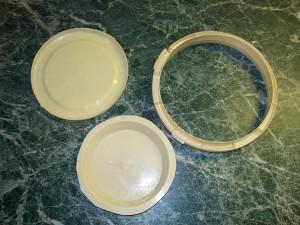
We only cut off the bottom of one.
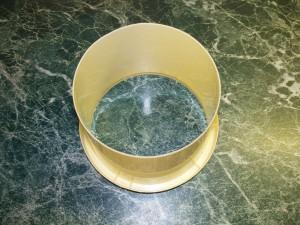
The second one has both a bottom and an upper rim.
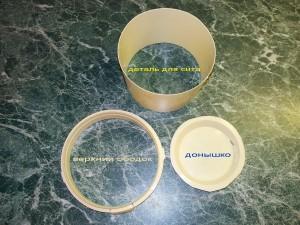
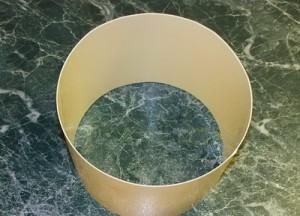
We leave the middle part for the sieve made by hand.
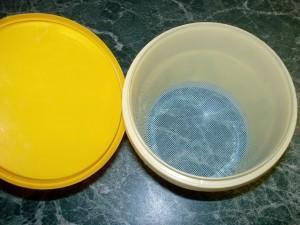
The photo below shows unused cutouts from plastic buckets.
And a general, explanatory photograph of what needs to be done with your own hands.
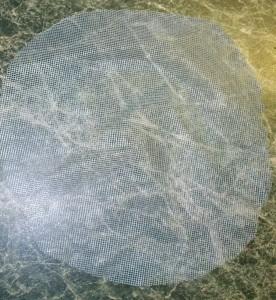
The mesh size of the mesh used should vary depending on the substances being sifted. For example, very fine mesh is required for sifting flour.
We assemble the sieve with our own hands from the prepared blanks as shown in the photographs.
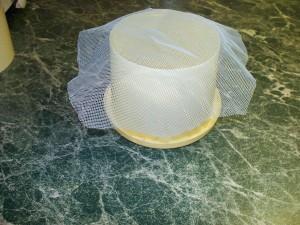
And here's the sieve, made by hand. The mesh is stretched tightly and clamped between the blanks.
I left the lid on purpose, it makes sifting flour easier.
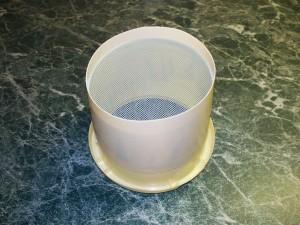
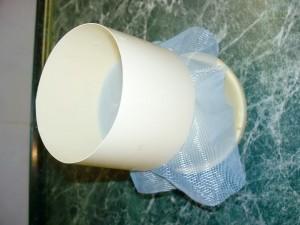
As soon as I made my own sieve, I immediately put it to the test by sifting flour for a recipe for unusual pancakes. The homemade sieve turned out very convenient; it's deep and collapsible.
A worthy replacement for a sieve
A sieve or sieve is an ancient kitchen utensil used to sift flour. Many housewives still use it, although it's a laborious and messy method. Is there an alternative?
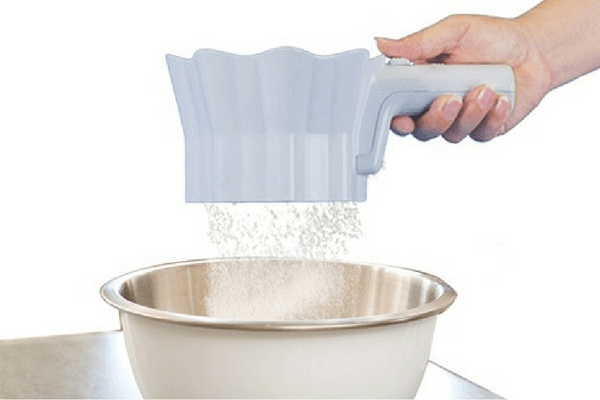
Special circles
They are much more convenient because the whole process is mechanized.
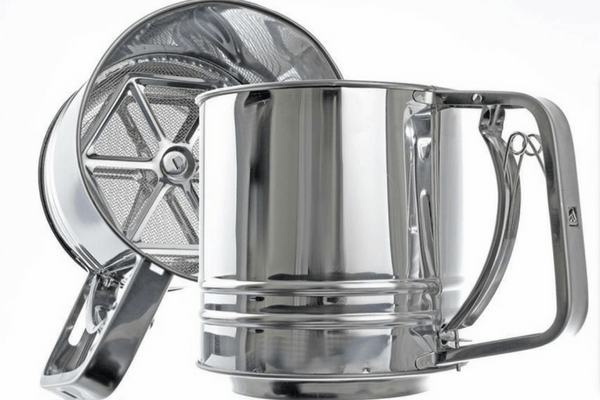
The device is a cylindrical stainless steel container with a fine-mesh bottom. The mug is equipped with a spring-loaded handle; when pressed, the paddles inside rotate, forcing the flour through the sieve.
Sometimes, instead of one sieve, two are used, with the upper one rotating relative to the lower one.
The advantages of the device are obvious:
- Higher efficiency than conventional hand sieve.
- Flour is poured in a directed manner into a container, for example, a bread maker pan, without scattering to the sides.
- Sifting requires minimal effort.
- It’s convenient to measure out the amount of product – there are special markings right on the mug.
- You can buy devices of different capacities, depending on what type of dough you prepare most often (for yeast dough you will need a 650 g container, for sponge dough 250 g will be enough).
- Dishwasher safe.
Important! You must clean the mug immediately after use, otherwise the flour around the sieve will become compacted and you will have to apply a lot of force to remove it.
Electric flour sieve
Even if mechanical sifting is not to your liking, or you only need a large amount of flour at a time, we recommend purchasing an electric version of the mug.
The device can have various designs, but it always consists of two connected halves with a sieve stretched between them. When turned on, the device begins to vibrate, sifting flour poured on top and falling to the bottom. From there, it drains through a tray into a container placed underneath.
Fast, neat and no effort on our part.
The only downside of this kitchen assistant is its high cost.
An electric sieve is indispensable for home mini bakeries.
Industrial machines – flour sifters
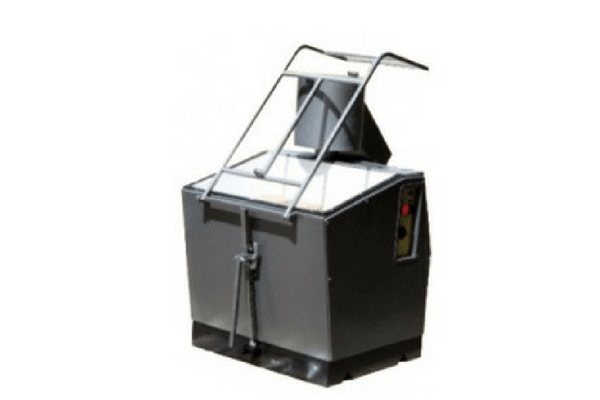
These powerful units are used in pastry shops and large bakeries. While they're certainly not suitable for home use, it's still interesting to explore.
Industrial machines are functionally no different from a conventional sieve. They simply handle larger volumes of flour and offer multiple levels of purification, including removal of metallic impurities. Let's examine their operating principle in more detail, using the MPM 800 flour sifting machine as an example.
This model is used in small businesses or in cafes and restaurants that produce their own baked goods. The machine is equipped with fixed sieves of varying diameters, through which the flour is mechanically sifted. Loading occurs from the top, through a hopper, and from there, the product moves through an auger shaft into a receiving drum. A magnetic collector for metal debris is located at the outlet.
The MPM 800 model is compact and highly productive. However, because the sieves are fixed, the flour is not sufficiently cleaned.
Machines with a mesh screen that either oscillates or vibrates are much more efficient. However, such machines are more difficult to operate.
Flour sifters are also used for purifying sugar, dry milk, cocoa, fine salt, breadcrumbs or starch.
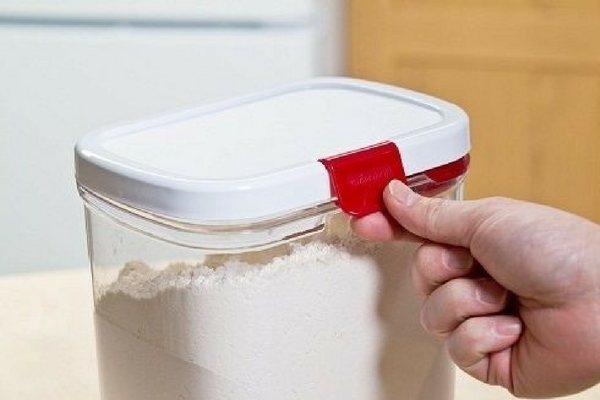
How to store sifted flour
If any product remains unused during baking, it should be placed in a spacious plastic container with an airtight lid or a glass jar. It's best to sift flour purchased in bulk immediately (this will protect against pests) and store it in the same manner.
The room temperature should be no higher than 18ºC, and the humidity should be around 65%. It's best to ensure complete absence of daylight. To protect against insects, you can add metal foil, garlic, hot pepper, or other strong-smelling spices to the flour container. These will repel bugs and moths. Just remember that flour absorbs odors well, so it's important not to overdo it.
Bay leaf is especially good for fighting pests – we won’t notice its flavor in the flour, unlike pests, which will bypass the spice.
It's recommended to sift products that have been stored for a long time to check for moth infestations and to prevent them from becoming caked or irritated. This should be done once a month.
Before using, sifted flour stored for storage should be lightly fluffed with a fork or whisk to saturate it with oxygen and can be added to the dough.
Is sifting necessary in all cases?
Nowadays, flour is generally sold already refined. In rare cases, it may contain foreign impurities such as burlap fiber particles. However, mold and insect infestations can still be a problem. This occurs when the product is not stored properly. If the packaging isn't sealed and the room is exposed to high humidity, the risk of mold and lumps is very high. Open packaging and warm, humid conditions also encourage the growth of bugs. The only way to sift flour without an insect screen is to use cheesecloth. All the above methods using improvised means are not suitable.
To avoid this negative effect, pack flour immediately after purchase in a container with a tight-fitting lid and store it in a cool, dry place. It's also important to remember that this product can be stored without deterioration for no more than six months. While you can sift and shake stale flour, it's best to use it fresh and in a state that hasn't lost its beneficial properties.
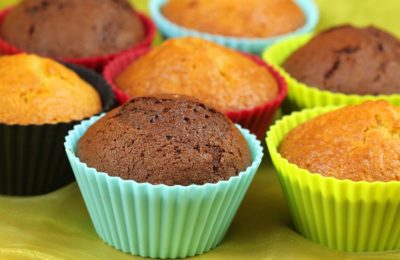
Sifted flour is often used in baking recipes. You can sift flour at home without a sieve or cheesecloth, and a few tricks will help you do it correctly.
The result is delicious baked goods, and the dough becomes airy and light. Don't skip sifting; it only takes a couple of minutes, but it will immediately improve the quality of your baking.
Sources:
- https://skolkogramm.ru/info/proseivanie-muki-so-vkusom-2
- https://kulinarka-tv.ru/vypechka/proseyannaya-muka.html
- https://primety-narodnye.ru/sito-dlja-muki-svoimi-rukami/
- https://netigor.ru/kak-sdelat-sito-dlya-proseivaniya-muki/
- https://FB.ru/article/294661/kak-proseyat-muku-bez-sita-s-pomoschyu-podruchnyih-predmetov
- https://workoutcrew.ru/chem-zamenit-sito-dlya-saharnoy-pudry/
- https://nyamkin.ru/advice/kak-proseyat-muku-bez-sita
- https://sladko.club/proseivanie-muki.html
- https://www.artofthehome.com/tip-how-to-sift-flour-without-a-sifter/